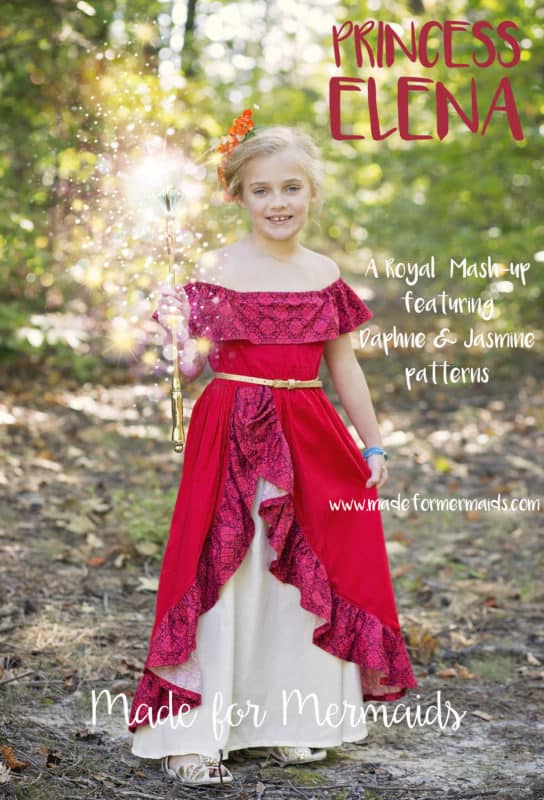
Princess Elena was introduced in 2016. A year later, the tv show is still going strong and you can even visit her at theme parks!! We didn’t jump to add an Elena-inspired dress to our collection, because we have two very similar patterns, that when mashed together, make the perfect Elena dress! We’ve been sharing our thoughts on pattern mashing for the last year now, but I’ve finally had a chance to sew it up and write a tutorial!
What you’ll need for the mash up….
Daphne Top, Dress & Maxi
Jasmine from the Everyday Princess Collection
Once you have your patterns, print out the Daphne bodice and skirt (regular or maxi length) and the hip veil from the Jasmine pattern.
Step 1
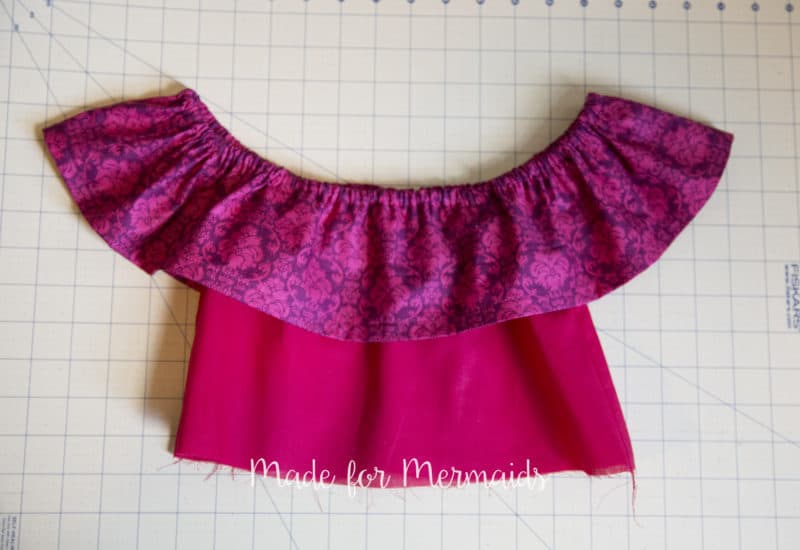
Assemble your Daphne bodice exactly per the tutorial. No mods needed!! Note: You can choose to add straps or skip them. If you want fixed straps, check out this blog post. (I actually may add straps before our trip to Disney to help with the weight of the skirts 😉 )
Step 2
Assemble the Daphne skirt. You can choose to use the regular dress length or the maxi skirt. This will be the white underskirt of Elena’s dress. I choose to make the maxi length. Note: you could also use the Jasmine skirt if you prefer the construction of that dress. 😉
Step 3
Use the same Daphne ruffle length for your top skirt ruffle. For size 7, my ruffle is 5.5″ long.
Step 4
The Jasmine hip veil will make up the red top skirt. You can choose to use the length as-is if you are making a dress length, or you can add length to it for a maxi. I wanted to lengthen mine so it looks closer to the Elena version. Lay out your skirt. Know your ruffle length. My ruffle is 5.5″ long and I wanted it to be just about as long as the underskirt. Lay your hip veil pattern piece on top of the skirt, lining up the top edge. Measure the difference so you know how much length need to be added to your hip veil.
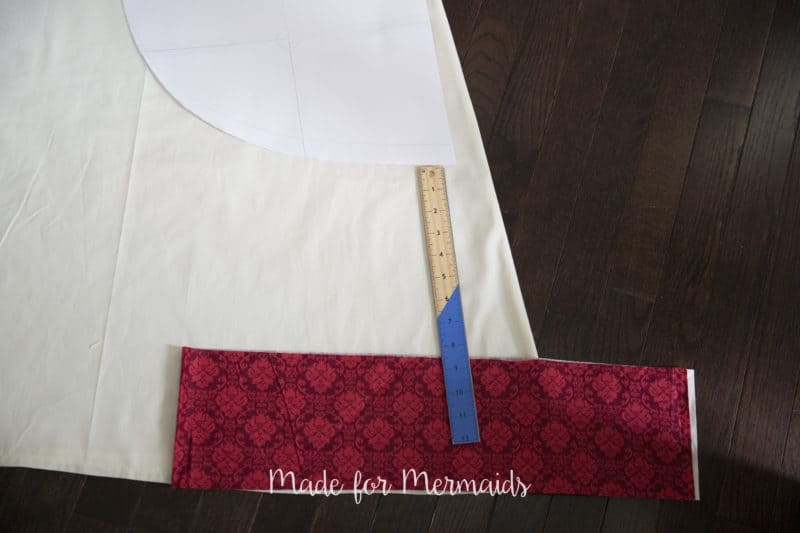
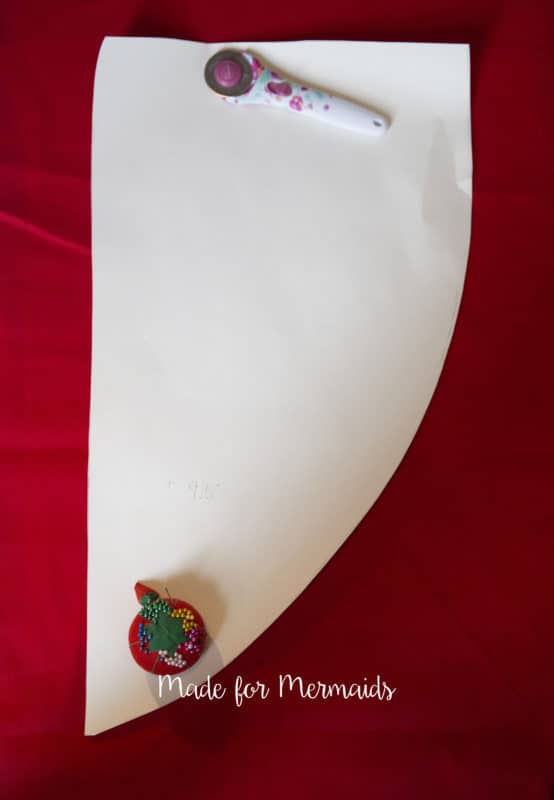
I ended up adding 9.5″ to my size 7 hip veil length. Here is my modified hip veil with added length. Cut 2 mirror images. PS- don’t forget to include seam allowances!!! 😉
Since I added 9.5″ to the hip veils… remember that you have to add the same amount to the back hip veil length!!! You’ll find the measurements for the back hip veil in the Jasmine tutorial measurement chart. Just don’t forget to add the same length that you added to your front hip veils!!
Stitch your 3 hip veil pieces together per the Jasmine tutorial.
Step 5
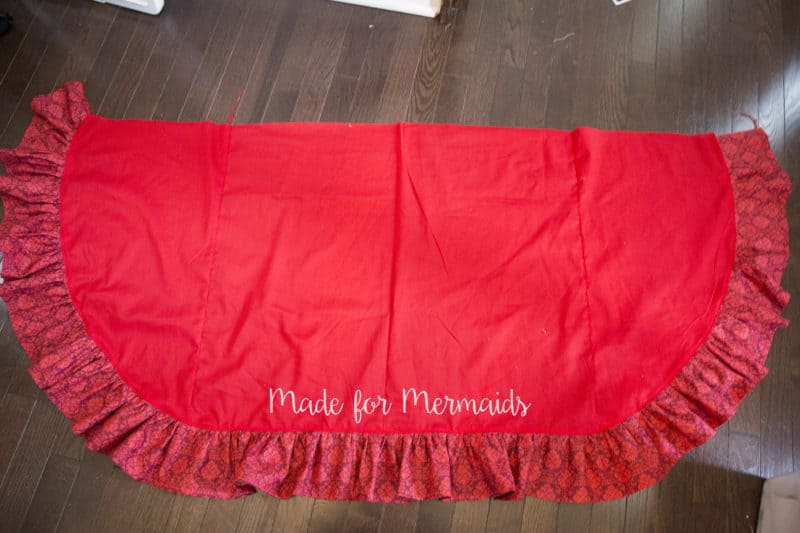
Measure the entire curved edge of the top skirt.
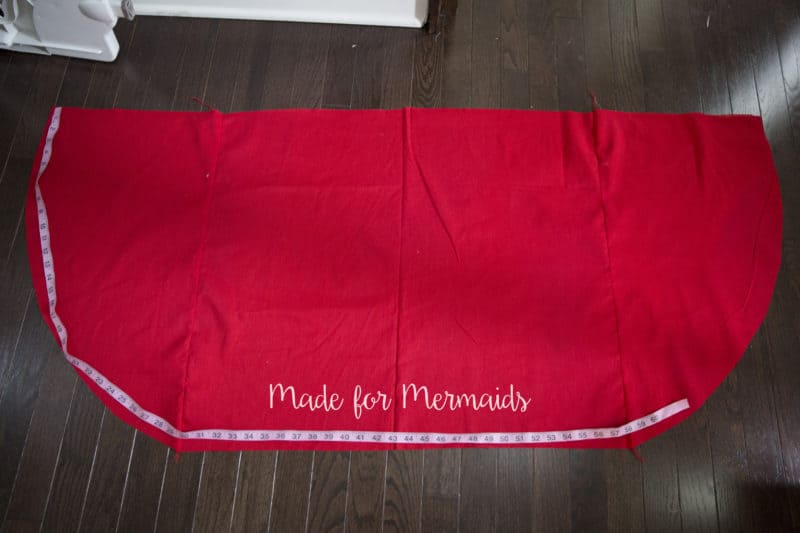
Take your measurement and multiply x 2. This will be your ruffle length. Don’t forget to add seam allowances!
With right sides together, stitch all of your ruffles together at the short ends. Finish edges with a serger or zig zag stitch. You should have one very long ruffle at this time.
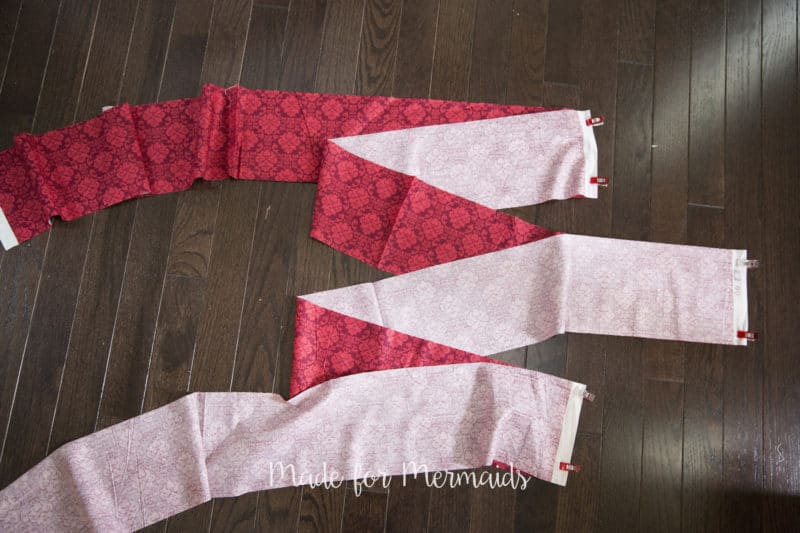
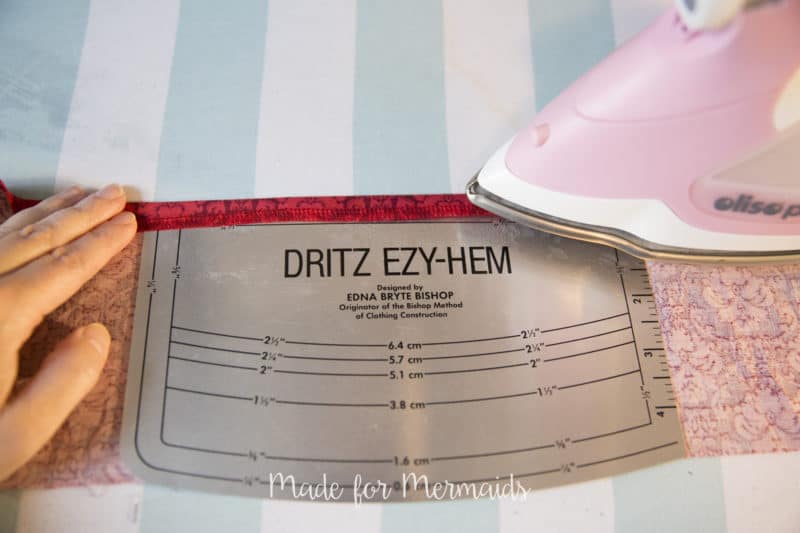
Hem the bottom edge of the ruffle. You can serge and hem 1/2″, do a traditional hem by pressing up 1/4″ and then another 1/4″ or roll hem the bottom edge.
Gather the top edge of your ruffle using your favorite gathering method. After gathering, your ruffle should be the same width as the rounded edge of your top skirt. Pin in place with right sides together. Stitch and finish seam with a serger or zig zag stitch.
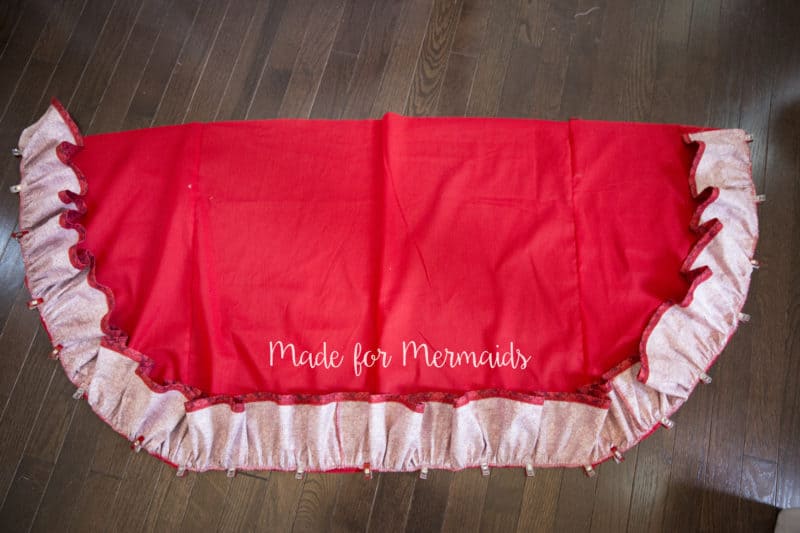
Press seam up and topstitch ruffle if desired. Run two lines of gathering stitches across the top edge of top skirt. You will want to gather the edge of the ruffle, across the top of top skirt and across the top of the other ruffle.
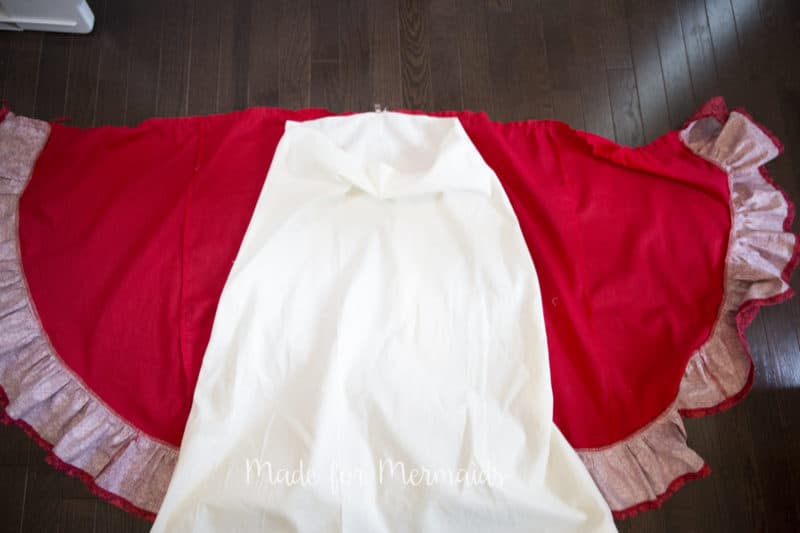
Lay your top skirt out with the wrong side facing up. Lay your underskirt on top. The right side of underskirt should be against the wrong side of top skirt. Match the center back of top skirt and the center back of underskirt and place a pin.
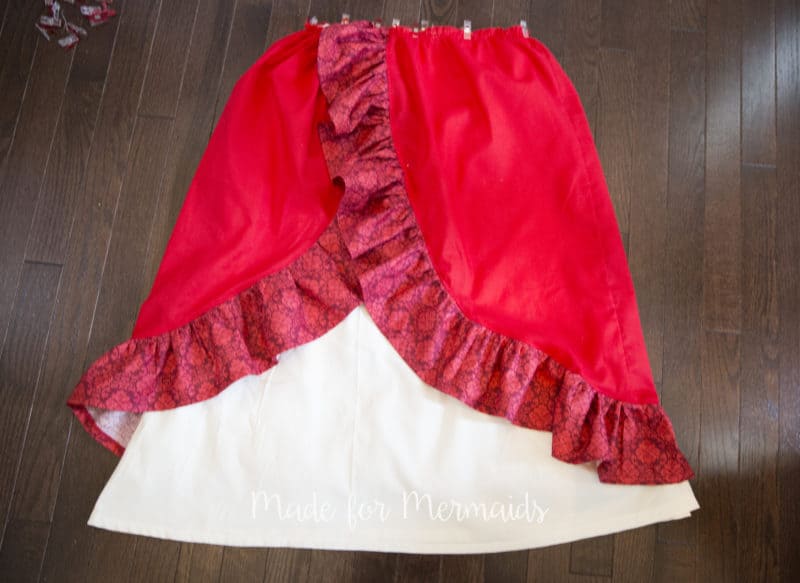
If you look at Elena’s skirt, the sides of her top skirt are off centered. I am going to replicate this by gathering the left side slightly more. Gather the left side of top skirt and place the front edge of it off center. Gather the rest of this side until it matches the width of the underskirt. Match up your side seams!
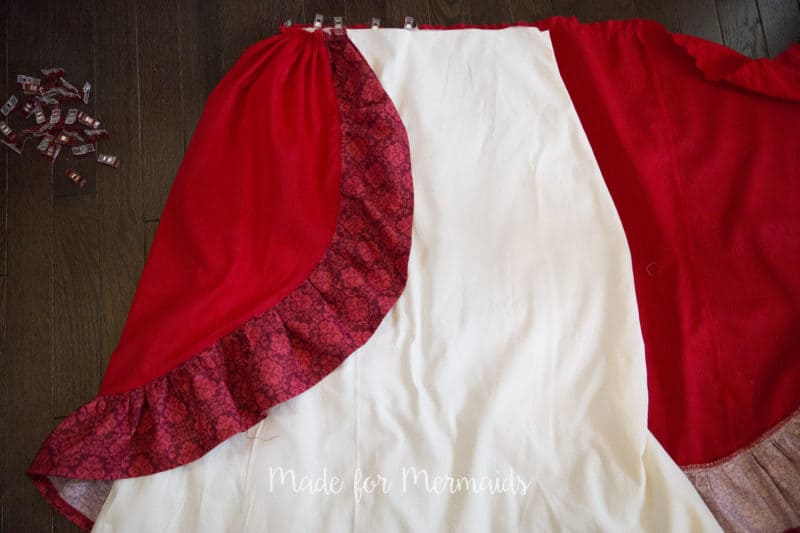
Now, we will repeat this step for the right side of the skirt. Gather the skirt until it matches the width of the underskirt on this side. Make sure your side seams are lined up. Overlap the ruffles, so the right side of skirt is on top. Pin well. Baste top skirt to the underskirt
Step 6
Continue following the Daphne tutorial for attaching the bodice to the skirt. Once you have stitched the bodice to the skirts, remove your basting stitch.
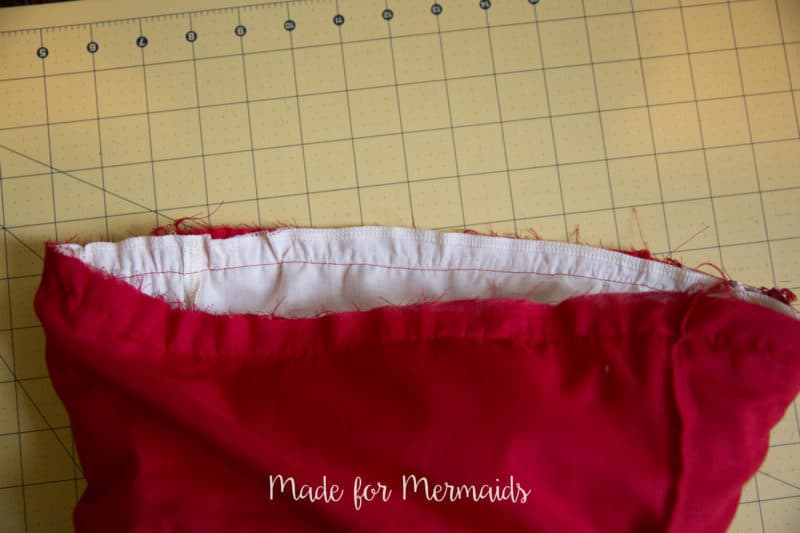
You will then trim the top AND top skirt seam allowance to 1/4″. DO NOT TRIM THE WHITE UNDERSKIRT!
Continue construction per Daphne tutorial.
NOTE: You could use the Jasmine skirt construction if you wish to add sash ties and omit the elastic waist. I chose this version because I wanted to add a separate belt and did not want a sash. 🙂
To complete your Elena-inspired look, check out the tutorial on making a floral hair comb!

My little princess loved her magical photoshoot and can’t wait to wear her Elena dress for Halloween, Disney, and dress up! 🙂


Halloween and the holiday season is quickly approaching and we have a surprise for you! All of our princess dresses, Daphne, Madison, Molly, Baby Molly, and Pearl patterns are on sale this week for just $5 each!! The sale will run Monday, October 2 through Saturday, October 7, 2017, midnight CST. Stock up on your favorite princess dress patterns and sew them up for costumes, dress-up play, and/or holiday gifts!
Daphne (Elena)
Madison (Ariel)
Molly
Baby Molly
Pearl
Everyday Princess Collection
Minnie
Tinkerbell
Baby Tinkerbell
Jasmine
Elsa
Tiana
Cleaning Cinderella
Merida
Christmas Belle
Briar Rose
Cinderella Ball Gown
Rapunzel
Belle
Aurora
Snow White
Anna
Hooded Caplet

Leave a Reply