Hi Mermaids! Brittany here. Last year when we released the Dylan Tee, we were frequently asked in the Facebook group if the side panel could be removed. Most of the time I like the added design element of the side panel. But if I need just a basic, solid tee, I’ll remove it. So today, I’ll show you the Dylan Side Panel hack to remove that side panel in 3 super simple steps.
Step 1
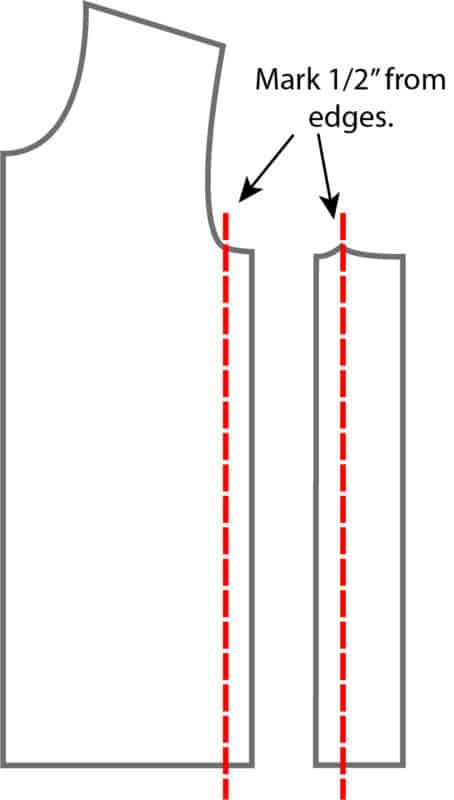
First, you will measure and mark 1/2″ from the armscye edge on both the front and side panel pieces. This is the edge opposite the fold marking on your pattern piece.

Step 2
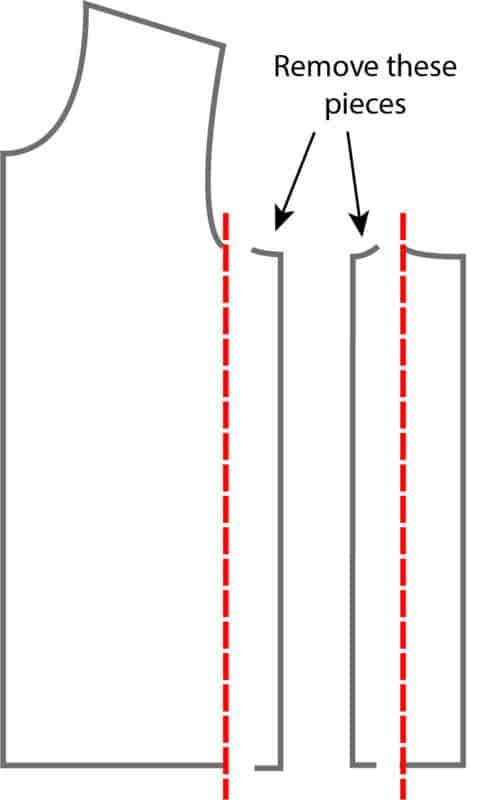
Next, you will either fold this 1/2″ section back or cut along this line to remove the seam allowance from the pieces.

Step 3
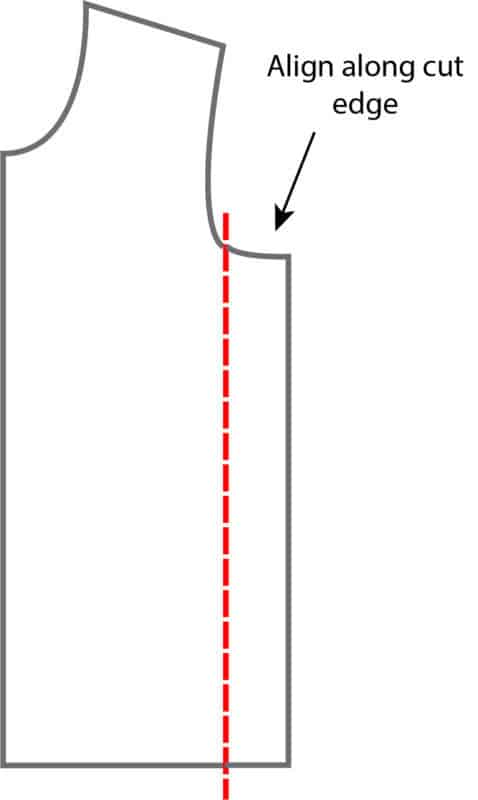
Finally, just align the front and side panel pieces along the cut edges. Repeat these steps for the back piece. That’s it! A note: if you are blending sizes (such as using 3 width and 4 length) you will have to smooth out the armscye curve slightly when you match up the cut edges.

You will now cut one front piece on the fold, and one back piece on the fold, plus 2 sleeves and a neckband as instructed in the pattern. You can construct the tee with the sleeves attached in the round as the pattern instructs, but since you no longer have a side panel, you can also attach the sleeves prior to sewing the side seams, like you would for most other tees or tops. Super simple hack and a great way to get add a few more basic tees into your little guy’s wardrobe! Paired here with the Lexi+Lou Loungers.

This hack can also apply to the Men’s Dylan Tee! Like this hack? Be sure to share it with us in the Made for Mermaids Facebook Group – we love to see what you’ve created!


Leave a Reply