Eloise is the first pattern to release as part of our Whistledown Collection, and it is SO CUTE. Eloise is a knit crop, top, peplum, and dress pattern loaded with options.
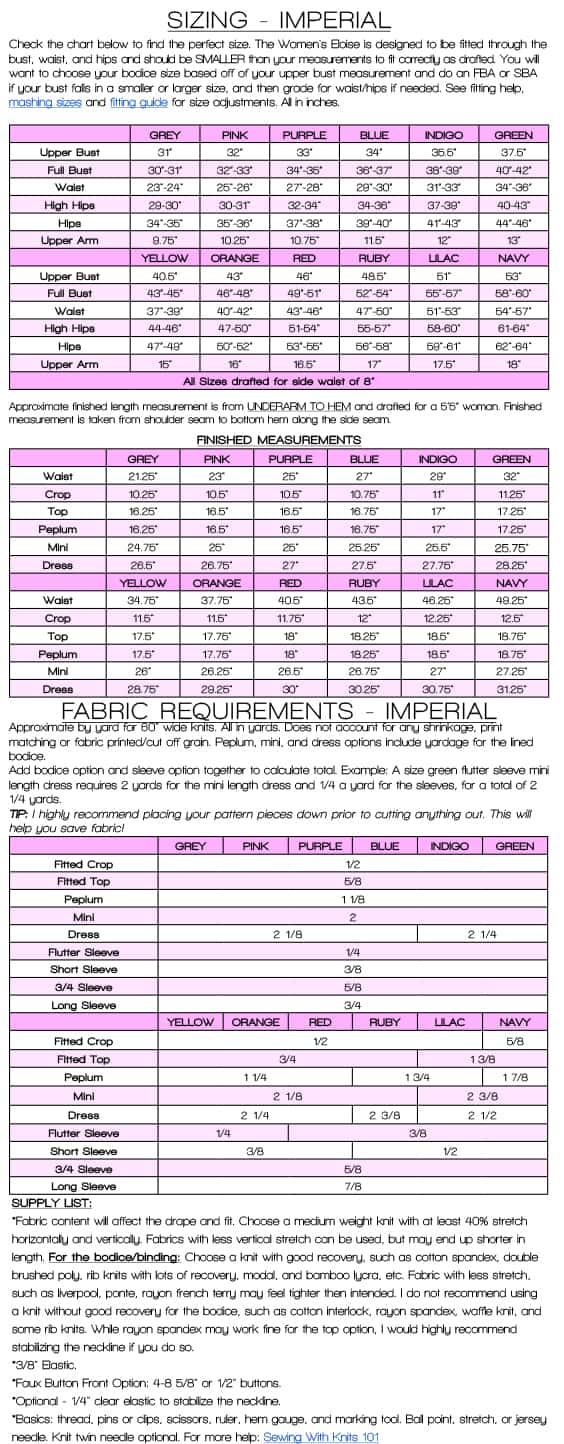
The Women’s Eloise features three skirted options (peplum, mini, and dress), with a lined bodice, while Crop or Top options are finished with a binding. Women’s also features multiple sleeve options (flutter, ruffled elastic short sleeve, elastic hemmed long, and elastic hemmed 3/4), and three necklines (high, medium, and low). Finally, you can choose from solid or faux button front options for the bodice.
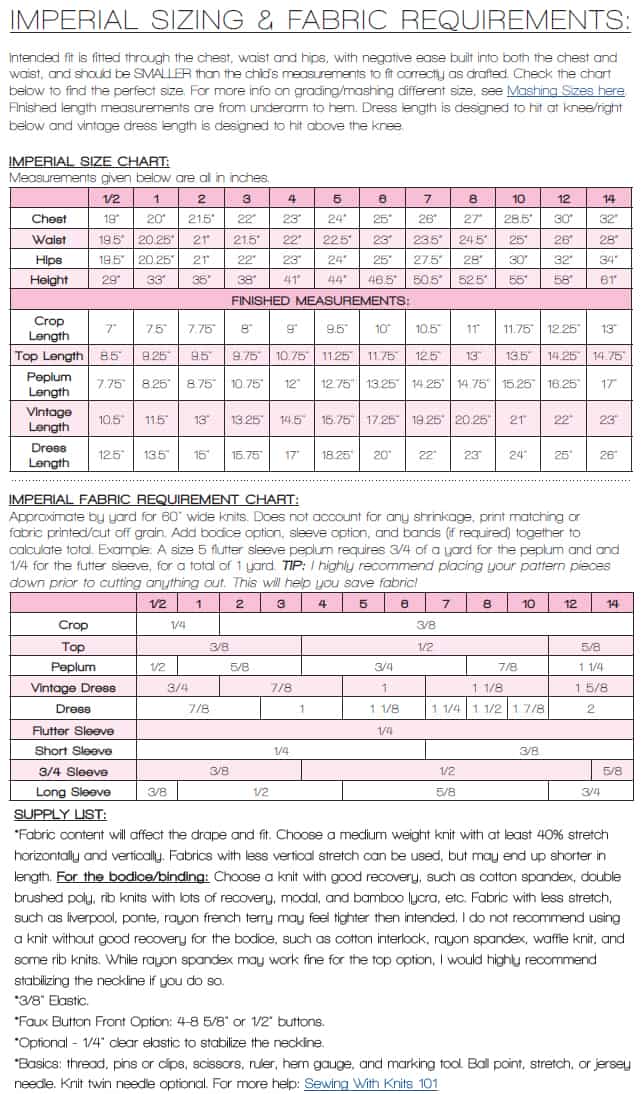
Youth Eloise includes three skirted options (peplum, vintage, and dress) with a lined bodice, with a Top/Crop option that’s finished with binding. Sleeves include flutter, ruffled elastic short sleeve, elastic hemmed long sleeves, and elastic hemmed 3/4 sleeves. You can also choose from the solid or faux button front.
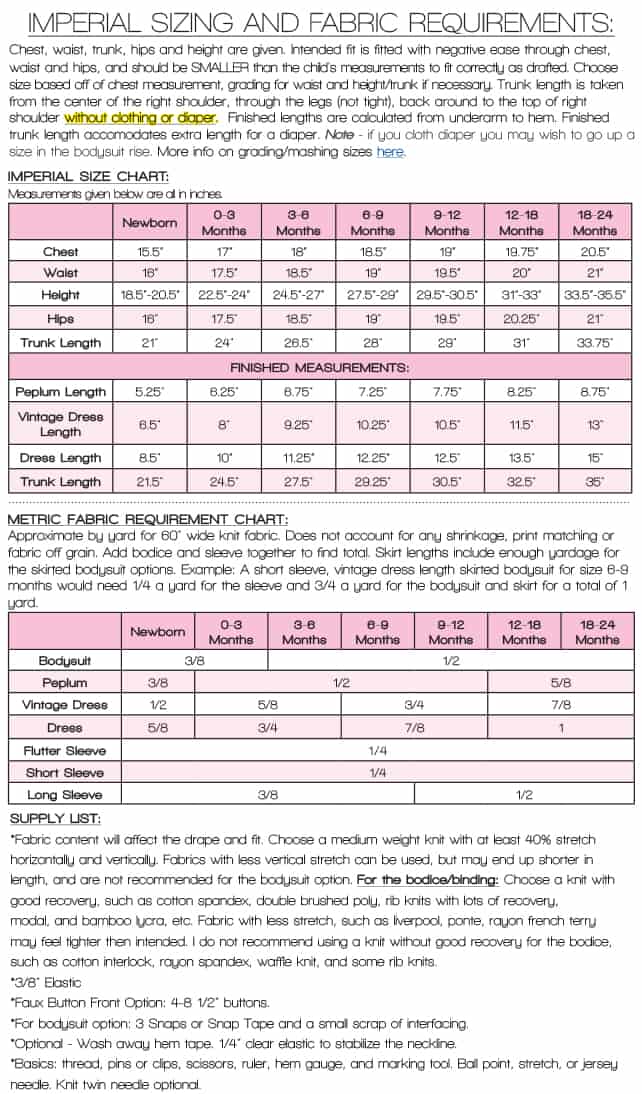
Baby Eloise includes three skirted options as well, plus a bodysuit option! It also includes all the sleeve options as Youth, excluding the 3/4 option.
We hope you love, love, love your new Eloise pattern! Don’t forget to come back and try out some of the fun hacks and mashes our team put together for you! Happy sewing!
Romper Hack
Rompers are my favorite for summer, so I made my own version with Eloise and Jade! I chose to use Jade since it is a gathered romper, so is a bit easier to adjust to fit the Eloise bodice.
**NOTE: Make sure to make any height or trunk adjustments prior to cutting. I have added 2.25″ to the romper bottoms rise per my needed trunk adjustment.**
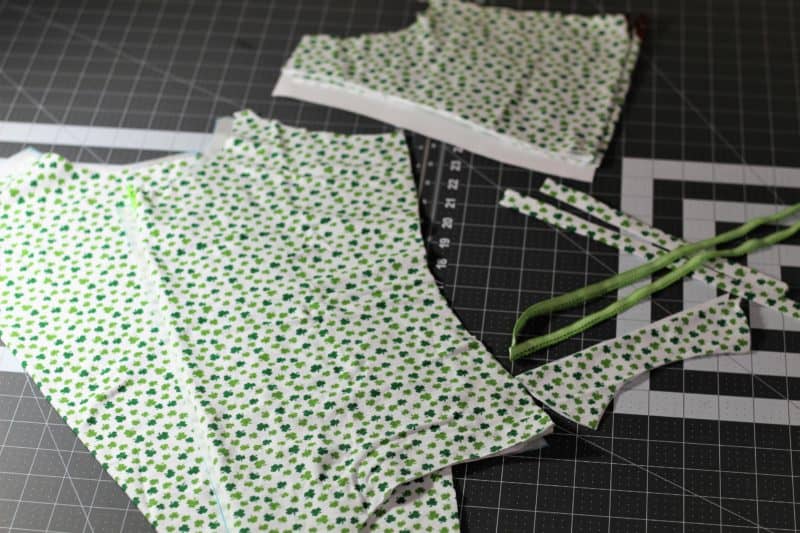
Cut your pieces for the Eloise dress bodice. You will need to cut according to the neckline of your choice, and with or without the placket. Cut the coordinating lining. Cut the sleeves of choice. For the Jade bottoms, cut mirror front and back bottoms. While I’ll be showing the 3.5″ inseam shorts version, you can use the same steps with the pants option too.
Next, fully assemble the bodice according to the Eloise tutorial. Assemble the Jade bottoms by following the Jade tutorial. Add gathering stitches to the top of the romper bottoms. I use a long straight stitch on my sewing machine at 1/4″ and 5/8″ from the edge along both the front and back.
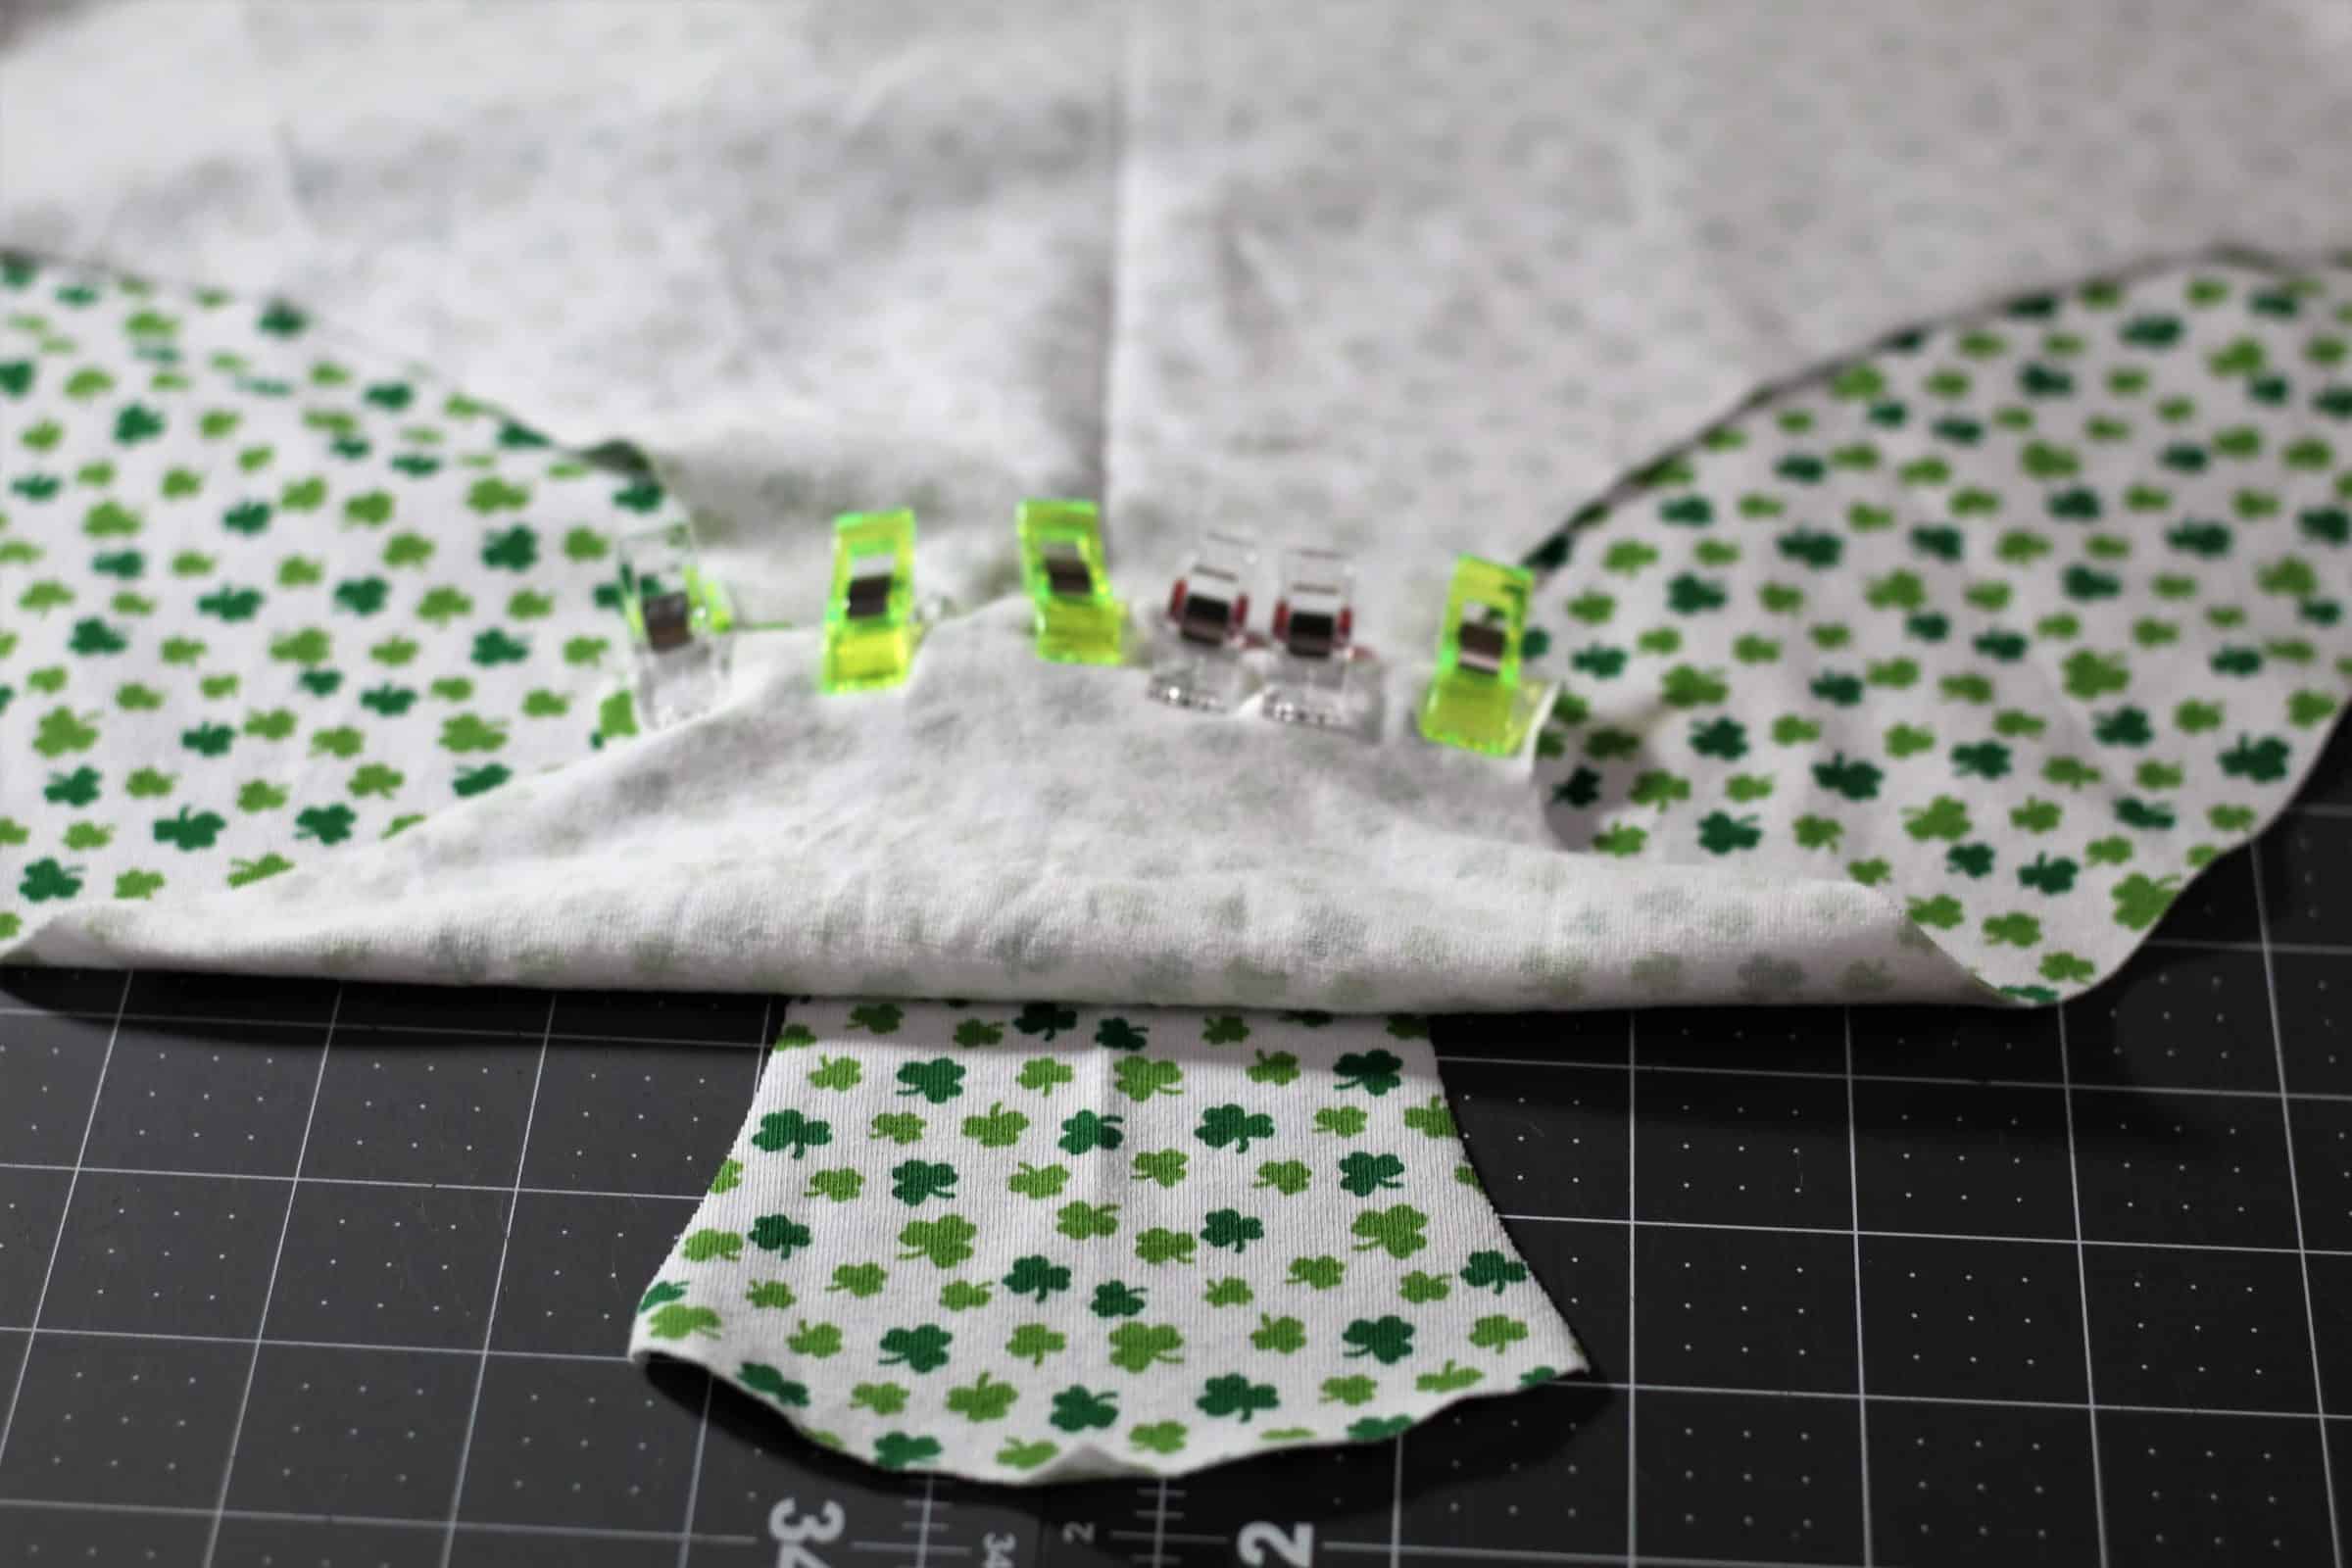
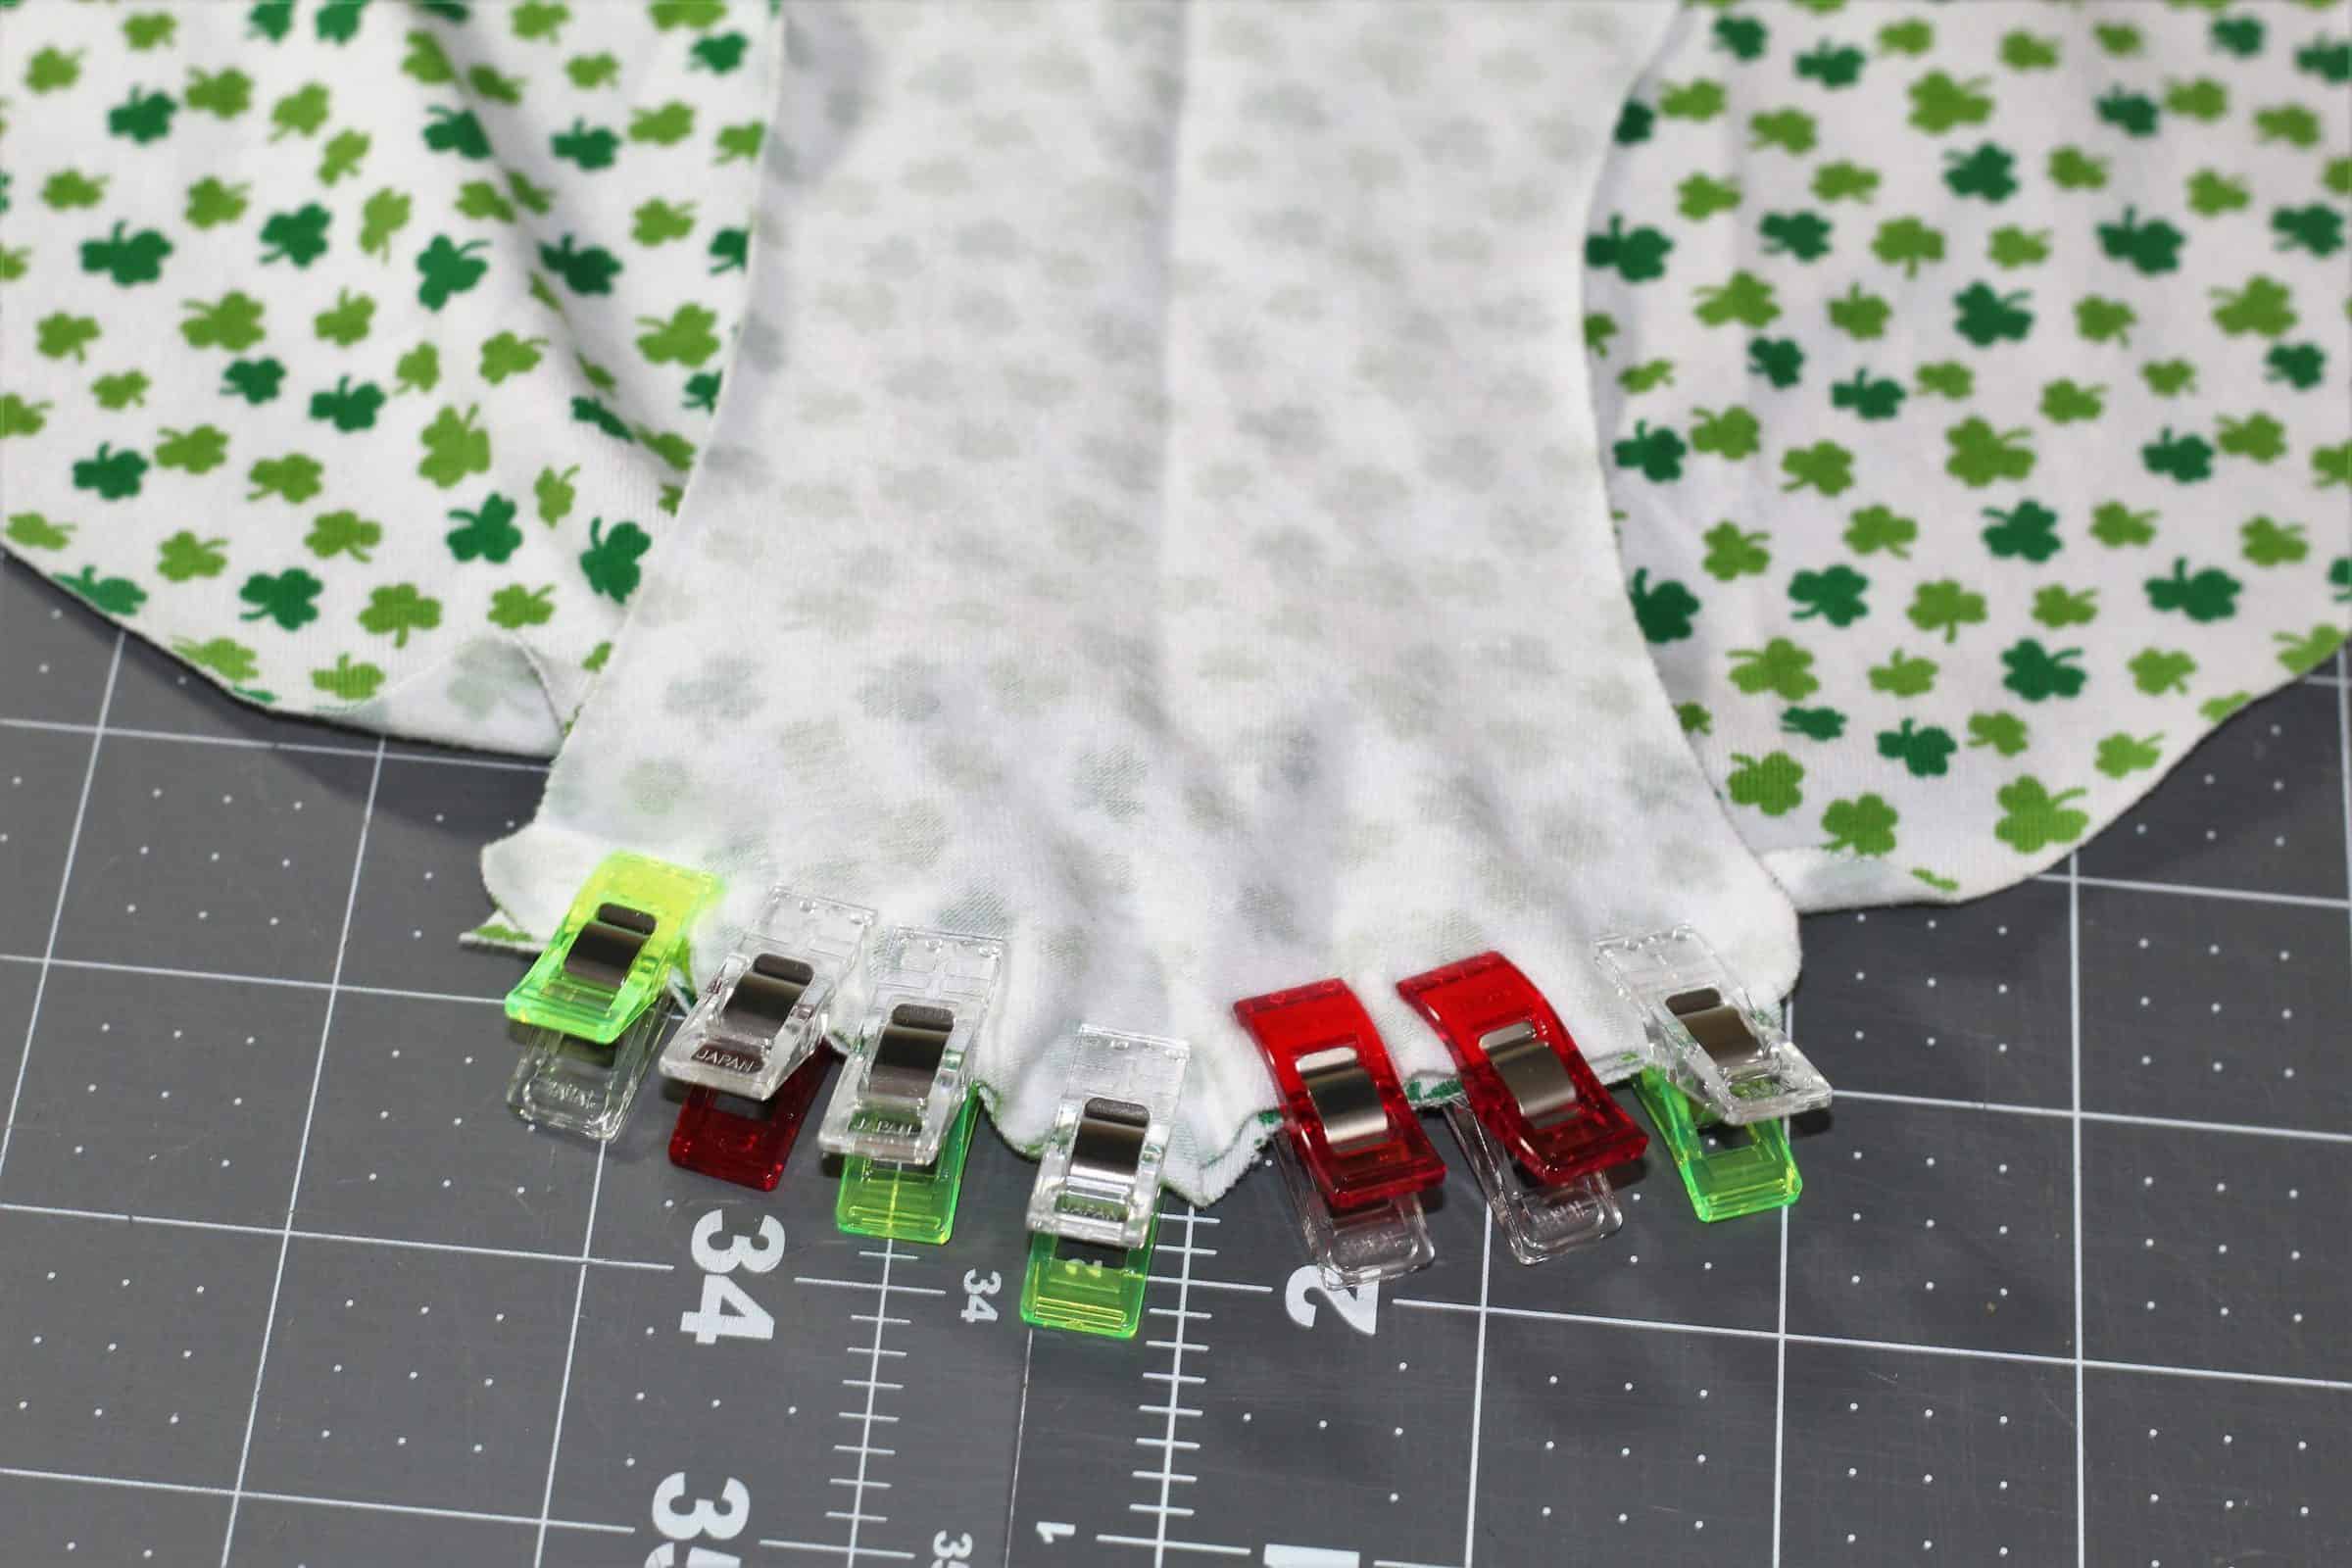
Turn the bottoms wrong side out and the bodice right side out. Place pins or clips on the center front and back of the bodice. Slide the bodice inside the bottoms making sure you are matching the front bodice to the front bottoms. The front bottoms will have a shorter rise. Pull the gathering stitches until the bottoms match the size of the bodice. Add clips to keep it in place then sew/serge at 1/2″ seam allowance. I prefer to serge with my gathers facing up so I can ensure they feed evenly. Remove any remaining basting stitches.
Now you have yourself the perfect summer romper! -Katie
Bodysuit Hack
Eloise is a romantic, classic silhouette we have been swooning over. As always with a fabulous new pattern, our imaginations were going wild thinking about all the fun hack possibilities. To give you more ways to customize and wear your Eloise, the bodysuit mash up with the Tai pattern is really easy and wearable.
STEP 1- TRACE PATTERNS
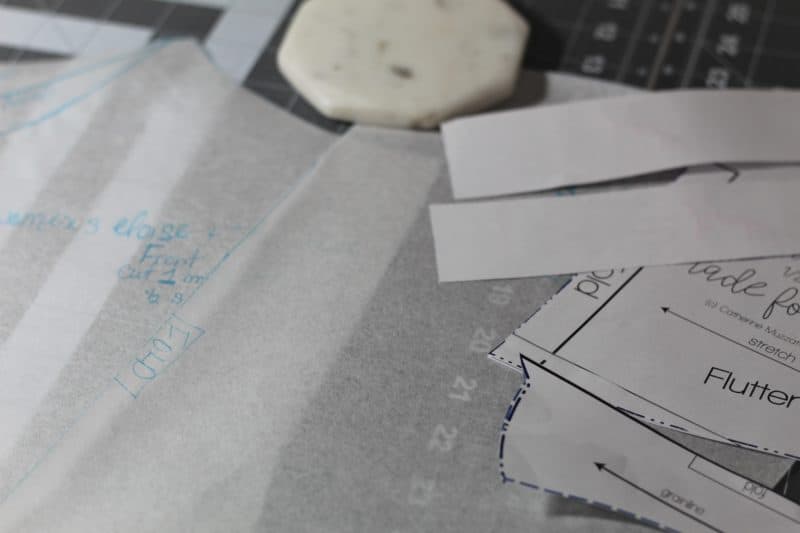
Lets get started with grabbing your copy of Eloise, Tai and some tracing paper. First you will want to choose a neckline for Eloise to trace. I used the low neckline. ***Don’t forget to fold Eloise on the solid front line not the button placket line.*** I used the solid front for an easy construction the placket option could be used, but would take a little more blending. We want to layer the two front pieces of Eloise and Tai to blend the top bodice of Eloise and the full bodysuit length of Tai. Trace the Eloise neckline, the armscye, then blend the side of Eloise to Tai. You will want the Tai width for a fitted bodysuit, then trace down to the leg line and crotch. Repeat this step for the back pieces of Eloise and Tai. Since Eloise already has a beautiful and flattering wider neckline it is simple to just slip on and off without adding a snap crotch (so it’s fast too).
STEP 2- CUT FABRIC AND PICOT or BANDS
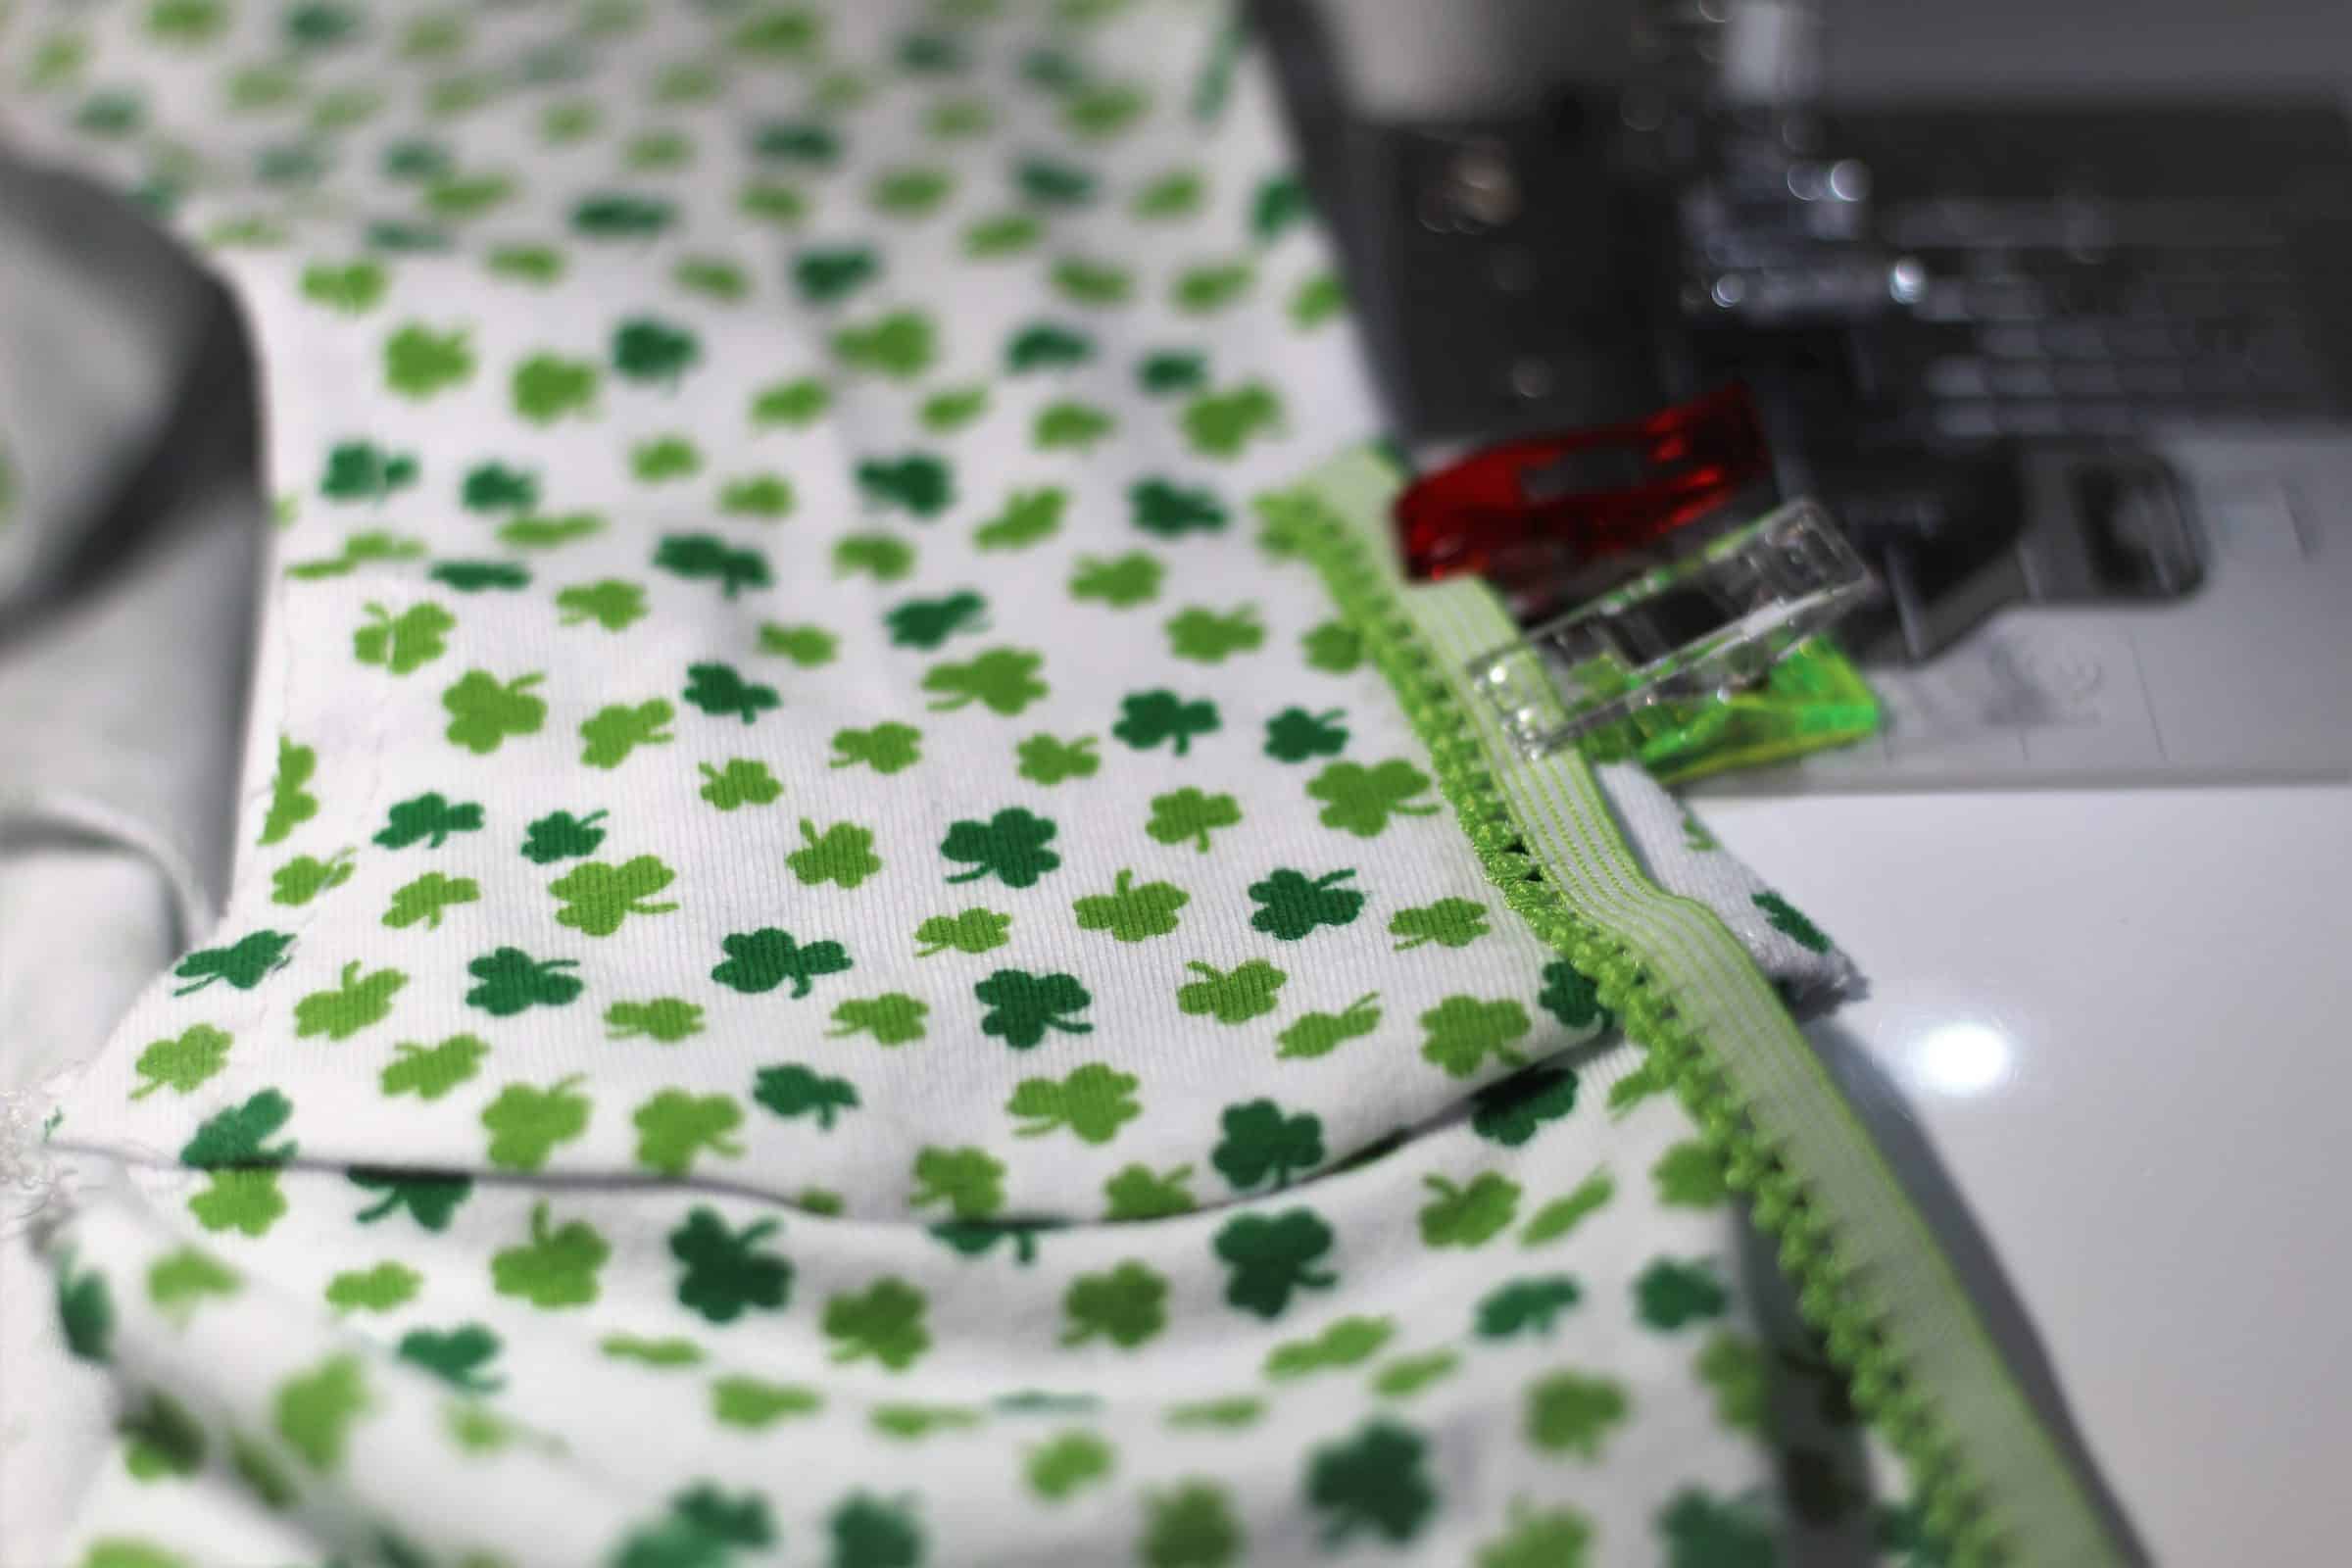
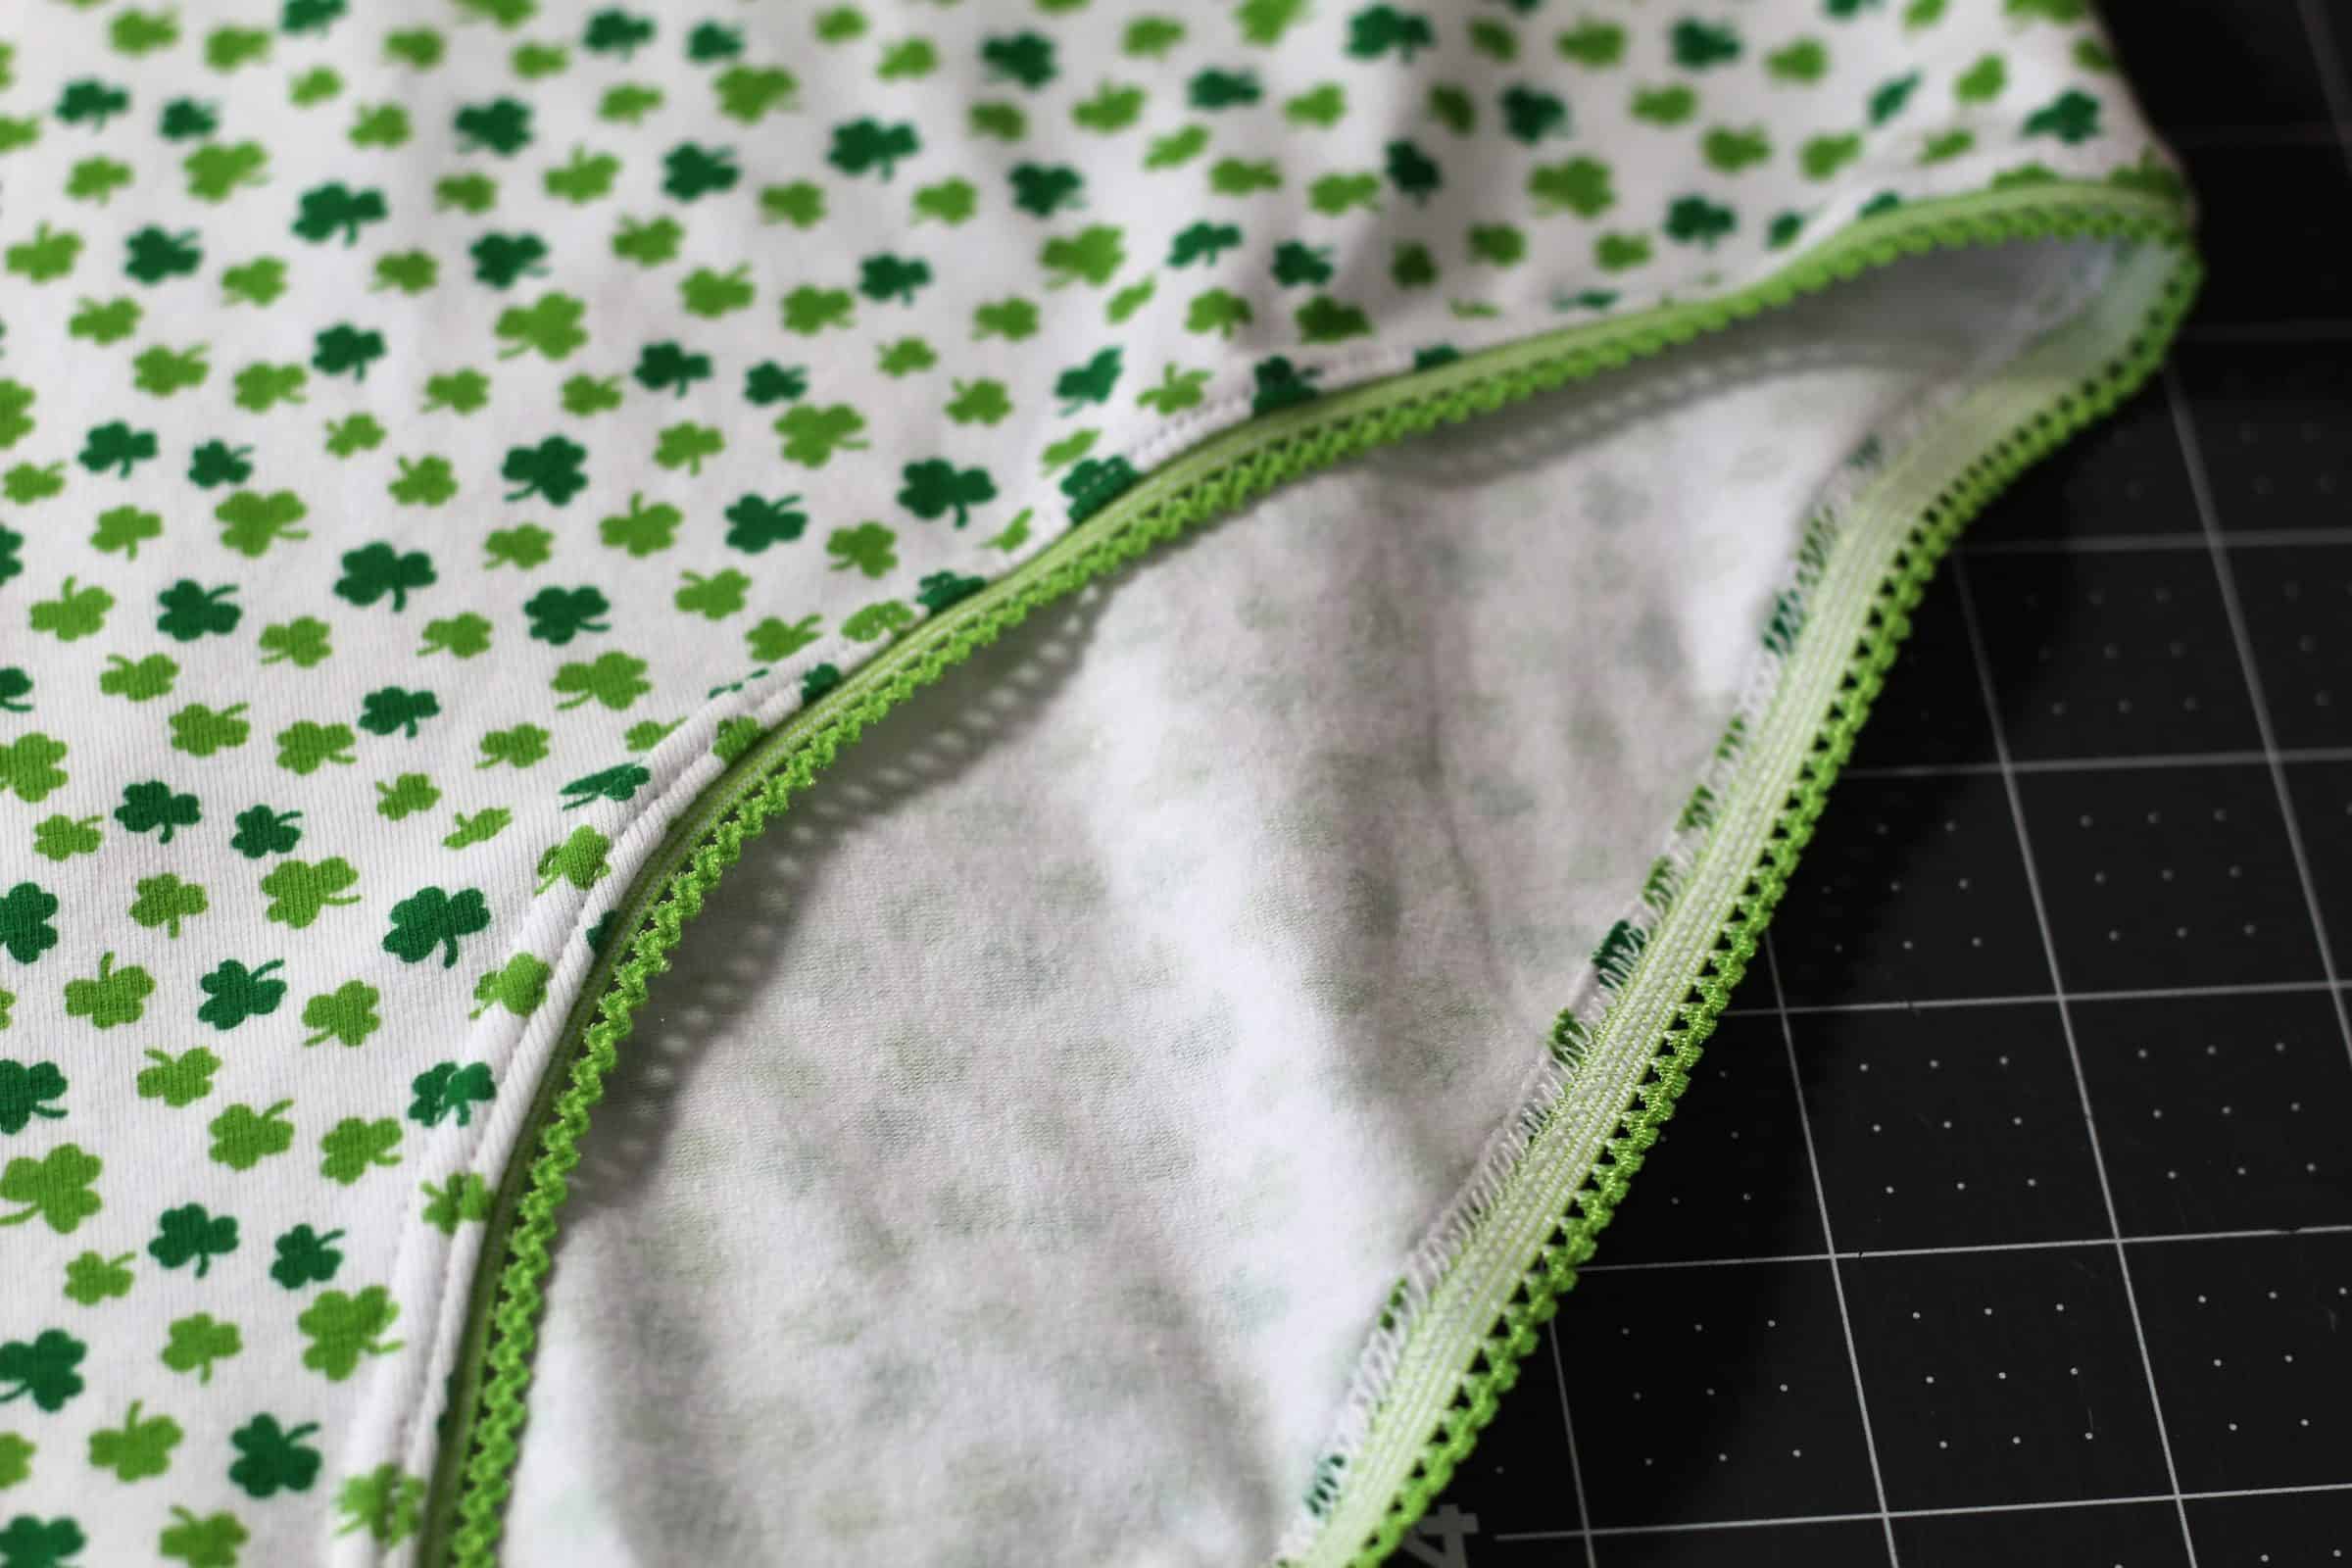
Once you trace the front and back new pieces then select a Eloise sleeve and binding, and cut the Tai bodysuit crotch lining. The last piece you will want to check is the Tai cut chart for lengths to cut your picot (or bands). Picot is a lingerie elastic. For more tips for working with picot, the Bridgette pattern has helpful links. You can also just go by feel when applying picot, and cut it once you sew the leg holes.
TIP: pre-stretch picot or any elastic and sew it on using 1.1 (no stretching) on the front of the crotch, and slightly pull around the booty curve for a nice fit. Don’t pull too snug it will be too tight.
If you prefer to use bands on the leg holes instead of picot that is a great option in the Tai tutorial too. Picot is my personal preference.
STEP 3- CONSTRUCTION
Start at step 6 in the Eloise tutorial. Follow the fitted top option for Eloise. Skip step 7. Follow step 8-10. Stitch sides. Next, sew the bodysuit crotch as you would in the Tai pattern tutorial.
Last finish the picot legs and you are done.
I used the Eloise flutter sleeves for a cute Spring/Sumer bodysuit in a festive print with green picot. Enjoy making all the Eloise options we just adore this new pattern!
~AMY~
Alice + Eloise Mash
We’re obsessed with Florence in this Alice + Eloise mash!! Doesn’t she look just stunning?!? Double-check your waist for the Eloise and the Alice, but that’s the only adjustment you would need to make! You can grade as needed to make sure the waist openings on each fit. Scoop up the Alice pattern here.
Gathered Skirt Hack
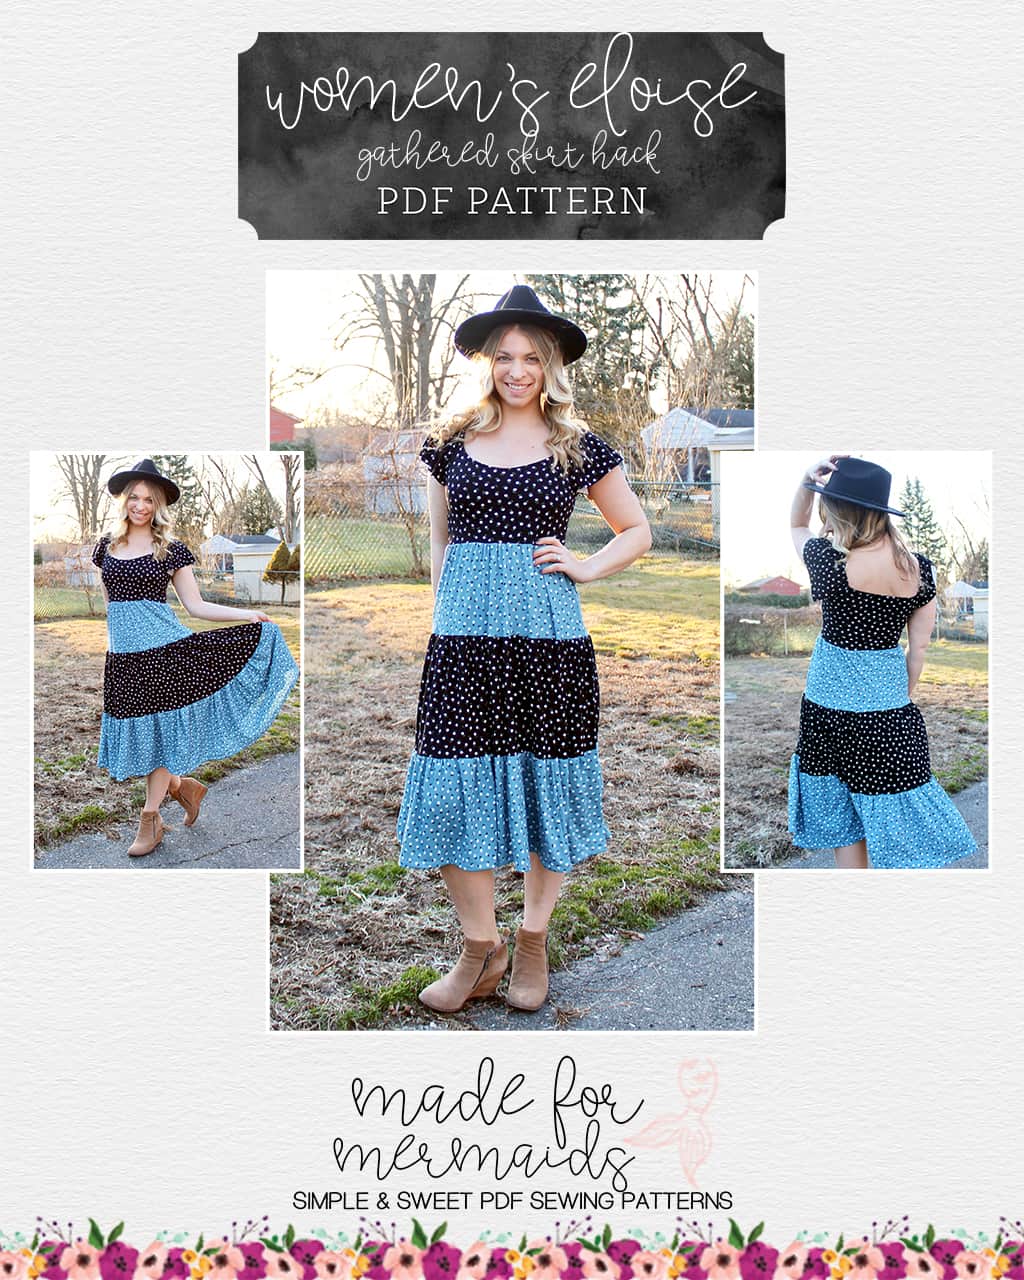
Eloise looks so good paired with a gathered skirt, too! You can use our Blythe or Aria patterns, or you can use almost any gathered skirt pattern you’d like!
PSSST – want a sneak peek at one of the next patterns in the collection? Check out our favorite Mermaid baby, Sutton, in the upcoming Siena pattern:
Sewing up the Eloise? Don’t forget to share your makes in our Facebook group and on Insta! We love to see what you’re creating!

























Leave a Reply