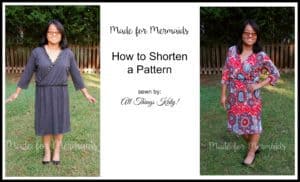
Hello, Lovely Mermaids! Heather from All Things Katy!,here! Small, little, petite, tiny, diminutive, mini, short… whatever you choose to call it, that’s me! Standing at just 5′-0″ tall, I’m considered pretty petite as an adult female. Even my seven (and a half, if you were to ask her 😉 year old daughter has only 10″ to go before we (literally!) see eye to eye!
One of the main reasons that I LOVE sewing for myself is the fact that when I sew, I have complete control and ability to create clothing that perfectly fits my petite frame and proportions. Even department store “petite” clothing tend to run long. Today, I’m here to help guide you through adjusting and shortening a Made for Mermaids pattern- specifically the Megan Romper and Dress. While the exact measurements included in this post are my own, you’ll hopefully be able to follow along and apply the same adjustments for your own self-care sewing. 🙂
Now, for the sake of this blog post, I’m going to be specifically referring to the Made for Mermaids Megan Romper and Dress pattern. I did NOT accessorize and I did not style these pictures so that you could get a better feel for the actual pattern/dress and how it fits my body. As-Is pattern pieces are labeled in red. Shortened pattern pieces are labeled in blue.
Let’s dive right in!
MEASUREMENTS:
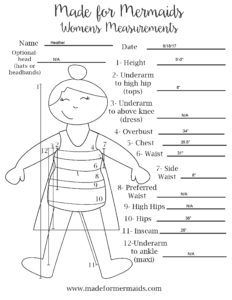
Printable Blank Measurement Chart
The very first thing we need to do is measure, measure, MEASURE! And when I say measure, I mean measure every time, for every pattern. Take the time to record accurate measurements, in the correct locations. Use this handy, free Printable Blank Measurement Chart to record your numbers. Using these measurements, refer to the sizing chart included in every Made for Mermaids pattern to find your size (for that pattern!). It may seem like a pain to always measure, but I promise you that it will help you produce clothing that you’ll WANT to wear and feel confident and beautiful wearing!
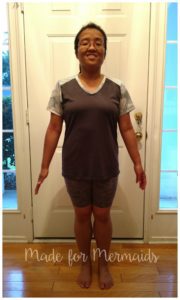
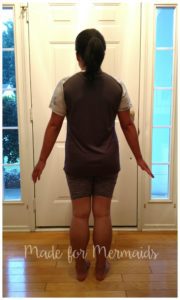
*Please be kind- This is where it’s going to get very real- these are my personal measurements- lumps, bumps and all! :)*
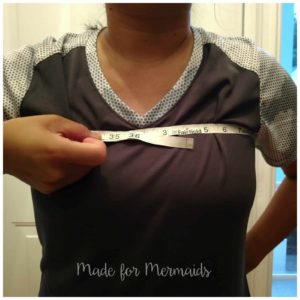
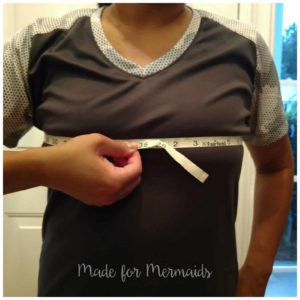
Measuring High Bust (left) and Full Bust (right).
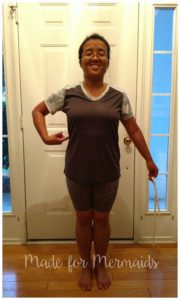
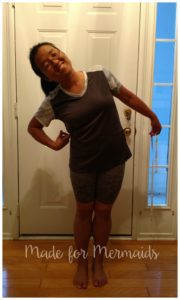
Natural Waist is considered where your body naturally bends (where I’m pointing).
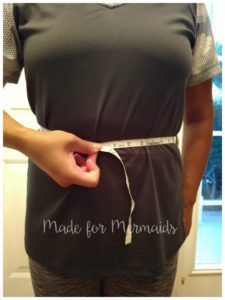
Natural Waist Measurement

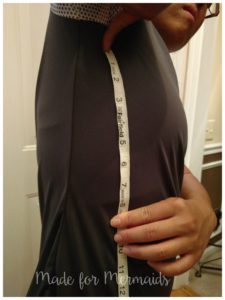
Measuring Natural Waist to High Hip (left) and Underarm to Natural Waist (right).
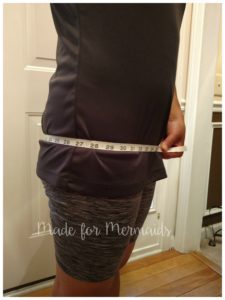
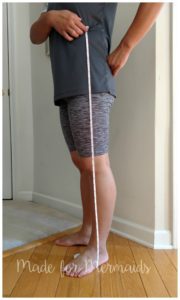
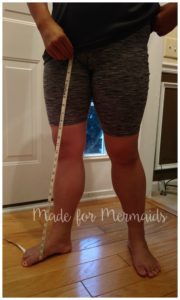
Measuring Hip (left-around the fullest part/around the booty), Waist to floor (middle) and Inseam (right- crotch to floor).
DRAFTING STANDARDS:
Okay, now that we have all the base measurements done and out of the way, let’s talk about drafting “standards.” Made for Mermaids PDF sewing patterns are drafted for the curvy 5′-5″ woman. When it comes to shortening a pattern, the general rule of thumb is to subtract 1/2″ for every 1″ you are under 5′-5″. For me, that means that I *should* take a total of 2 1/2″ off the overall length of the pattern (more about that, later).
HOWEVER, WHERE you take that length from is CRITICAL!! For example, typical underarm to natural waist measurement is 8″. My underarm to natural waist is 8″. So, in other words, my torso is actually very average (and not short at all)! Plus, keep in mind that your bust will either take up (or, not 😉 some of the bodice real estate. 😉 My inseam is where I’m REALLY SHORT. Typical female inseam (crotch to floor) is 28″-32″. My personal inseam is only 26″ long. In a nutshell, I’ve got an “average” torso and a very short inseam. In other words, I need to take length from the bottom half of patterns and minimally modify tops/bodices.
“FIT” and “EASE”:
The next thing that you need to consider when sewing is the “ease” in a pattern. A lot of times “ease” and “fit” get confused. “Fit” refers more to just that- how the garment fits and lays on your body. “Ease” refers to how much extra room is already built into the pattern pieces (on top of your own, personal measurements). The Megan Dress is meant to have a “blousier” fit and it has plenty of “ease” (aka, extra room already built into the pattern pieces). So, if you like your clothes to fit a little closer to the body, you may choose to size down. Alternatively, if you want a looser feel, you may choose to sew up a larger size.
It’s also worth mentioning that you may not fit into just one size. For example, your bust may be size purple, your waist size blue, but your hips a size pink. For example… just sayin’… If this is the case, you may choose to blend sizes and mash pattern pieces. (We’ll save mashing and blending pattern pieces for another day).
MEGAN DRESS PATTERN AS-IS:
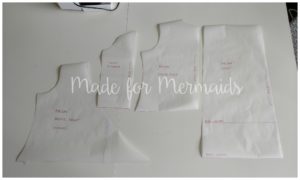
Megan Dress Pattern Pieces As-Is- Size Purple Top, Size Pink Skirt, 3/4 sleeve, no modifications to pattern pieces
This gray dress is based on Size Purple Top, Size Pink Skirt, 3/4 sleeve, no modifications to pattern pieces. I used a soft jersey knit for the body of the dress. While this fabric had nice drape and is perfectly suitable for this pattern, I believe we can all agree that this gray Megan Dress is less than flattering on me.


Megan Dress Pattern As-Is- Size Purple Top, Size Pink Skirt, 3/4 sleeve, no modifications to pattern pieces
Let’s critique… First off, this dress is too baggy. Instead of defining my shape, it just hangs loosely and limply. The waist (where the skirt and bodice meet) falls well below my natural waist. The skirt length is too long. The sleeves are too wide around my forearm. Because the crossover bodice is too big on me, it gaps and creates awkward wardrobe malfunctions should I choose to move. At.All. Ha! It’s just too much fabric in all the wrong places.
MEGAN DRESS PATTERN SHORTENED:
Okay- now for the fun part and punchline of this whole post… SHORTENING the pattern and modifying it to fit the wearer (me), better!! Here’s what I did to modify the Megan Dress pattern pieces:
-Used size Pink pattern pieces for both top and bottom.
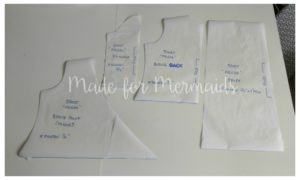
Megan Dress Pattern SHORTENED- Size Pink, Knee length dress, 3/4 sleeve
-Shorten Front Crossover by 1/2″ (length taken from halfway between armpit and waist).
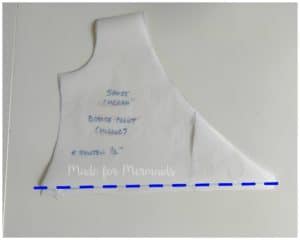
-Shorten Back pattern piece by 1/2″ (length taken from halfway between armpit and waist). *Remember to always take the same amount off the back AND front pattern pieces so that everything matches up!*
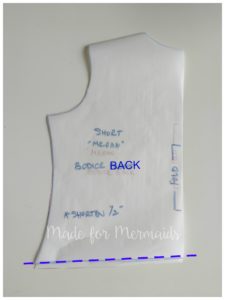
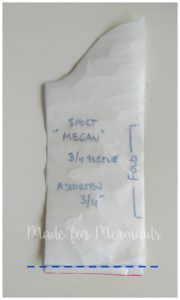
-Shorten sleeve by 3/4″ AND subtract 1/2″ total to the overall width of the arm opening (In retrospect, I could have easily taken another 1/4″ off the overall width for an even better fit).
-Shorten Skirt by 3/4″ AND I chose to take a 1″ hem (opposed to the instructed 1/2″ hem).
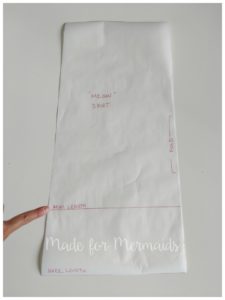
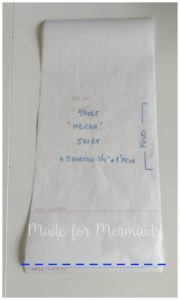
*I used the “mini” dress length as a guide to take away length from the overall skirt (opposed to just taking the length from bottom hem). I cut across the mini dress length and then shortened by 3/4″. I then redrew my side a-line skirt. In doing it that way, I kept the same proportions of the pattern while making it better fit my height.*
Do you see how I didn’t just take length off the bottom hem and call it a day? Notice, I chose to take length off in various, key places throughout the pattern. In total, I took 1 3/4″ off the pattern. Because I wanted this dress to be work place appropriate, I did NOT need to take a full 2 1/2″ off the overall length (as I stated, before).

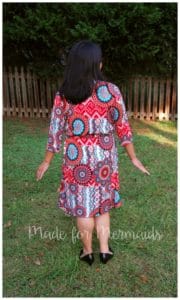
Megan Dress Pattern SHORTENED- Size Pink, Knee length dress, 3/4 sleeve
See how the waist of the modified pattern pieces actually hits me at the waist? Notice that the skirt of the modified pattern pieces hits me mid-knee (knee length!). The sleeves are tapered and not as gaping. The front crossover isn’t as loose, or plunging. In other words, IT FITS ME!! Woohoo!

Megan Dress Pattern SHORTENED- Size Pink, Knee length dress, 3/4 sleeve
**By day, Heather works outside of the home as an interior designer. By night, she’s a one-woman sewing machine powerhouse. 😉 She blogs about family, sewing and everything in between over at All Things Katy!**
Leave a Reply