
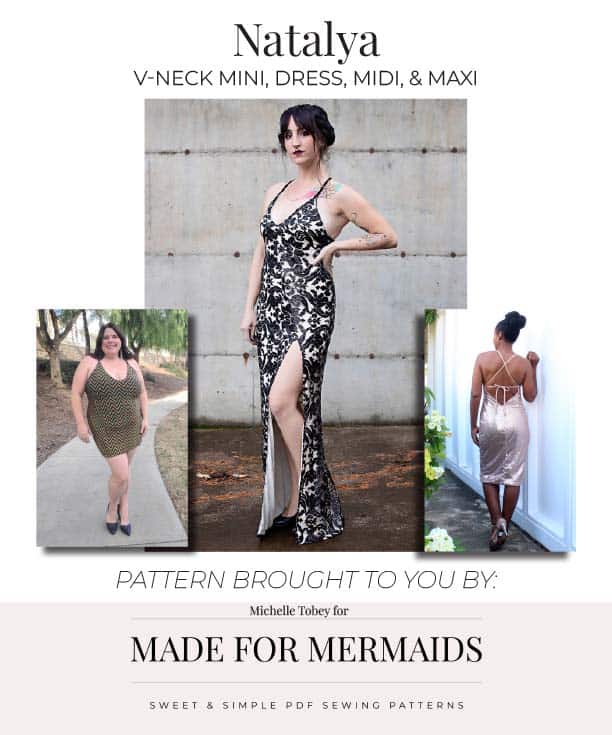
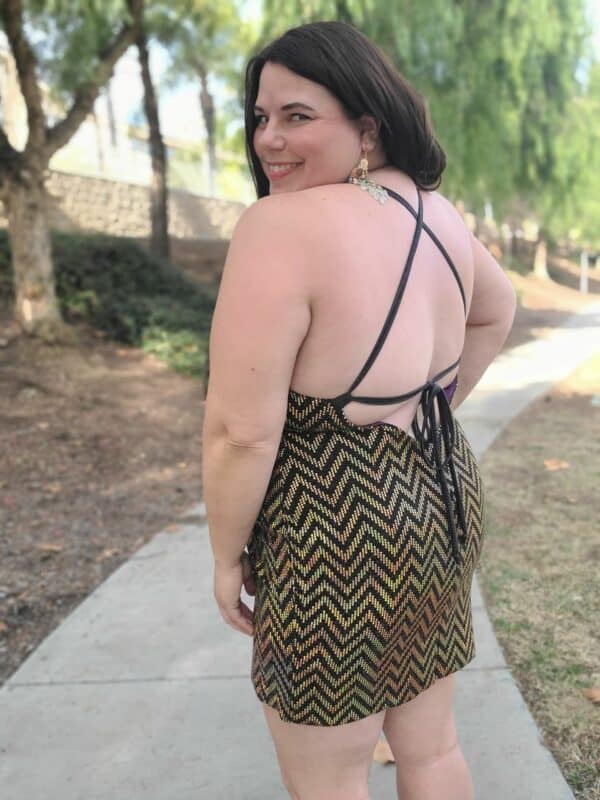
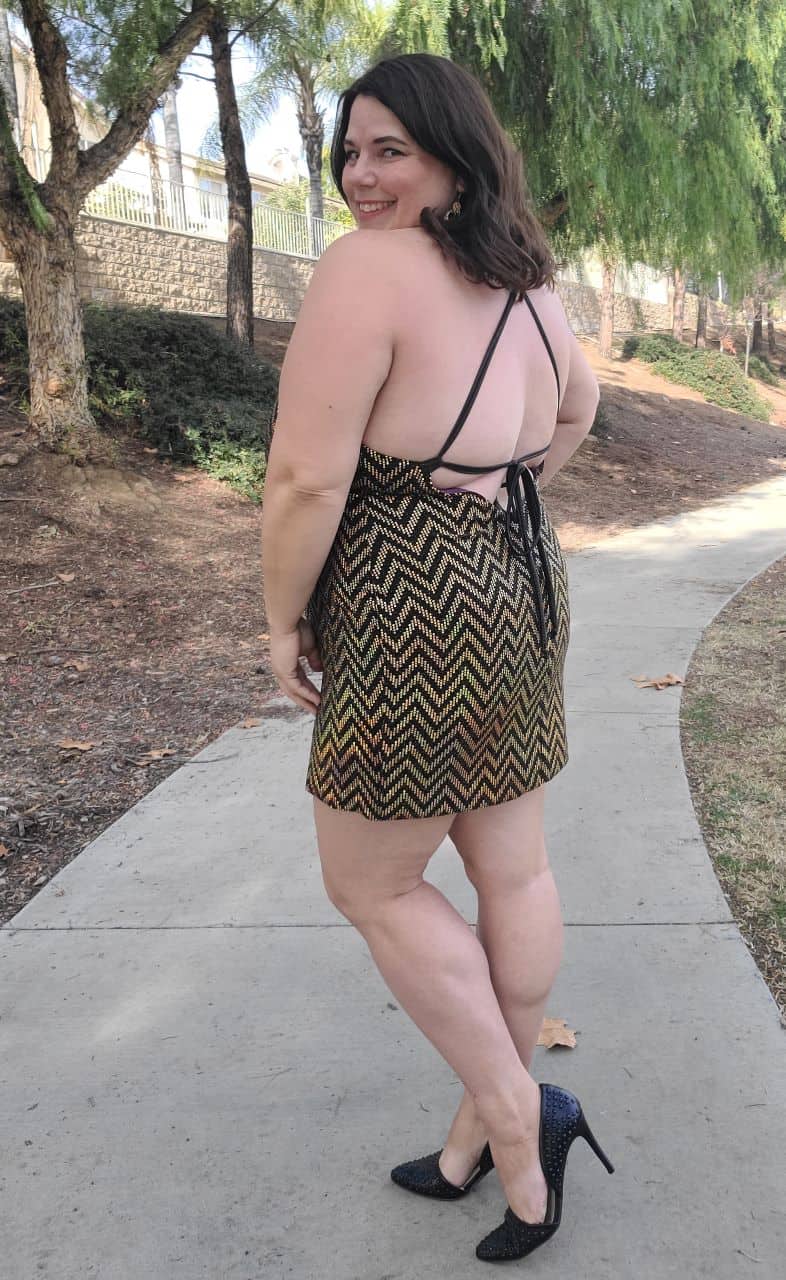
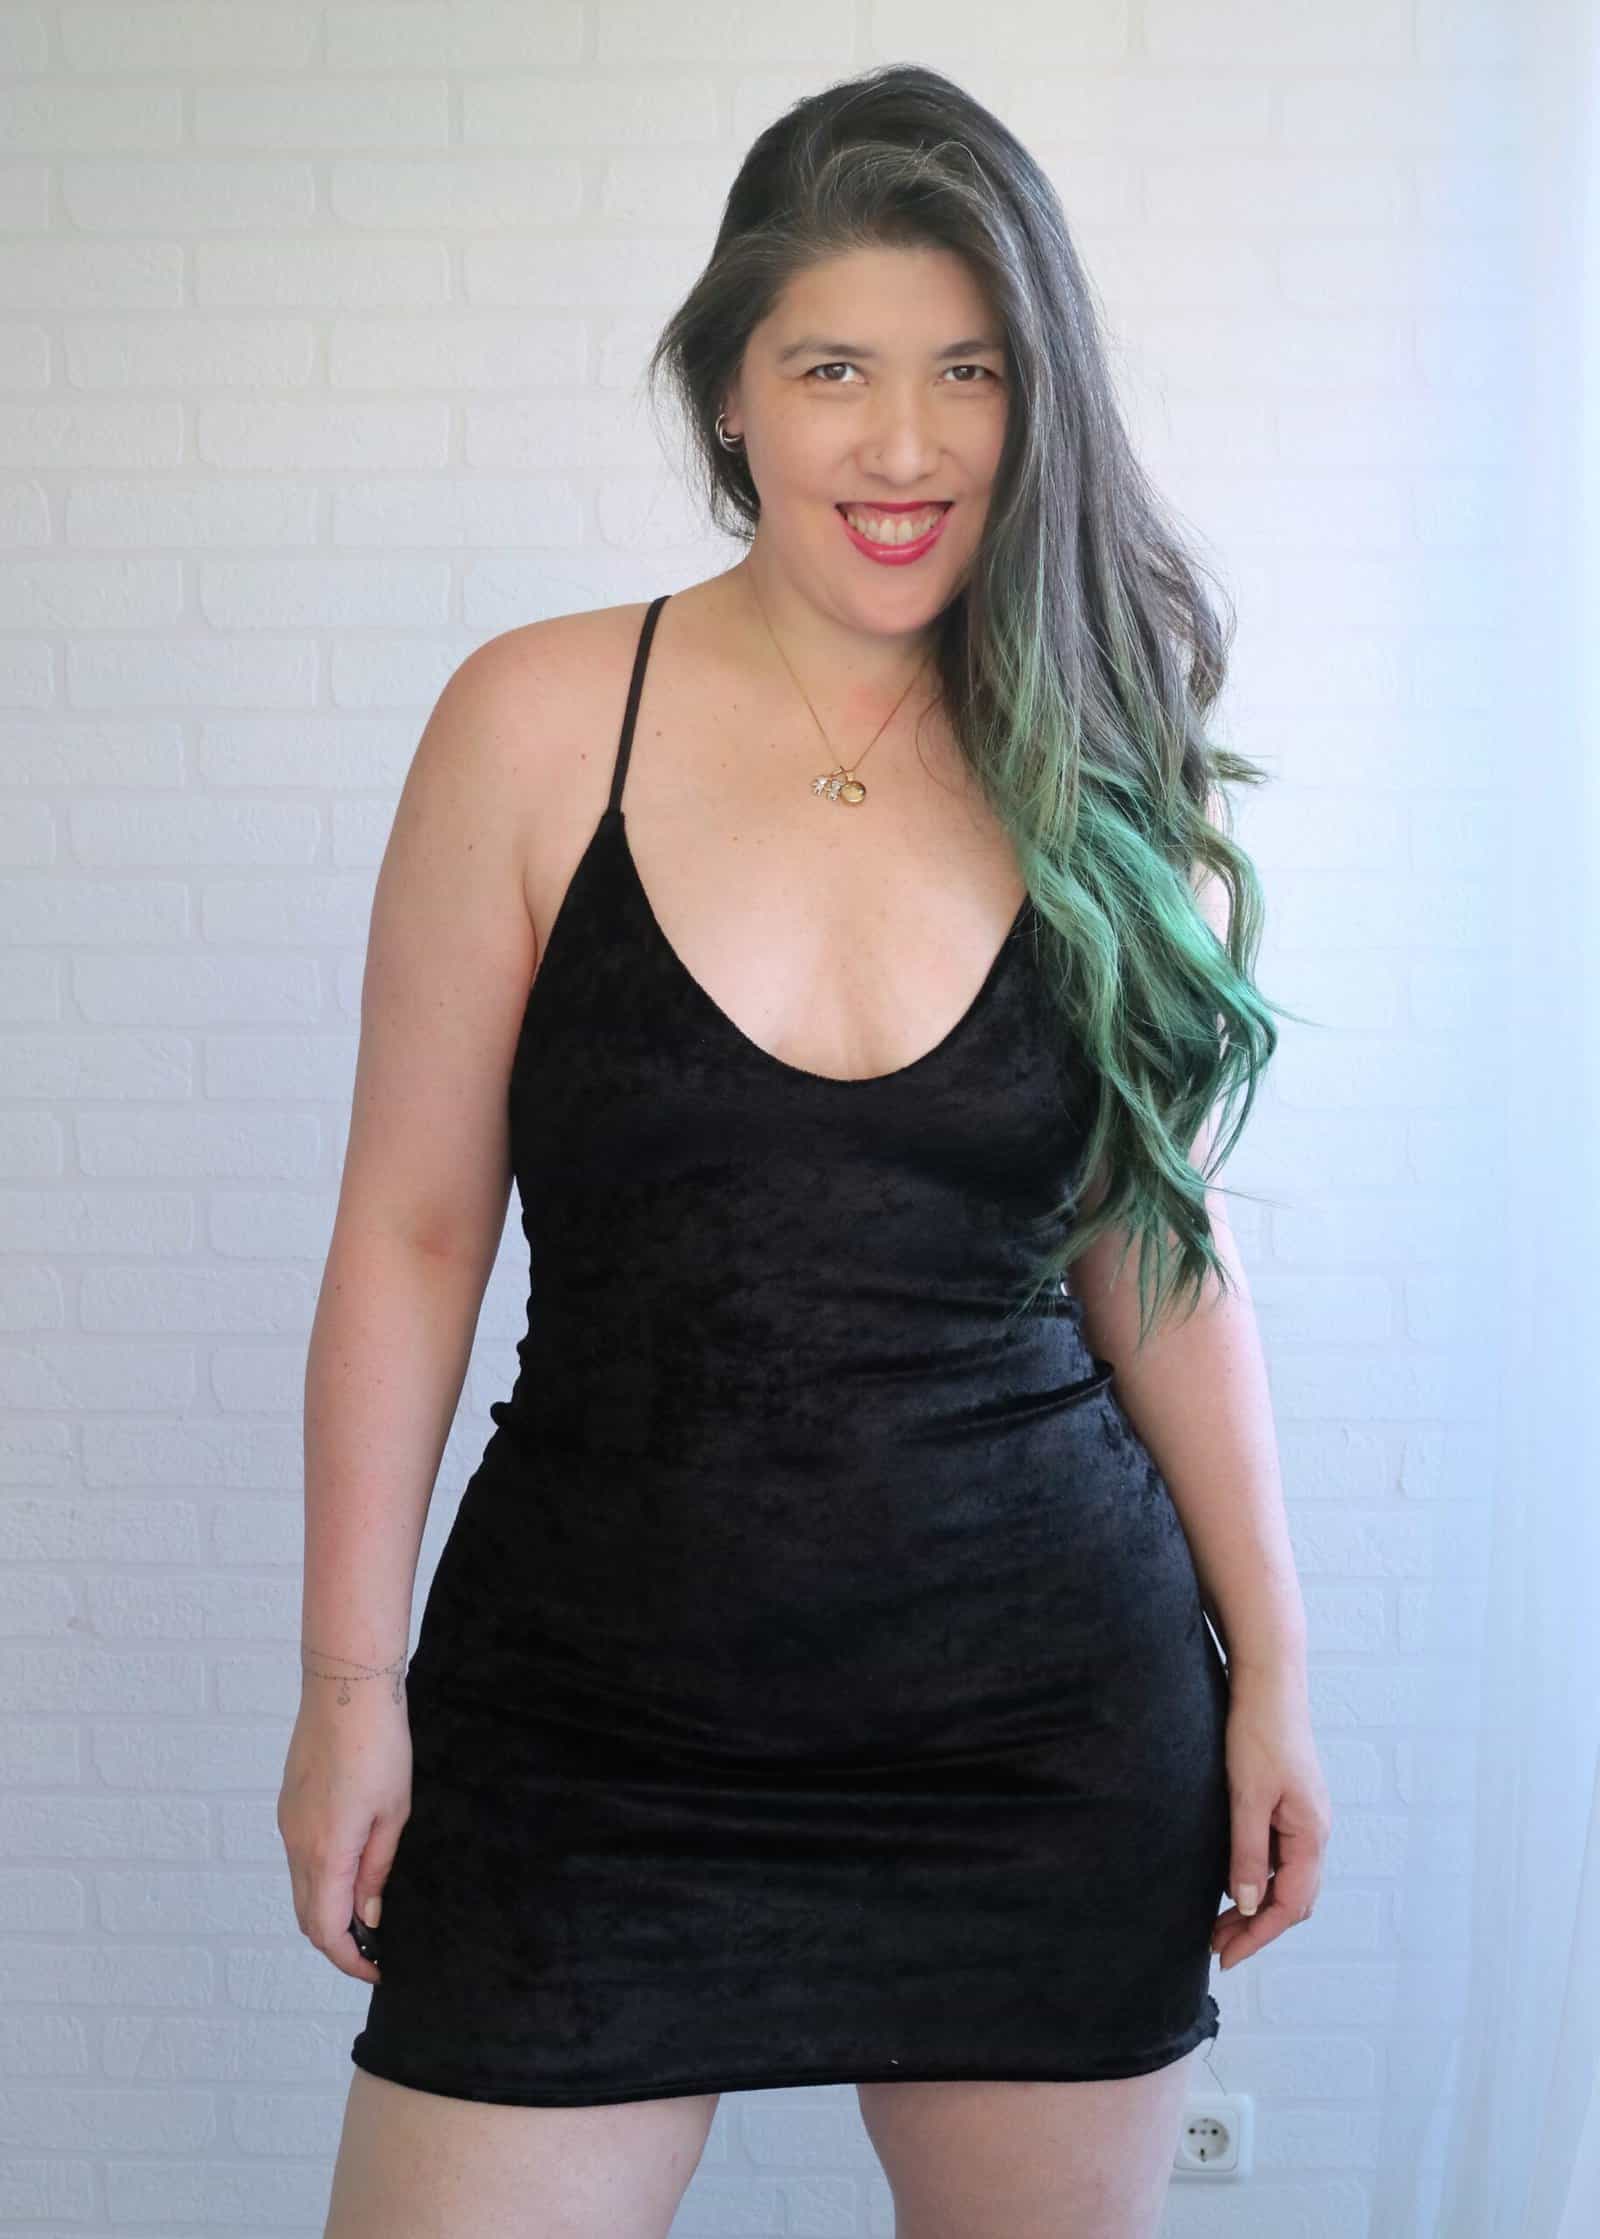
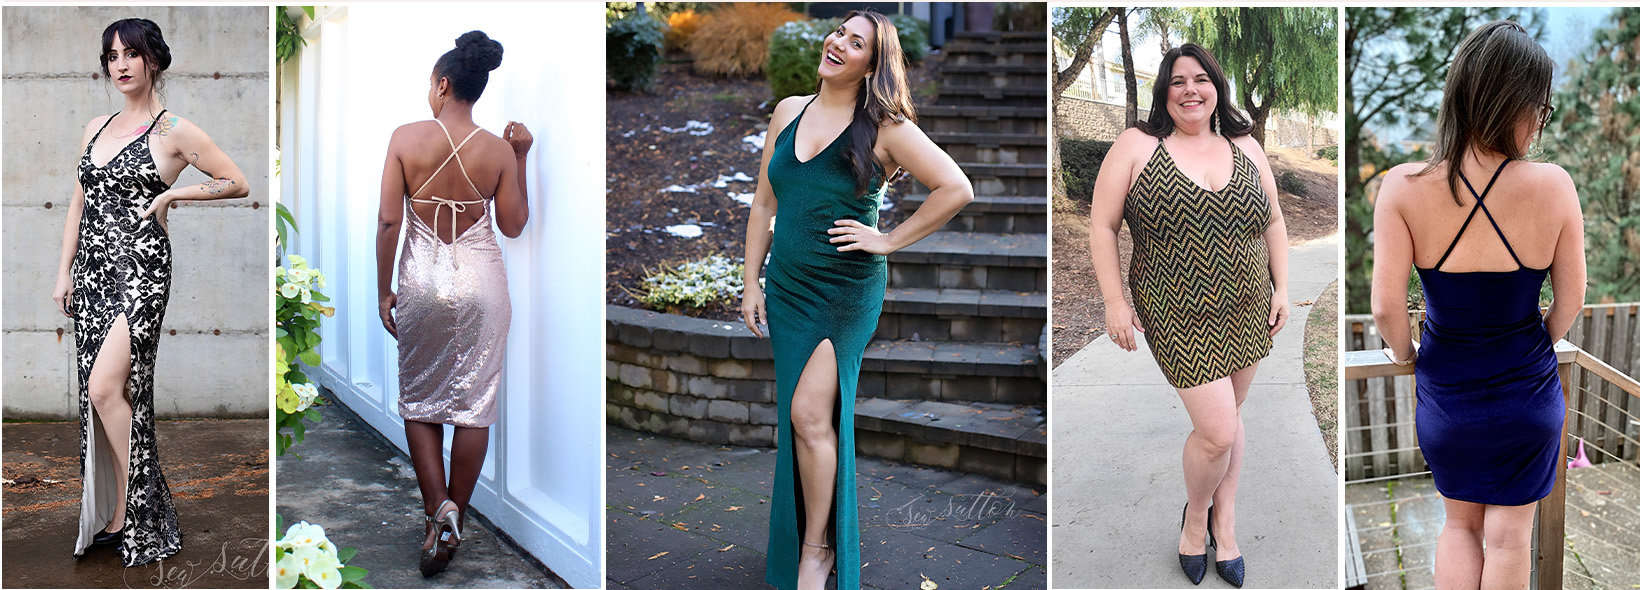
We are so excited to share Natalya, our newest pattern, with you! Natalya is the perfect knit pattern for your next big event, even if your big event is binge-watching Wednesday on Netflix; no judgment here!! The Natalya pattern is fully lined, with a high or low front v-neck. It’s reversible by nature if you use another “main” fabric as the lining! Two dresses in one?? Don’t mind if we do! The back of the dress has a center seam for a beautiful fit, and you can choose from a full-back or low v-back. If you’re looking to wear a strapless bra, the full-back is the perfect coverage for that! The straps for Natalya are crisscrossed, and can be either fixed or adjustable depending on your preference; the low back also has a tie option. Finally, Natalya offers four lengths (mini, dress, midi, or maxi) and two slit options (high or low, in either standard or more dramatic cut-out). You’ve got to see our full tester album; talk about show-stopping!!!!

Of course, we can never say no to just a *few* more options. We have a few simple hacks for you on the blog today.
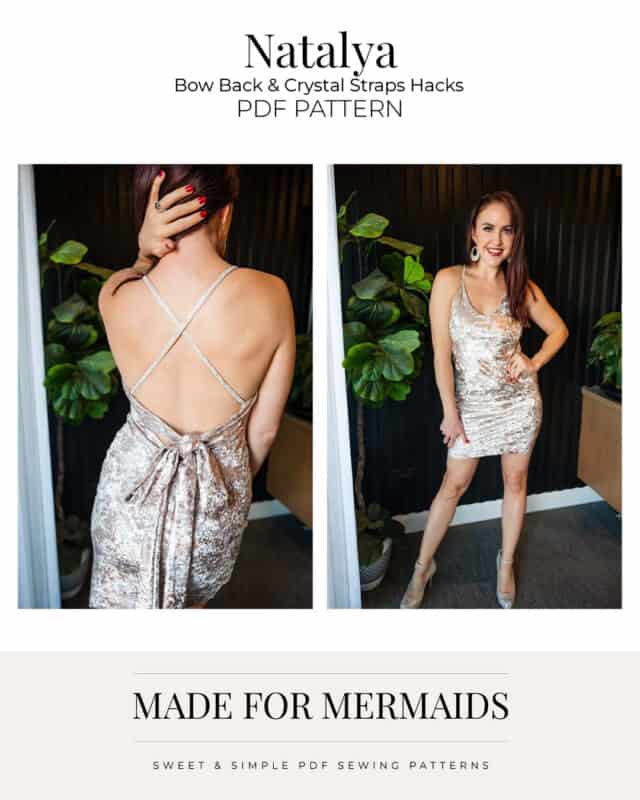
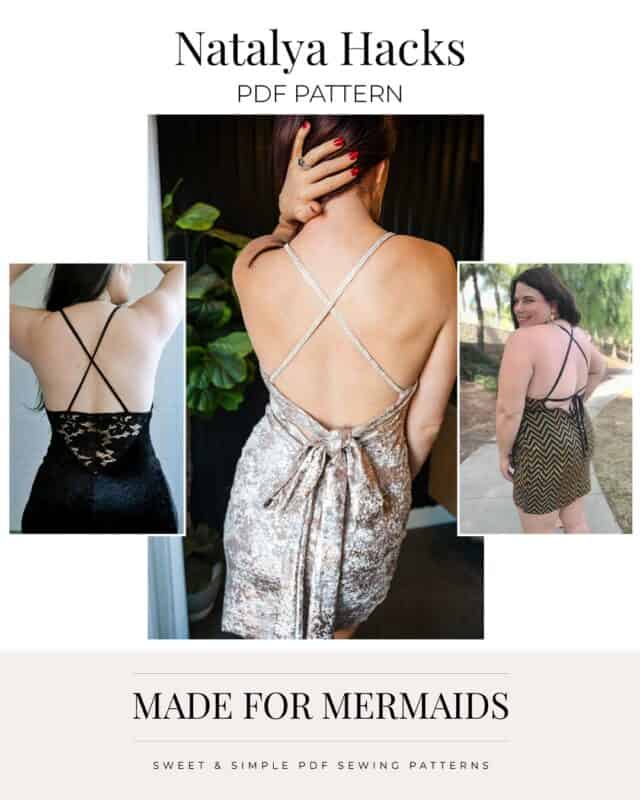
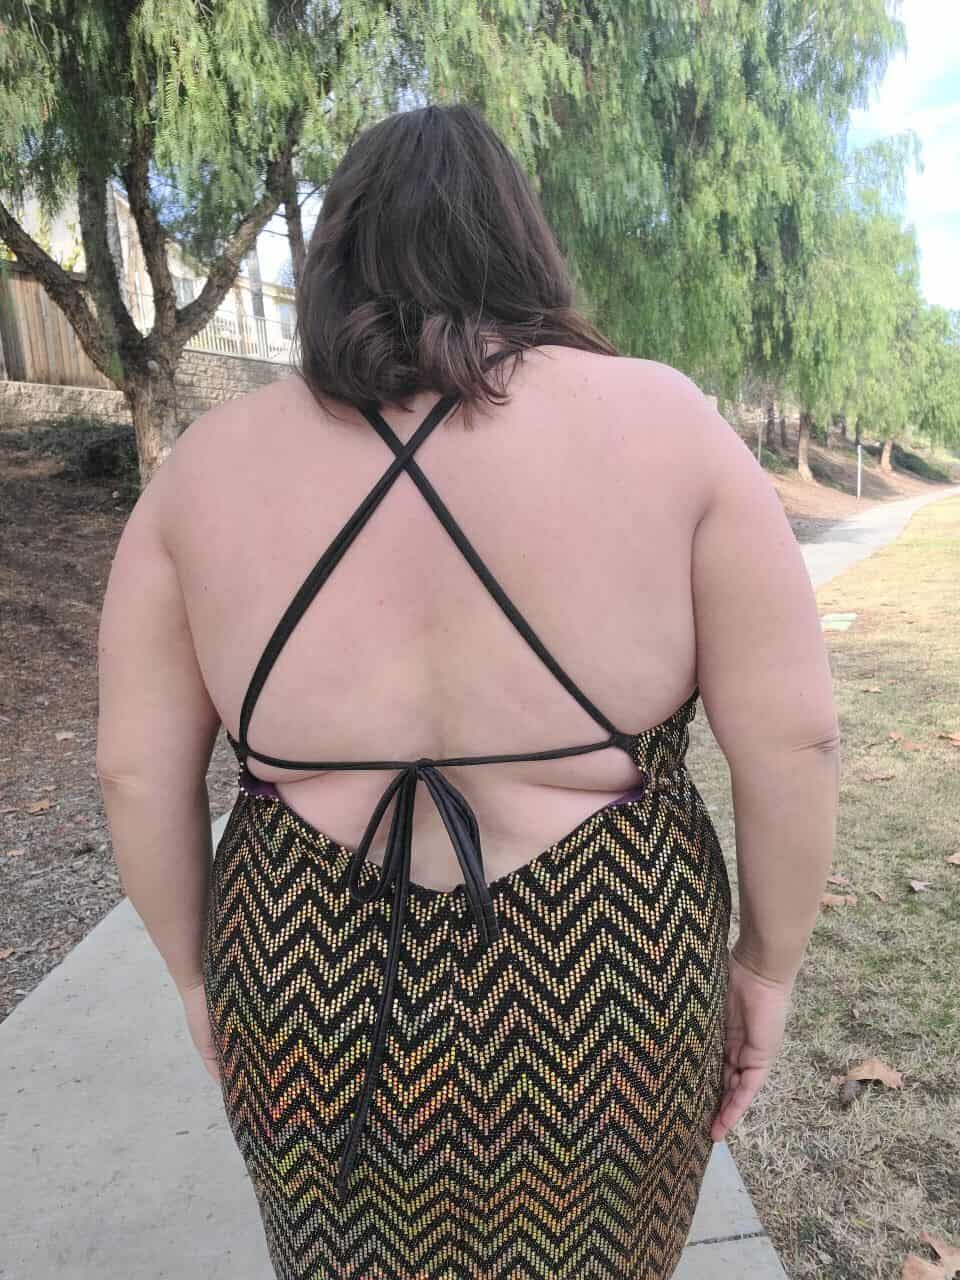
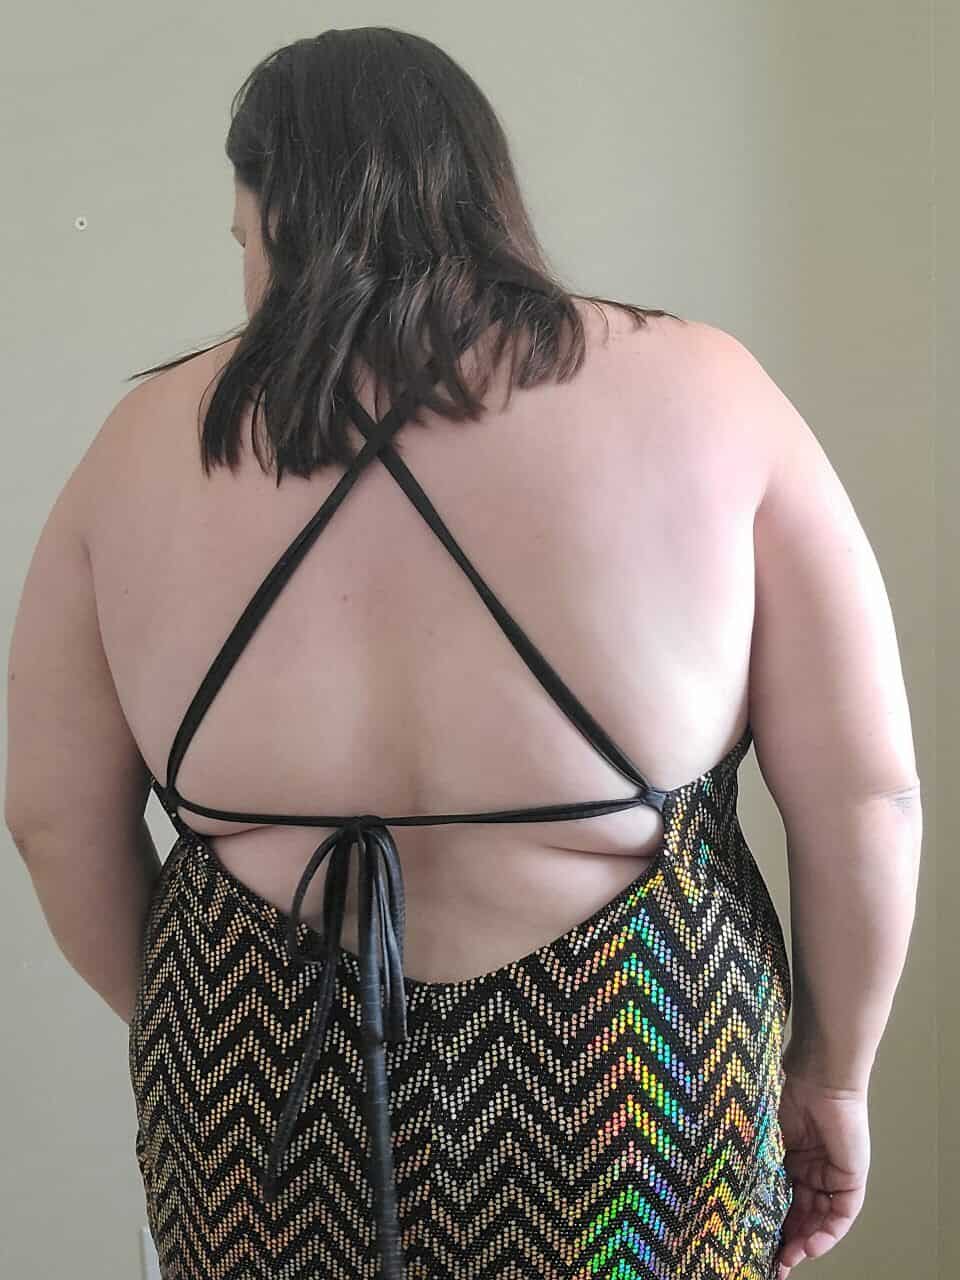
Hello all, and welcome to the season of sparkly sewing! I’m so excited to share these fun Natalya hacks today: how to add a bow back to the low back option, and how to add Rhinestones to the cross-back straps. Both are easy hacks that add such a pop to this already amazing pattern. Here we go!
Bow Back Hack
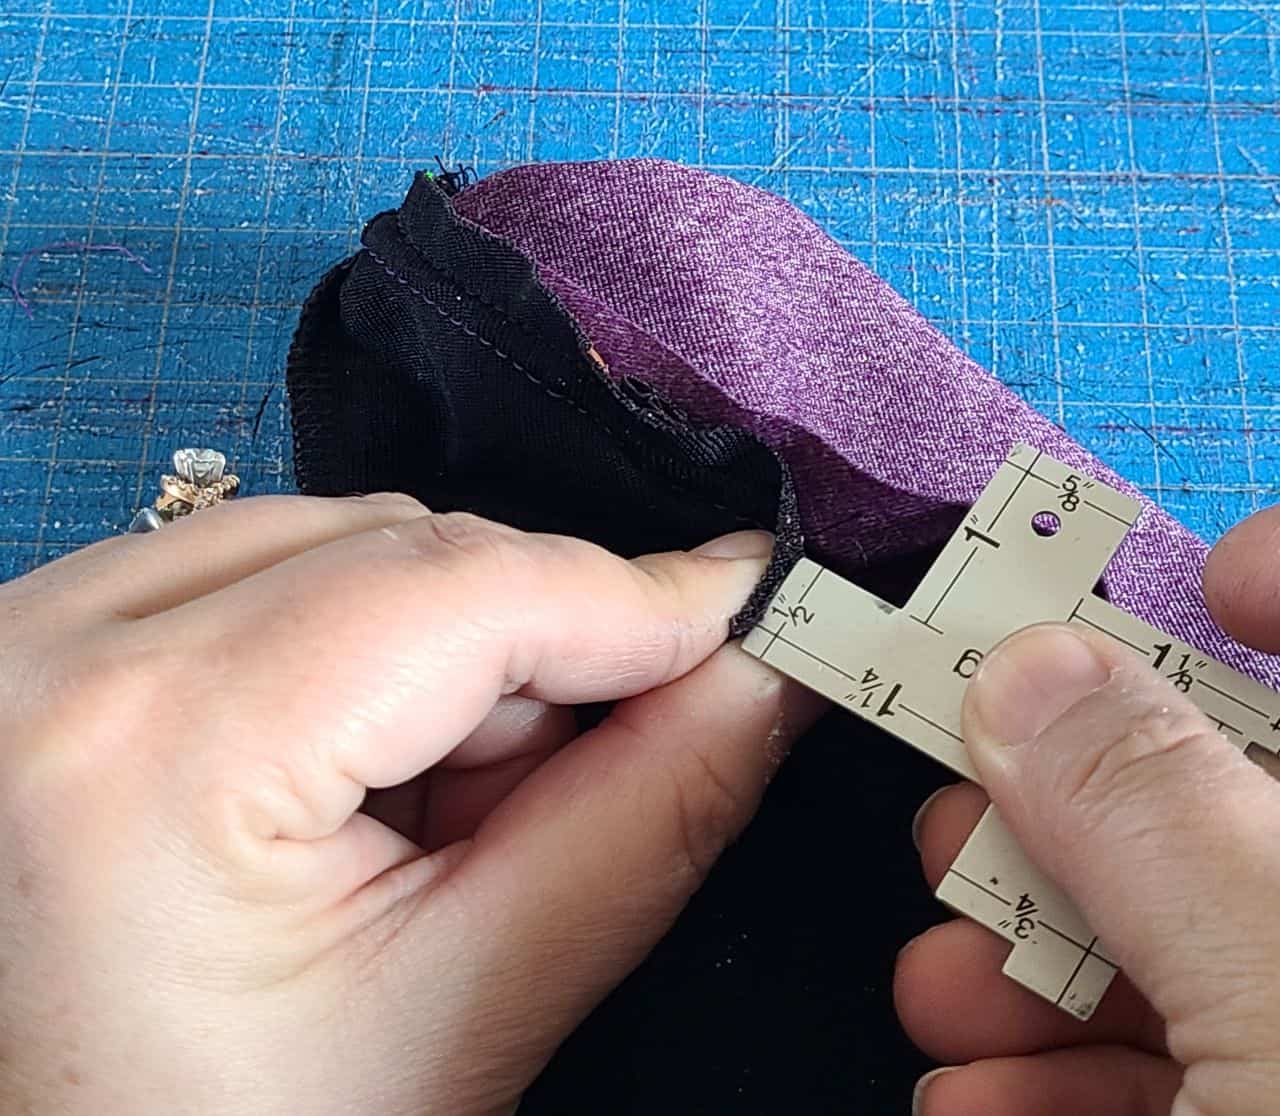
First, cut two low-back ties from your main/exterior fabric. I cut mine at 7.5″ tall by 42″ wide simply based on the amount of fabric I had left, and it worked well. Fold them right sides together (RST) and sew ONE short side and the long side, leaving the other short side open. You can use the seam allowance in the pattern (1/2″) or I used 1/4″ so my ties would be as wide as possible.
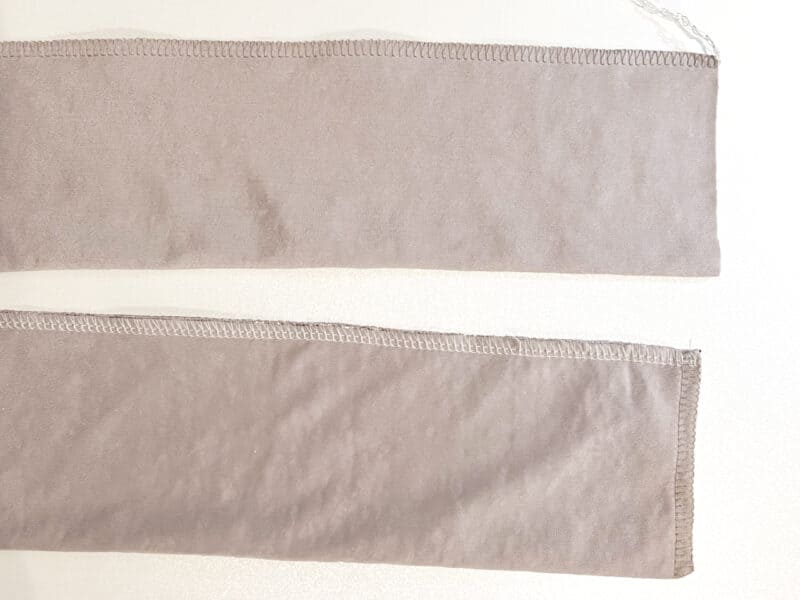
Turn both tubes right sides out. Sew the side seams of your main fabric, and align the unsewn end of each tie parallel to the side seam, as close to the side seam as you can without overlapping the seam. The tie will be laying vertically. Pin in place and baste along the edge of the V back, and trim the excess.

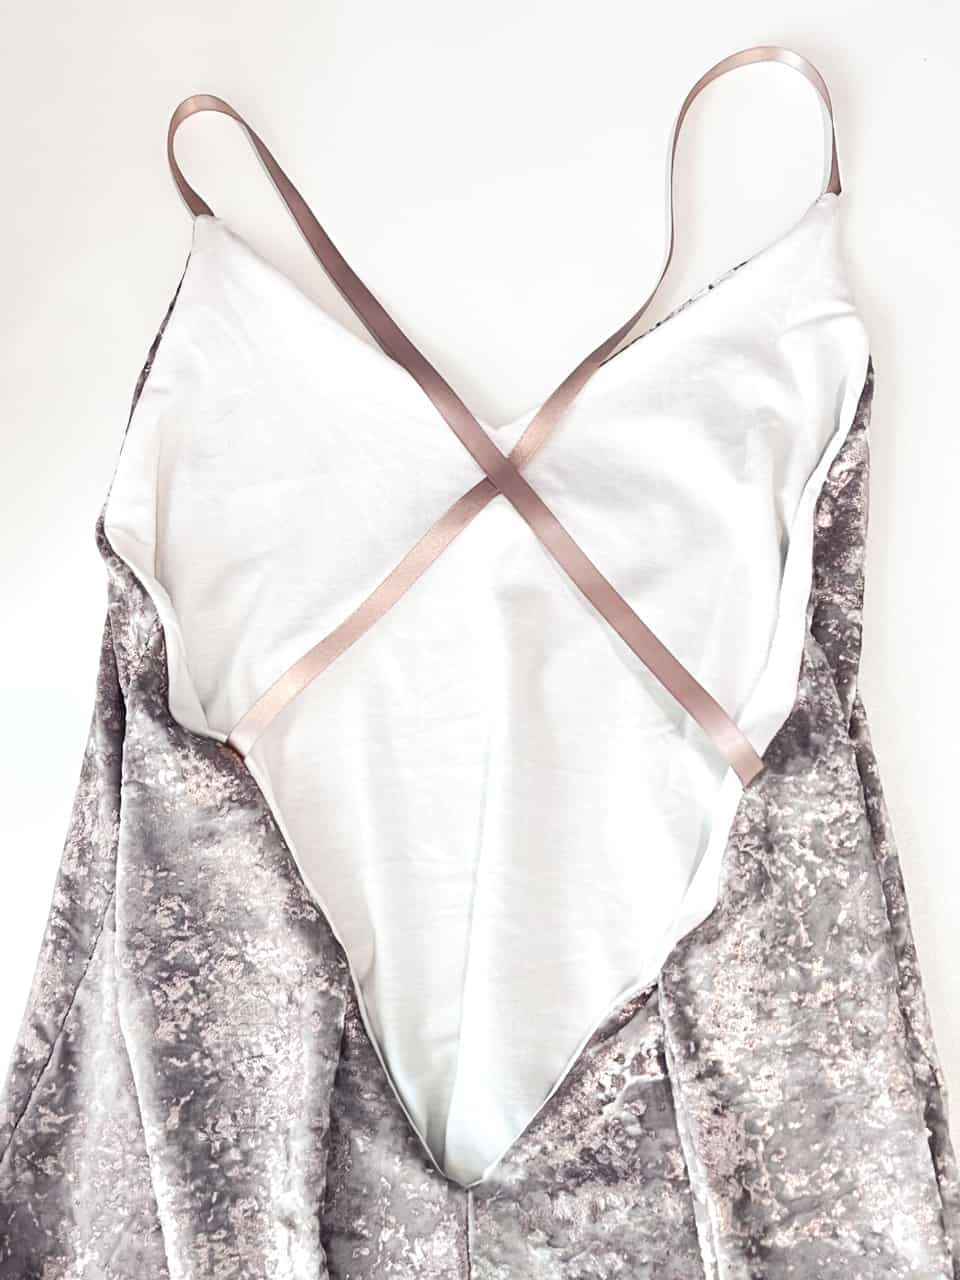
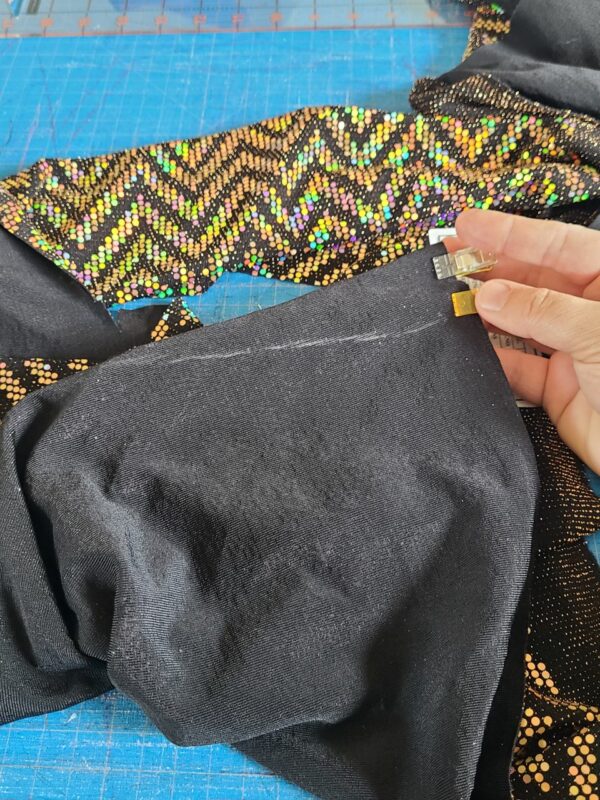
Take your cross back strap (I’m using ribbon here – if you wish to use a woven/ribbon for your strap, read the next hack first!!) and align it at the strap marking, on top of the basted tie. Continue to assemble per the instructions! When you sew the back and neckline with the lining and main RST, be sure that the straps are tucked between the two layers. That’s it for this hack!

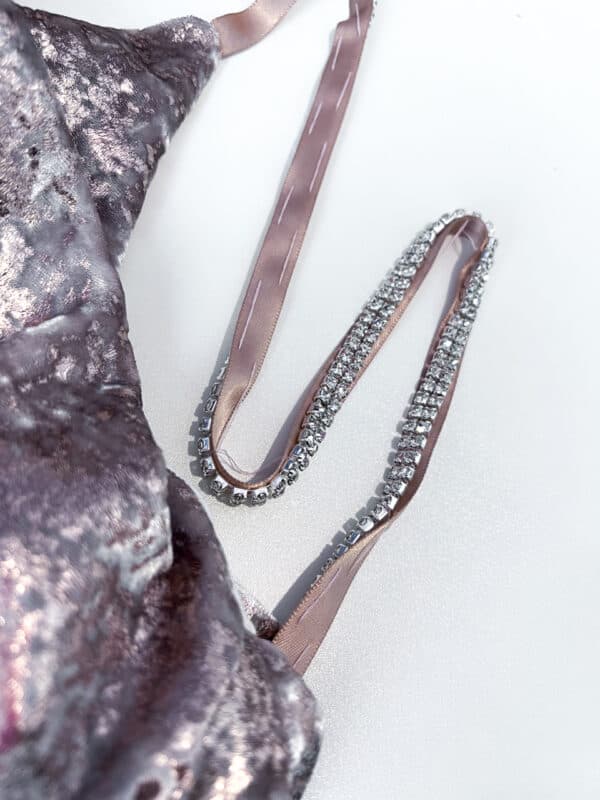
Rhinestone “Crystal” Straps
This hack is done when the dress is mostly assembled, all the way through except for hemming. I use a 2-row rhinestone strip for strength and extra glitter!
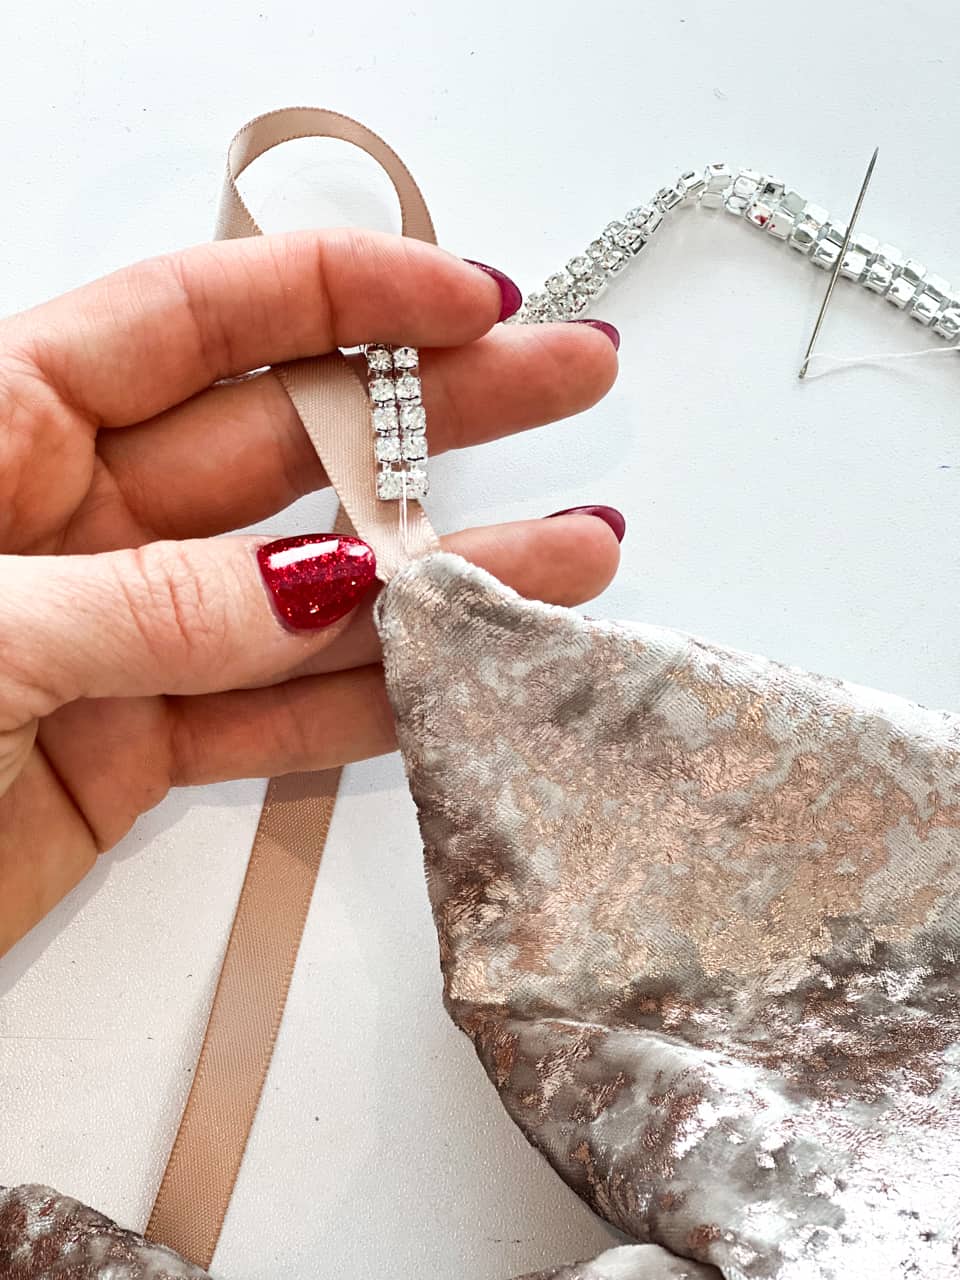
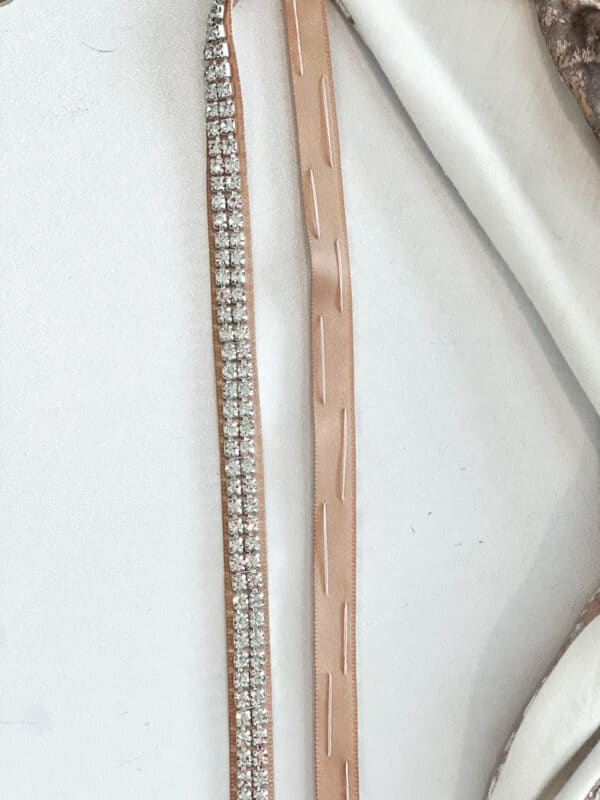
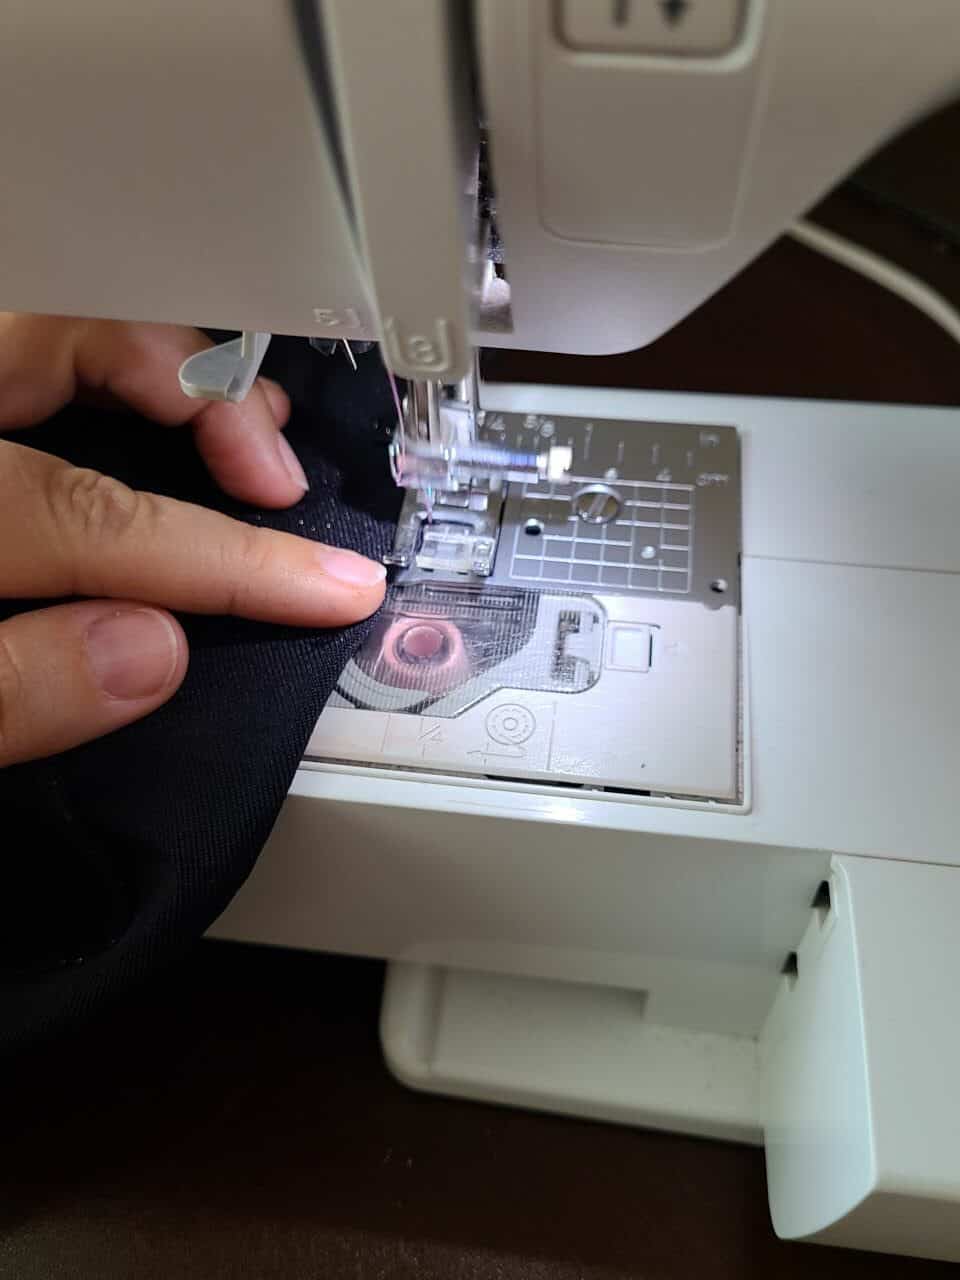
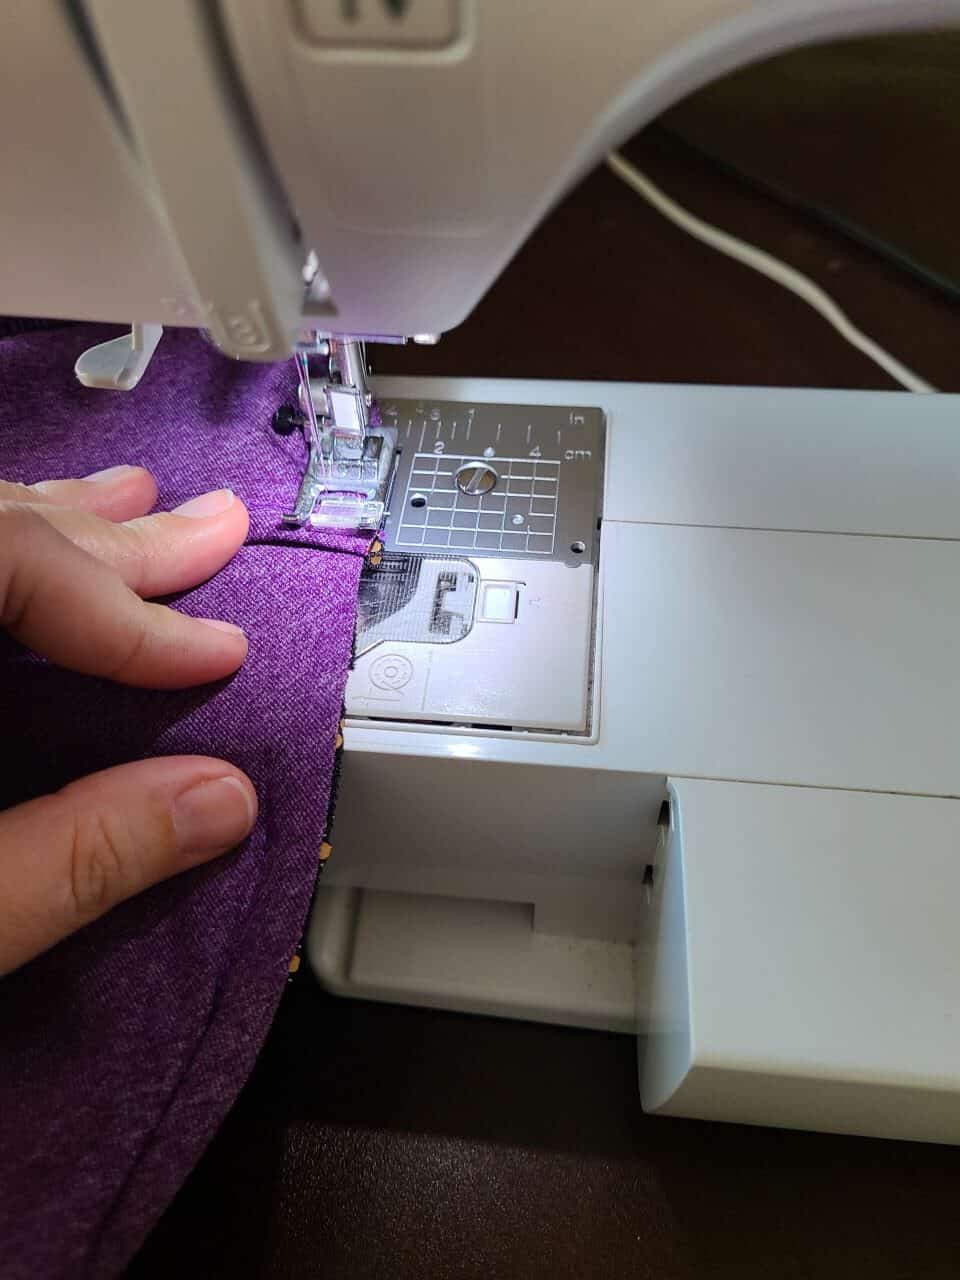
To attach rhinestones, you’ll need a woven/non-stretch fabric so the rhinestone strips don’t break. I used a satin ribbon here. Cut the ribbon a few inches longer than the recommended strap length the pattern piece shows. I cut mine 2″ longer and it was barely enough, so I’d recommend giving yourself more length and trying the dress on to adjust from there! Use a lighter to heat set your cut ribbon ends to avoid fraying.
Once your dress is assembled and straps are in place per the pattern, measure the total length of your strap from the front seam to the back seam. Take your length of rhinestones and cut it 1″ longer than your strap, as inevitably the rhinestones can shift a bit, or may break during cutting.
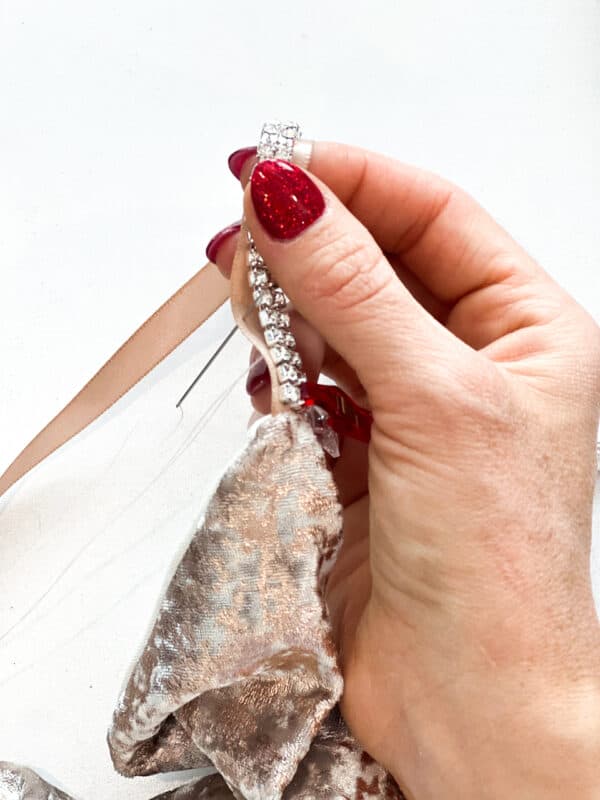
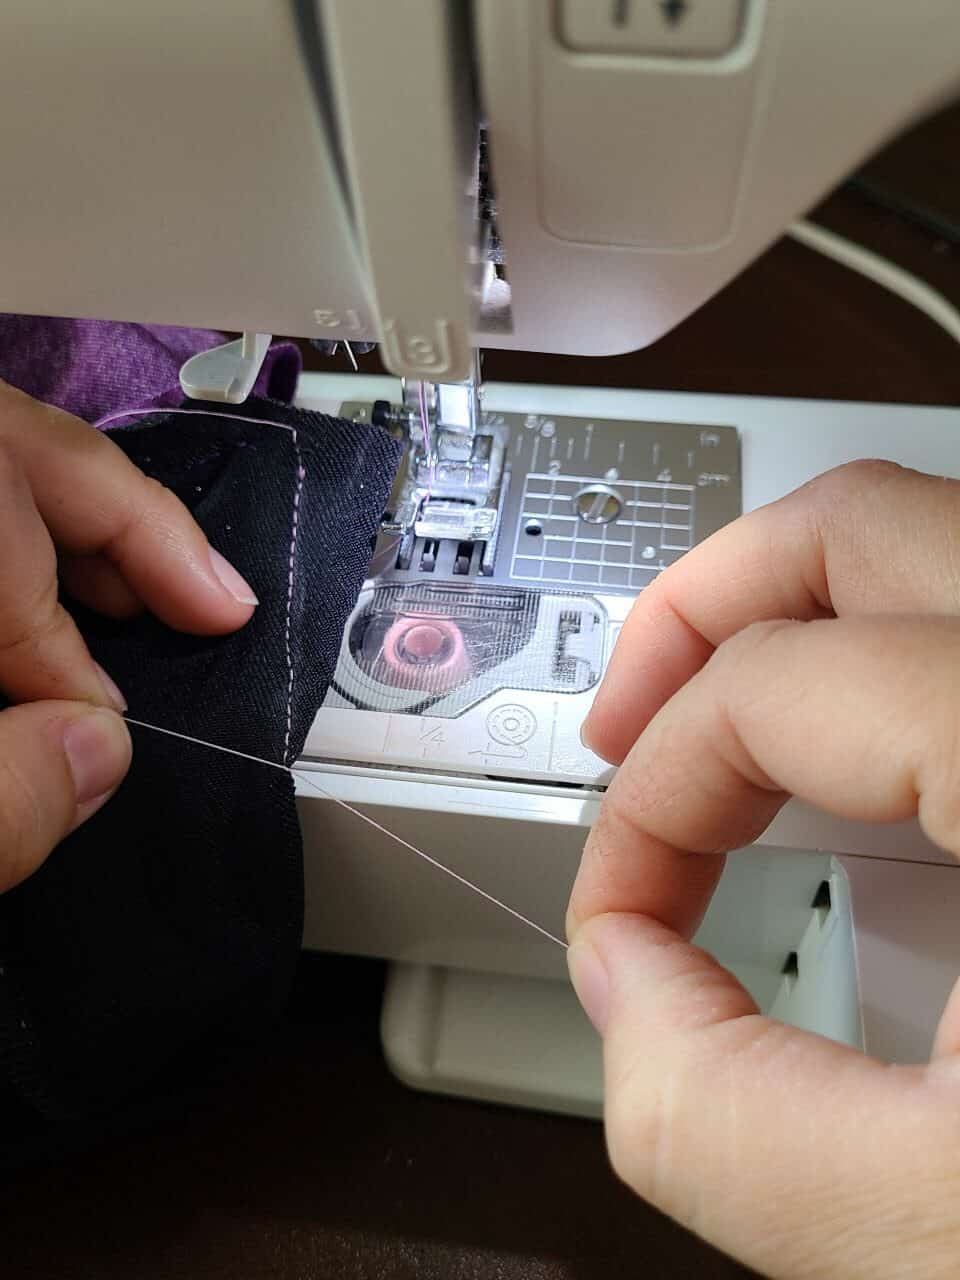
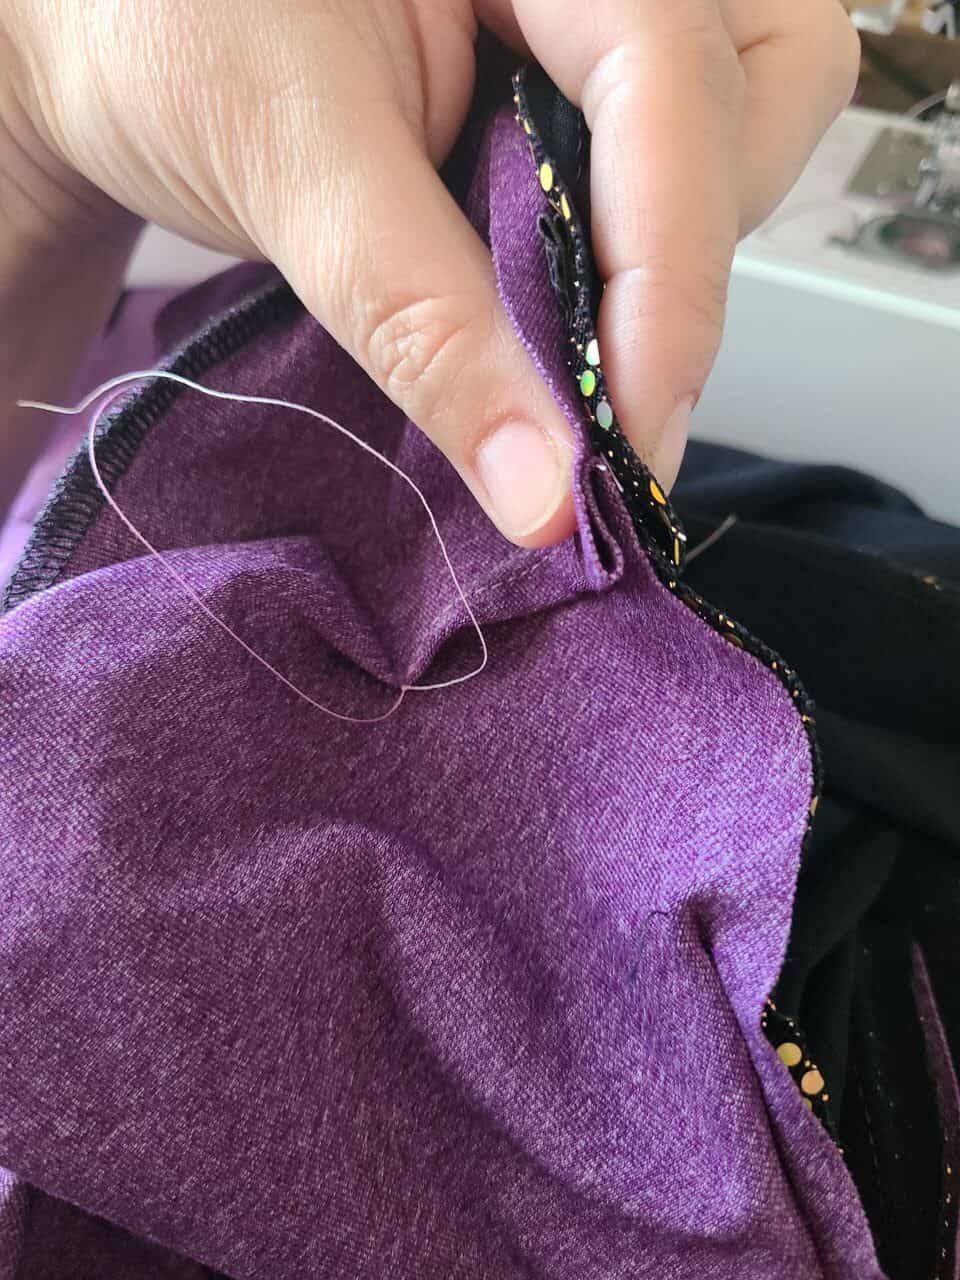
Using a hand needle and a long piece of thread, feed the needle up between the main and lining, and pop out at the top of the front strap. This is so the knot is inside the dress and not scratching your collarbone.

Loop your thread around the first row of rhinestones, between the top two to secure it. Pull tight and clip in place so it doesn’t shift while starting your next few stitches.

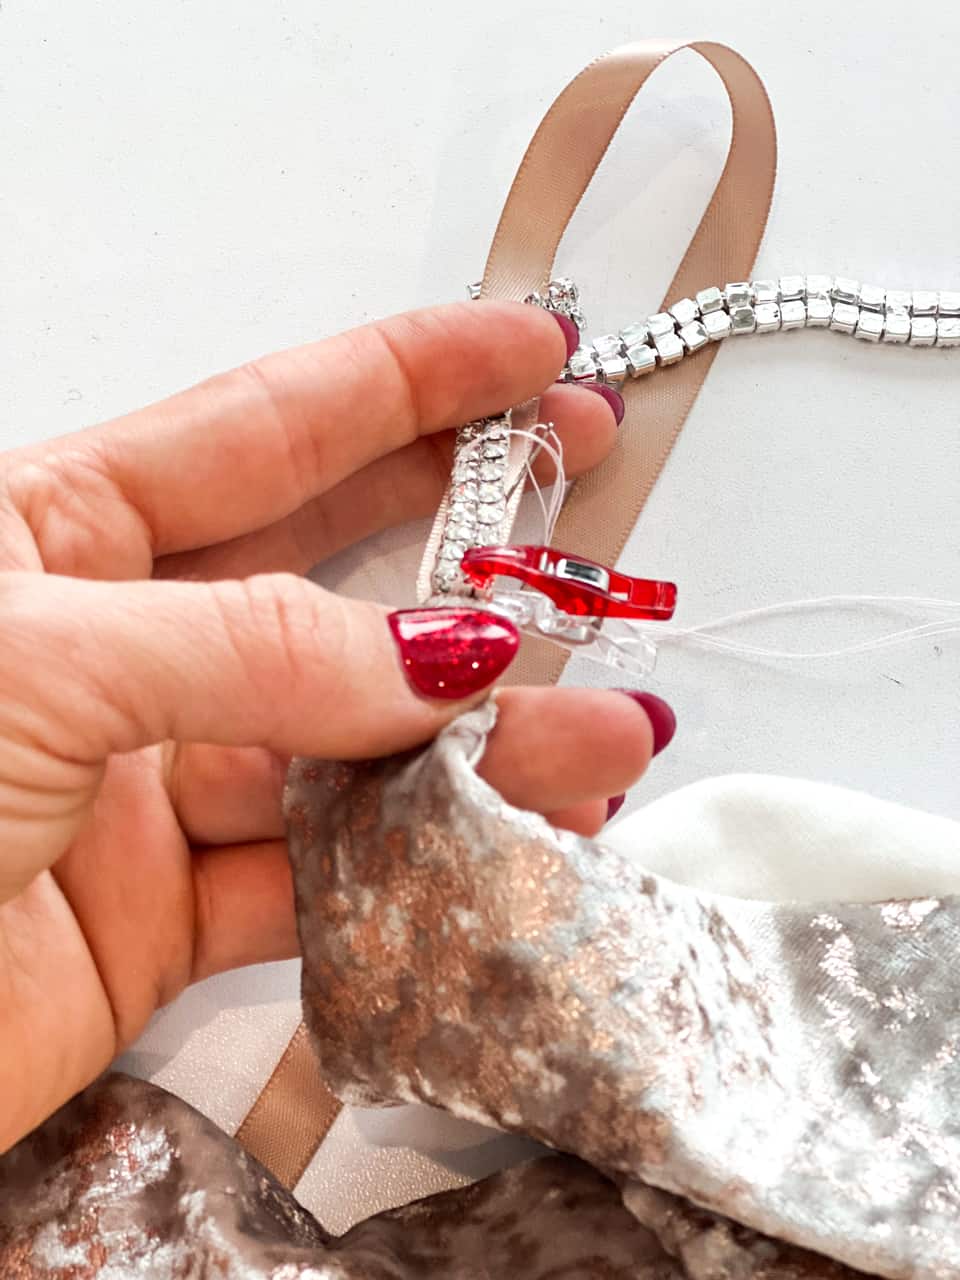
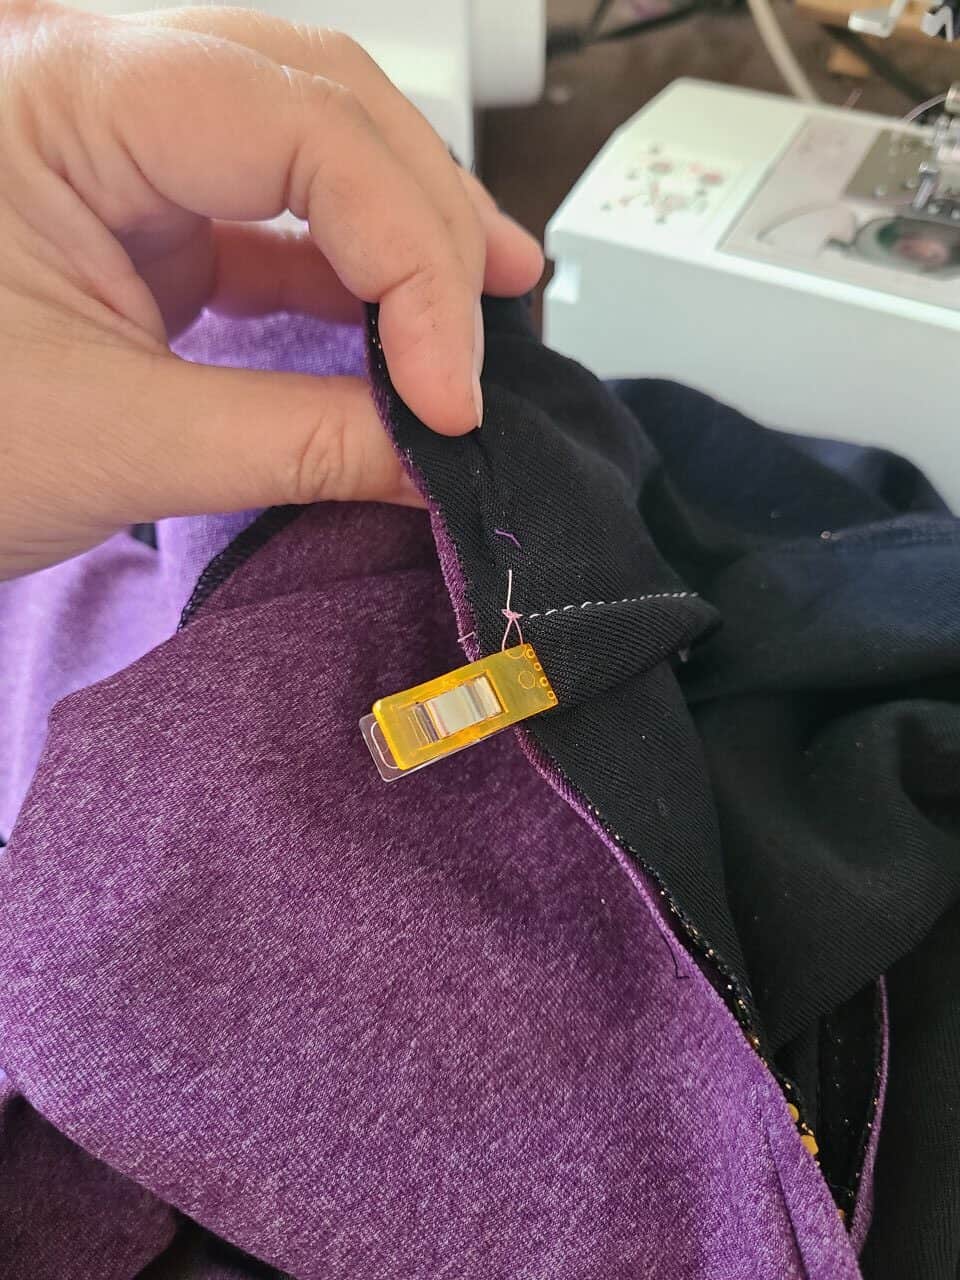
Moving slowly down the chain, stitch around the rhinestones, making sure to stay close to the anchors between each set of stones. This ensures the rhinestone strips don’t move around later. Loop around the rhinestone strip every few stones.
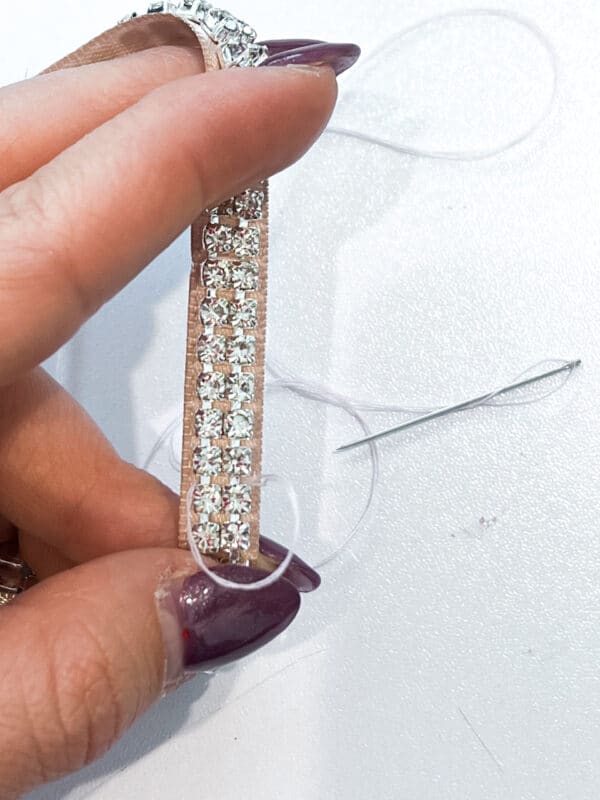
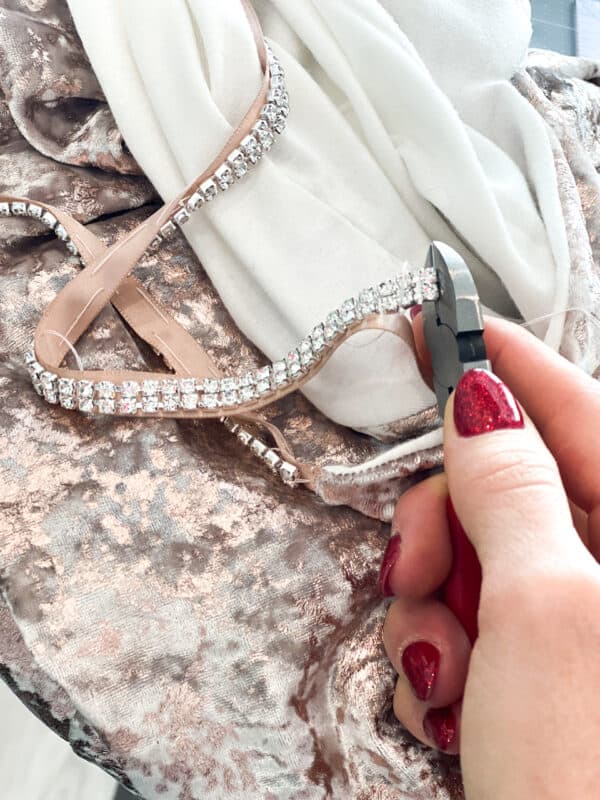
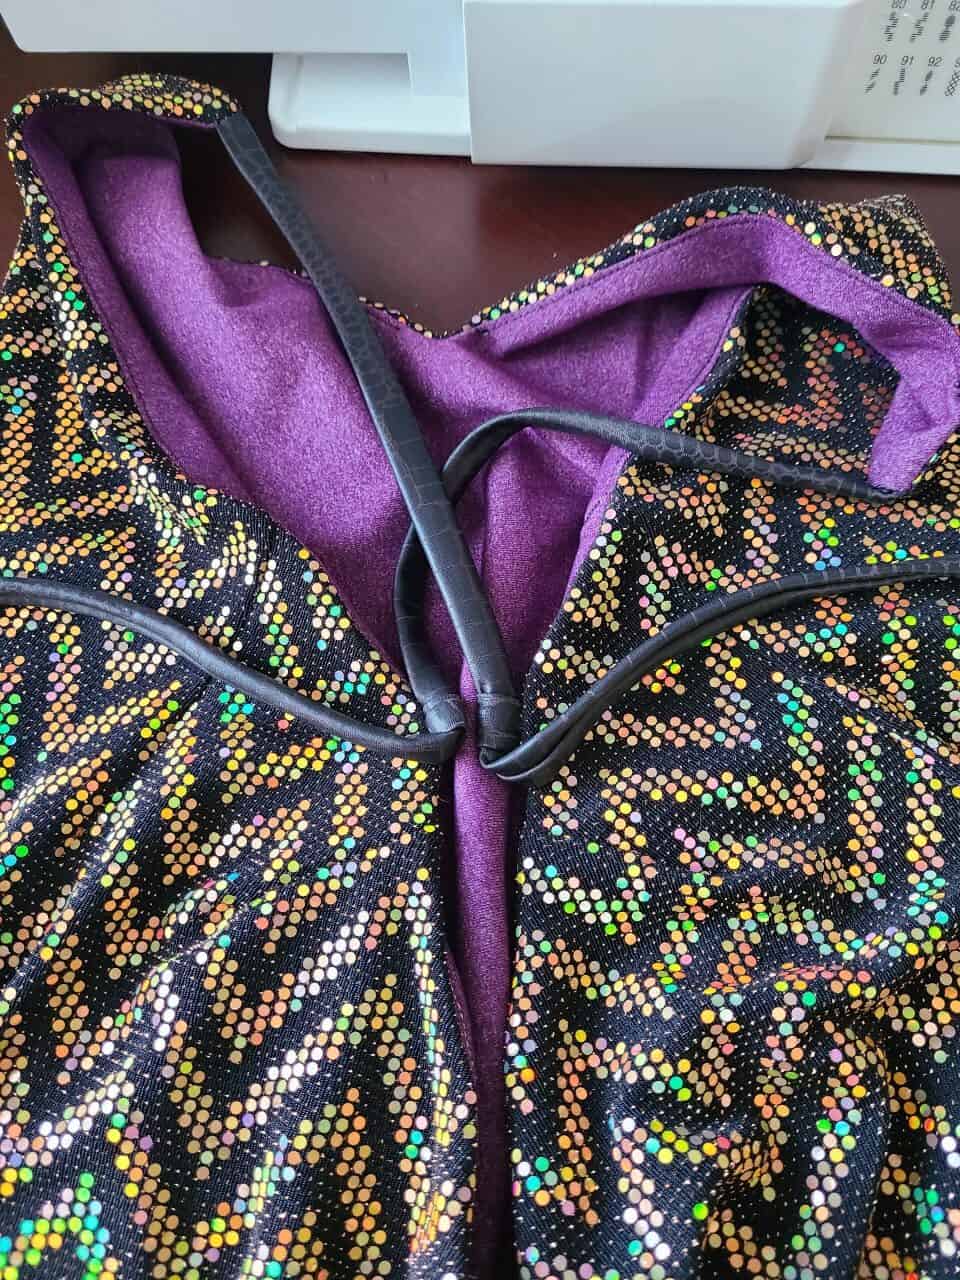
Once you get to the end of the strap, carefully trim any excess stones. Just as we did at the first set of stones, loop between the last two stones to secure the end, and tie off in the back. The front and back of your straps should look like this:
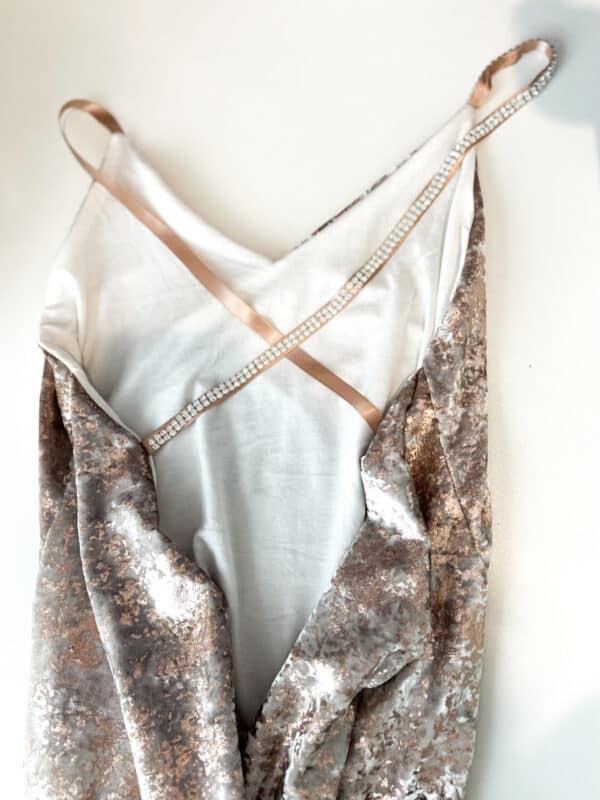
Once you’ve completed the first strap, go ahead and repeat for the second strap, and you now have gloriously sparkly straps on your Natalya dress!
Thanks for joining in these hacks, hope you love the extra pizazz these give as much as I do!
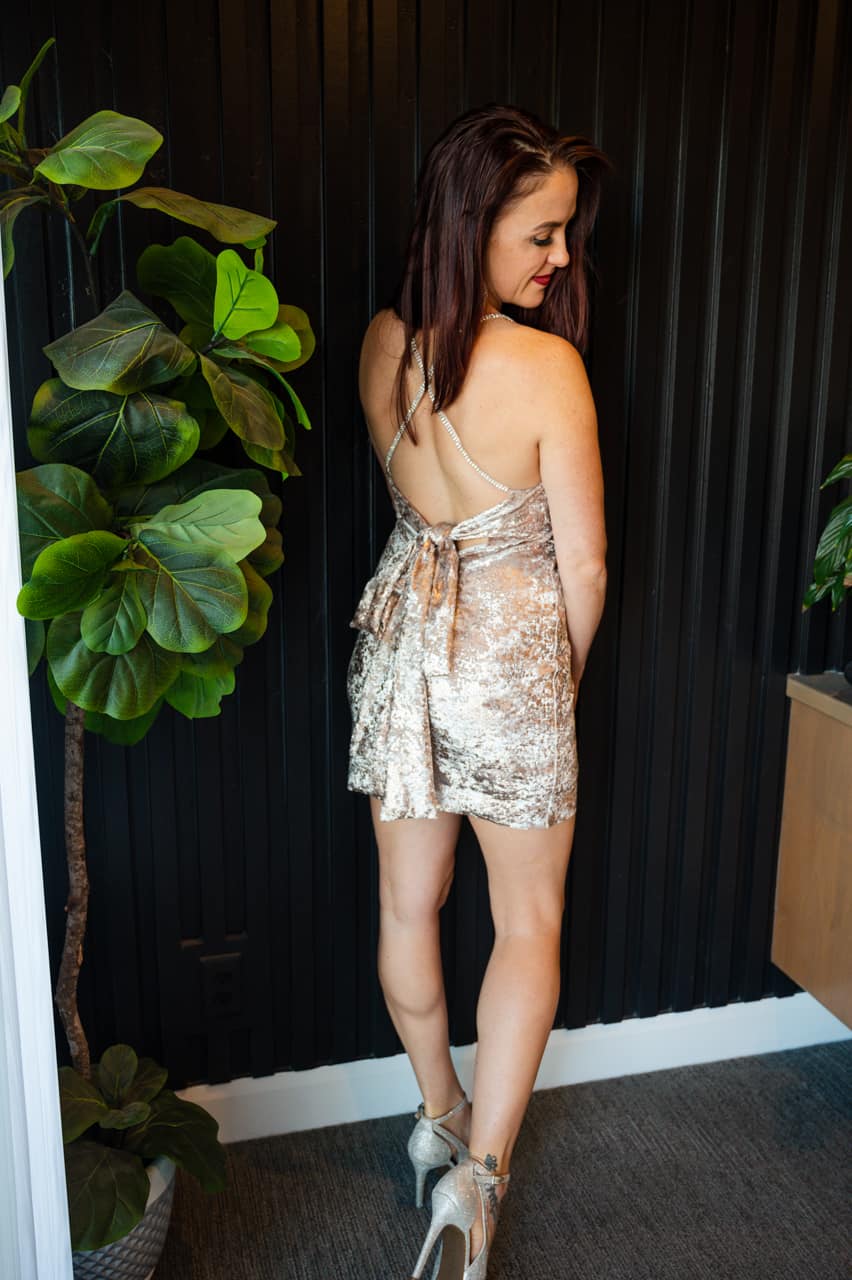
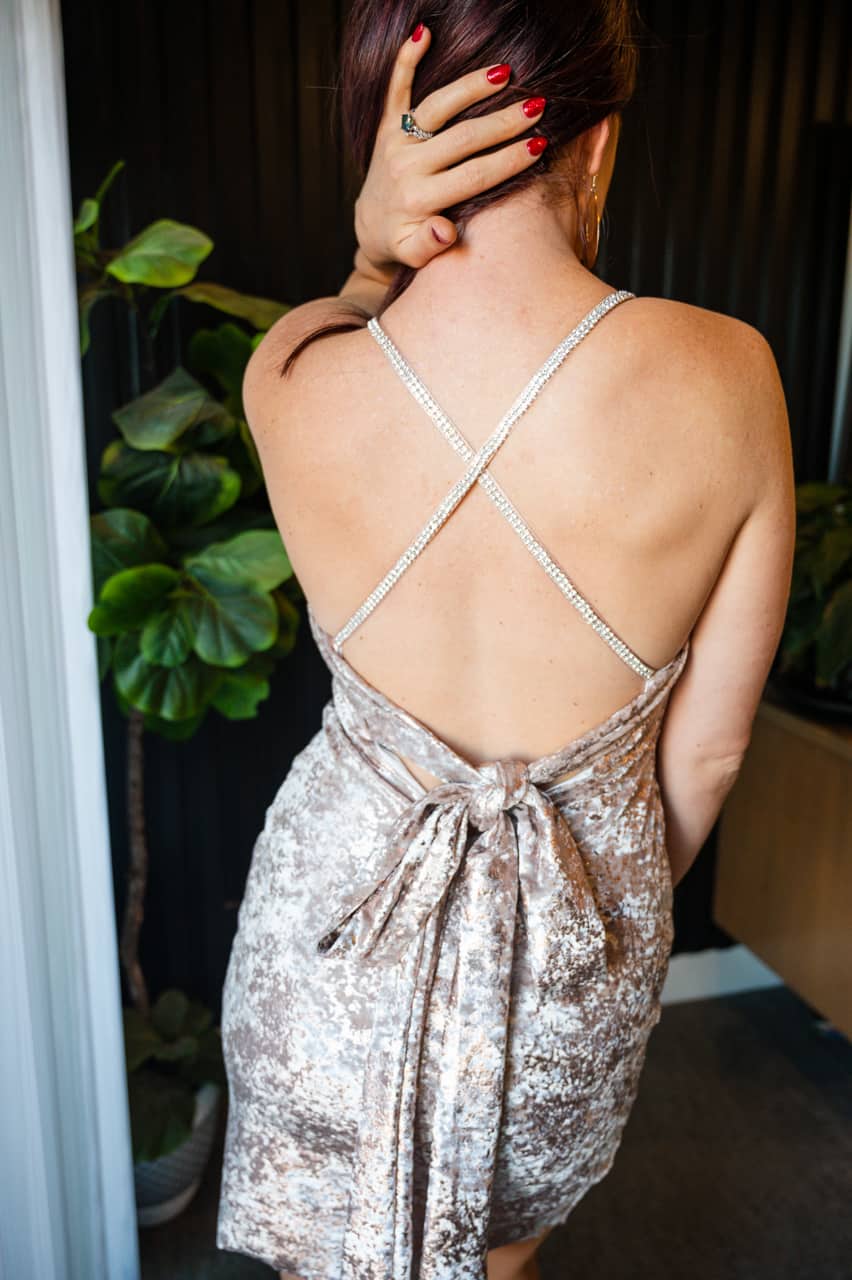

Hi everyone, Kelly here to show you how to add a dart to your Natalya lower back if you need a little tweak for a perfect fit! Natalya is a gorgeous dress pattern with a higher back option, or lower back option that curves down to a “v” on your lower back.
-

- Natalya low neckline option

-
- Natalya low back option
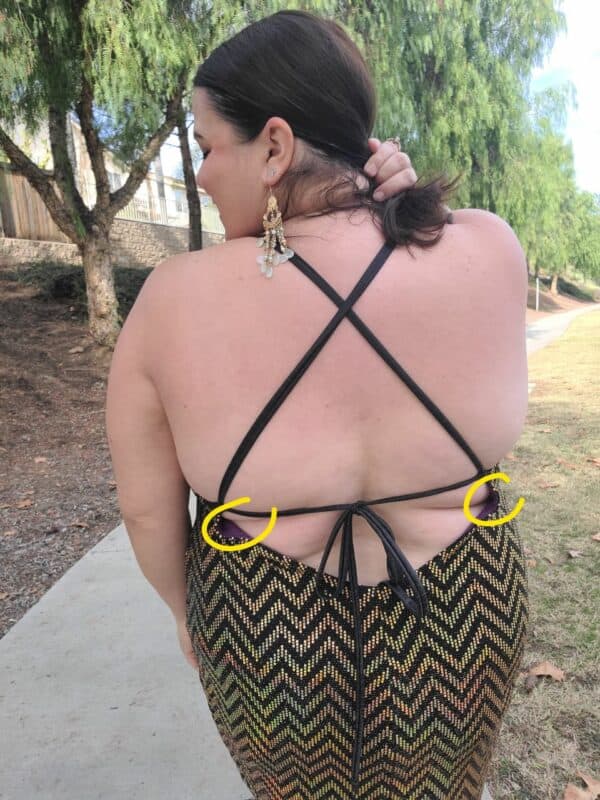
Now, no two lower backs have the same shape, and fabrics that we each choose to use for Natalya will have a different amount of recovery and you may find that you need a little help to have your dress sit flat to your body right below the tie hooks.
-
- Slight gaping below the tie hooks – we can fix that!
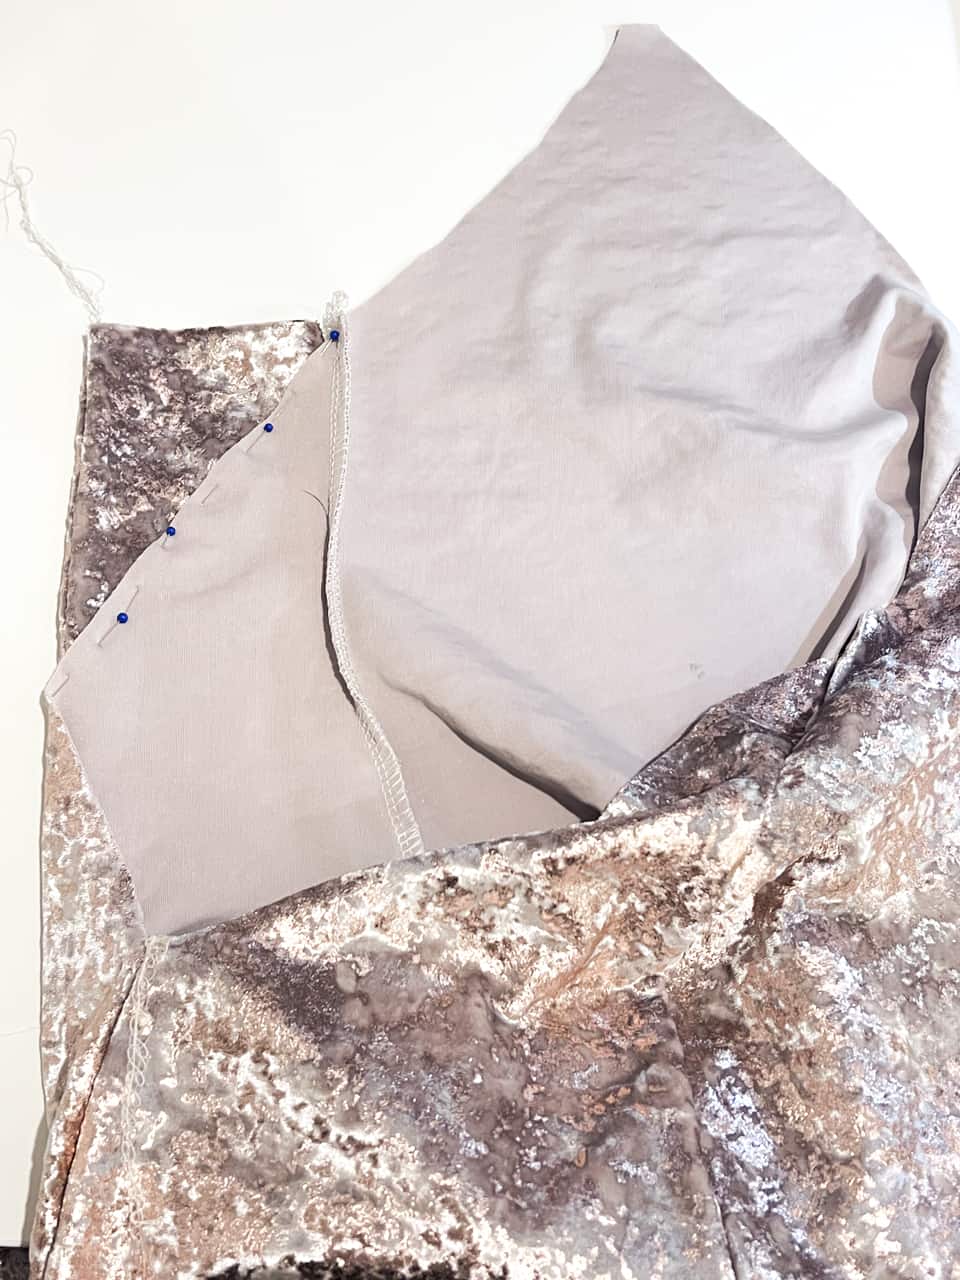
There is an easy fix for this – you can create a dart! First things first, you will sew up the shell with your main fabric as is suggested in the tutorial. Attach the straps and hooks and tie the ties snugly. Take a photo of your back or have someone help you to see how much fabric you will need to pinch out. (I sewed up the dress entirely with a straight stitch so I could try on the full garment and easily seam rip any areas that may need tweaks, so you will see both the shell and lining in my photos.)
-

- Opening up the seam to work some magic
-
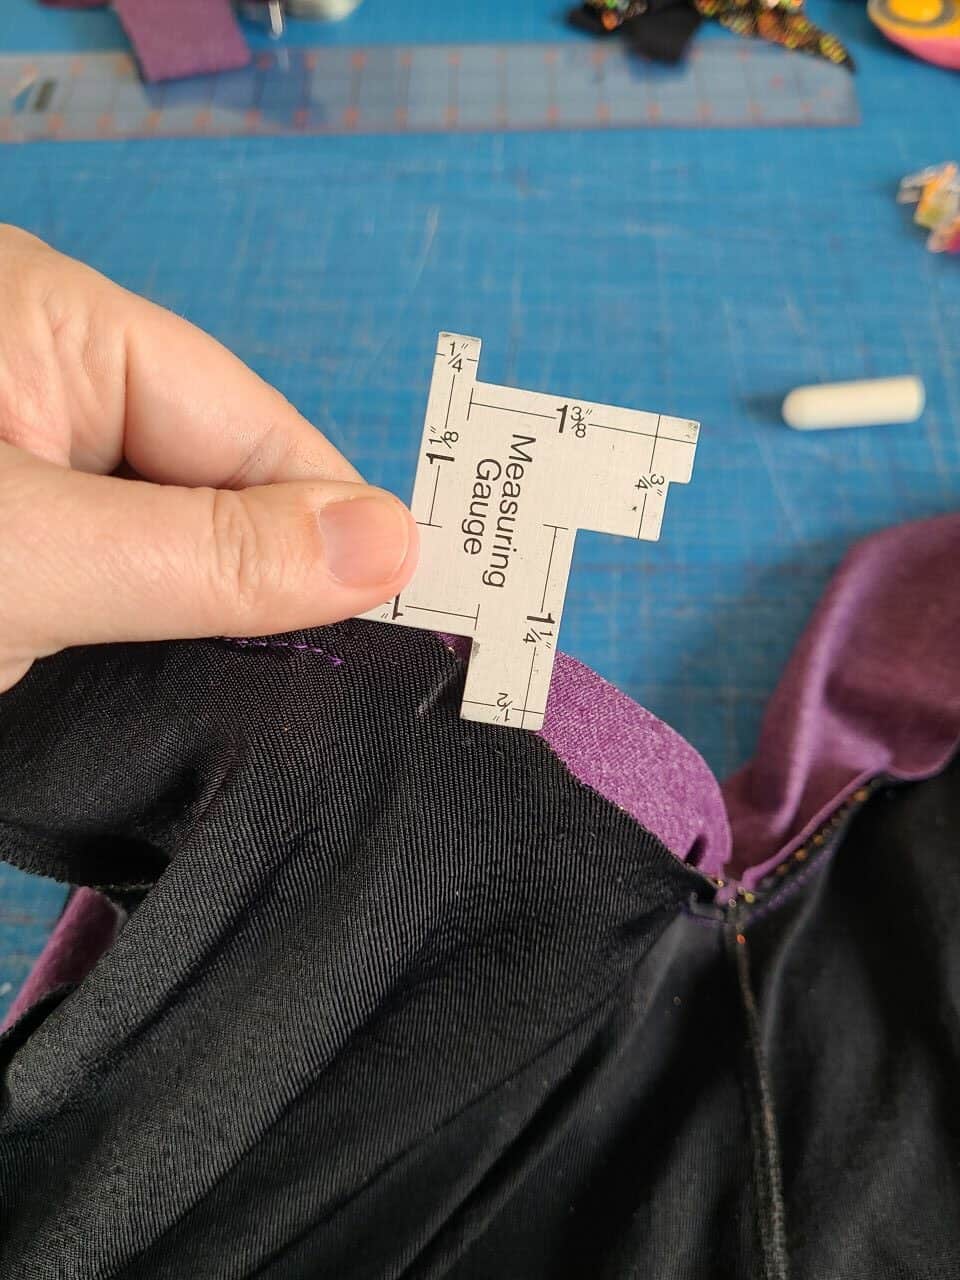
- I need the dart about an inch down from the tie hooks
-

- I only need a small dart
-

- Drawing out the dart with chalk first

On my dress, there is a slight pucker of fabric about an inch below my hooks. Depending on your fabric, you can pin or clip this extra fabric out in the shape of a dart. It will most likely be a smaller dart that is needed – yours may be a little bigger or a little smaller than my own, it all depends on what you need to achieve your best fit.
It’s pretty intuitive to know how long the dart will be. Once you’ve pinned out the amount of fabric you need to eliminate, the dart will take shape. Starting at the raw edge of the fabric and working on one side of the pinched-out fabric, start to taper your dart line towards the folded fabric edge until it comes to a point. You can mark this horizontal line with pins or with a chalk pen or other marking tool. You can see in my example below that pinching out more fabric will naturally create a larger and longer dart.
-
- A dart naturally becomes larger/longer as you pin out more fabric at the raw edge
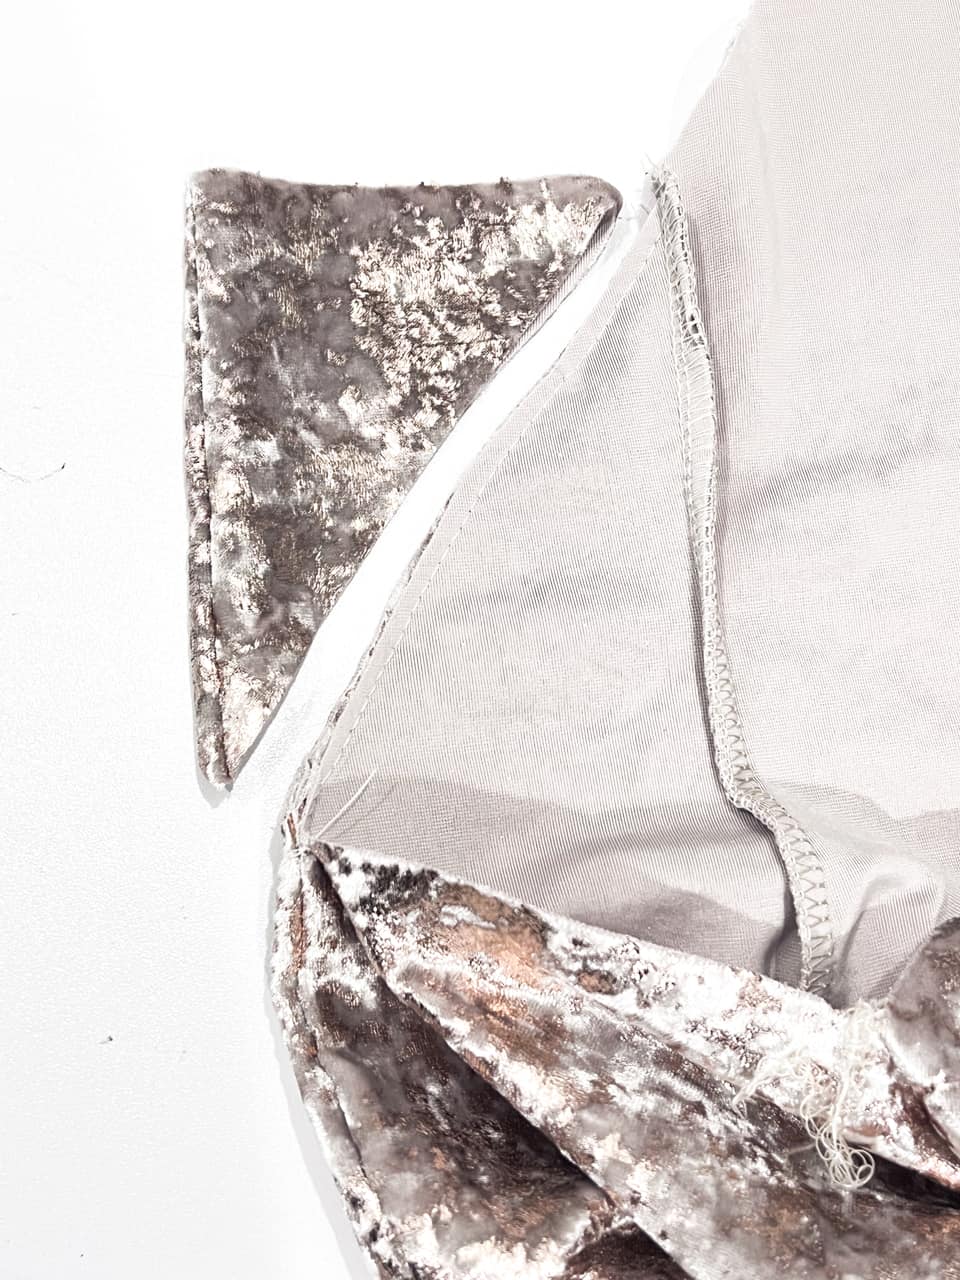
Make sure that you are pinning the dart so the extra fabric will be on the wrong side of your shell and wrong side of your lining. Starting at the raw edge of the fabric, sew your dart using a medium stitch length and making sure to taper off towards the point.
-
- Sew dart starting at the raw edge

-
- Sew right off the end of the point, leaving extra thread
-
- Tie a knot at the end/point of the dart
When you get to the point, let your needle go right off of the fabric without backstitching. Cut your thread with a bit left over for tying and tie a knot at the tip of the fabric/your point of the dart (not too tight, you don’t want to create a pucker at the tip).
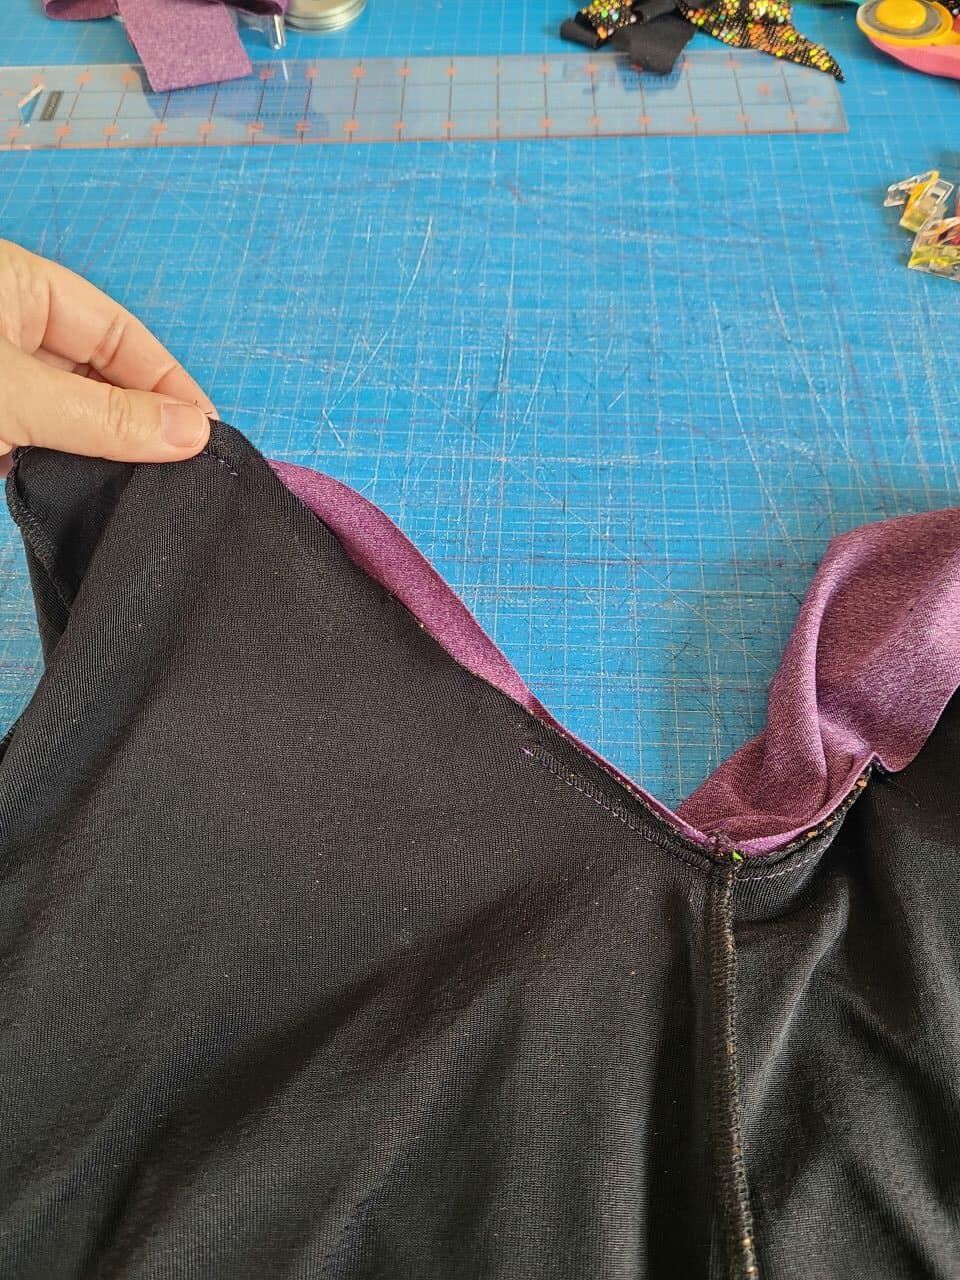
-
- Dart from lining and main
-
- Press dart body downwards
-
- Sew the back seam
Do the same to the other side and the lining as well. When you’ve finished sewing up your darts, you will press or finger-press the body of the darts downward and sew up your seam.
-
- Darts are now sewn in
-
- Before darts – slight gaping under the hooks
-
- After darts – no gaping!
Try on your dress again and admire your handiwork – well done!
Adding a dart to your Natalya, if needed, is a quick way to achieve a smooth, beautiful fit.

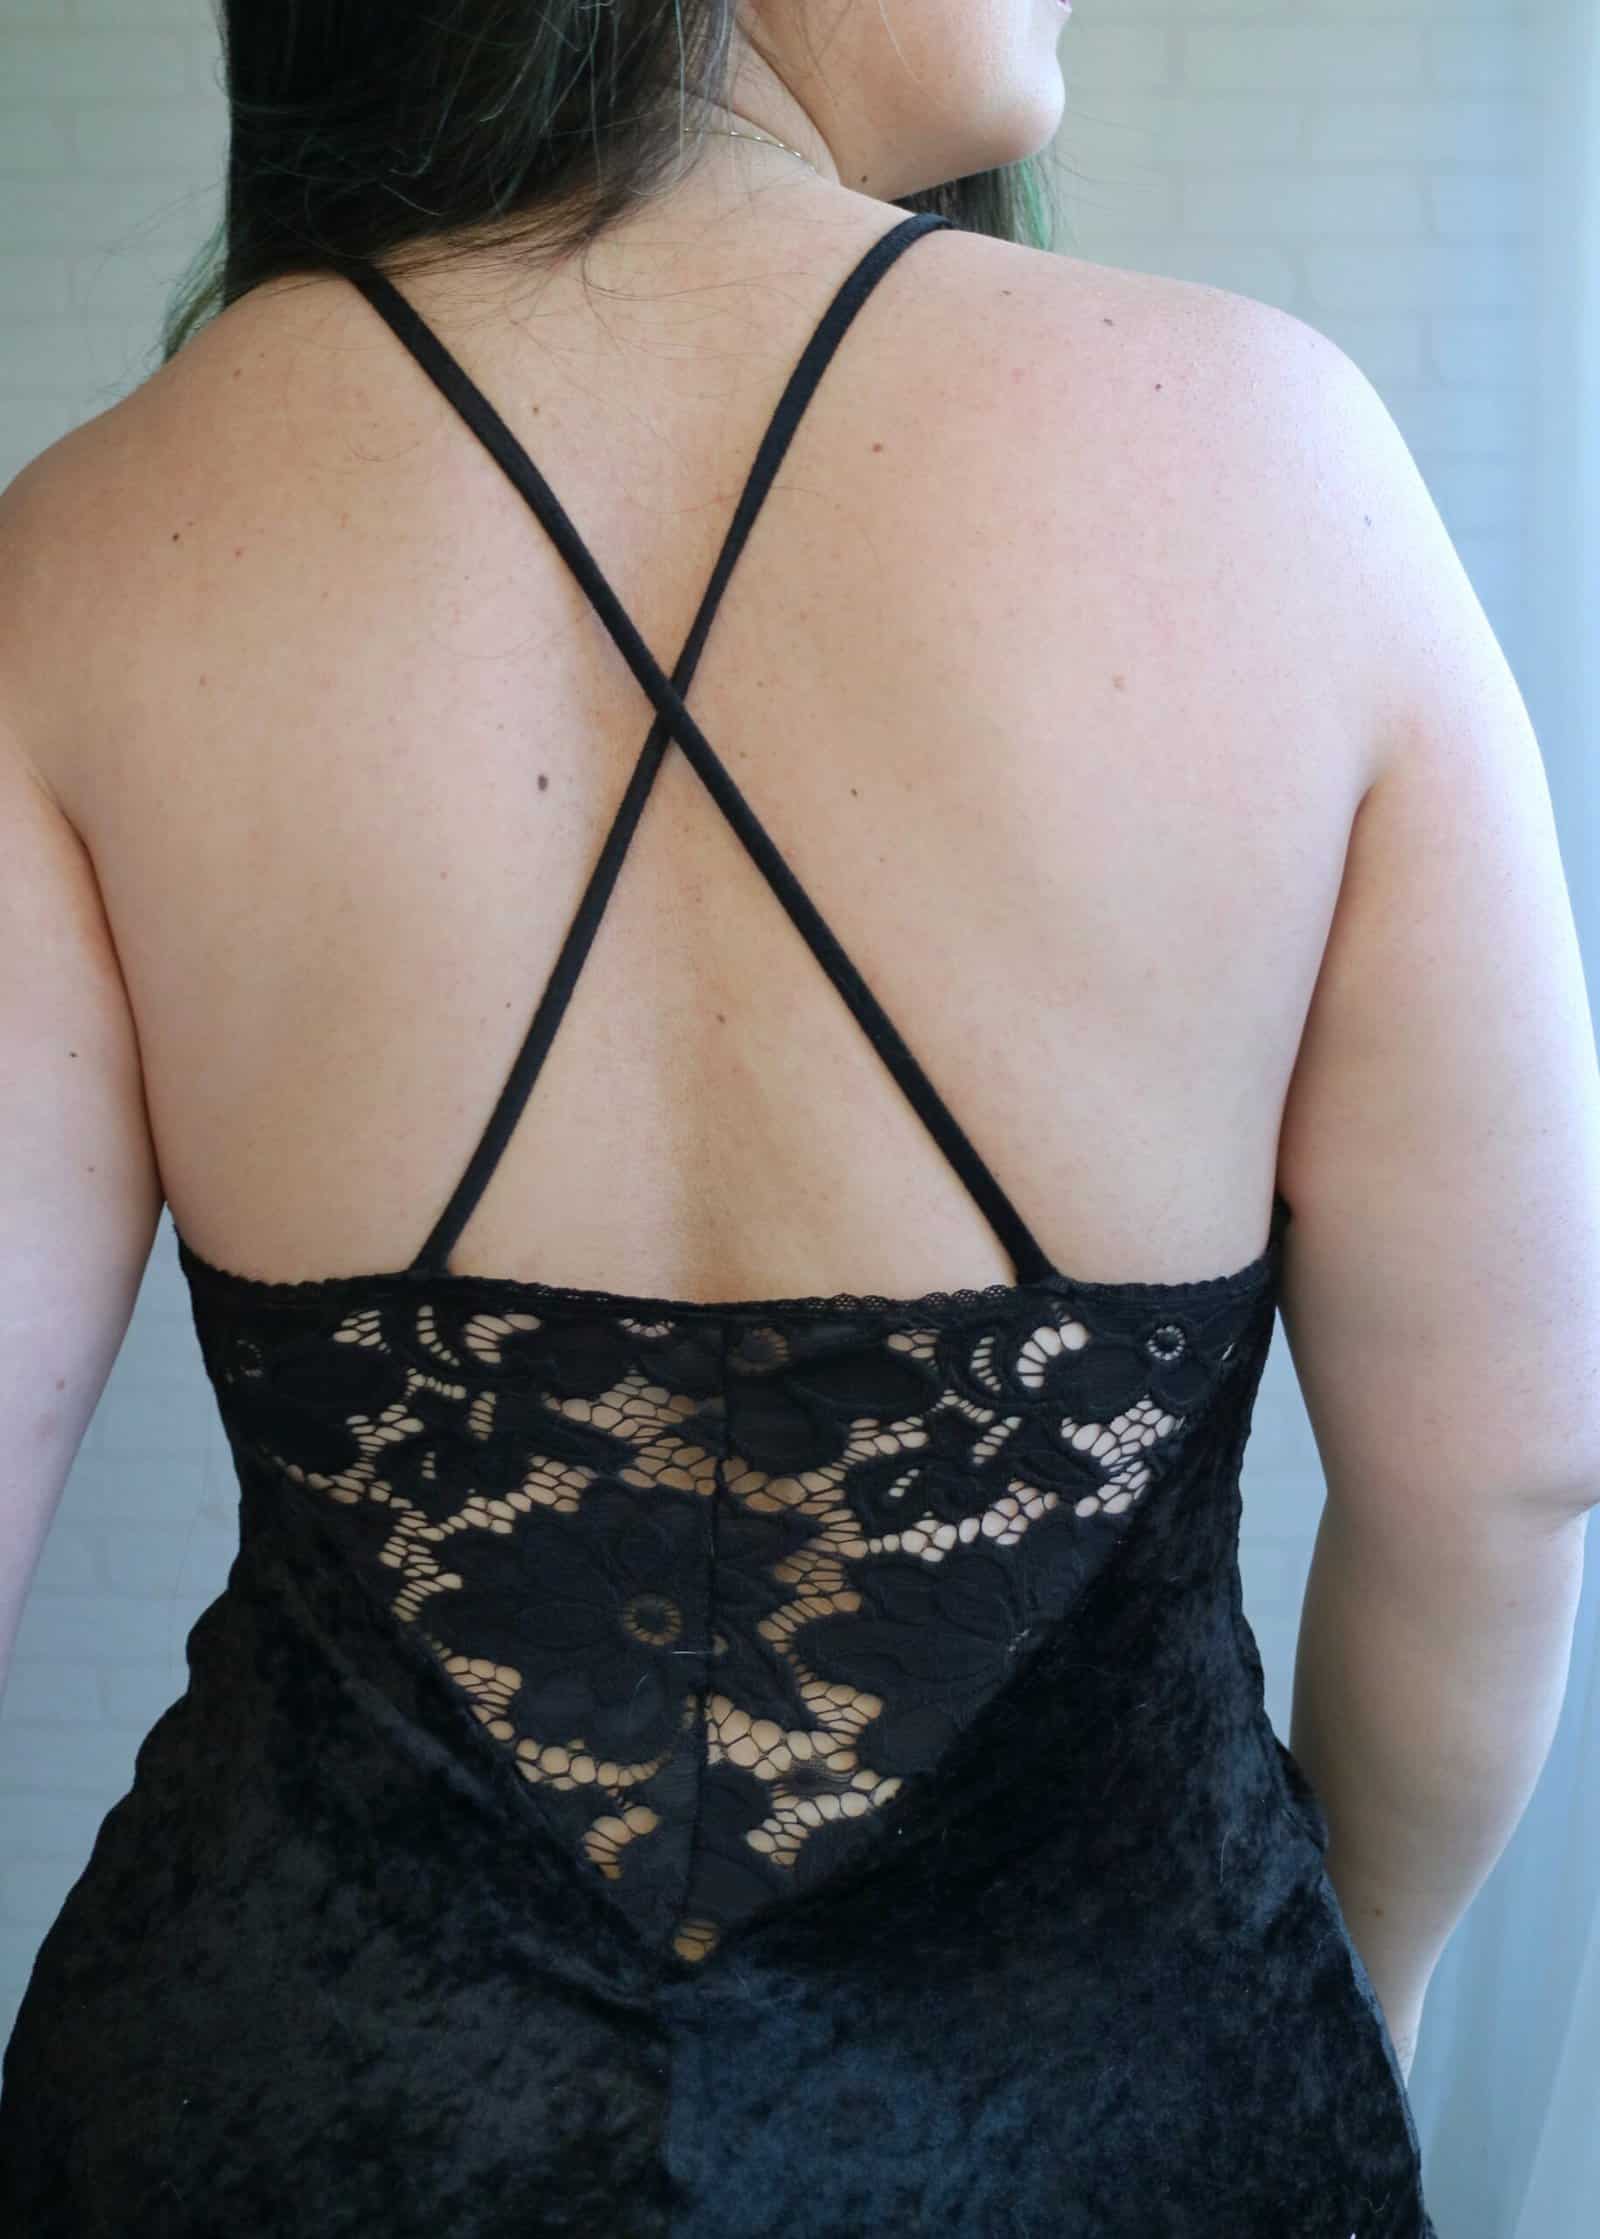
Lace/Mesh Hack
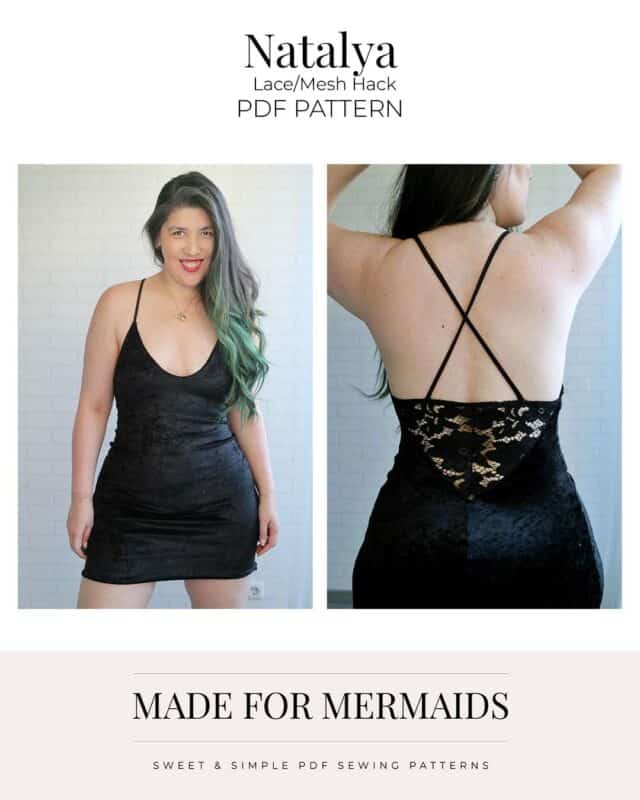
Do you love the sexiness of the low back but still would rather have a bit more coverage? Then this one is for you! We’ll be adding a lace panel to mash the Full and Low back options perfectly.
What you’ll need:
- Natalya pattern
- Lace (or mesh)
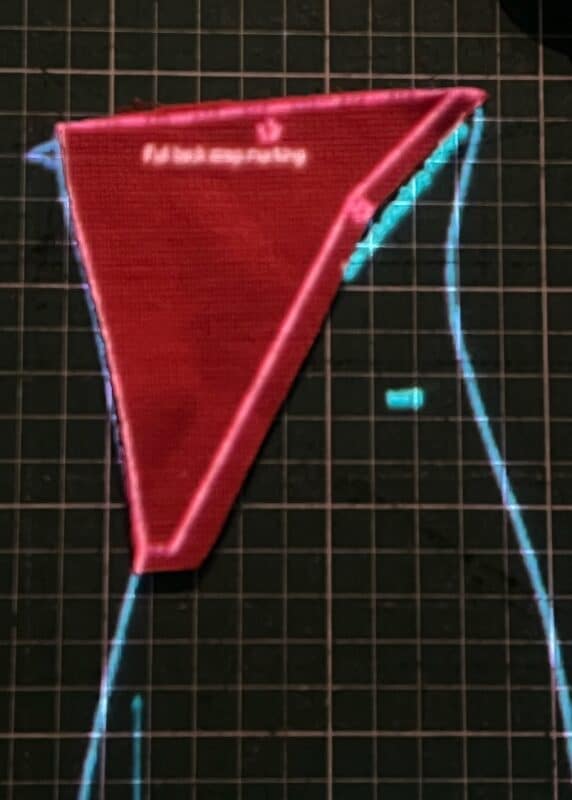
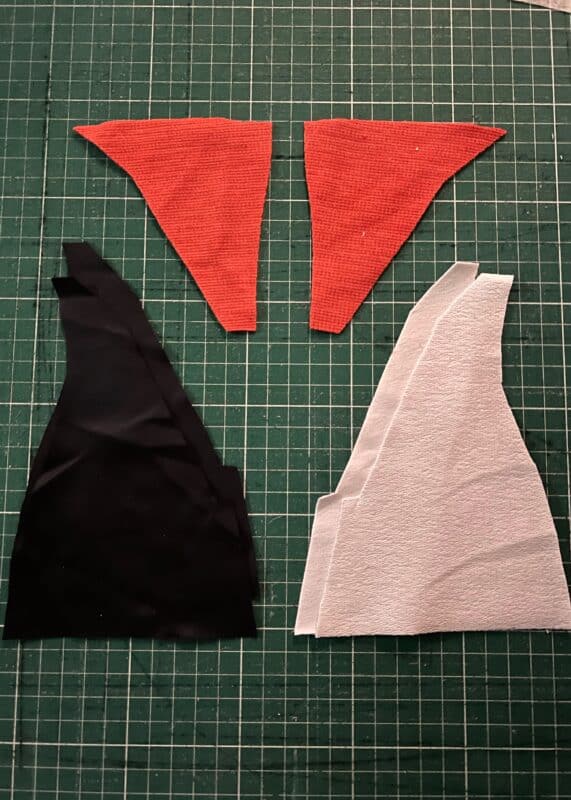
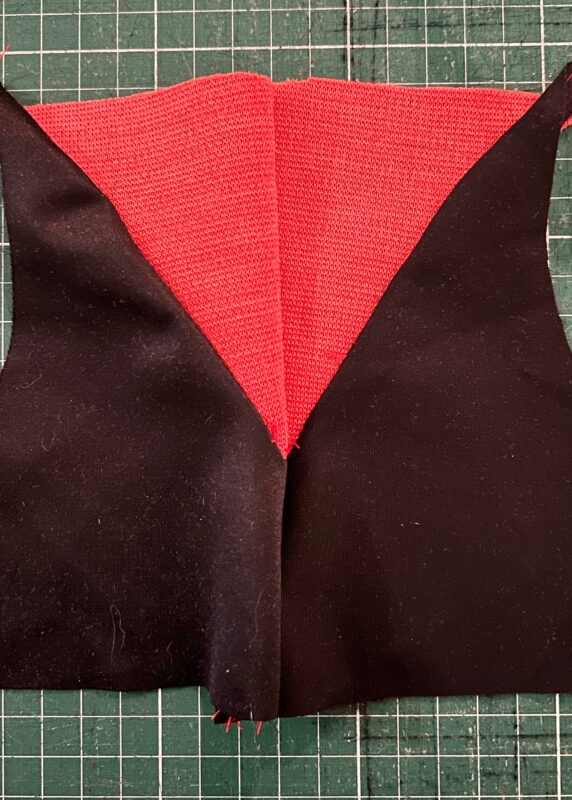
NOTE: The photos shown below were made just as an illustration, I used different fabrics to make visibility easier.
Orange = Lace
Black = Main
White = Lining
You’ll cut the dress as per pattern as if you were making the low cut back.
Then you’ll need to cut the extra piece for the full-back option, not forgetting to add seam allowance to the side you’ll stitch it to the back panels, as shown below.
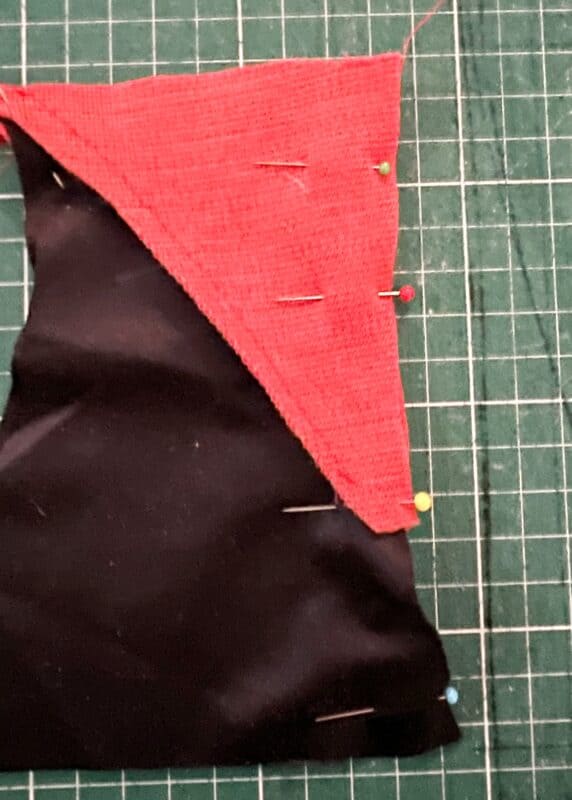
You’ll attach the Lace panel (shown in orange fabric below) to the main back pieces, right sides together.
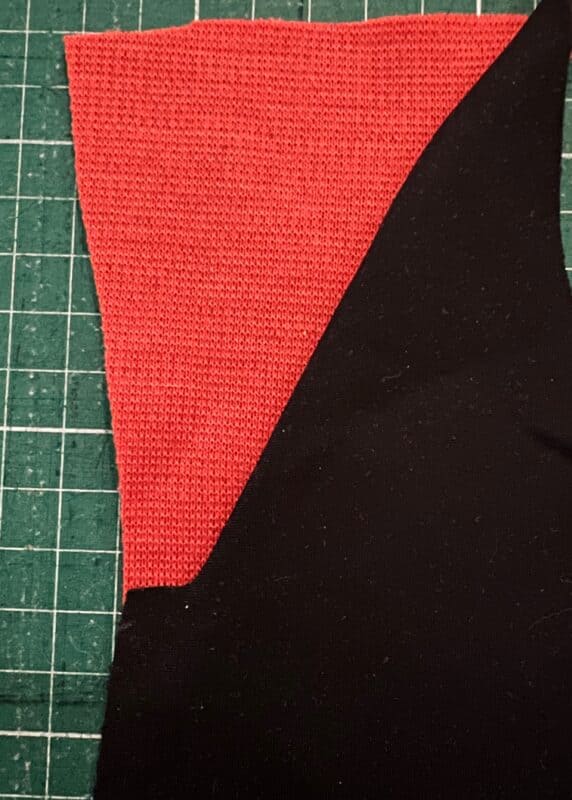
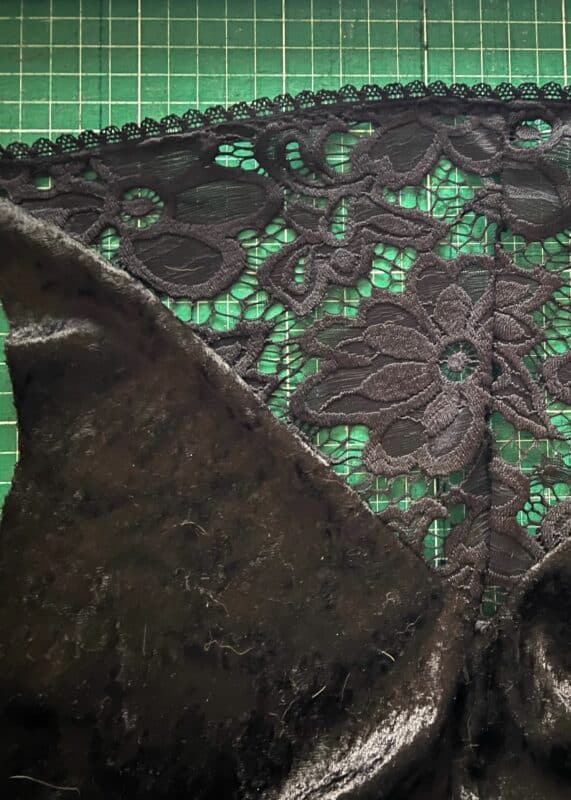
Now, sew the center seams according to the pattern instructions and use your preferred method to finish the top edge of the lace. I forgot to add it to the mock-up, but I used a scalloped elastic on my final version (the black lace on the right).
Next, iron the seam allowance of the lining to the wrong side, creating a memory seam. Don’t skip this step as it will make finishing off the dress a LOT easier.
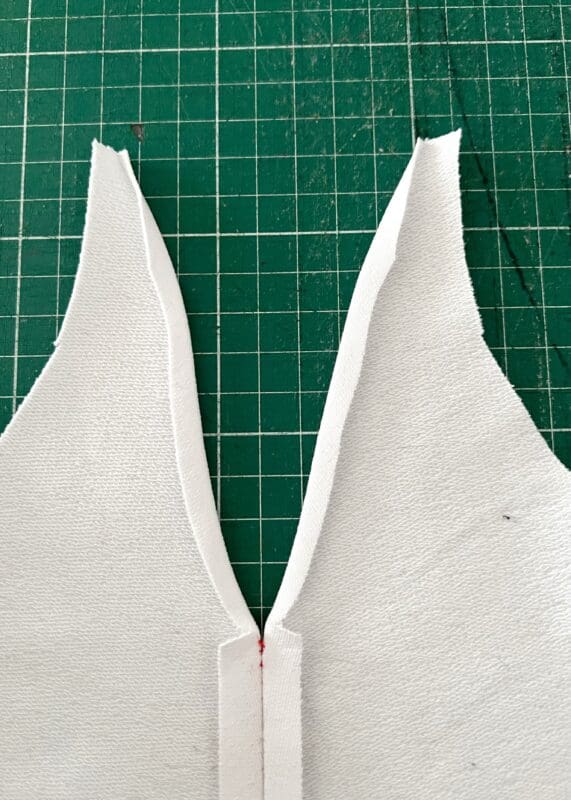
Follow the pattern instructions until step 4 (Attaching the lining to the main). Attach the lining and main as instructed, but ONLY THE FRONT SIDE, SIDE SEAM TO SIDE SEAM.
Flip your dress to the right side and align the low back V. Memory seam (lining) to the seam allowance of the main fabric+lace. Topstitch.
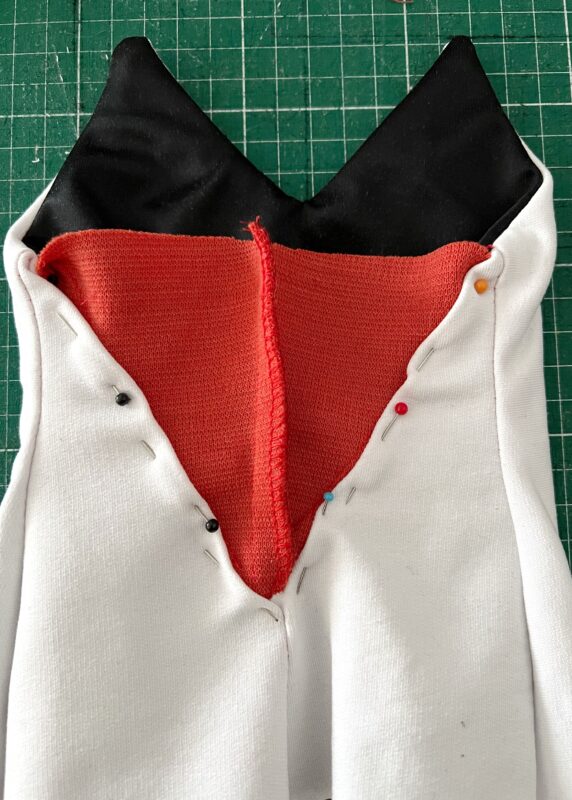
That’s it! Now you can add your straps and hem your dress as per pattern. <3 This way you’ll have the dress completely lined with all seams hidden, with the exception of the lace center seam.
If you don’t mind having a “less pretty”finish, an easier way to add the lace panel would be:
- Make low-cut dress as per pattern;
- Attach the lace panel at the end by topstitching it to the V as you would an applique.
This would be a lot easier and less fussy, but you’d have the stitching showing on the inside of the dress. It’s all a matter of preference 😉
If you have any questions, please feel free to reach out!
xxx, Livia
We hope you feel just as stunning as you are in your new Natalya dresses! Don’t forget to share your. makes with us on FB and IG! #natalyapattern #madeformermaids
Hi there! is the are hack for adding a shelf bra of some kind, or cups, or is this already included with the pattern?
TIA
It includes directions on adding sew-in cups.
ahh perfect, thanks so much for the fast reply.