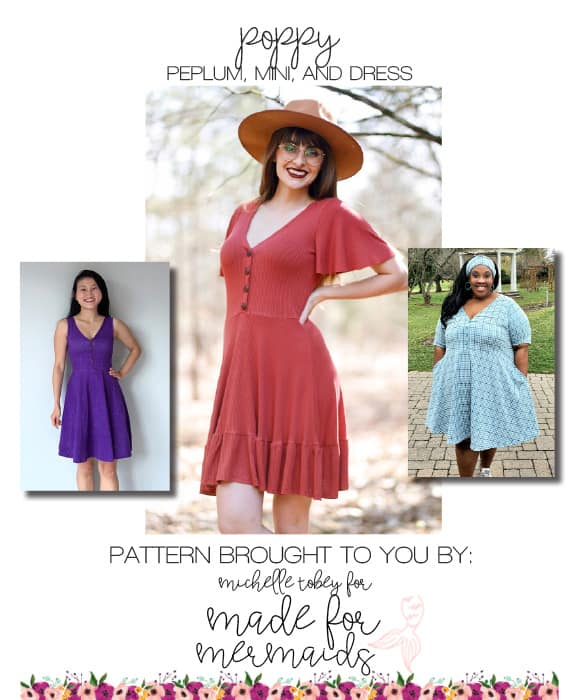
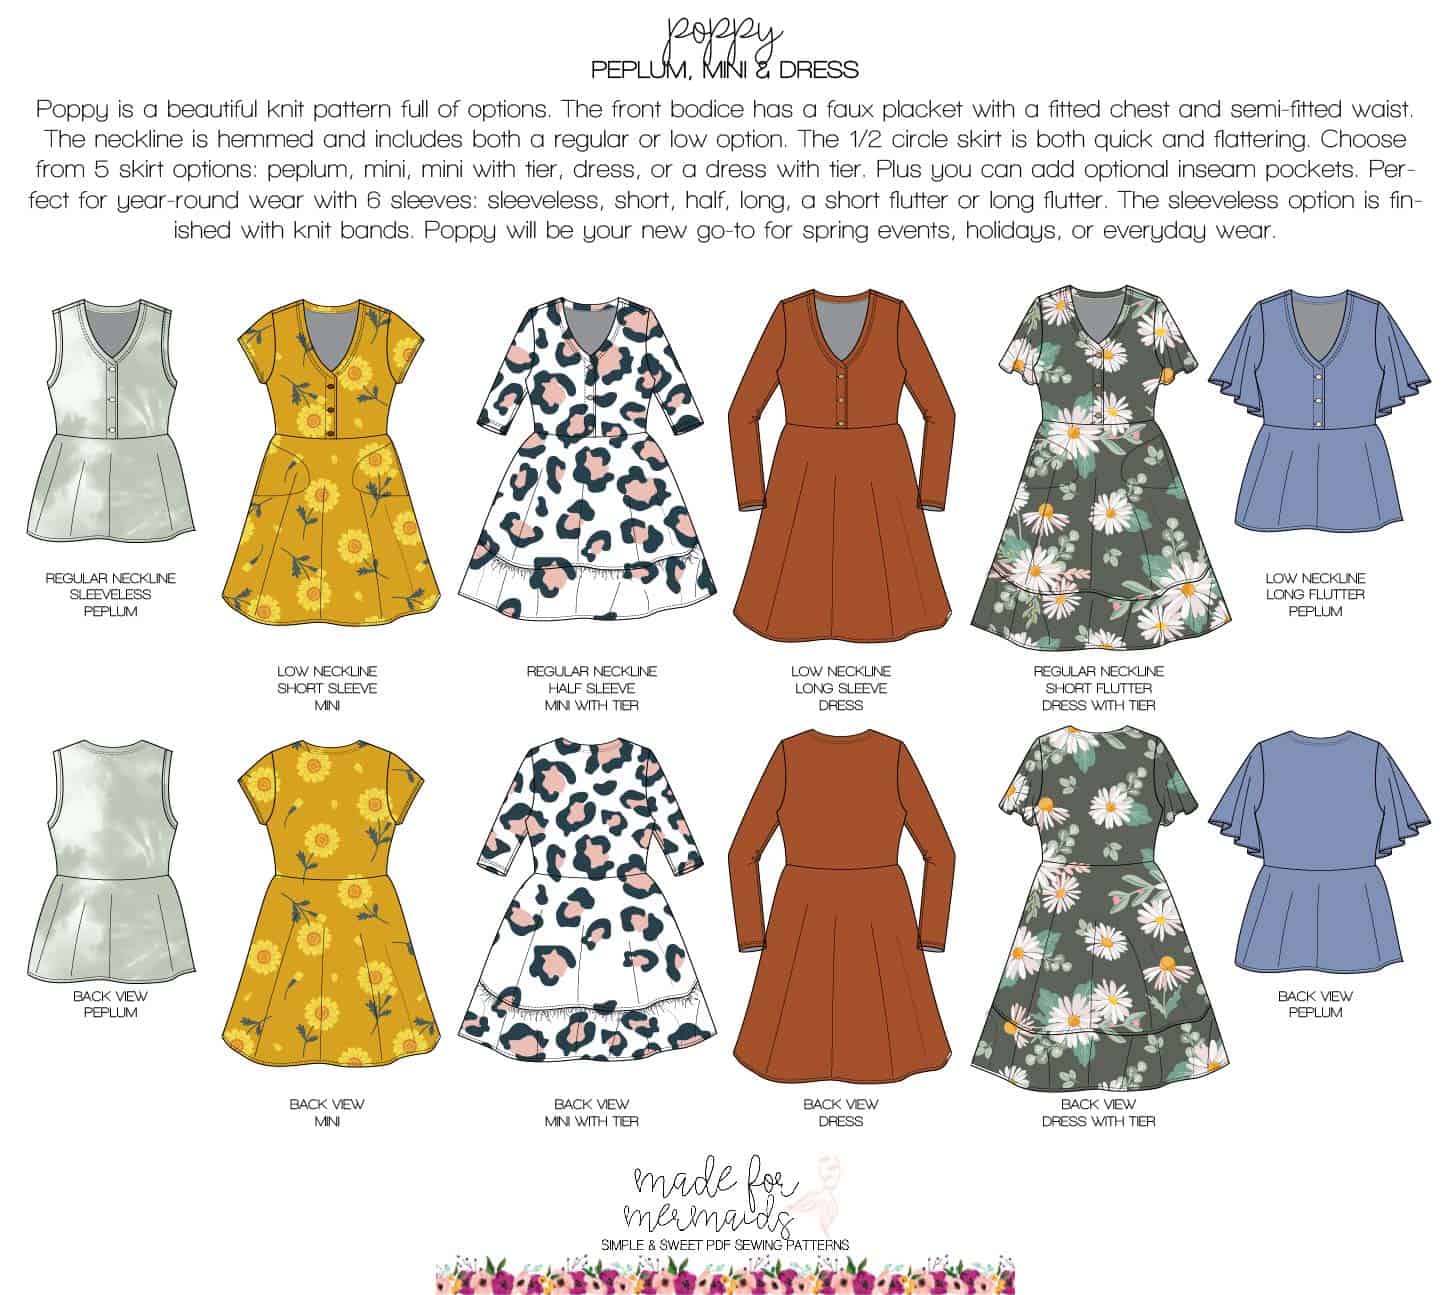
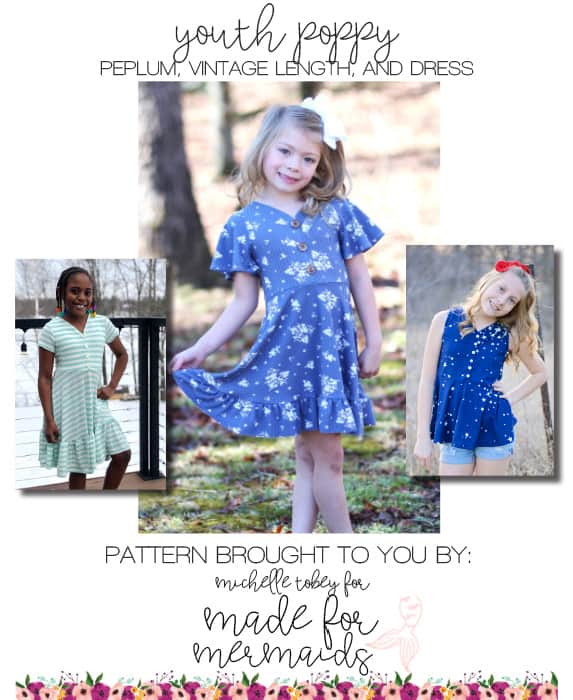
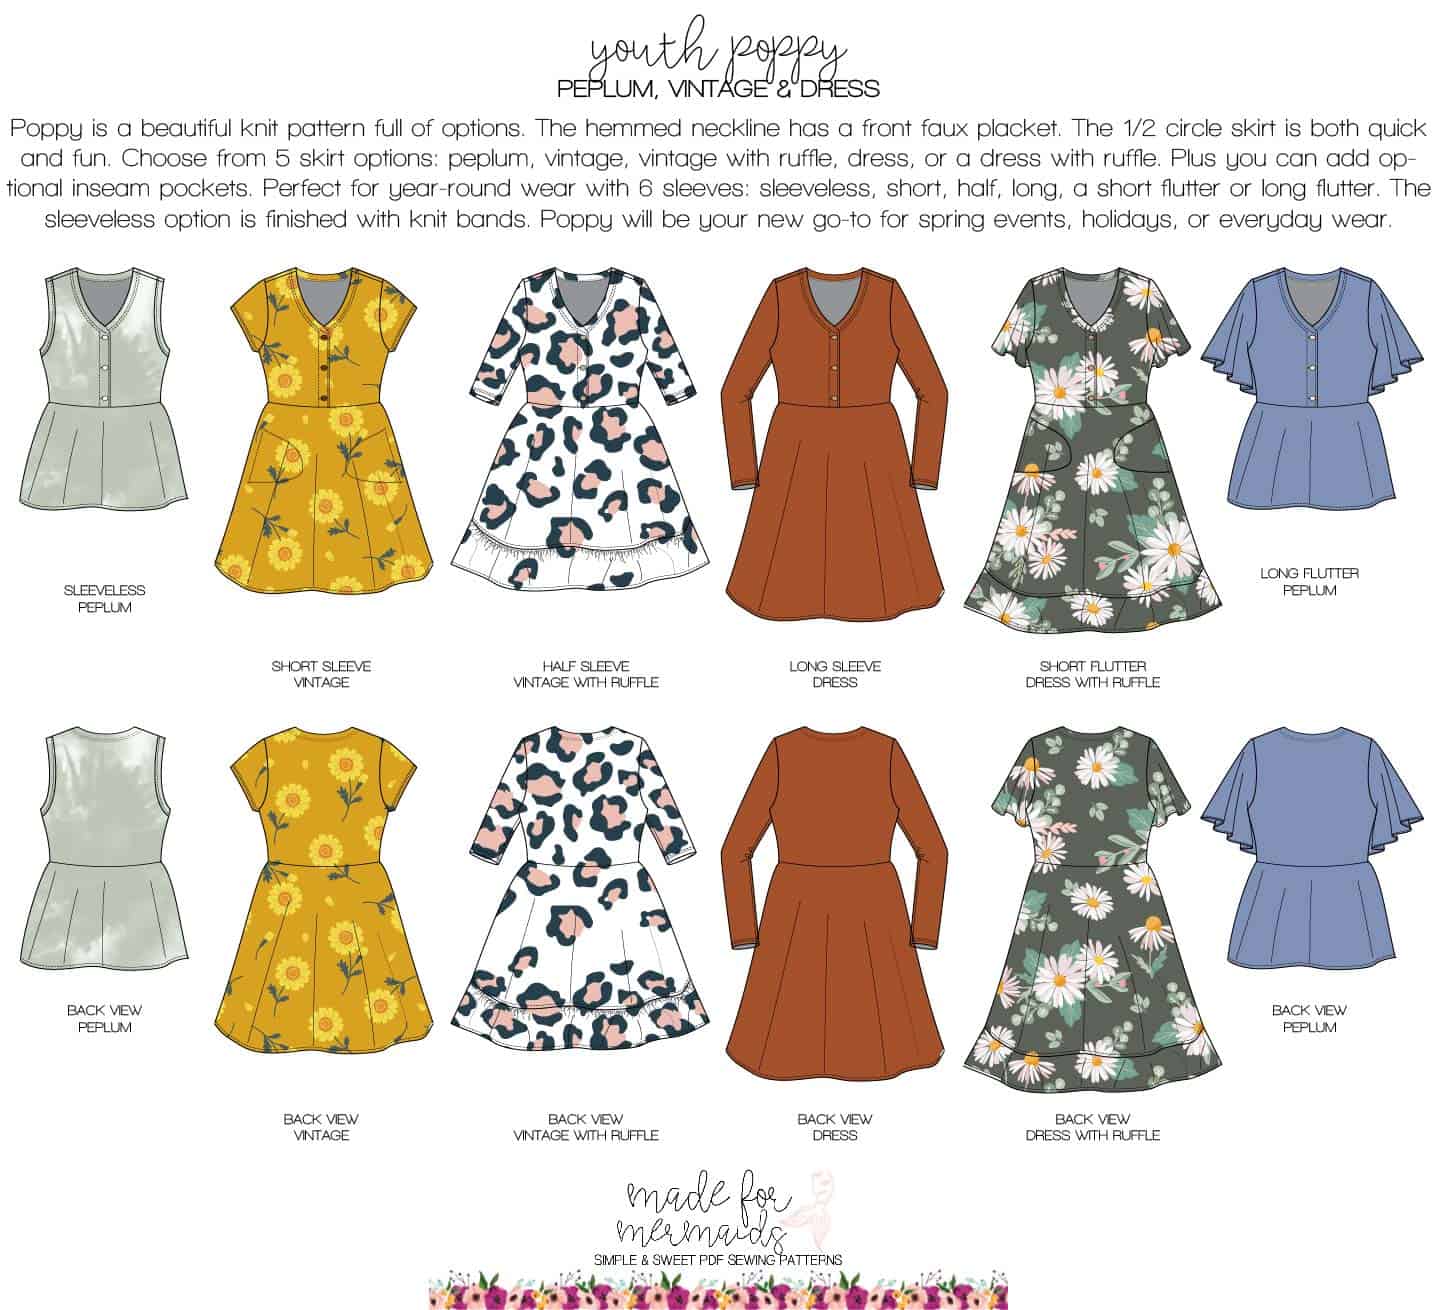
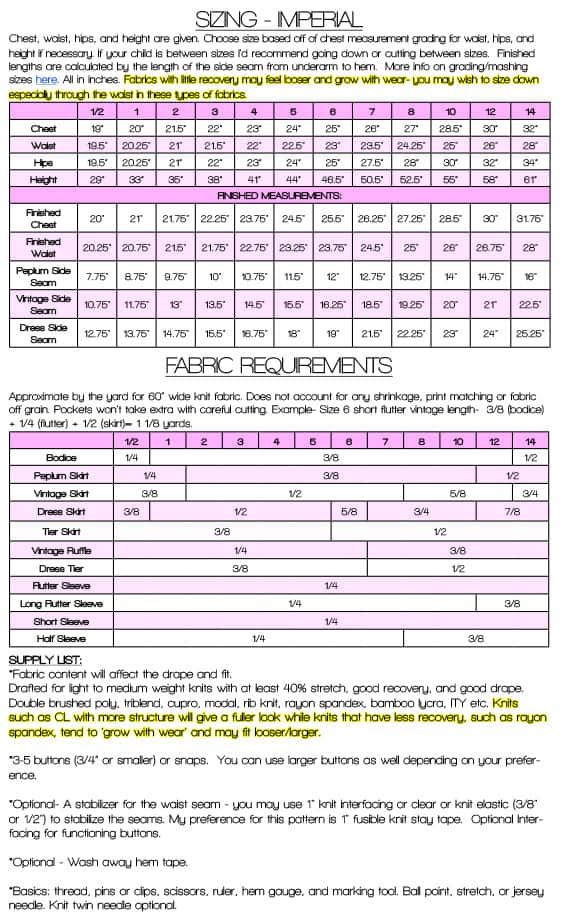
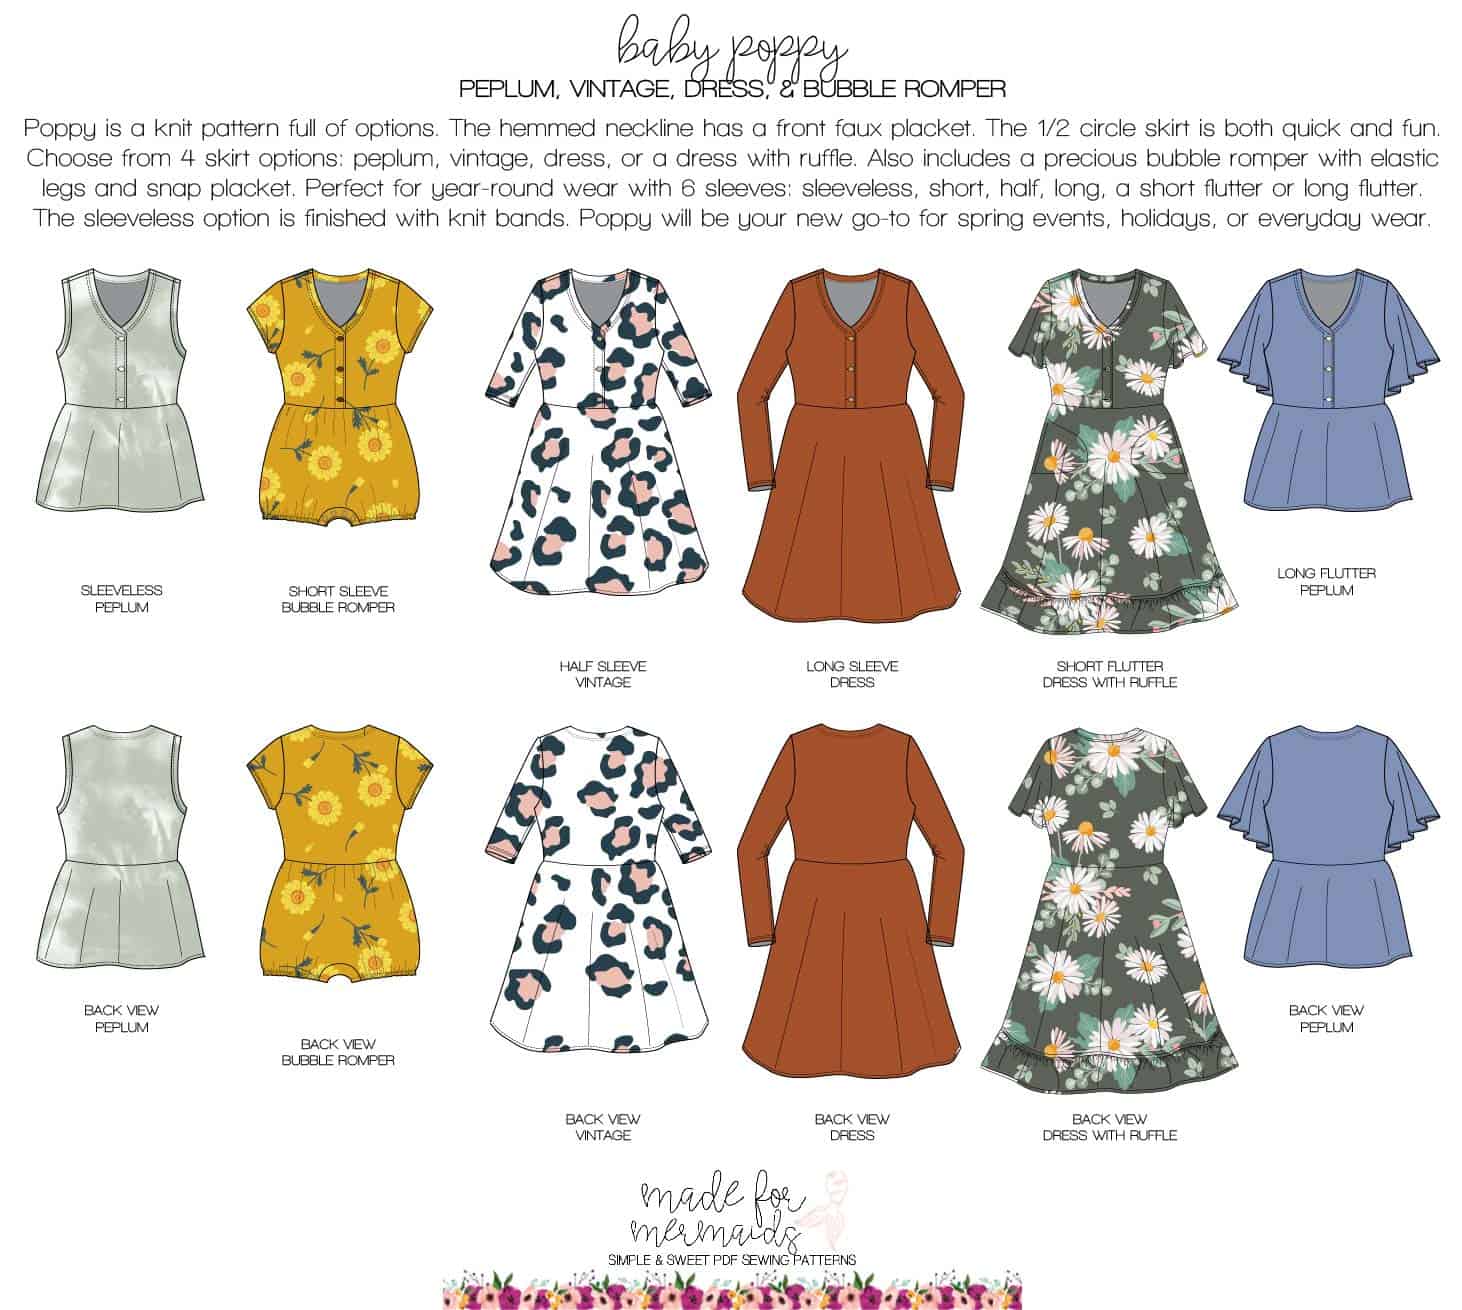
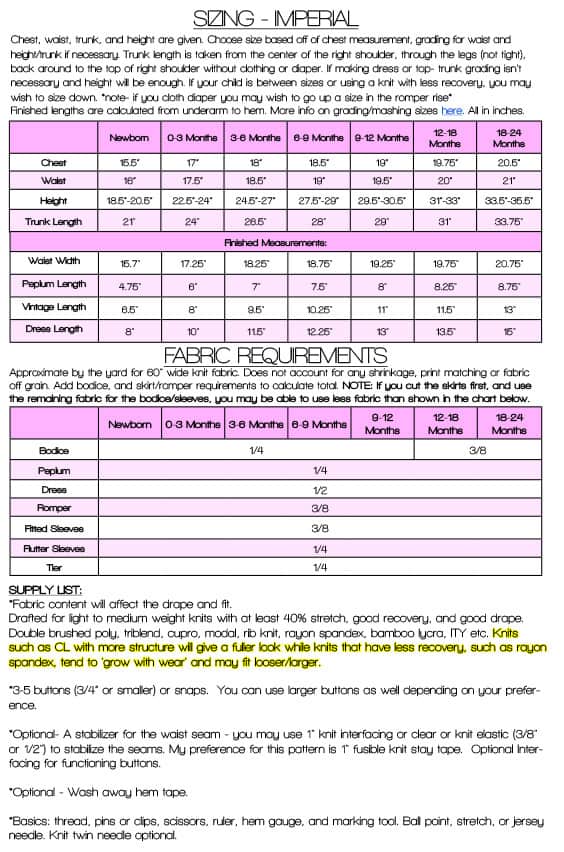
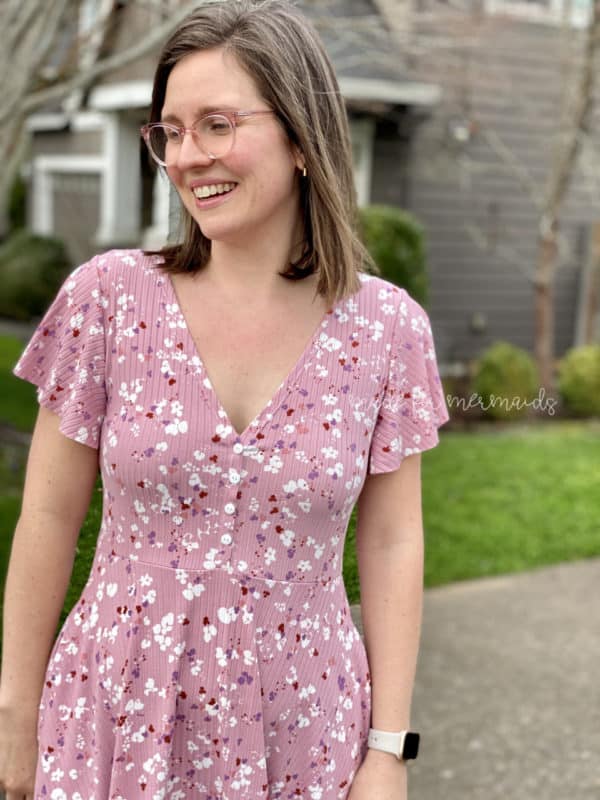
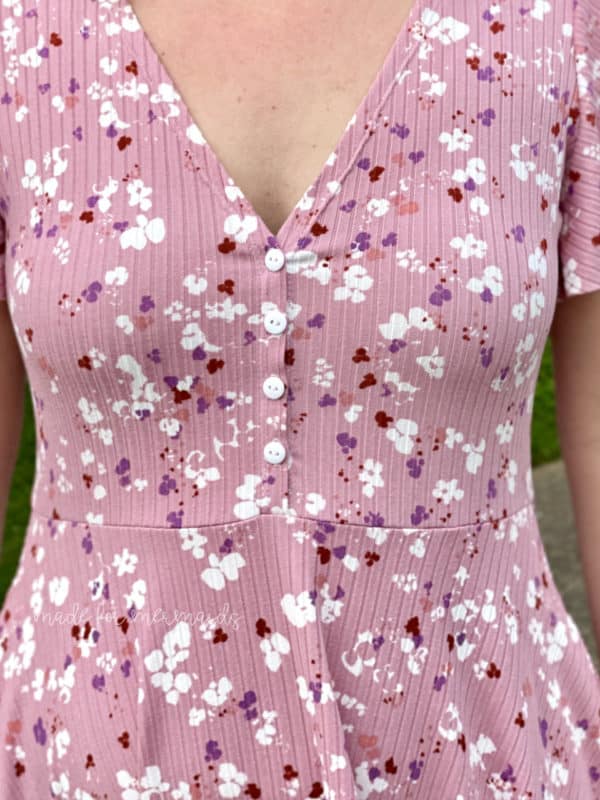
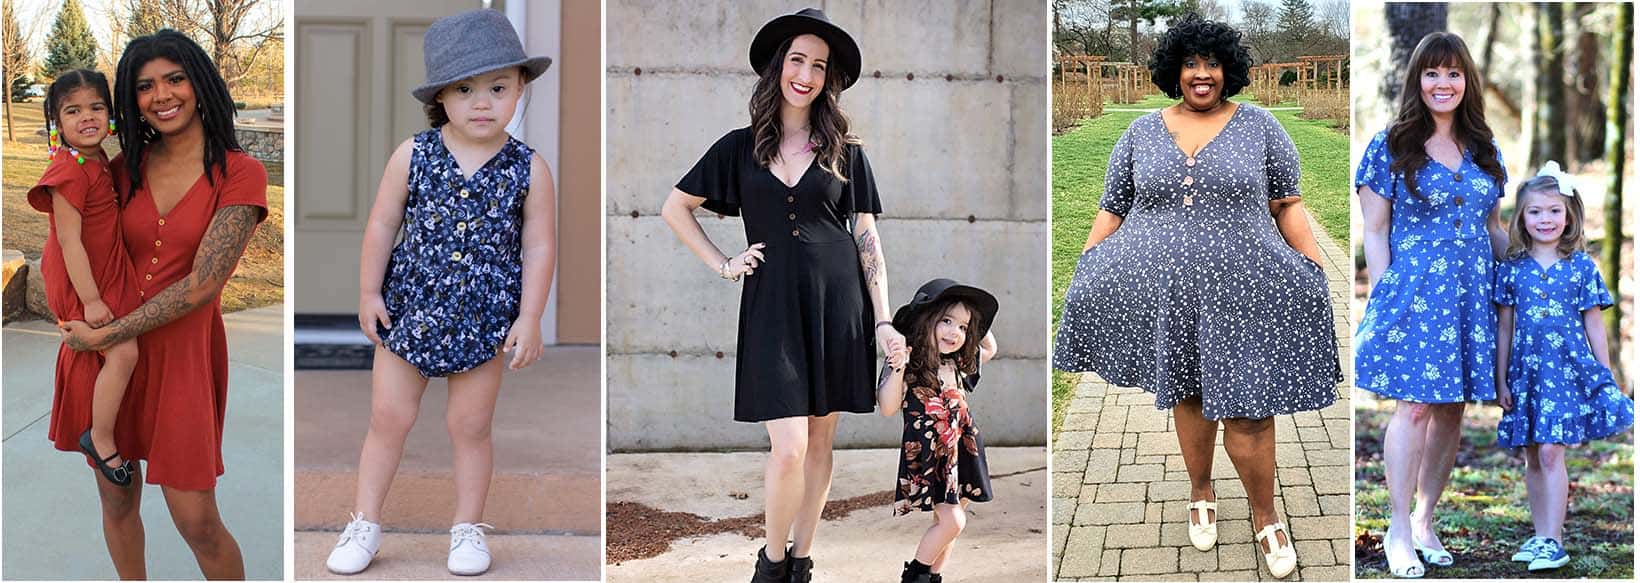
Our new Poppy patterns are so cute! It’s available in baby, youth, and adult sizing. It’s a knit pattern with a faux button placket front. The adult version has both a regular and low neckline. The 1/2 circle skirt is quick and flattering. It includes several different hemline lengths too! The baby includes an adorable bubble romper option. It has 6 sleeve options: sleeveless, short, half, long, short flutter, and a long flutter. Poppy is going to be your new go-to dress!
Split Sleeve Hack
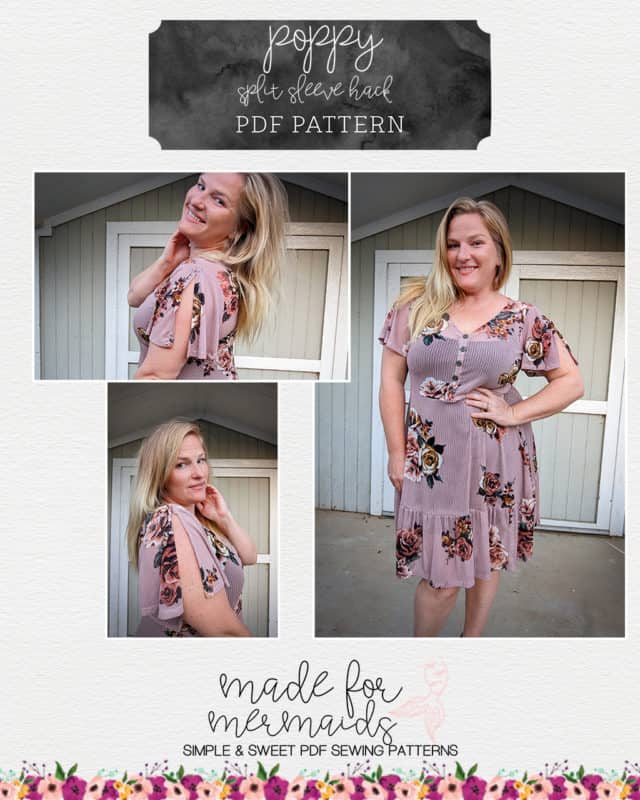
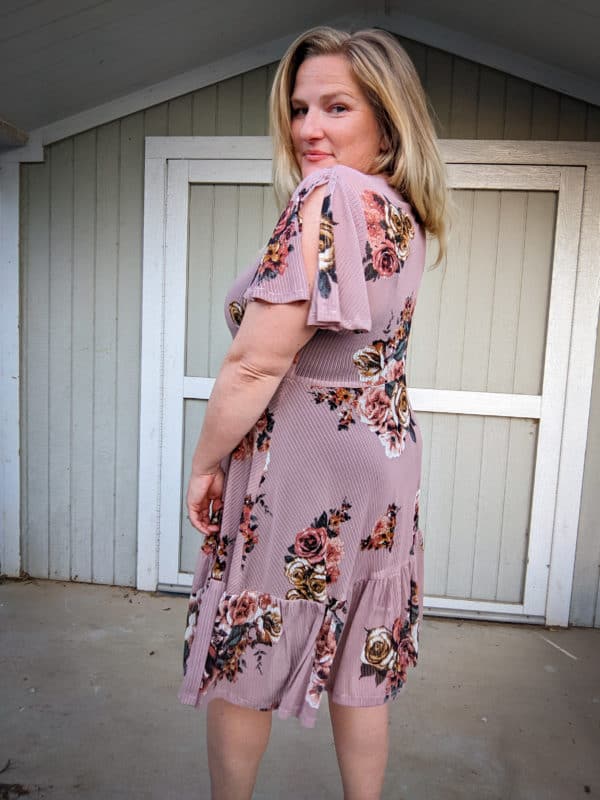
Let’s add a little extra romance to the Poppy with a split flounce sleeve.
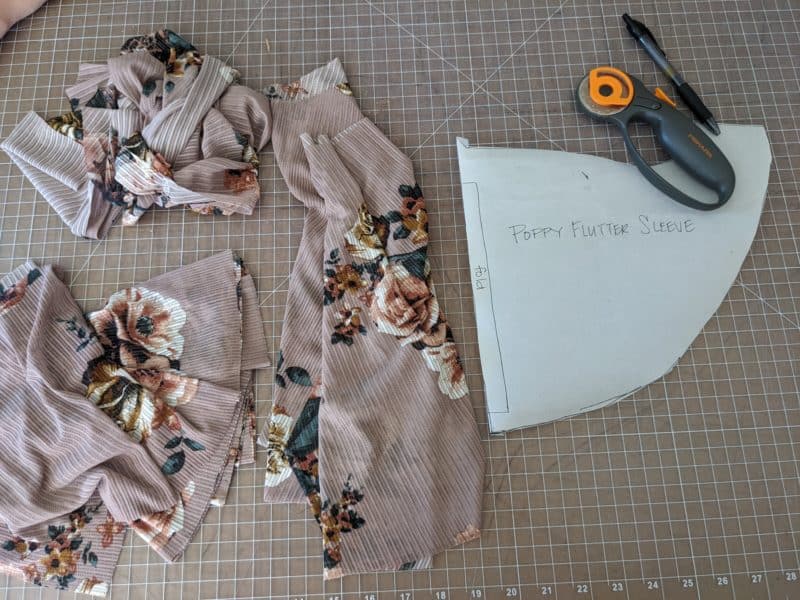
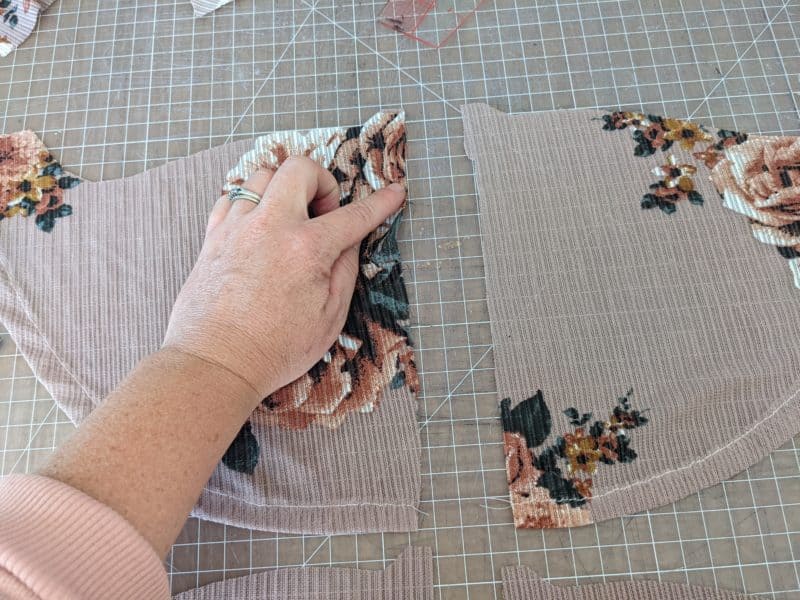
You may begin by cutting out all your pieces, except the sleeves. Select either the regular or long flutter sleeve pattern piece. I am going to be using the long version.
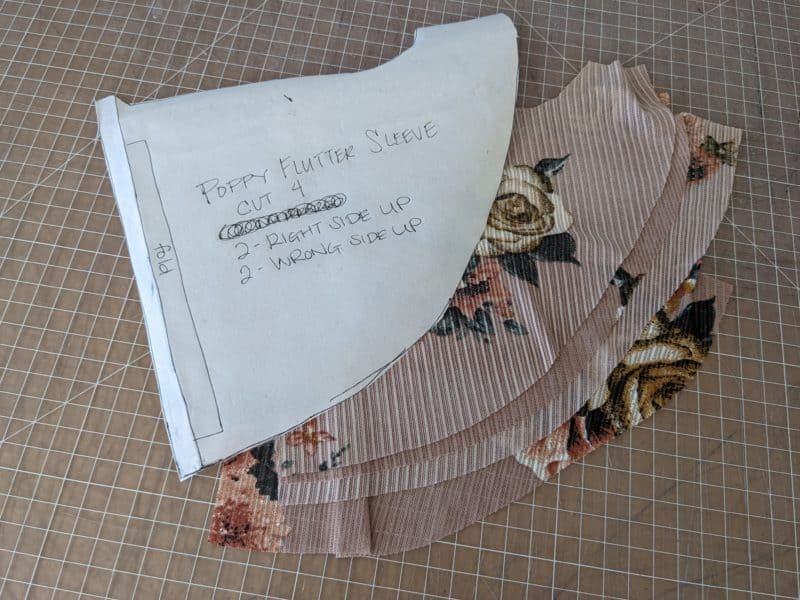
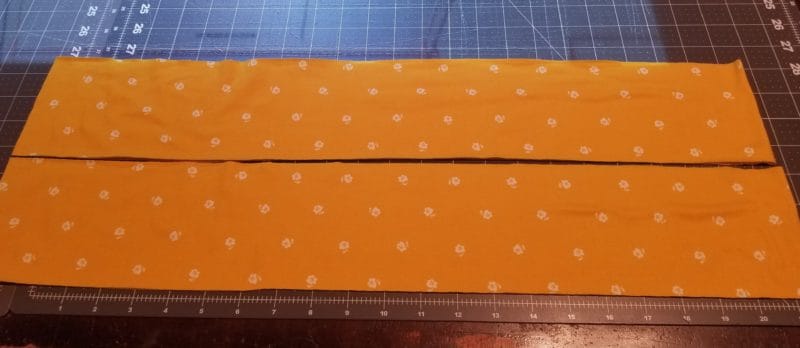
- Instead of cutting on the fold, add a 1/2″ seam allowance
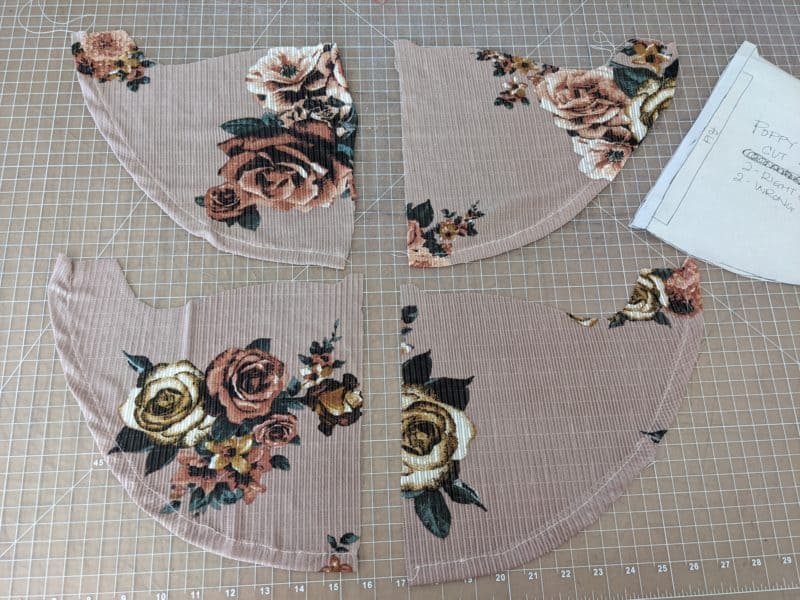
- and cut 4 sleeve pieces.- 2 wring side up, 2 right side up
- Hem Sleeves.
- You may chose to finish theses edges with your serger at this time. (I skipped this)
- Decide where your would like your split to begin.
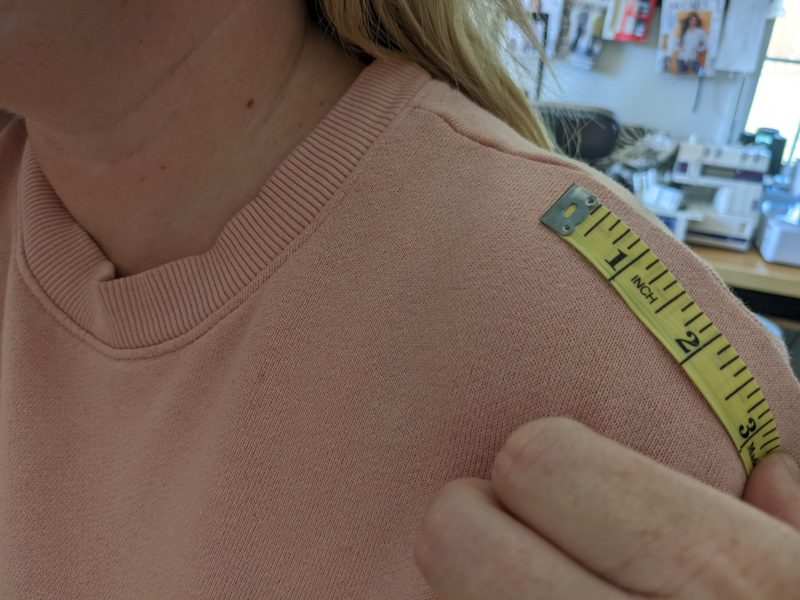
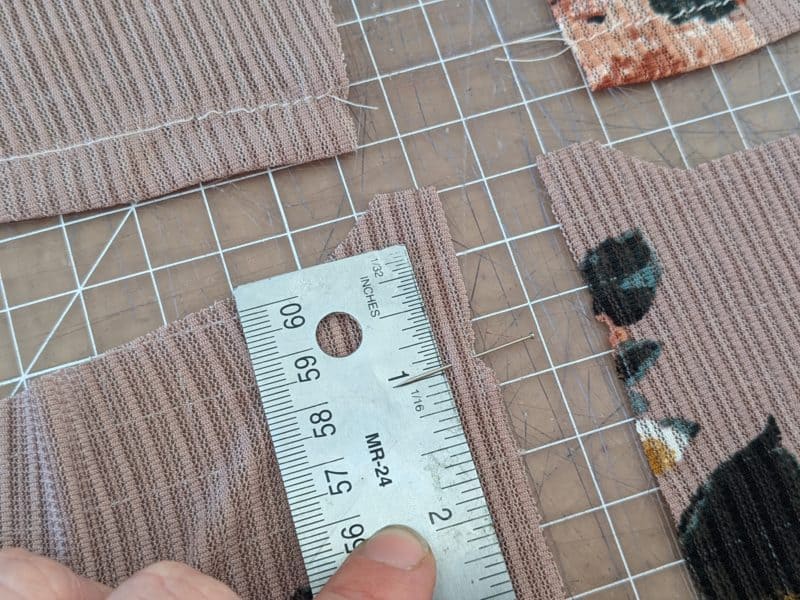
- I wanted my slit to open about 1/2″ below the shoulder seam. (Notice that I marked at 1″. Seam allowance + your chosen length is where you will pin.)
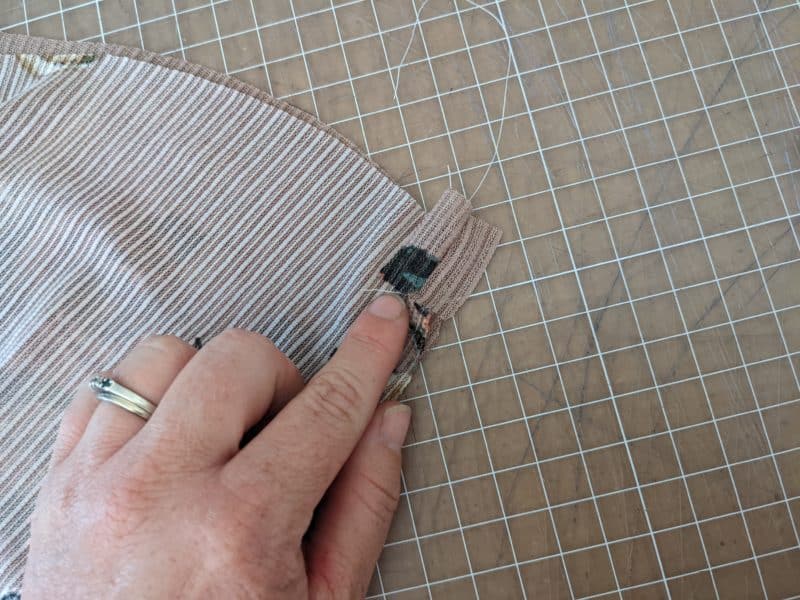
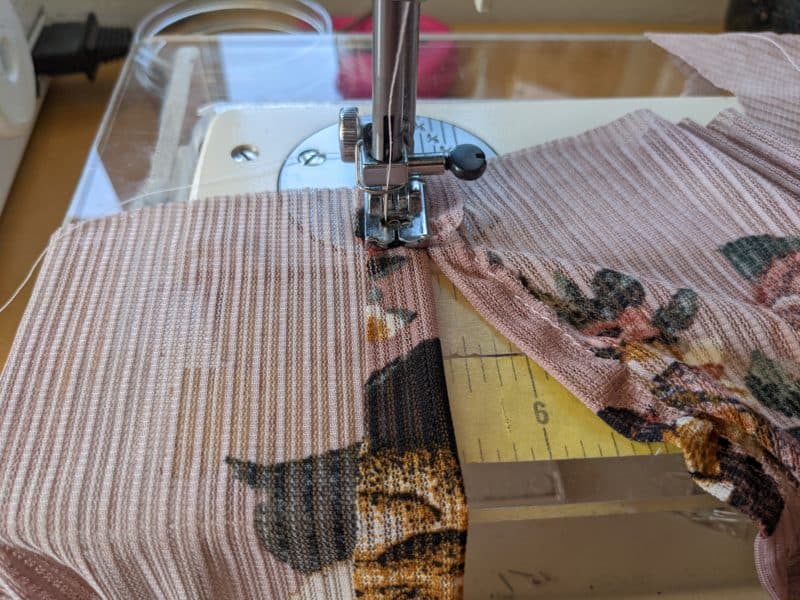
- With right sides together, using a 1/2″ seam allowance sew down do your mark.
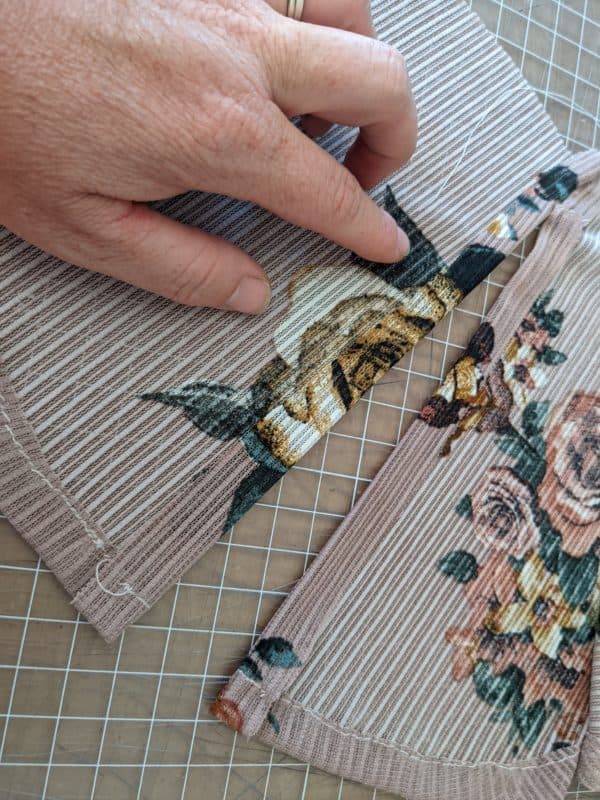
- Open up the sleeve with wrong side facing your, turn over seam allowance
- Hem/topstitch all in one pass from top of the sleeve to the hem line.
You are now ready to follow the pattern instructions to finish your Poppy.
Functional Placket Hack
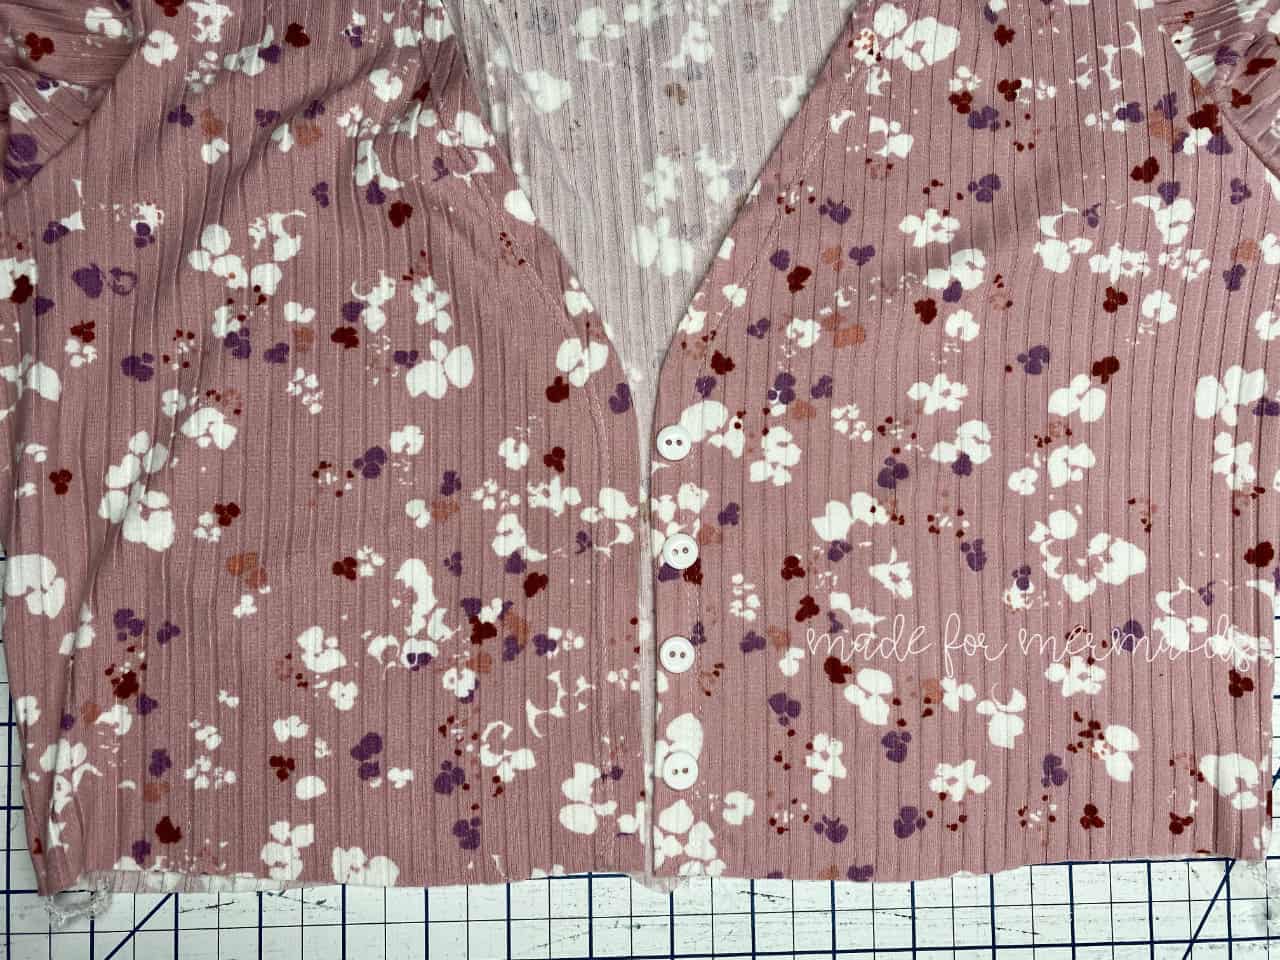
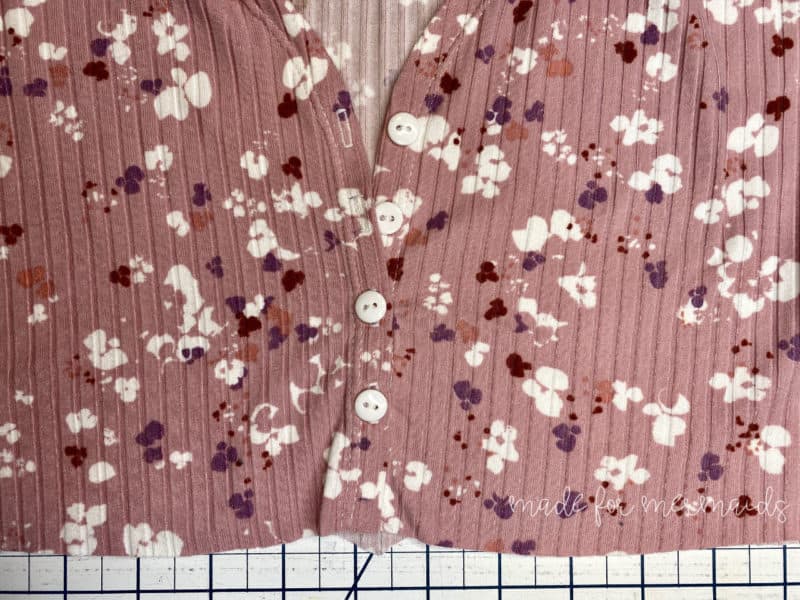
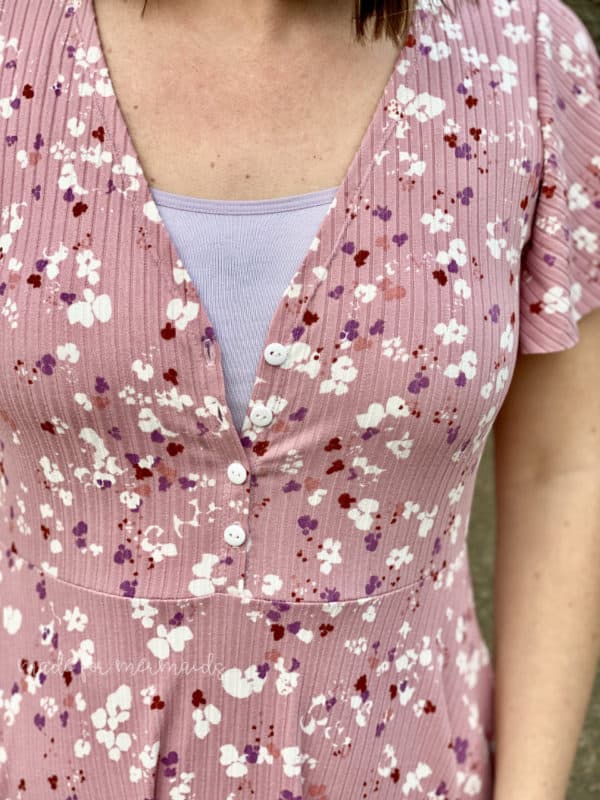
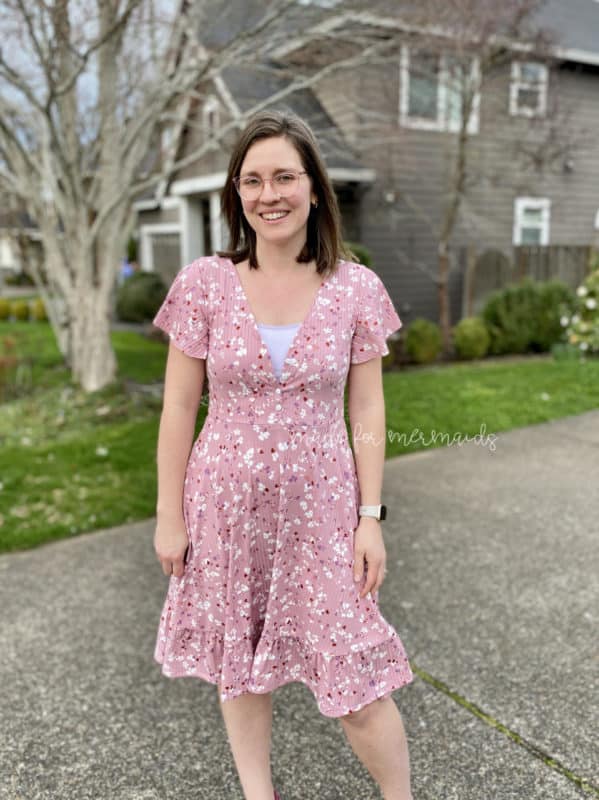
I’m seriously crushing on Poppy. Isn’t it fabulous as a faux button bodice?! What if you want the buttons to function though? With just a few extra steps, you can do that too. This is especially a great hack if you are nursing.
To begin, cut out all pattern pieces like normal. You can pick either the low or high neckline. You will want to stabilize the front neckline with interfacing at the beginning before finishing construction. Stabilizing the front neckline will ensure the buttonholes are easier to add later on. I’m using a 1″ tricot here, and cut along the curve of the front neckline. You only need to attach a 1/2″ wide strip of interfacing since you will be folding it over for a 1/2″ hem. I find with a lighter weight tricot interfacing, the 1″ width ends up folded over and gives additional stability. Iron the interfacing onto the wrong side of the front.
Continue construction according to the tutorial through hemming around the neckline. Stop before sewing the front bodice closed.
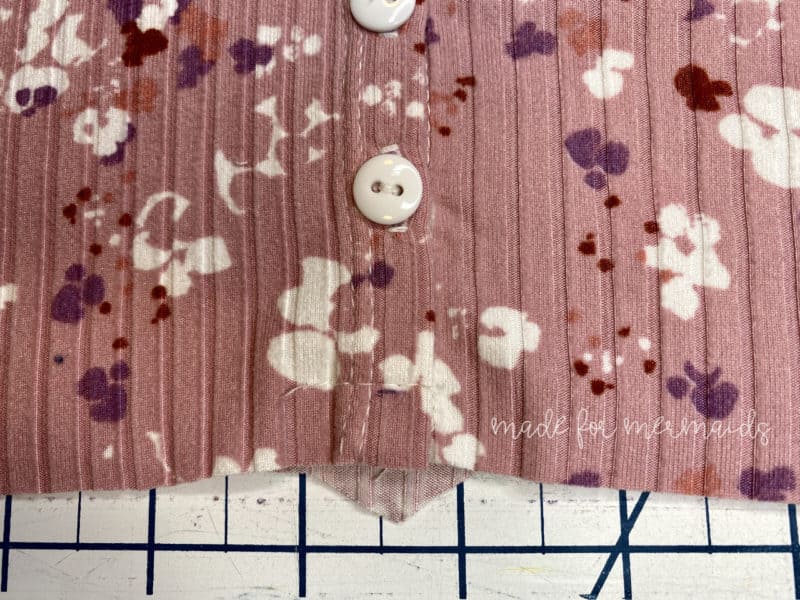
Rather than sewing the front bodice closed, let’s start on making the bodice functional with buttonholes. Overlap the front bodice 1/2″. Typically, the wearer’s right side overlaps the left. That means the buttonholes will be on the right side and buttons on the left. I started by marking 1/2″ up from the bodice bottom along the overlapped bodice. This will show where your stitching will be when you attach the skirt and ensure the buttons won’t be too close. Next, figure out how you want to layout the buttons. I usually start with the buttons first then sew the buttonholes second. Depending on the size of the buttons, I’d recommend 3-4 buttons. Since this is a functional placket, make sure they are close enough so there isn’t gaping.
After attaching the buttons and sewing the buttonholes, baste the overlap 1/2″ up from the bottom of the bodice. This ensures the placket stays closed when attaching the skirt. Continue sewing your Poppy following the tutorial.
I accidentally added a second hack to this make too. This is actually the mini-length skirt with the mini ruffle. This achieves a length closer to knee length.
Happy sewing! -Katie
Belt Hack
Hello, my lovely mer-peeps!
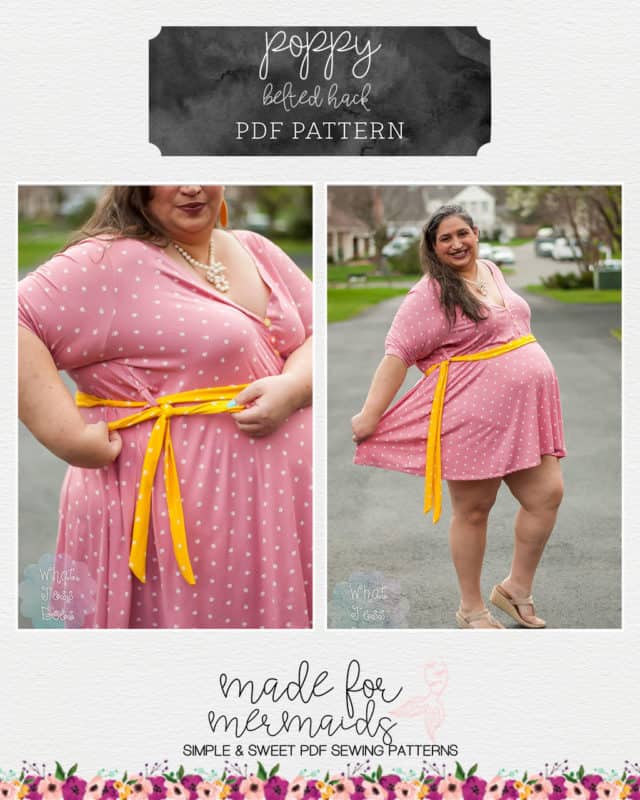
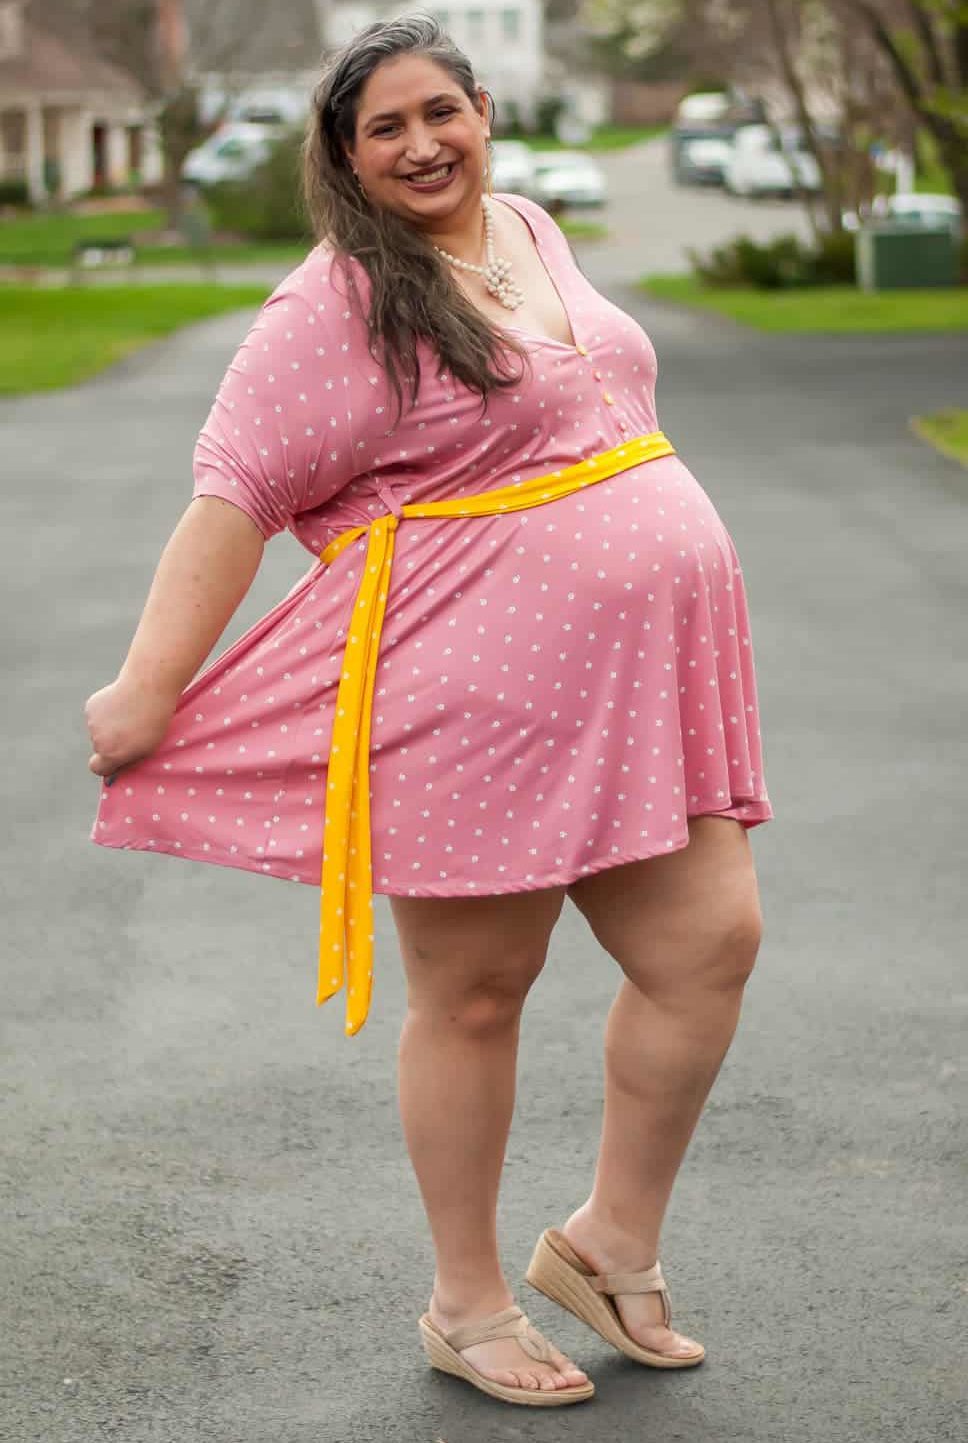
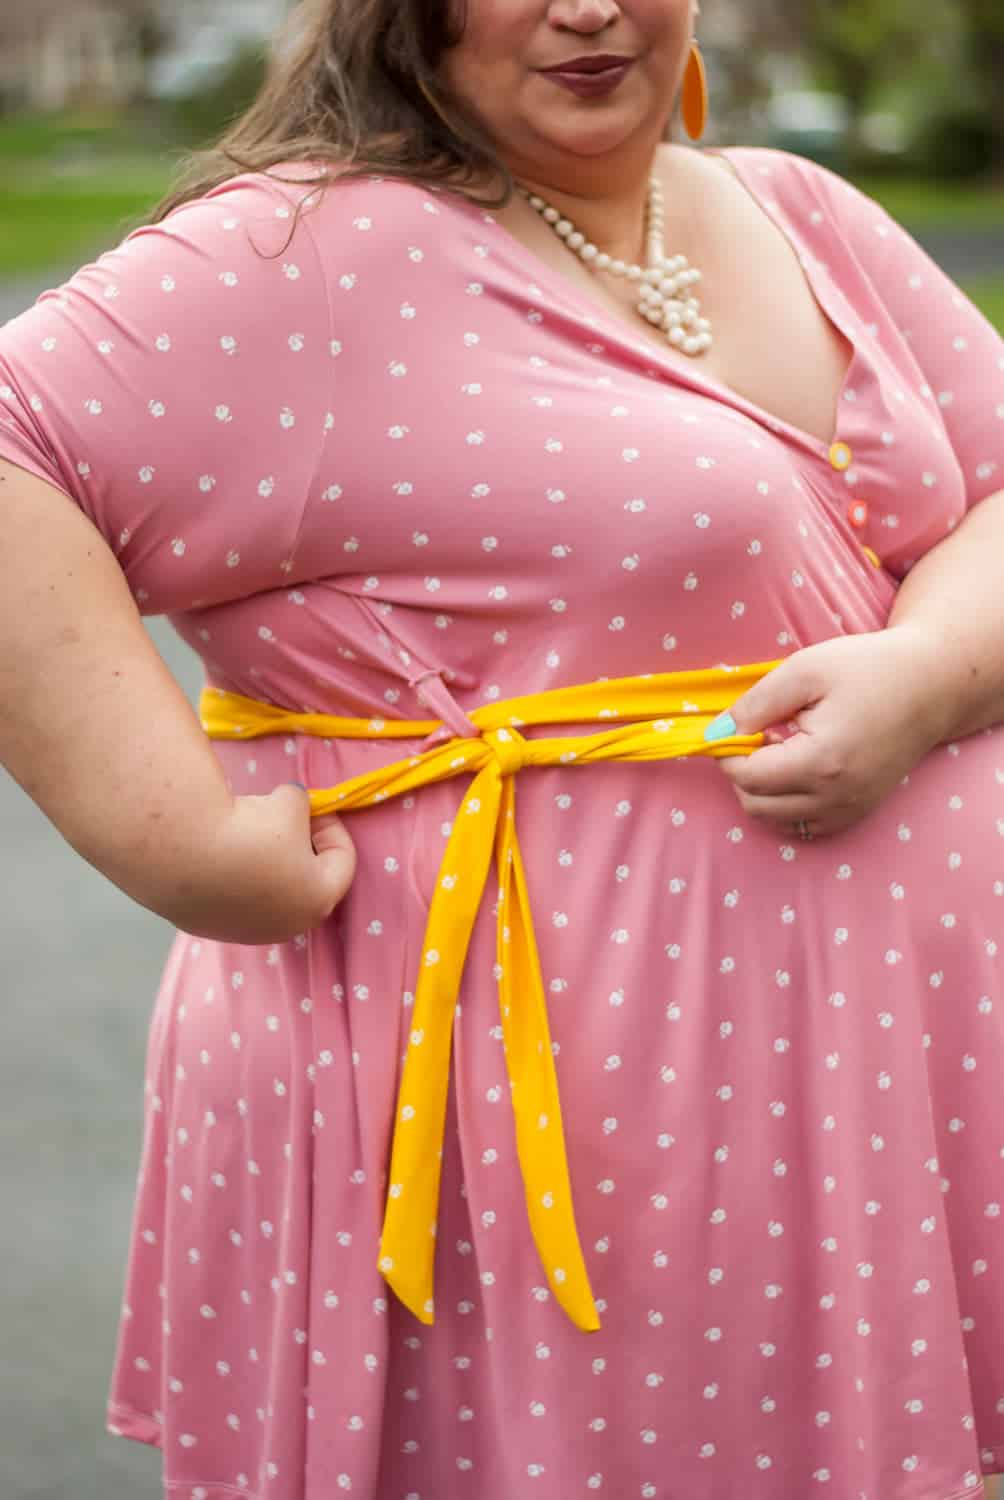
Got a super easy hack for ya if you wanna add a tie to the waistband! Seriously, if you can add buttons, you can definitely add belt loops and make a tie to help cinch in that waist, or just add a lil’ extra flair!
First up, you need a couple of extra pattern pieces!
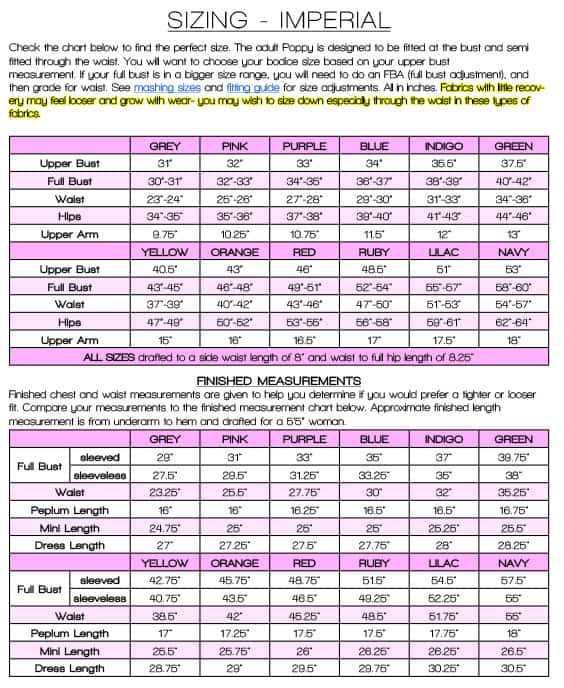
For the belt loops, I just did a simple 2″x 4″ rectangle of fabric for each side. I cut two since I just wanted them on the side seams, but feel free to cut and add however many you want (one in the back might be helpful, for example!) Now, I’m sewing on my size “Ruby/Navy”, but if you’re adding to a youth size, I’d probably cut them slightly shorter, perhaps 2″x 3″.
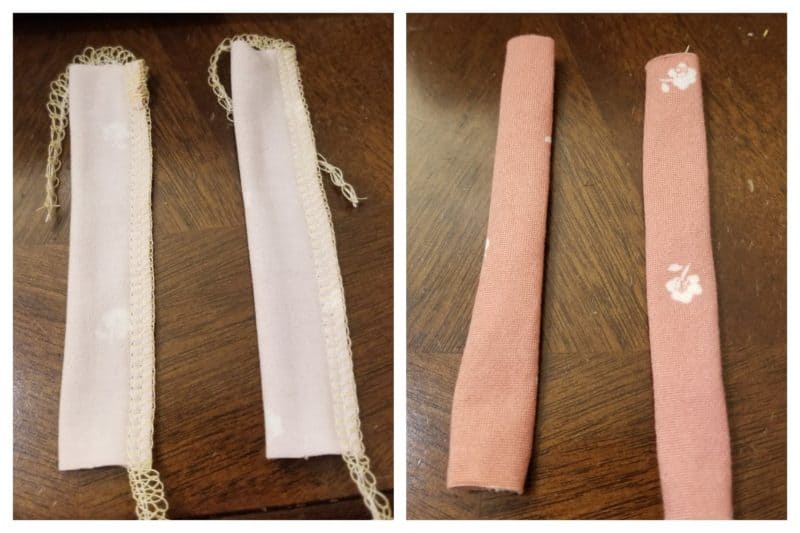
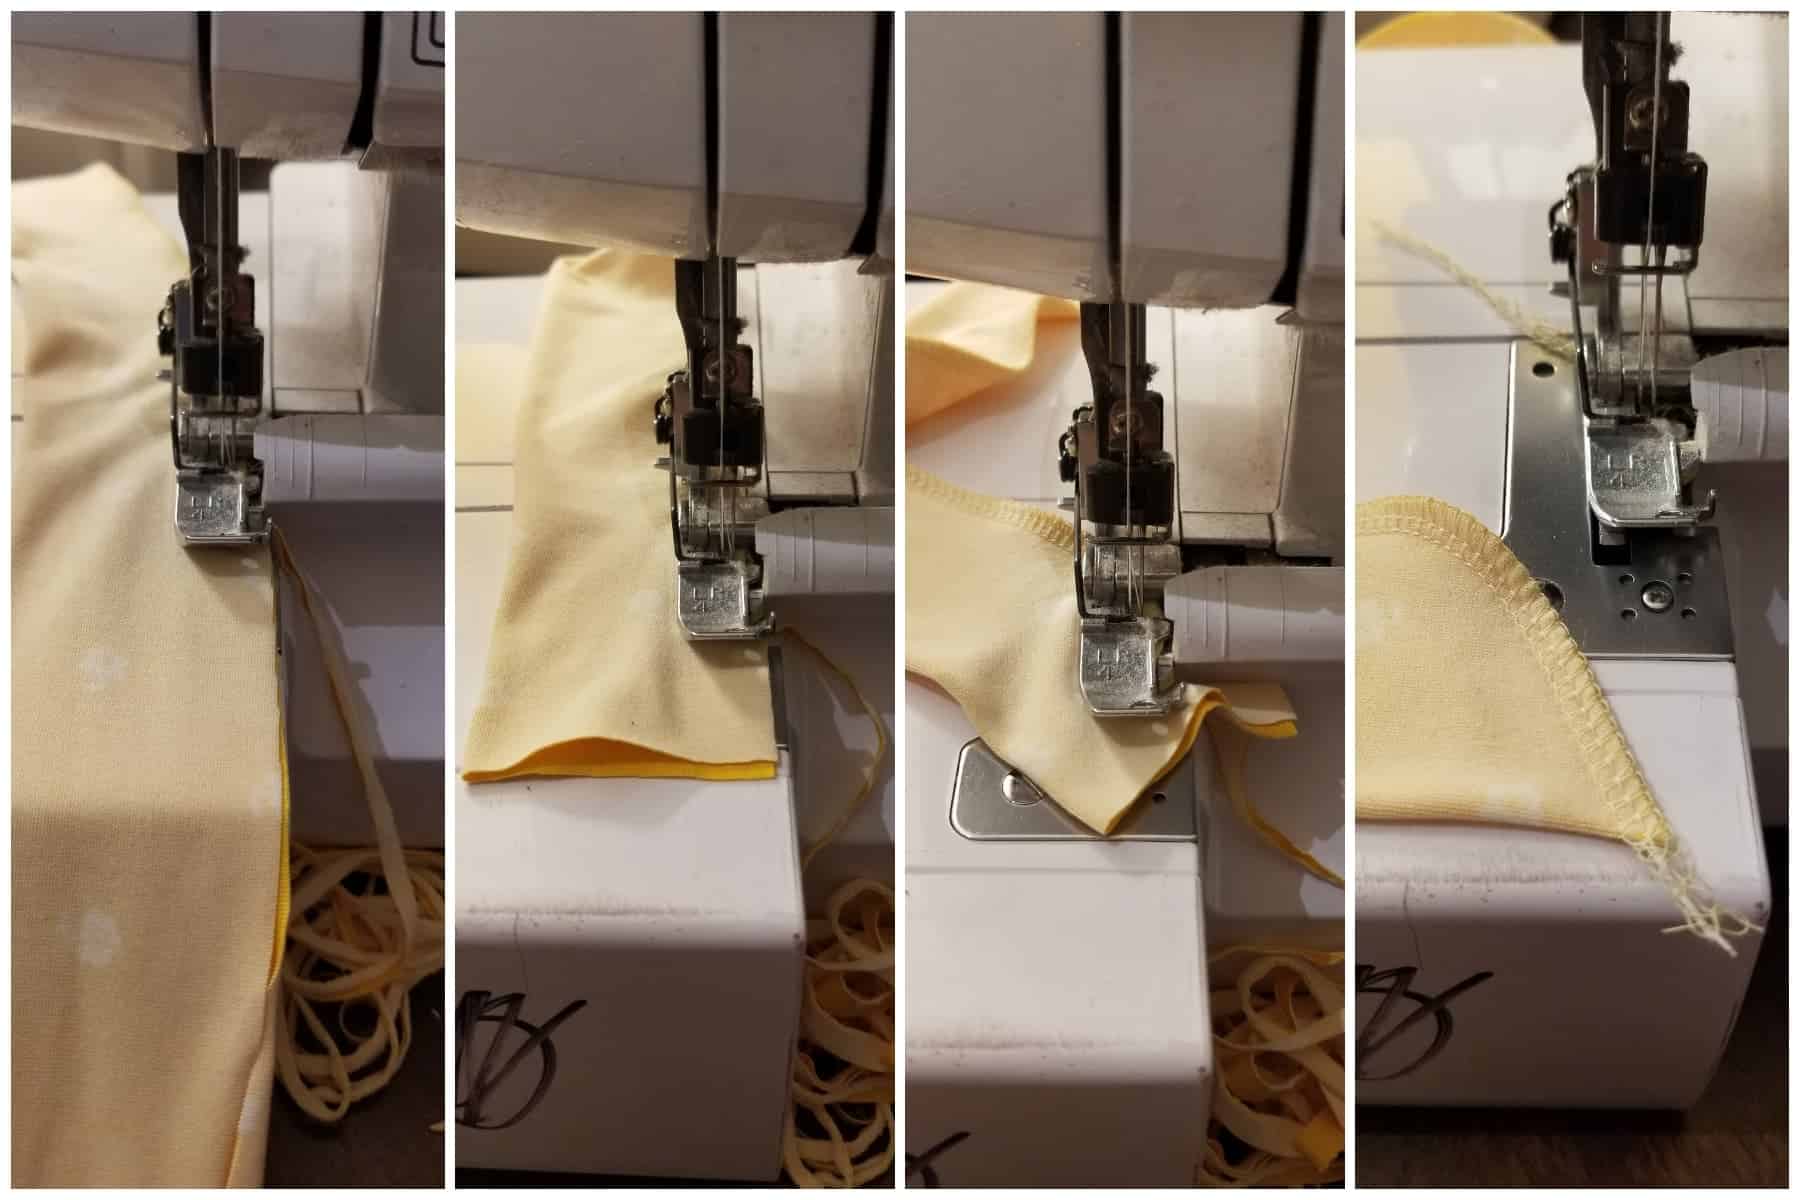
Once you’ve got those cut, go ahead and fold hotdog bun style, wrong sides together, and serge or sew the long raw edge. I used a 1/2″ seam allowance for consistency, but you can use a slightly narrower seam allowance for a wider loop, or a bigger seam allowance for a thinner loop.
Turn right side out, give ’em a press, and set aside for now. Now, let’s work on our tie! (Feel free to skip if you plan on using your loops with a regular belt, of course!)
The math on this will vary depending on your preferences. I did a 4″ high by 1.5″ x my waist measurement. So, for example, if your waist (or if you’re sewing for someone else, just use the median waist measurement for their size range) is 40″, you might want to cut 60″ long. That’ll give you about 10″ of ties on each side. But if you want to be able to tie a big bow and still have ties hanging, cut double waist length. You can always cut and trim later if too long, but adding length is more challenging, so err on the side of too long. Don’t forget, too, if you’re using knit and you’re cutting with the stretch, it’s going to be longer since it will s….t…..r……e…..t……c…….h…….. Just a few tips to keep in mind!
- I had to cut two and stitch together to get the length I wanted; you may only need to cut one 🙂
Now, to sew this up, fold in half, wrong sides together, lengthwise, just like we did for the loops. Starting at the middle, sew out to one end and taper if you’d like. Go back to the middle, leave a 1″ gap for turning and sew again, middle to end. You can use a serger or sewing machine, and again, I used about a 1/2″ seam allowance.
Use your turning notion of choice to flip the ends through your hole.
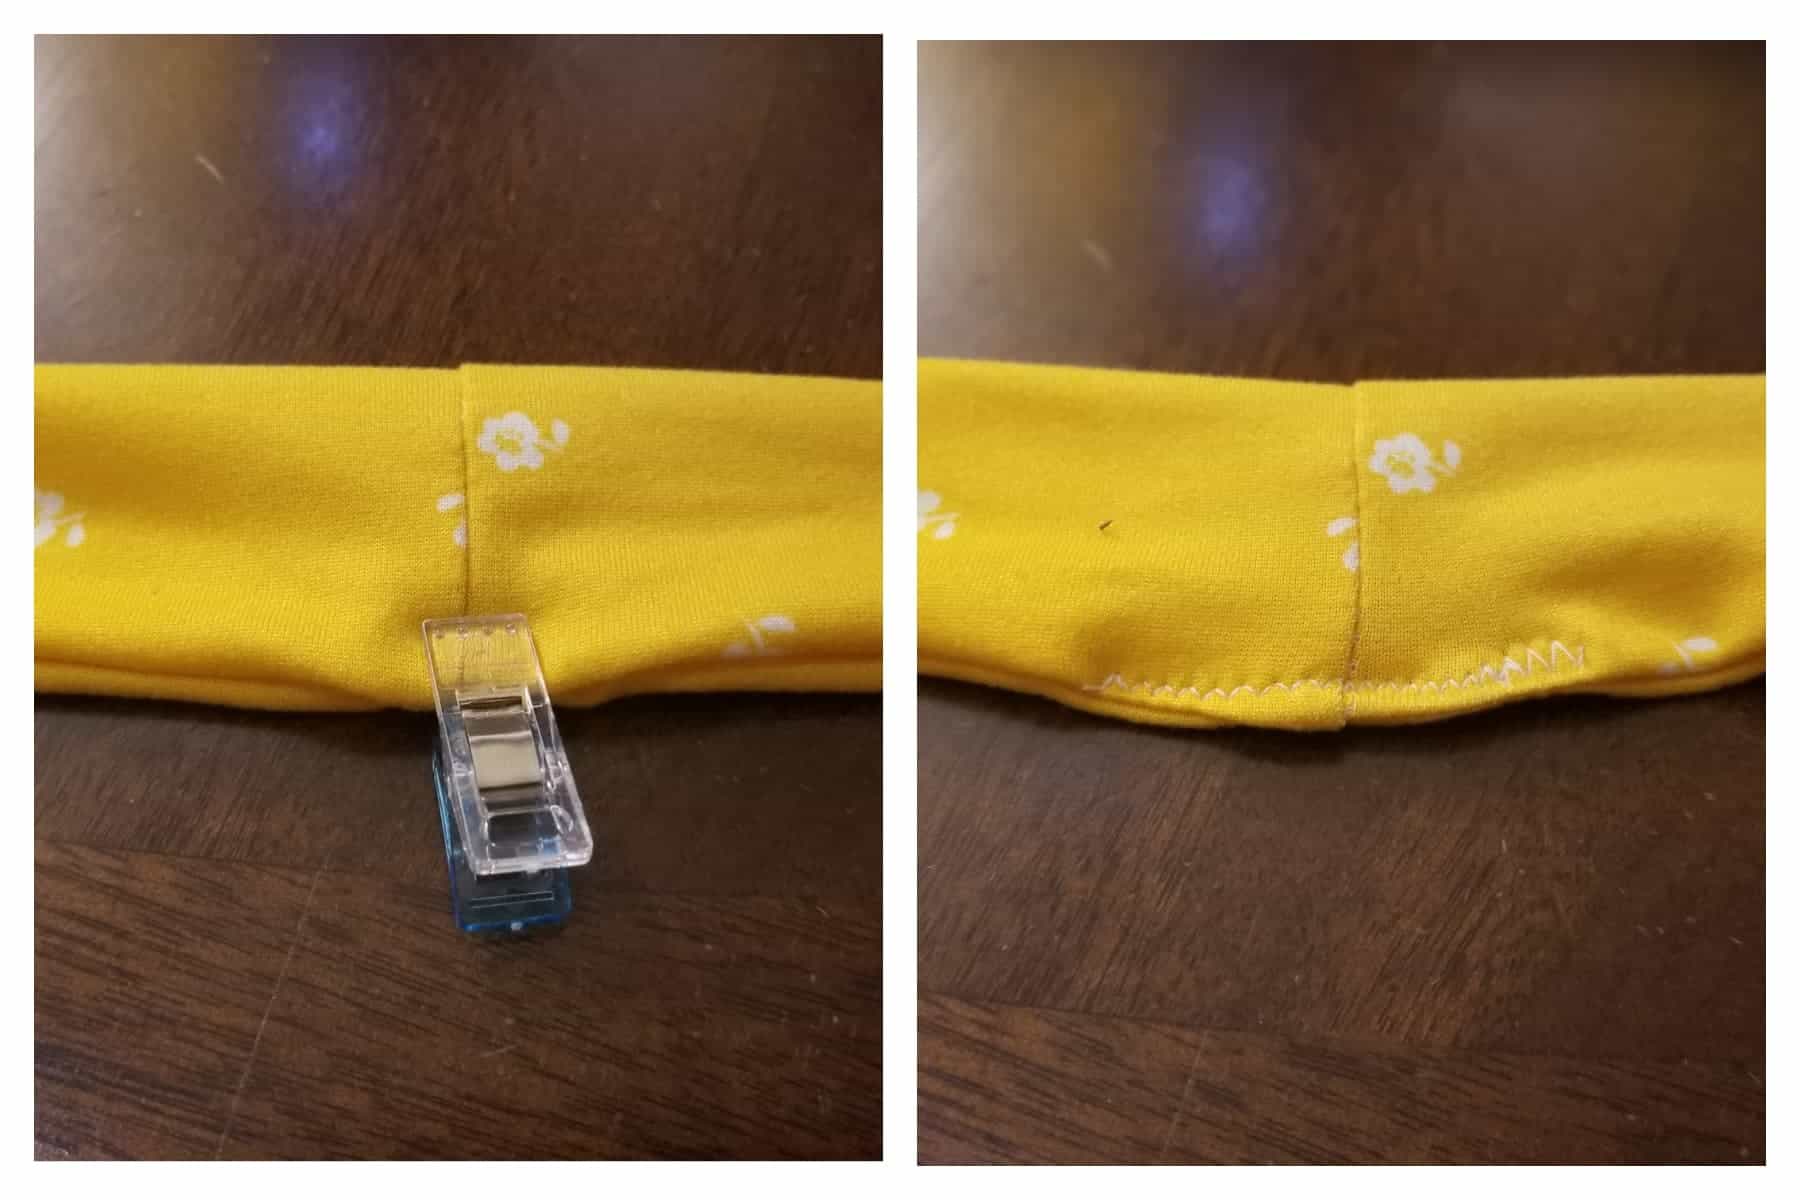
Then simply pin/clip your turning hole shut and sew it down. I used a simple zig-zag for this, but whatever stitch you choose will likely be fine (it probably won’t be very visible, so no worries if it’s not perfect!) OPTIONAL: You can topstitch around the entirety of the tie, using a cover stitch or your topstitch stitch of choice, for a more crisp, finished look if you’d like! Give it a good press and set that to the side.
BACK TO THE LOOPS!
Assemble your Poppy pattern as instructed in the tutorial, completing the bodice and skirt, but stopping just before attaching the two.
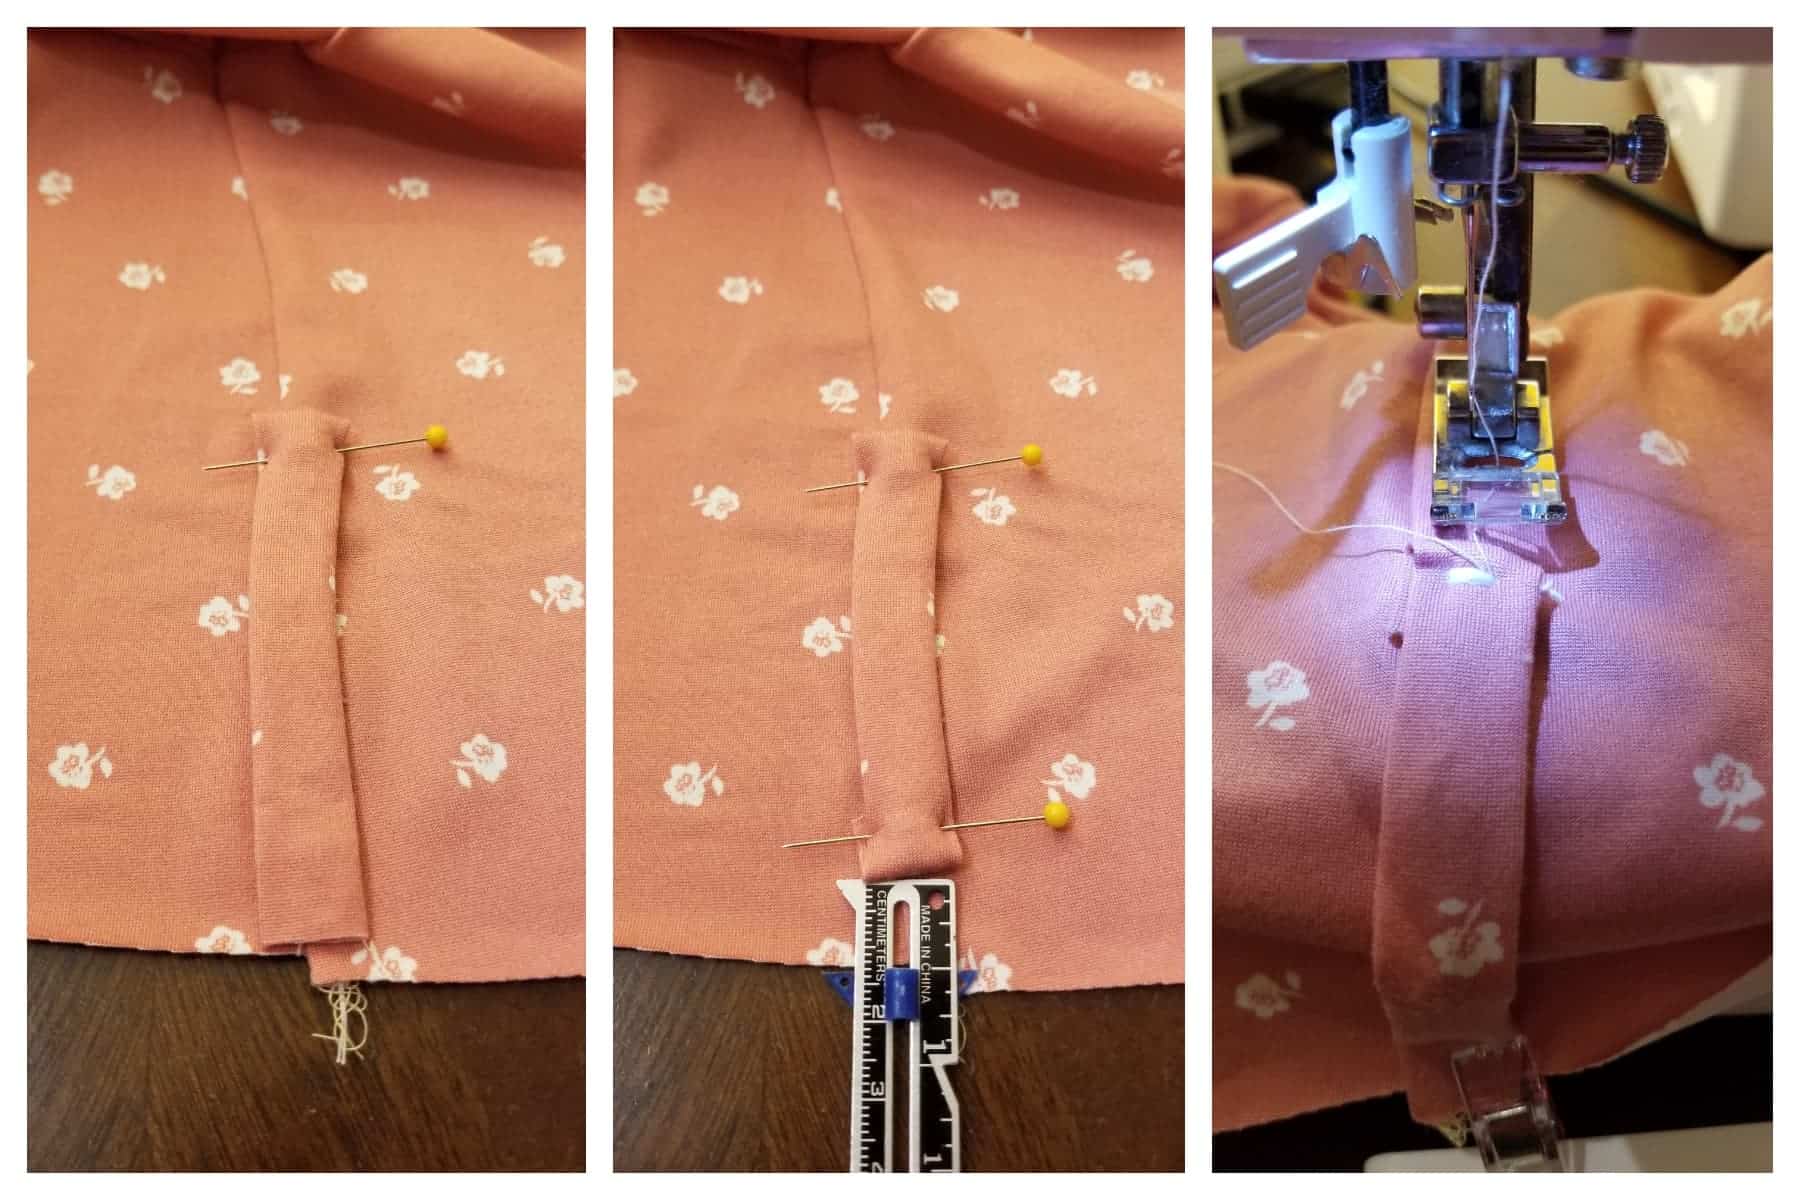
Take one of your loops and line it up on the side seam of your bodice and pin/clip in place. Fold-down the top of the loop about 1/4″, pin in place, and sew down. I like using a wide zig-zag at 0 stitch length for a wide bartack stitch. It behaves better on my machine than trying to sew it down with a line of stitching. If I’m worried it won’t hold well, I’ll move my presser foot down a smidge and do another right below it, but generally, that’s not necessary.
For the bottom, you can either just sew it into the seam allowance to attach when you add your skirt piece OR you can fold that up and under and stitch in a place like you did for the top. Just make sure you’re lining up the bottom of it just above your seam allowance.
Repeat for the other loop on the opposite side.
QUICK NOTE: I don’t bother adding stabilizer for loops, since they’re more a guide for the tie rather than supporting actual weight and stress. But if you have very thin knit and want to reinforce them, you can press on some knit interfacing on the inside of the bodice beforehand. Alternatively, my favorite “stabilizer” for little jobs like this is the selvage of a more stable fabric, such as flannel, minky, whatever scraps I have that won’t unravel on me.
That’s it! Attach your skirt, finish your Poppy according to the tutorial and you’re good to go!
Hope you found this helpful!!
’til next time,
~jess
Sierra Mash
Of course, you KNOW our romper queen Stephanie had to make a Poppy romper! She mashed Poppy with Sierra. For the mash, use the waistband/romper bottoms and attach them to the Poppy bodice. Depending on where you carry your height, you may need to make some slight adjustments, but otherwise, it’s a pretty easy mash!
We hope you love, love, love your new Poppys; don’t forget to share what you’re sewing up. We love to see what you’ve made!













Leave a Reply