

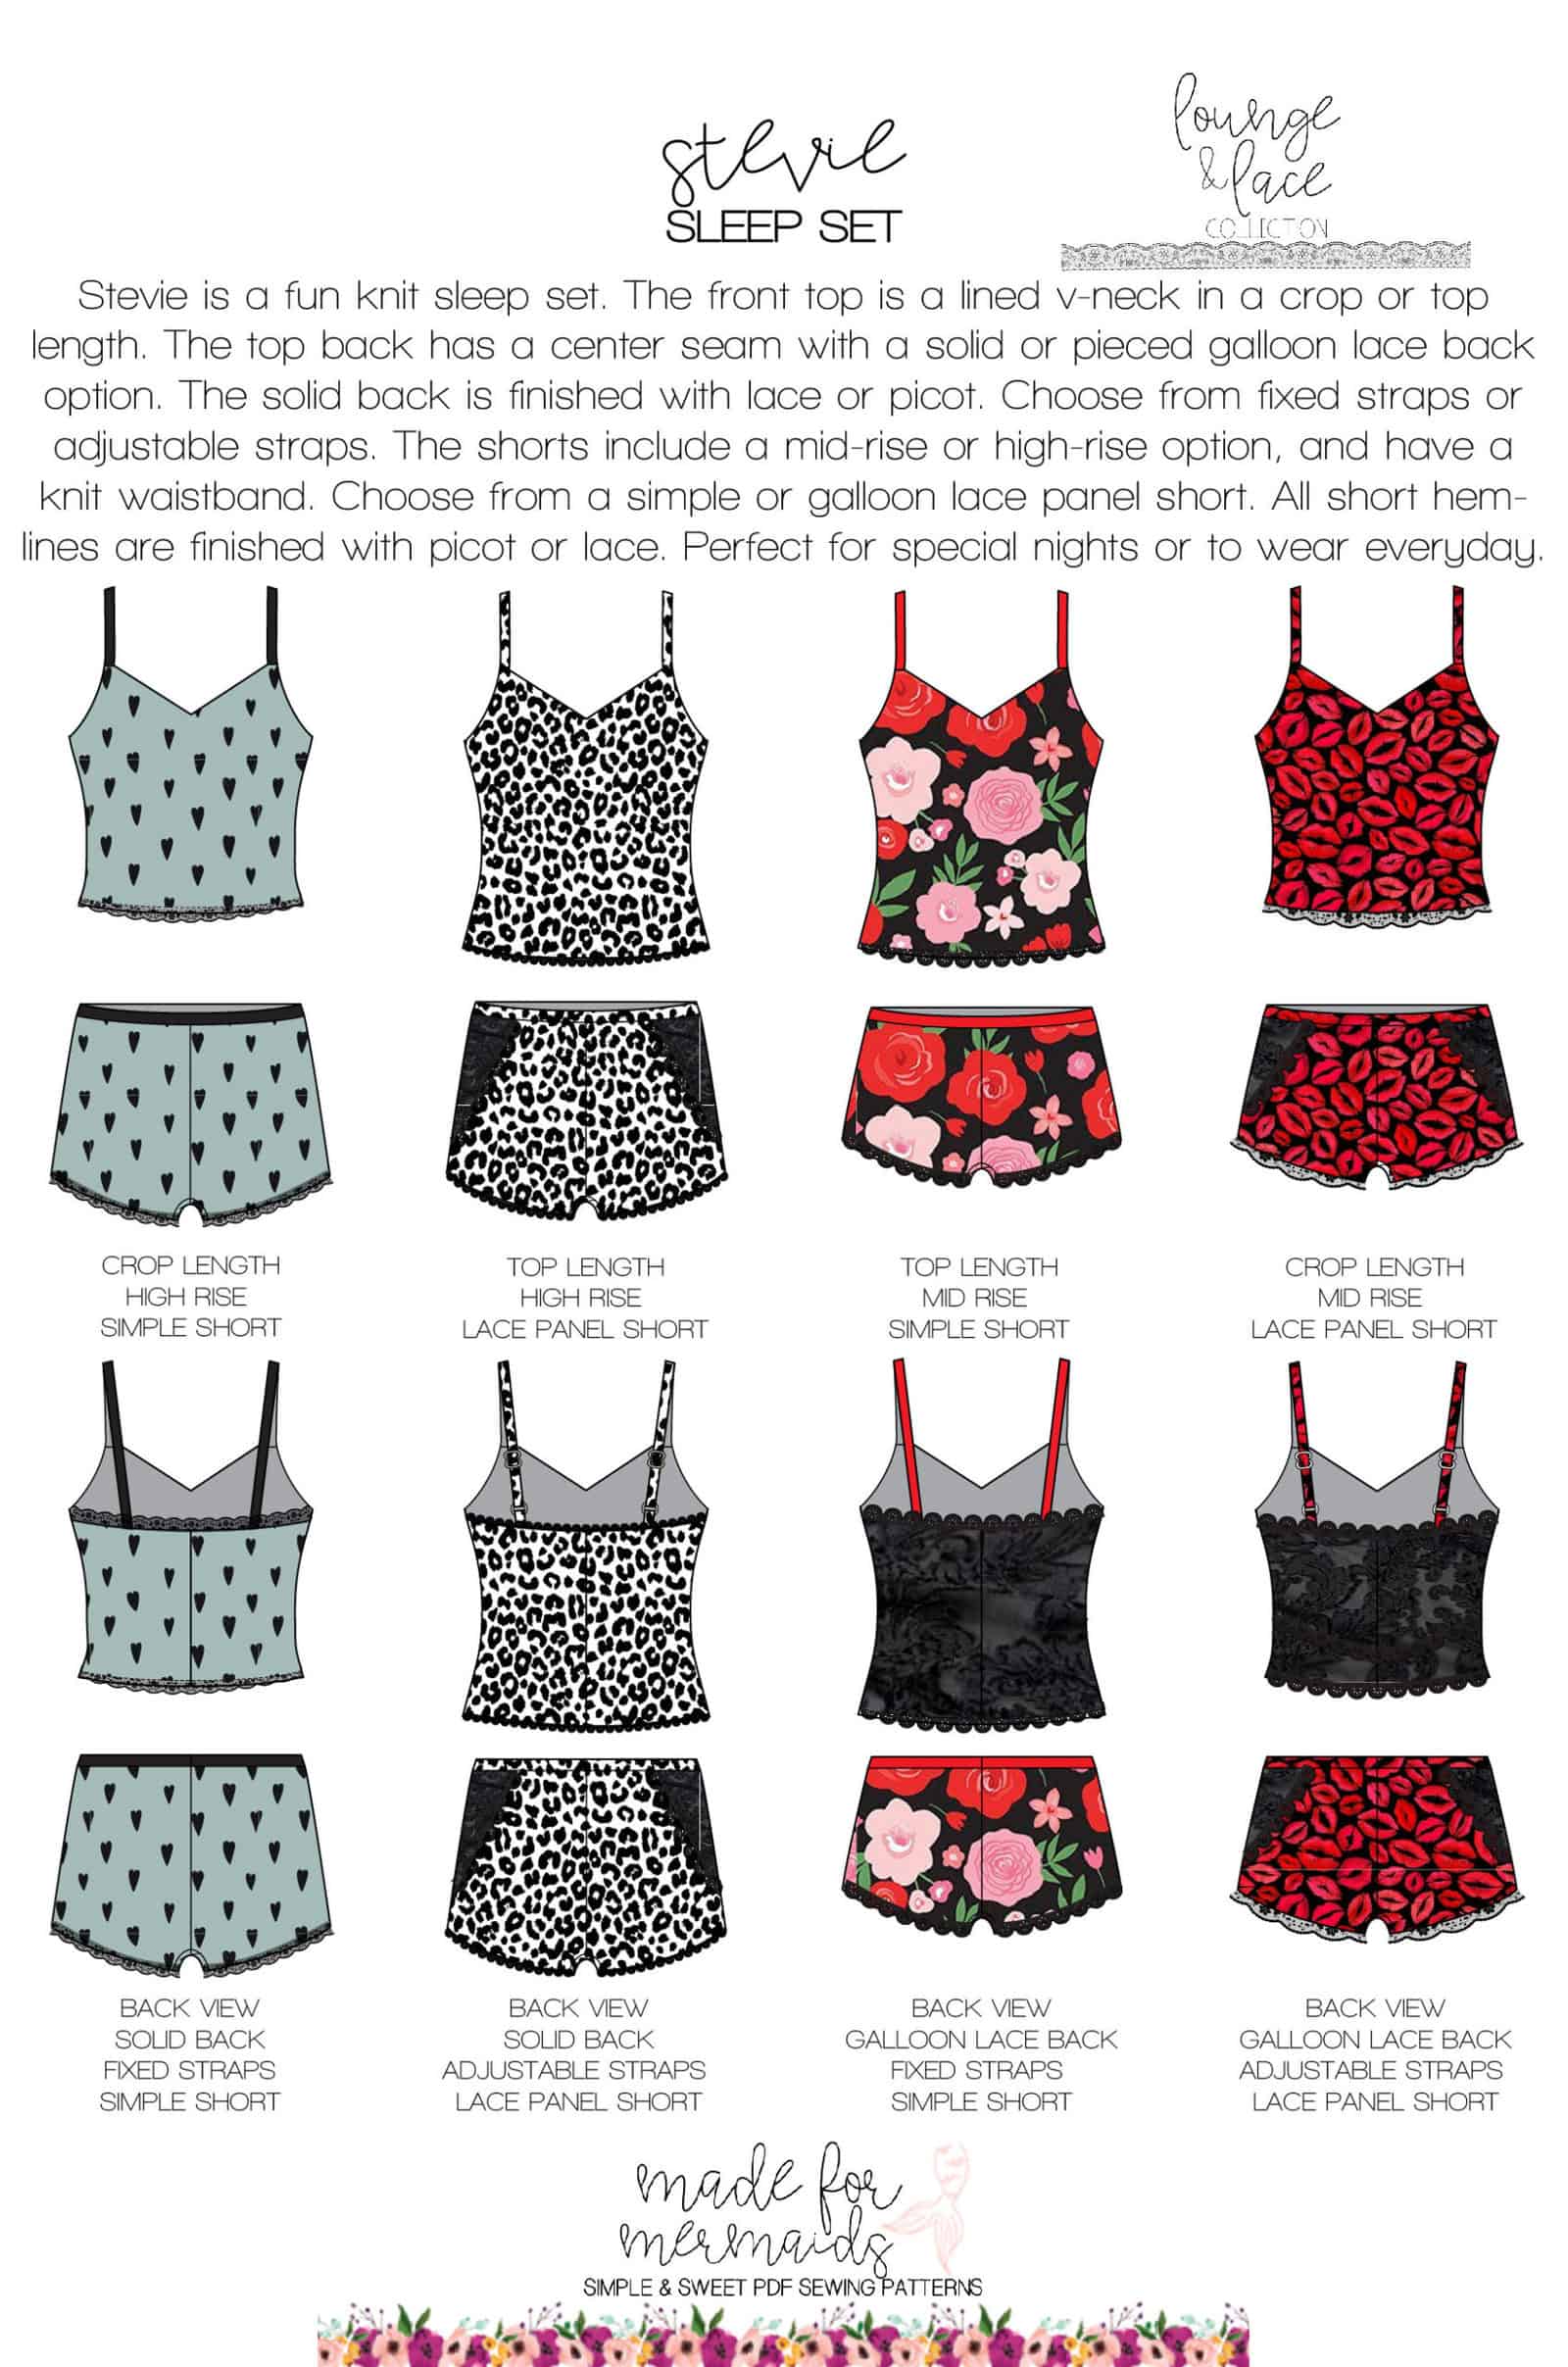
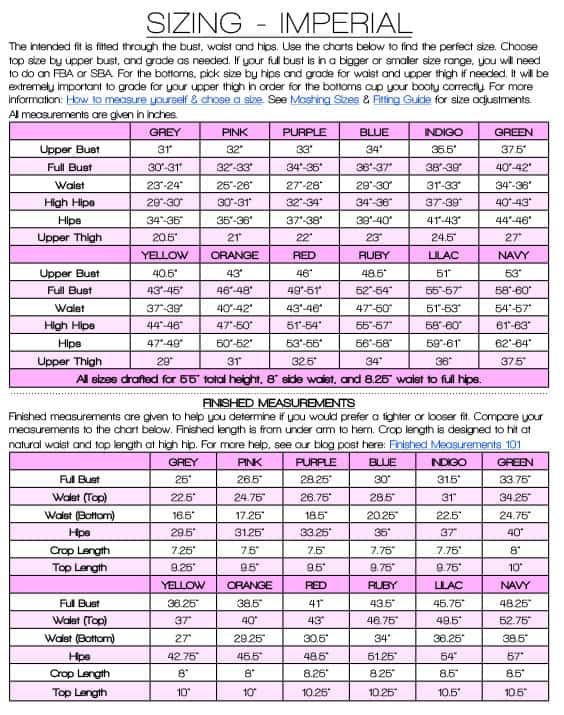
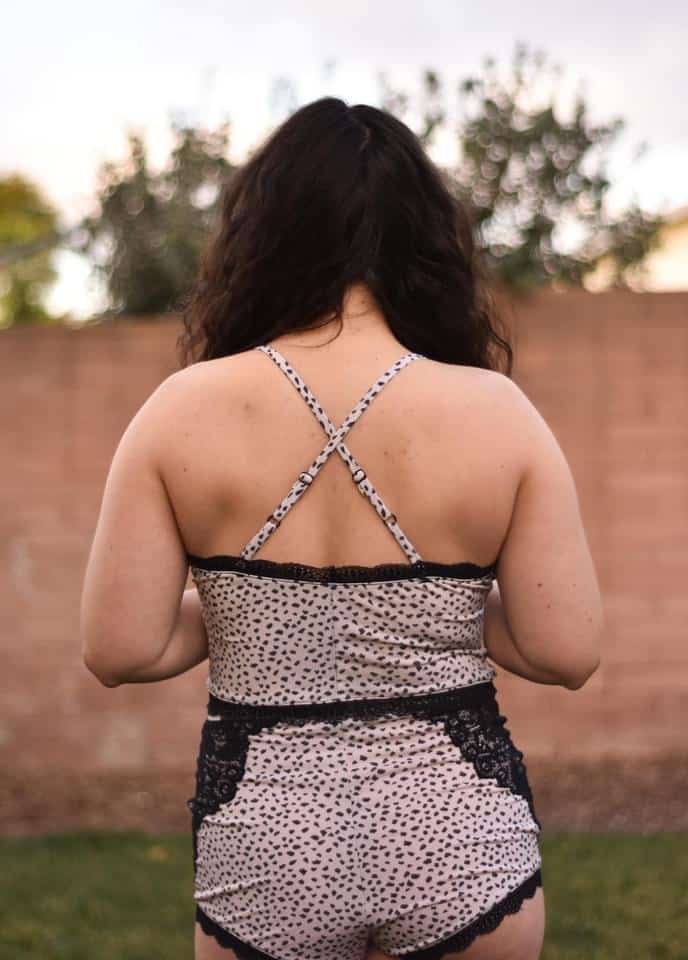
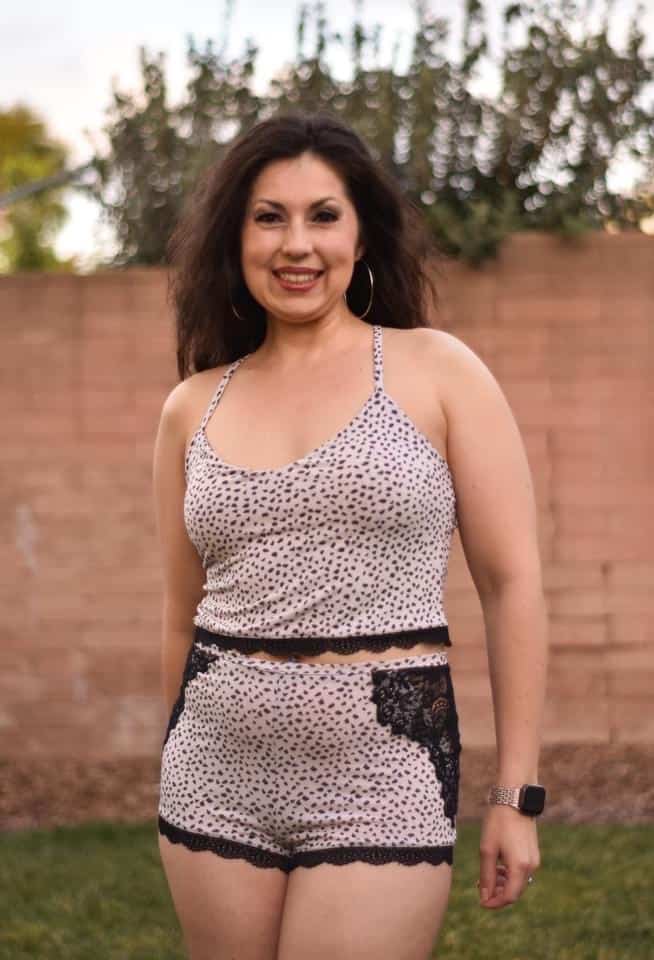
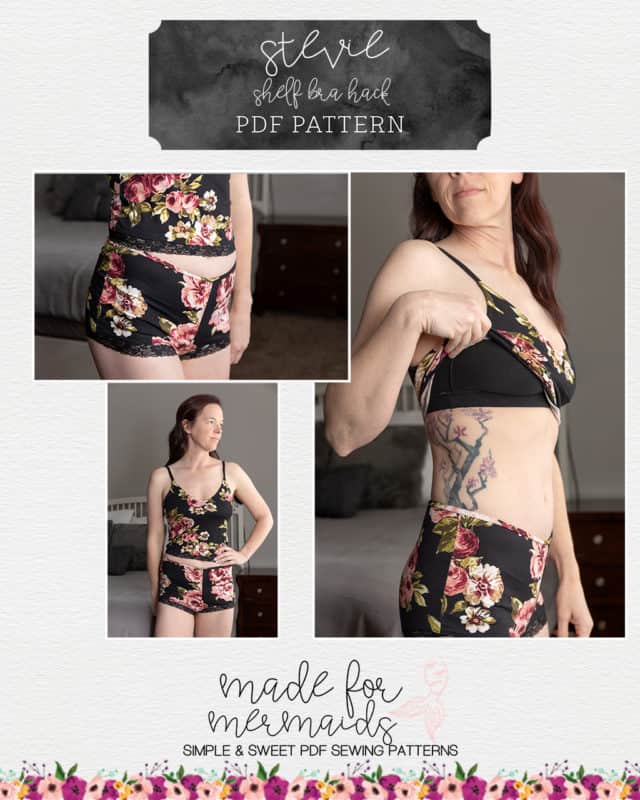
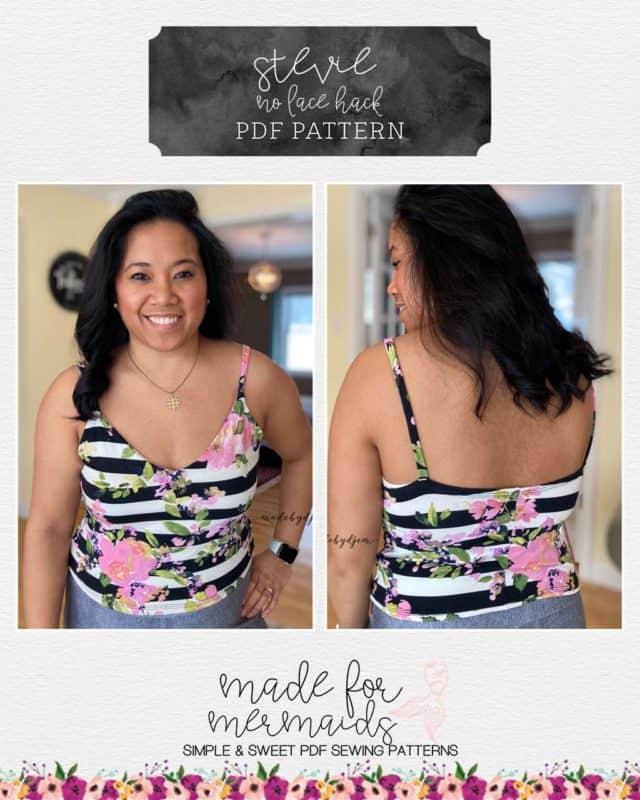
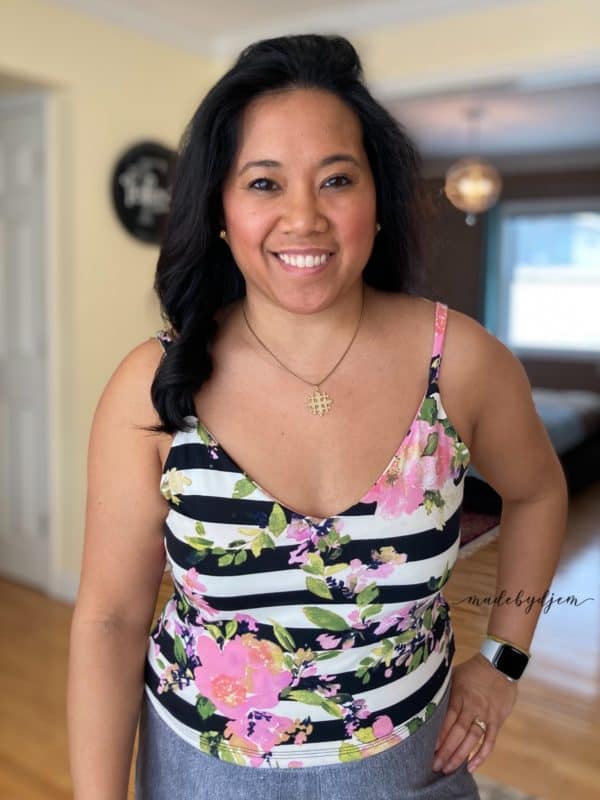
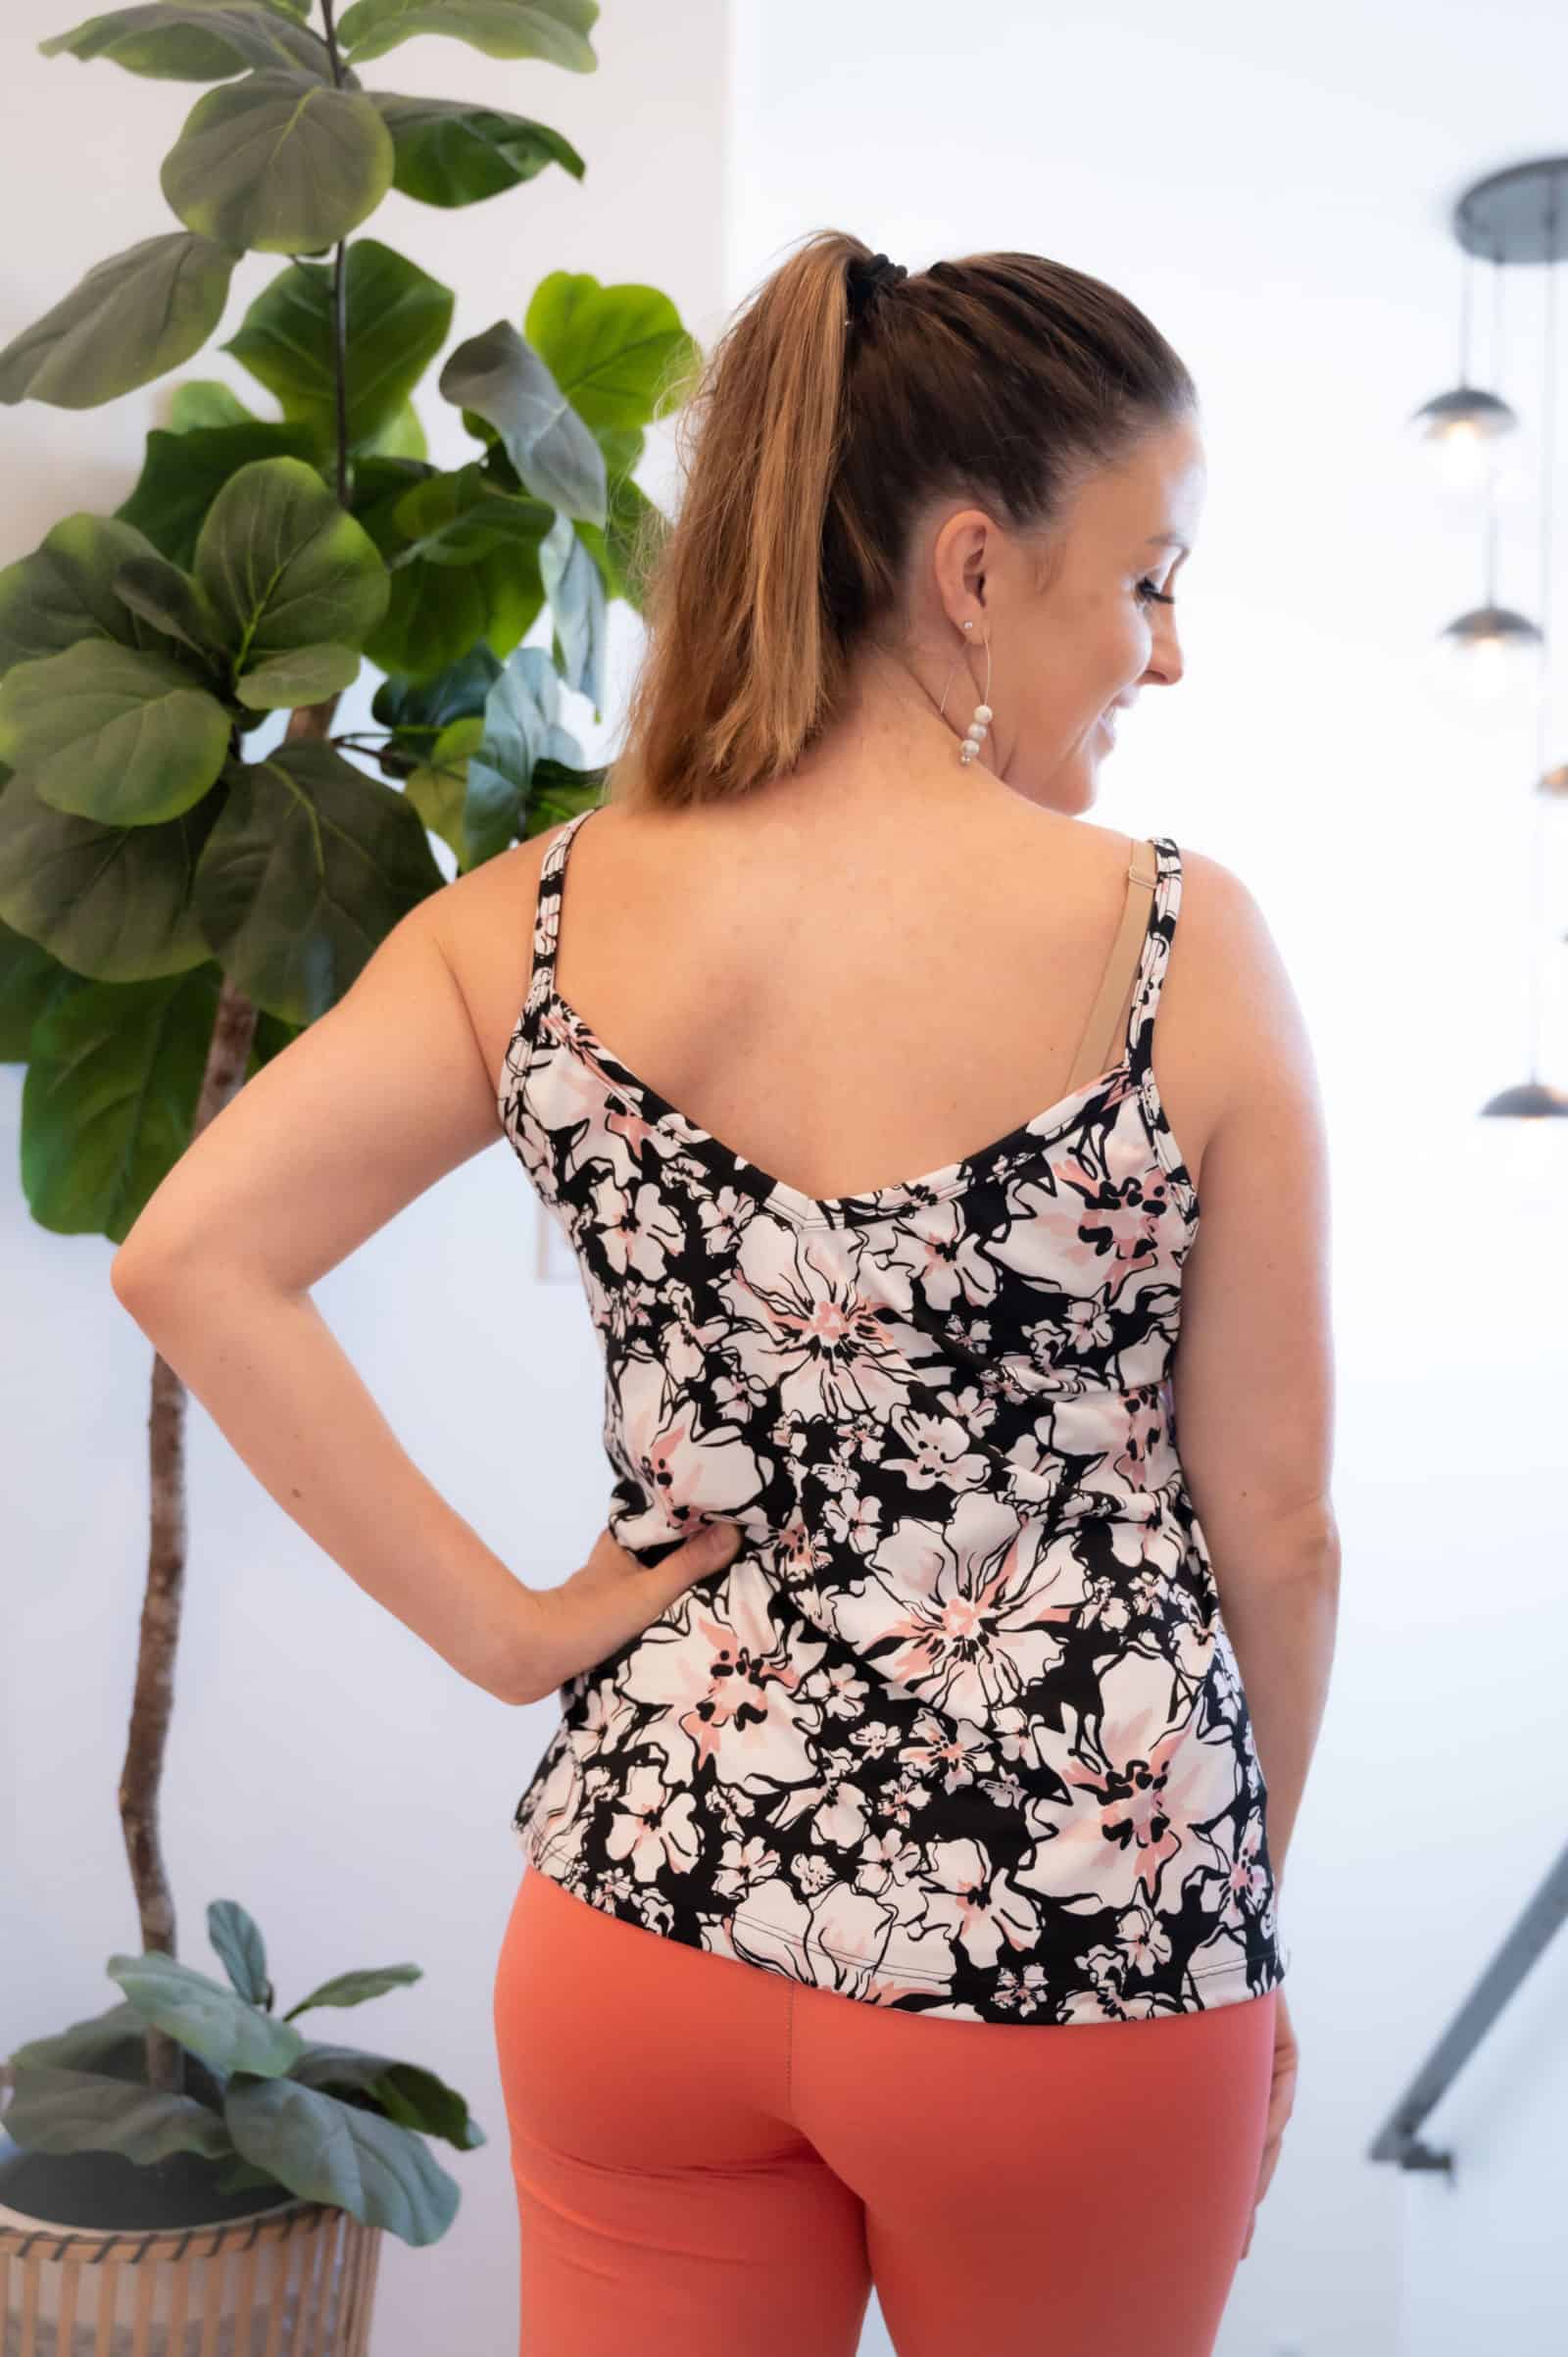
The new Stevie Sleep Set is putting my usual PJs to SHAME! I have talked a big game about a PJ overhaul in the past, but have I done it yet? Absolutely not. Now, I can claim I was waiting for the Stevie Sleep Set to be released. It is SUCH a cute set and a lot simpler than you might expect. The top features a crop or top length, and galloon lace or solid back options, plus an adjustable strap option. For bottoms, choose between high or mid-rises, and solid or lace-paneled shorts. Stevie is perfect for light-to-mid-weight knits, such as ITY, DBP, modal, bamboo lycra, certain rib knits, etc. Do keep in mind that your waistband will need good stretch/recovery. Use 1″ stretch lace for solid options, and 5″-6″ (or larger) galloon lace for the lace panel and/or lace back. If opting for the adjustable straps, you will need 1/2″ rings and sliders.

One of the *best* parts about testing is getting to witness the creativity of our tester team. They are always coming up with fun hacks, whether accidental or intentional! Lydia had two adorable hacks this time around – one intentional (Cross Back Straps), and one a super cute make-it-work moment (Lace + Solid Hack)! We’ve also included a few other hacks for you, so you have plenty of options with the Stevie Sleep Set. 🙂
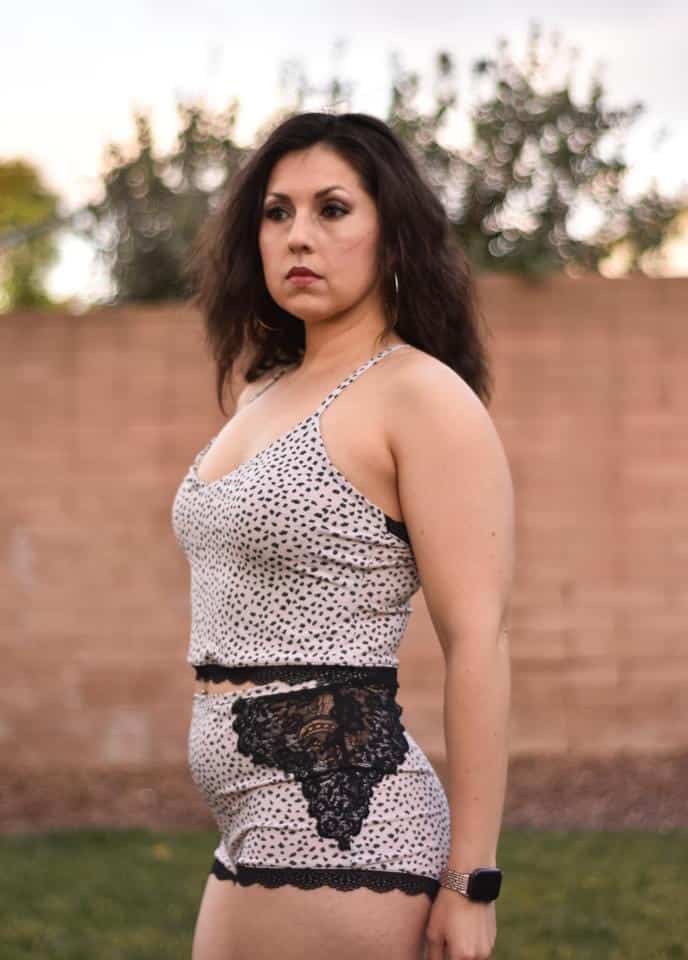
Cross Back Straps Hack
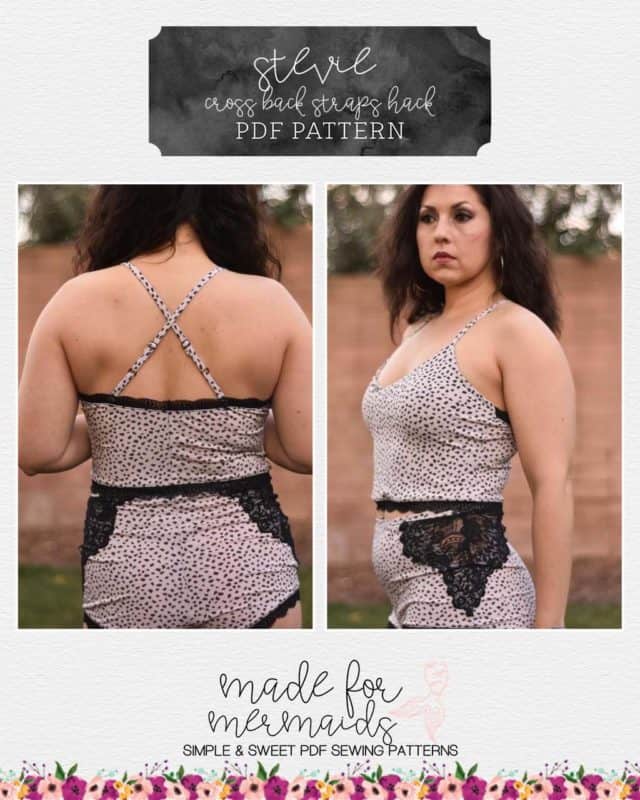
SUPER quick and easy hack! For this, just ensure you use the adjustable strap option and double-check that your strap length gives you enough room to cross the straps comfortably. You can easily add length if needed. Construction will not change; just be sure to “cross” your straps before attaching! I would recommend basting to check length first.
Lace + Solid Hack
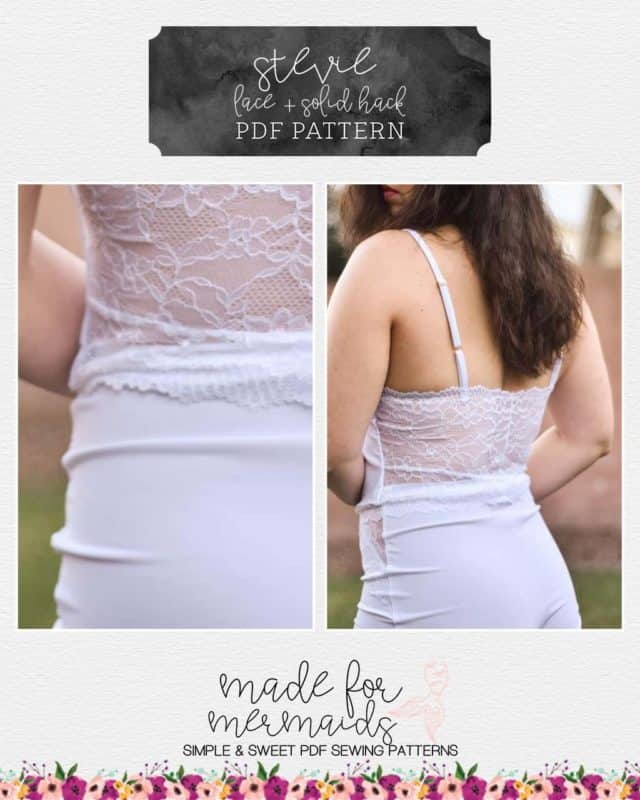
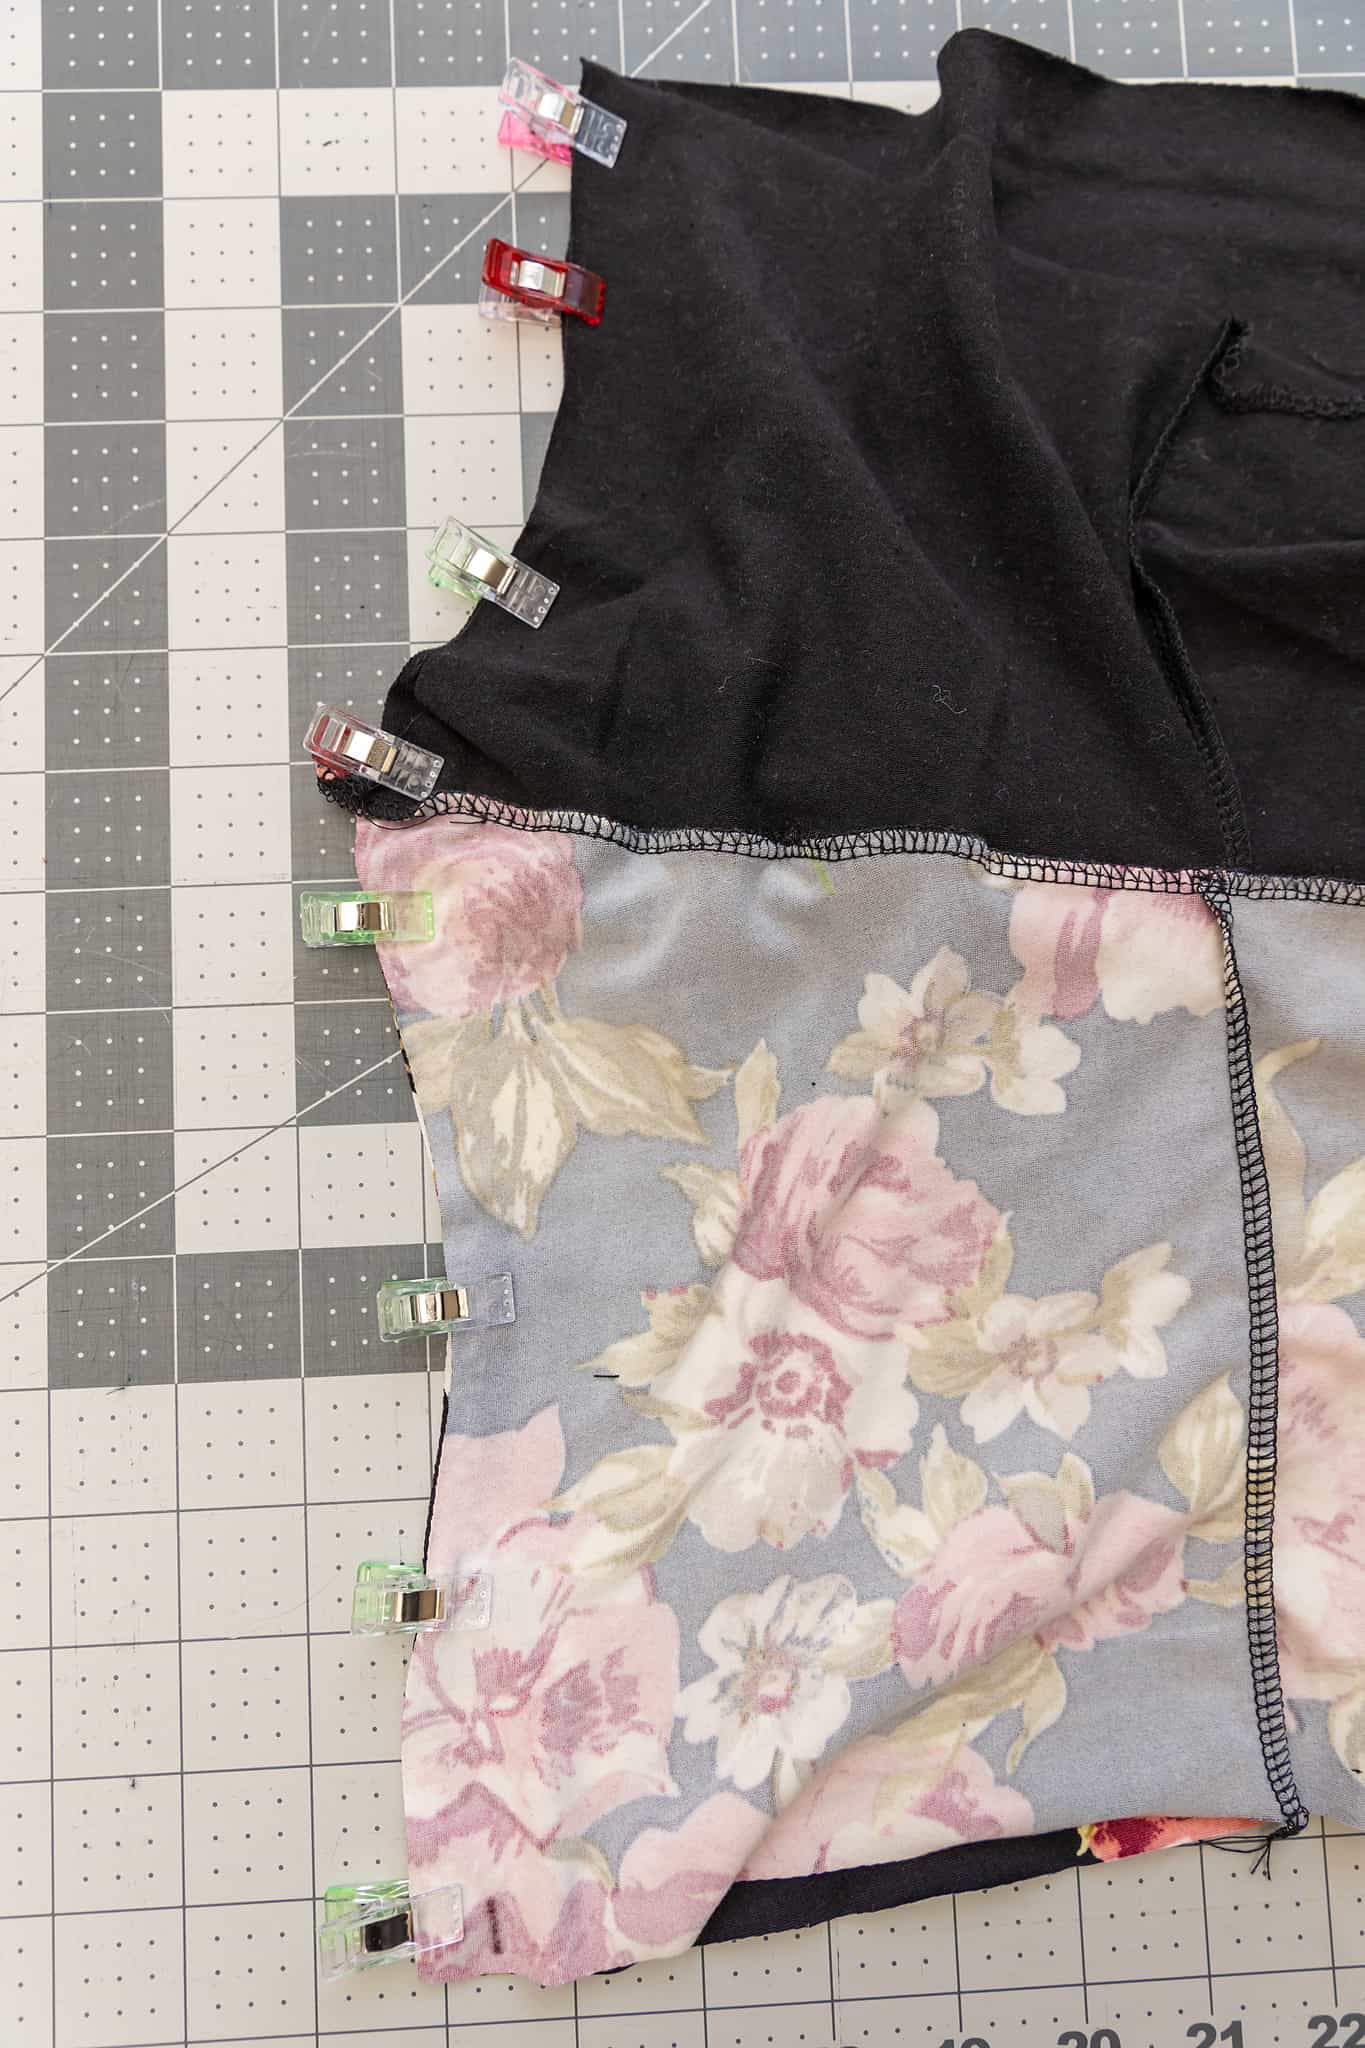
We are 100% on board with hoarding scraps, especially pretty lace! Sometimes you don’t have *quite* enough for a project as intended, though. What to do then? Lydia adjusted the bottoms to omit the back lace piece for the bottoms. To do this, just cut the front lace piece, straighten the side seam for the back bottom piece (or use the solid back piece) and continue construction per the tutorial. Super easy!

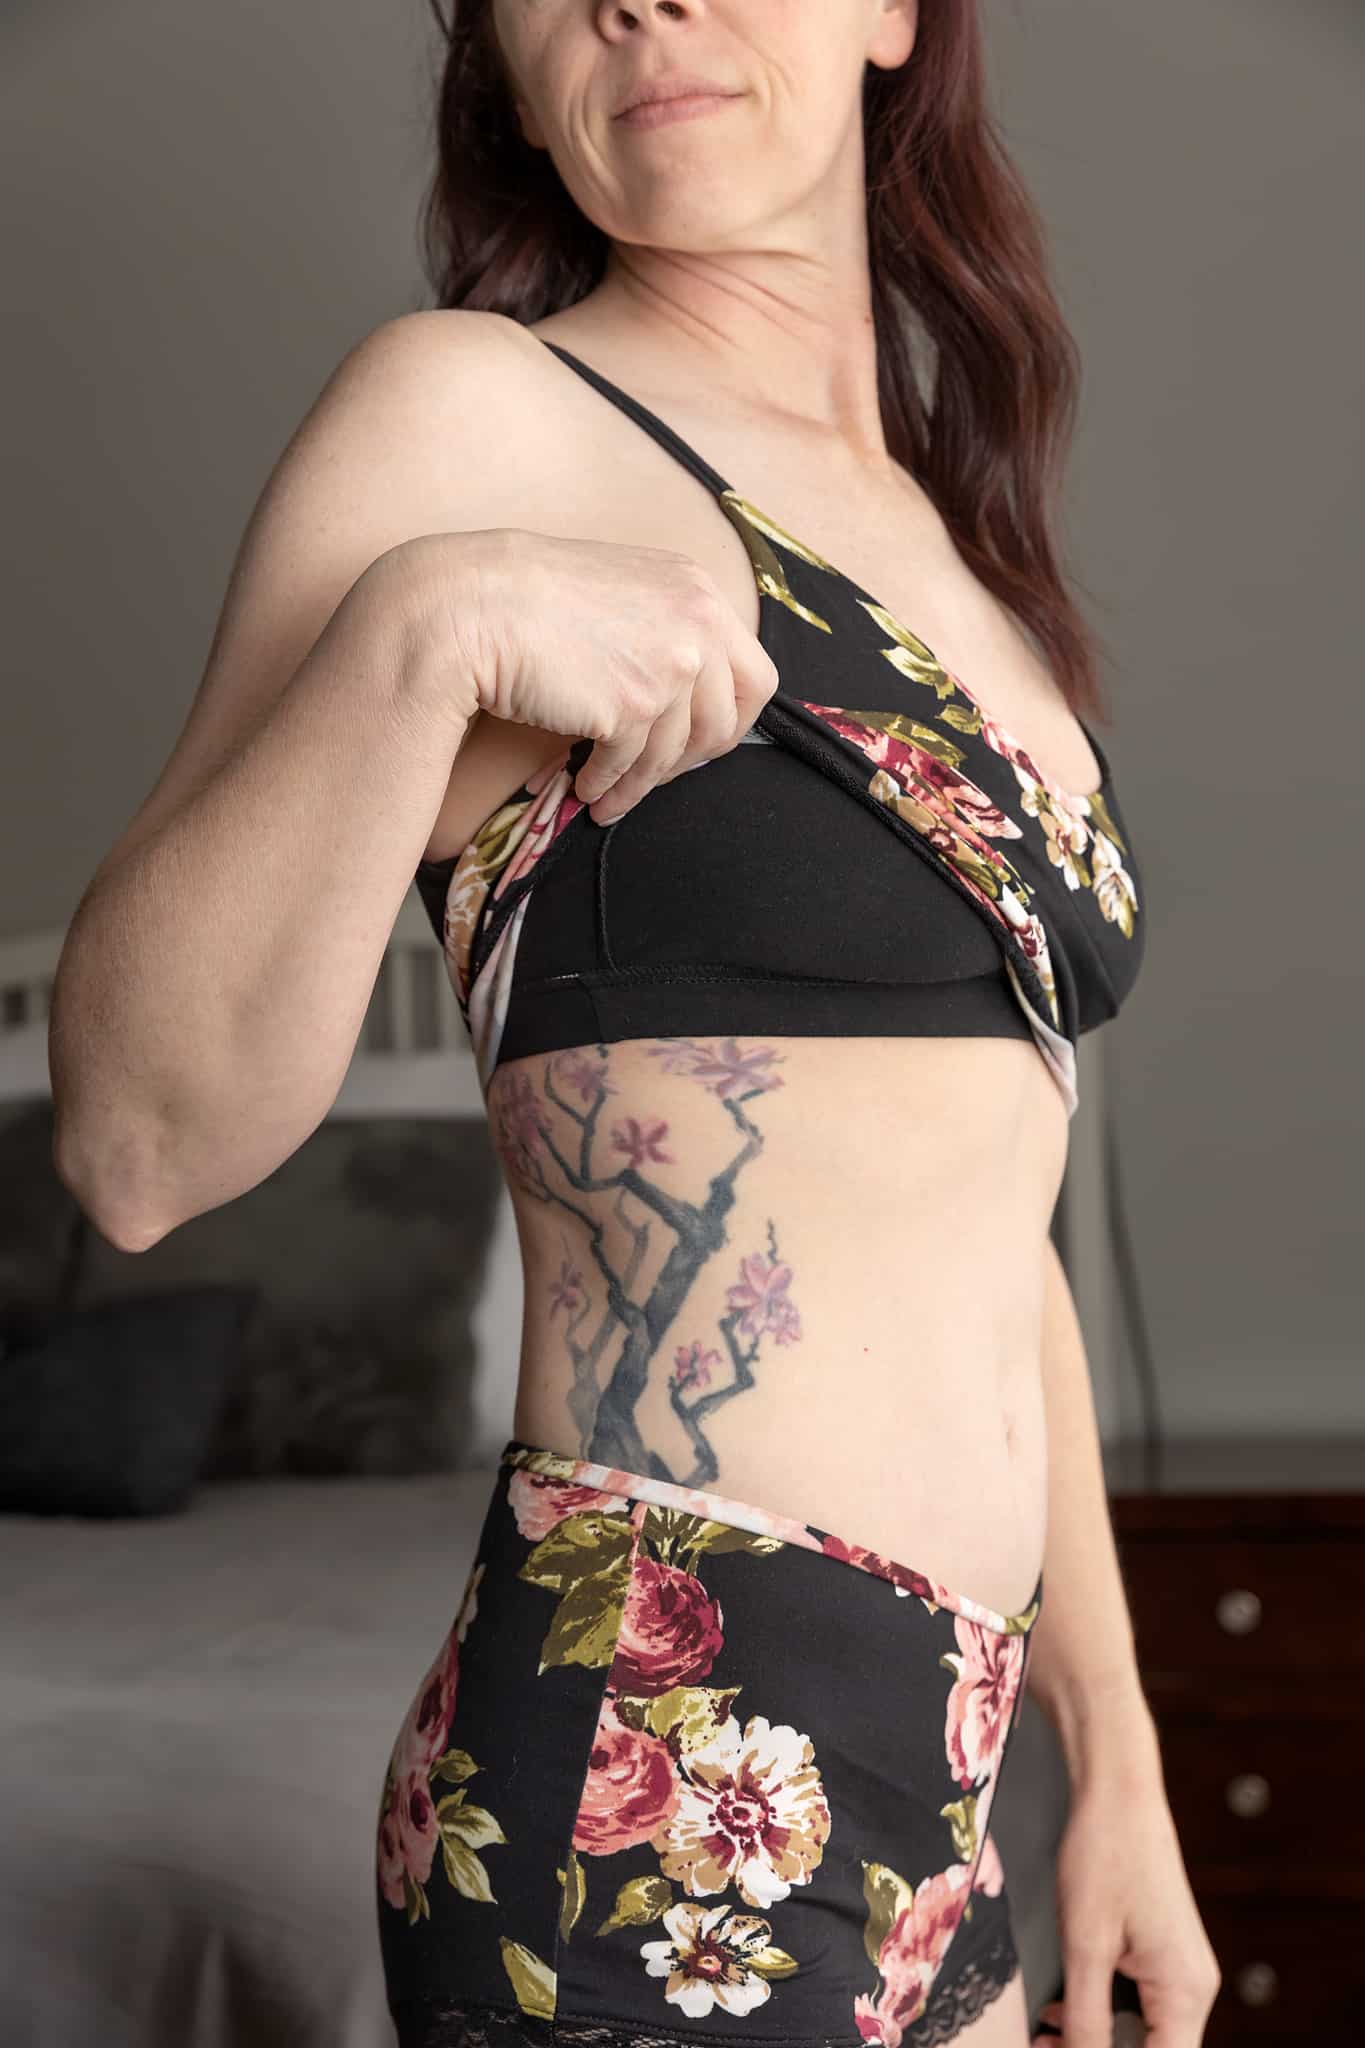
Shelf Bra Hack
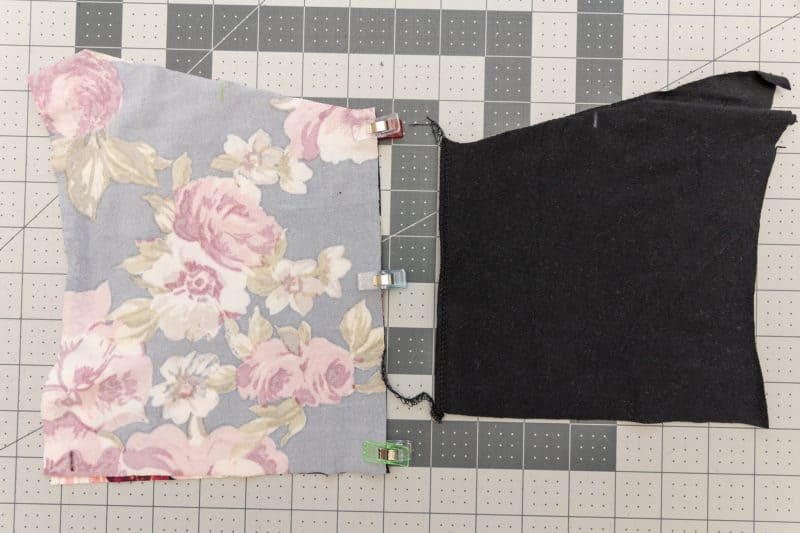
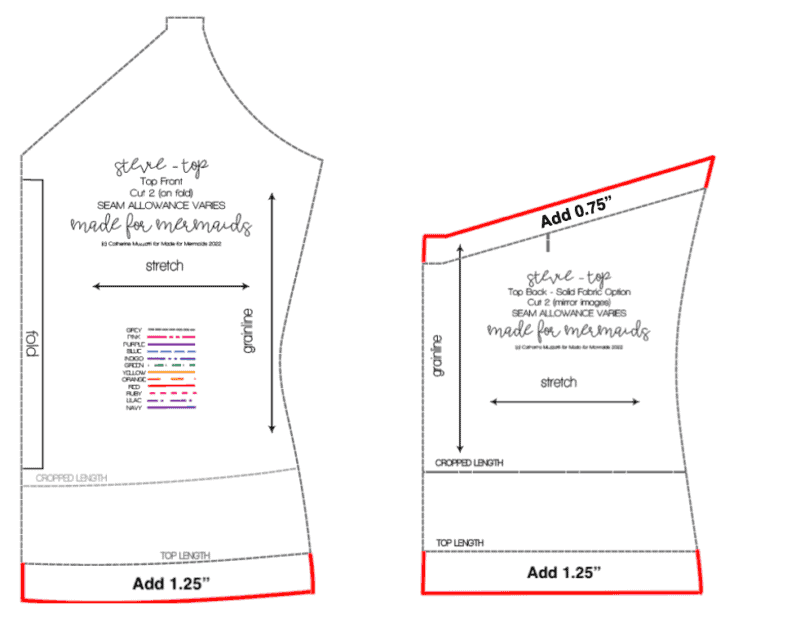
I love the look of the Stevie set, but I knew that I would love to have a shelf bra built into my top. I’m going to show you how I hacked the new Stevie top to have a built-in shelf bra. First off, you’ll need to print your pattern. We’re going to be adding some height to the back piece at the top since we won’t be adding the lace finish on the top back. To do this, you’ll need to add 1/2″ at the top back pattern piece, as seen below.
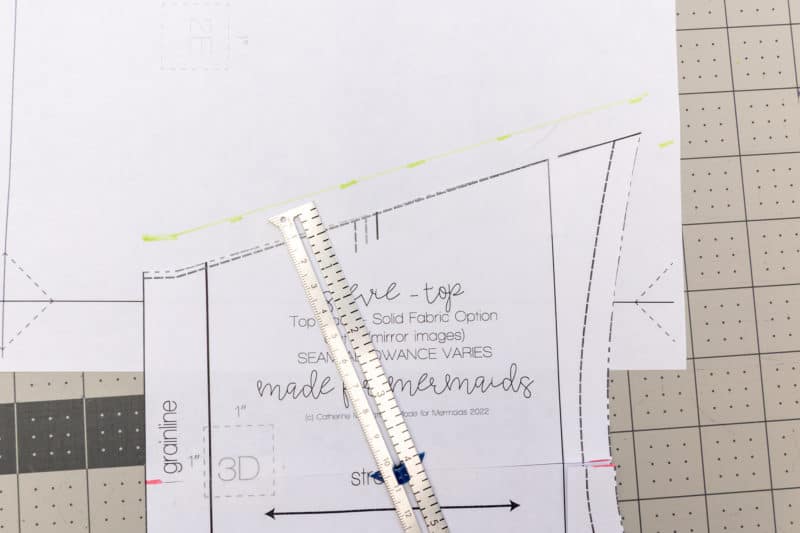
I then cut the pattern piece out with the added length, following the curve on the side seam to extend up as well. I cut out my front and back main fabric pieces using the new back piece and the front piece. I then cut the pattern pieces down to the cropped length for my lining pieces that I’ll use for my shelf bra. I then cut my lining pieces at this shorter length.
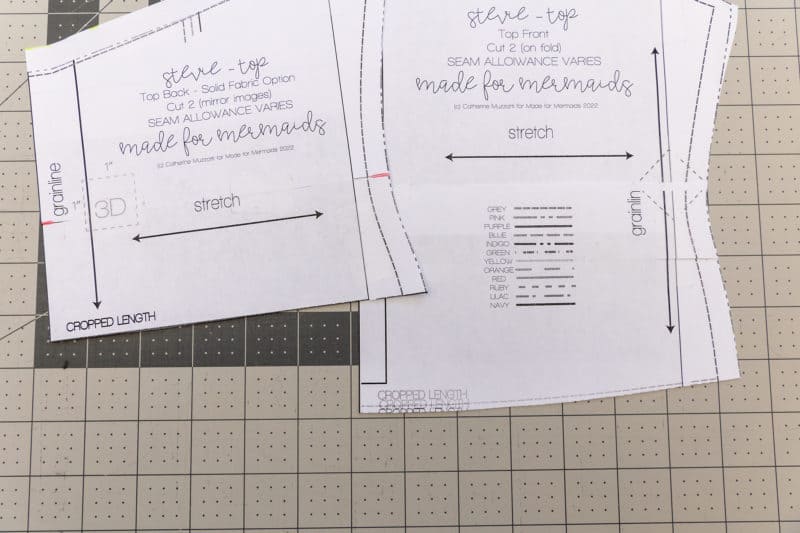
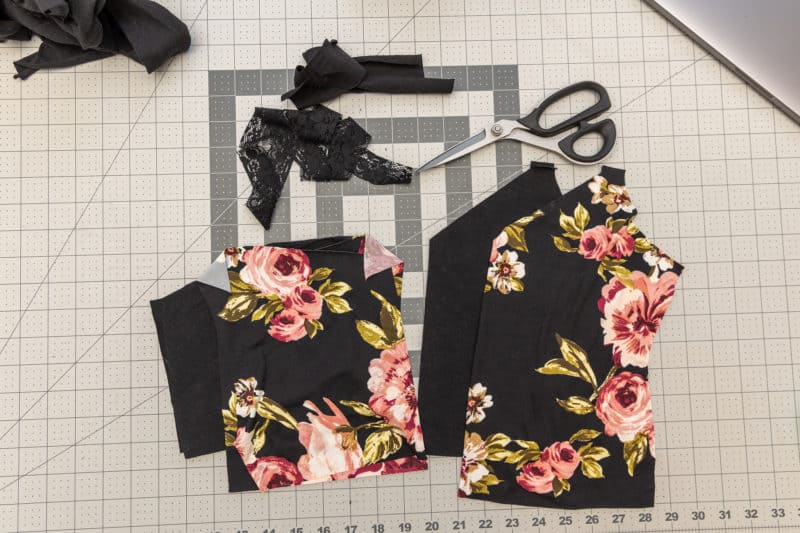
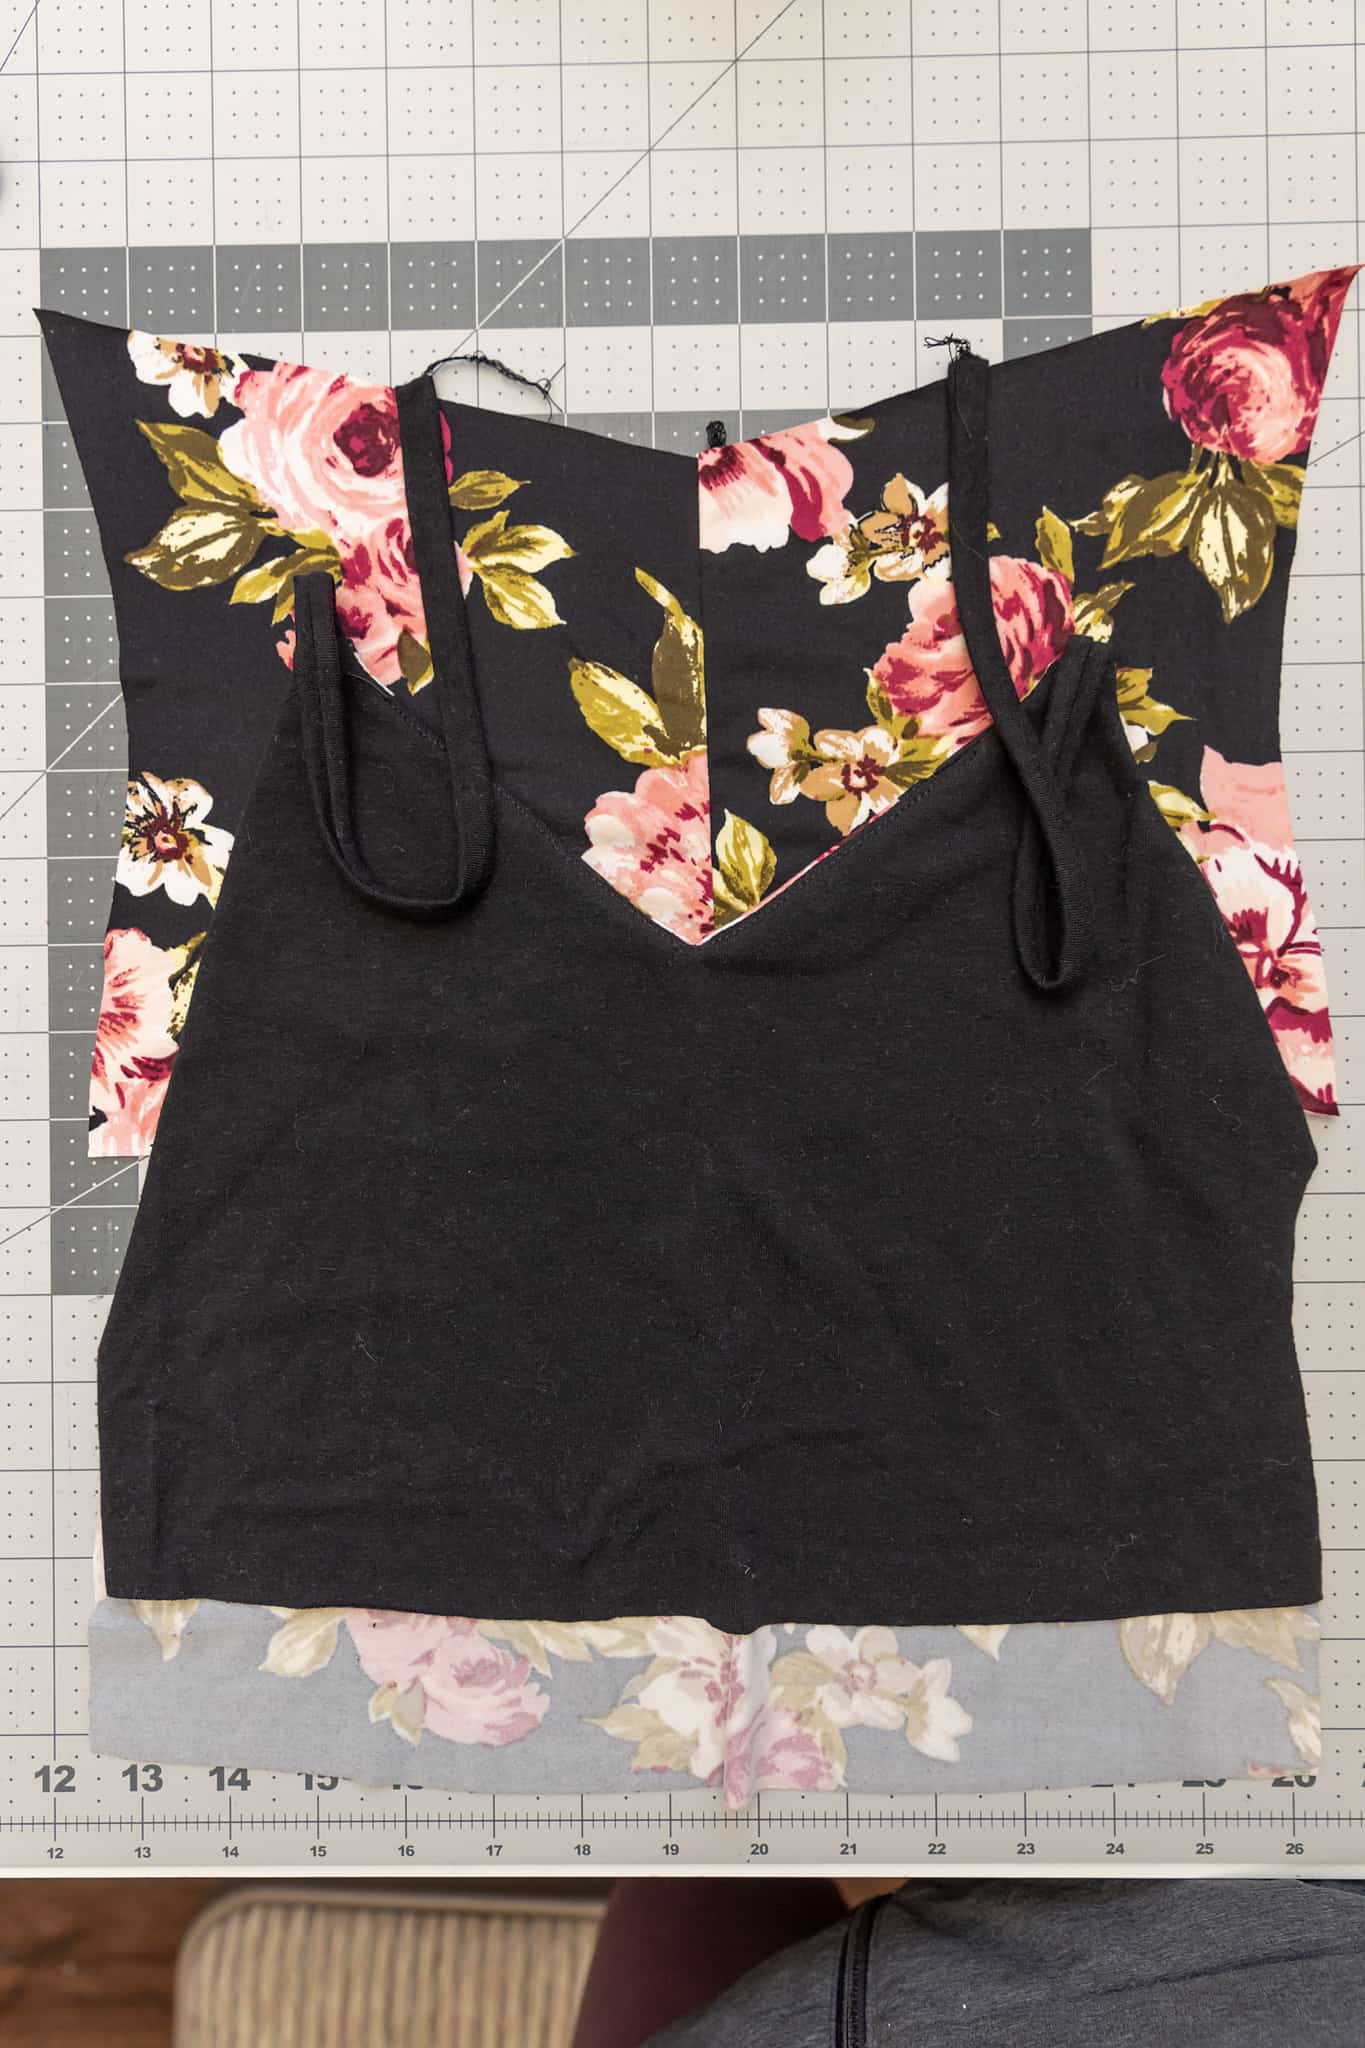
I cut all of the other pieces according to the tutorial. Next, I followed the tutorial for constructing the front bodice. After that, I sewed the back pieces down the center back with right sides together, both the lining and the main.
Next we’ll be sewing the top of the back bodice together. At this point, you can either sew the straps into the top of the back bodice, or you can leave a 1″ opening at the strap markings so that you can adjust the length of the straps before sewing them into the seam. I chose to sew them in at this point. Lining up the front bodice with the main pieces right sides together, I placed the straps (making sure to not twist them) at the markings on the back. You’ll then lay the back lining piece on top aligning the top raw edge and sew at a 1/4″ seam allowance.
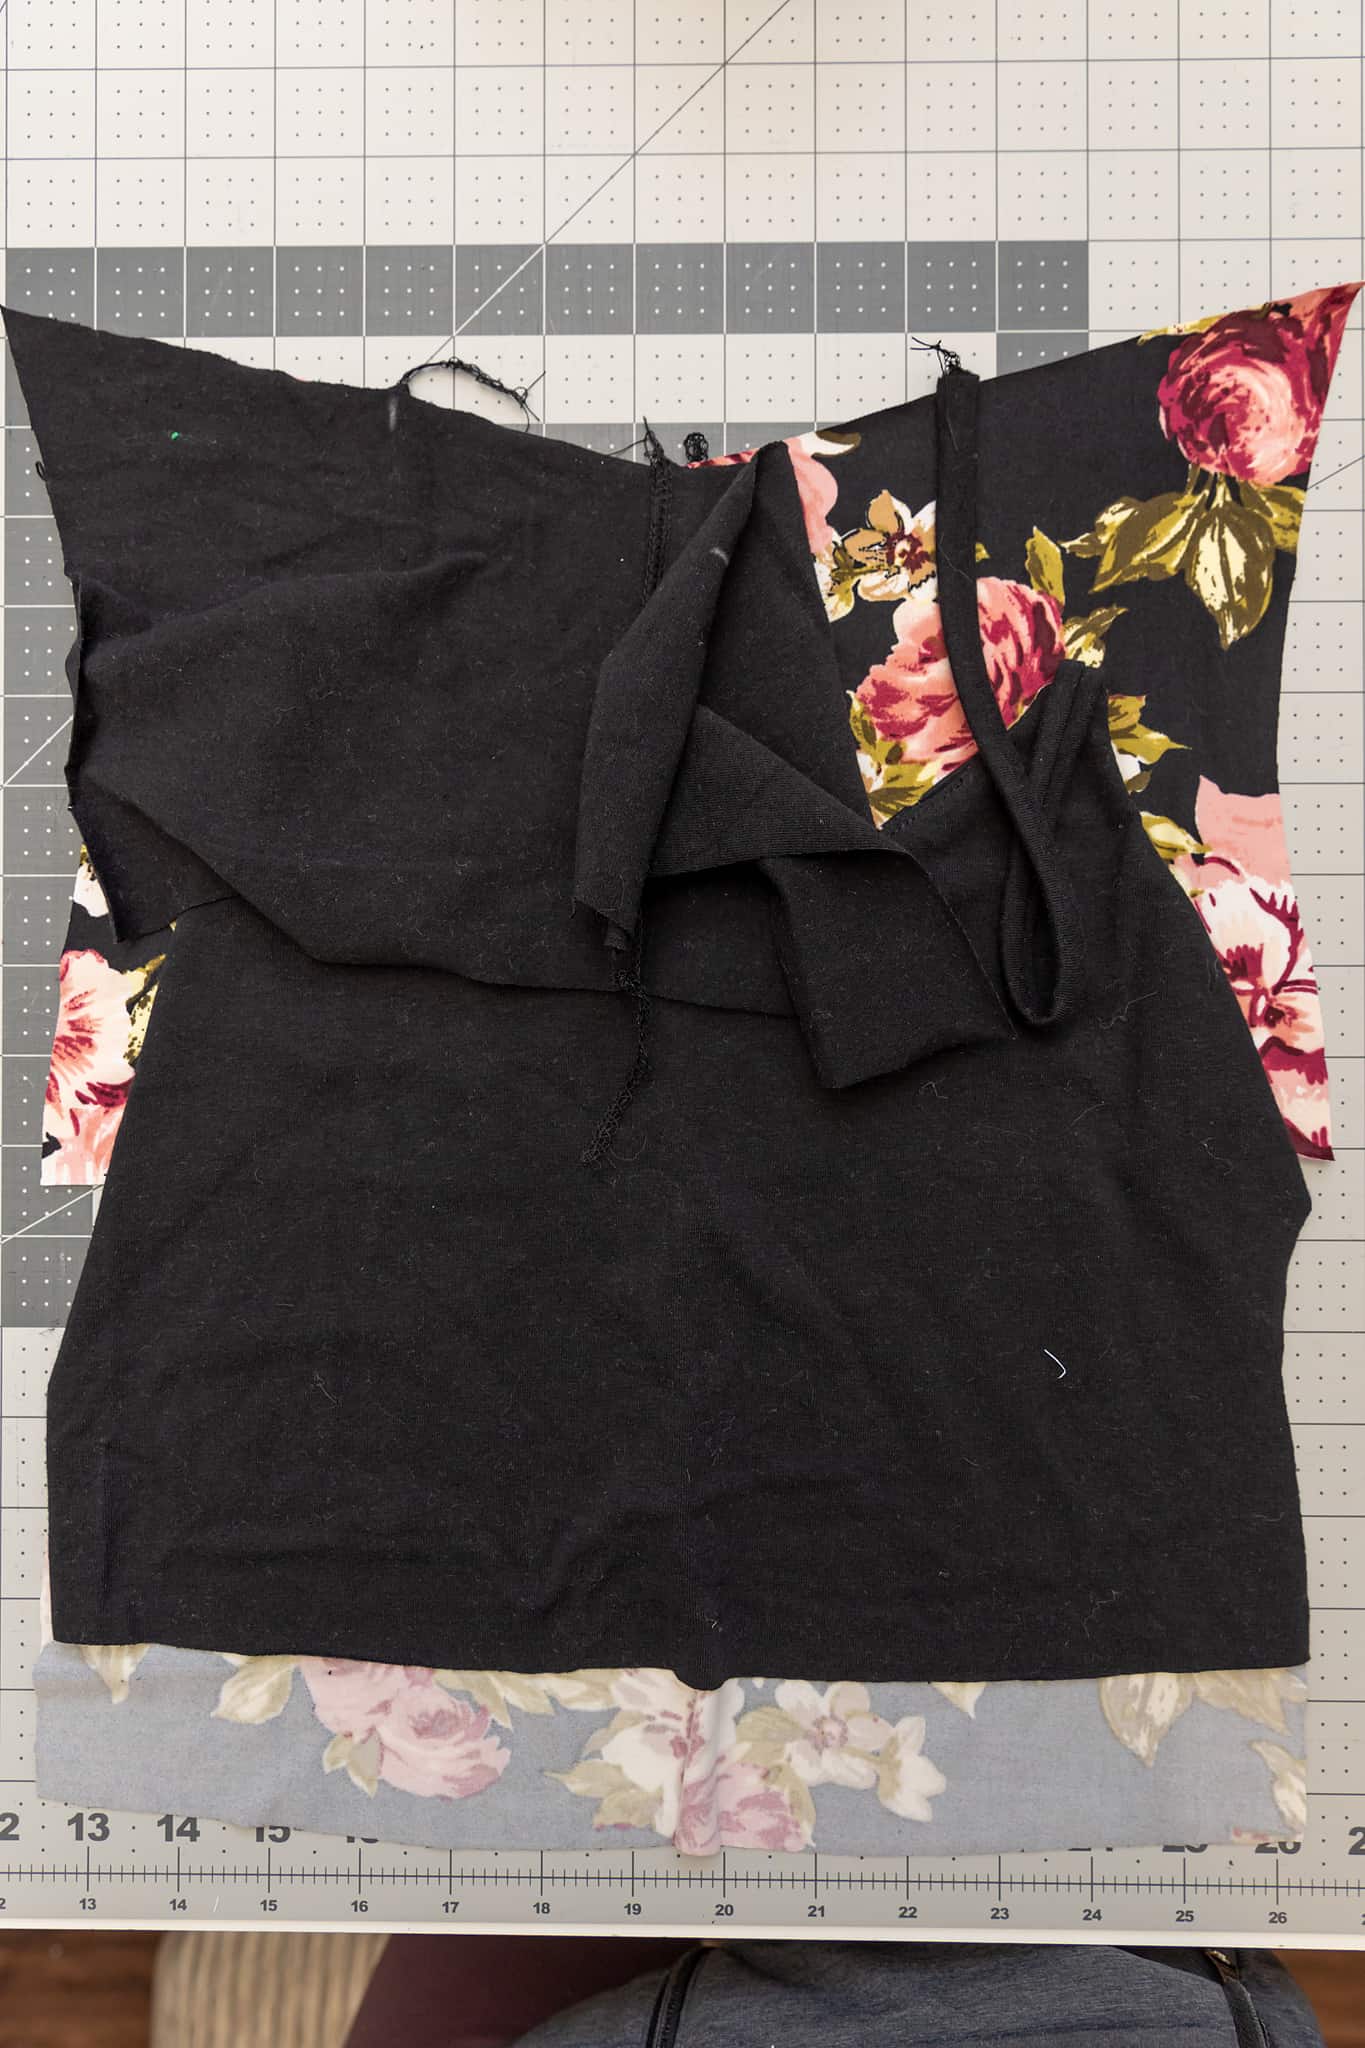
Next, you’ll open up the side seams laying the top main and lining flat. You’ll then do the same for the back. Place the back on top of the front bringing the right sides of the mains together and the linings together, as seen below. Make sure the straps didn’t get twisted, if you already sewed them in. We’ll be sewing on of the side seams together with 1/2″ seam allowance.
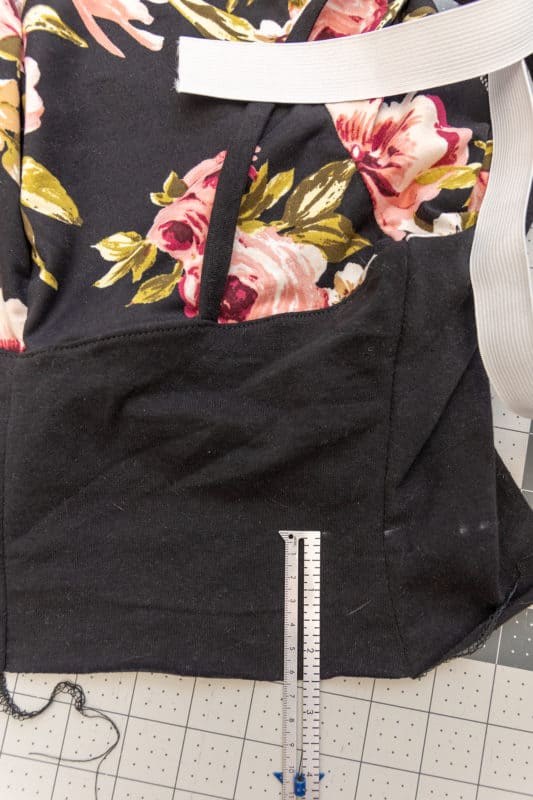
Following the tutorial, you’ll add the lace for the bottom hem. Then using the same method above for the other side seam, you’ll place the main right sides together and the linings right side together and sew the other side with 1/2″ seam allowance. Now you’ll need to try on your top. Measure from your underbust to the raw edge of the lining. Determine how much you’ll want to remove. I used a 1″ elastic for my bra. When I measured, I got 4″ from my underbust to the raw edge. I knew the elastic would take up 1″, and for good measure, I left another 1/2″. So, I knew I wanted to remove 2.5″ from the bottom. Everyone will be a little different when it comes to chest size and how much you might want to take off. It will also depend on the width of elastic that you use. Make sure to take the width of your elastic into account when you measure since it will shorten the lining by the elastic width when it’s finished.
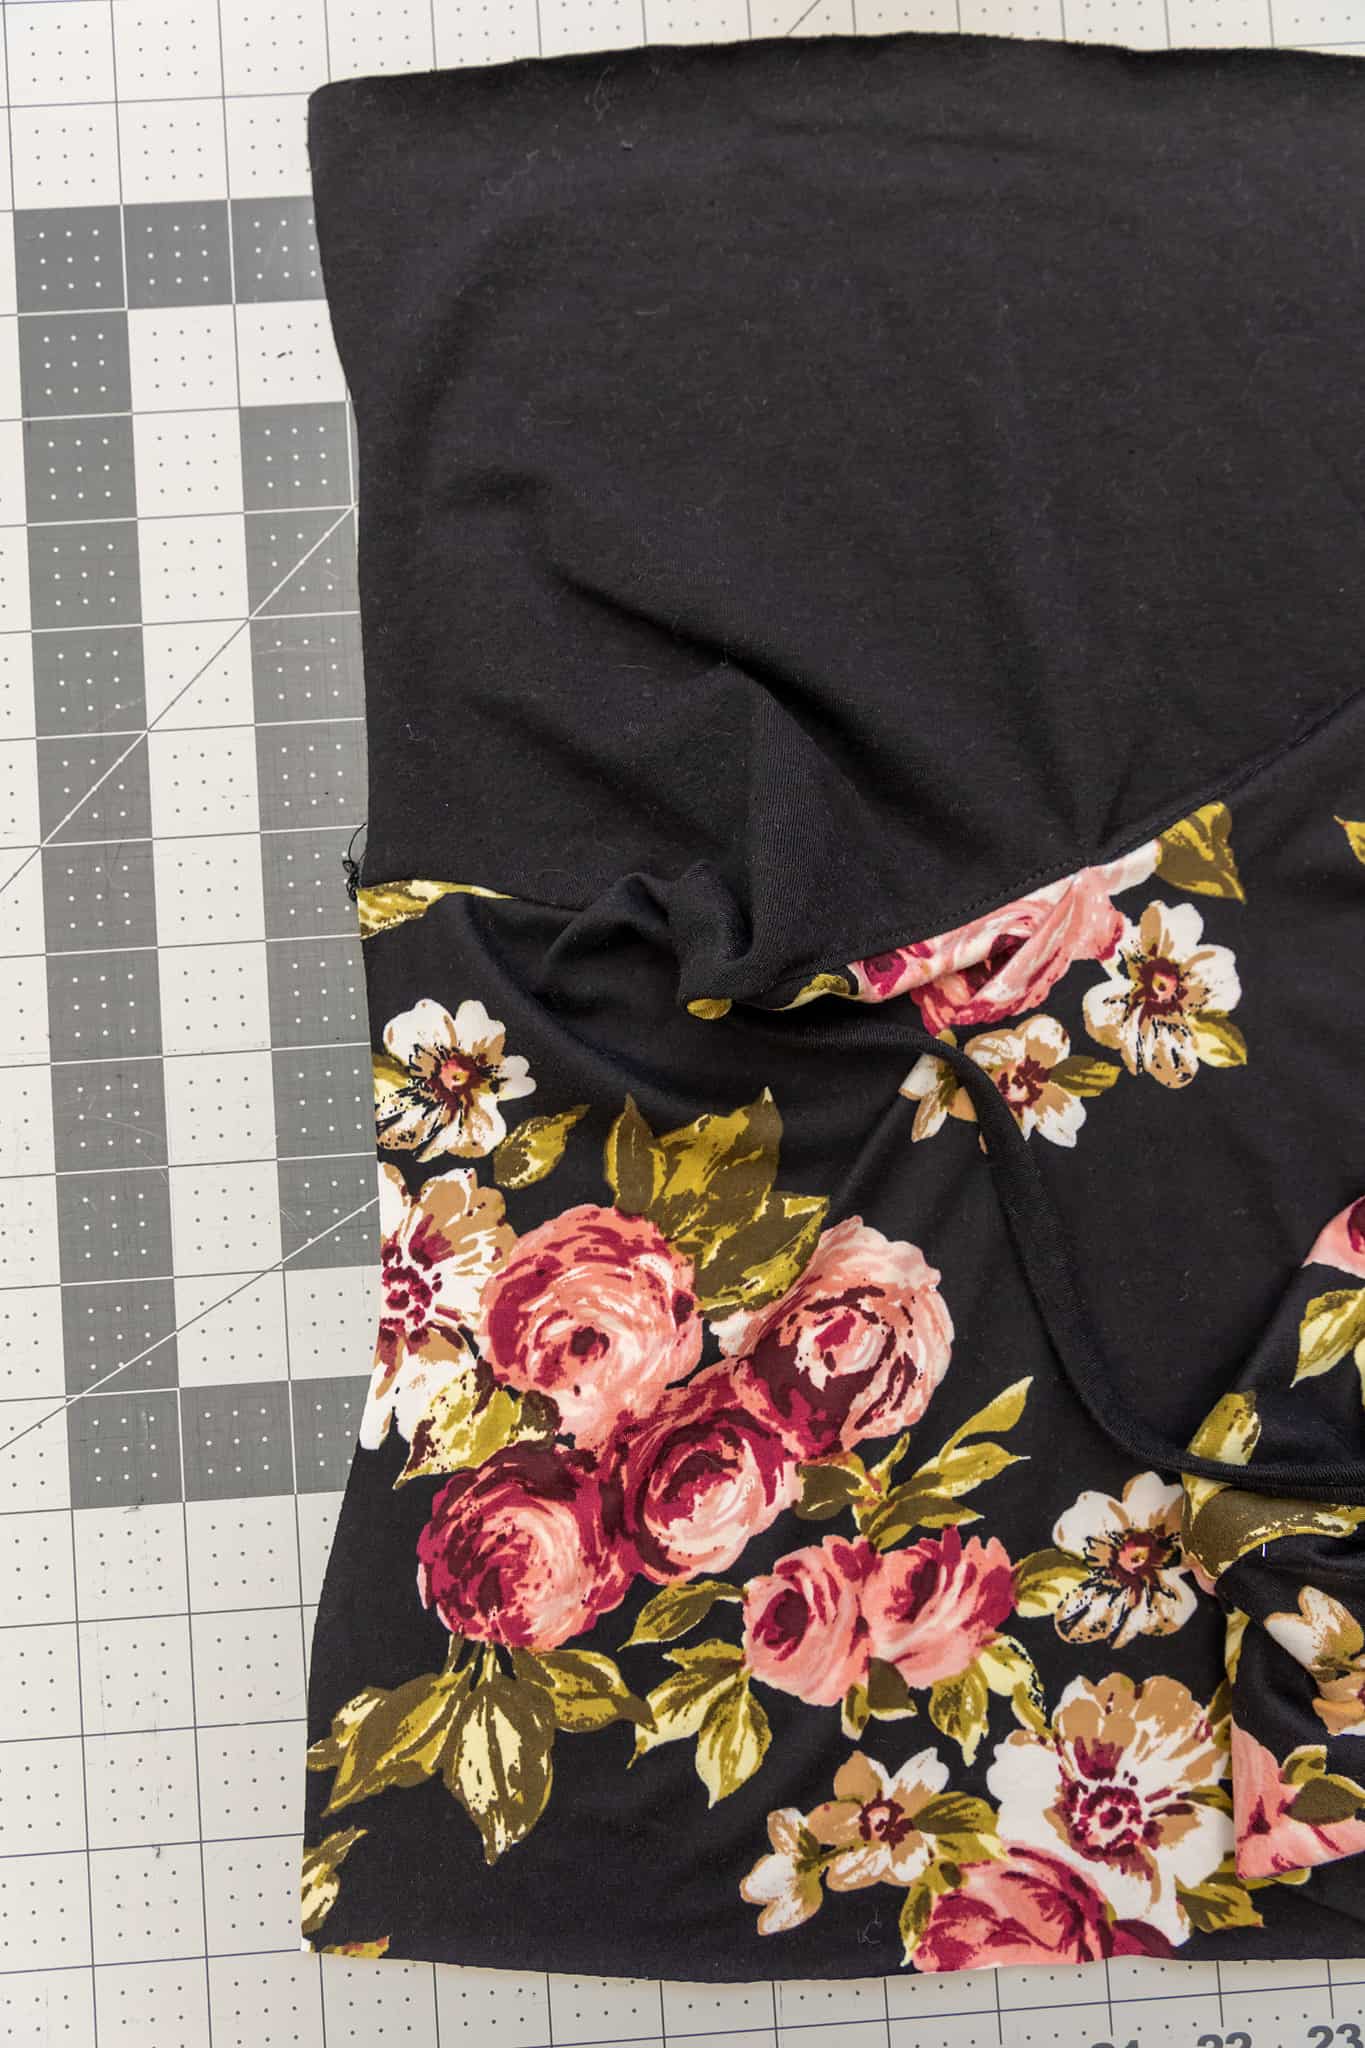
Next, to find out how long to cut my elastic, I wrapped the elastic around my underbust until it felt comfortable to me. I then sewed the elastic into a circle by overlapping the ends. I quartered my elastic and then placed it on the wrong side of my lining at the raw edge.
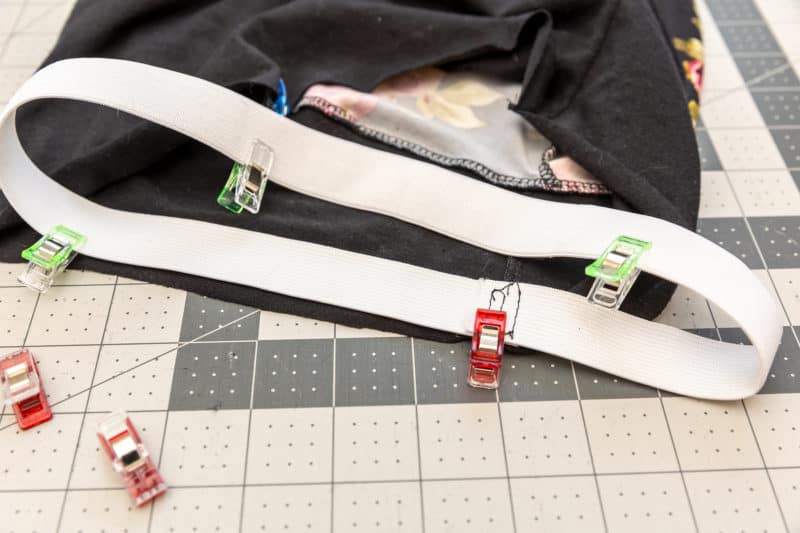
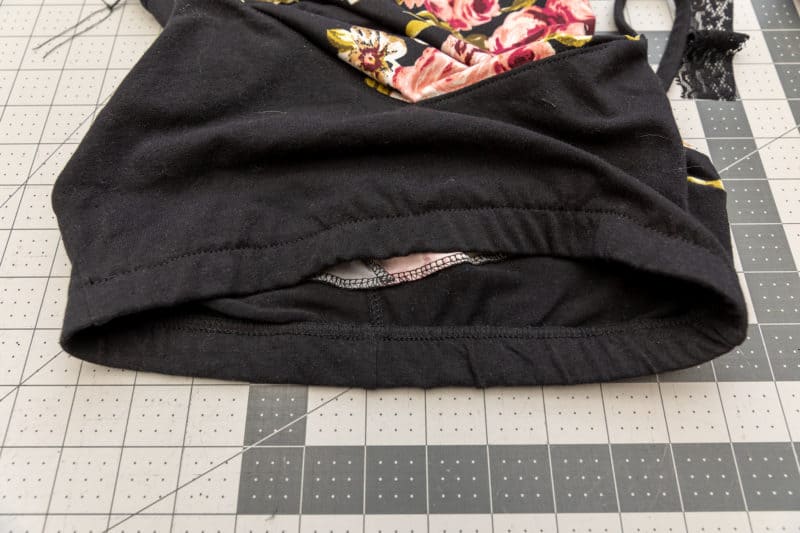
Using a 1/4″ seam allowance, I sewed the elastic to the bottom edge while stretching in-between the quarter points. You’ll then turn the elastic up and edge stitch the elastic in place. If you didn’t place your back straps in the previous steps, you’ll now want to try on your top and adjust the length and then sew your straps in place at the back strap placement lines. Enjoy! – Anna
No Lace Hack
As written, all options for the Stevie top use stretch lace to finish the edges. Not a big fan of lace? Want to wear Stevie for everyday wear instead of loungewear? No worries, because Djem has a no lace hack for you!
For the back bodice construction:
Nursing Hack
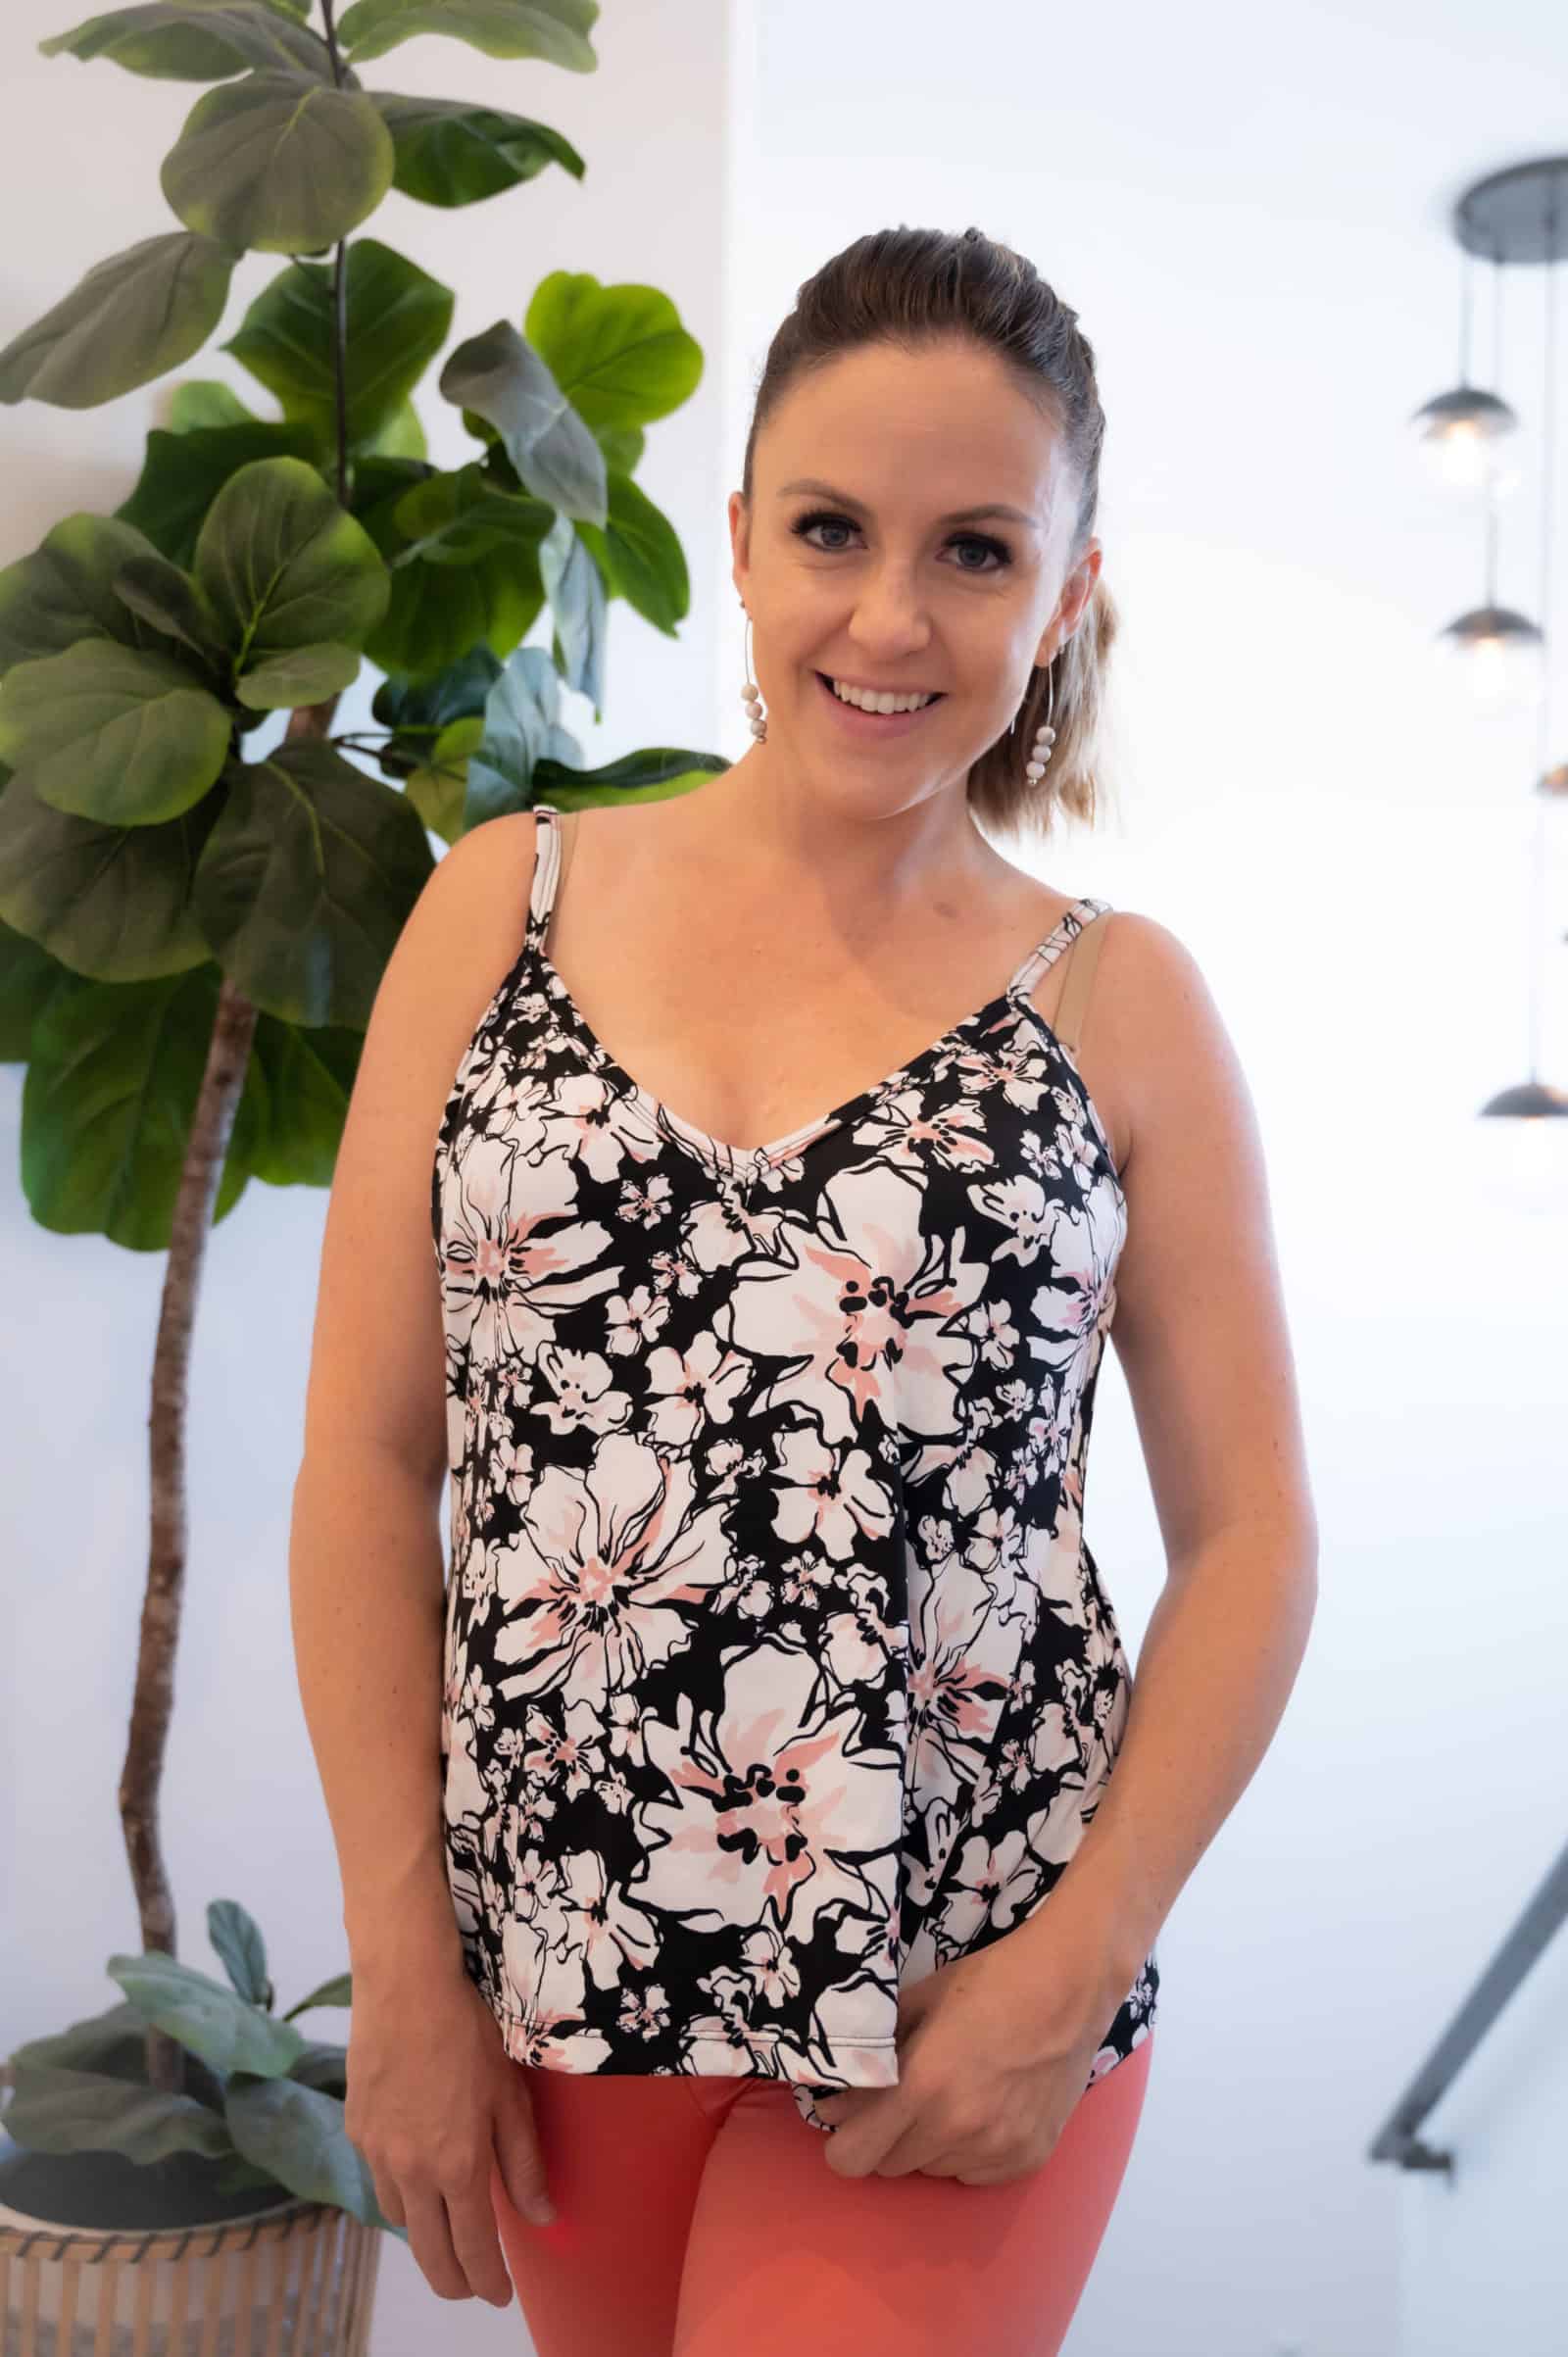
The hack below is actually from our Alana pattern, but you can use the exact same process! Your pieces will just look slightly different since you’re using the Stevie top pattern pieces.
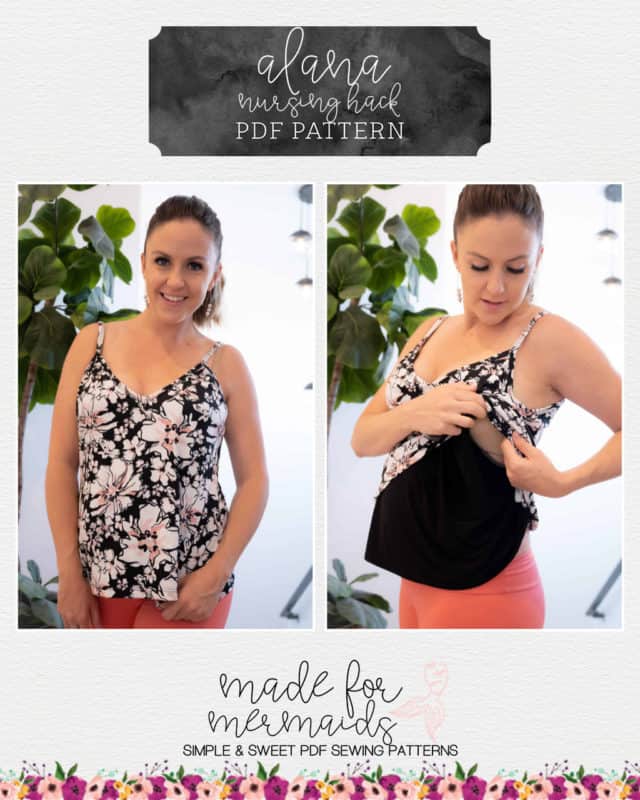
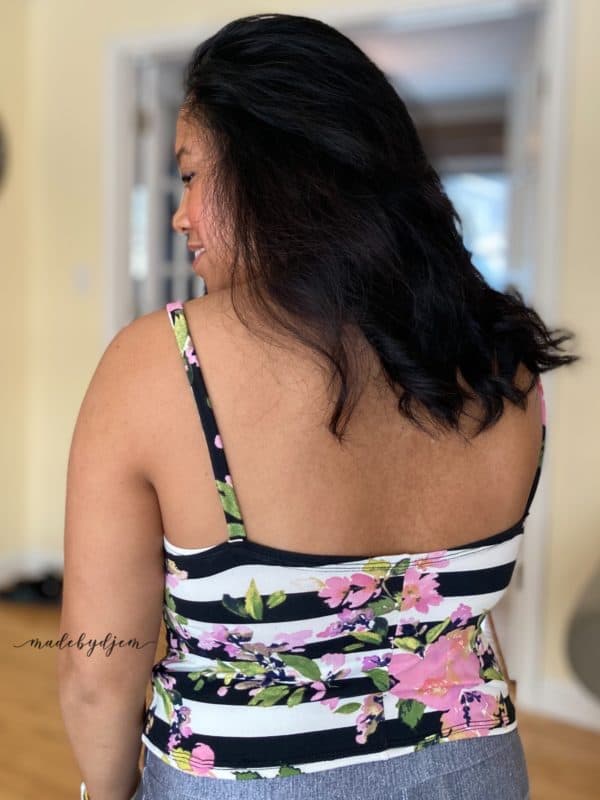
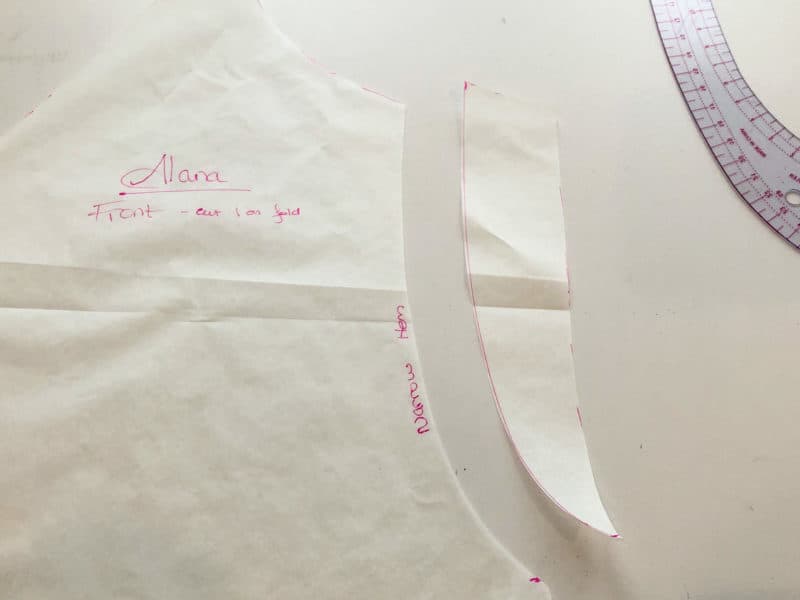
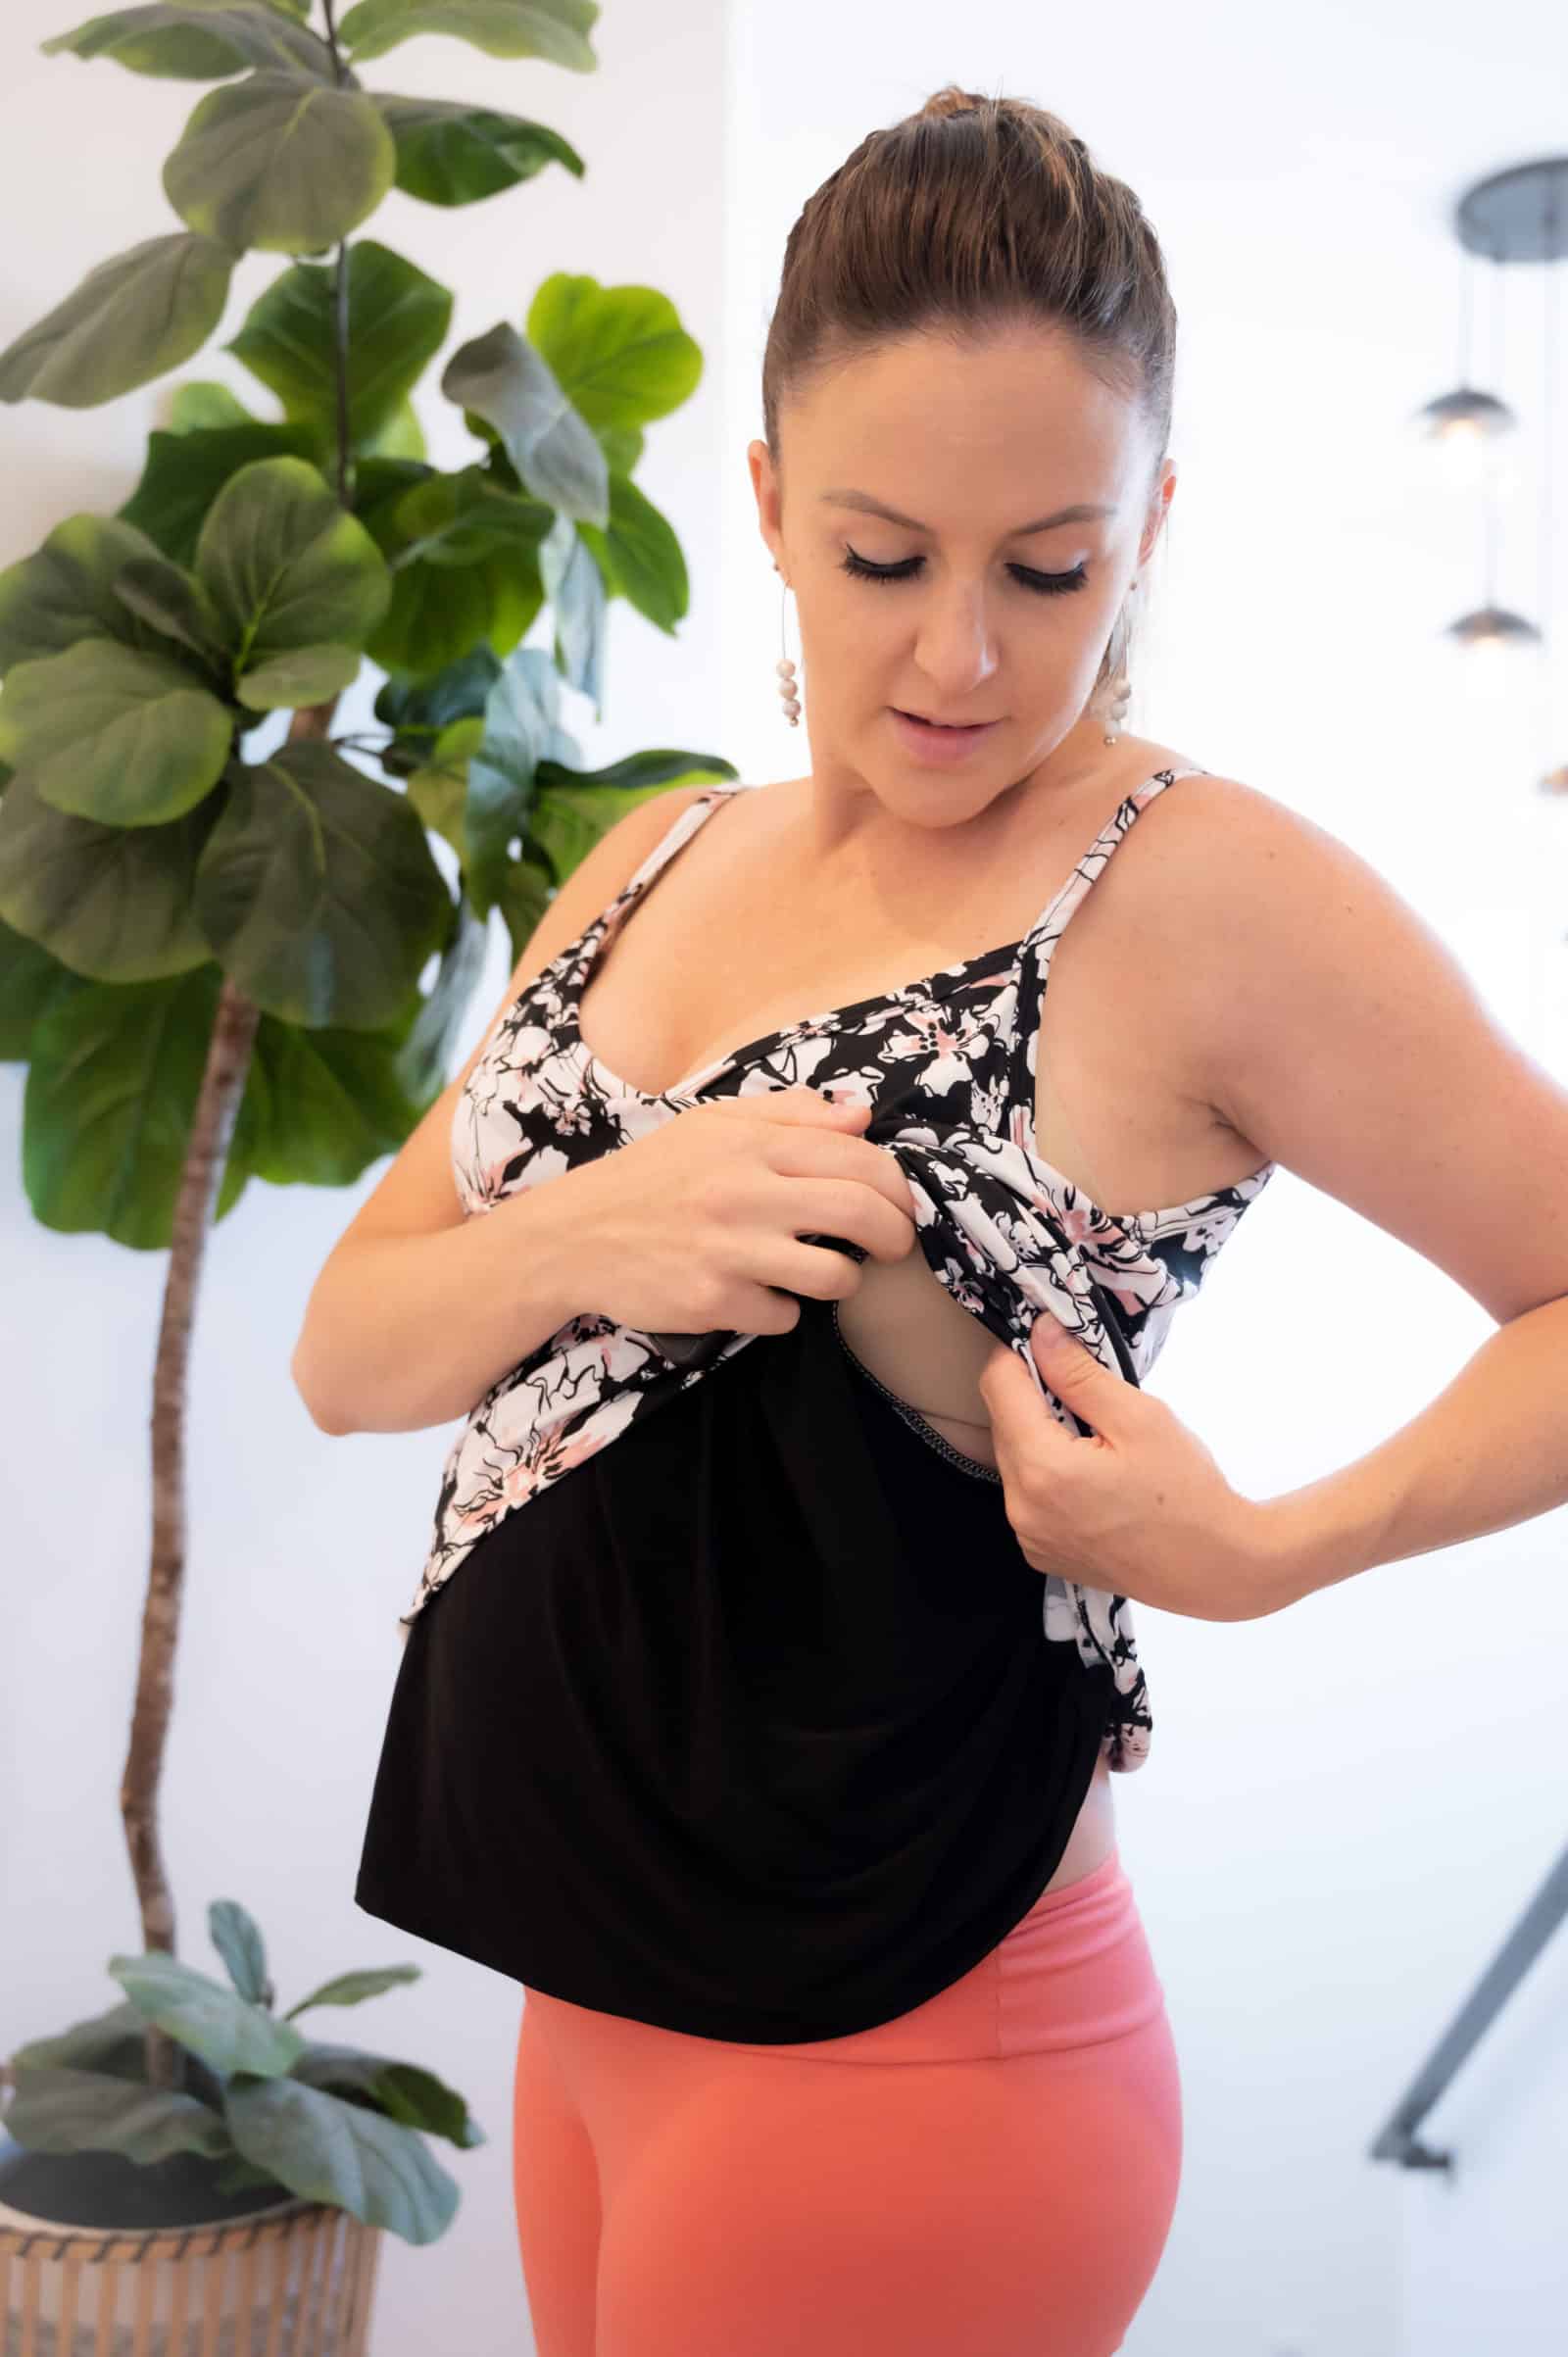
Hey friends! Sonia here with a fun lift-up nursing hack for the Alana tank. This is a simple hack, involving cutting 2 front bodice pieces and altering the layer underneath for nursing access. Let’s get started!
First off, I traced 2 of the front bodice piece, so we can alter one. I marked 1.5″ in from the armscye, though you can adjust this for how much space you’d like to create.
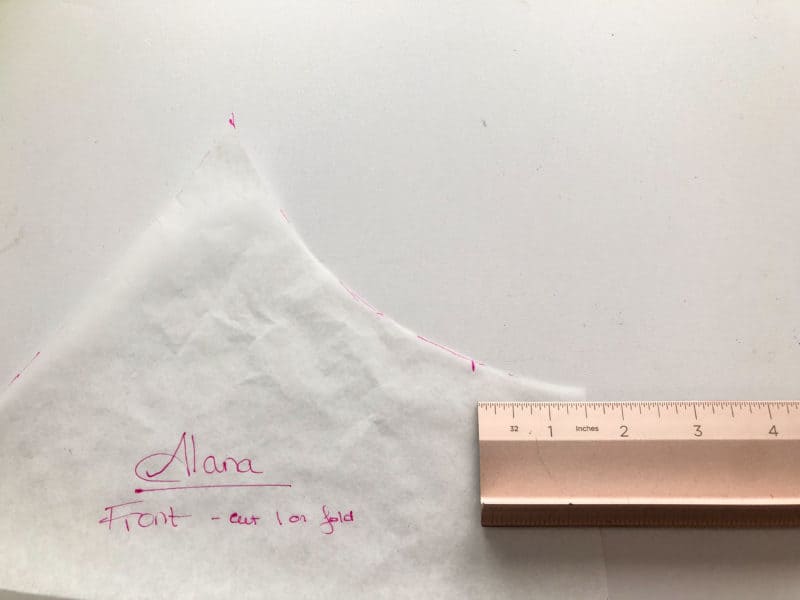
Then, I used a french curve (though you can definitely eyeball this if you don’t have one of these tools!) and curved the nursing opening down to the waist marking on the pattern piece.
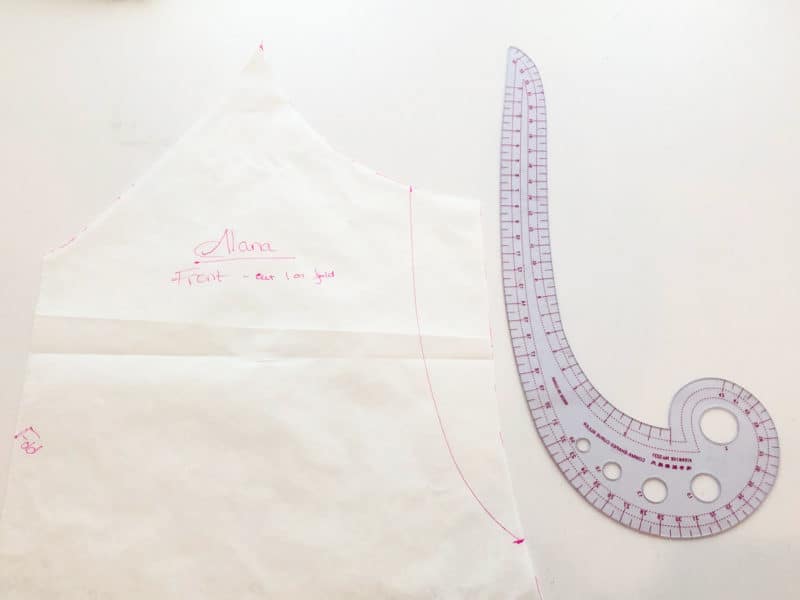
Go ahead and cut along the line you just created – this will be your underneath layer! Go ahead and cut all of your pieces out now, which will include your front bodice pieces, back bodice, and binding pieces.
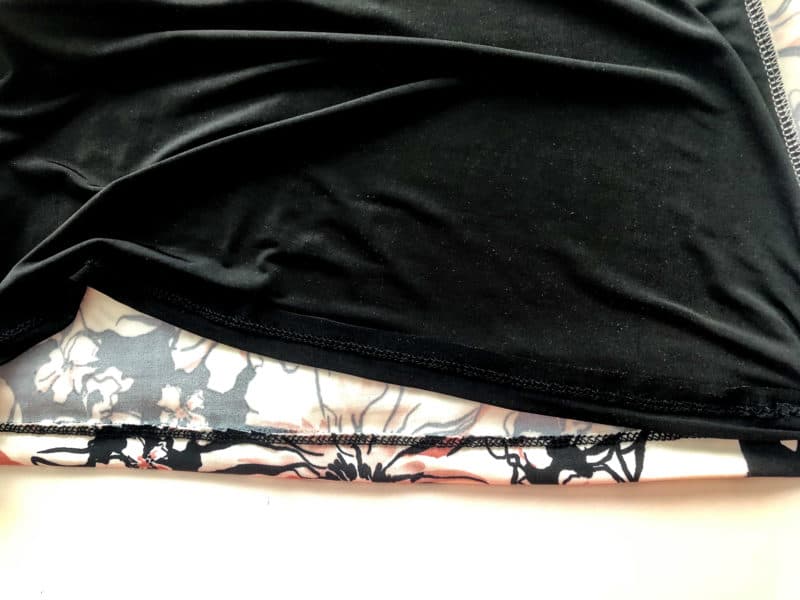
I recommend finishing the cut edge which will be pulled aside for nursing. You can serge this edge and then, if you prefer, fold over and narrow hem it. We’ll baste our two front pieces together along the front neckline and armscye, with your wrong sides together, so the hemmed edge of the underlayer is facing towards the body.
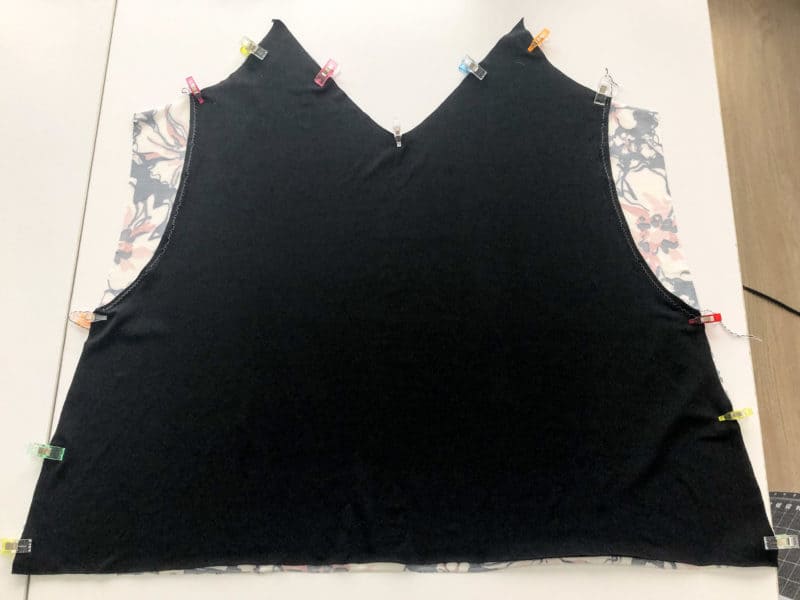
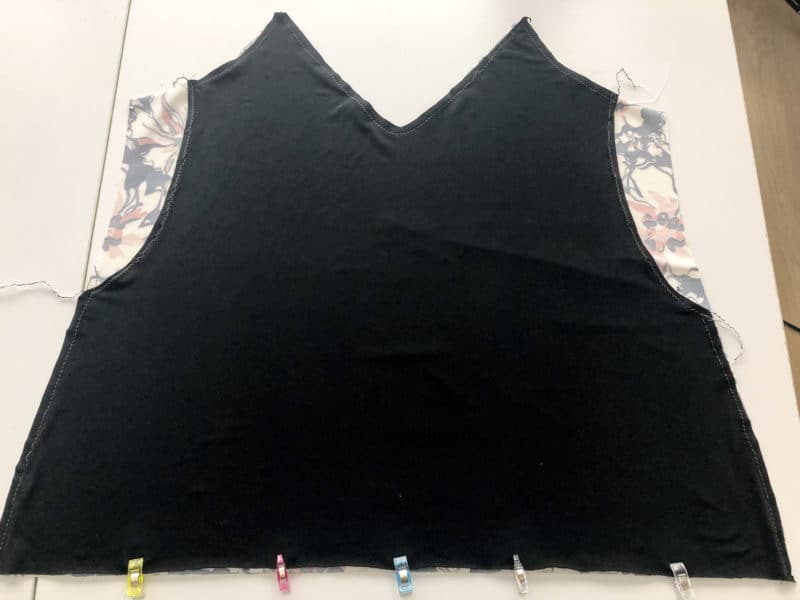
Next, you will HEM the underlayer and then continue to baste the sides. I like to hem the underneath layer a bit shorter than the outer piece will be, to make sure it doesn’t show.
After this, go ahead and use the two front layers as one, and assemble the rest of the tank per the instructions! The great thing (or one of many, I should say!) about this pattern is the nice swing style it leaves lots of room, so it’s great for both maternity and nursing 😀 Hope you enjoy this hack! – Sonia
Leave a Reply