
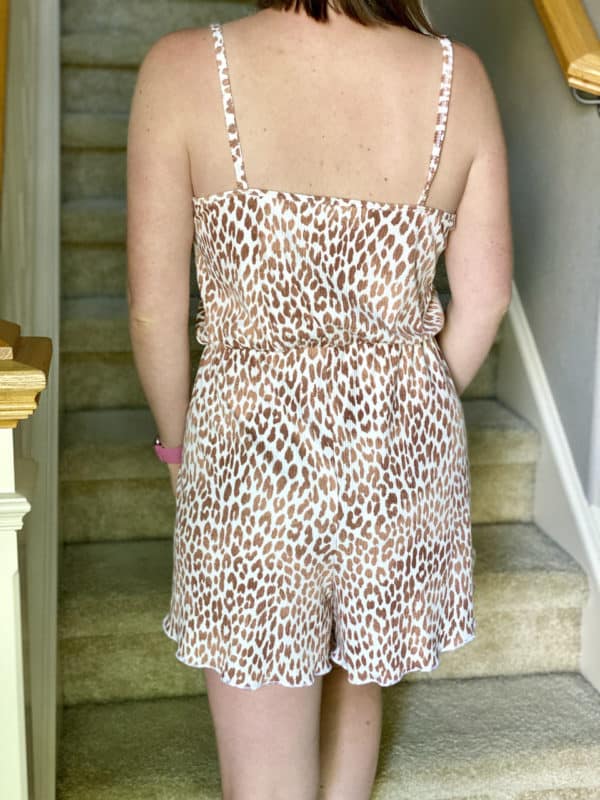
If you want to up your pajama game, I’ve got the make for you! I’ve been living in my Betty’s since I discovered the pattern last year. Depending on the fabric selection, they can provide enough coverage to walk around the house but with a sexy flare from the lace front. Then the knit Saraya shorts came out. These crossover leg shorts are flirty and fun. I felt like they would be perfect to use for the bottoms of a Betty romper so that’s what I’ve done!
I’m using a rib knit from Mily Mae Fabrics for this mashup. I find rib knit is comfortable to sleep in and isn’t sheer. I wear rompers around the house with my kids, to take out the trash and sleep in so I prefer a fabric that has enough coverage. Rib knit is one of my favorite fabric bases to work with as it’s easy to sew, has stretch and recovery plus comes in so many color and pattern options. Just keep in mind all rib knit is not the same when picking it out.

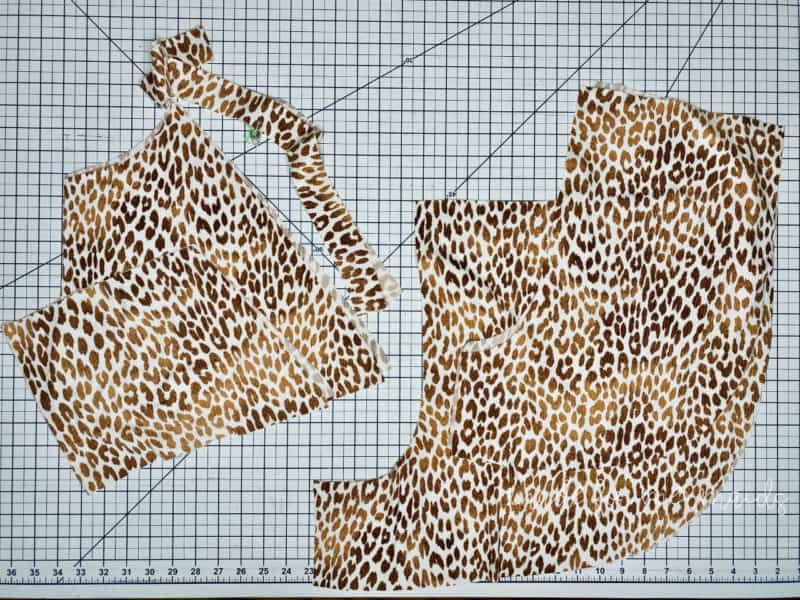
For this mashup, you’ll need both the Betty and Saraya patterns. Since this is a romper, start by measuring your trunk length and comparing it to the Betty size chart. If you need to make trunk or height adjustments, you’ll need to know where that needs to be done first. The side waist is drafted for 8″ and waist to hip for 8.25″. I have a longer trunk and add 2″ to the waist to hip therefore will only add to the bottoms.
Cut the top of the Betty including any trunk or height adjustments. You should be cutting 2 mirror front bodice, 1 back bodice on fold and 1 binding piece. (If you are making the adjustable straps, you’ll cut the 2 additional pieces for that.)
Before you cut the Saraya for the bottom, we need to make an adjustment. The Saraya pattern has a waistband which we won’t be using. Instead we will need to add that height to both the front and back bottom pieces. Add 2″ to the preferred waist cut line on the front and back pattern pieces and then cut mirrored pieces of both. You can cut any length of Saraya but need to adjust from the preferred waist cut line for this to work. My Saraya bottoms are cut at the 3.5″ inseam. (Since I needed to adjust for my trunk length, I’ve added 2″ to adjust for the waistband height and 2″ for my trunk so a total of 4″.)

You should now have cut all the pieces for the Betty top (left) and Saraya bottoms (right).
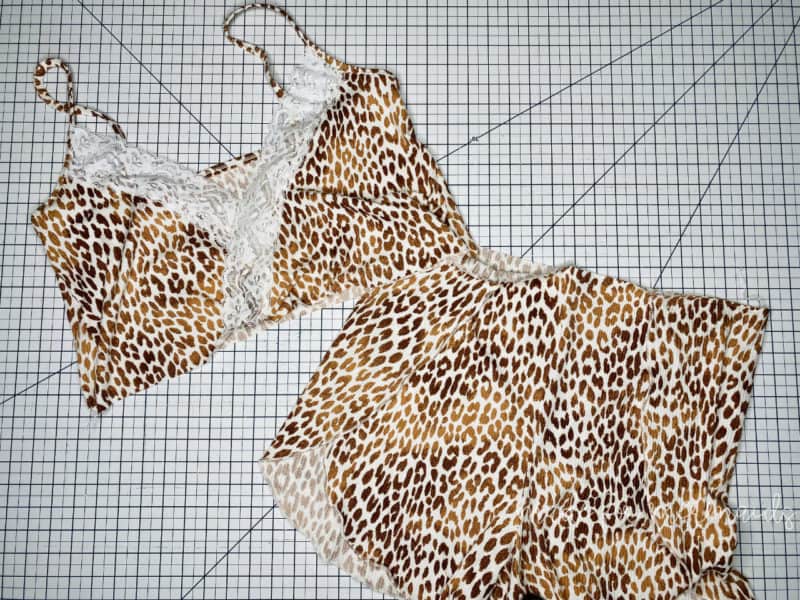
I followed the tutorials to assemble each pattern on it’s own before joining them together. For Betty, I attached the lace, sewed the side seams and finished the binding. I basted the front overlap and straps in place. I’ll adjust the strap length later. For Saraya, I sewed the inseams together then used a lettuce hem finish. I’ve basted the top overlap in place.
Let’s join the two pieces to get our romper. Start by turning the Betty top wrong side out and the Saraya bottoms right side out. Find the quarter points of both and add pins or clips. Slip the Betty bodice RST over the Saraya matching the quarter points and making sure the fronts are lined up.
NOTE: To ensure you have the fronts meeting, the Saraya front has the overlap on top while the Betty front has the lace.
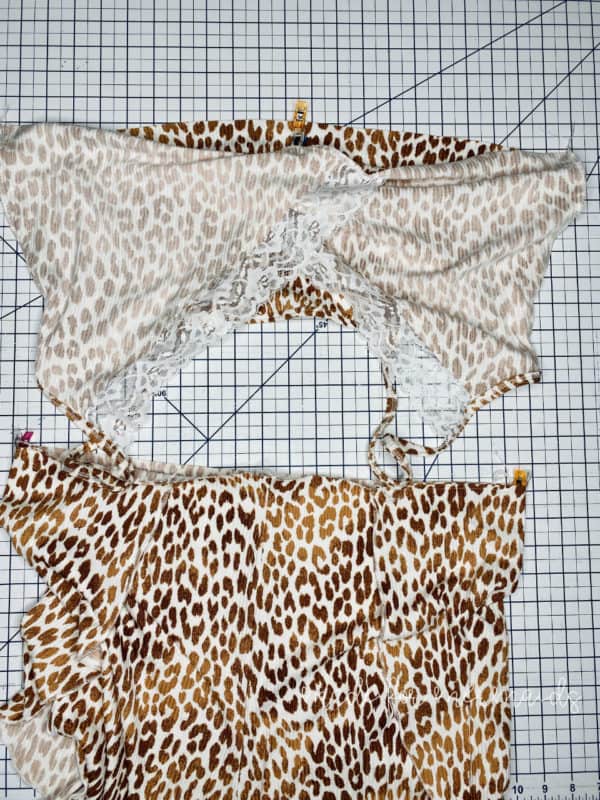
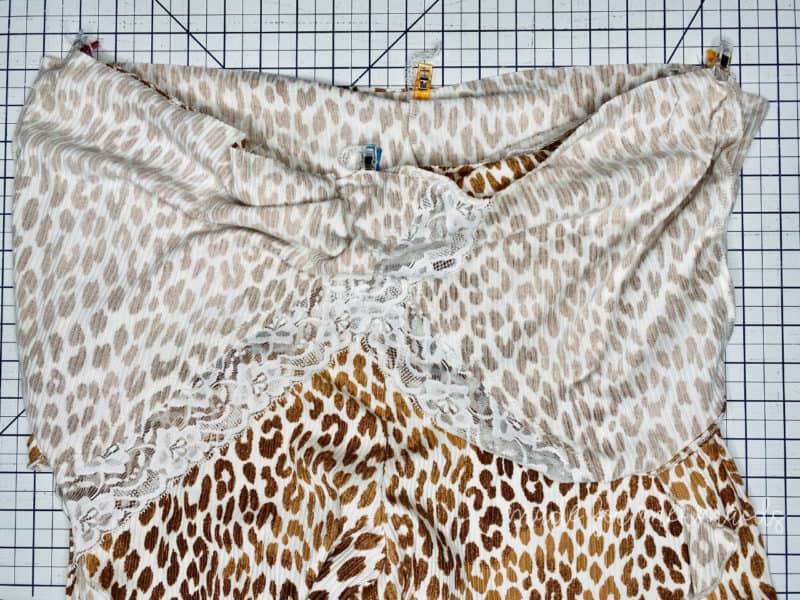
I’d recommend stitching/serging your pieces together at this point. I didn’t and regret it as the next step becomes more difficult.
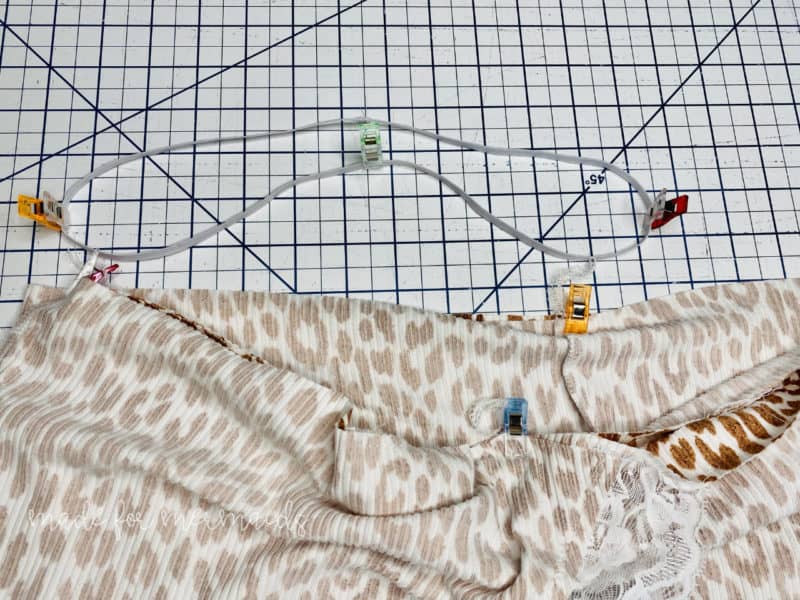
Cut a piece of 1/4″ elastic according to the chart on Betty for your waist size. Overlap the elastic 1/2″ and stitch with a zig zag stitch to create a continuous loop. Quarter the elastic. Pin the elastic to the quarter points of the now assembled romper. (I say to pin the elastic to the main because I’ve found the clips can pop off when stretching to fit.) Stitch the elastic over the stitching using a serger or zig zag stitch. The elastic is going to need to be stretched quite a bit when attached since Betty is designed to have a draping effect, the elastic holds the romper at the natural waist.
Now that your romper is assembled, try it on and adjust the straps as needed. -Katie


Leave a Reply