
The Bonny Leggings are Made for Mermaids free leggings pattern for youth, and it is well-loved by many! One question we see a lot in the Facebook group is, “can I use Bonny Leggings for swim?” And the answer is YES!
I’ve been using the Bonny Leggings as swim bottoms for years. But for my littlest kids, I didn’t really do anything differently except use swim fabric. And that worked just fine (especially for diaper age kiddos that still wear swim diapers everywhere). My bigger kiddos, though, want a lil’ more. So here are some ideas to make the Bonny Leggings the perfect swim bottom for y’all!
Simple Lined Version

First up is a super simple lined hack, for when you want to use Bonny as is, but need a bit more coverage. All you need is your Bonny pattern, swim fabric of your choice, and lining fabric. I used regular ole’ swim for the lining, but you can certainly use actual swim lining-specific fabric instead!
My son wanted longer shorts, so I cut the MAIN fabric in a hacked length of his preference. For the LINING fabric, I cut at the shorties length.

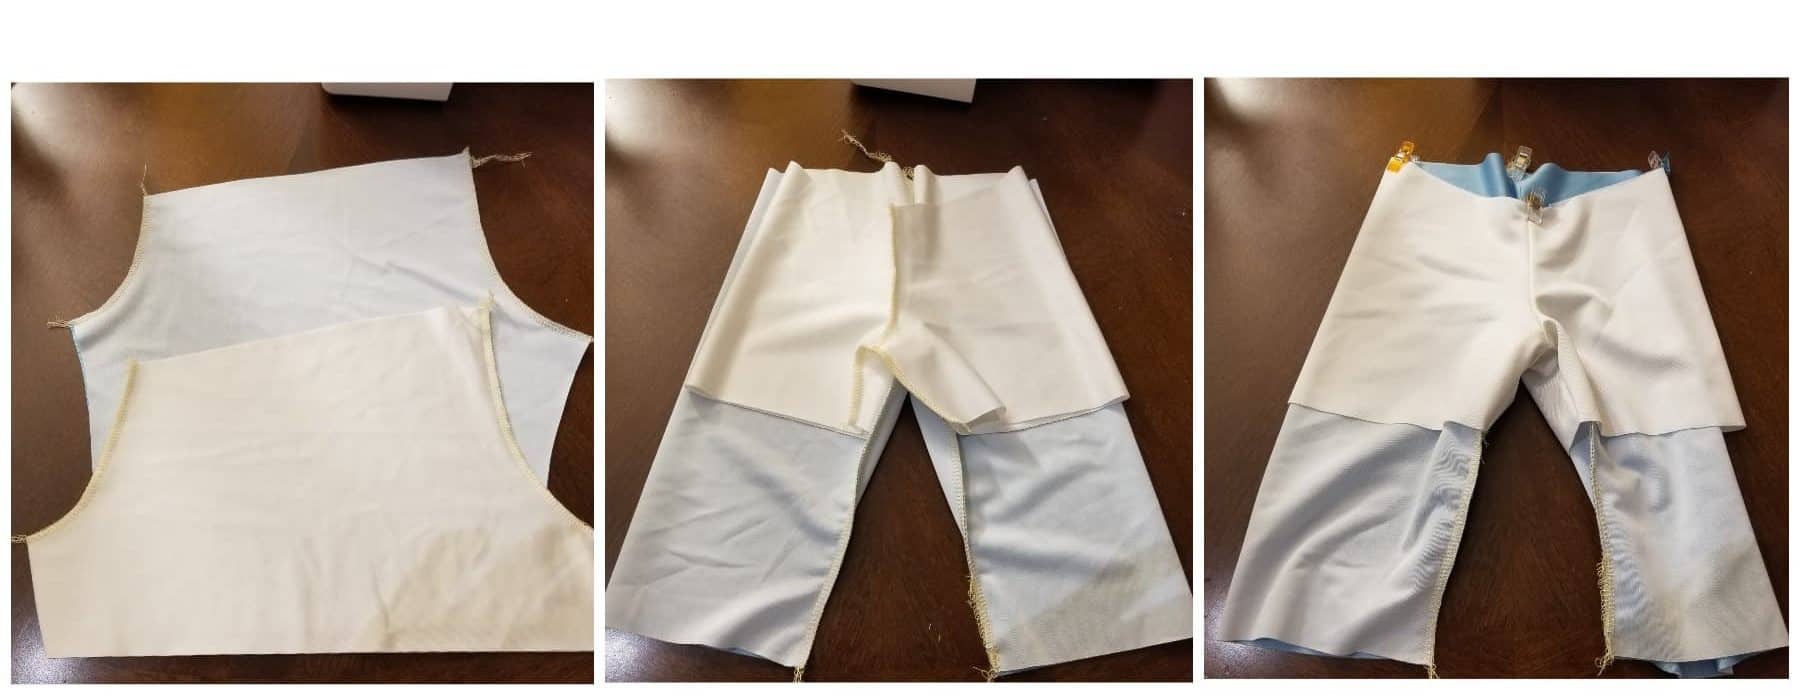
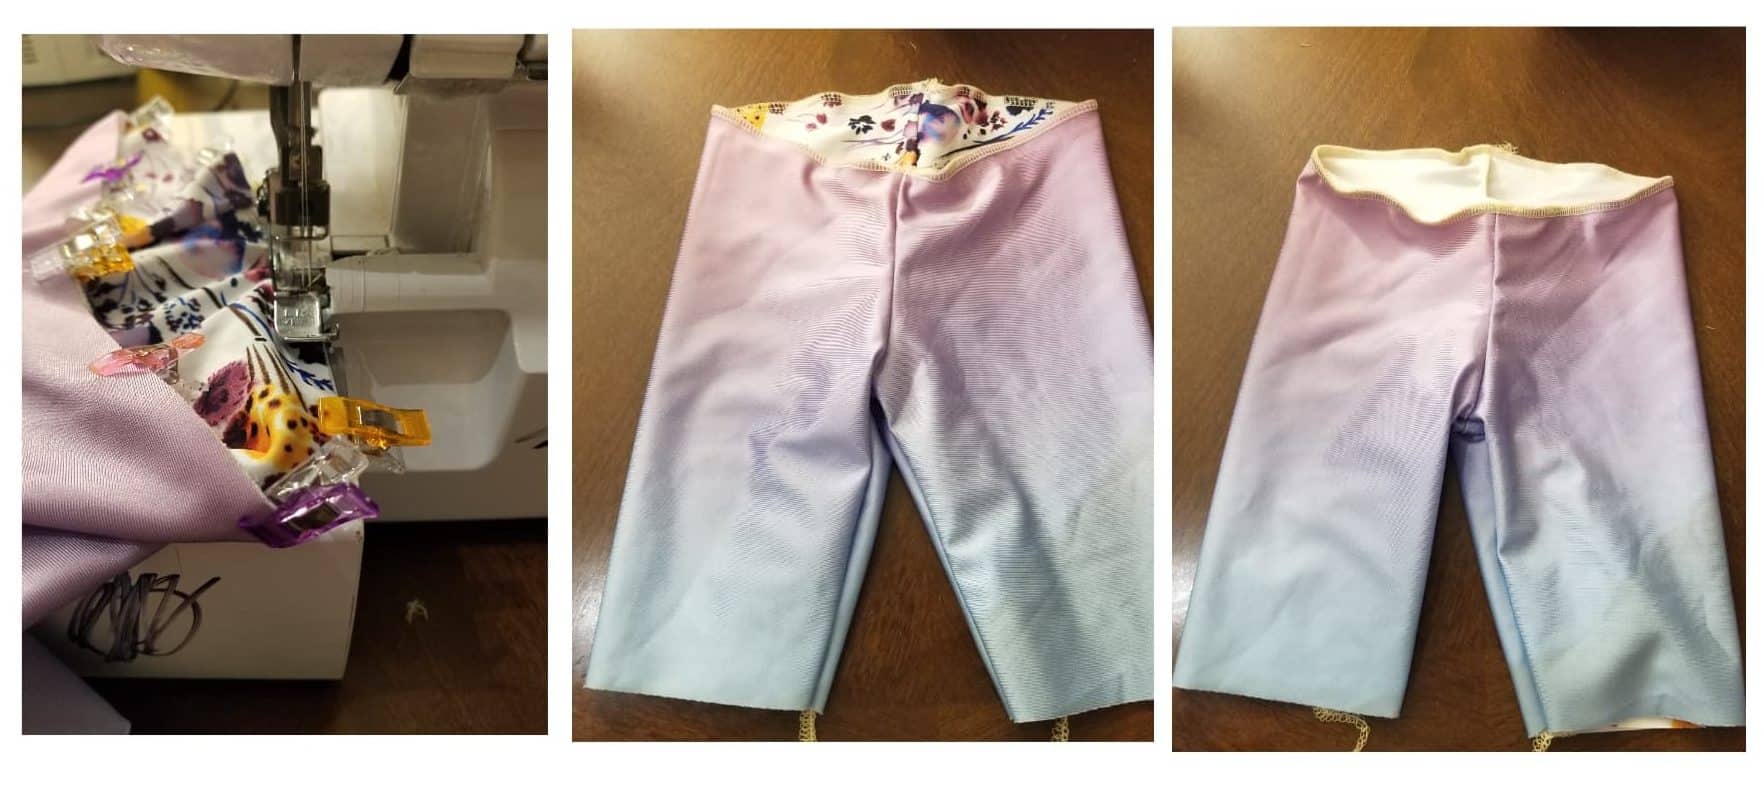
Sew up each pair of shorts at the crotch seams, front and back, with right sides together. [PRO TIP! Use a washable glue stick to “baste” your swim pieces together—super easy and they won’t shift at all like they might with pins or clips! Allow to dry for a few minutes before sewing, and you’re good to go!] Then line up the seams one on top of the other so you can sew the inseam (I like to start at the crotch point and go down each leg, but you can also just start at the hem and go up and back down to the other side if you prefer!).
Once your shorts are sewn up, turn your lining right side OUT and pull those up over the still “inside out” main leggings. Make sure the rises line up properly (the front rise is lower than the back.) HIGHLY RECOMMEND basting these two layers together before attaching the waistband, but if you, too, like to live ‘dangerously’, all the power to ya! 😊
-

- First shows crotch seams sewn up. Second, main and lining are all sewn up! Third, lining is turned right side out over main and ready for basting and a waistband!
Now, add your waistband and hem as per the pattern instructions and you’re good to go! No need to hem the lining, as swim won’t fray and most don’t roll or anything. So easy!

Fully Lined and Reversible

This pair of Bonny Swim Shorts is the hardcore version of swim shorts! They’re fully lined, reversible, and reinforced with elastic in the waistband so there’s NO chance they’re coming off in the rough play on the beach or in the pool! Honestly, the elastic in the waistband is going to be overkill for most people, but it is nice to have for piece of mind!
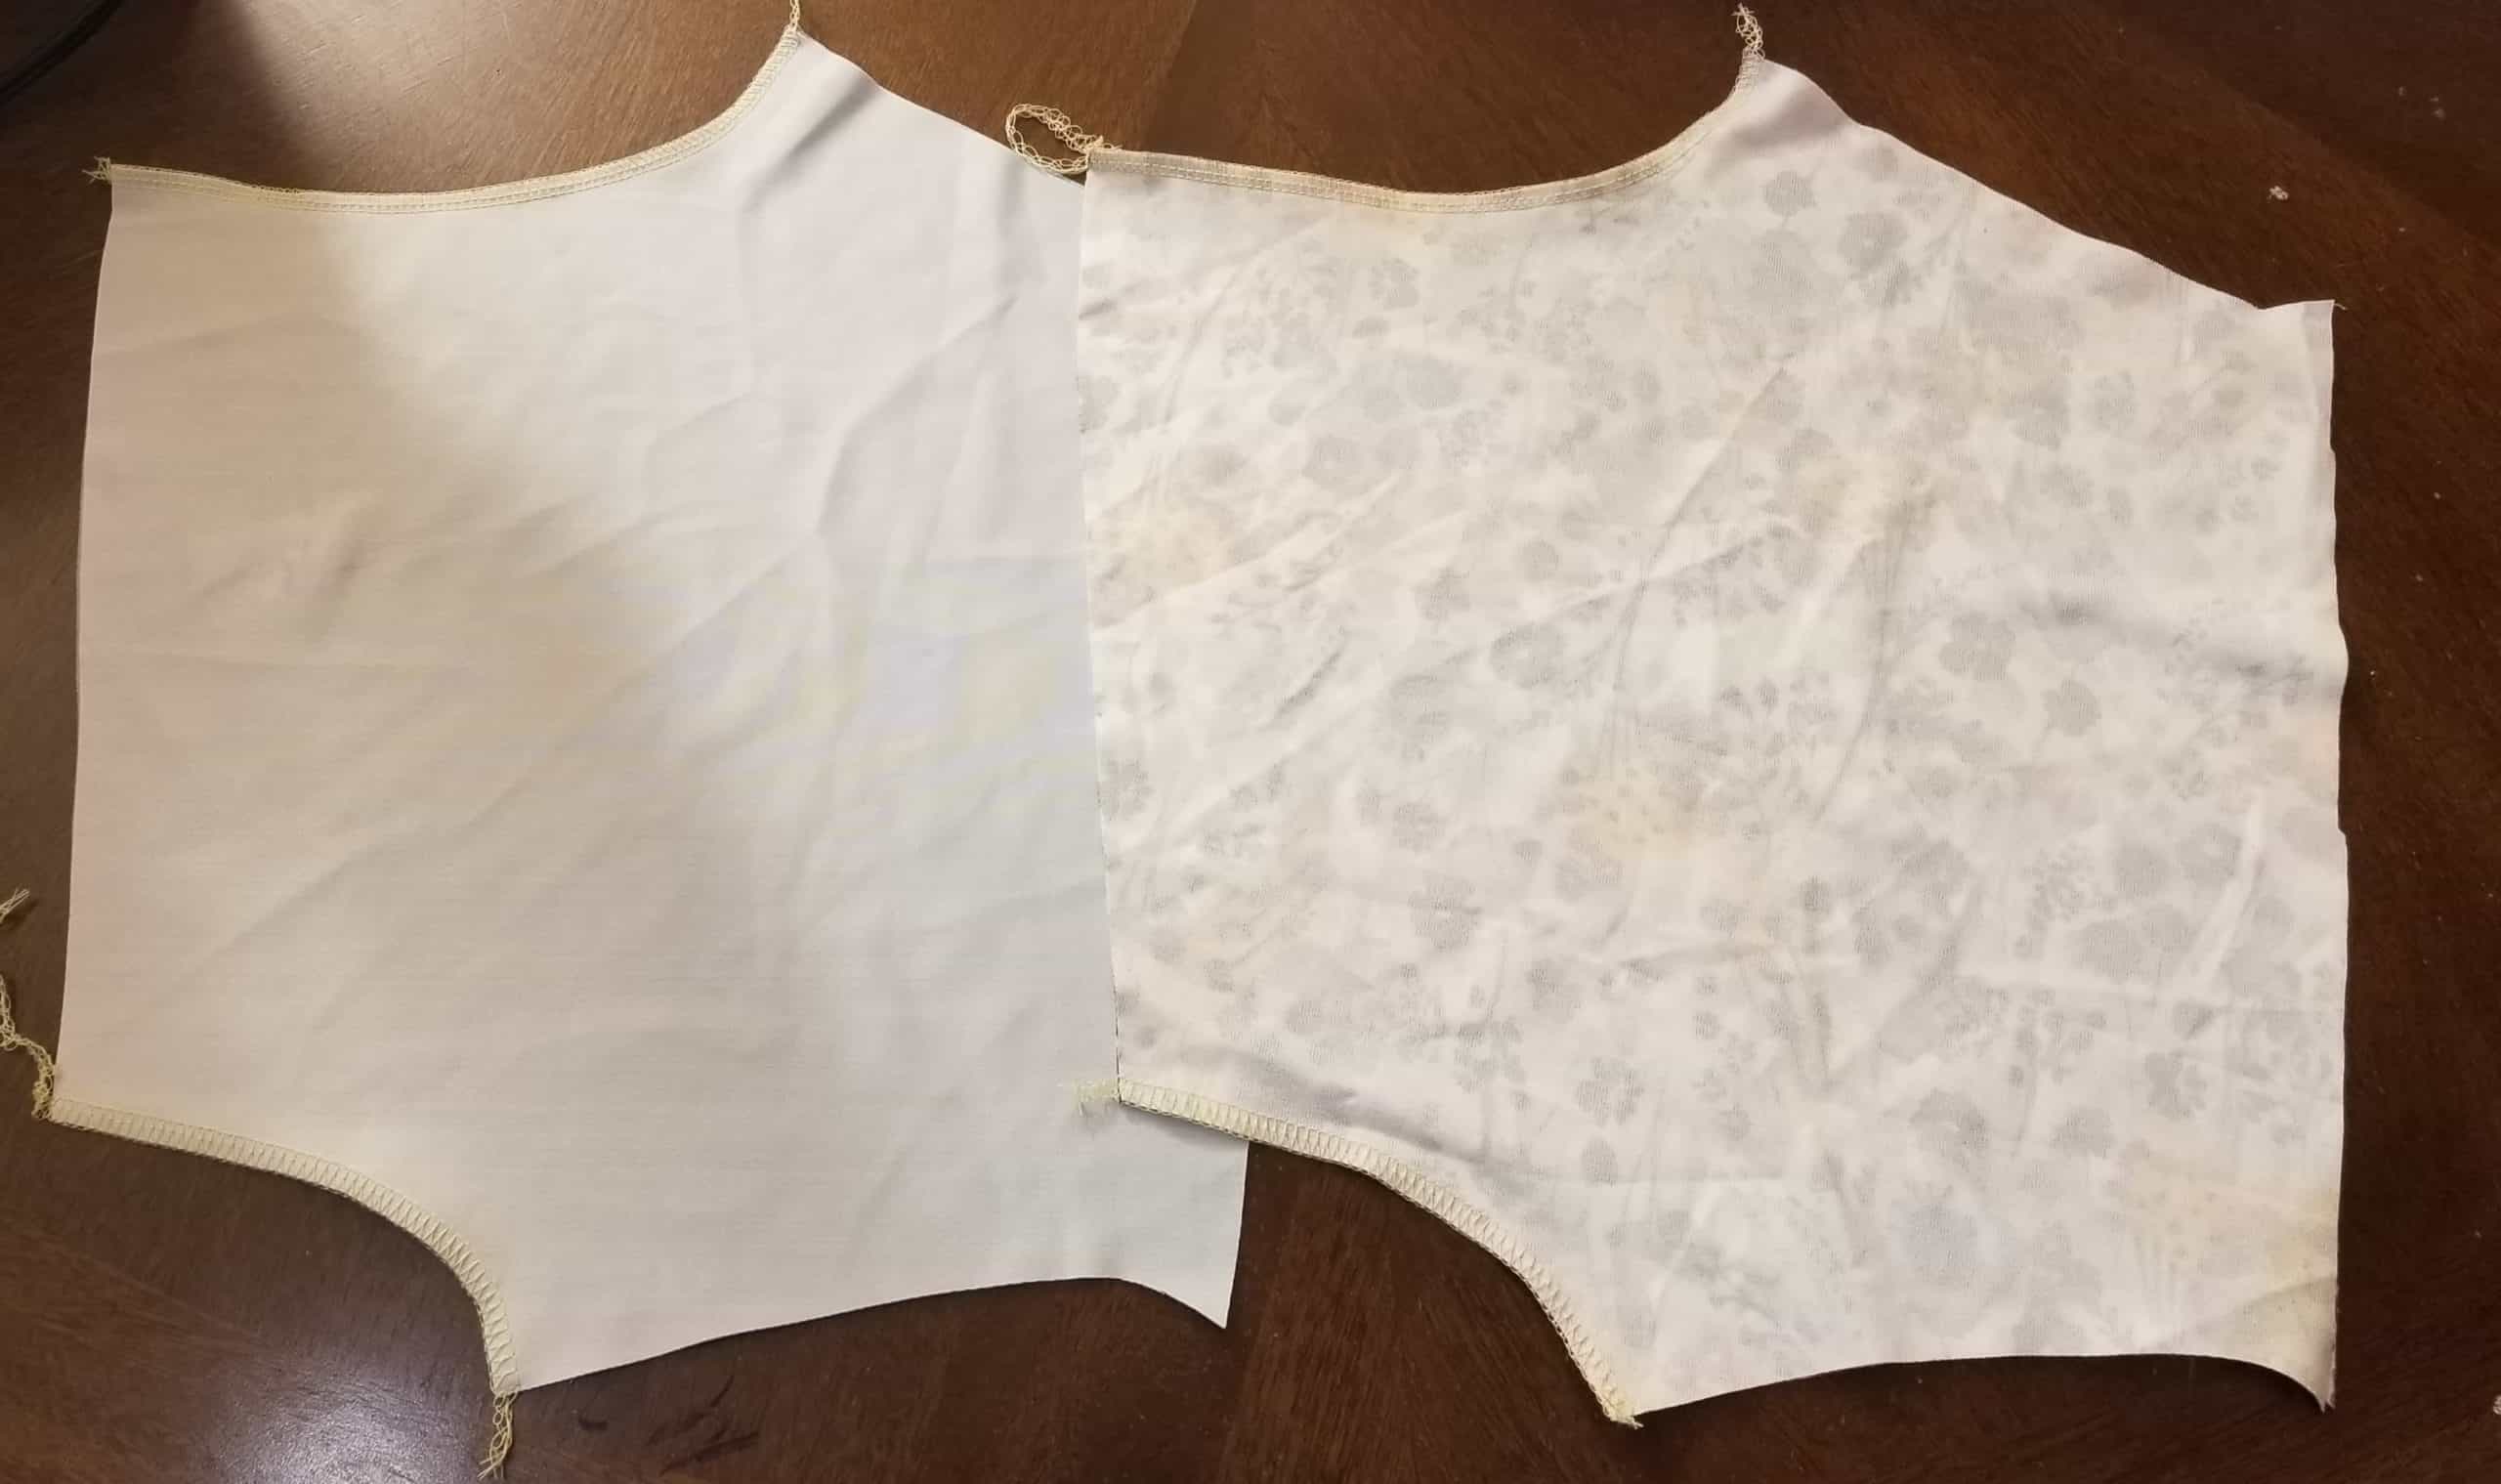
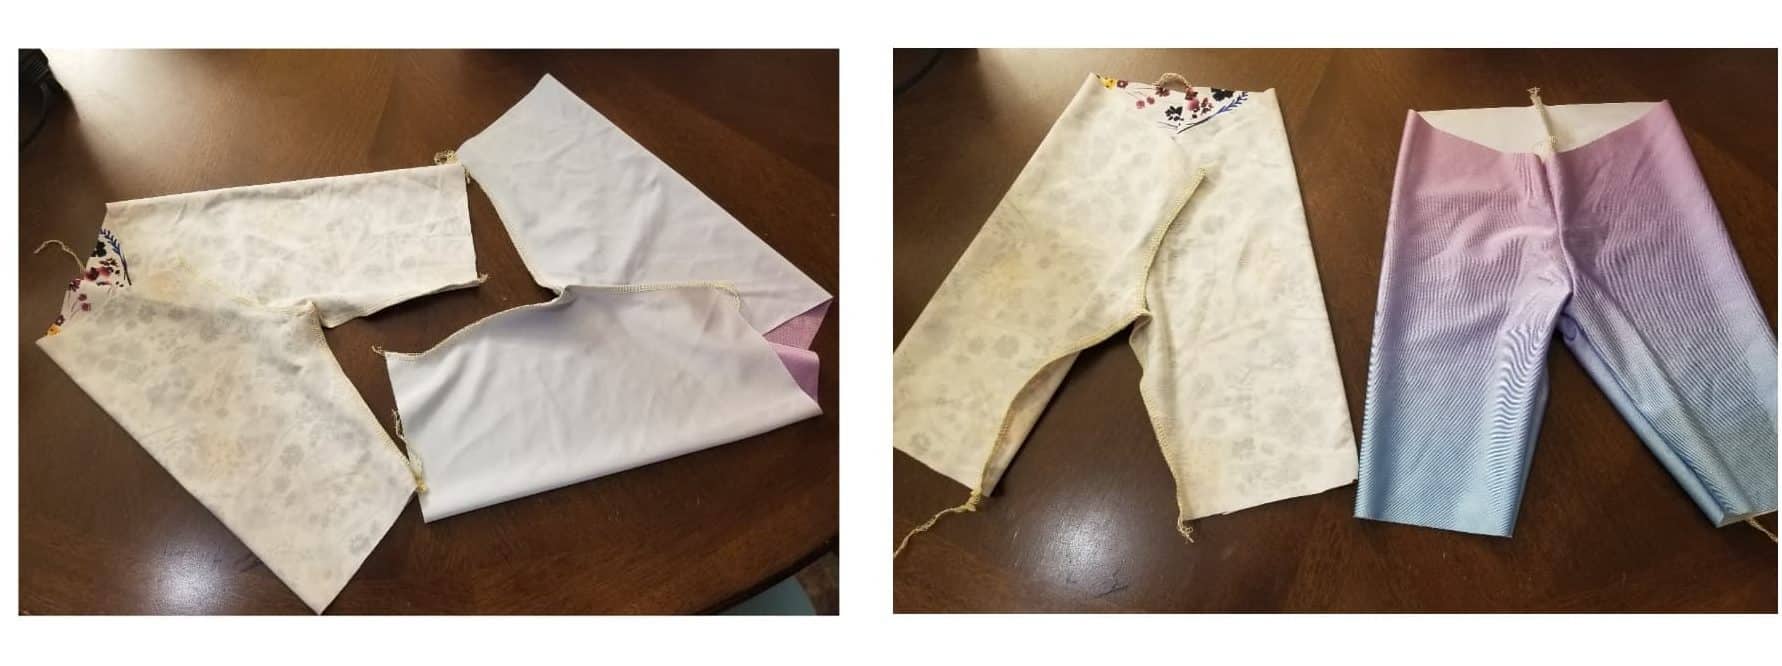
This option is a little more complicated since it is reversible, but the basic construction is exactly the same as the simple version. First, sew your individual shorts separately, turn one pair right side out, and pull those up over the inside out pair, so they’re wrong sides together.
-

- Main and lining all sewn up, right pic shows lining right side out.
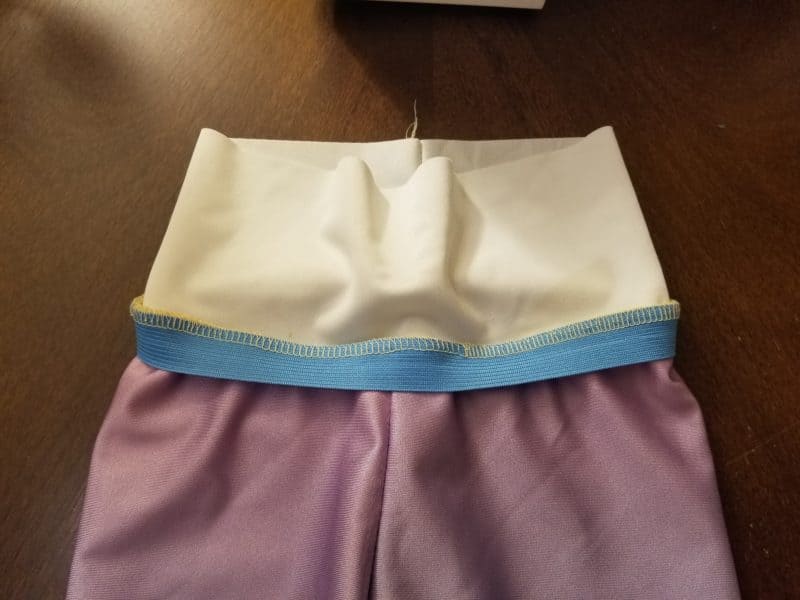
Once again, baste your layers together to make adding the waistband easier. I wanted to add elastic (blue in pics) to the waistband for extra staying power and chose to attach it when I basted the main and lining layers together so it wouldn’t shift or twist around in the waistband. This did add an extra layer of complexity that I quickly regretted, so DO AS I SAY AND NOT AS I DO. If I make them again with elastic, I will either just add ¼” clear elastic to seam OR sew my elastic into a loop and lay it over the band before finishing it.
-

- First pic is basting main and lining, 2nd pic is basted together, 3rd pic is with waistband attached right sides together to main shorts.
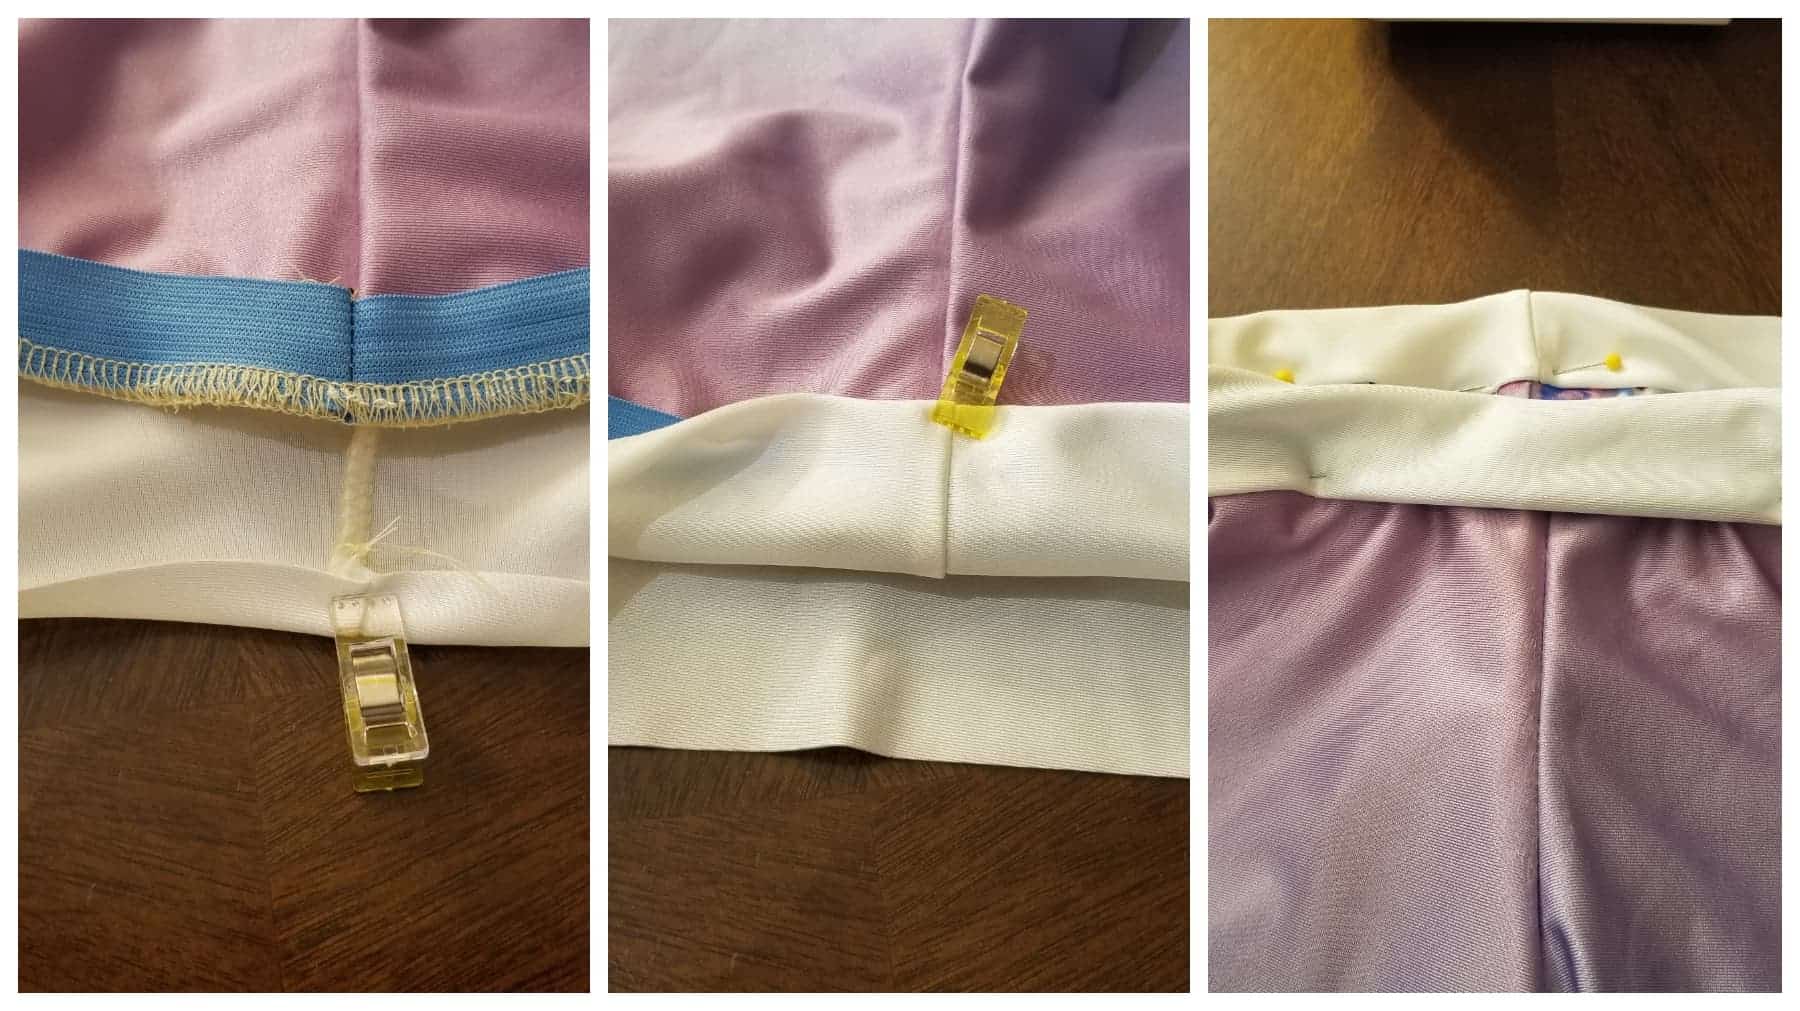
For the reversible-ness of the shorts, I attached the waistband like a binding. I sewed it into a loop, but instead of folding it in half lengthwise, I sewed one edge to the right side of the shorts first. [PRO TIP! If you’re using a serger, serge the long sides of the band to give you a little more grip when attaching. If you’re using a sewing machine, sew a straight stitch at the hem allowance line, ½” from the edge, as that’ll act as a “hinge” when you fold it over.] Once that’s attached, you can add your elastic loop, if you’re using it. Fold your band up and over to the inside of the shorts, folding/tucking the seam allowance up inside the band, and pin in place (clips will probably not be too helpful here, unless they’re the longer kind!)
-

- First two pics are “sewists view”. Last pic is flipped around upright to show waistband pinned in place!
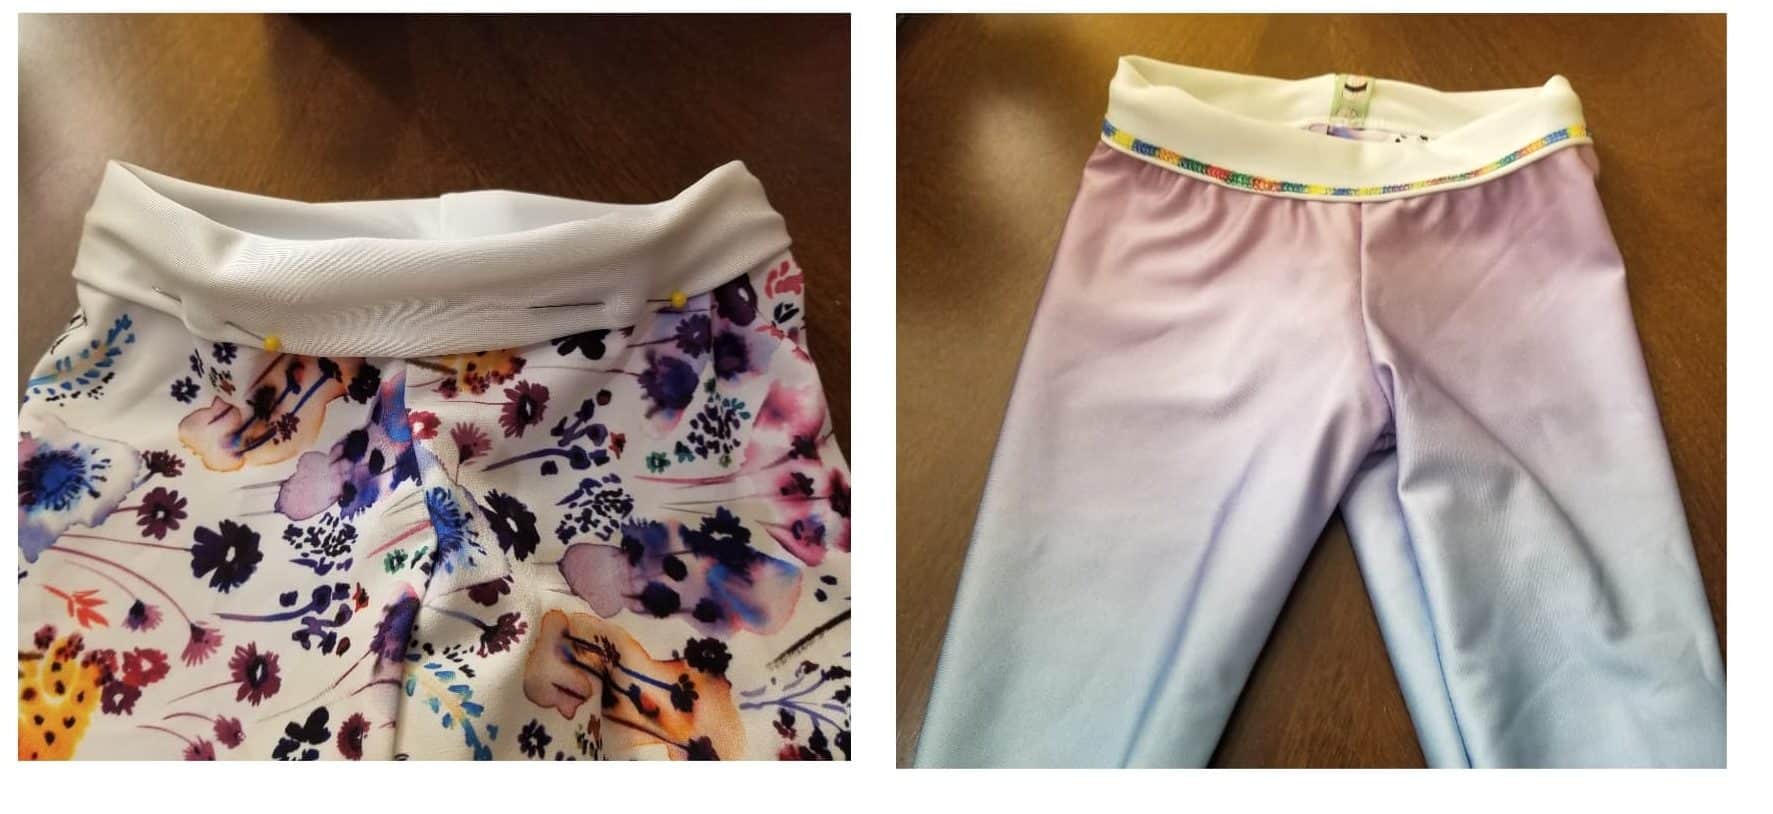
Topstitch the waistband down to secure. I chose to use my coverstitch, so I put fun thread in the looper so it would look nice on the reverse side. But you can totally do this with a stretch stitch on your sewing machine, too! I would baste it first with a straight stitch and then switch to your stretch stitch, as it’s so easy for the band to twist slightly while sewing (again, glue stick or washaway hem tape can help you here!).
-

- Topstitched on the main side, looper thread of coverstitch shows on reverse. “Pusheen sushi” elastic added to back so my girlie doesn’t complain that she doesn’t know which side is the back. 🙂
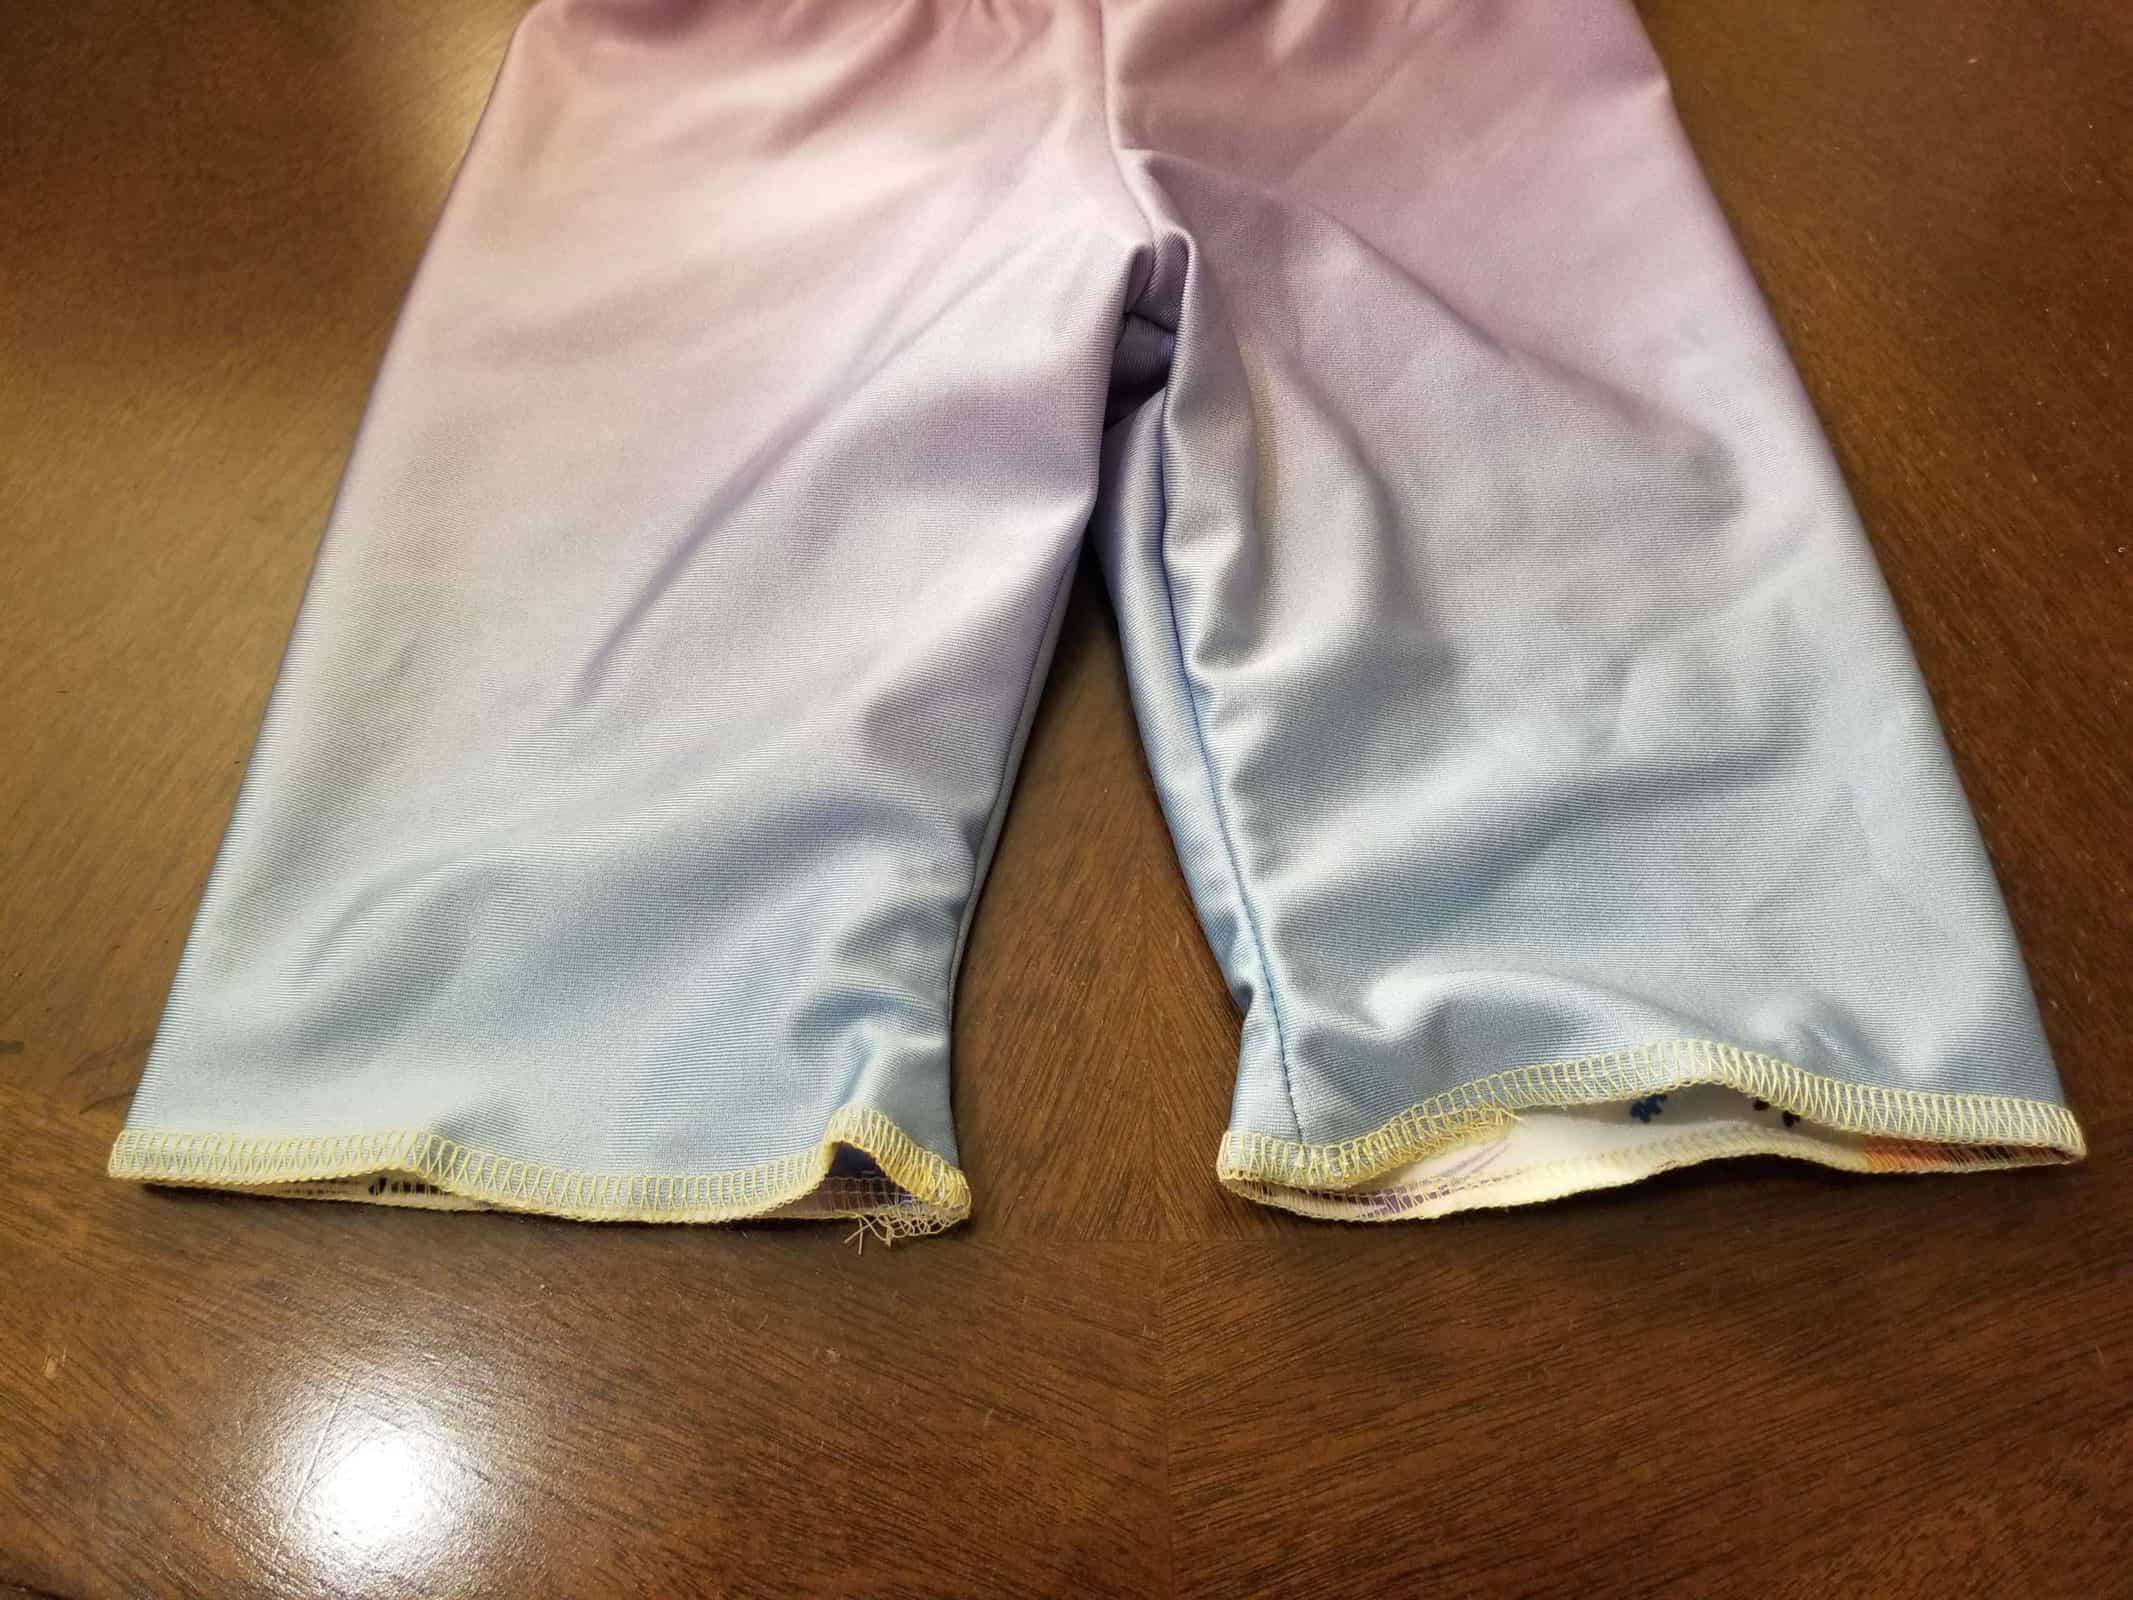
To hem the legs, I just basted the layers together with my serger, folded them up an inch and topstitched with my coverstitch. I folded the solid side to the patterned side, as I thought it looked better, but you do it however you like! Since the coverstitching covers the raw edge, it looks fine as is. But if you are using a sewing machine, you can fold up ¼” and then flip all that up ¾” and topstitch that down with your favorite stretch hem stitch (some decorative stitches are nice and stretchy, but if nothing else, good ole zig zag or triple straight stitch will work, too.)
-

- Serged the layers together before hemming. Next time I’ll use the same looper colored thread in both the serger and coverstitch!
-
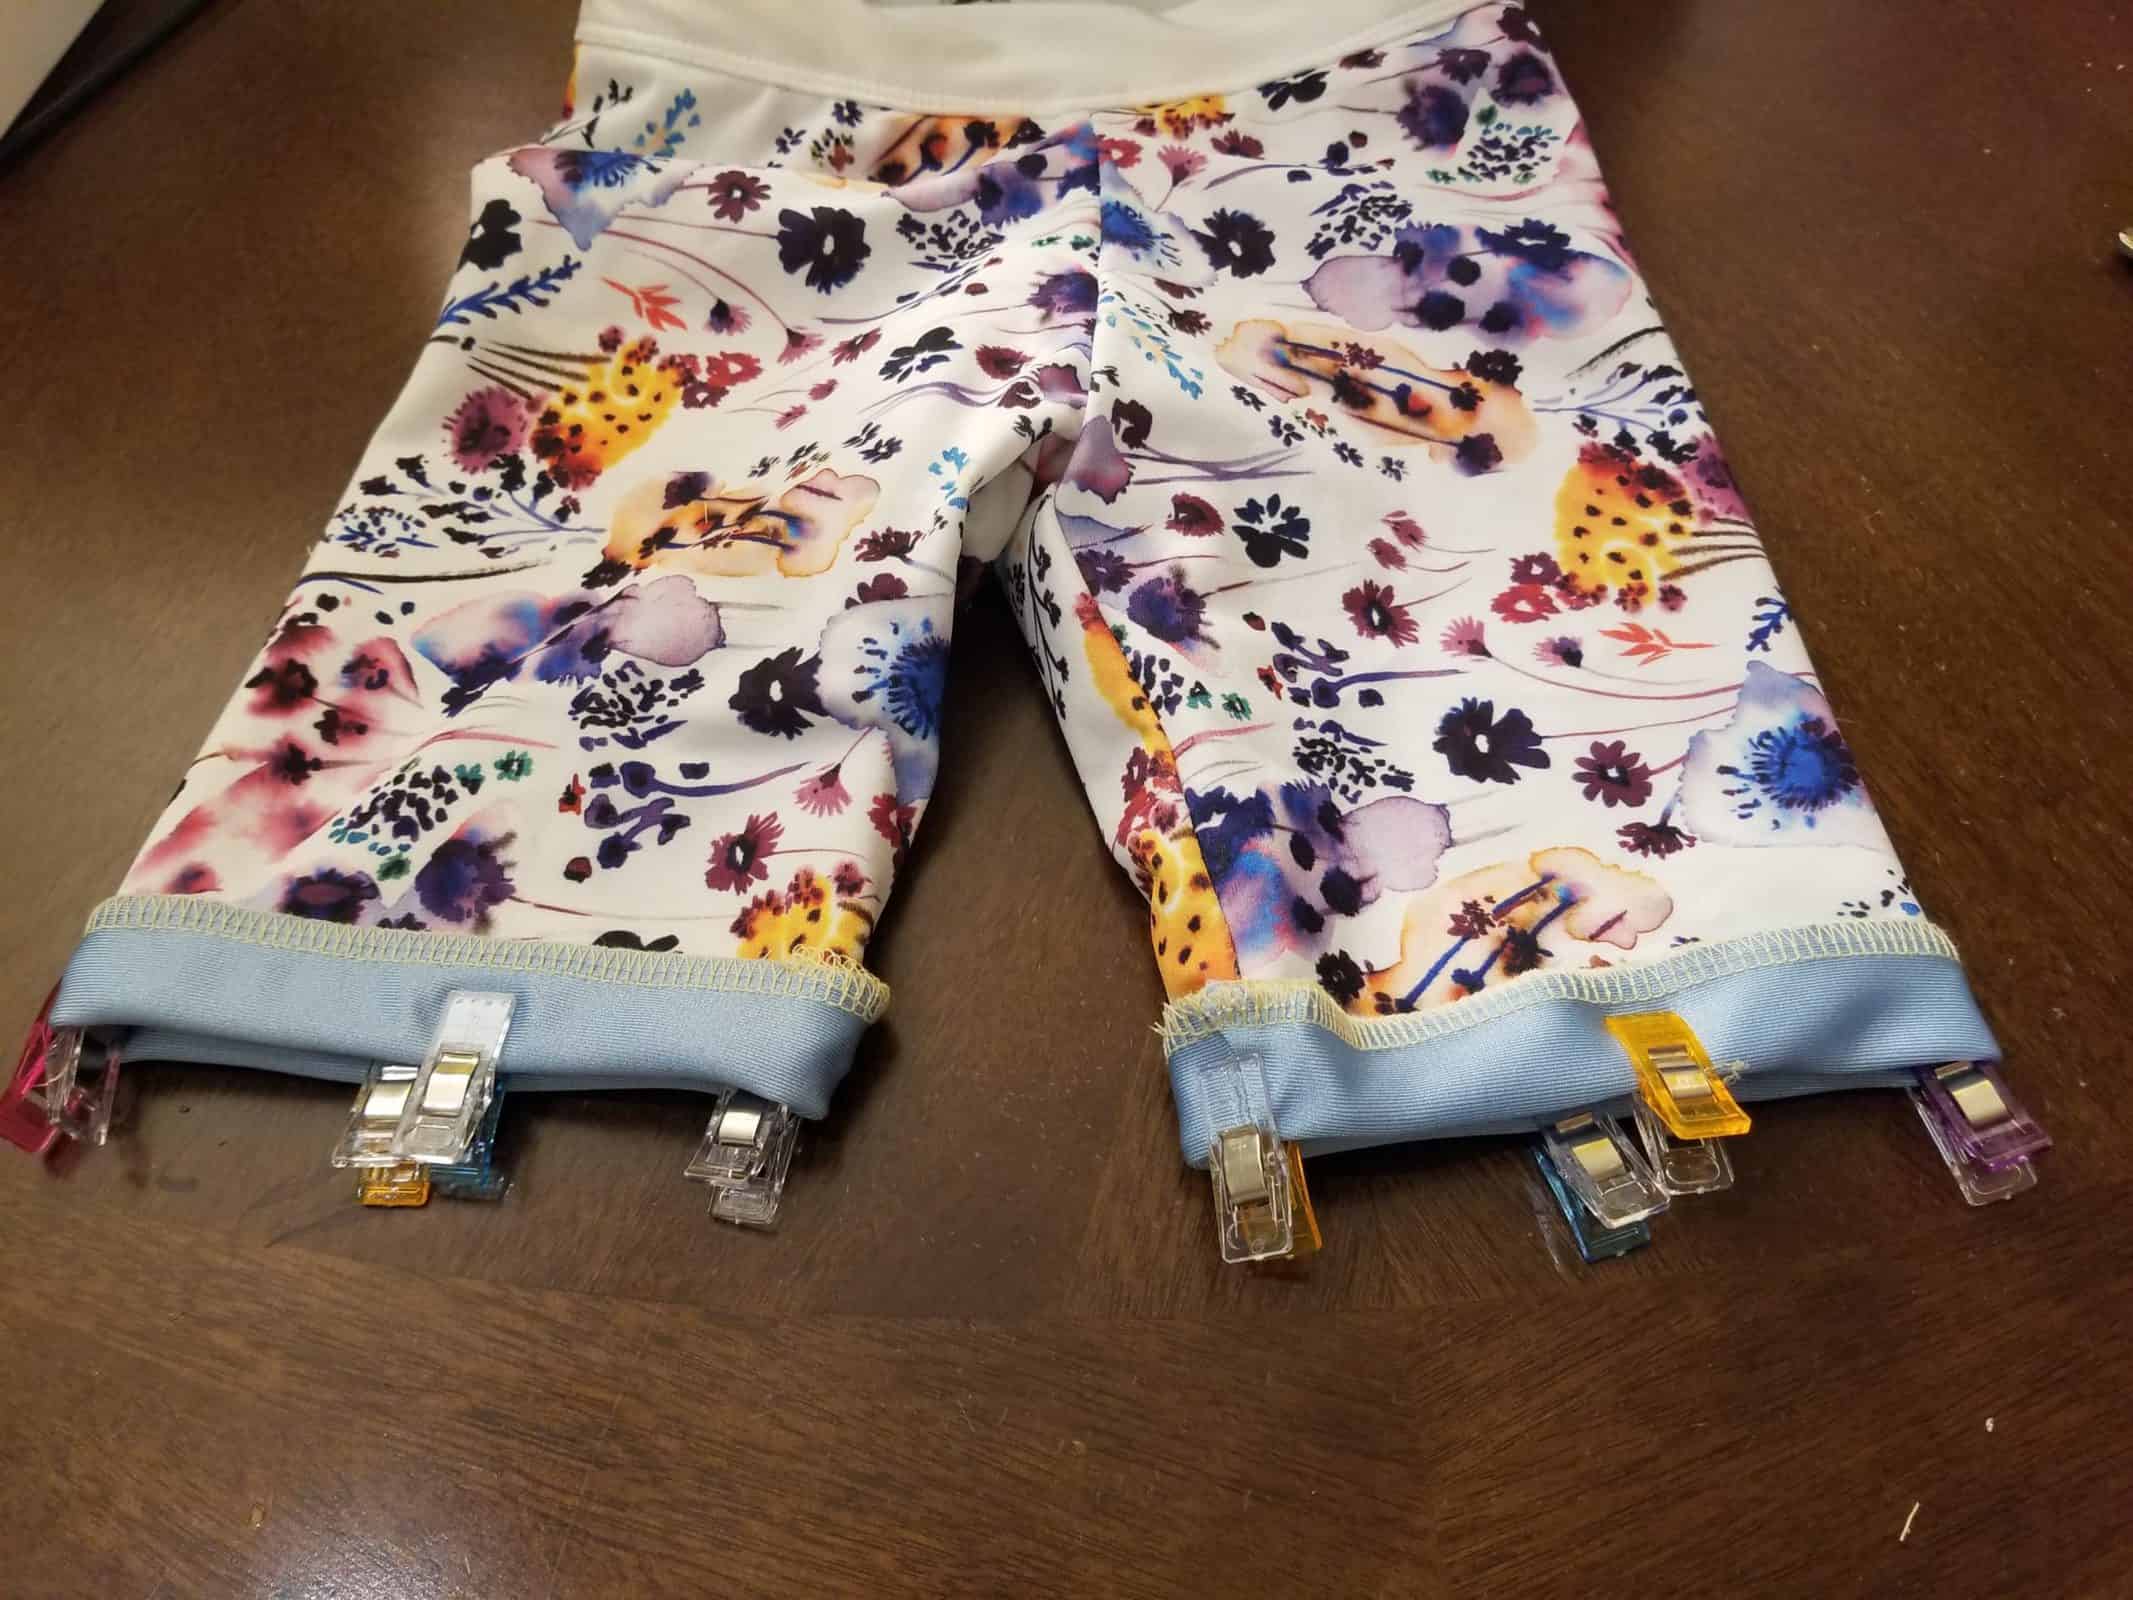
- Ready to topstitch! Highly recommend some glue or hem tape here to prevent twisting and shifting!
-

- SO fun!
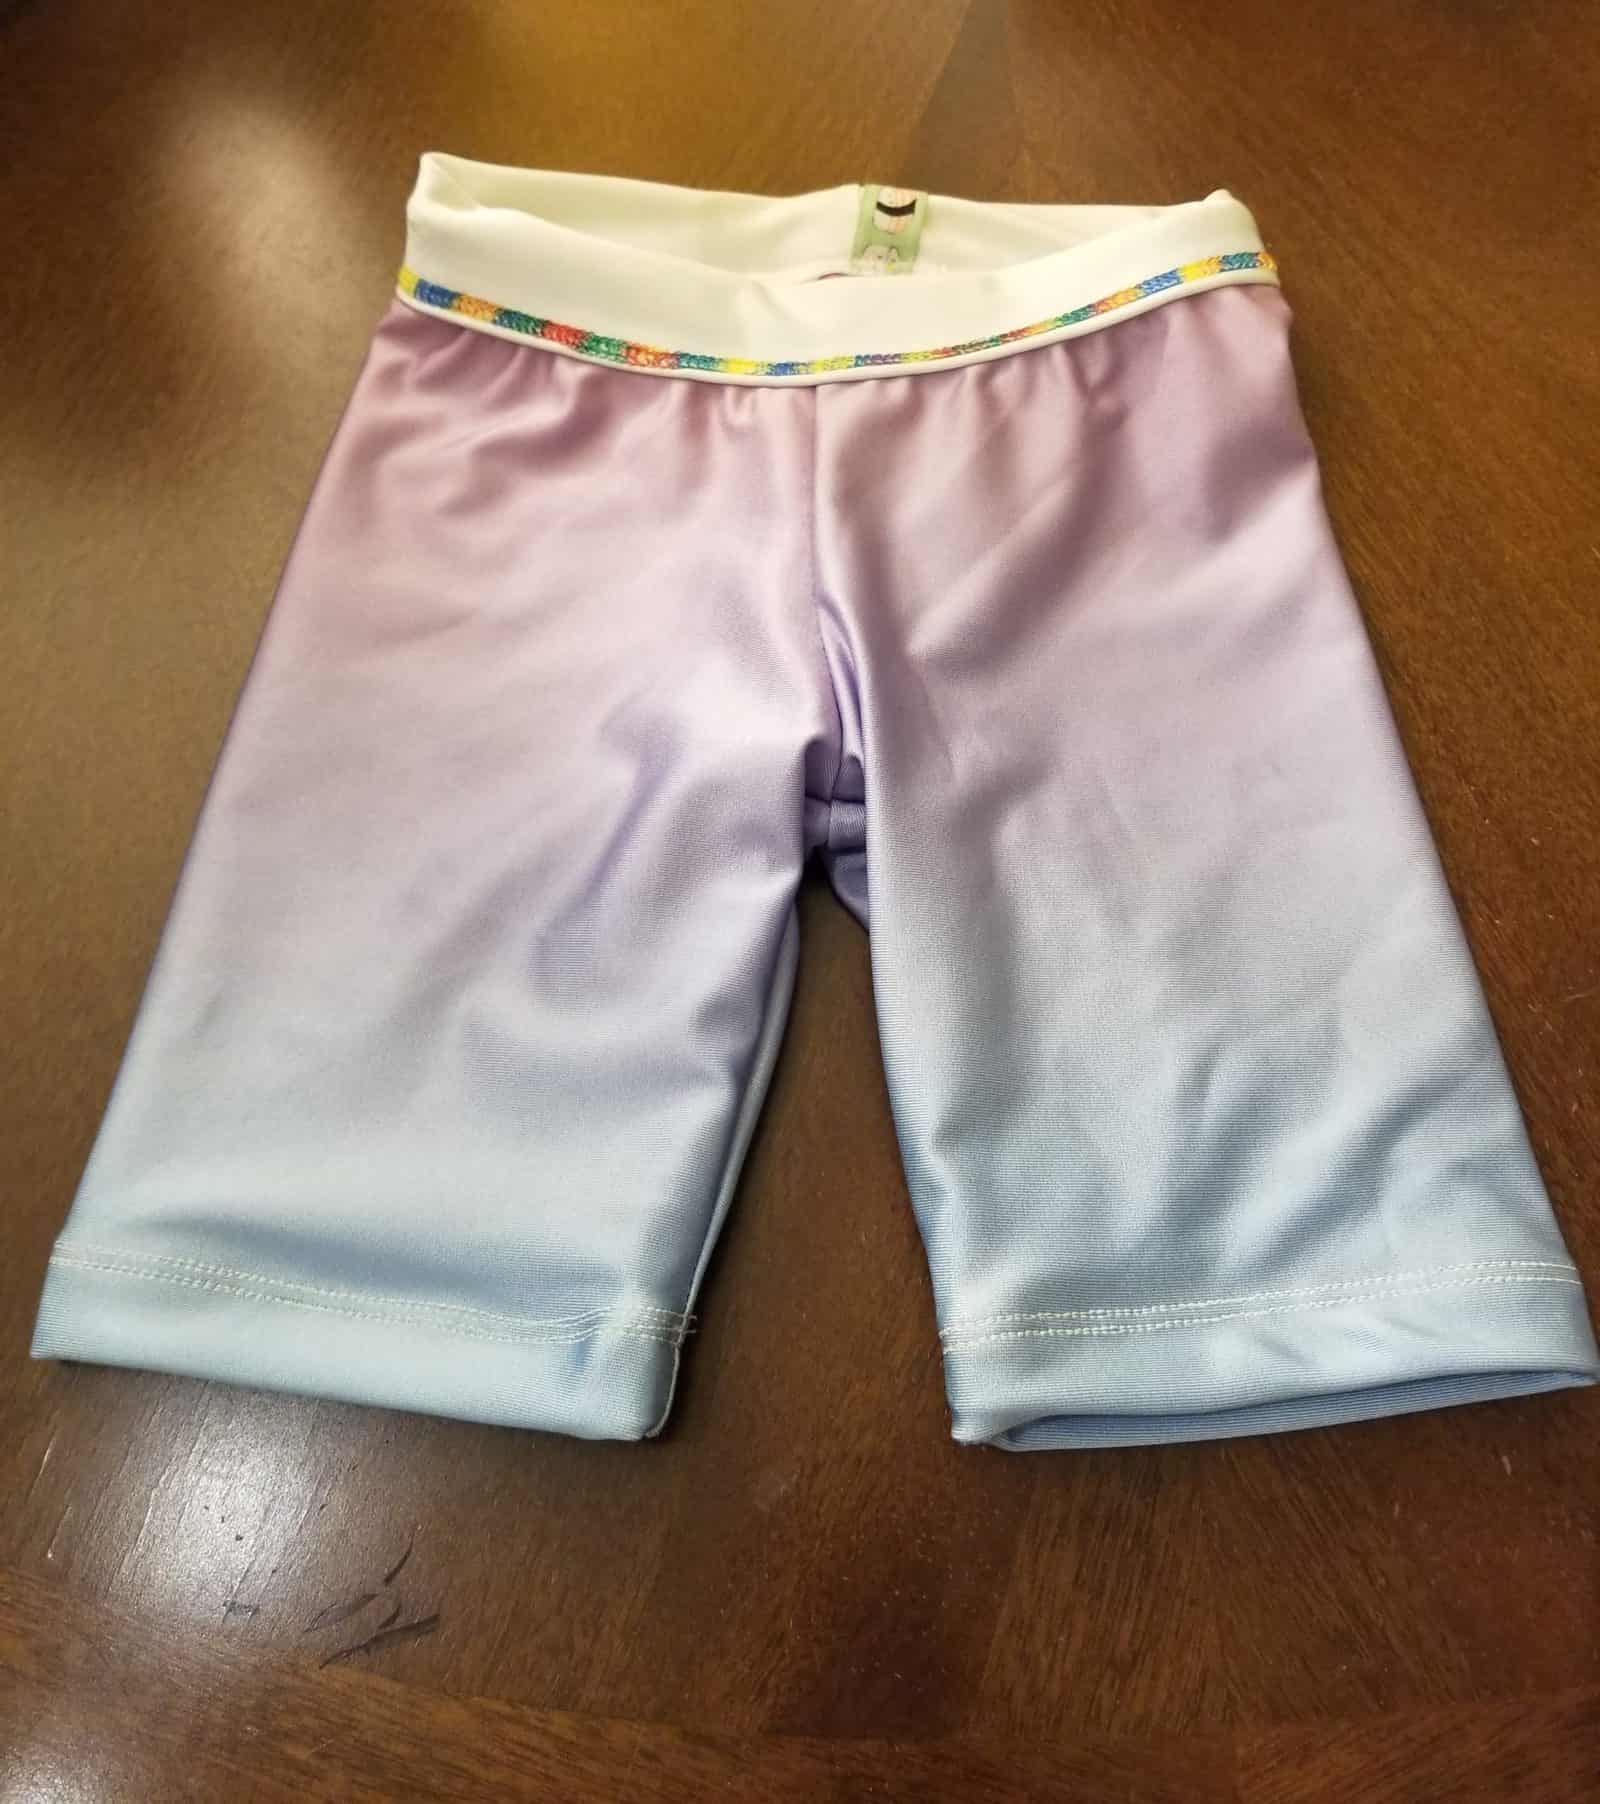
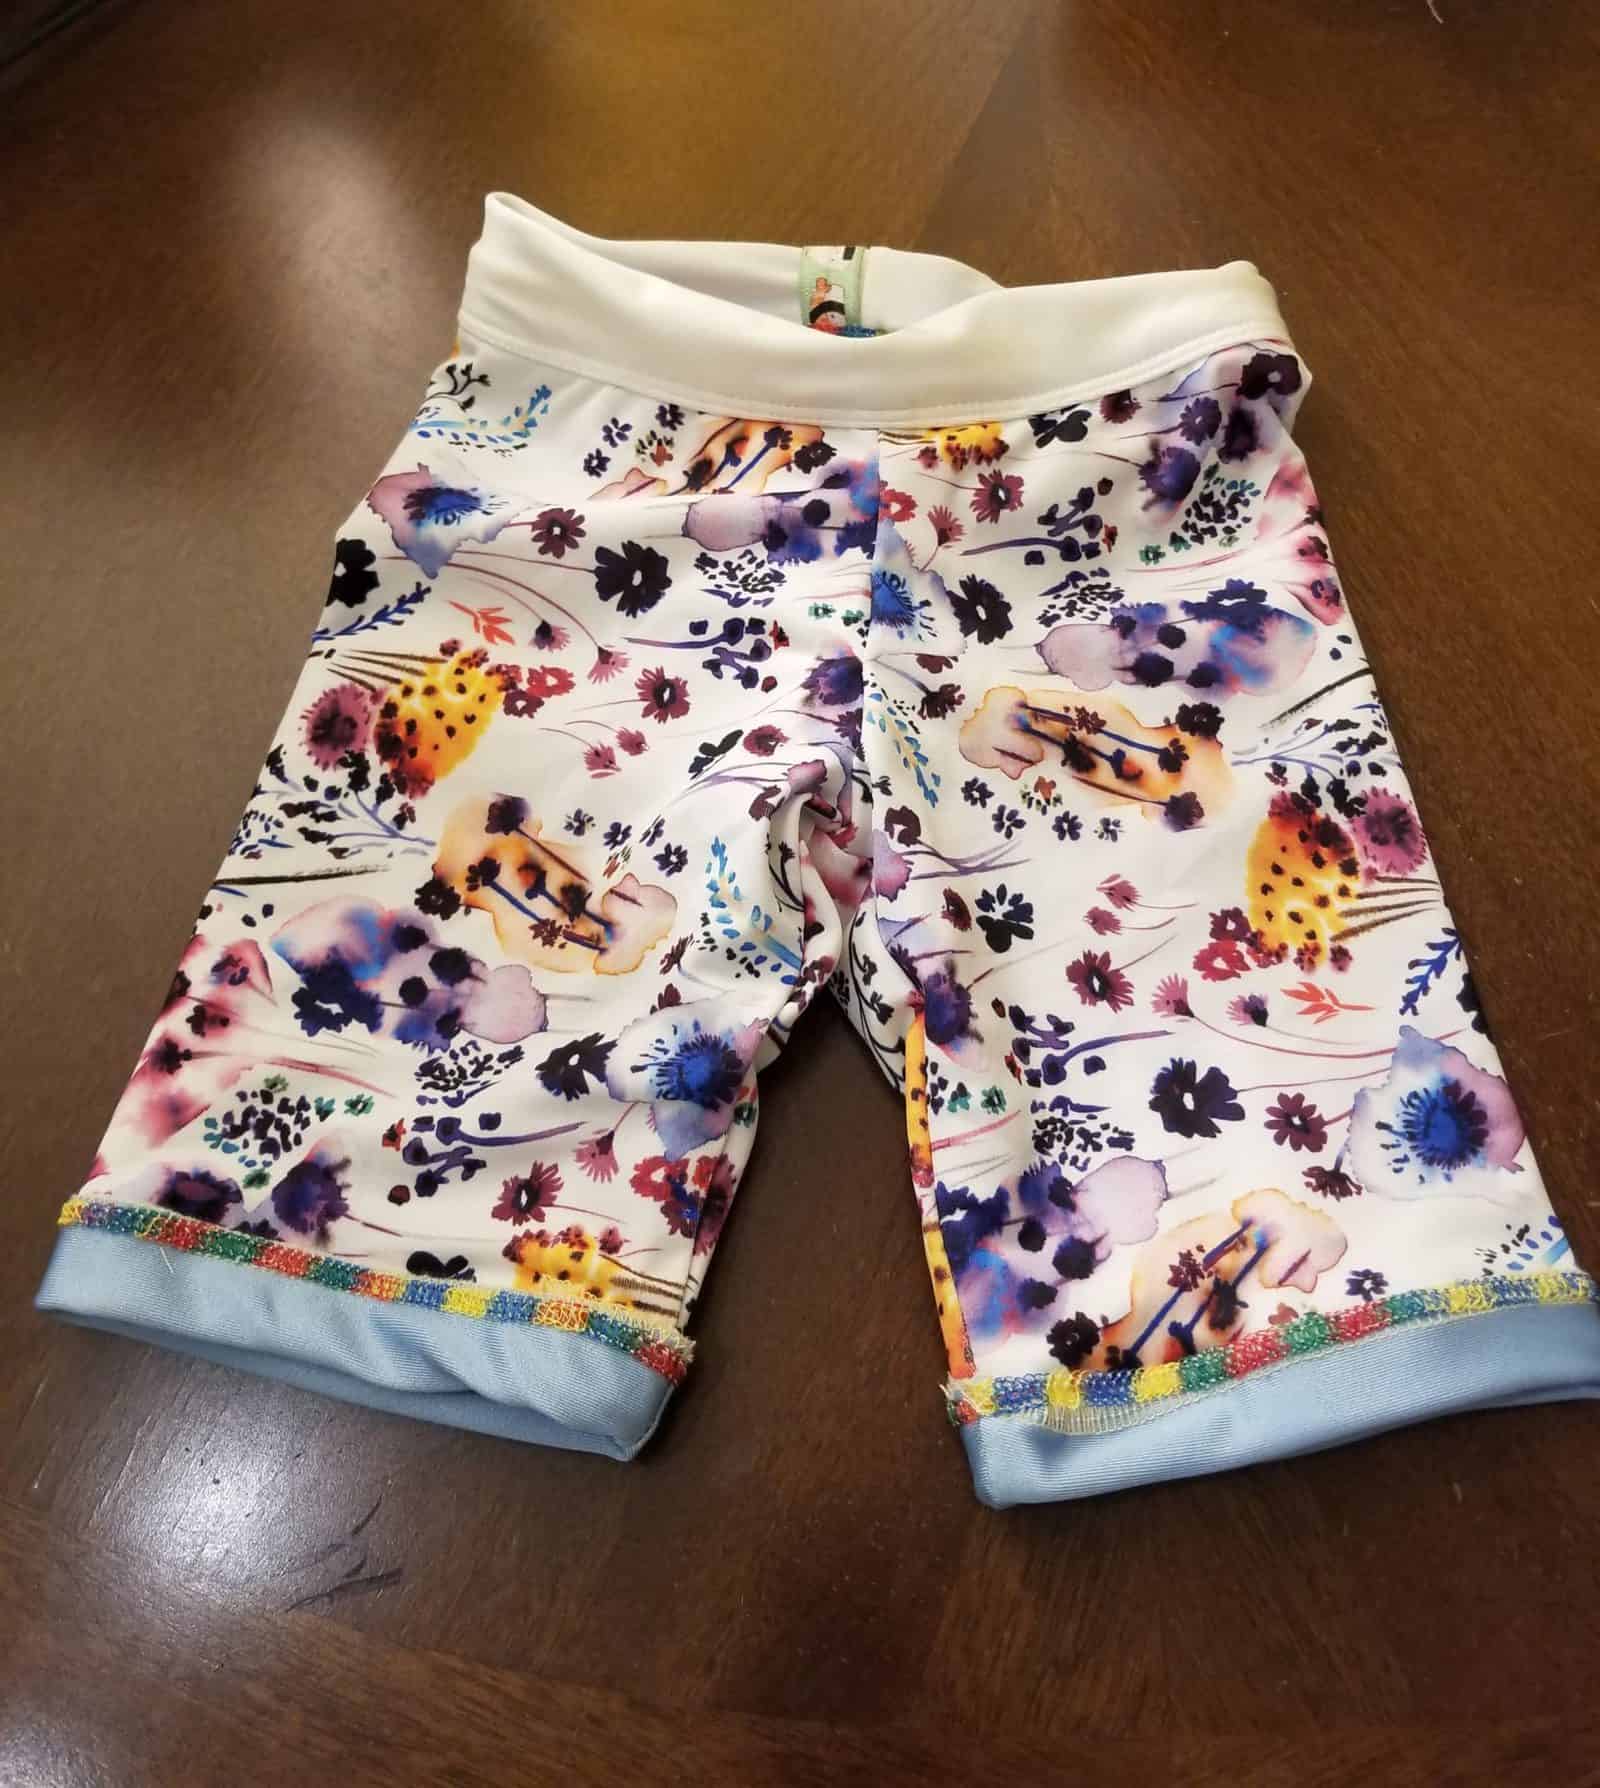
SO FUN!!!
In summary! When making Bonny Leggings in swim, baste main and lining together, glue sticks are super helpful, elastic can be added if needed, but is probably not necessary for most. I know we’ll be getting a lot of use out of these suits over the summer! Hope you give it a shot and let us know what you think!

~jess wilcox
Leave a Reply