Available in Adult (women’s standard size chart) and Youth, Calliope is the perfect cozy cardigan to sew up as 2021 comes to a close. Whether you’re sewing one up for yourself, or sewing for someone else, we’re so glad you’re joining us this week!
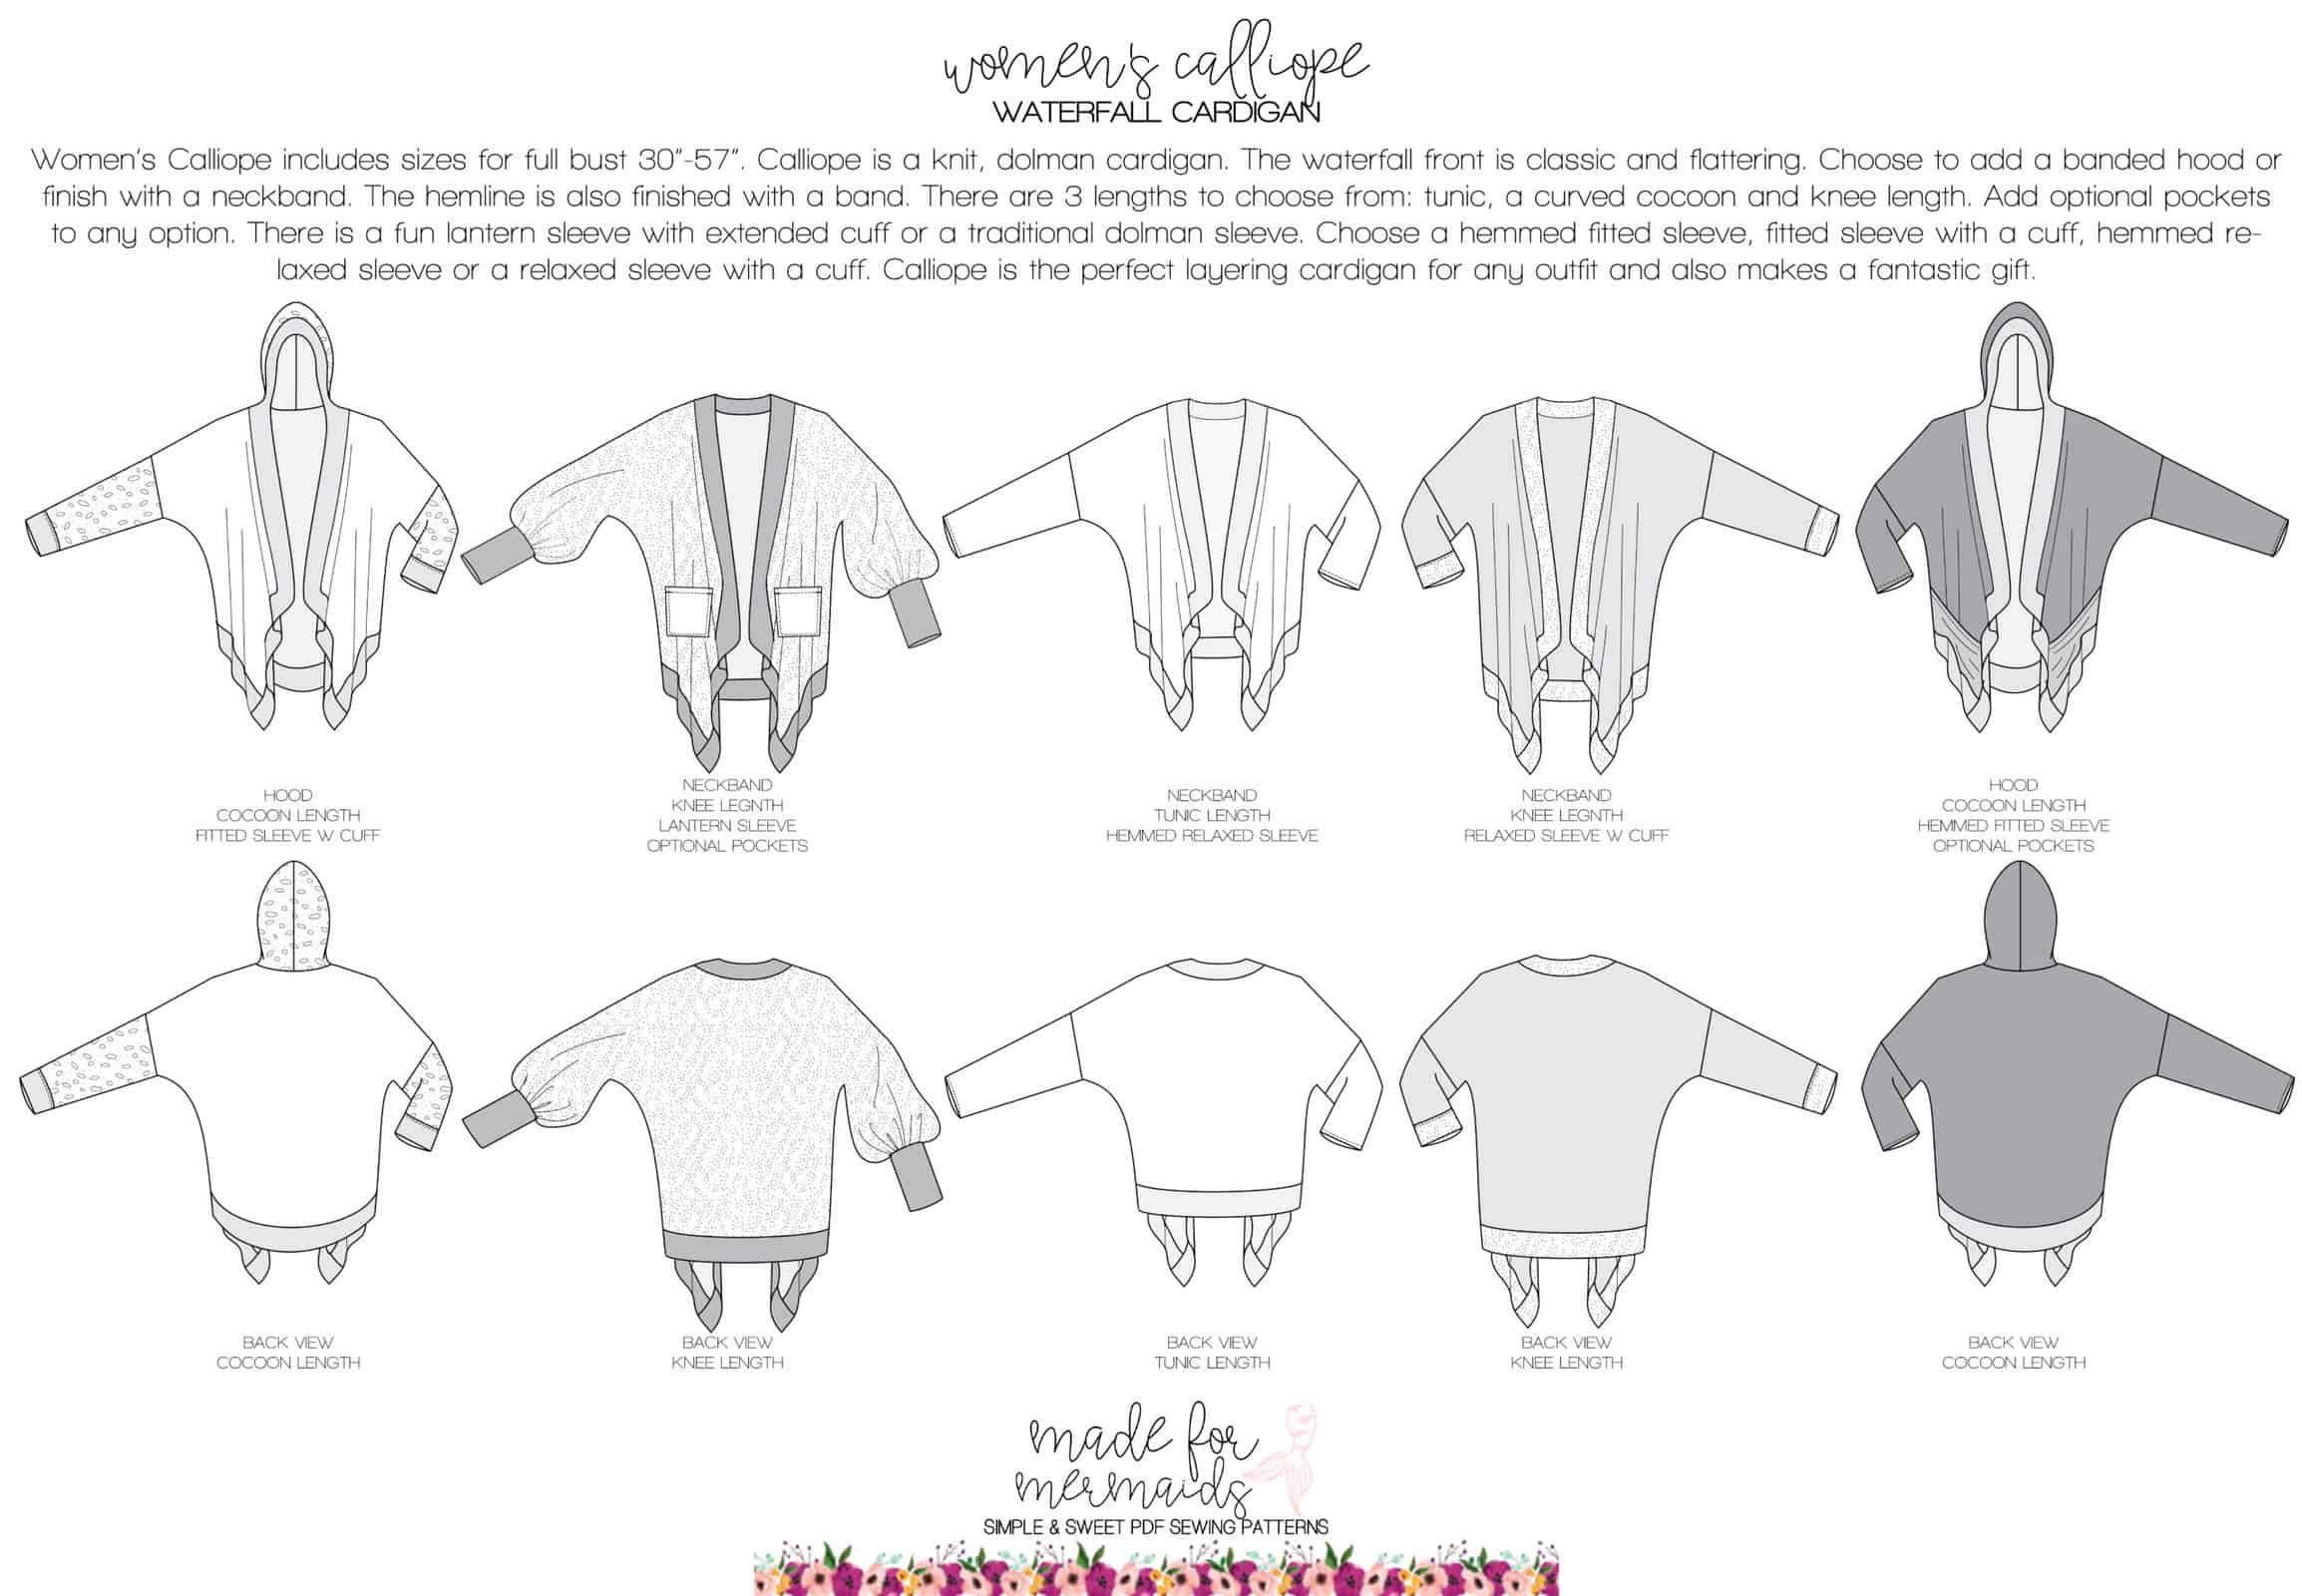
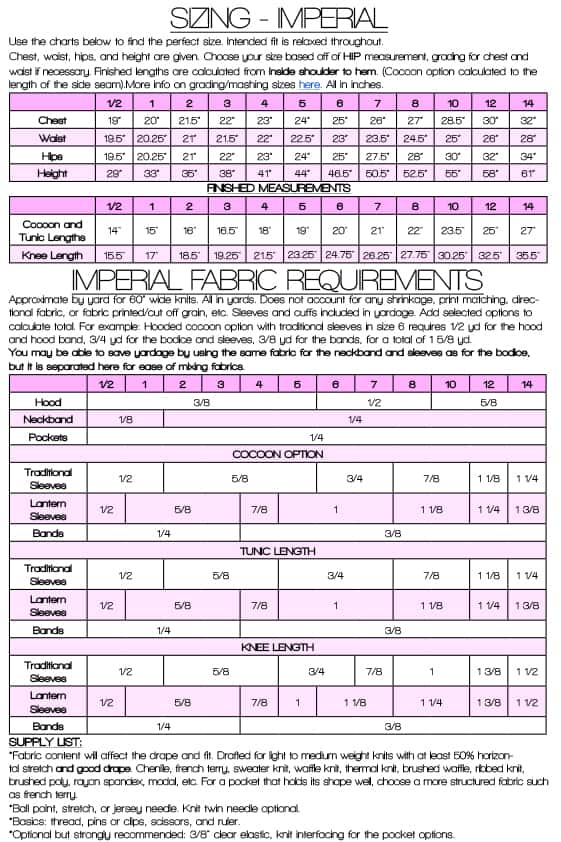
Check out the line drawings below for more info on pattern options, recommended fabrics, as well as sizing information. You can also visit the pattern listing for more in-depth information, or if you’ve already purchased the pattern, it will be available in the tutorial as well.
Getting Started:
There is a ton of helpful beginner information between the M4M and P4P blogs, in case you are new to knits, or new to PDF patterns in general:
- New to PDF patterns? Check out our helpful tips here
- Not quite sure how to measure yourself accurately? Don’t worry; check out the post here!
- Wondering if a pattern is “true to size”? Read more about sizing and intended fit here, and information on using finished measurements here.
- Having issues printing? Most issues can be resolved by using our FAQs/troubleshooting tips
- Looking for some gathering suggestions? Look no further.
- Look here for more extensive grading help!
- Not in our official SAL group yet? Join here 🙂
Day 1:
Our first day is all about prep! First, be sure to measure yourself (or the person/people that you are sewing for) accurately. The tutorial includes information about grading and mashing, but you can also check out the blog linked above! Since Calliope is an open front cardigan, it will be a bit more forgiving, but measurements are still a wonderful tool to start with.
After you’ve measured, you’ll want to decide which version/options you’d like to sew up. This will determine which pattern pieces and fabric pieces you’ll need to cut out.
Then, you’ll want to choose your fabric and gather your supplies. Be sure to use knits with good drape! If you use something like cotton lycra for the tiers, just keep in mind that it will be much bulkier and it will not drape as well as you might hope. For children, this may not be as important to you! Some good fabric options are modal, bamboo lycra, double brushed poly, etc. Be sure to check the tutorial for more fabric suggestion information.
Additional notions/supplies:
- Optional but strongly recommended: 3/8″ clear elastic and knit interfacing for pocket options
Next, go ahead and print your pattern. Be sure to print a test page and measure your 1″ square before you print the whole pattern. Once you’ve got your pattern pieces printed and assembled, go ahead and cut out your fabric so you are all ready for day 2. Remember that even if your pattern is only off by 1/16″, that’s 1/16″ PER INCH, not total. Definitely reprint if you notice your test square is off!
Don’t forget:
- Make sure you are taking an accurate and consistent seam allowance; seam allowance is already included on all pattern pieces.
- Be sure that your pieces are cut on the fold or as mirror images, however it’s indicated on the paper pattern piece
- There are a LOT of pages; be sure to make use of the print chart at the end of the written tutorial to conserve paper and ink!
- When you’re grading, be sure to add/subtract length to front AND back pieces as applicable
Want to sew along with me? Check out today’s video!
If you have questions about measuring yourself, printing, putting your pattern together, or cutting your fabric, you are always welcome to post in our SAL group so we can help you! Be sure to check in each day during the SAL, and look for daily posts to enter our giveaways. We can’t wait to see what you create this week!

DAY 1: CUTTING + PREP
DAY 2: SHOULDER SEAMS + SLEEVES
DAY 3: POCKETS + SIDE SEAMS
DAY 4: HOOD or NECKBAND
DAY 5: BAND
OUR SPONSORS:
Be sure to visit our friends at Raspberry Creek Fabrics – they have SO many gorgeous prints and fabrics to choose from.




Leave a Reply