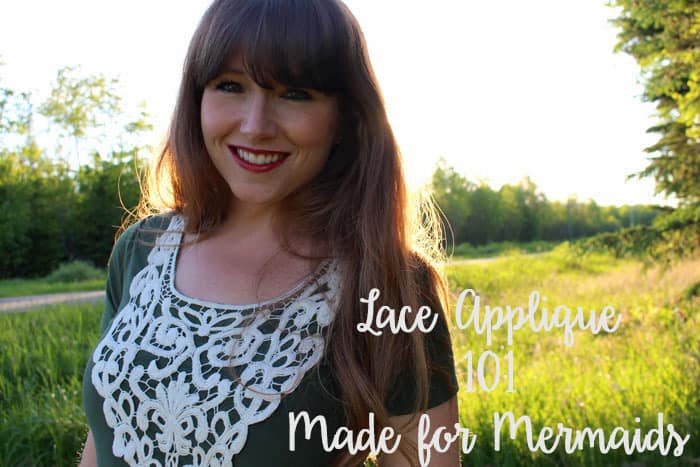
Hello Mermaids! I’m excited today to talk about using lace appliques to sweeten up your favorite M4M patterns. I’m such a sucker for lace appliques- I have a big collection and never hesitate to pick up one more. But I’ll be honest: for a long time, I was really intimidated about actually using them. I wasn’t sure exactly how to sew them, and I struggled to find the perfect project for each unique applique. You really do need to find the trifecta: the perfect applique for the perfect pattern for the perfect fabric. And there are A LOT of different styles; some are perfect for backs, some for fronts, some full necklines, and some the perfect racerback shirt shape. But don’t let all that intimidate you- deciding on the project is the hardest part- the sewing is so, so easy!
Made for Mermaids patterns are the perfect match for lace appliques. You can make your Dreamy Collection extra dreamy, or spice up a Mama Mya or Ava. There are a few main ways to utilize an applique: hand sewing (for a delicate piece), various fabric glues or fusing (for a fast and easy method, given the right project), and machine sewing. Most appliques I buy and see from the on-line shops are perfect for machine sewing, so don’t stress if the words “hand sewing” had you running for the hills! Today, I’m going to use Mama Mya for this lace applique. Grab your pins or basting spray and let’s get started!
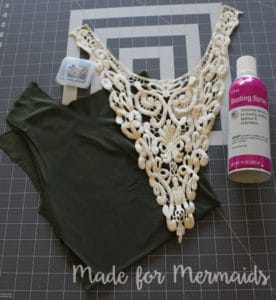
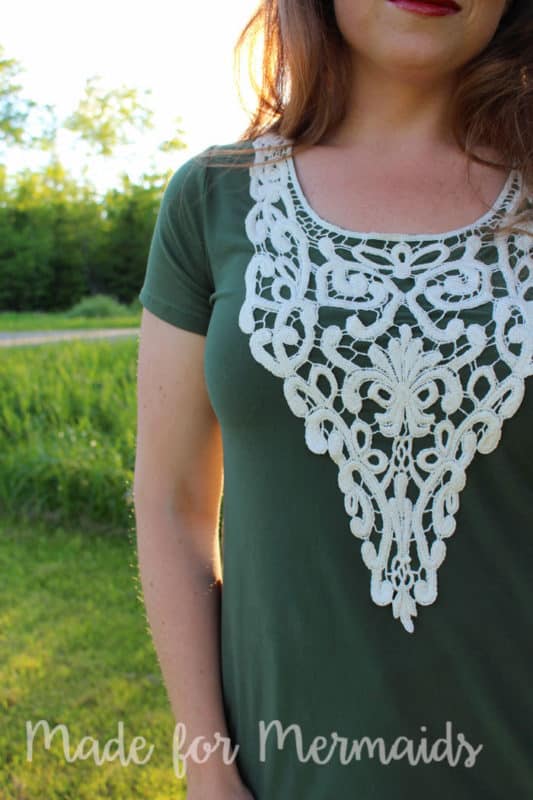
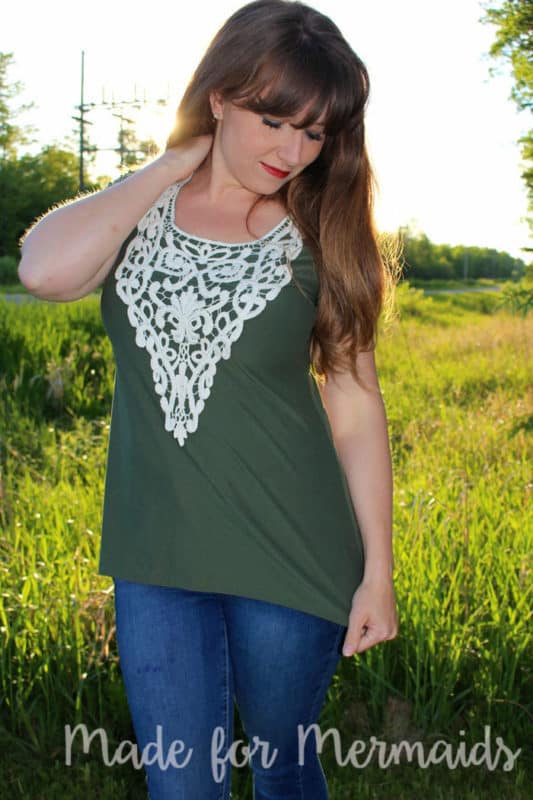
I’m using my applique on the front piece of the Mama Mya. The applique was actually the exact same shape as the neckline of Mya! You can definitely still use an applique that it’s as exact as this one– just trim your bodice piece to match. I used basting spray to lay down the applique on the shirt precisely how I wanted it. You could also pin the heck out of it. Take your time to center the piece and make sure everything is exactly how you want it.
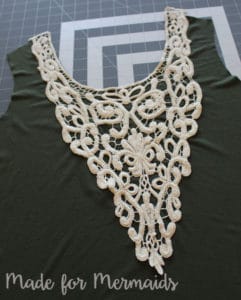
As you move over to your sewing machines, you have a couple of basic stitch options: a tight and narrow zig zag, your double needle, or even your coverstitch machine will all work great. My sewing machine and I fight on a regular basis, so today I went with my coverstitch machine. Following the thickest sections of the applique, I went along the neckline and down each side, hitting the entire border of the applique. From the back, you can see that I had to stop and restart in a new spot, because of the way the design of the applique is. From the front, my thread is perfect match and you can’t see the stitching at all! Just go slow so that you can be as a precise as possible!
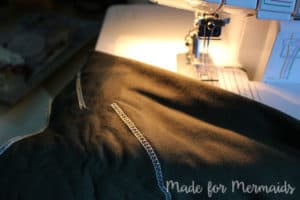
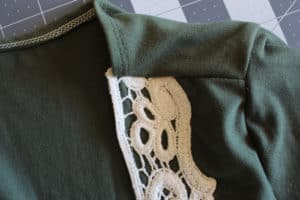
I chose to align my applique so that I would sew it right into the shoulder seam- personal preference that I planned from the beginning. You can also see here that I chose to press the back of my neckline and stitch it down, as opposed to adding a neckband to this section. You can definitely only add the neckband to the back, or I could have chosen to put the neckband on the whole piece like normal and have the applique start directly under the neckband. This is all adaptable to your personal preference; you might find yourself doing it differently depending on the project.
As this is the front of my shirt, I decided not to cut away any areas of my green fabric. When adding an applique to the back though, it’s a fun look to cut away the fabric, to just have the applique! To do this use a good pair of scissors or embroidery scissors to trim the fabric away right up to your stitch line.
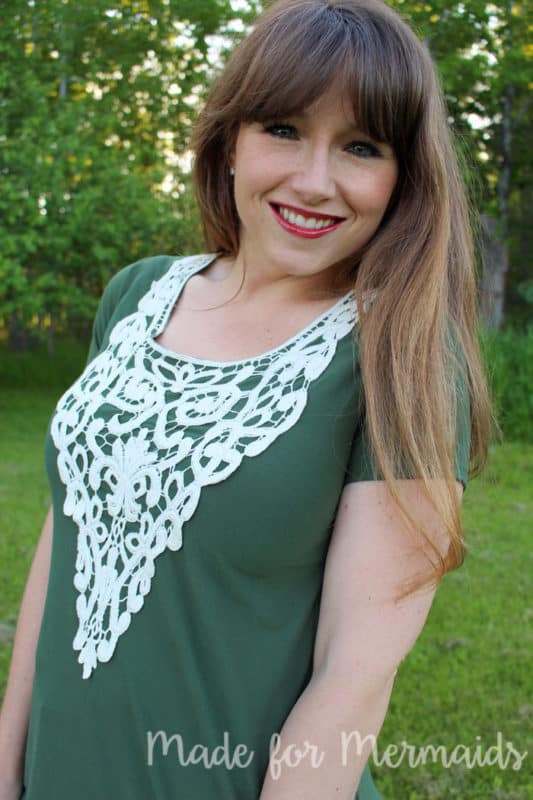
I love the cream applique against the green brushed poly–comfy and cute! Mama Mya was my very first M4M pattern, so I loved using it for my very first post here! I must have made seven of them that first month I owned it, it’s such a great go-to pattern.
Thanks for checking out my latest M4M project! I hope this helps motivate you to use that stash of appliques you’ve been hiding away. For some Pin-spiration on creative uses for appliques, I have a Pinterest board put together- feel free to use it as inspiration!
Molly is a coffee-obsessed, antique-loving boy mom. She sews, crafts, and blogs from her home in Northern Wisconsin. You can find her at Middle River Studio.
Leave a Reply