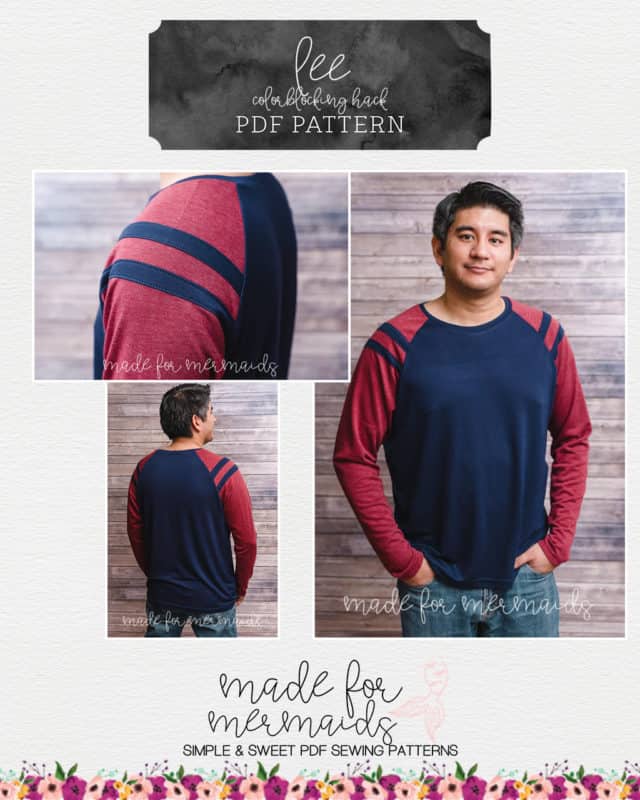
Lee Hacks
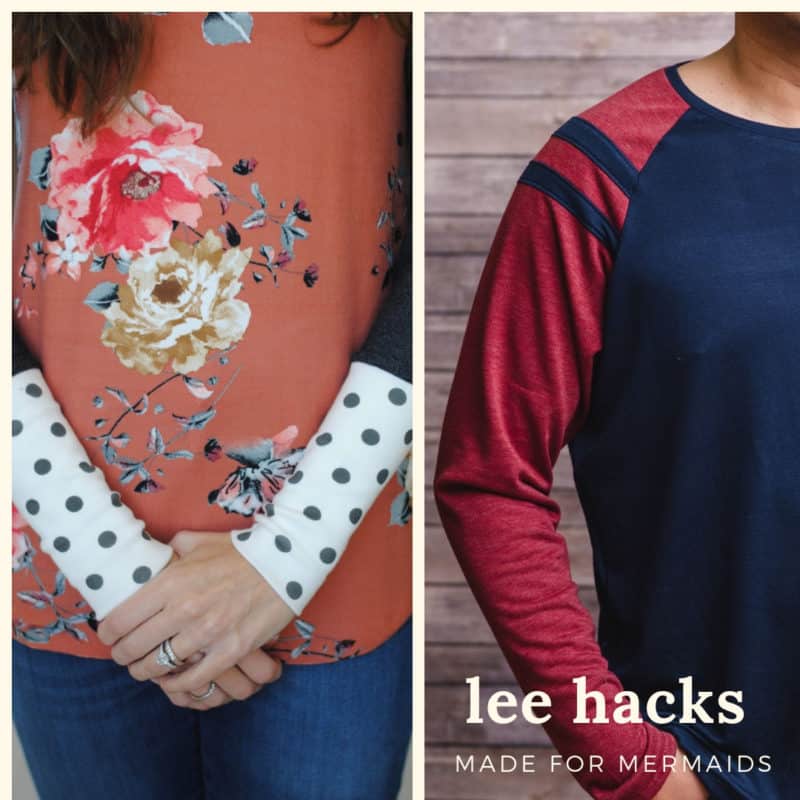
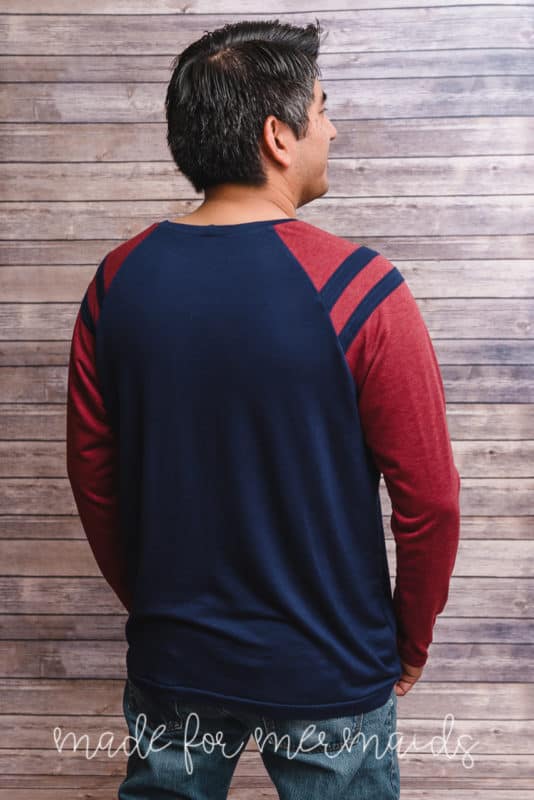
Have you seen our newest release? It’s a great wardrobe basic, and sure to become a staple for the whole fam! All three patterns are a semi-fitted raglan top, with several options already included!


The Women’s Lee features three lengths (top, shallow curved hem, tunic), four sleeve options (short, 3/4, hemmed long, cuffed long), and two neckline options (traditional crew, Henley placket). Our Men’s Lee includes three lengths (short, average, tall top lengths), three sleeve options (short, hemmed long, cuffed long), and the same great neckline options as the Women’s Lee. The unisex youth Lee pattern is just as versatile, with two lengths (top or shallow curved hem), four sleeve options (short, 3/4, hemmed long, cuffed long), and again, two neckline options. The length and sleeve options make this a perfect staple pattern, whether you’re looking forward to spring and summer, or still sewing up cold-weather gear!
Wondering how you can add some variety to the thirty Lees you have planned out in your head? Check out these two easy hacks to mix it up a little!
Colorblocking
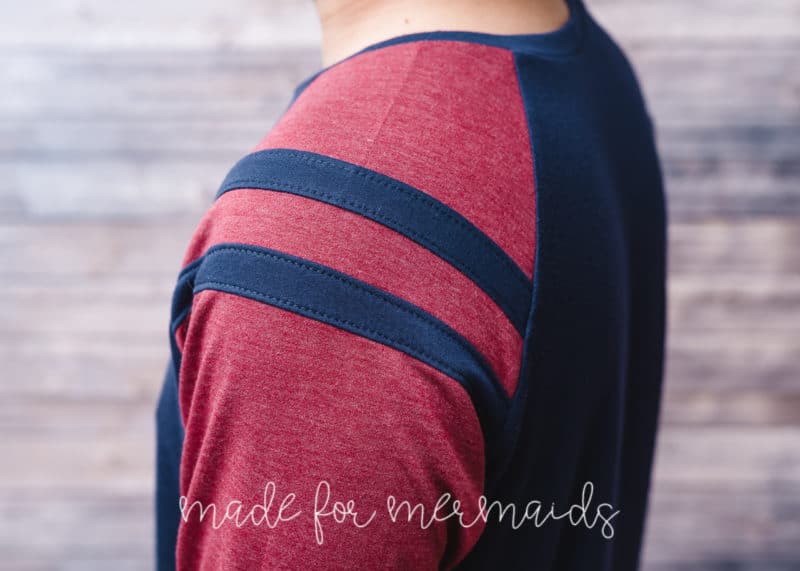
Shoulder stripes!
How fun are these colorblocked shoulders? This is a great way to create different looks, and use up those scraps that you just can’t part with!
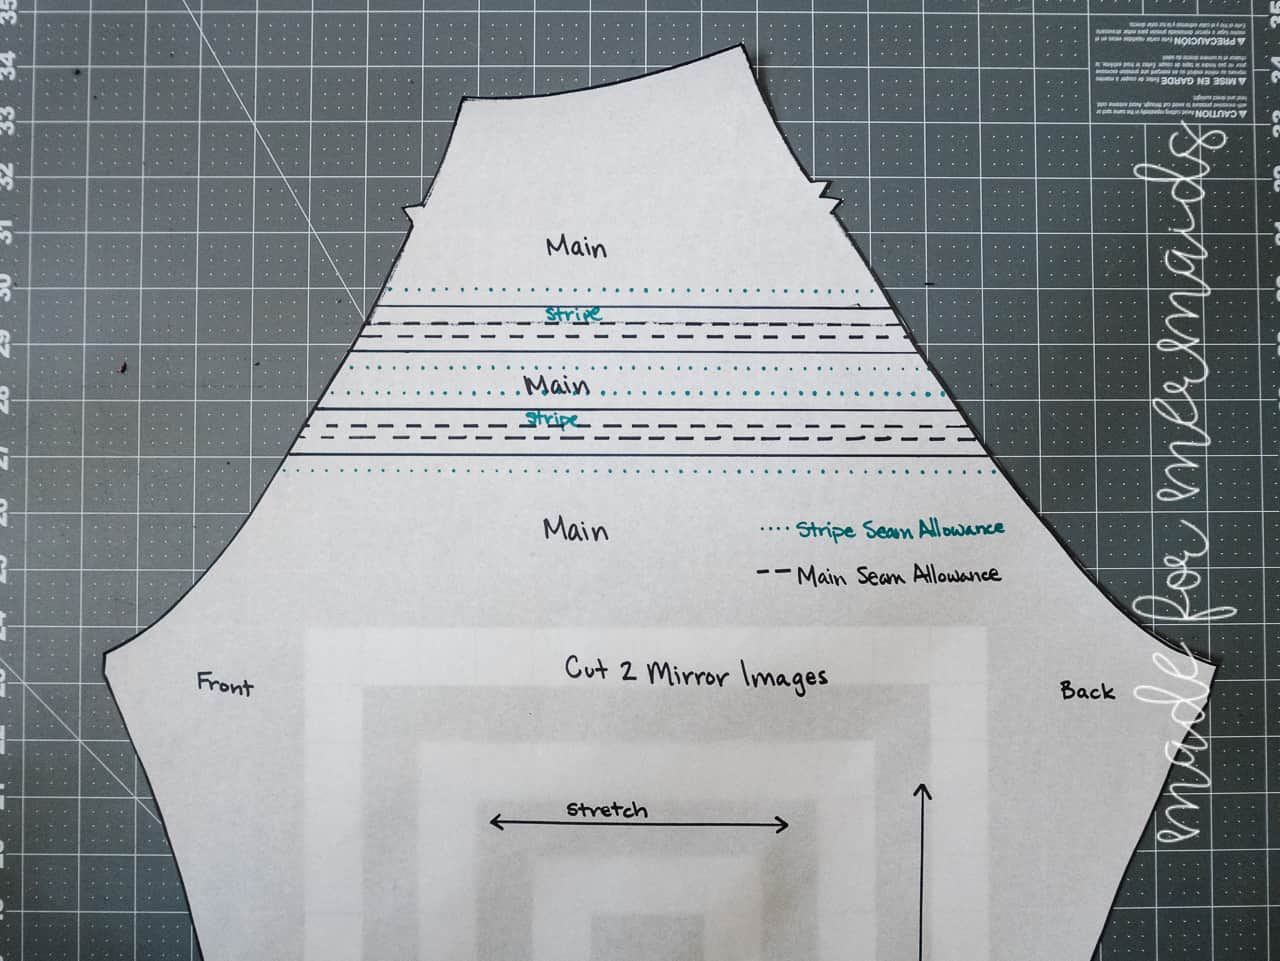
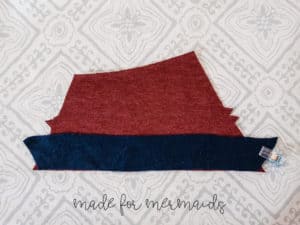
Where to start cutting your pattern piece?
Start with your sleeve pattern piece that’s been adjusted (graded for width/lengthed/shortened) if needed. I measured from where the sleeve would finish (my husband likes his long sleeves to end below the wrist and thumb joint) to the point he selected on his shoulder for the stripes. That measurement is 25”. I added the 0.5” hem allowance to my total and drew the first line for my stripes 25.5” from the bottom of the sleeve.
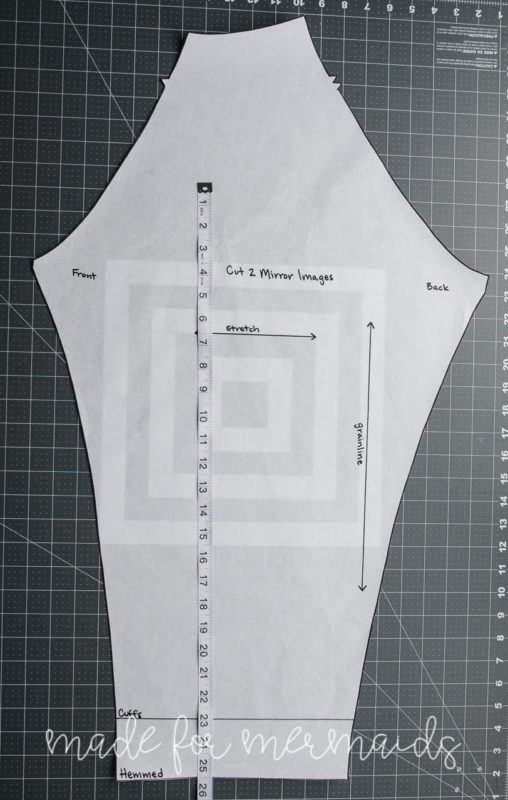
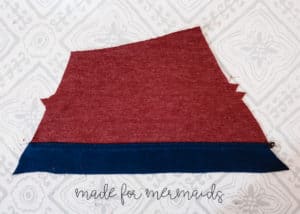
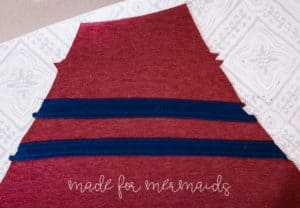
Now decide how many and how wide you want your stripes!
I went with two stripes ¾” wide, and a one-inch stripe between them. I drew my design on my pattern piece. A clear quilting ruler makes this easy. The original pattern and stripes are done in black.
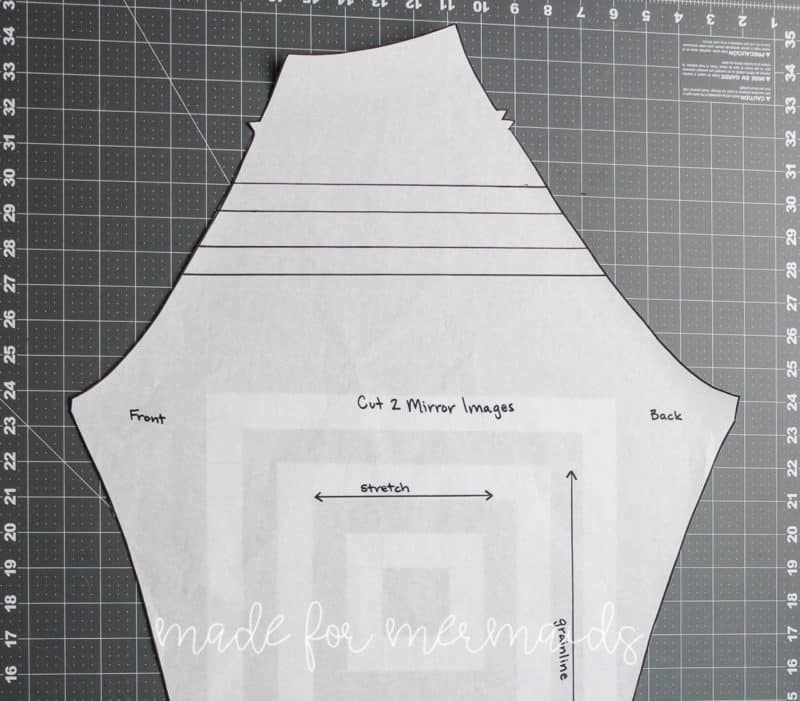
Don’t forget about seam allowances!
If you skip this step, your sleeve will end up shorter than intended! I added a ¼” seam allowance to all of my new seams. Again, a clear quilting ruler makes this quick and easy.
-

- Add seam allowance to main fabric.
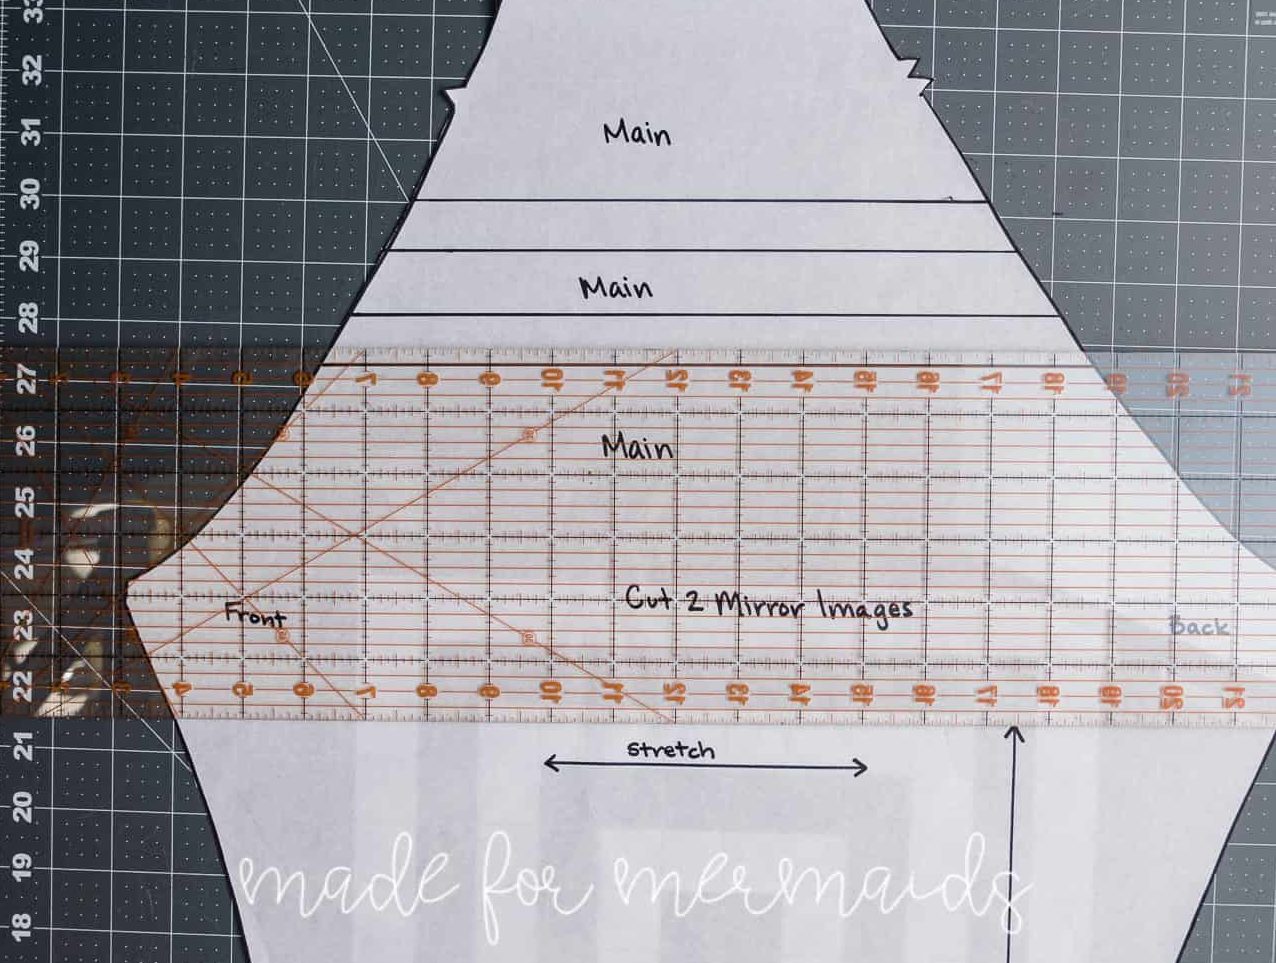

-

- Add seam allowance to stripes.
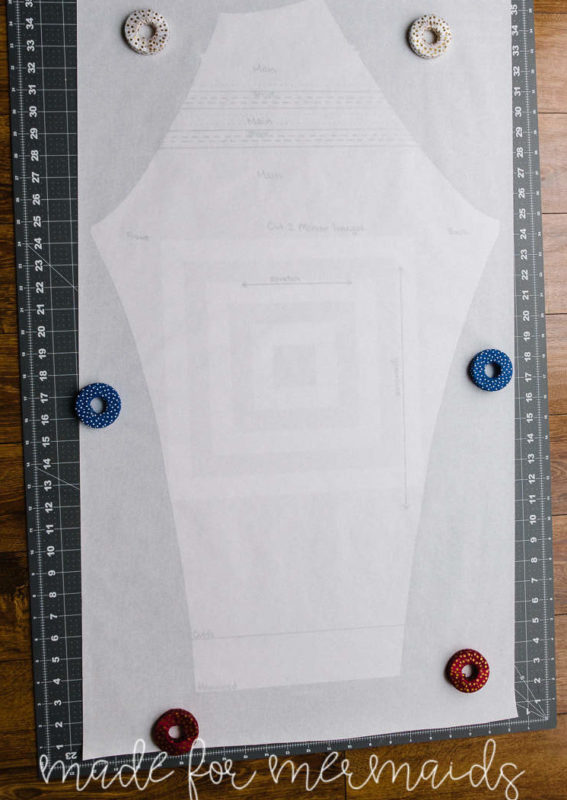
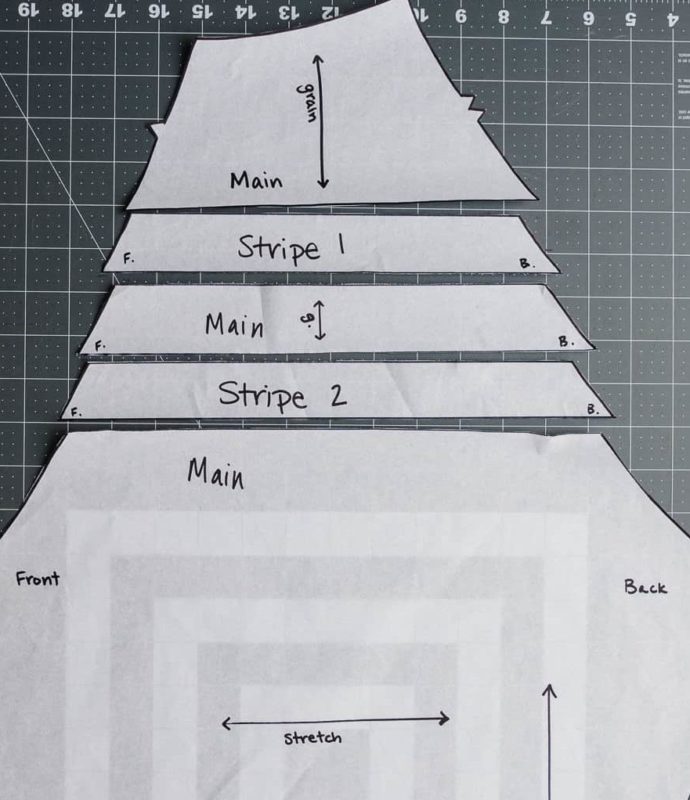
Trace off new pattern pieces and cut:
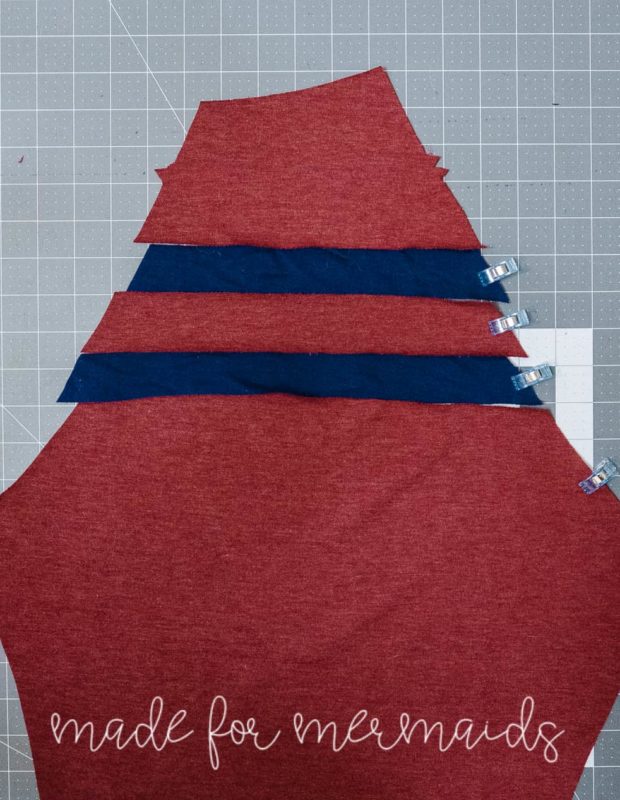
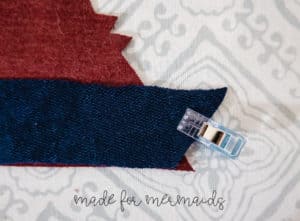
Trace the new pattern pieces that include your seam allowances. Be sure to cut two mirror images when you cut your fabric! Take the time to label or mark the front and/or backside of your pieces. I used blue clips to mark the backside of the sleeve. Trust me; it’s worth it.
Time to sew!
Start with the top of the sleeve and take stripe 1 and stitch RST, using a ¼” seam allowance. NOTE: because of the angle of the pieces you will be left with these small ¼” triangles. Continue with ‘Main’ stripe, Stripe 2, and sleeve. OPTIONAL: Top-stitch down seam allowances. Repeat for opposite sleeve.

The sleeves are done, but, I wasn’t very careful on that first seam. I quickly learned to pay more attention to when you only give yourself ¼” of seam allowance! This time, I’m not going to sweat that mistake too much since it falls within the ½” seam allowance of the sleeve.
Now, you just follow the instructions in the original tutorial to finish your Lee raglan. Enjoy! – Alexandria

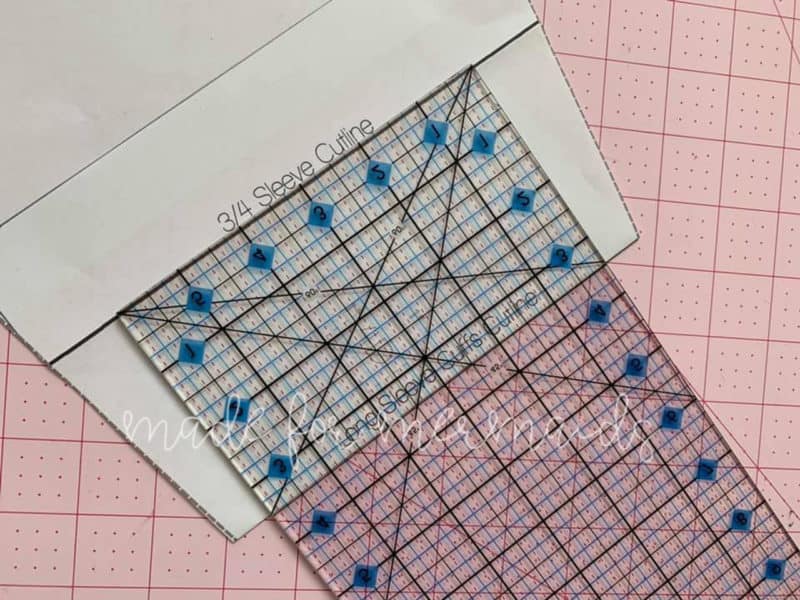
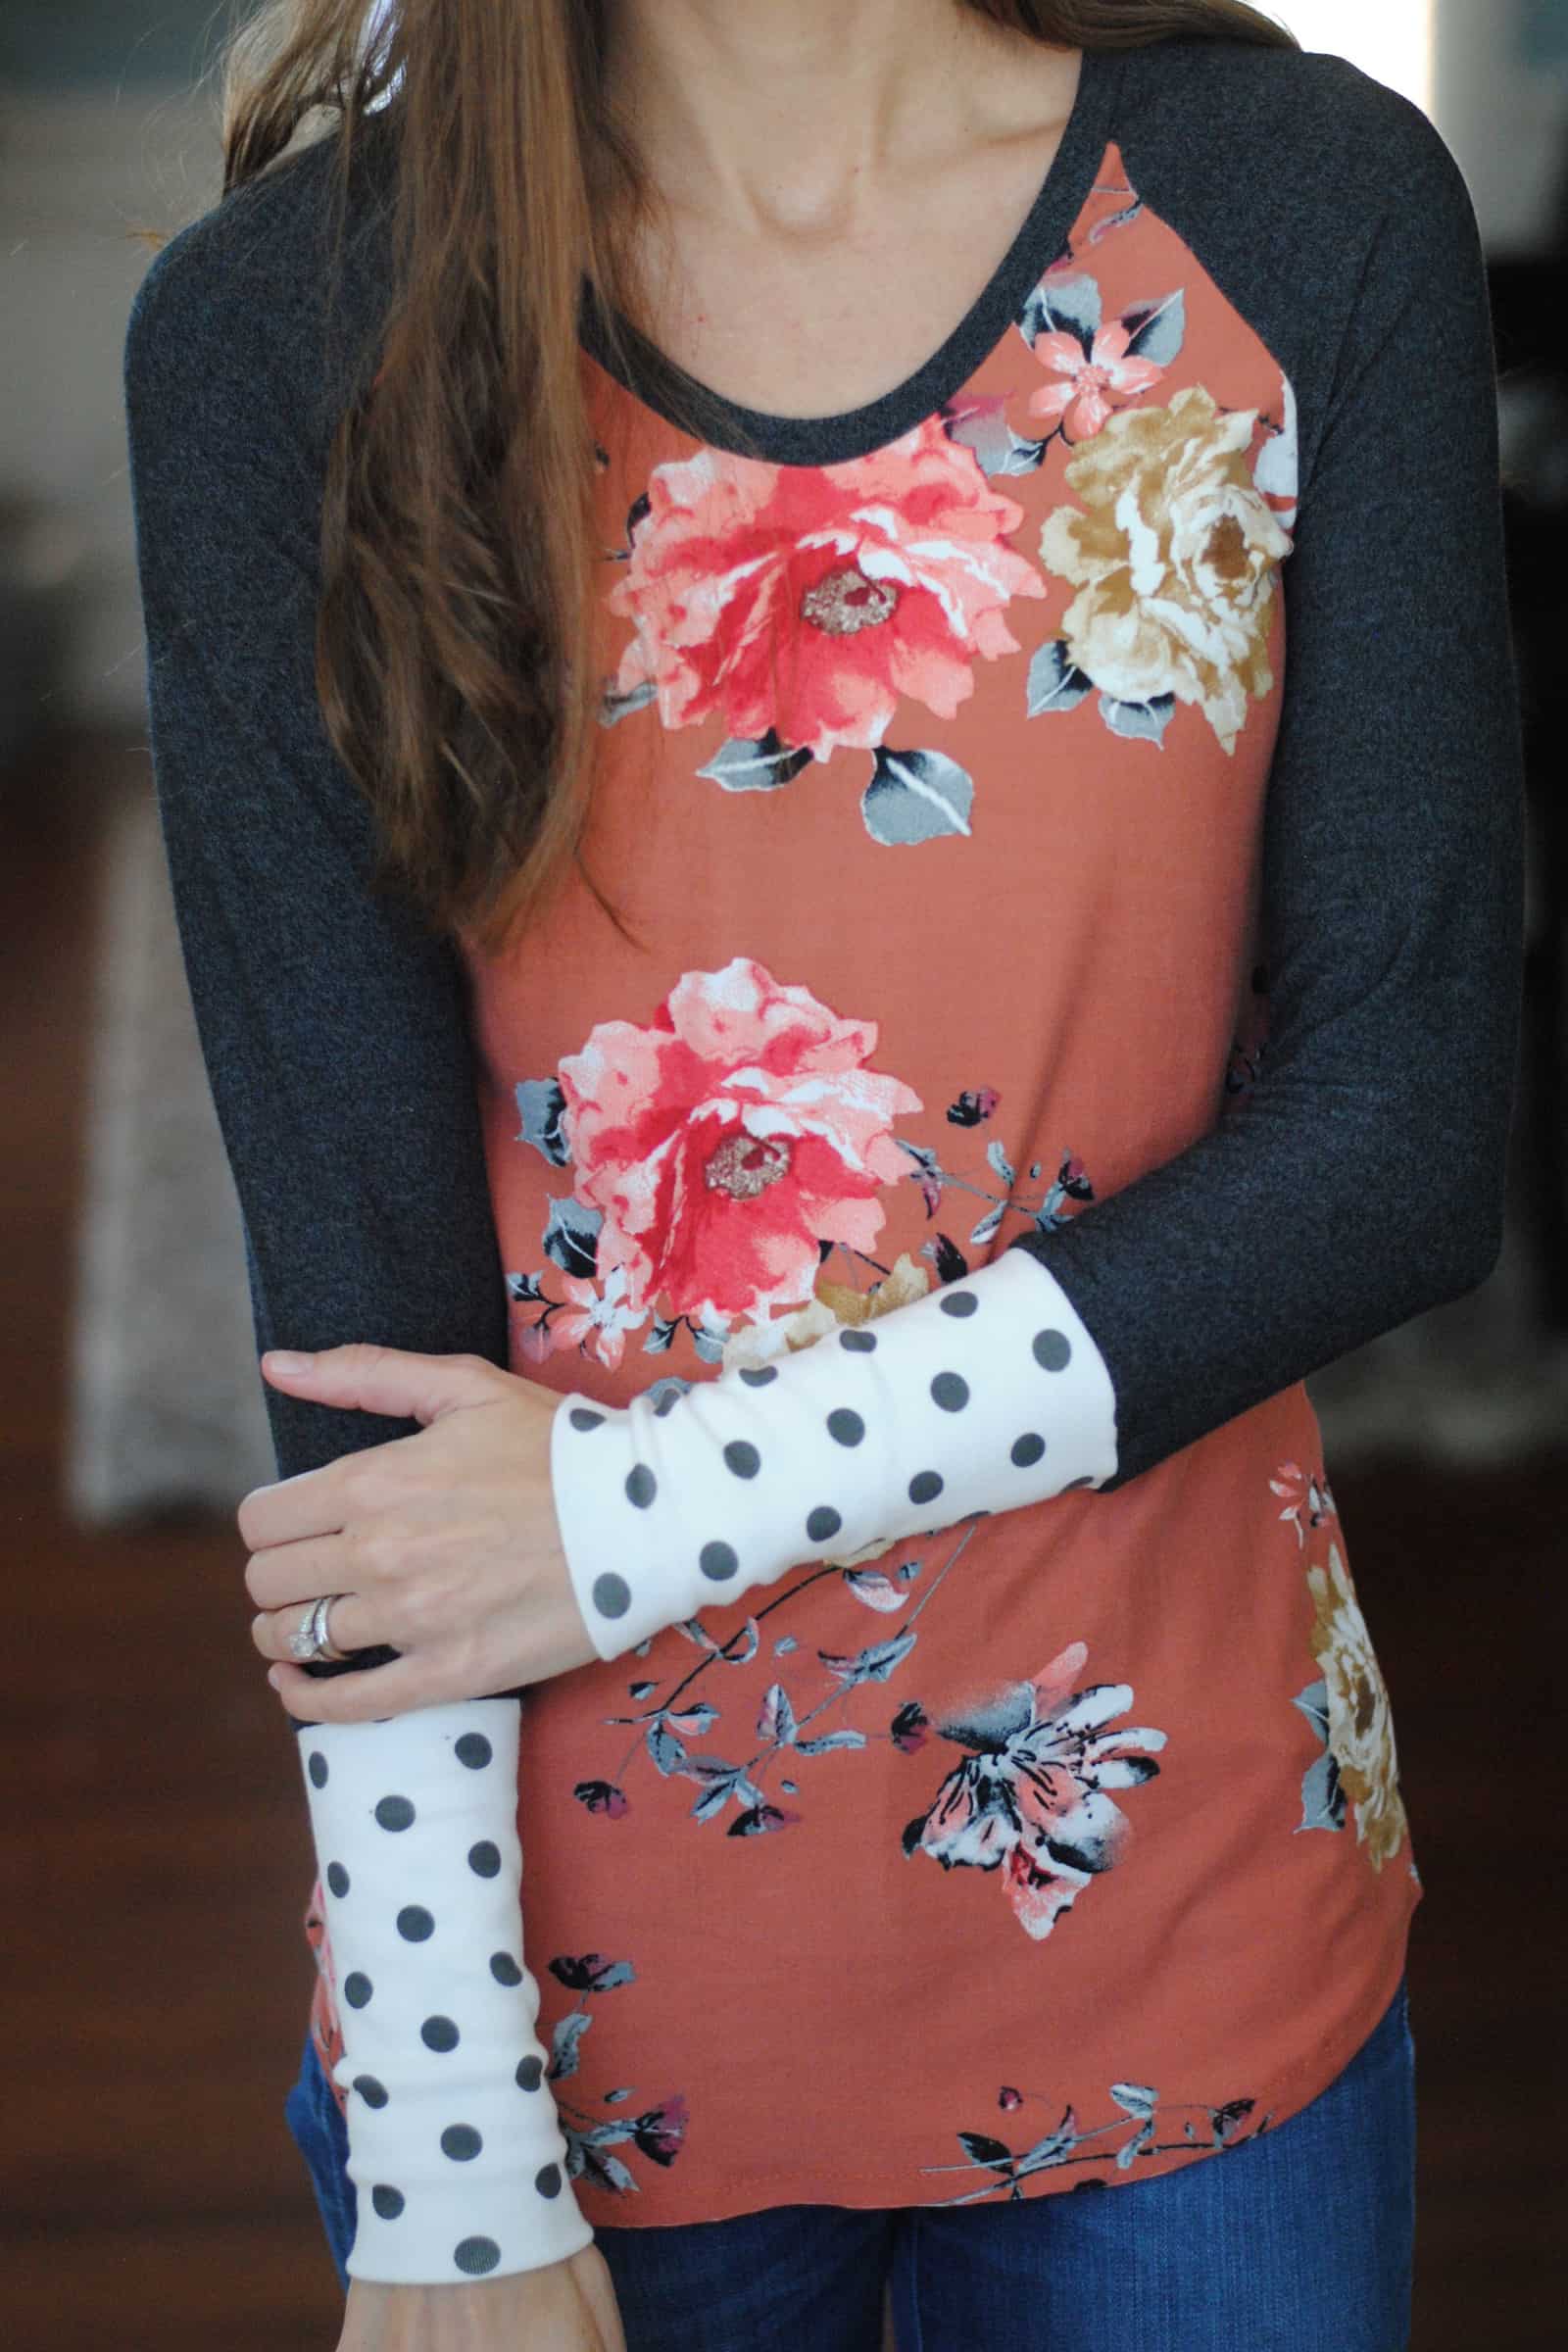
Extra Long Cuffs
This is a pretty simple hack that can really change the look of your top! The “cliffs notes” version of this hack is to remove the length from the sleeve pattern piece, and add that length back DOUBLE to your cuff piece! Now, I’ll break it down a little more and give a few more tips, but in reality, it’s that simple!
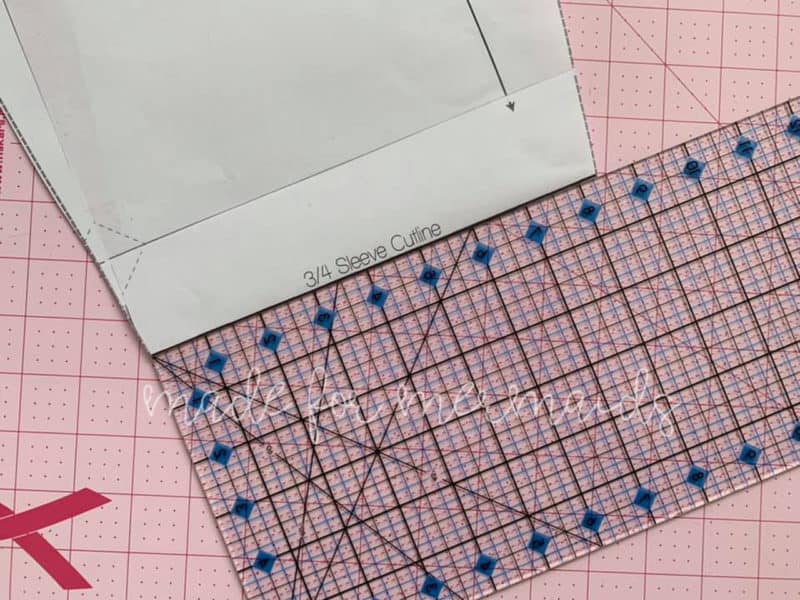
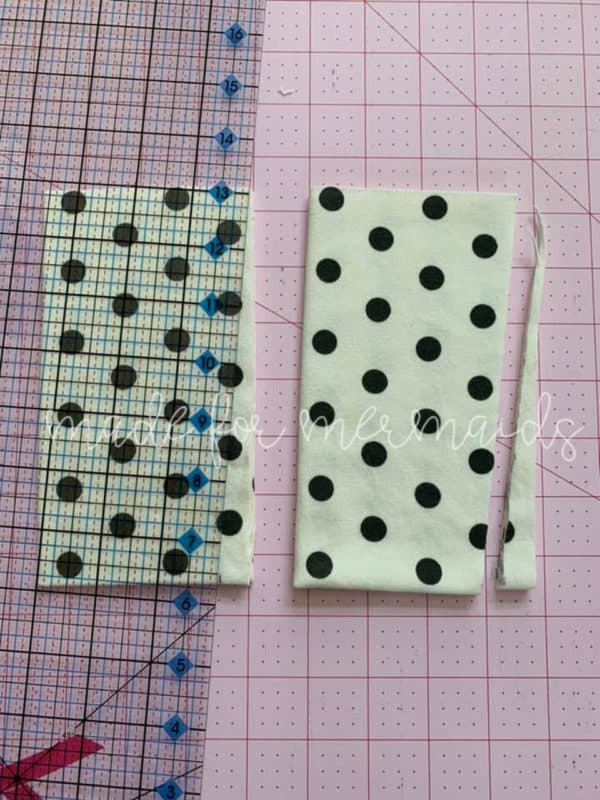
I wanted to really lengthen my cuffs, so I shortened my sleeve piece all the way up to the 3/4 sleeve cut line. This took out 3.5″ of length from the sleeve, so in order to get the length back, it meant I needed to add back 7″ to my cuff pieces (it’s doubled because it gets folded in half).
When changing the length of your cuffs, it’s also necessary to think about how the adjustment will affect the width of the cuff as well. If you are just lengthening the cuff a little bit, its really not necessary to add any width to your piece. However, if you are adjusting it 3.5″ like I chose to in this example, its worth making that width adjustment.
You can see that the width of my pattern piece at the original “Long Sleeve Cuff Cutline” is 7.25″. The width of the piece at the “3/4 Sleeve Cutline” is 8.25″. I wouldn’t want to try to attach my cuff at the original width to that, so I will be adding the extra inch of width to my cuff piece.
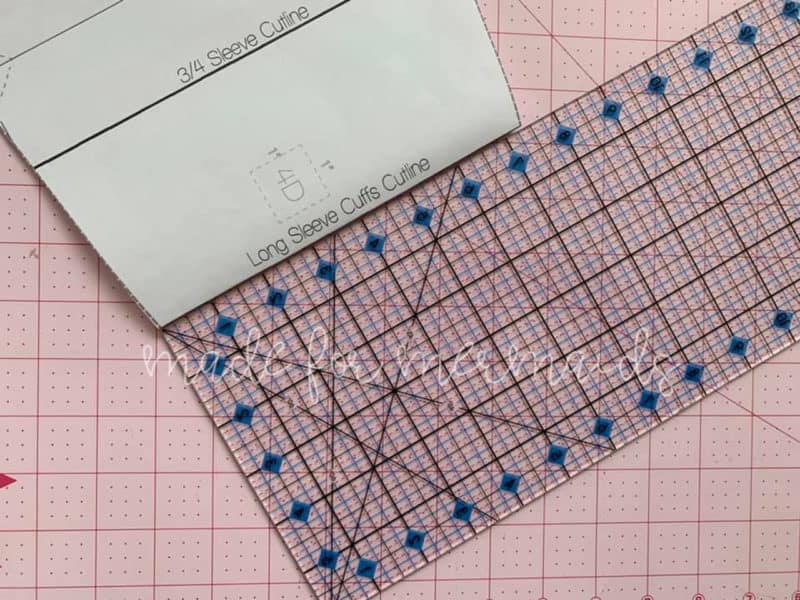
I am making a size “gray”, and the cut chart calls for a 6.5″ long x 6.25″ wide cuff piece. After adding my doubled 3.5″ length and 1″ width adjustments, my new cuff pieces will be 13.5″ long x 7.25″ wide.

Now, you could just go ahead and attach the cuff as is, I just want to note that the cuff itself will finish an inch wider at the wrist because we added that width to match up with the wider sleeve point we are attaching it to.
If you’d like to taper your cuff to finish smaller at the wrist, you can do the following:
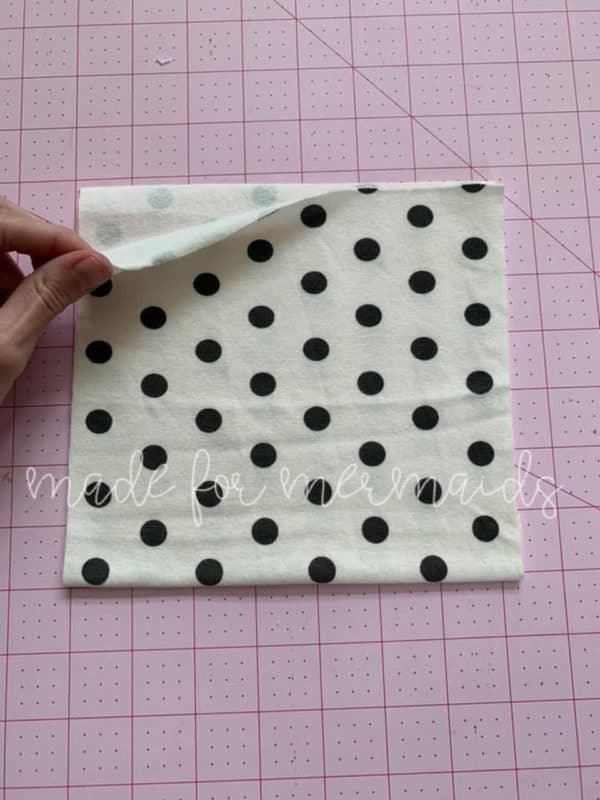
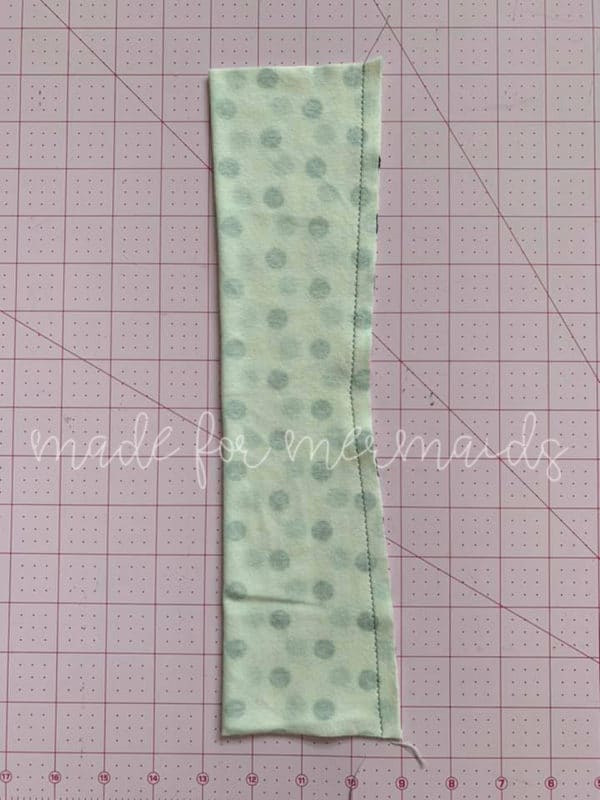
Fold your cuff pieces in half, short ends together. Then fold in half again the other way, long sides together. Make a mark 1/2″ in from your RAW EDGES on the folded side.
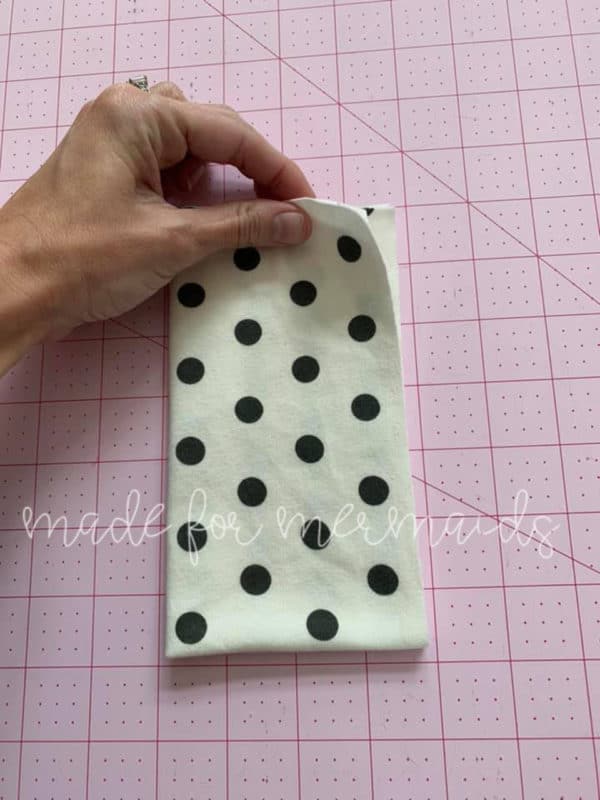
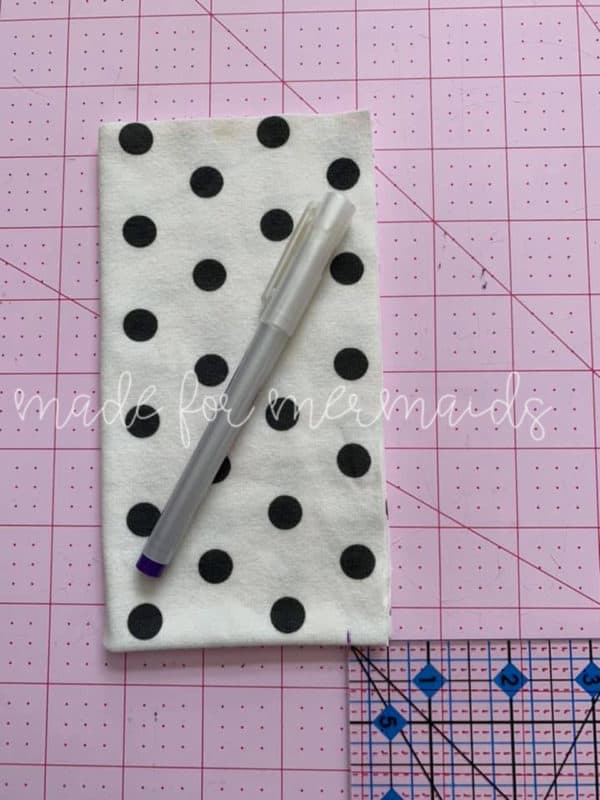
Make a diagonal slice from the raw edge corner, down to your marking, and discard that scrap. When you unfold your cuff piece, it’ll look tapered in the middle like this!

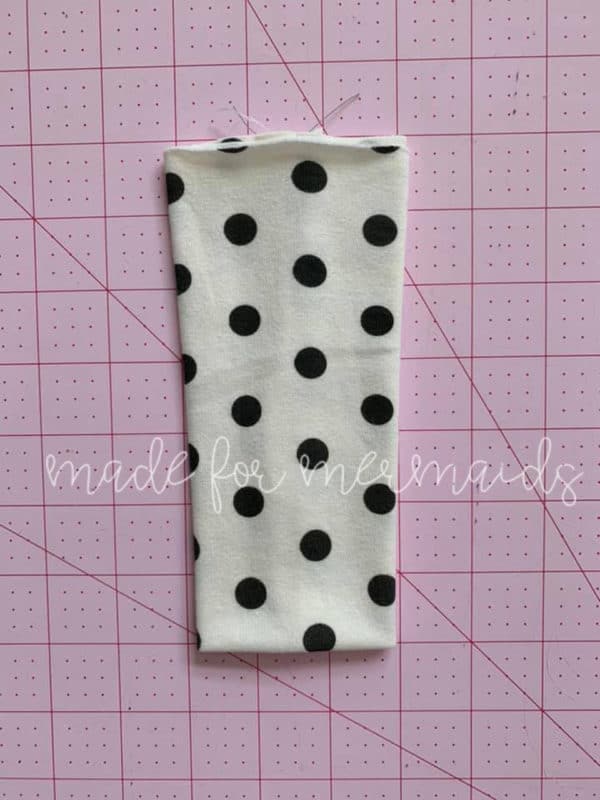
Now, you can fold it in half, rights sides together aligning the long edges, and sew it together. I usually like to use my sewing machine here to be able to keep that angle in the middle of the taper, but that is personal preference. Fold it down, wrong sides together, and you’ve created a new longer and tapered cuff. Go ahead and attach it to your top and you are done!
Happy Sewing,
Jody


Don’t forget to share your makes over in our Facebook group! We love seeing your work!
Leave a Reply