We are so excited about our new Lee Raglan patterns for Men, Women, and Youth! Raglan patterns make great beginner’s patterns, but there is generally less info out there about fitting adjustments that may be needed. Not to worry, we’re here to help with the most common fitting adjustments for raglans, all of which we saw during our testing process!
Bicep Adjustments
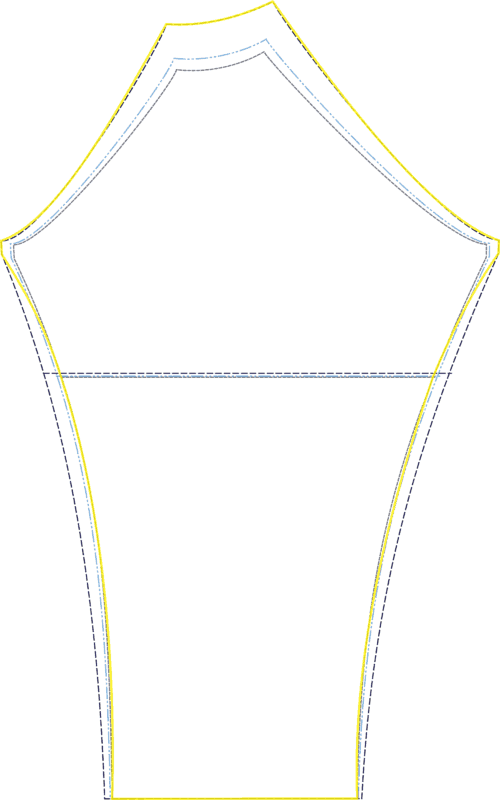
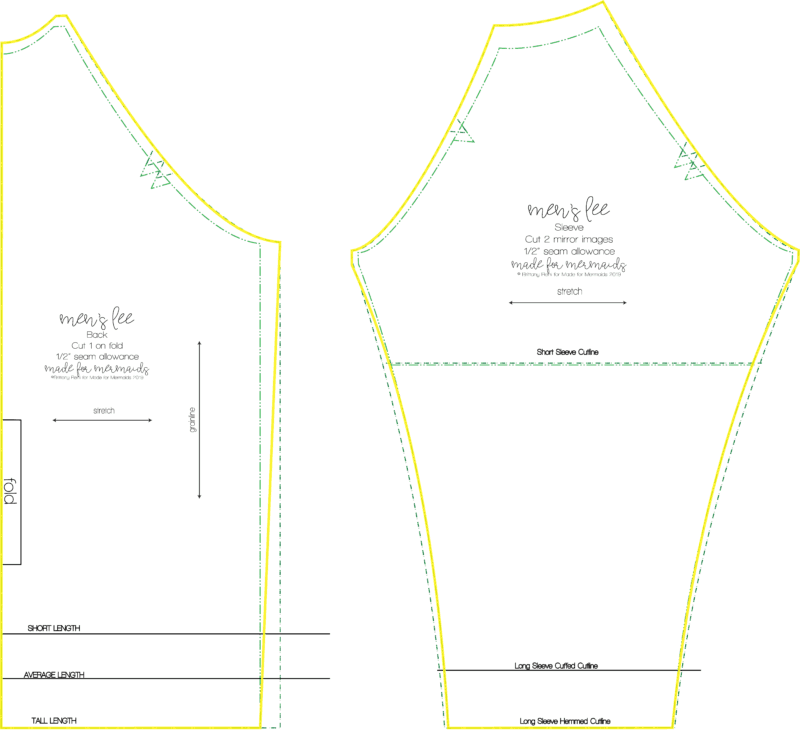
We included the finished bicep/upper arm adjustments in the Men’s Lee Pattern to allow you to modify based on size or preference for a looser/slimmer fit. You can use the finished measurement in the chart for your size to compare to your own measurement and decide whether or not you would like to adjust. If you find that you or your model’s bicep measurement is SMALLER than the finished measurement in the tutorial or you would like a slimmer fit, you can make a small bicep adjustment, as shown below. Simply follow your measured size (in this case, Medium) along the top of the sleeve. Then, gradually grade in to the smaller size (size XXS below) below the armscye to the short sleeve line. Below the short sleeve line, you may wish to grade back out slightly to the larger size, or continue with the smaller size. All of the Lee patterns are drafted for a slim fit through the forearms and wrist. You would use the same concept for women’s sizing. If you find that the sleeves are more loose than your preference through the upper arm, simply perform a small bicep adjustment on your next version!
Small Bicep Adjustment-Size Medium, with XXS Finished Bicep Measurement
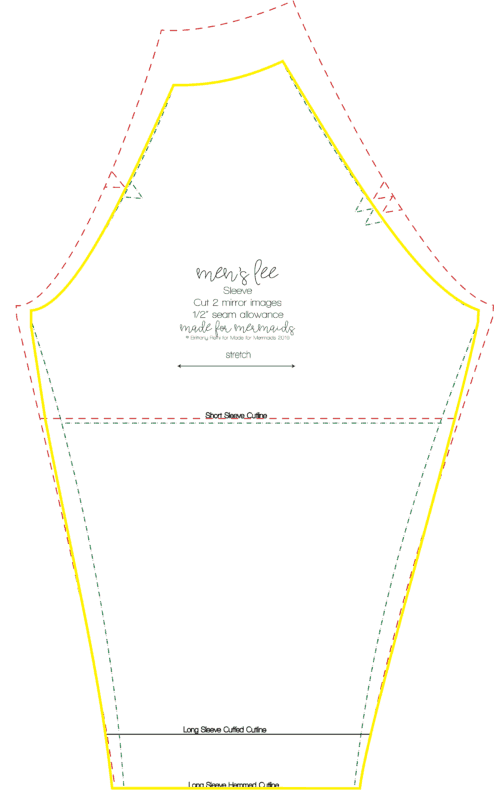
In the same way, if you find that you or your model’s bicep measurement is LARGER than the finished measurement in the tutorial, and you would like a slimmer fit, you can make a large bicep adjustment, as shown below. Simply follow your measured size (in this case, XL) along the top of the sleeve. Then, gradually grade in to the smaller size (size XXXL below) below the armscye to the short sleeve line. Again, you would use the same concept for women’s sizing. If you find that the sleeves are too slim for your preference through the upper arm, make a large bicep adjustment the same way pictured below!
Large Bicep Adjustment-Size XL, with XXXL Finished Bicep Measurement
Broad Shoulder Adjustment
Drag lines from the shoulder joint out toward the front and back sleeve seams, as well as wrinkles along the sleeve neckline are one of the tell-tale signs that a broad shoulder adjustment is needed. You can see in the photo on the left below that this tester has some drag lines going out to the front sleeve seam from the shoulder joint, which is very tight. With a broad shoulder adjustment, the drag lines are gone and the shoulder isn’t as restricted.
There are multiple ways to do a broad shoulder adjustment. The easiest way is to simply trace the larger size (in this case XL) along the armscye and neckline of the front, back, and sleeve pieces. Then grade back down to the chest or bust size along the side seam, as shown below.
Full Bust Adjustment
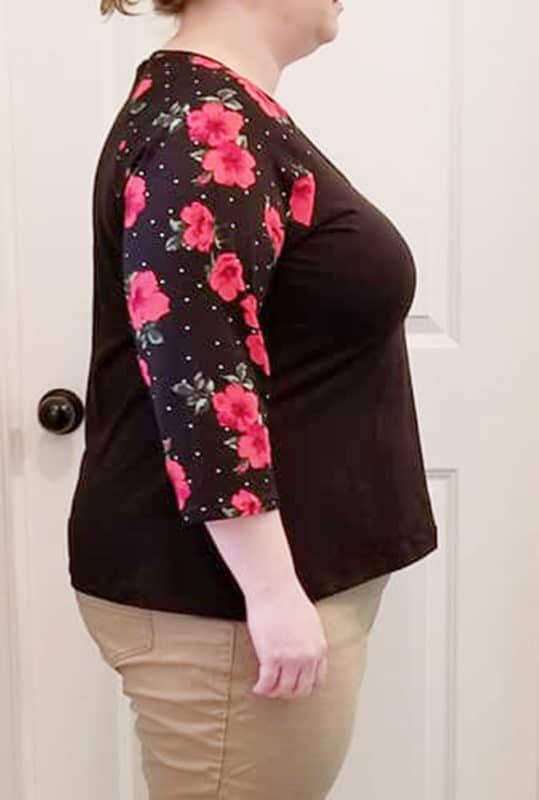
We had several testers who needed FBA’s during testing. They had some horizontal pulling right at the underarm pointed straight to their apex. The front/sleeve seam was also pulling forward toward the bust. This can be seen in the picture on the left below. The picture on the right was taken after a pivot-and-slide full bust adjustment. You can see that the front/sleeve seam is in the appropriate place and the pulling is no longer pointed at the apex.
(It is important to note that raglan sleeves are drafted with the arms out at a 45 degree angle. This means that when the arm is out at the 45 degree angle, there should be no wrinkles. But you will have some vertical wrinkles under the arm with arms down by the side. This does not mean you need a FBA. The front/sleeve seam pulling forward will be the most obvious sign of needing a FBA.) Follow the method below to perform and pivot-and-slide FBA.
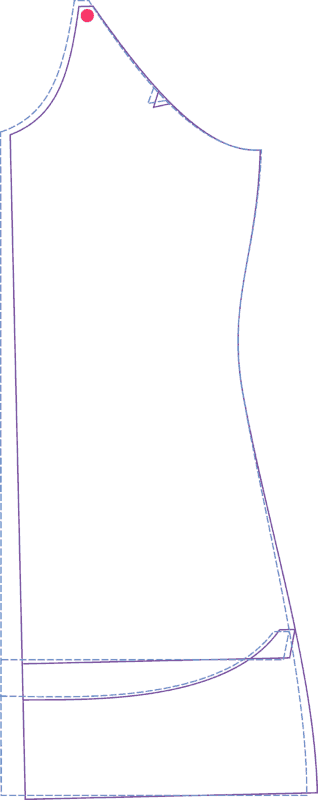
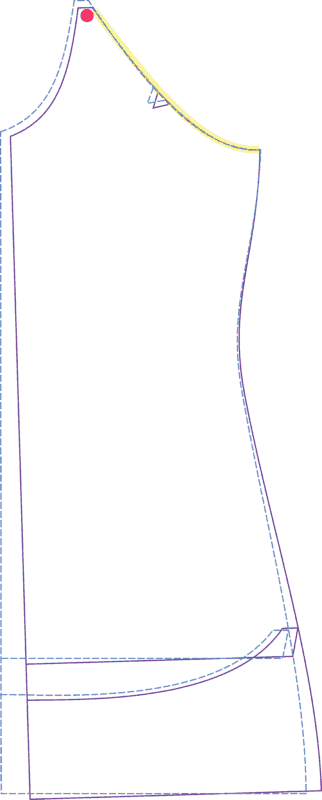
Step 1: Print and cut both your upper bust size and your full bust size. Use one finger to hold the outer neckline of the front pieces in place (the pink dot pictured below). Rotate the smaller size until it matches the armscye of the larger size.
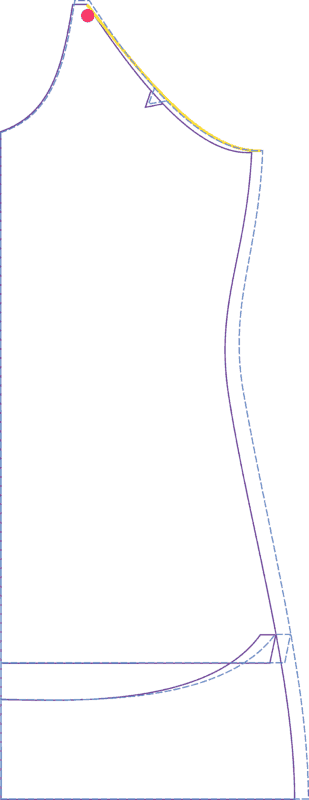
Step 2: Trace the new armscye of your adjusted piece (yellow line shown below).
Step 3: Rotate your smaller piece back into its original position. (It should be lined up at the center and bottom with the larger size.)
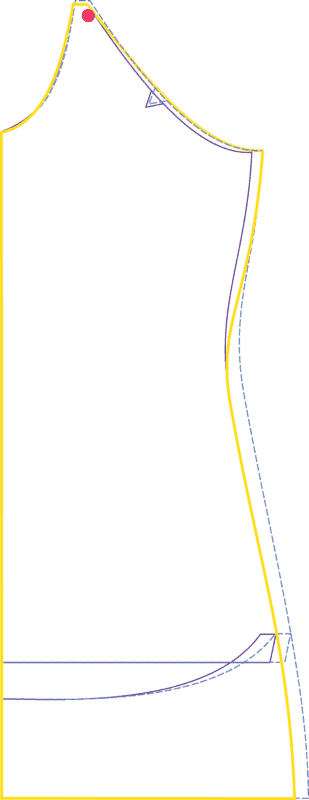
Step 4: Trace the smaller size along the remainder of the pattern – the neckline, center, hem, and side seam.
Have any more fitting questions for us? Don’t hesitate to post in our Facebook Group for help! Or just come share your makes and chat with us. We love seeing what you’re creating! <3
Leave a Reply