Hello, Lovely Mermaids! Heather from All Things Katy!, here!
Made for Mermaids Mama Lea/Ella Mash
How about a fun little tutorial for the Mamas, out there?! Today, I’m going to show you my way to mash the Mama Lea Dress pattern with the Mama Ella dress pattern. Think of it as a Mama Lea dress with the back ruffle and knit neckline binding of the Mama Ella. This tutorial will walk you through modifying the bodice pattern pieces.
Let’s jump right in!
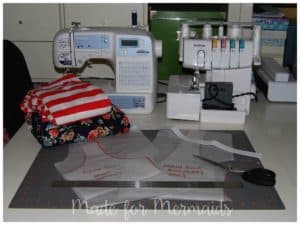
Supplies:
Knit fabric (I used double brushed poly)
1/2″ elastic
Scissors
Ruler/Tape Measure
Thread/ball point needle/sewing machine/serger (opt.)
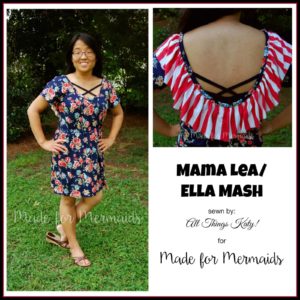
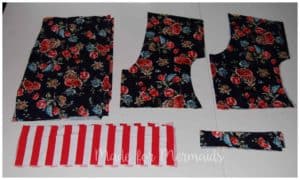
For a point of reference, I sewed up a size purple Mama Lea/Ella mash, mini length. I did modify the pattern pieces to accommodate my particular shape and size (I’m five feet tall). The floral fabric was used for the skirt, bodice and binding. The coral striped fabric was used for the back ruffle.
The first thing we need to do is modify the neckline of the Mama Lea pattern pieces. The Mama Lea pattern uses a turn and hem method for the neckline. The Mama Ella uses a knit binding for the neckline. In order to get the deep back curve and ruffle of the Mama Ella, we need to modify the Mama Lea neckline.
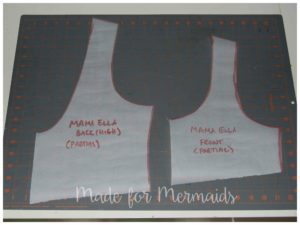
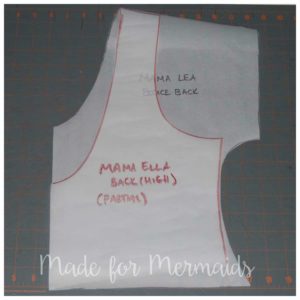
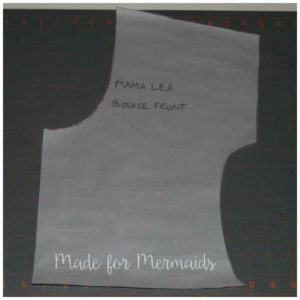
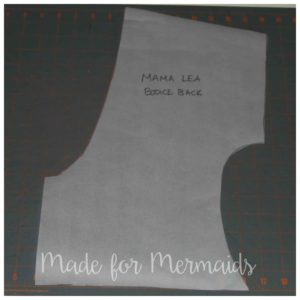
So, per the Mama Lea pattern/tutorial, print and cut out the bodice pieces (shown in black).

Do the same for the Mama Ella bodice pieces (shown in red). For the sake of this tutorial, I am only showing a partial pattern piece- the neckline- for the Mama Ella front and back bodices. I cut the Mama Ella back bodice on the “high back” cut line.
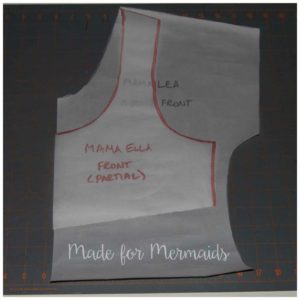
Next, lay the Mama Ella front bodice pattern piece on top of the Mama Lea front bodice pattern piece. Be sure to match up at the “fold” edge and the shoulder point. Cut along the red, Mama Ella neckline curve. It should look something like this:
Do the same for the back pattern pieces. The back should look something like this:
Your NEW pattern pieces will look like this:
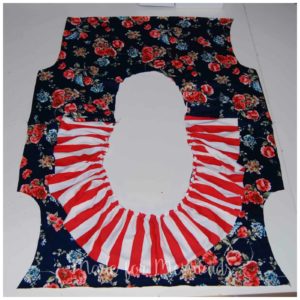
Now, we need to figure out how long to make our back ruffle. Once you have created your new bodice pattern pieces, measure your neckline. A flexible tape measure will assist you most in this step. For size purple, the back neckline is approx. 26″ long (shoulder to shoulder). I doubled this in order to get a nice, full ruffle. For the knit neckline binding, I just followed the Mama Ella pattern for the “high back” neckline.
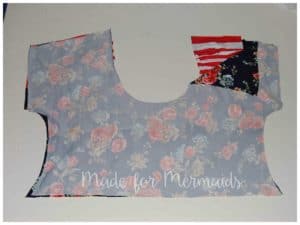
Here are my pieces, all cut out:
*Note, for this mash, the back ruffle will end at the shoulder seam and NOT continue to the front as it does in the regular Mama Ella pattern.*
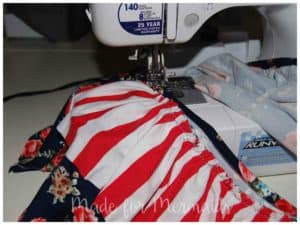
Next, I basted the back ruffle to the back bodice neckline (both pieces right side up). This will help with assembly in later steps.
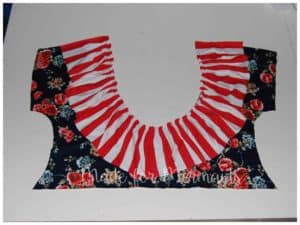
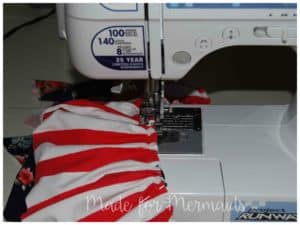
After the ruffle is basted to the back bodice piece, I took the front bodice piece and laid it on top, right sides together. Sew both shoulder seams.
This is what the bodice looks like after the shoulder seams are sewn:
Then, follow the Mama Ella tutorial for the neckline binding. Be sure to catch the ruffle properly in the binding and that everything lays nice and flat while sewing.
Here is what the bodice looks like once you have attached the binding:
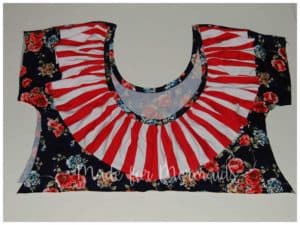
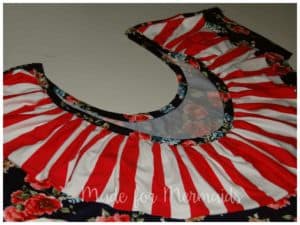
Look at that pretty knit neckline binding! 🙂
Lastly, follow the Mama Lea tutorial to sew up the side seams, attach the skirt/elastic casing and hem. *Tip: Be sure to move the back ruffle out of the way when attaching the skirt to the bodice…. ask me how I know… ;-)*
Ta-da! Introducing the Mama Lea/Ella Mash! Sew much fun to sew and wear!

Mama Lea/Ella Mash- FRONT

Mama Lea/Ella Mash- BACK
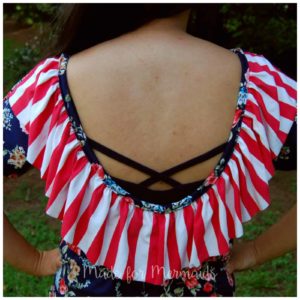
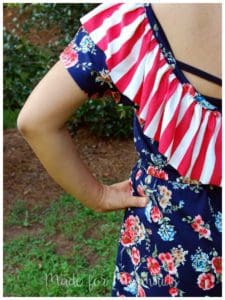
Mama Lea/Ella Mash- BACK DETAILS
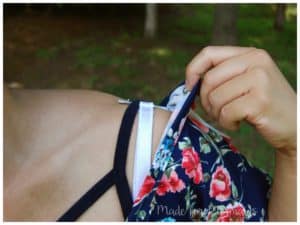
Of course, I had to add the Bra Strap Holder to my Mama Lea/Ella dress….! No wardrobe malfunction for me! 😉
And, of course the Patterns for Pirates Cross Your Heart Cami look PERFECT with this dress…!
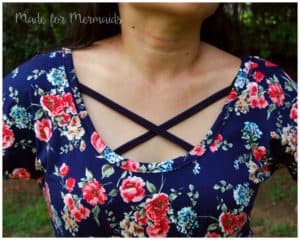
Patterns for Pirates Cross Your Heart Cami (High front X and low Back X)

Mama Lea/Ella Mash
Leave a Reply