Today is the last day of our sew-a-long! If you are just joining us, make sure to check out Day 1, 2, and 3!! Time to work on the pockets, skirt construction, and last but not least, adding those fun buttons!! Are you excited yet?!?!
Skirt Construction
If you are making a basic skirt, meaning no button down front and no pockets, follow the tutorial to sew your front and back skirt together. Remember, the back skirt is wider than the front, so don’t mix them up! I usually stick a pin in the front skirt to help me remember. Skip down to ‘Hemming & Gathering your Skirt’.
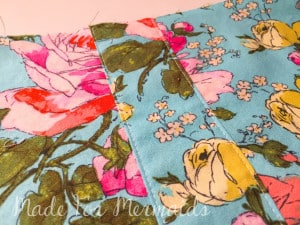
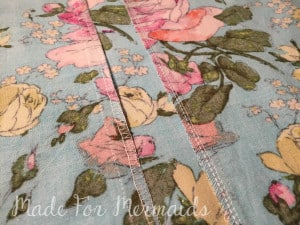
If you are making the faux button placket, sew the center panel to each front skirt piece, as per tutorial. See how the seams are pressed towards the center panel on the backside, and then top stitched on the right side? Now that the front skirt piece is sewn together, you can skip to the ‘Pockets’ section if adding pockets. If you are not adding pockets, sew your front skirt to your back skirt, as per tutorial, and skip down to ‘Hemming & Gathering your Skirt’.
Pockets
Pockets are great, my little one LOVES to shove her ‘treasures’ in them. Oh, and rocks. TONS.OF. ROCKS! Pockets aren’t as scary to make as you think! Let’s start by finishing those pocket pieces and both short sides of your skirt pieces. I’m using my serger, but if you don’t have one you can use a zig zag, or an overlocking stitch on your sewing machine. If using your serger, don’t cut any fabric off!
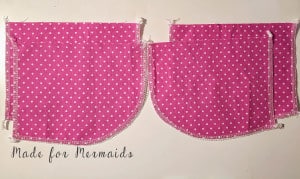
Lay your front skirt down, facing up. With right sides together, place one pocket piece on each edge of skirt, as per tutorial. With a 1/2″ seam allowance, stitch each pocket to skirt along side seam.
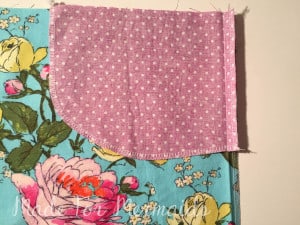 Press both pocket seams open, where the pocket and skirt meet. This step is important! Your skirt seam allowance should now be pressed toward your skirt, and your pocket seam allowance should be pressed toward your pocket. Repeat with back skirt/pockets.
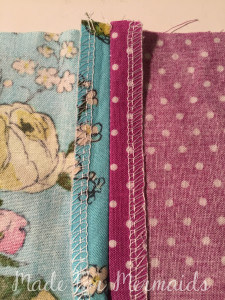 Lay your front skirt on top of your back skirt, right sides together, matching up pockets. Stitch front and back skirts together, from top of pocket, along outside edge of pocket, to skirt hem. This is a little fussy, as you need to keep that seam pressed open along the pocket. Repeat on other side.
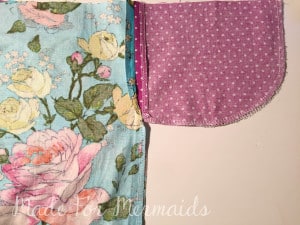
Press pocket toward inside of skirt.
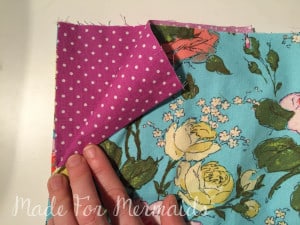
Here is why it was important to press that pocket seam open! you want to edge stitch along the front and back side of the pocket openings, catching just the POCKET seam allowance on the underside. Make sure the skirt seam allowance is still pressed toward the skirt.
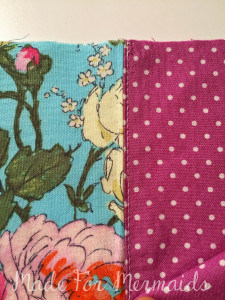
Fold the pocket into place and baste pocket to FRONT skirt only along the top edge. Repeat with other side. Tada! You can’t even see the pocket in that side seam!
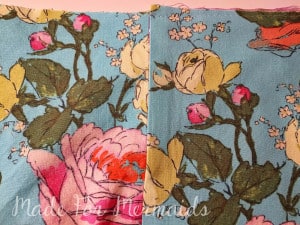
Hemming & Gathering Your Skirt
You are now ready to finish your skirt! Hem skirt, as per tutorial. Sometimes I like to add lace to my hem, or even roll the hem! Get creative…it’s YOUR skirt! Once your skirt is hemmed, gather your skirt using your favorite gathering method. If you added pockets, you will need to be extra careful not to break your thread while gathering them because of all the layers.
Attaching your Waistband
Samantha was recently updated to include 2 methods of attaching your skirt to your waistband. You can either 1)leave the waistband seam exposed by attaching the skirt to the waistband and waistband lining at the same time, or 2)enclose your skirt inside of your waistband. Enclosing your skirt in the waistband gives you a nice, professional finish, especially if you don’t own a serge or if your little one does not like the feeling of seams against their skin. If you are doing option 1, follow the tutorial to finish your skirt. If you are enclosing your skirt in the waistband, follow along below!
Enclosing Your Skirt in the Waistband Seam
Your skirt should now be gathered and your waistband lining should be folded ½” towards wrong side (my lining is the pink fabric in this photo). Place the waistband inside the skirt, right sides together (RST), pulling lining out of the way. Match side seams (and center seams if you made the button placket version) and pin to MAIN waistband . Sew skirt to waistband, making sure not to catch lining. Press seam towards waistband.
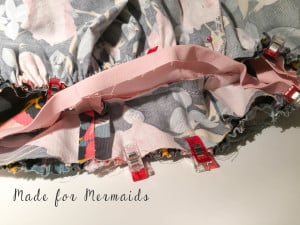
It is now time to create the back casing that will hold our elastic. Fold lining over waistband seam. Remember, your lining is still pressed 1/2″ towards wrong side. We will be top stitching on the front side of the the BACK WAISTBAND ONLY, catching the lining under and enclosing the seam. You could pin like crazy to get that lining to stay in place while you top stitch, but I prefer using a fusible tape! It really makes for a nice, professional looking finish. I like this double sided fusible tape because it’s 1/2″ wide-exactly the size of our seam allowance! To use this particular fusible tape, you simply press it down, iron in place, peel off the backing, and lay the lining on top. Make sure to follow the directions for the brand you use. 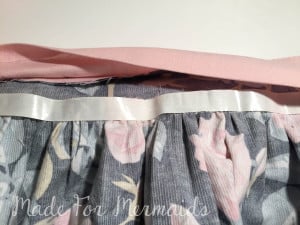
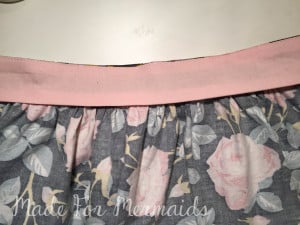
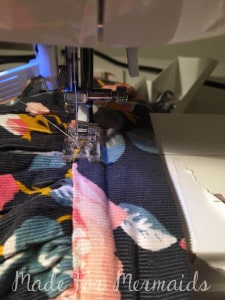
Top stitch along back waistband only
Doesn’t that look so nice?! The inside of my skirt is just as pretty as the outside!
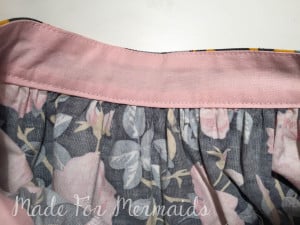
Adding the Elastic
You will now need to insert the elastic into the back waistband, as per the tutorial. If you don’t have the recommended elastic size you can create two casings like I did (Remember, since you are creating two casings you will need two pieces of elastic)! Here, I am using 2 pieces of 1/2″ elastic instead of the recommended 1.25″ or 1.5″ elastic. If you want to use 1/2″ elastic you will need to stitch down the center of the back waistband. You will now have two casings instead of the one. Insert Elastic(s) into casing(s) and secure in the side seams by stitching in the ditch, as instructed in the tutorial.
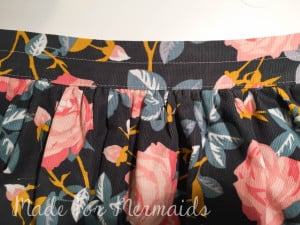
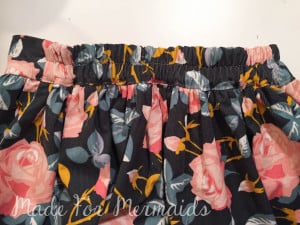
Here’s a close up of the back waistband with the elastic secured in one side only. I have stitched in the ditch along that side seam, catching the elastic to secure it. When I stitch in the ditch I like to reduce my stitch length. It makes it harder to see the stitches and further secures the elastic!
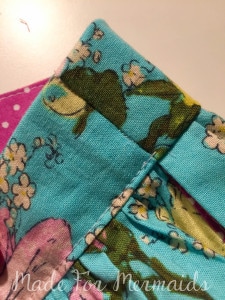
We are almost done! Finish enclosing that front seam by top stitching on the front side of the the front waistband, catching the lining under and enclosing the seam.

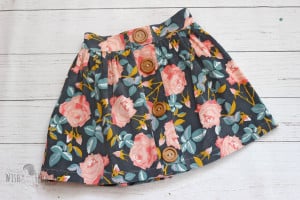
Now it’s time to embellish your skirt with buttons, if adding! You can either hand stitch those buttons in place, or use your machine.
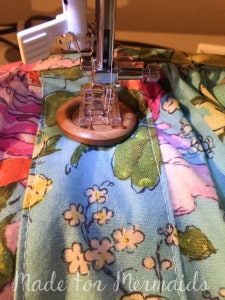
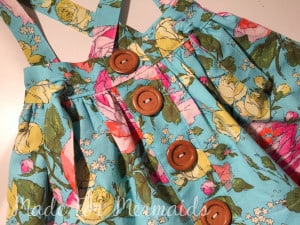
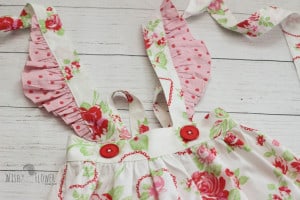
If you made the Knot Style Suspenders, try out those knots! They are just too cute!
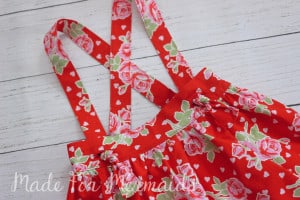
You did it! You can now #sewallthesamanthas! Don’t hesitate to ask questions in the Made for Mermaids Patterns Group page on Facebook! I can’t wait to see all the gorgeous versions you create! Snap some pictures of your finished skirt, modeled or not, and share them in our Final Picture Album in the Made for Mermaids Patterns Group page on Facebook or Instagram #samsal #m4msal #samanthasuspenderskirt. You have all day today, into tomorrow to add your photos! Voting will begin Sunday, and winners will be announced on Monday!! Anyone in the facebook group can vote for/”Like” their favorite Samantha. You can “like” more than one finished skirt.
On behalf of #TeamMermaid I want to thank you for sewing along with us! We hope you had fun and got some sweet sewing accomplished in time for Valentine’s Day, or this Spring! Don’t forget to share.. we love to see what you’ve created with your Made for Mermaids patterns! xoxo
Thank you for creating this Sew-a-Long and helping all of us out, especially the newbies. I look forward to making more Samantha skirts and using more M4M patterns in the future!
So glad you it! Thanks for sewing-a-long ; )