

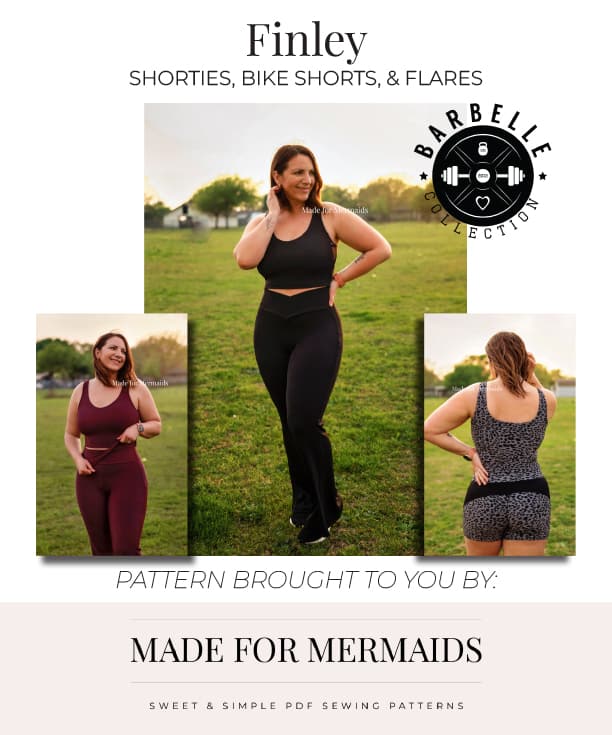
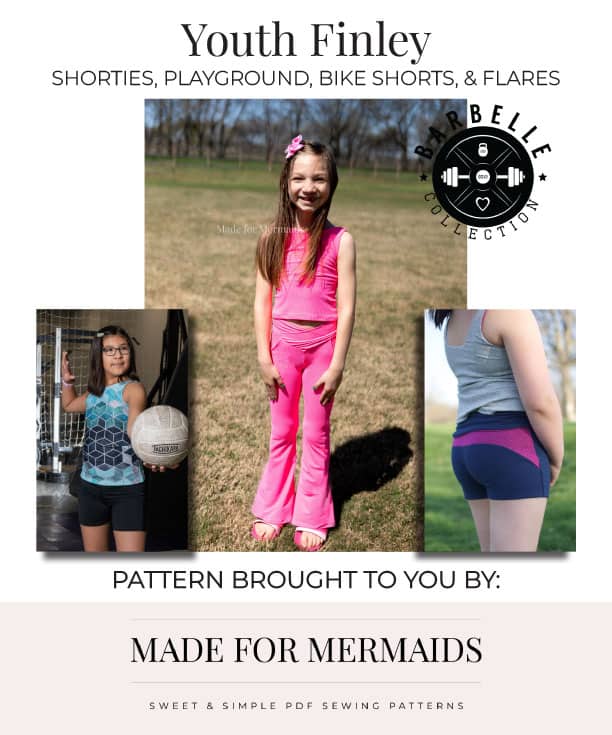
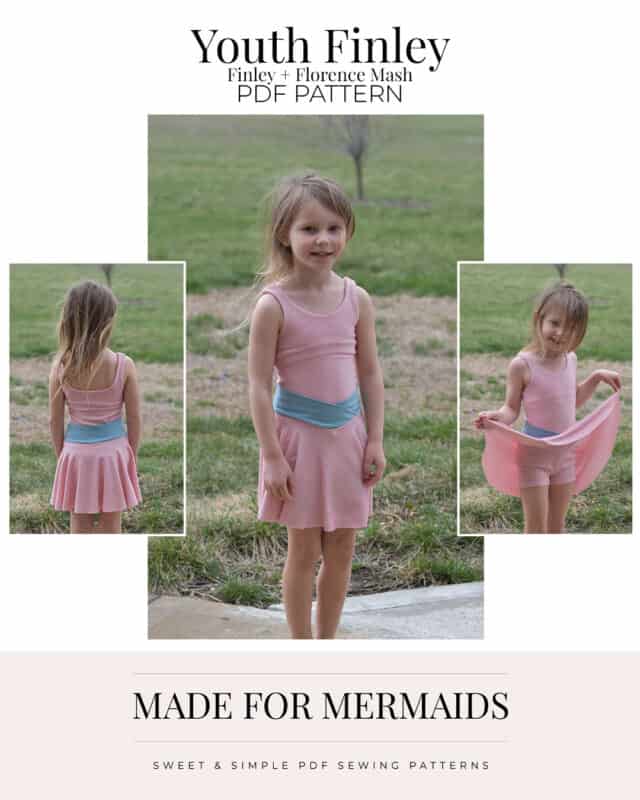
We’re so excited to be releasing the first four patterns in our brand new Barbelle Collection – Youth and Adult Lulu, and Youth and Adult Finley. As with our other collections, you’ll see more patterns added to the lineup over time, but check out more info on Finley below:
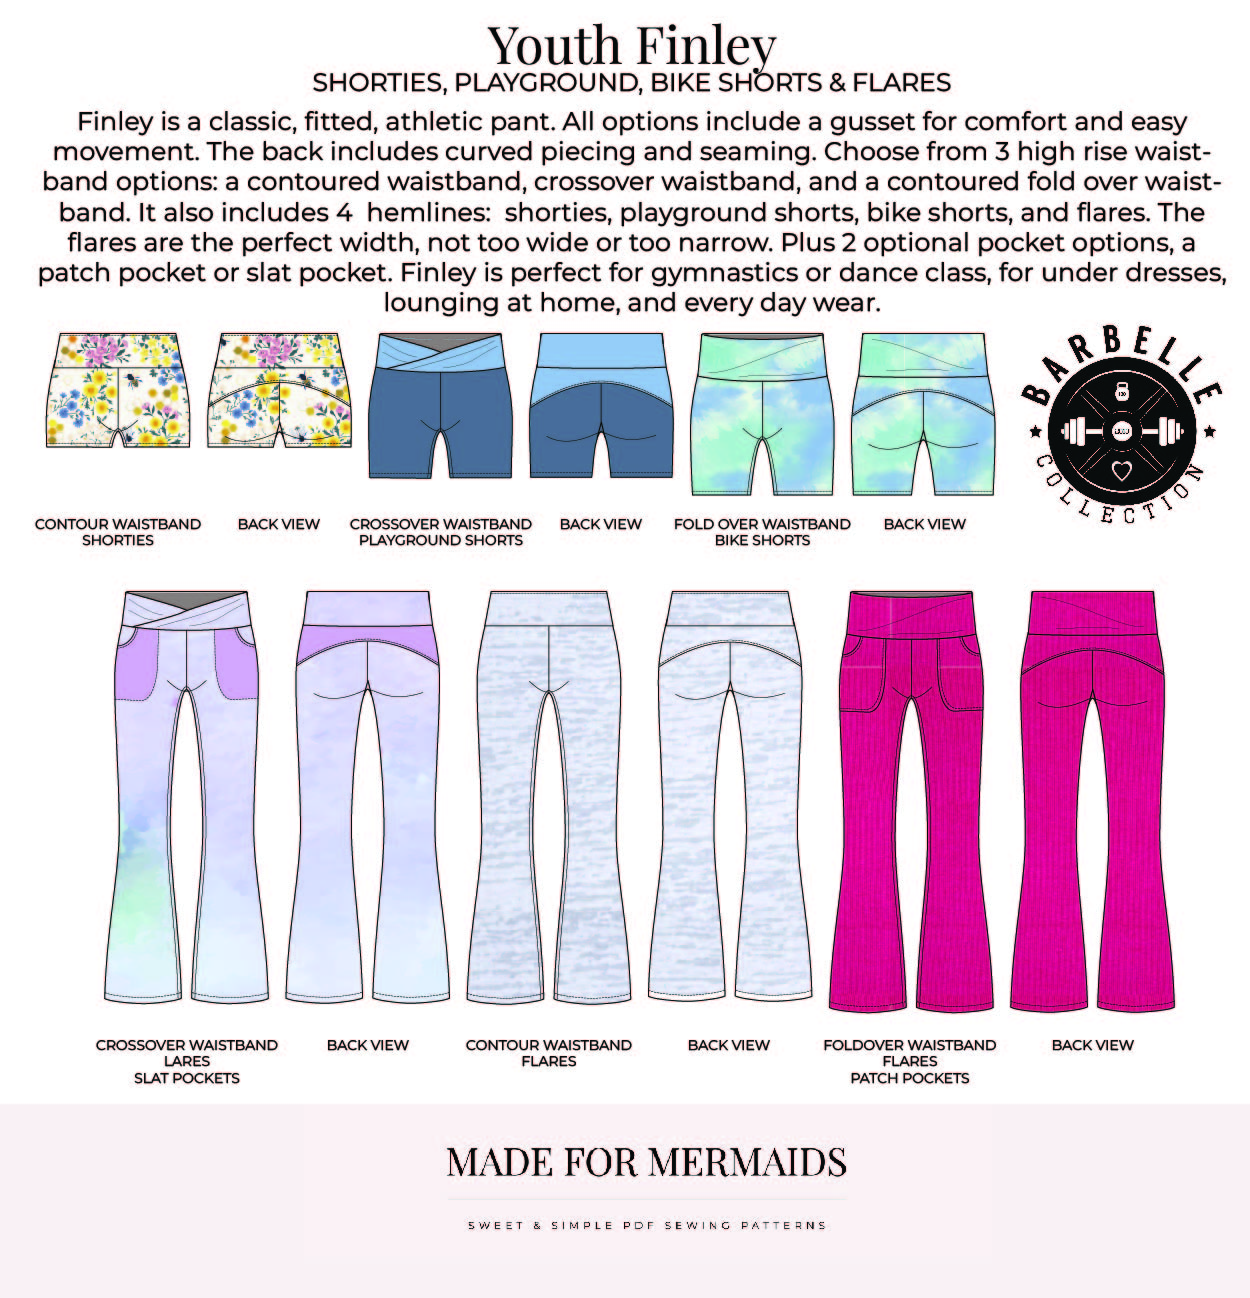
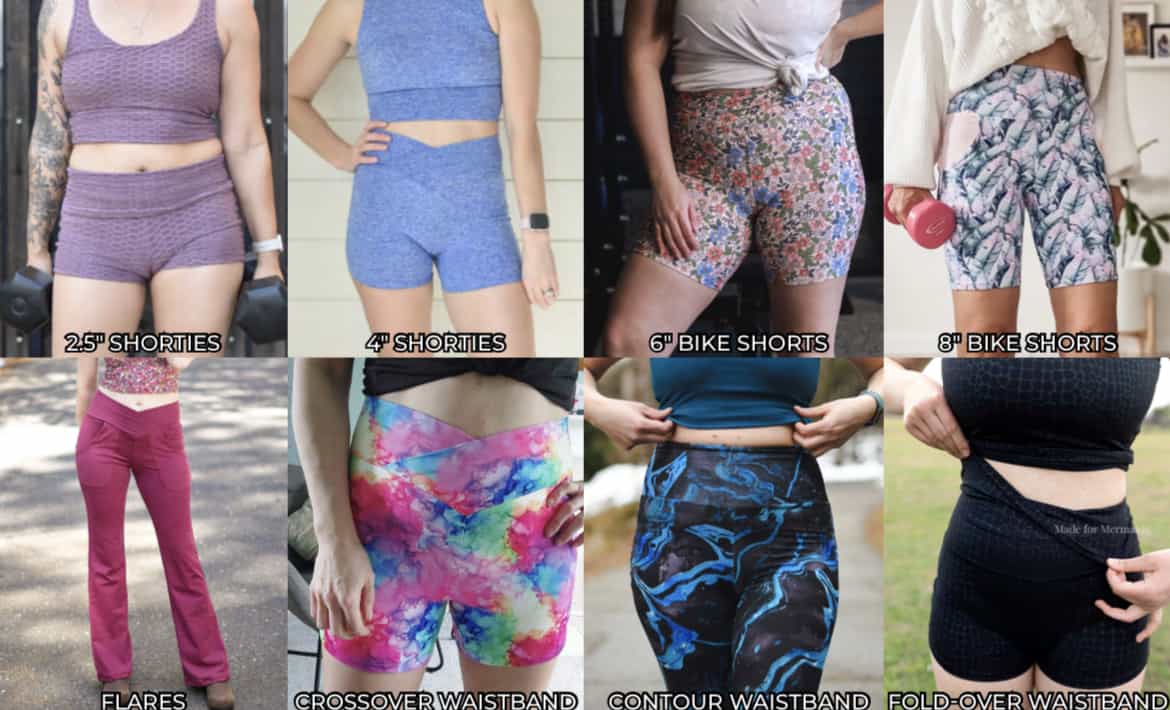
Finley is a classic, fitted, athletic pant. All options include a gusset for both comfort and ease of movement. The back includes flattering curved piecing and seaming. You can choose from three ultra high rise (youth is just high rise) waistband options – countered waistband, crossover waistband, and a contoured fold-over waistband. There are SIX (yes, six!) hemlines for adults: 2.5″ and 4″ shorties; 6″ and 8″ bike shorts, and 30″ and 32″ flares. There are 4 hemlines for youth: shorties, playground shorts, bike shorts, and flares. The flares are the perfect width – not too wide or narrow. There are also two optional pocket styles – patch or slat. Finley is the perfect choice for the gym, dance class, lounging at home, and every day wear!

Getting Started
Before you purchase your pattern, there is a ton of helpful beginner information between the M4M and P4P blogs, in case you are new to knits, or new to PDF patterns in general:
- New to PDF patterns? Check out our helpful tips here
- New to sewing with knits? Brittany has some great info here
- Not quite sure how to measure yourself accurately? Don’t worry; check out the post here!
- Having issues printing? Most issues can be resolved by using our FAQs/troubleshooting tips
- Join our Facebook group here.
Choosing Your Options
We have lots of tester photos in our FB group and on the site if you want to see a variety of photos of each option before you decide! Here is a quick snapshot of the different options:

Fabric + Notions
Finley is designed for medium weight knits (200 gsm +) with 4 way stretch, great recovery, and a minimum of 50% horizontal AND vertical stretch. You’ll want to look for a high spandex content – 5% minimum, but 12%-25% will be better!
Recommended fabrics for athletic wear include ribbed athletic knit, athletic brushed poly, nylon spandex, poly spandex, supplex, yoga knit, nylon spandex tricot, poly spandex tricot, ribbed tricot, athletic foiled knit, etc.
Recommended fabrics for more casual wear include cotton lycra, double brushed poly, thicker ribbed knit, etc.
Note – higher spandex content and heavier weight knits will feel tighter and provide more compression.
Finley Hacks
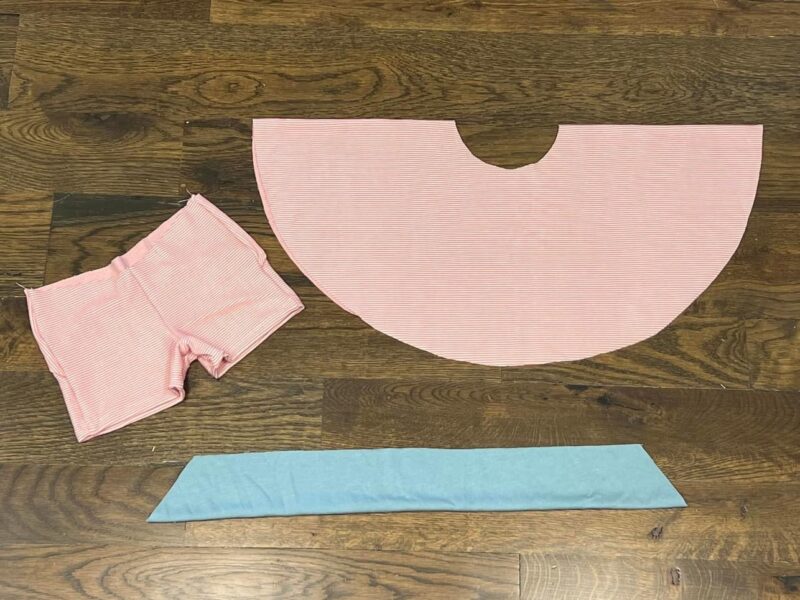
Finley + Florence Mash
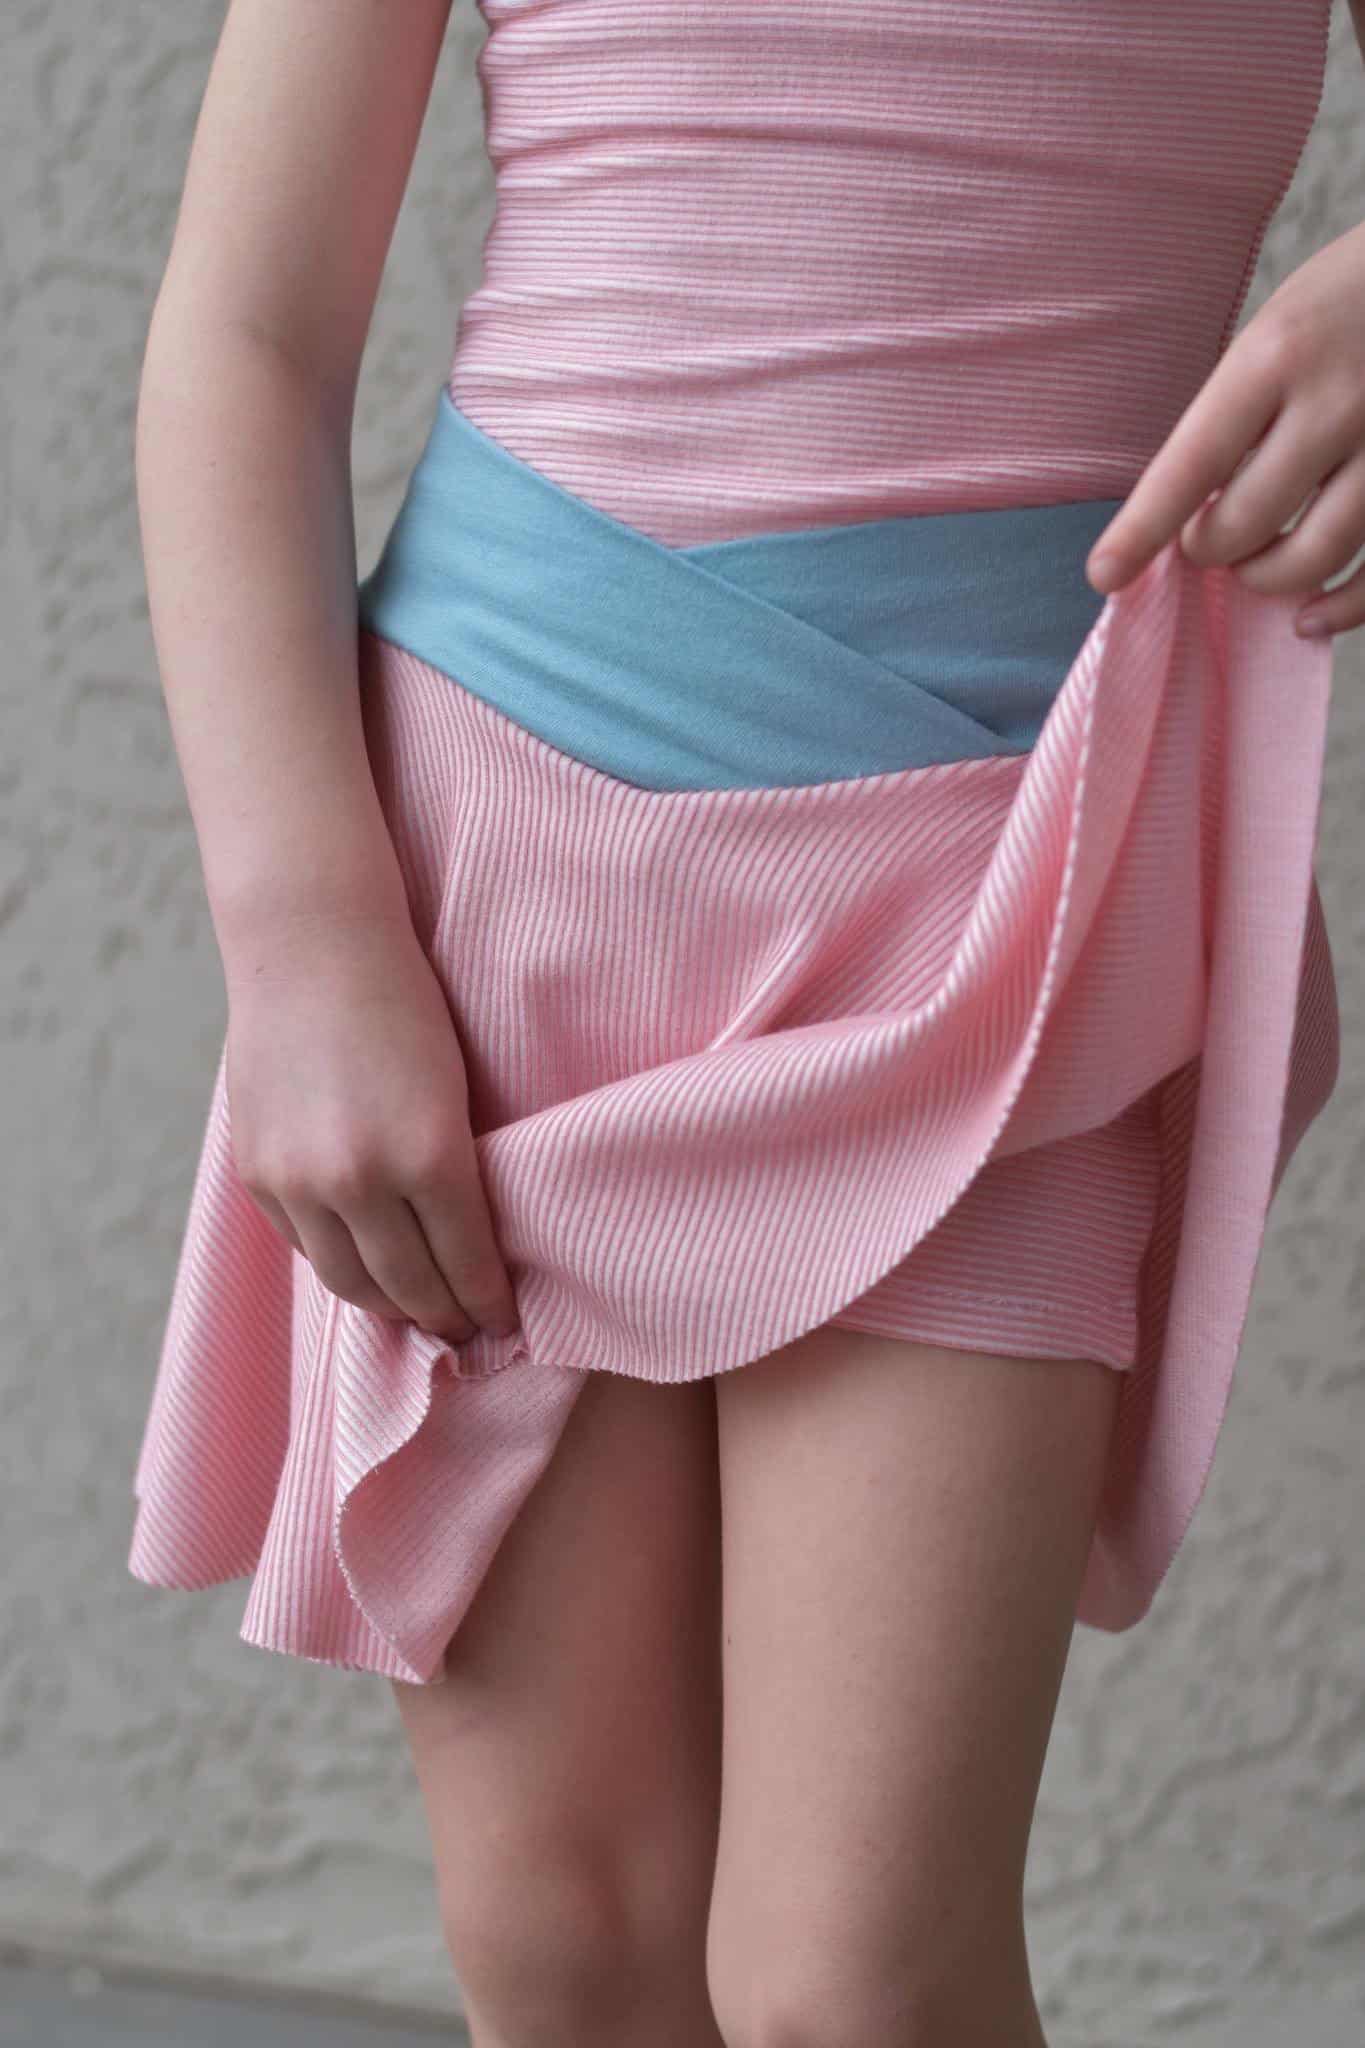
Want to turn your Finley into a skort? Super easy! Tammie used the Florence peplum length to add a simple circle skirt to the Finley shorts.
First, cut your shorties and waistband pieces from the Finley pattern. Next, cut out your Florence peplum. Be sure that the waist size for both Florence and Finley match.
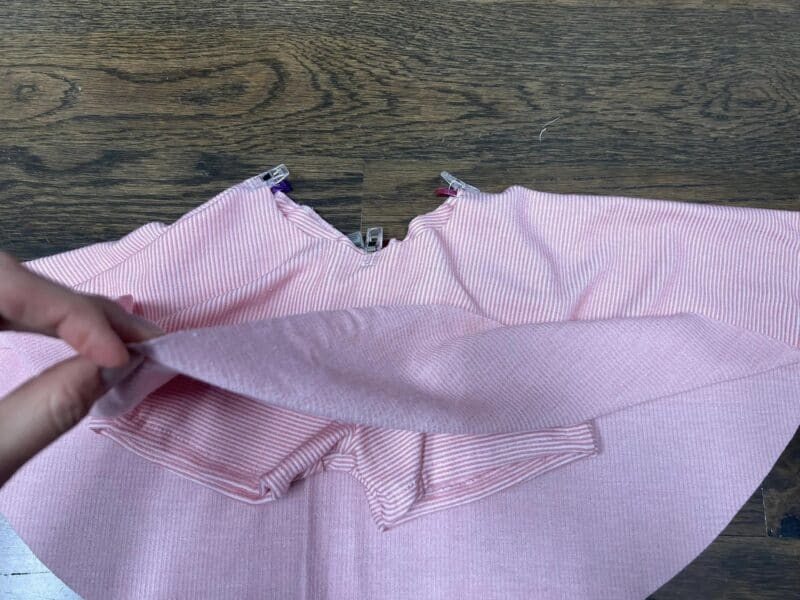
Construct your shorties per the Finley tutorial. Clip or pin the waist opening of your Florence peplum to the waist opening of Finley. Both Finley and Florence should be right side out, with wrong side of Florence touching right side of Finley.
Baste together, then proceed by treating as one single layer.
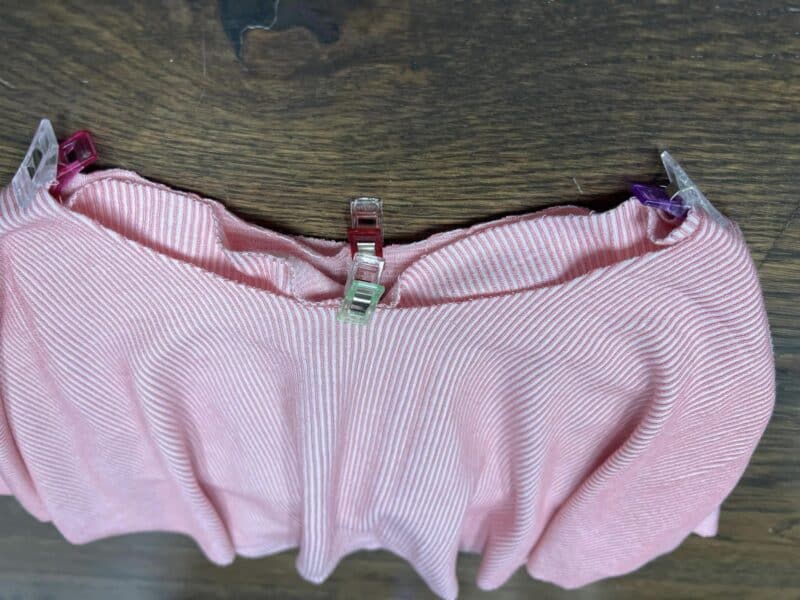
Construct and attach waistband as instructed in the Finley tutorial.
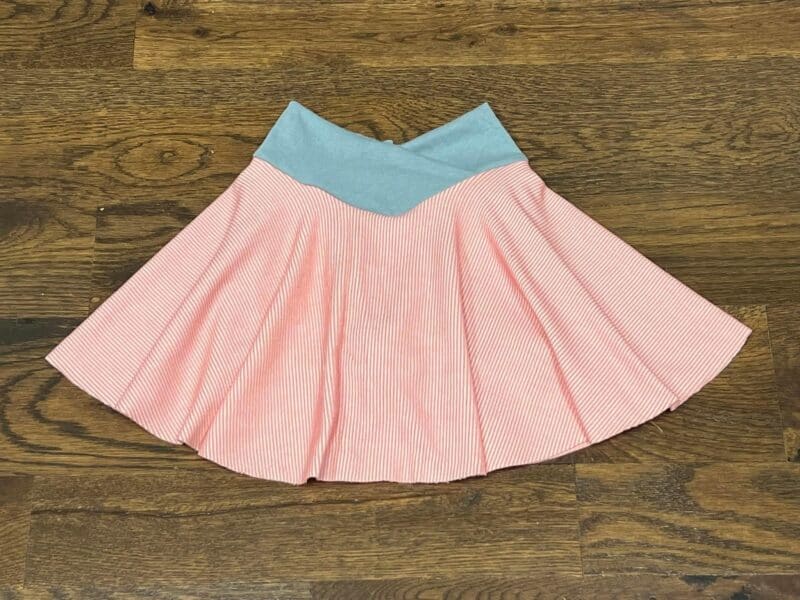
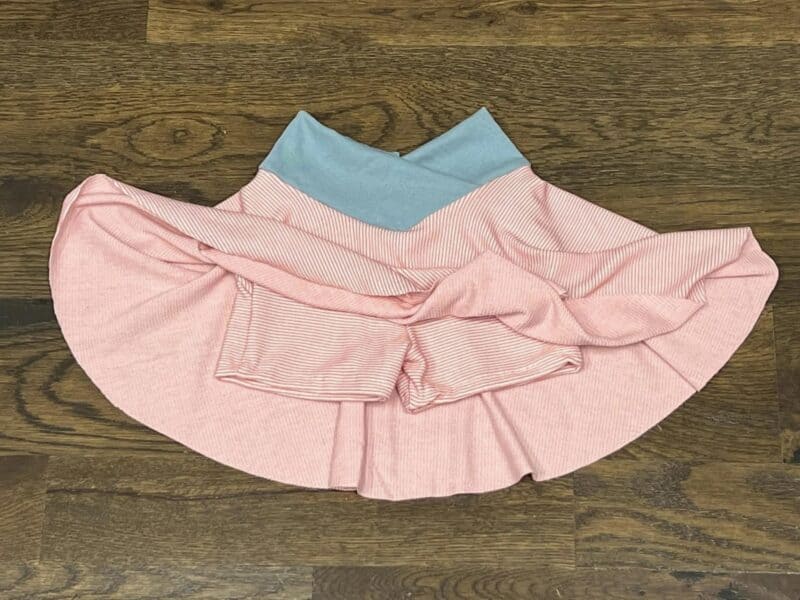
That’s it!! Enjoy!!


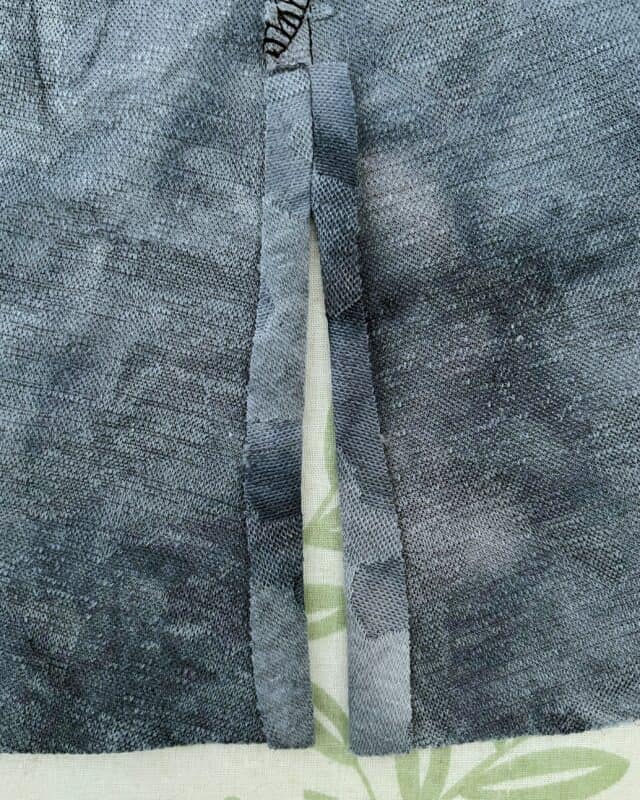
Split Hem Hack
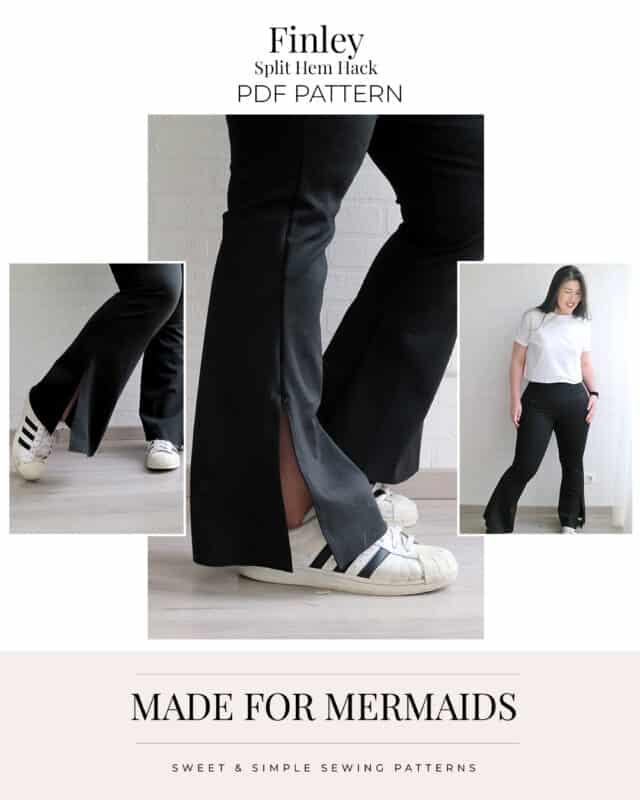
When you have a great fitting pair of flares, like Finley, you just want to wear it everywhere, all the time, am I right?
But sometimes you just want it to be a bit different, or an extra detail… Split hem to the rescue!
A split hem is a simple, yet impactful, way to modify your leggings, adding to the already great versatility of it.
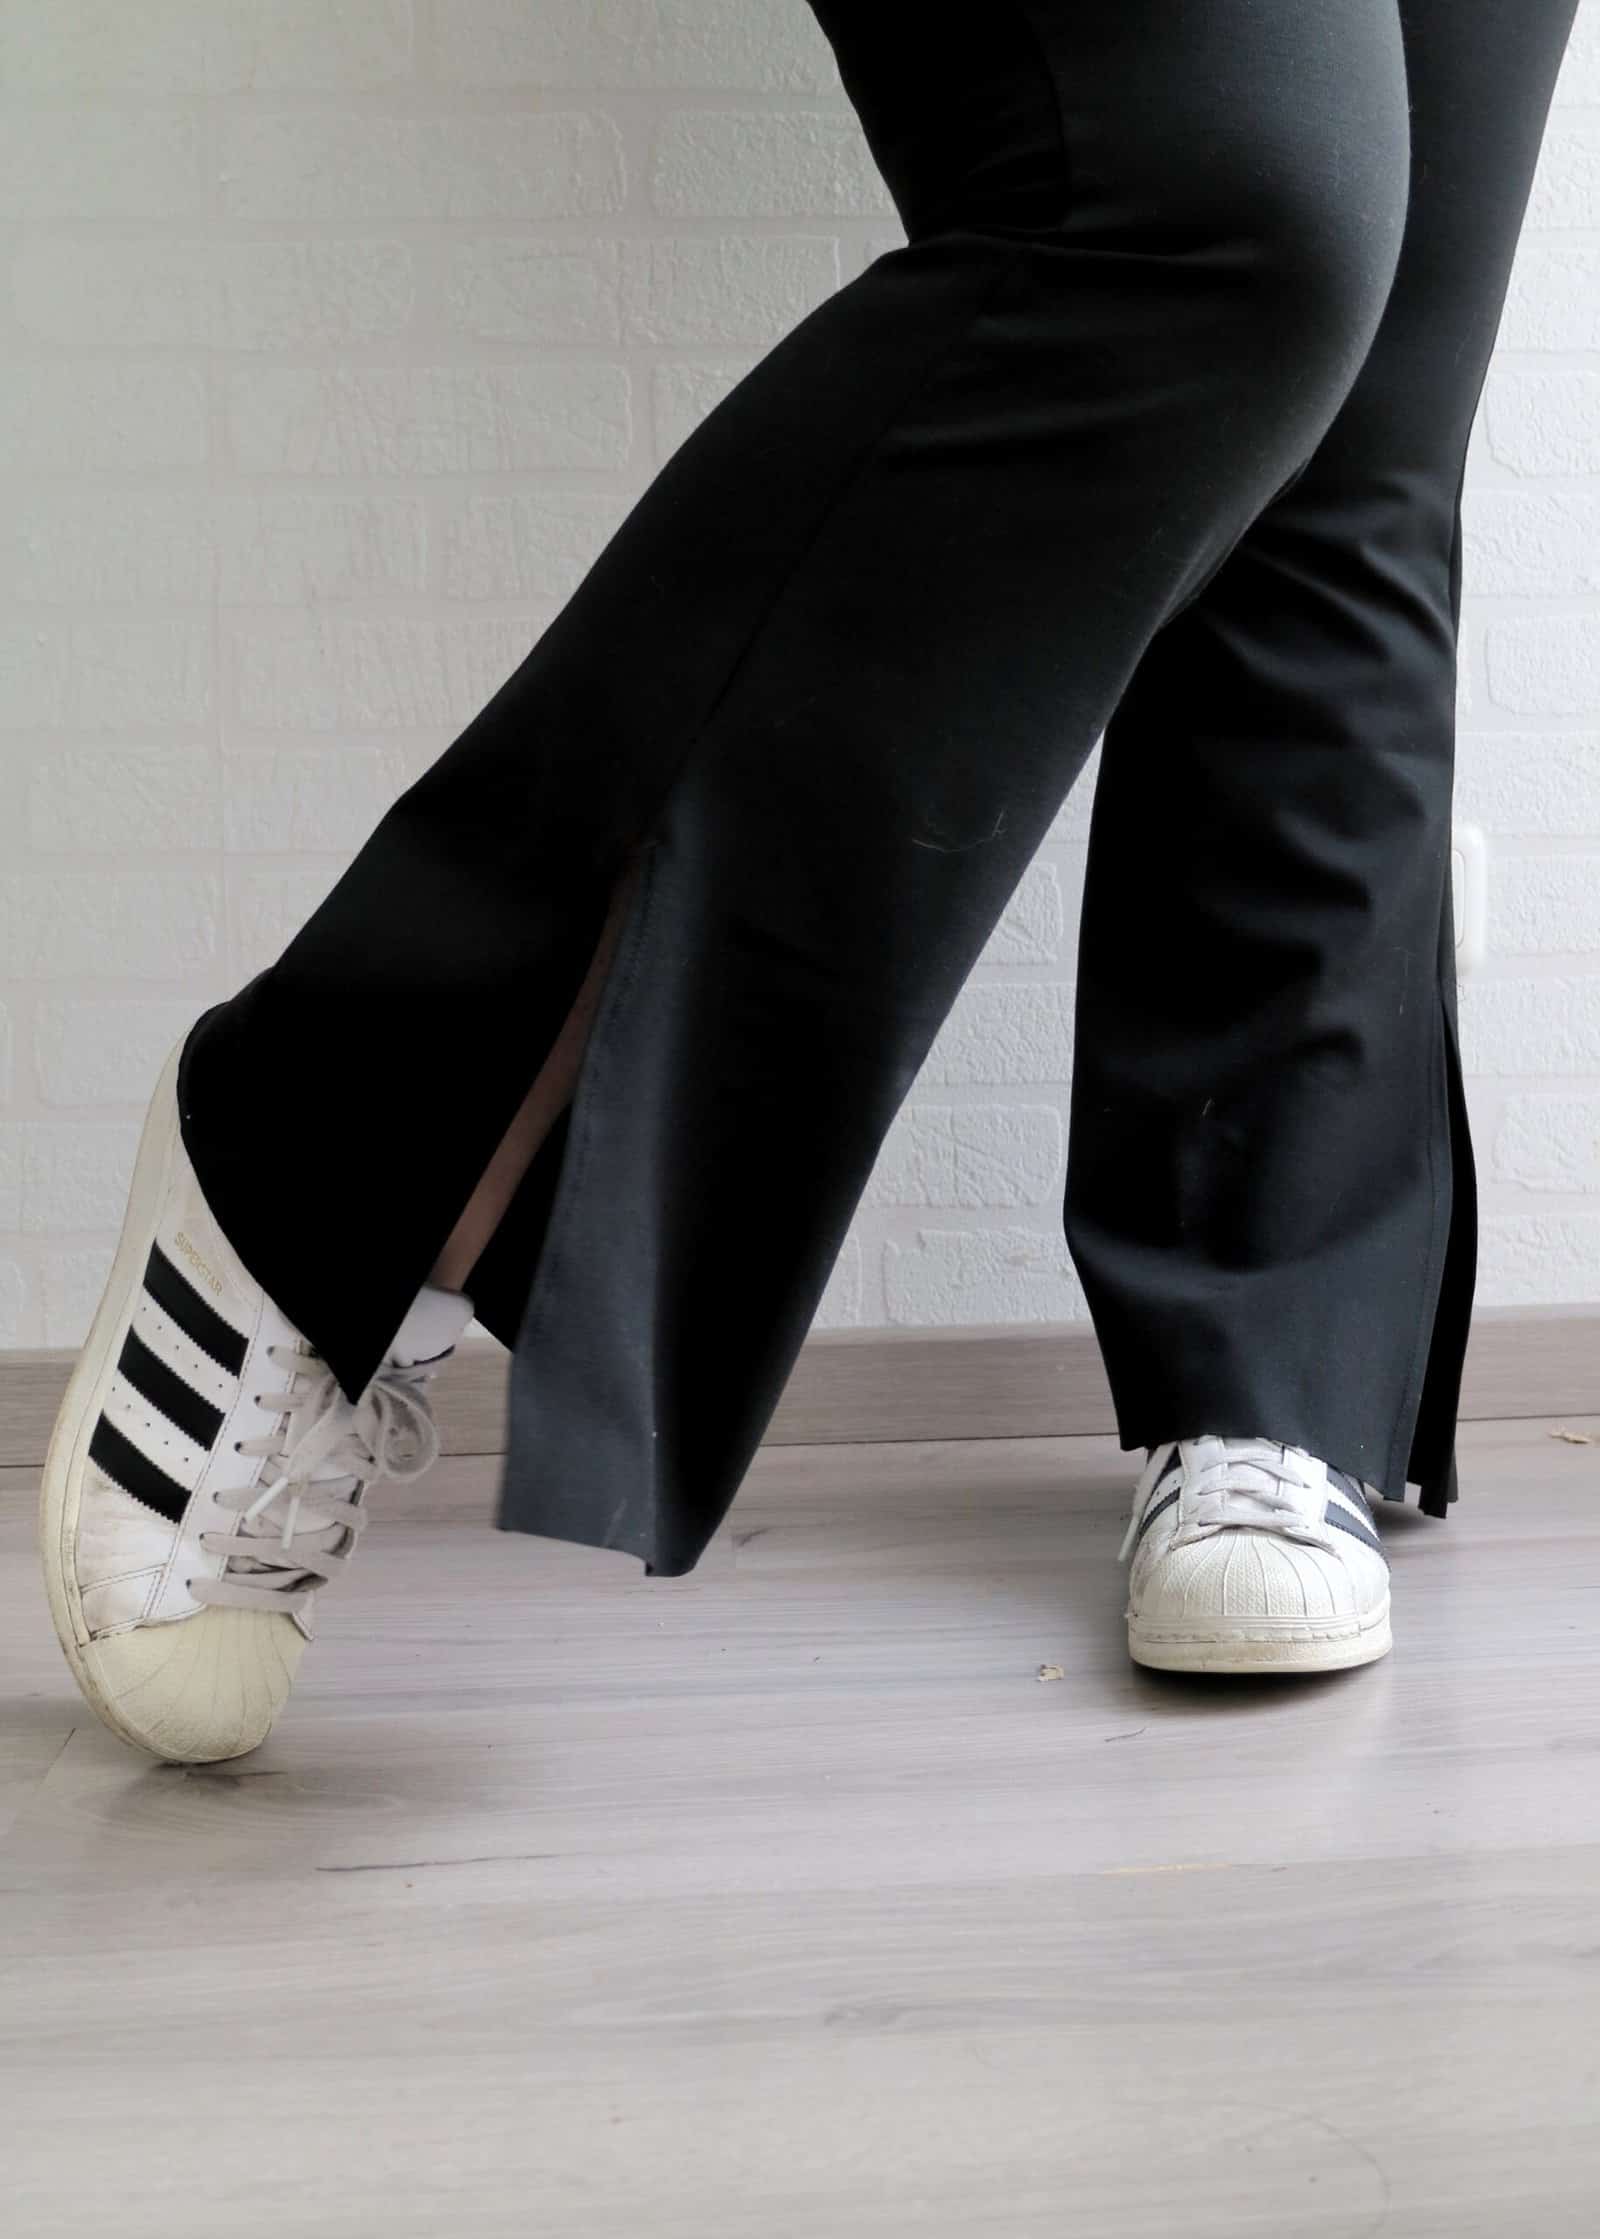

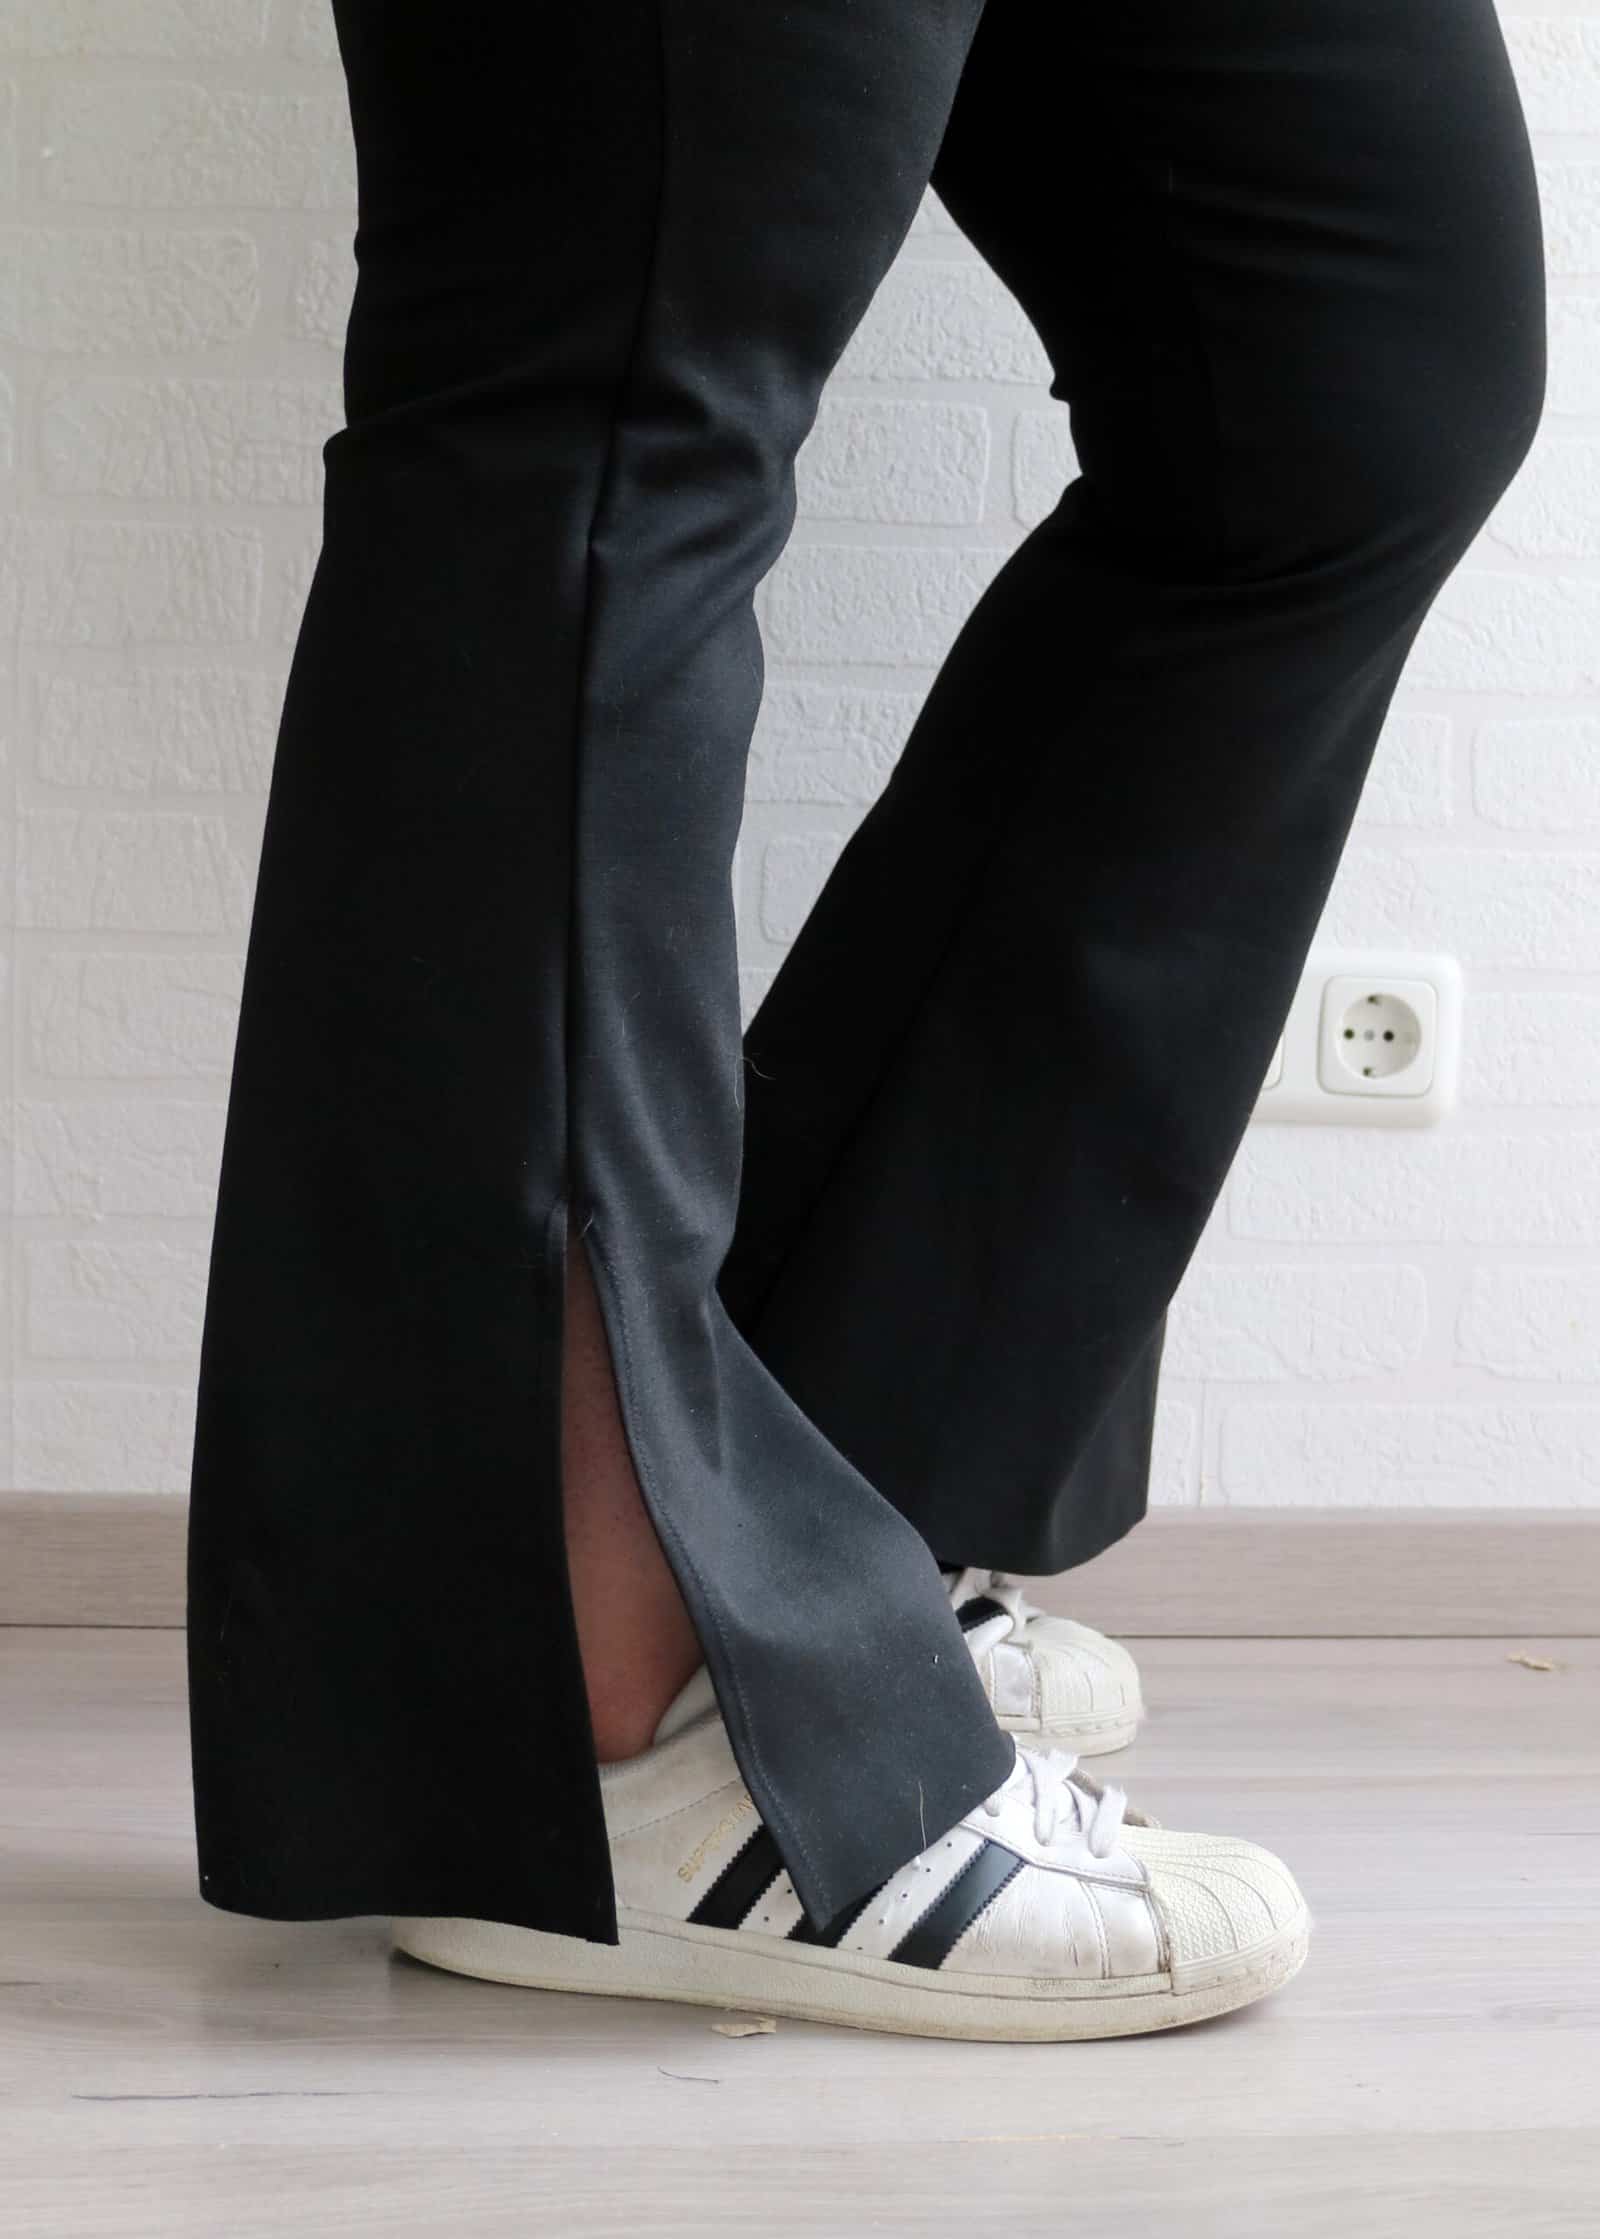
For this hack you won’t need anything thing extra; all we’ll do is change how we finish the side seams. Easy peasy!
The steps will vary a bit depending on wether you’re using a regular sewing machine or a serger to sew the side seams.
Let’s take a look!
Regular Sewing Machine
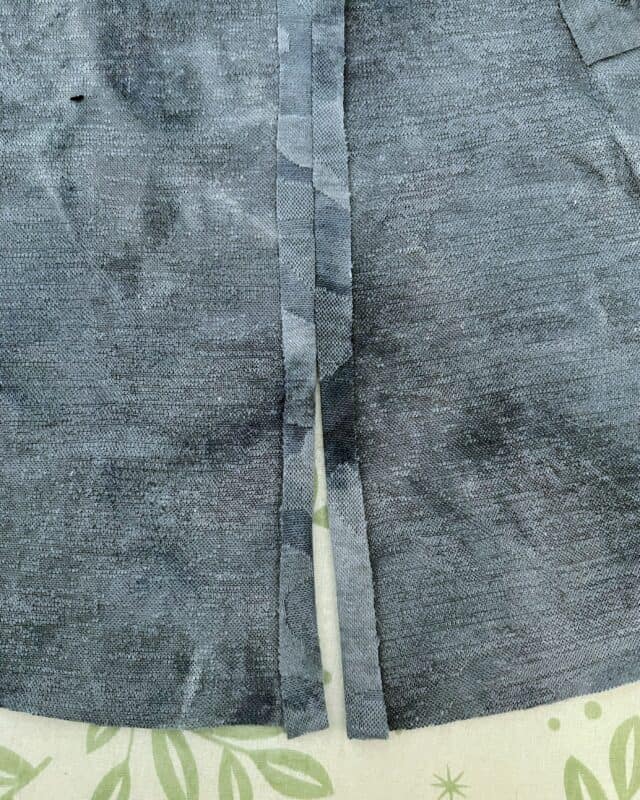
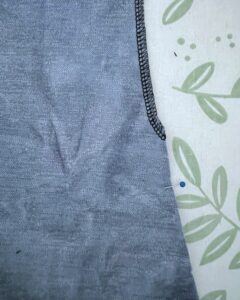
- Decide how long you want your split to be and mark it with a pin or clip.
- Don’t forget to account for the hem allowance.
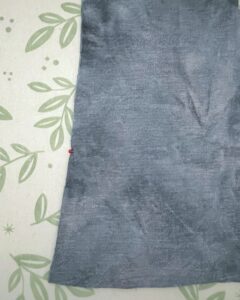
- With a stretch stitch sew the side seams as per pattern and stop at the pin you placed to mark the start of the split.
- Iron the seam allowance open.
optional: finish the fabric edges with the serger before sewing the side seams.
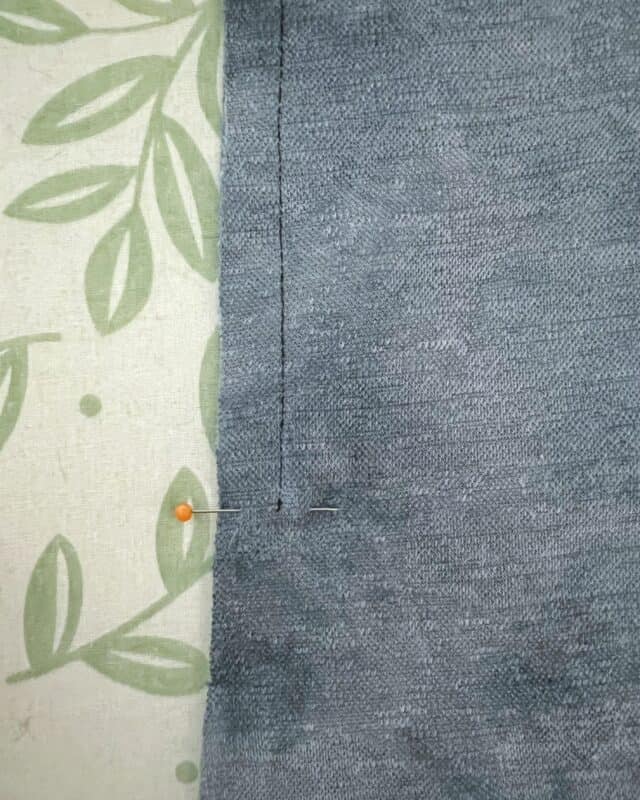
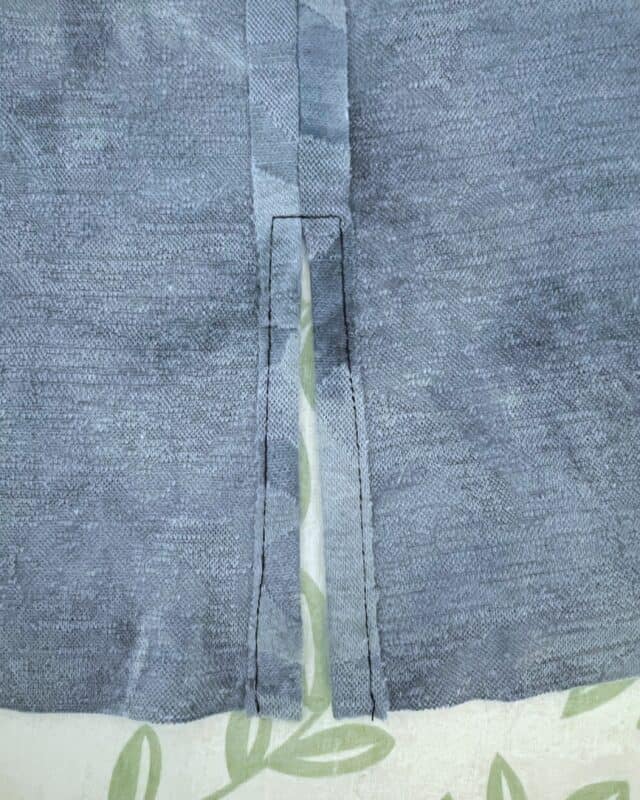
- Top stitch around the split you just created, making sure to reinforce the top by going back and forth a couple of times.
- Hem according to pattern instructions.

Yes, it’s that easy! 😀
Serger
If you’re using a serger it takes a bit more finicking, but still super simple and easy.
- Decide how long you want the split to be and mark it with a pin or clip (don’t forget to account for hem allowance).
- Now add another pin/clip one inch ABOVE the one you just placed.
- Serge the side seam down to that upper pin.
- Serger stitching will end one-inch above the split.
- Following the serger stitching line, using a stretch stitch on your sewing machine, stitch straight down to that first pin marking the start of the split
- Make a tiny snip on the seam allowance being careful to not cut through the stitching
- Iron the seam allowance open and stitch around the split as mentioned in the Regular Sewing Machine steps above
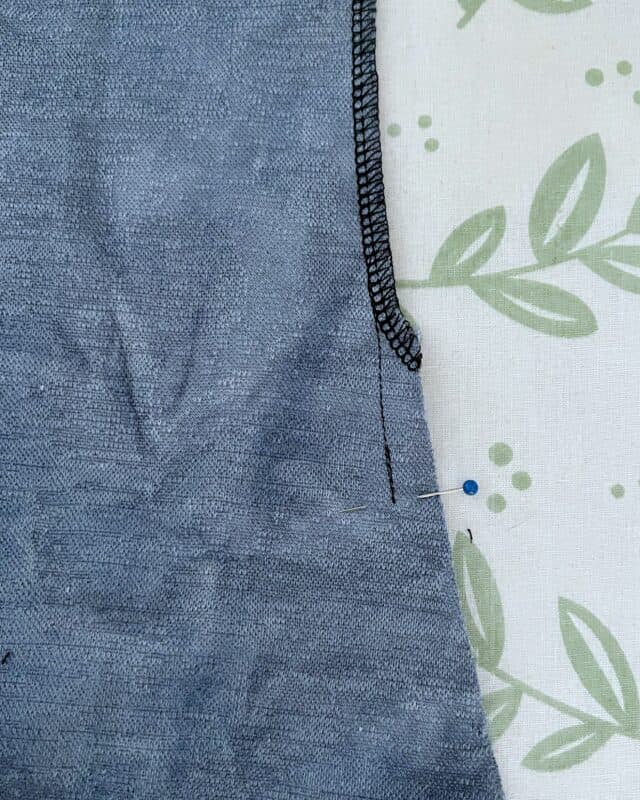

- Hem according to pattern instructions.
That’s it! Told ya it was super easy 😉


Next, I’ll make a pair that is a bit longer so I can wear it with heels. It’s the perfect detail to show off pretty and fancy shoes!
xxx, Livia.
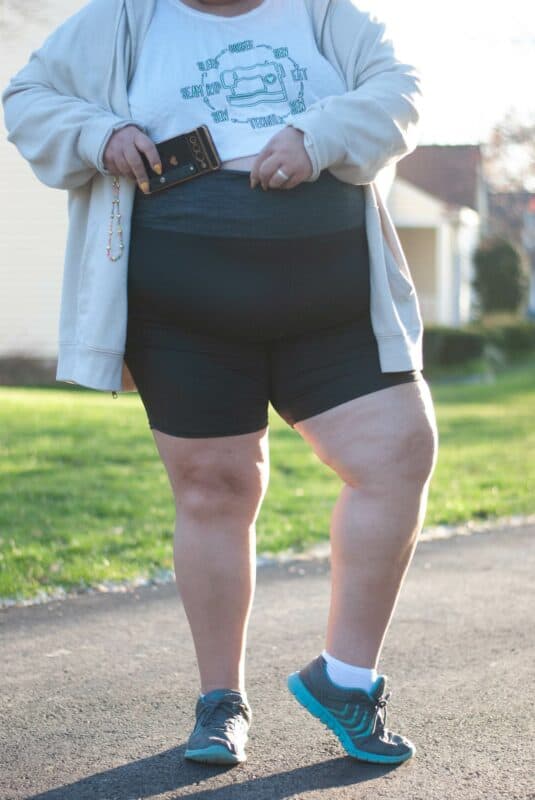
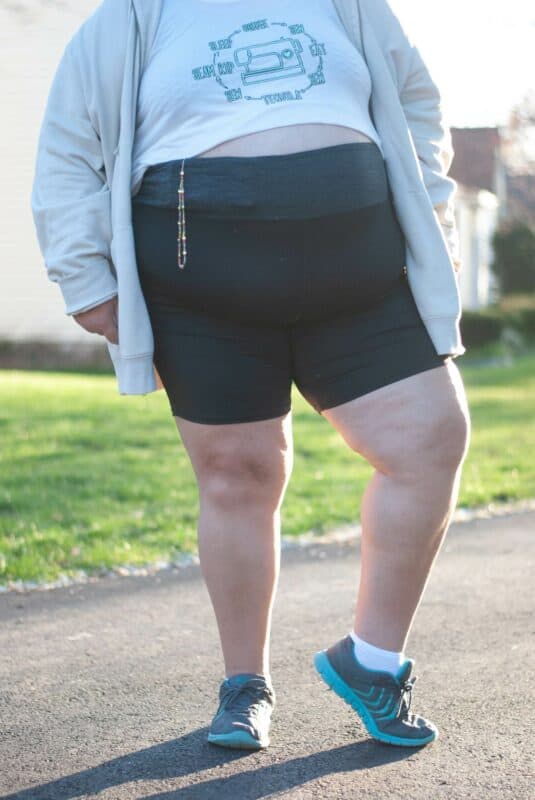
Waistband Pocket Hack
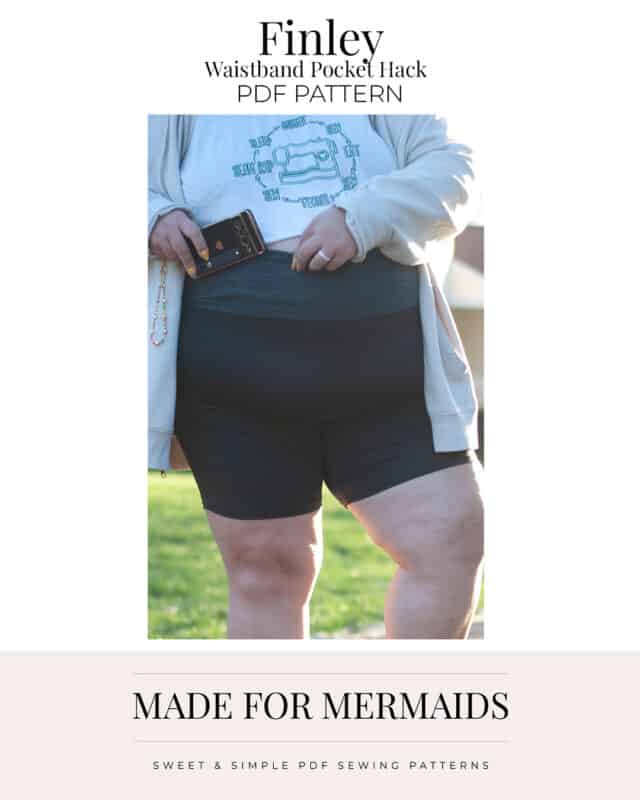
Hey all, Jess here. As much as I love pockets, I am aware that not all do! Even so, sometimes you still want somewhere to stash your phone, keys, cash, ID, etc. So here’s a sweet little hack to add a bit of storage to the waistband of your flares without adding bulkier pockets elsewhere. Let’s grab some scraps and do this!
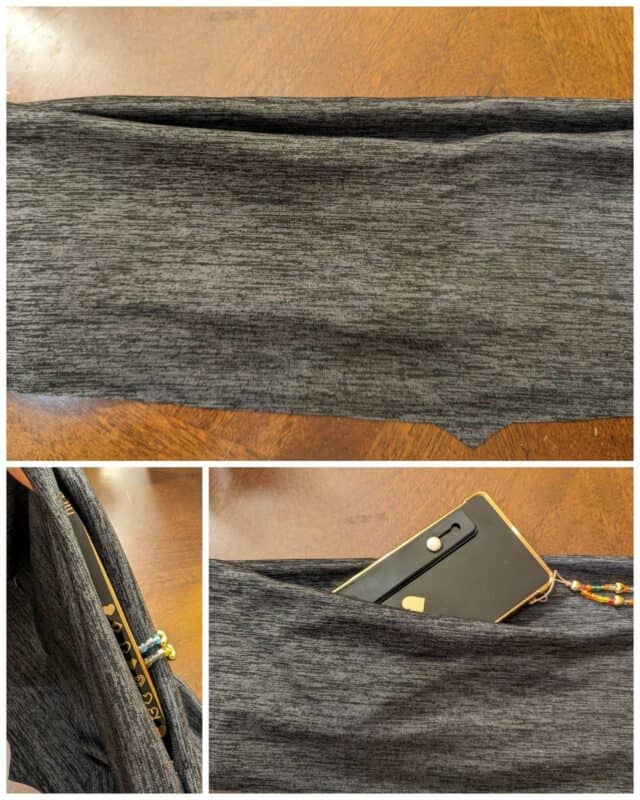
Decide on the pocket size. Full disclosure: I’m not a runner. The only thing I generally need a pocket for is my phone, so that’s what I based my pocket size on. I put my phone on two layers of scraps and cut around it, leaving about ½” seam allowance around.
If you’re unsure what size you want, then I suggest just using 4″x6″-ish piece for general use, or a 2″x 4″-ish piece if you just need somewhere to stash a key and some cash, but you make it whatever size you’d like it to be! I just would not suggest more than half the length of your front/back waistband pieces (unless you want to add a zipper to keep it closed!). For reference, the opening on my pocket is about 3.5″ which is more than enough to slide my phone on and out of.
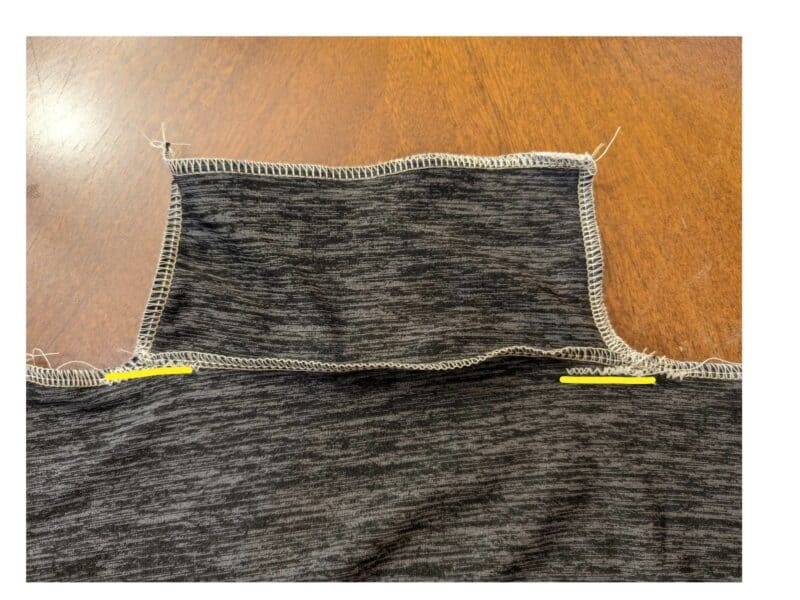
Now that we’ve got our pieces cut, we’ll sew them to our waistband pieces. I like mine 2″ from the side seam, but if you prefer middle placement, put it there. Center back would also be a good spot, but for me, I want it front right for easy access. Line up your pocket pieces on your front waistband pieces 2″ from the side seam.
This step can easily cause confusion, so I like to lay my waistband pieces the way they’ll be when worn (so wrong sides together), and then insert the pocket pieces between them. Once you’ve got them lined up in the correct spot, flip them to the RIGHT SIDE, and pin/clip in place.
Once you’ve got lined up, let’s sew! Sew along the top of the pocket to attach it to its waistband piece.
Sew your contour band as normal, sewing the front and back main pieces together at the side seams, and then the lining pieces. Turn your lining waistband right side out so the waistbands are right sides together and pin. The pocket pieces should be sticking out as shown. Sew along the top of the waistband, going around the pocket when you get to that section.

The last step is to sew a small portion at the top of the opening, right along the seam allowance, to help close the pocket a bit. I like to do ½” on each side, but if your fabric is super stretchy, you might want to do a bit more.
That’s it! Tuck in your pocket, check that it works the way you’d like it to, and finish sewing up your Finleys according to the instructions.
Happy sewing!
~jess wilcox
We can’t wait to see how you take Finley and make it your own! Don’t forget to share with us on Insta, in our Facebook group, or over on TikTok!
Leave a Reply