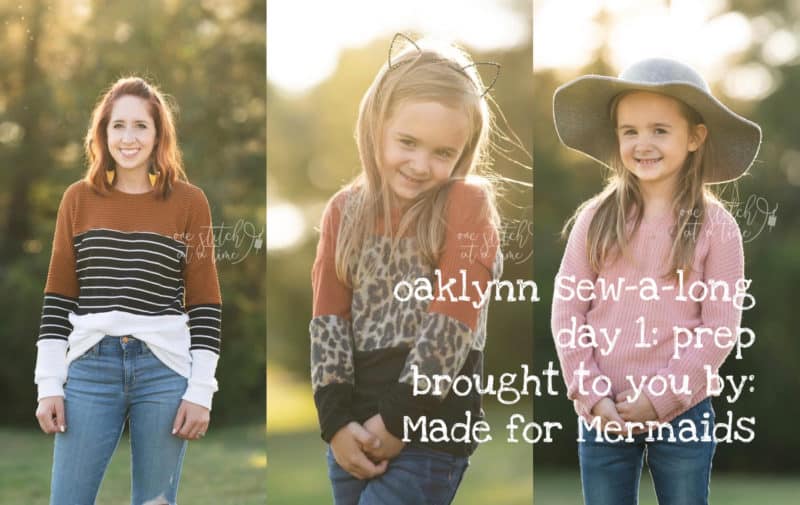
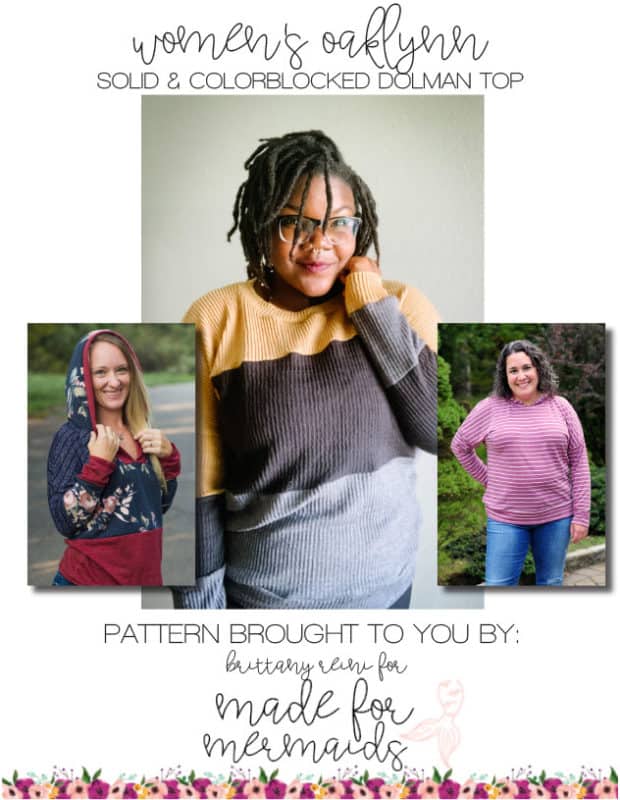
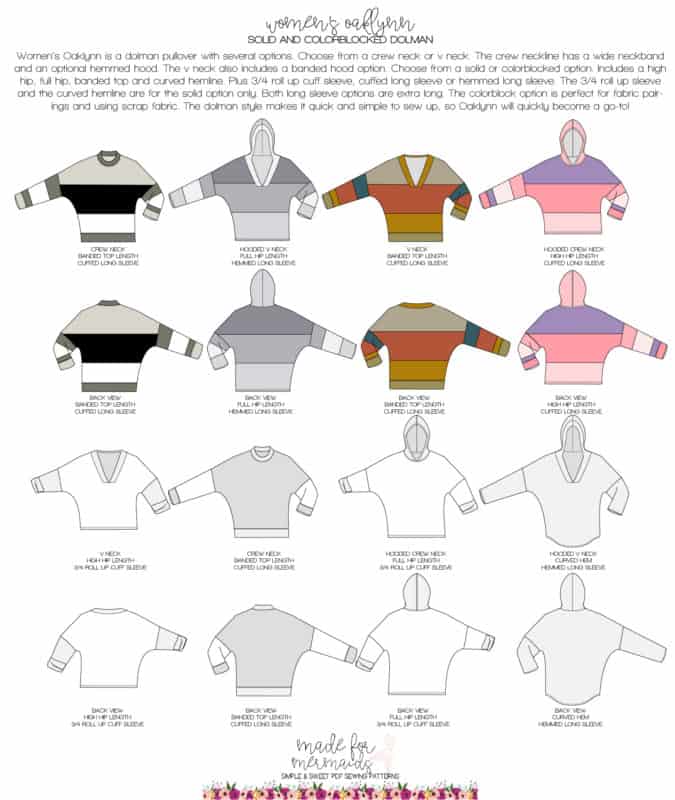
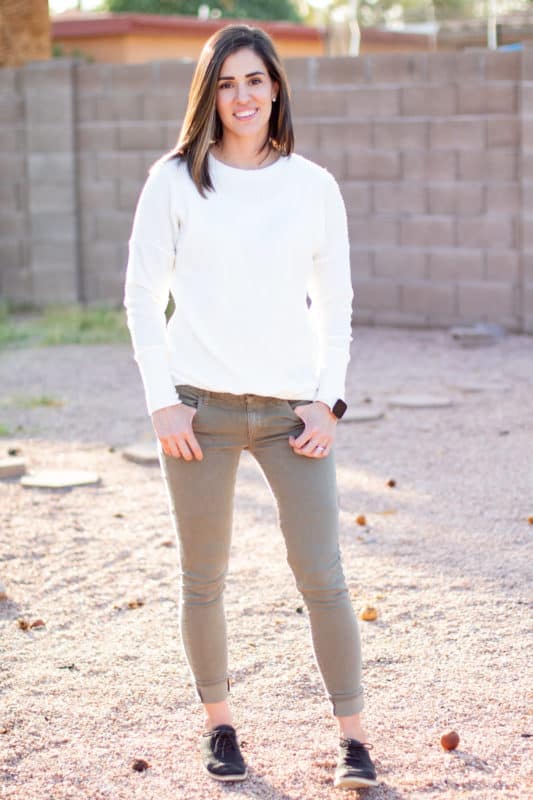
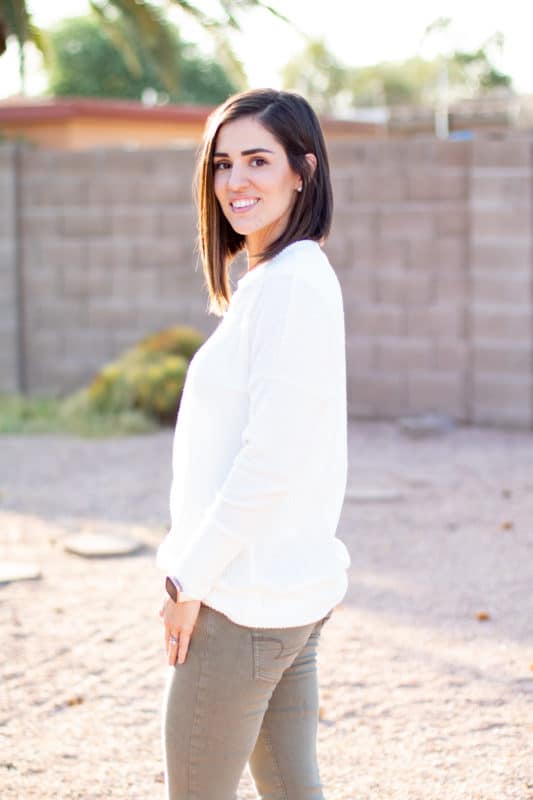
Oaklynn (Women’s, Youth,) is the perfect staple sweater, regardless of the options you choose. My daughter is going to be SO BUMMED when she notices that I am sewing for myself, not her, during this SAL. SHHHH – nobody tell her!! I’ll be sewing up the color block, cuffed long sleeve, v-neck options this week, but you’re welcome to sew up any options you’d like!
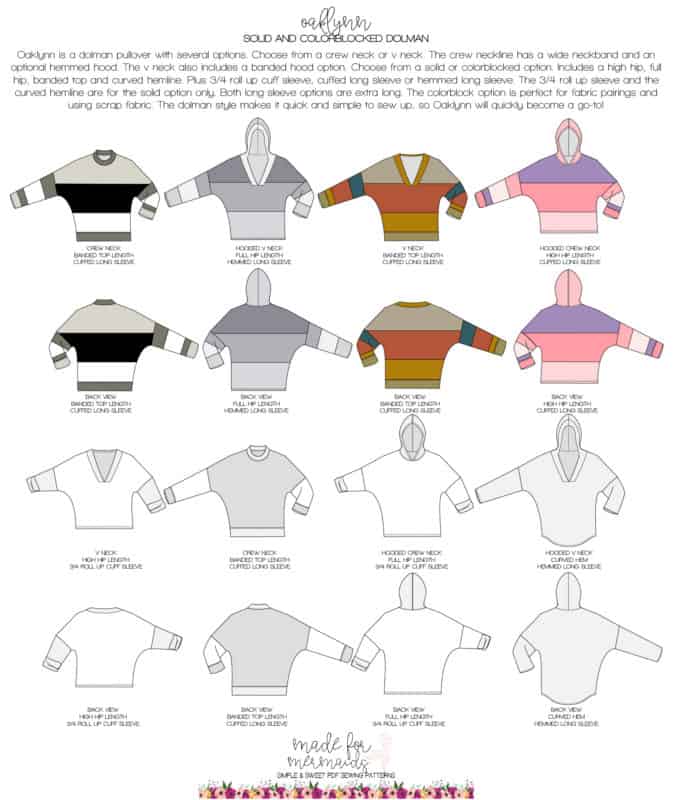
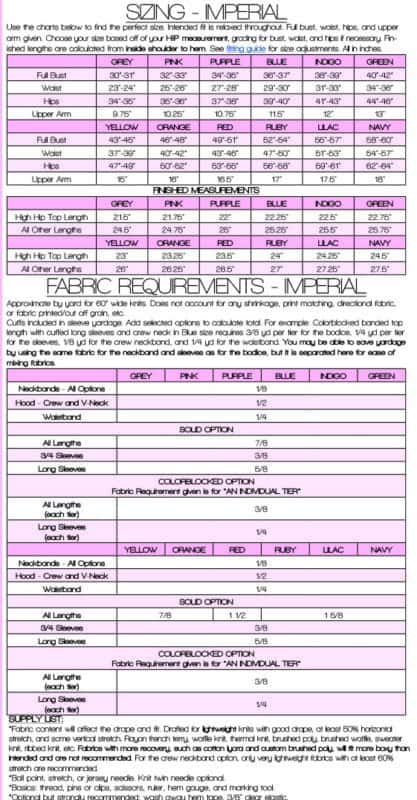
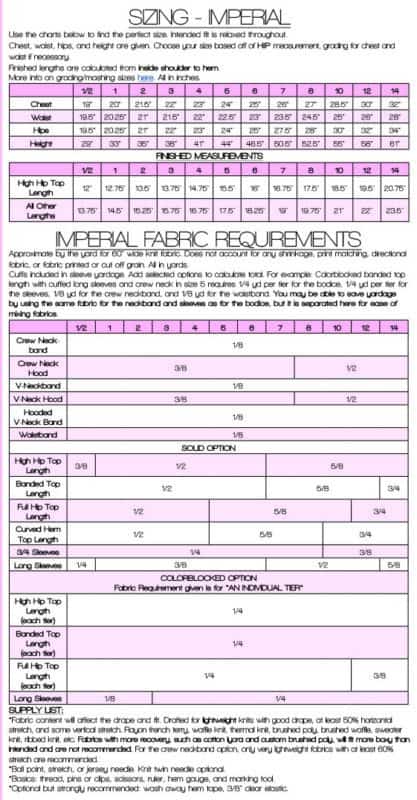
Check out the line drawings below for more info on pattern options, as well as sizing information:
Before we get started, there is a ton of helpful beginner information between the M4M and P4P blogs, in case you are new to knits, or new to PDF patterns in general:
- New to PDF patterns? Check out our helpful tips here
- New to sewing with knits? Brittany has some great info here
- Not quite sure how to measure yourself accurately? Don’t worry; check out the post here!
- Wondering if a pattern is “true to size”? Read more about sizing and intended fit here.
- Having issues printing? Most issues can be resolved by using our FAQs/troubleshooting tips
- Looking here for more extensive grading help!
- Not in our official SAL group yet? Join here 🙂
Our first day is all about prep! First, be sure to measure yourself (or the person/people that you are sewing for) accurately. The tutorial includes information about grading and mashing, but you can also check out the blog linked above!
After you’ve measured, you’ll want to decide on making the pattern as is, or sewing it up using a hack! Check out the Oaklynn hacks here.
Then, you’ll want to choose your fabric and gather your supplies. Some of my favorite fabrics for this are waffle knits, sweater knits, French Terry, and lighter jersey knits for a light and casual Oaklynn. I personally wouldn’t use cotton lycra or custom fabrics for myself, but I wouldn’t be opposed to using them for my daughter! If you’re doing the color blocked version, be aware of fabric weight! You don’t necessarily have to use the same exact fabric base for all blocks, but I liked to use similar weights. If they are slightly different, be sure to use the heaviest fabric for the top blocks to help reduce some of the pull/strain on the fabrics and seams.
Next, go ahead and print your pattern! Be sure to print a test page and measure your 1″ square before you print the whole pattern. Once you’ve got your pattern pieces printed and assembled, go ahead and cut out your fabric so you are all ready for day 2. Remember that even if your pattern is only off by 1/16″, that’s 1/16″ PER INCH, not total. Definitely reprint if you notice your test square is off!
Don’t forget:
- Make sure you are taking an accurate and consistent seam allowance; seam allowance is already included on all pattern pieces.
- Be sure that your pieces are cut on the fold or as mirror images, however it’s indicated on the paper pattern piece
- The waist band piece will vary depending on what size!
- There are a LOT of pages; be sure to make use of the print chart at the end of the written tutorial to conserve paper and ink!
- You can place a clip at the top raw edge to differentiate your back pieces from your front pieces, if you’d like
- TIP: If doing the color blocked version, cut out all top fabric pieces together, all middle block pieces together, etc. to avoid pulling the same yardage out multiple times.
Want to sew along with me? Check out today’s video!
If you have questions about measuring yourself, printing, putting your pattern together, or cutting your fabric, you are always welcome to post in our SAL group so we can help you! Be sure to check in each day during the SAL, and look for daily posts to enter our giveaways. We can’t wait to see what you create this week!

DAY 1: PREP
DAY 2: ASSEMBLING COLOR BLOCK PIECES + SHOULDER SEAMS
DAY 3: SLEEVES + SIDE SEAMS
DAY 4: SLEEVE CUFFS + WAIST BAND
DAY 5: NECKBAND + HOOD
DAY 6: HEMMING + CATCH UP
OUR SPONSORS:
We LOVE Mily Mae Fabrics, and there are so many perfect fabric choices for Oaklynn! Head on over to Mily Mae to check out their selection.


Leave a Reply