If you’ve never worked with PDF patterns before, get ready to have your mind blown. As a long-time user of printed patterns, I remember exactly how excited I was to learn about using PDF patterns… I was ecstatic to have the ability to print my pattern in multiple sizes, any time I needed to.
Here are all of the tips and tricks that you need to get started immediately with PDF patterns, while getting the most out of the included links and layers.
Download Adobe Acrobat Reader. This is the free version, not a paid version or subscription version. As you go through the prompts, you will likely be encouraged to go for a free trial of the Adobe Reader Acrobat Pro version. You will not need the Pro edition to use Made for Mermaids patterns.
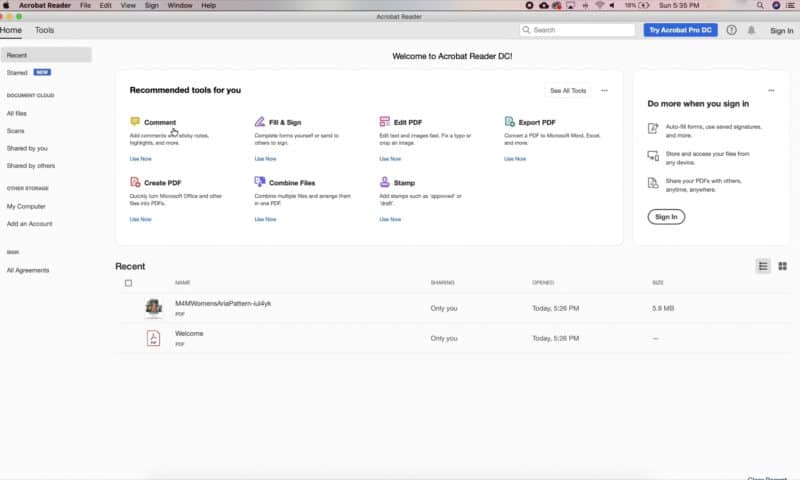
Download your file from your Made for Mermaids account and open in Acrobat Reader.
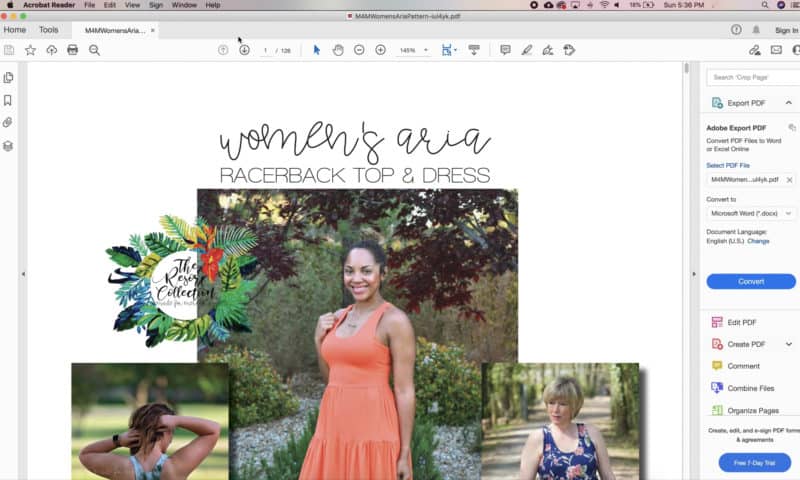
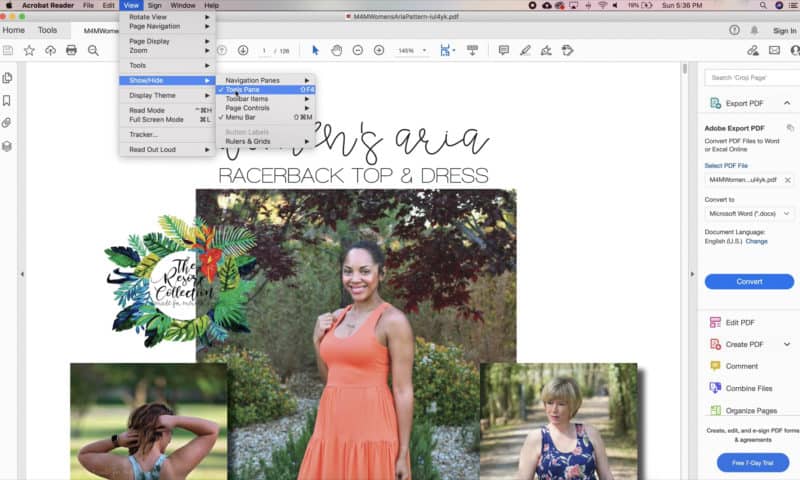
When you open your file, you may have extra toolbars and options on your screen. If you find them distracting, you can turn them off under the menu: View > Show/Hide > Tools Pane. If you decide you want them back, it’s as easy as returning to the “View” menu and selecting the pane you wish to display.
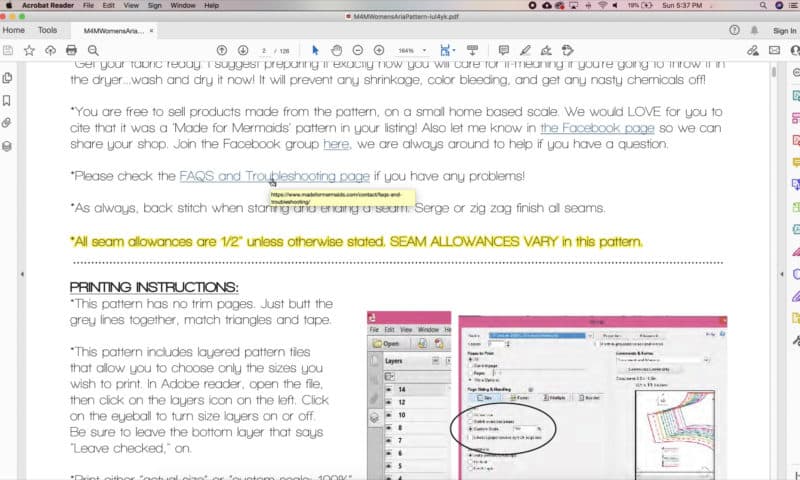
All of Made for Mermaids pattern tutorials are interactive. The PDF instructions contain links to take you to helpful videos along the way. If you hover over the links, you will see the web address of the link location. You may also find embedded buttons to help you move to the parts of the tutorial that are relevant to the pattern options you are working on.
On the left side of your screen, you will find tools to help you navigate through the PDF. The first link will open up a small thumbnail of each page. Rather than paging through the entire tutorial, you can scroll and click directly on the page you wish to visit.
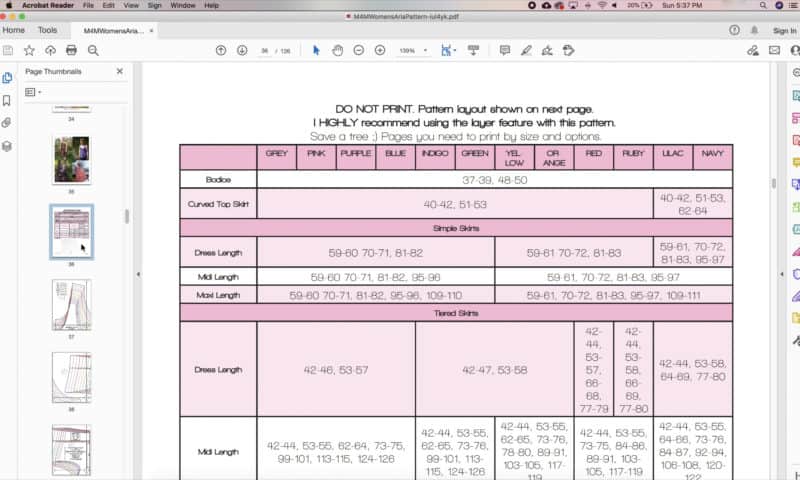
Each Made for Mermaids pattern is equipped with a Print Chart (see above), typically located just before the pattern pieces. This chart will help you to determine which pages you need for your pattern pieces. Make a note of the pages that you will need to print, as they will not always be sequential.
The fourth tool on the left sidebar is your “Layers” display. This is where you will turn on/off only the sizes you wish to print. If they are collapsed under a sub-menu, simply click on the link and the layers will display.
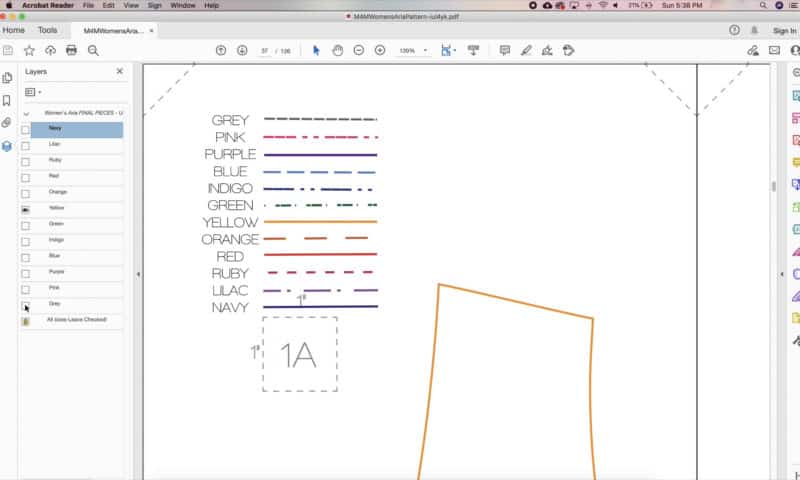
The last layer typically contains all of the notations and guidelines you need. It should be locked so it can’t be turned off… but if you find these details are missing on your pattern, make sure you haven’t unchecked this important layer.
If you are grading between sizes, you can select the sizes that fall within your range to assist you in grading. You’ll have the major guidelines you need to grade with precision!
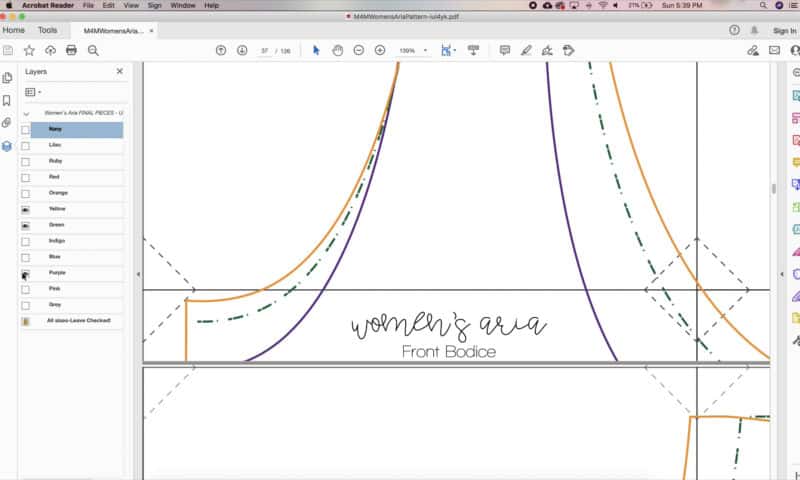
Once you’ve selected your layer(s) and have made note of the pages you need to print, it’s time to print your pattern. Go to menu: File > Print. Under “Pages to Print,” select the “Pages” radio button and fill in the pages you wish to print, separating with a comma – for example, 40-44, 47-49, 56, etc…
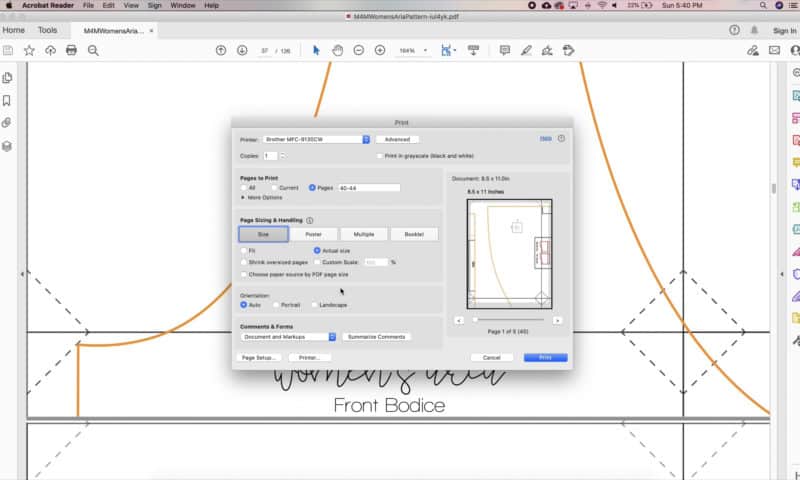
Also, be sure to select the “Actual Size” option under “Page Sizing and Handling.” That will ensure that your pages fit together as intended and to your measured size. You can navigate through a preview of the pages you have selected on the right side of the Print window.
Once you print your pages, you’re ready to assemble your pattern pieces! You can get more tips here and here if you’re new to PDF Patterns.
Be sure to let us know what pattern you’re currently working on; we love to see what you’re creating!
-Rachel
See our PDF 101 and PDF 102 blog posts for more info!


Leave a Reply