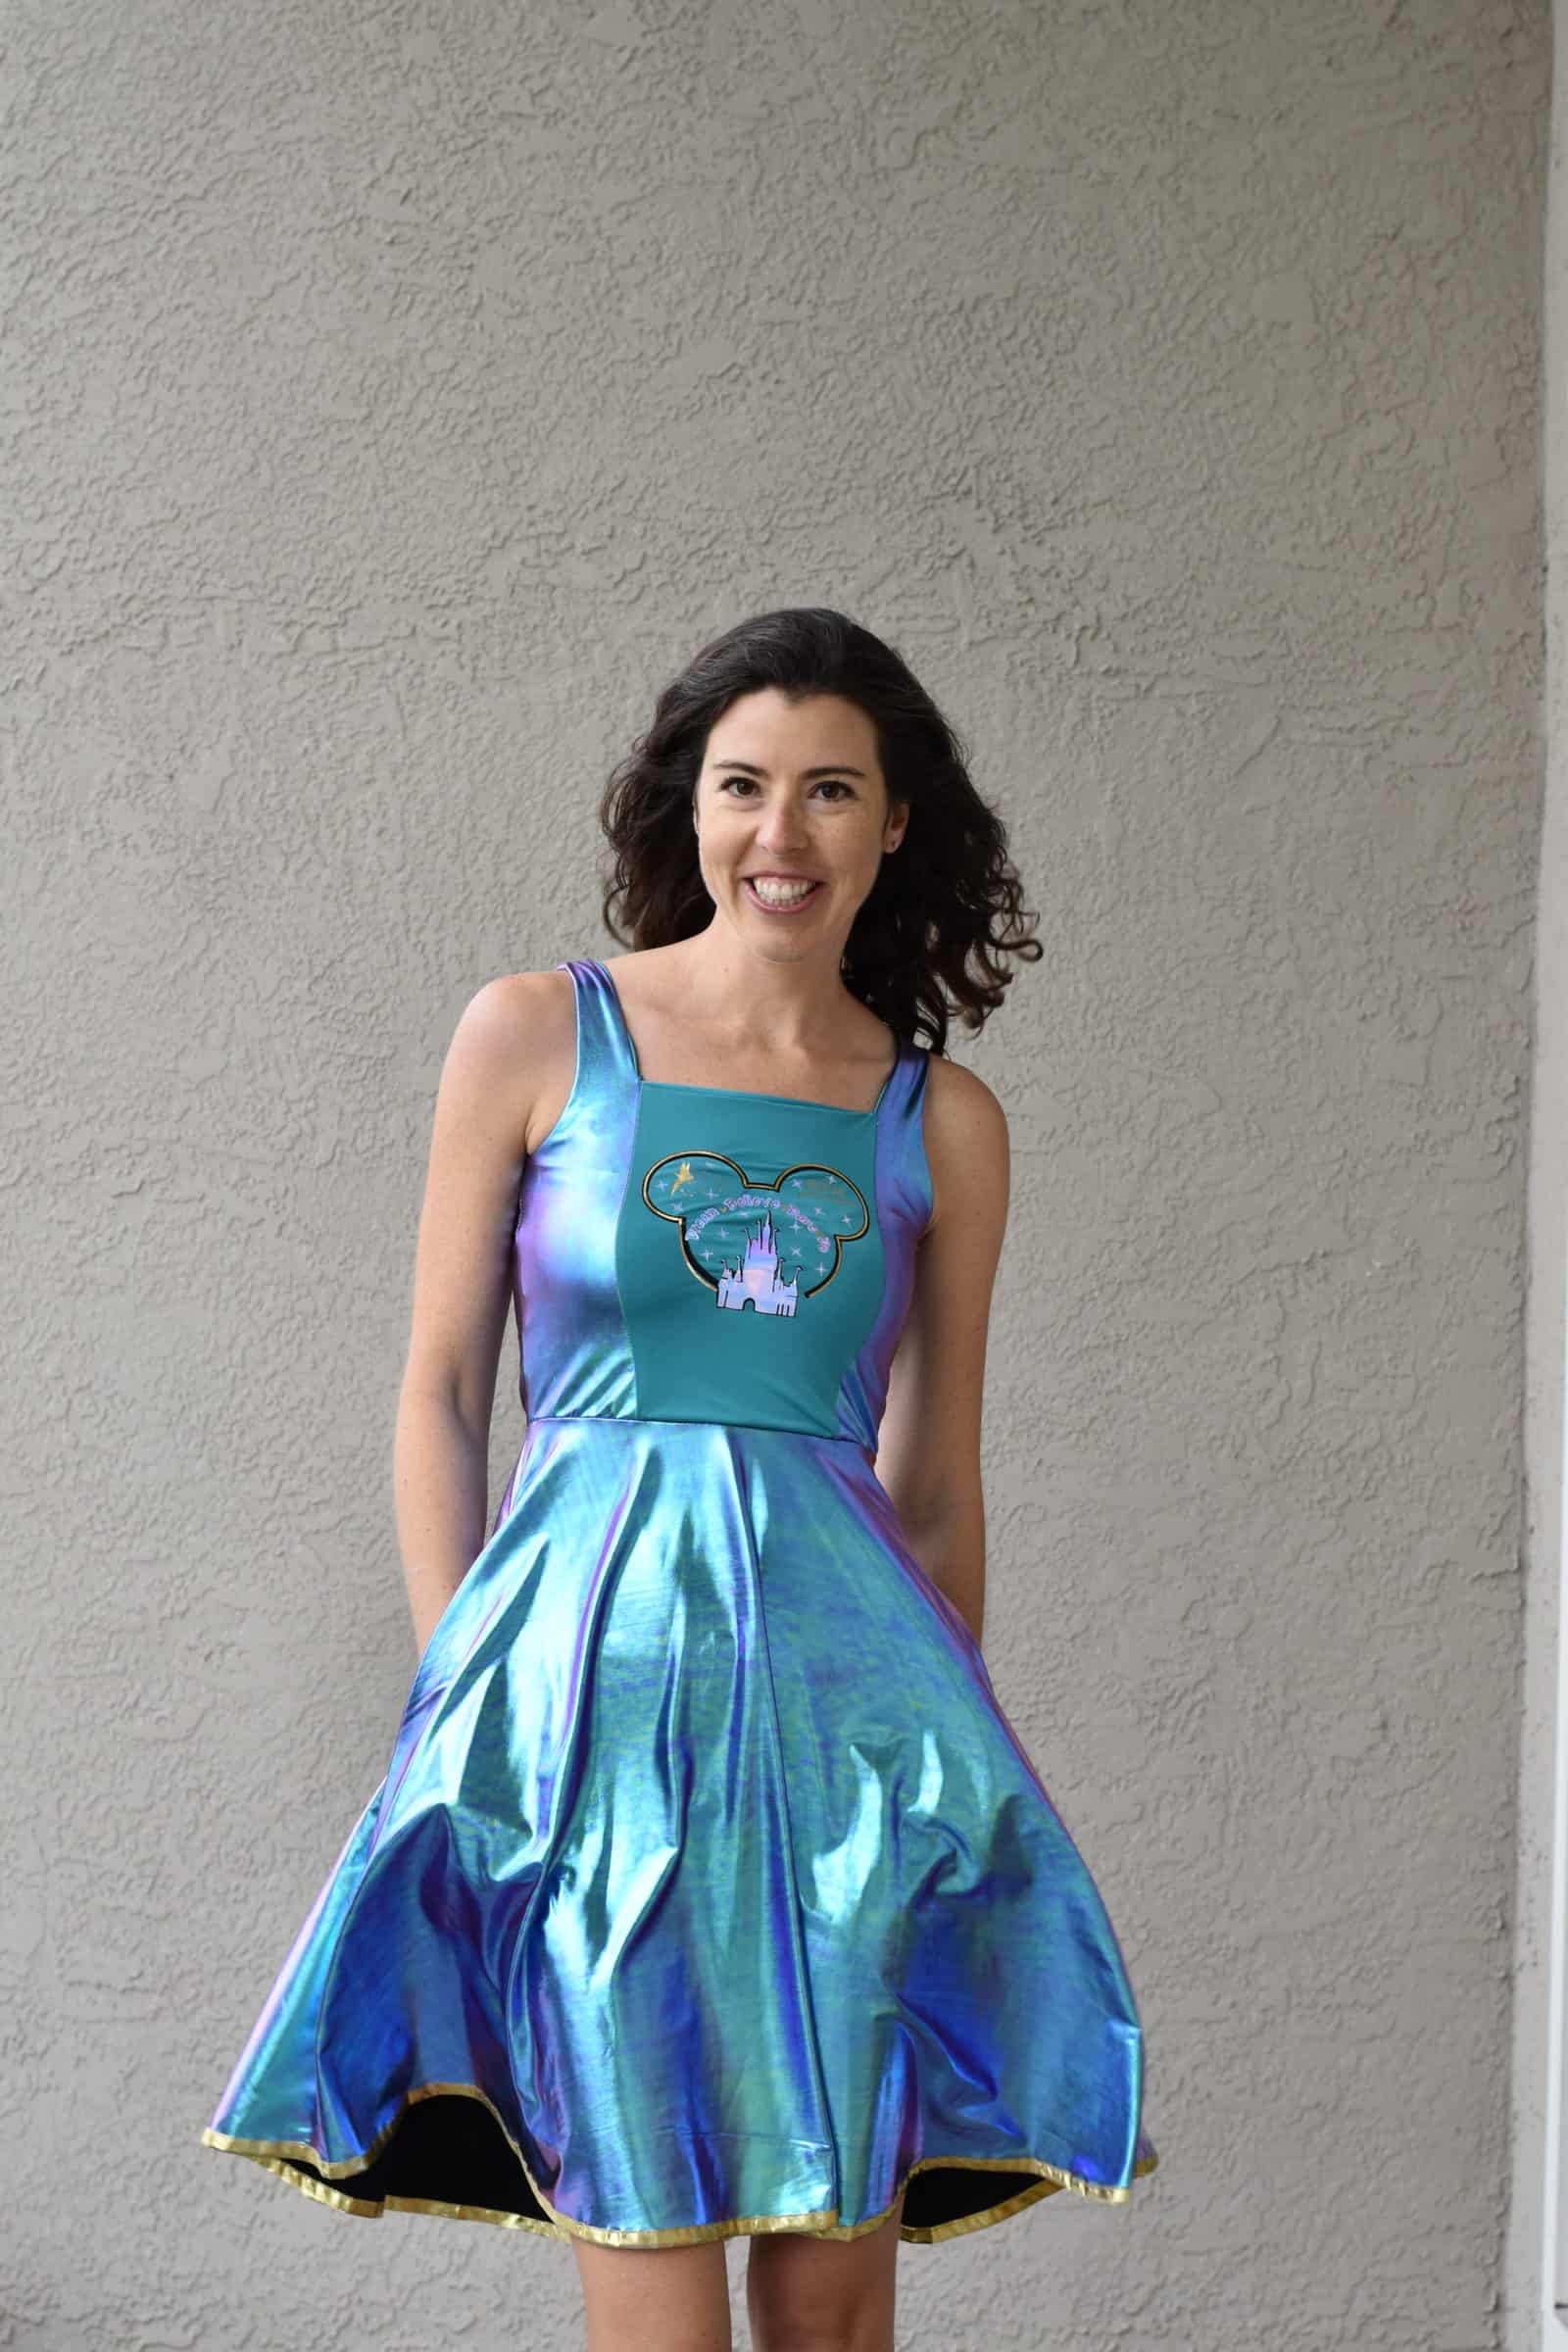
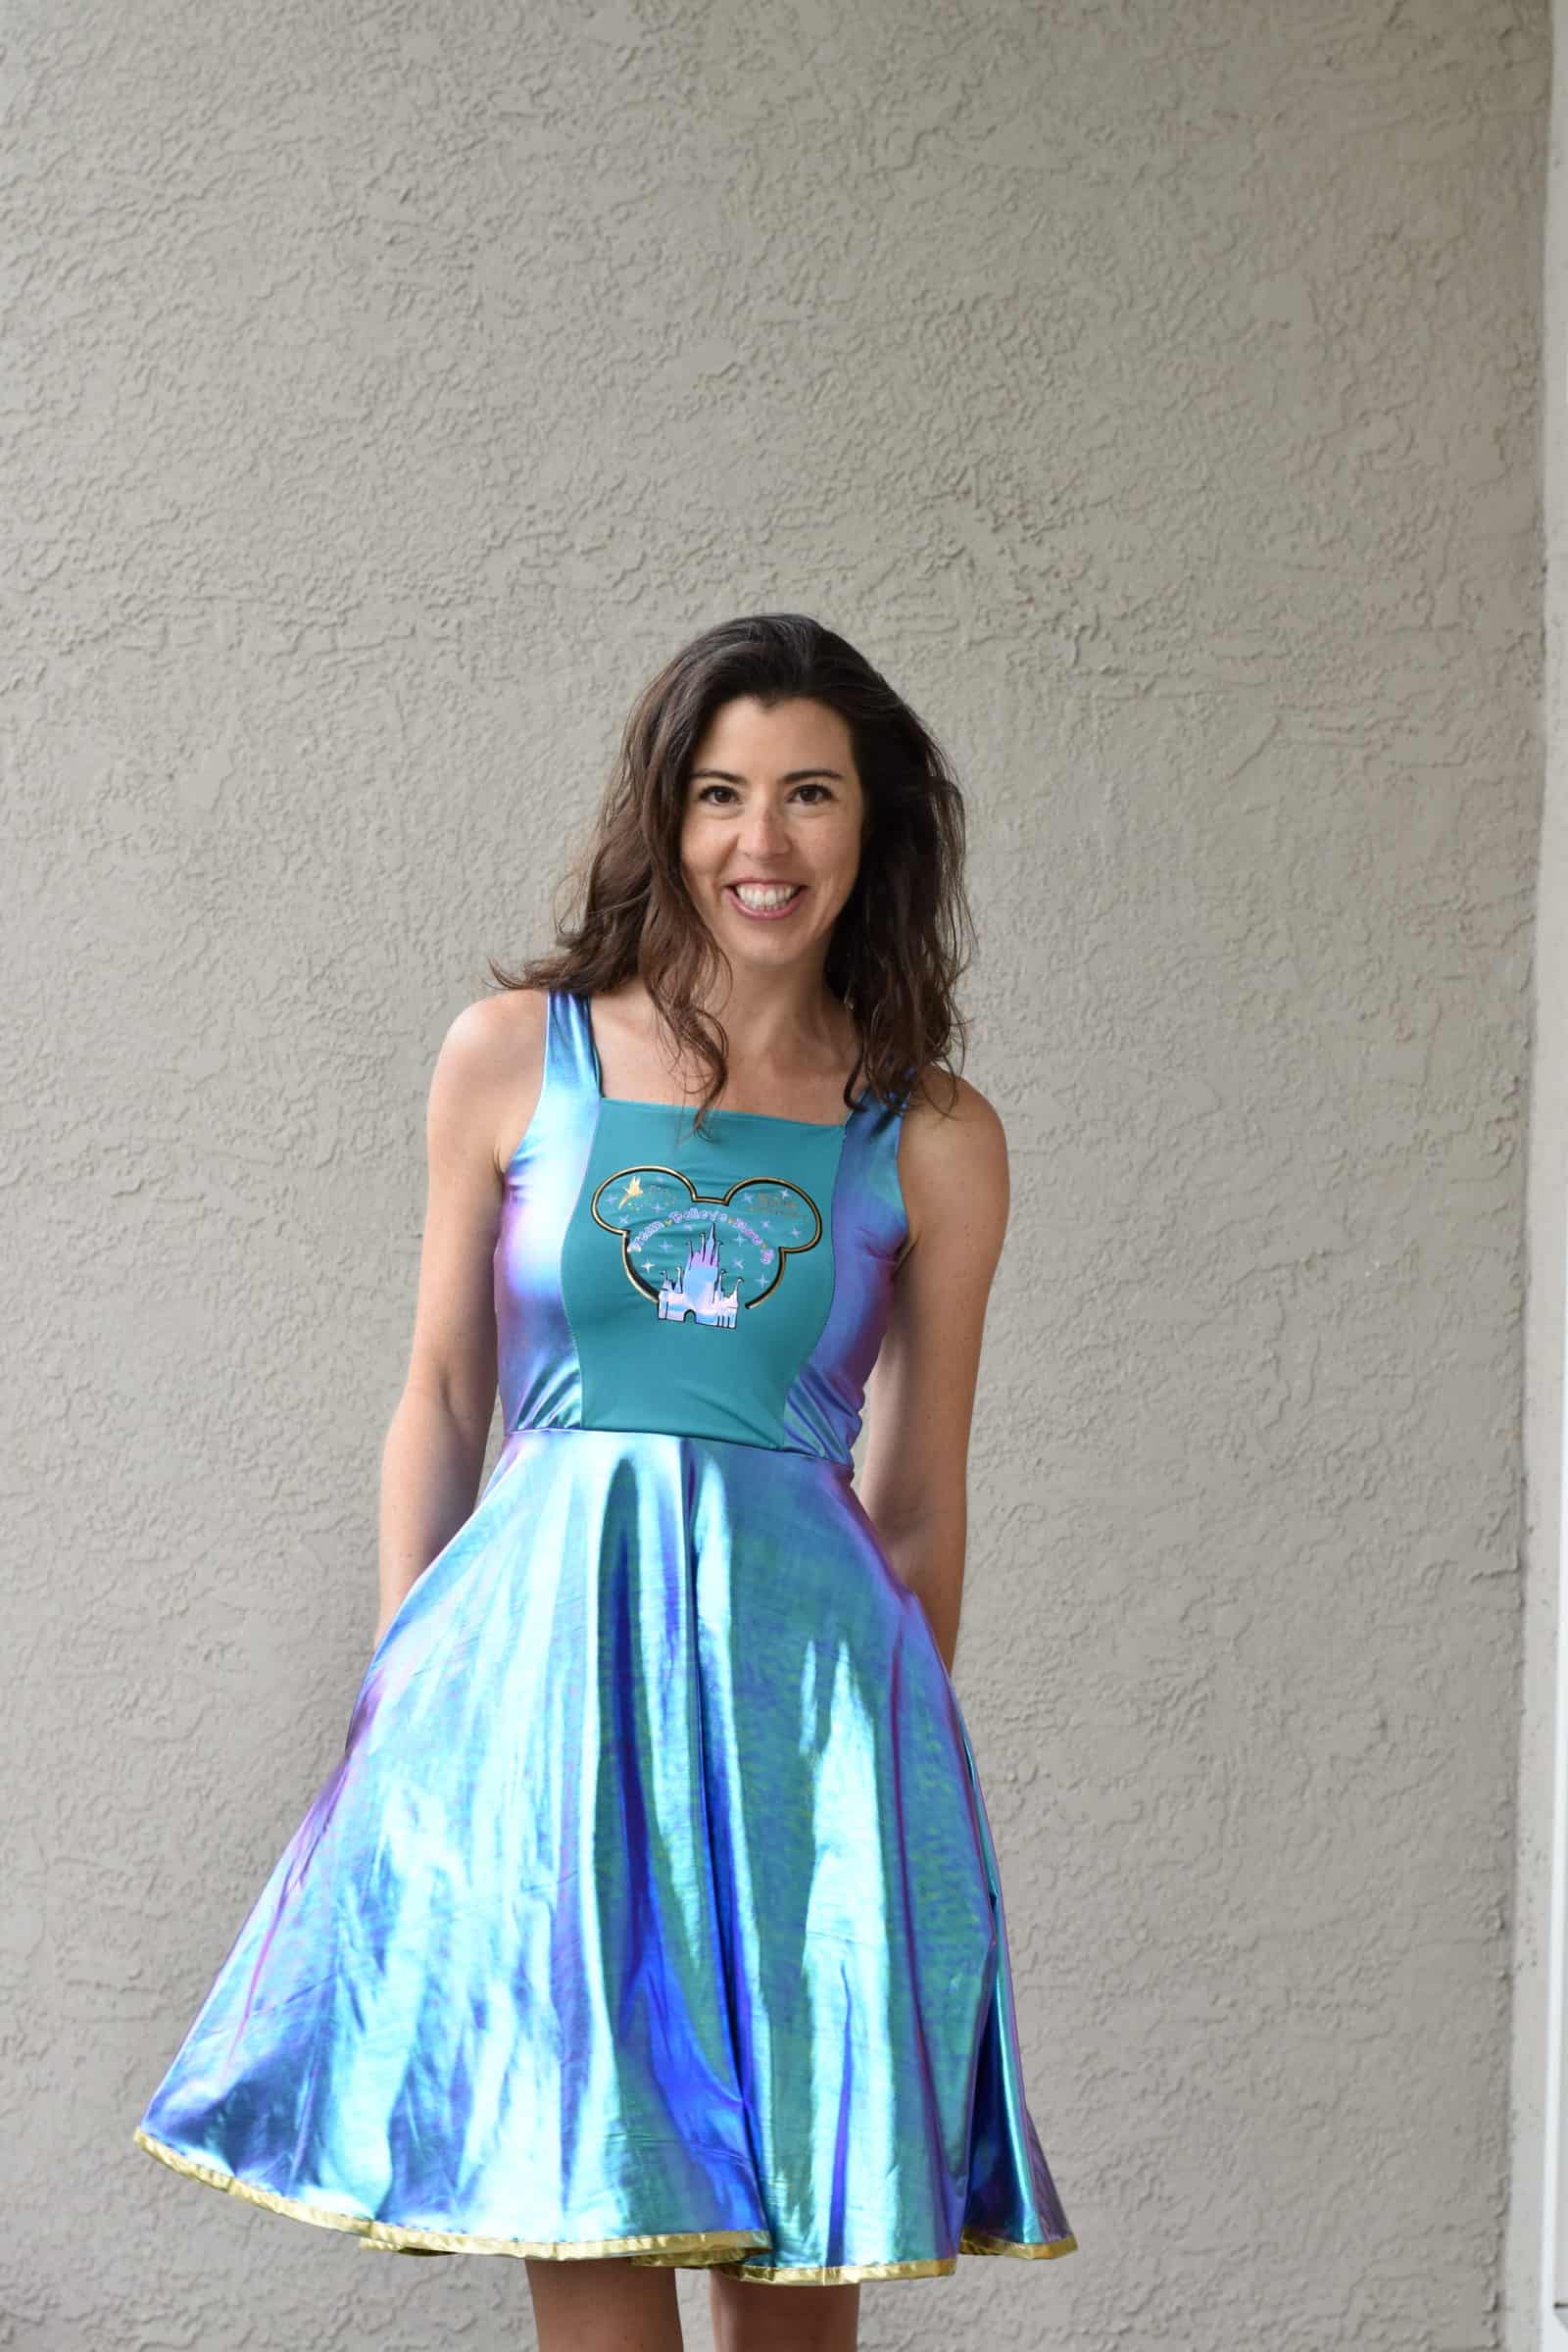
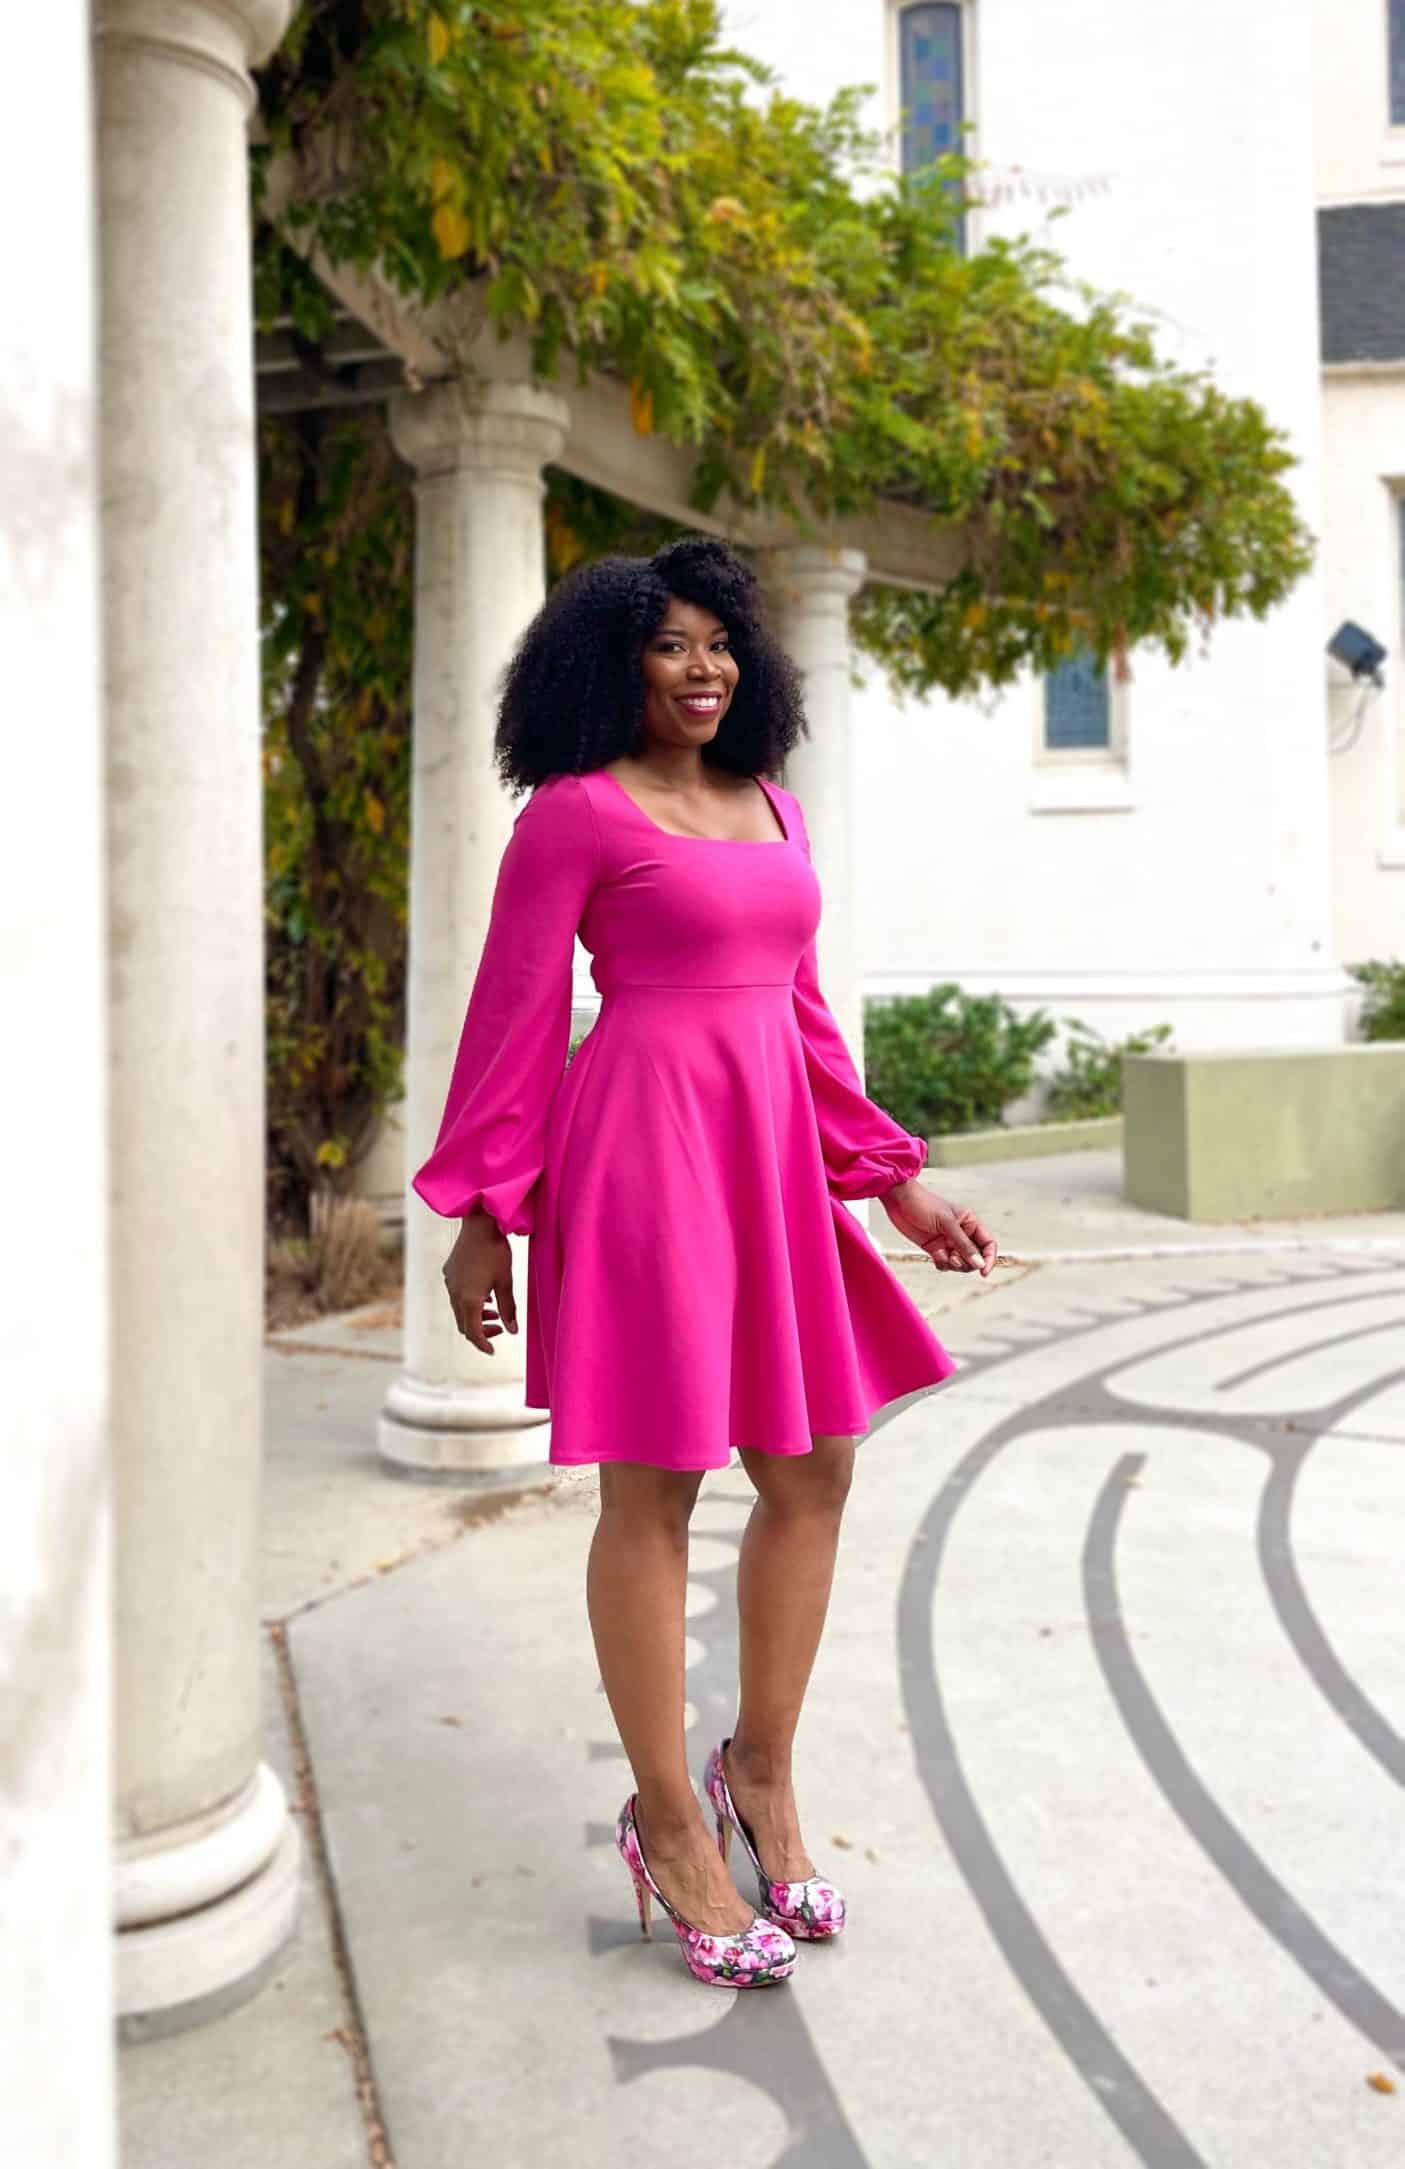
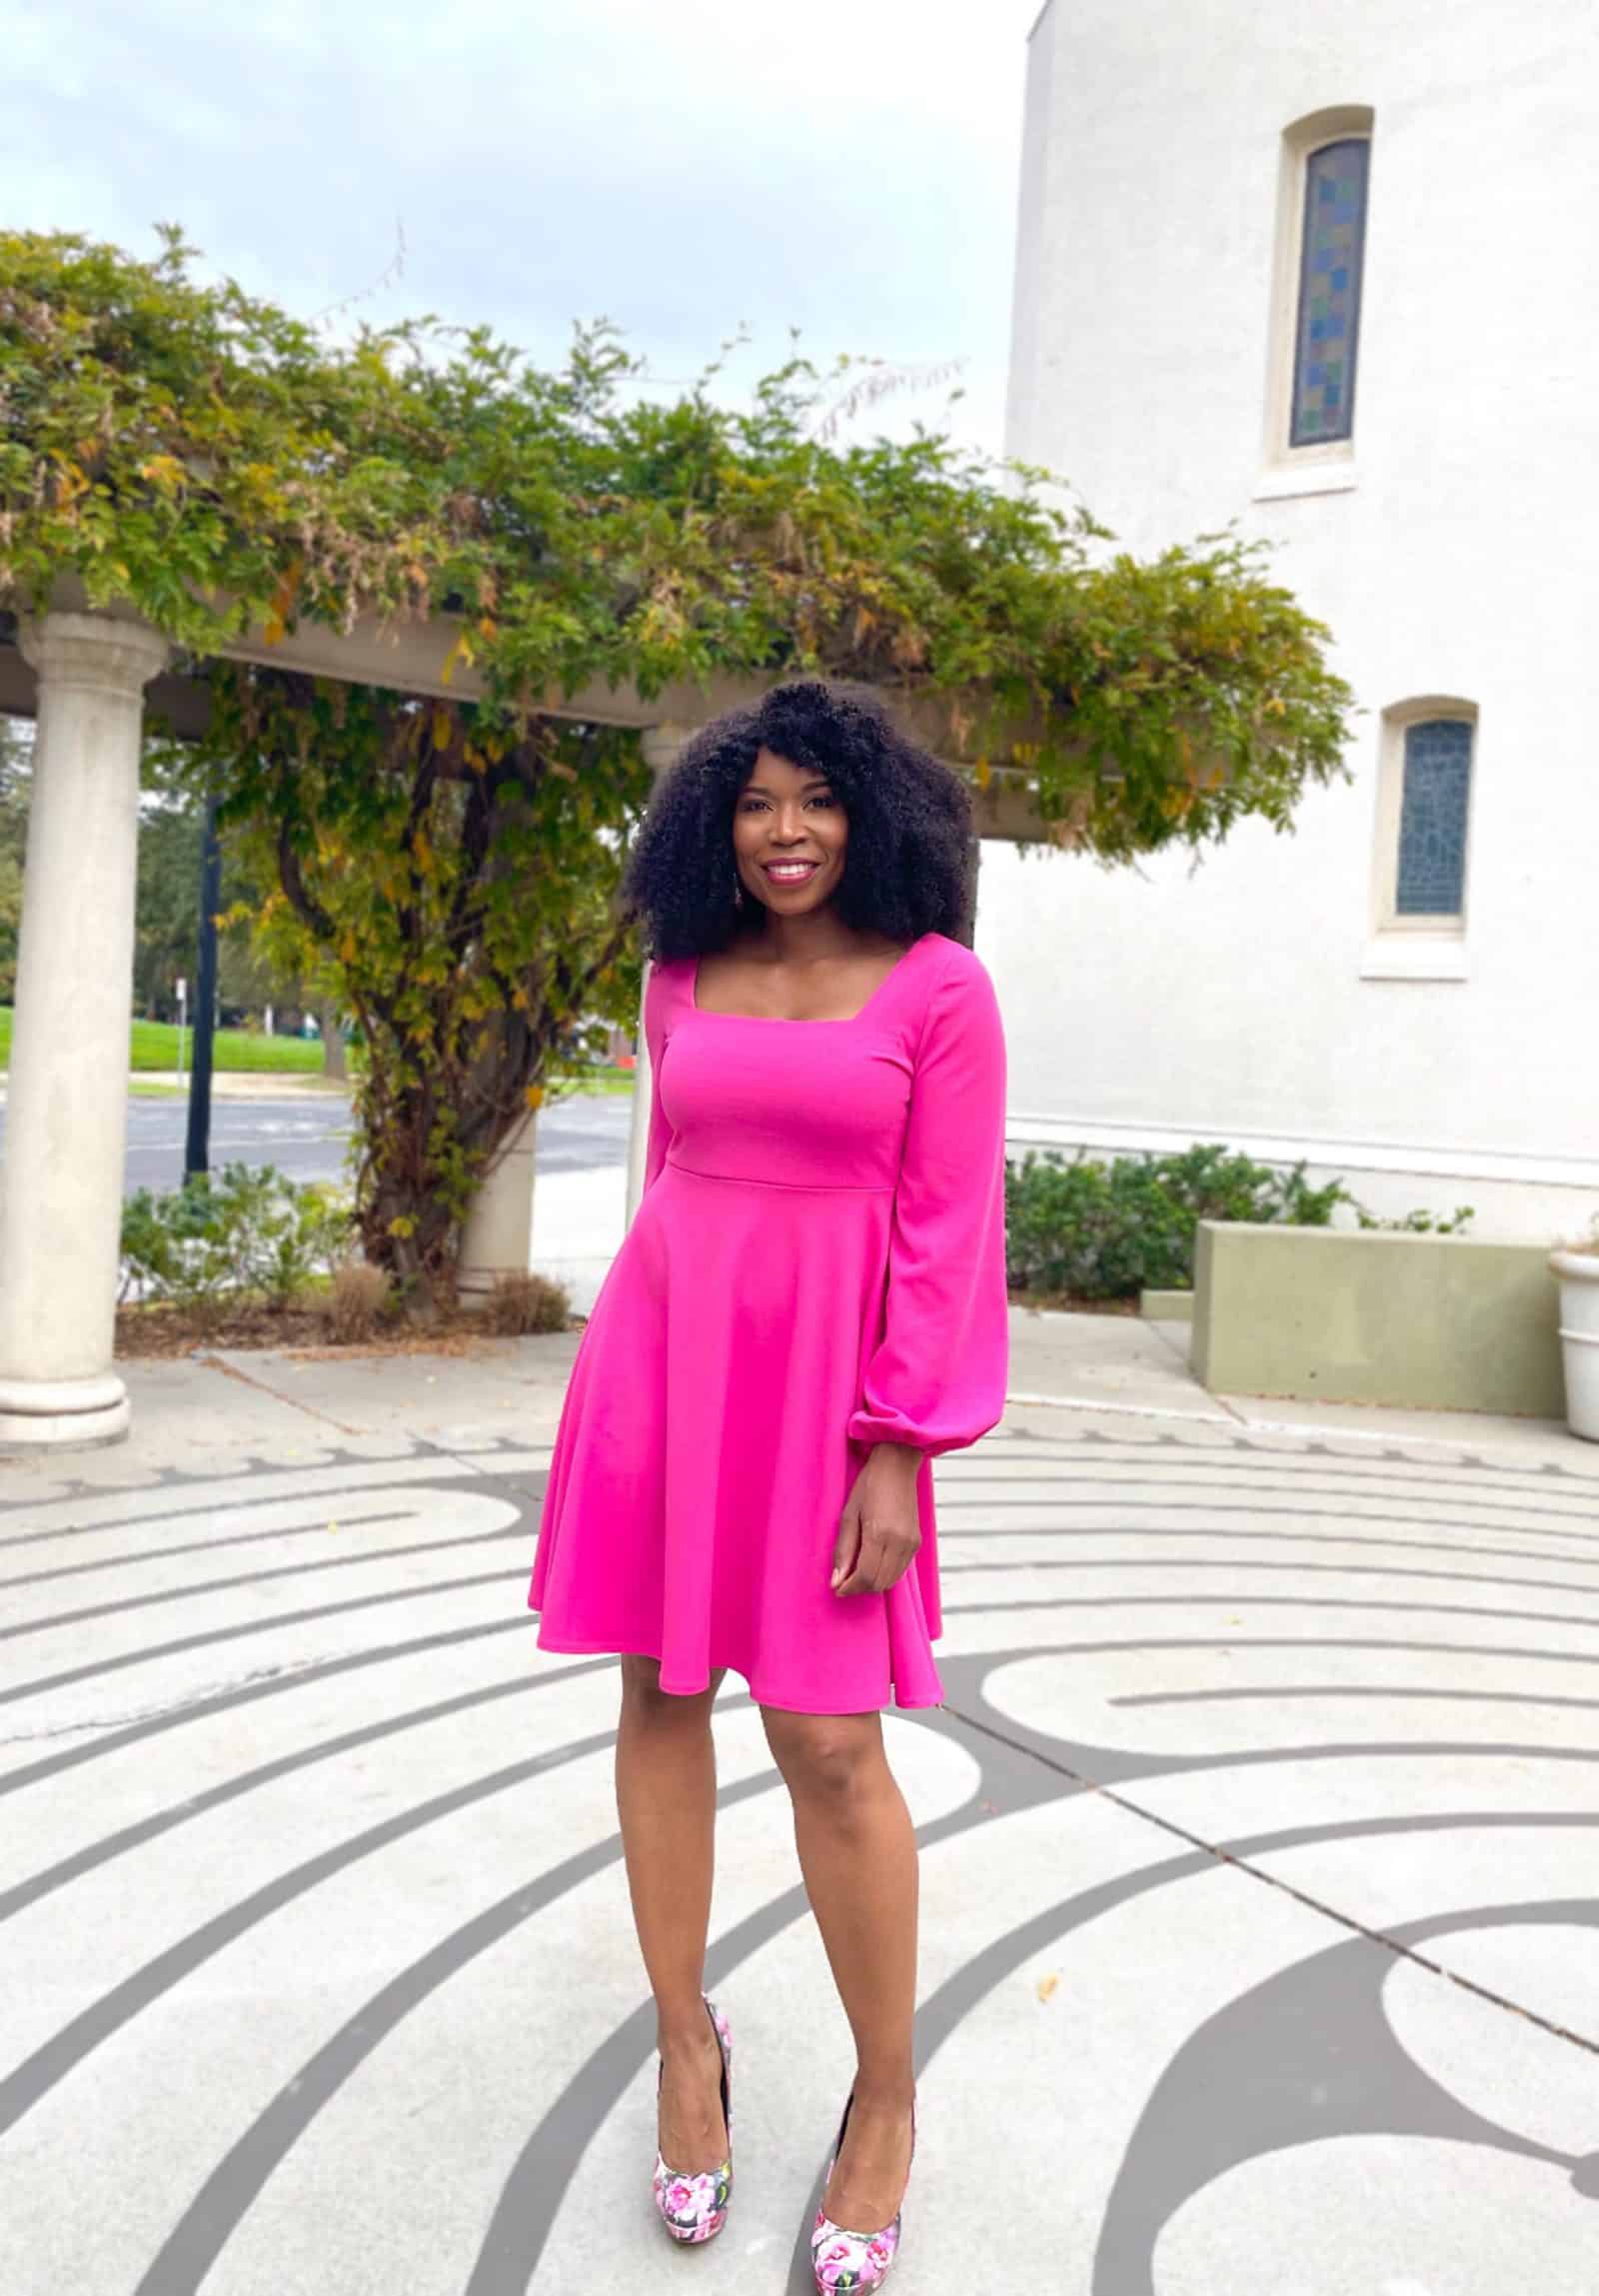
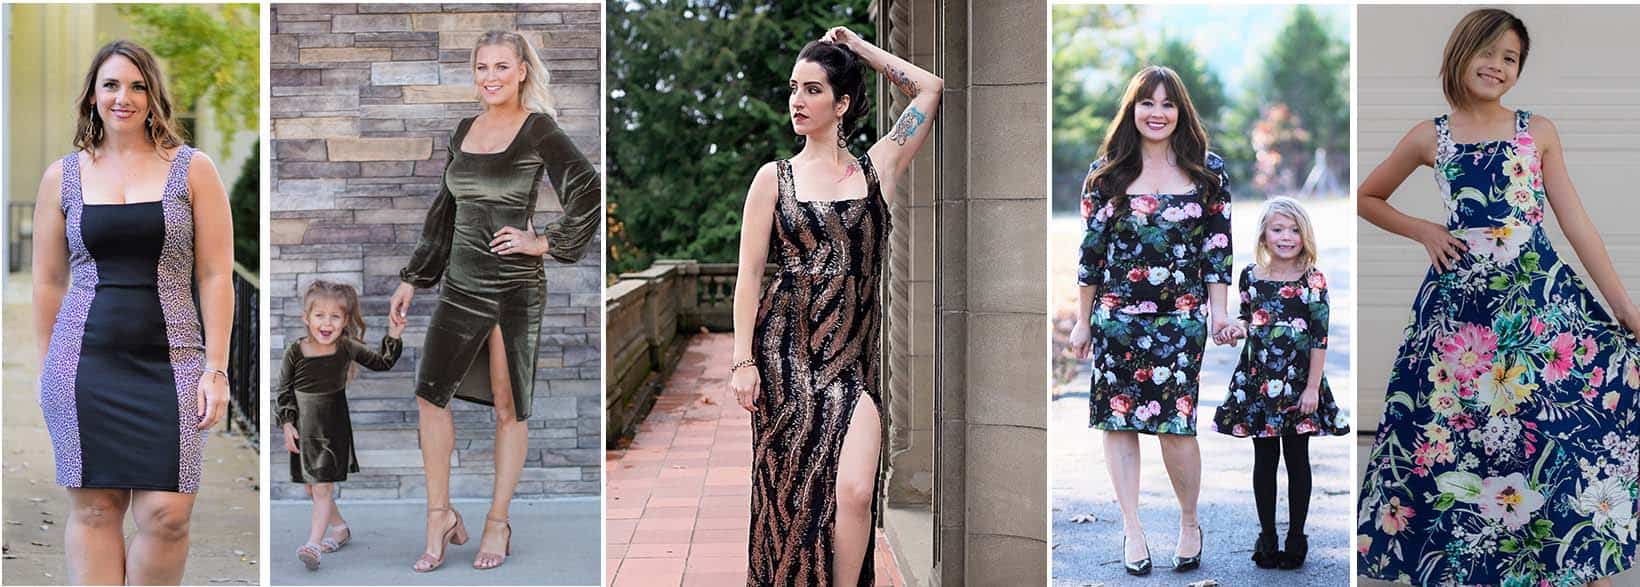
Scarlett is here, and WHEW, our testers are pure fire! We had so much fun seeing all of them rock this dress!
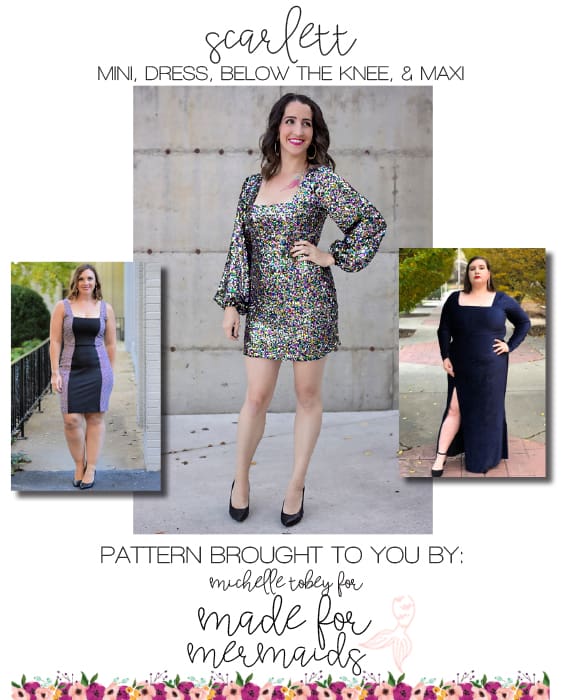
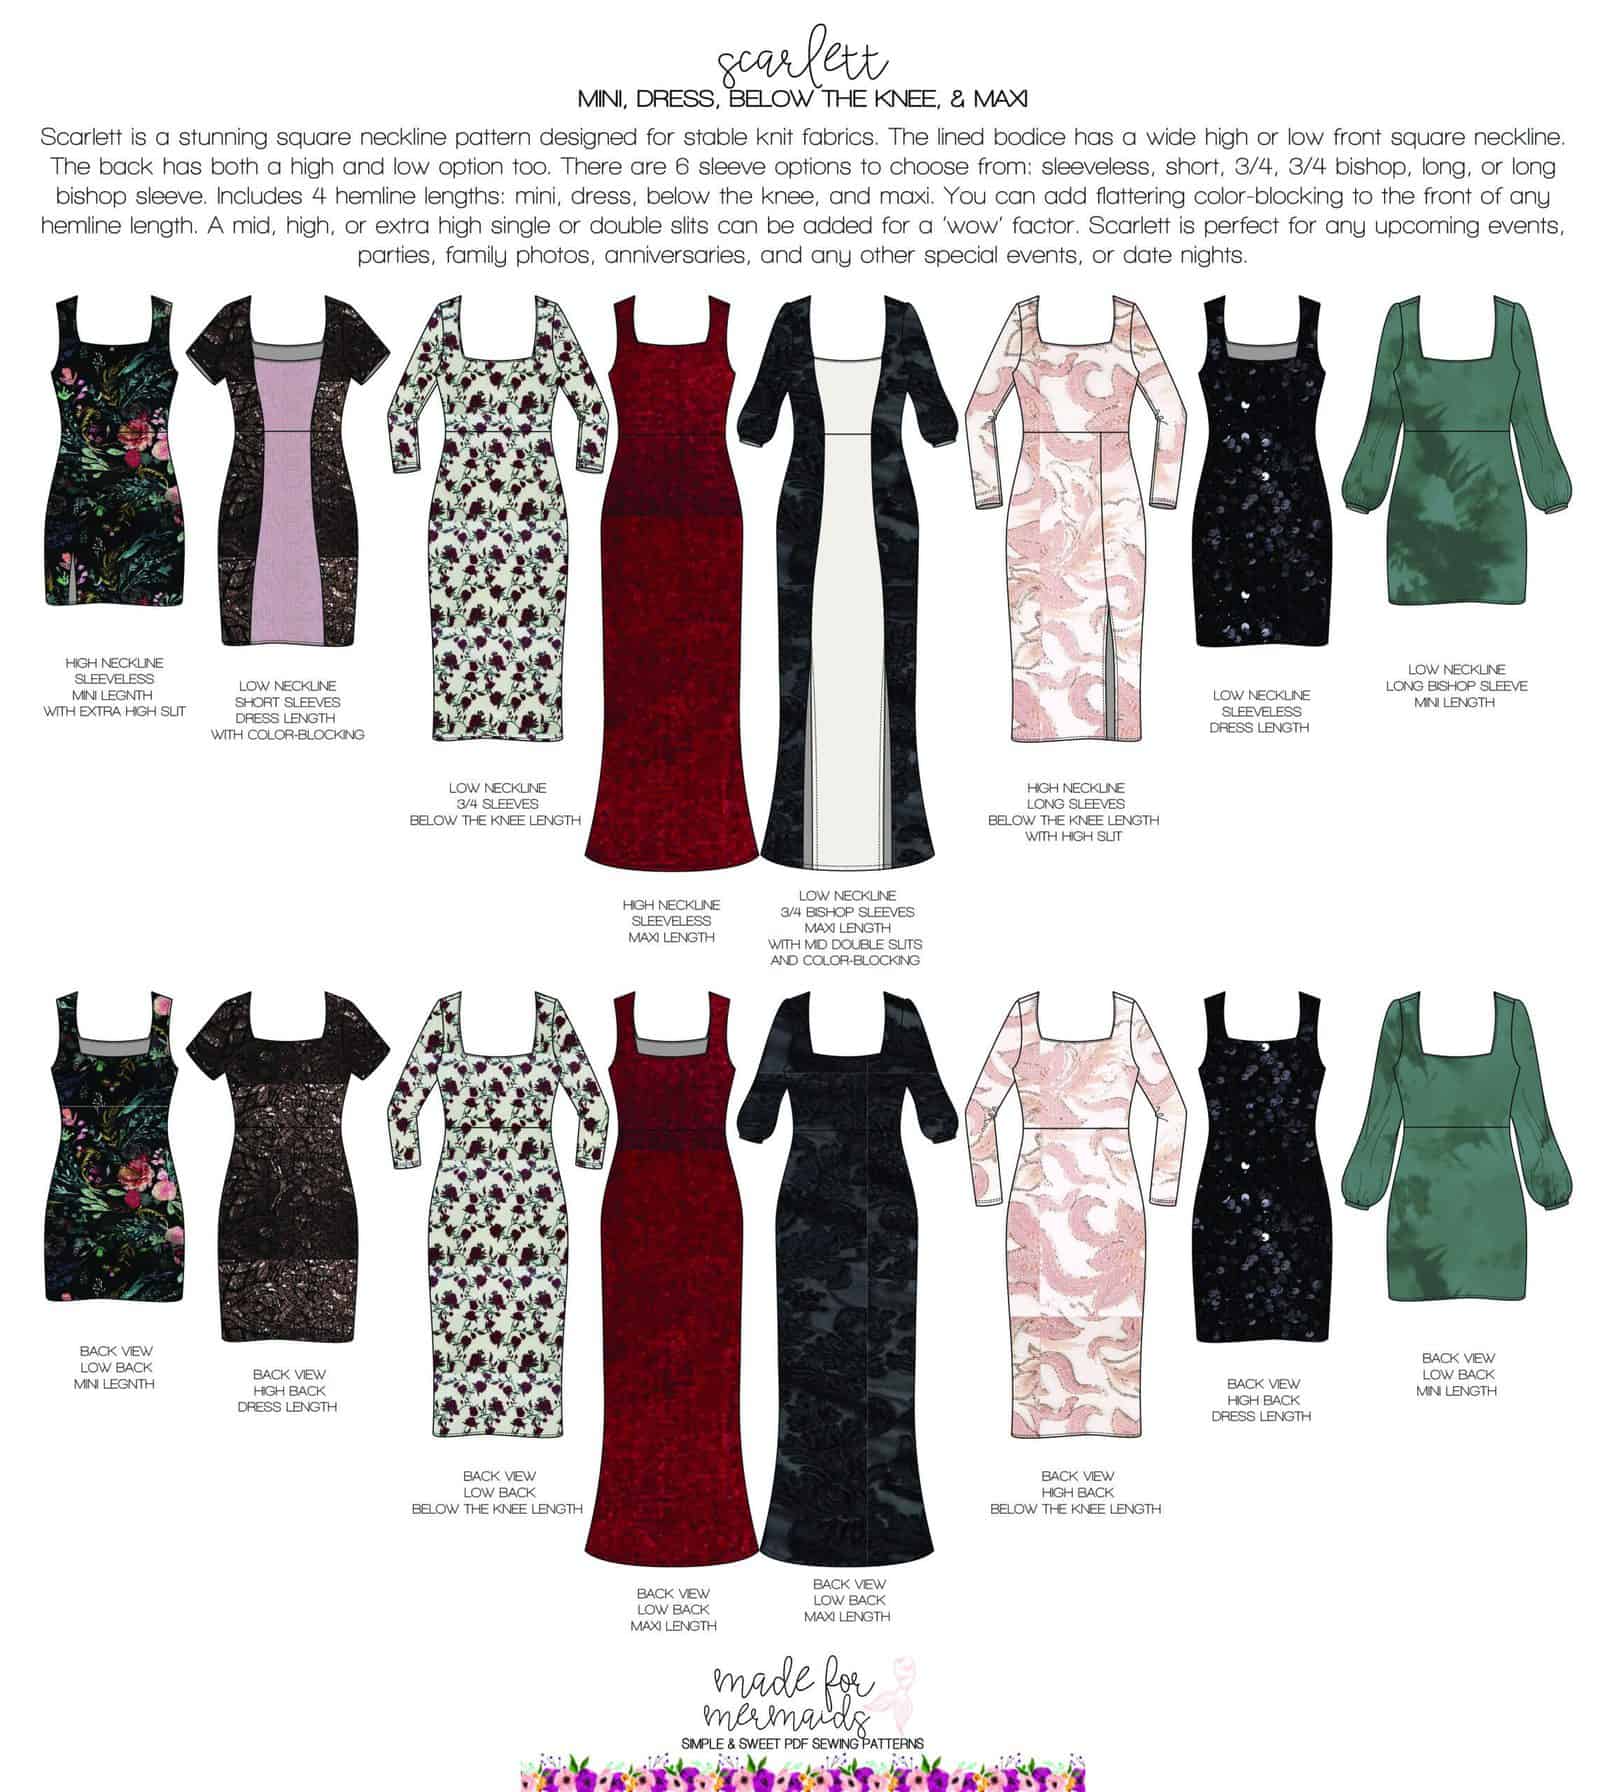
The adult Scarlett features multiple square necklines (high front and back, or low front and back), SIX sleeve options (sleeveless, fitted short, 3/4, long, bishop long, and bishop 3/4), several lengths (mini, dress, below knew, maxi), a front color-block option, AND several slit options.
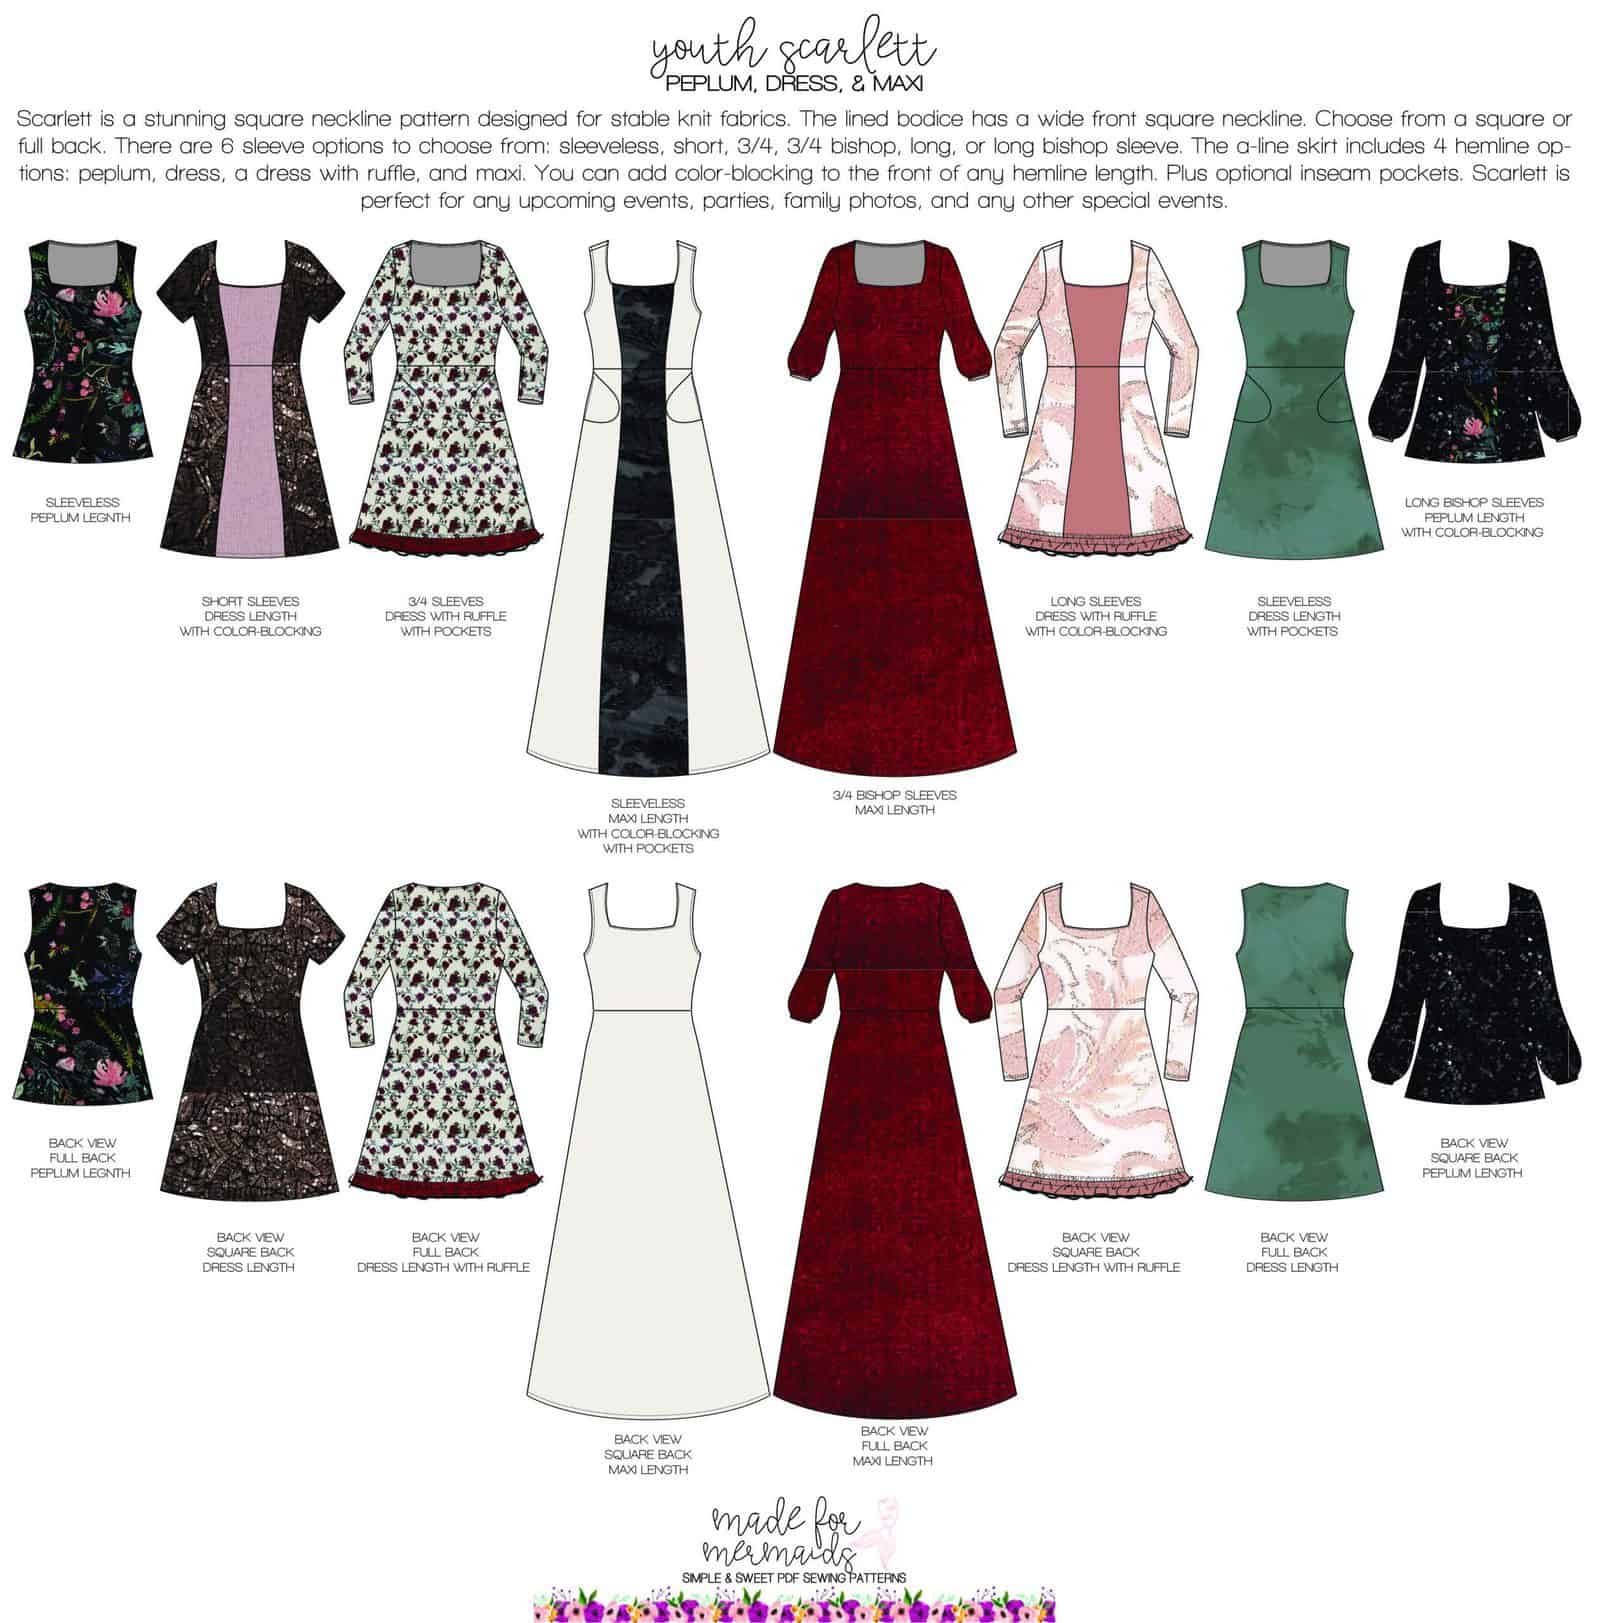
Youth Scarlett includes a square neckline with a square or full back, the same six sleeve options as the adult version, four a-line skirt options (peplum, dress, dress with ruffle, and maxi), plus a color-block option and optional pockets.
Hidden Bra Strap Hack
Hello everyone! My name is Kelly. This is my premier blog post for Made For Mermaids, and I am so happy to be here today to show you all how to create bra strap keepers for your garments. I love designs that show a little more skin at the neckline, but I also like to wear a bra when I’m going out in public. I don’t like to constantly tug at my neckline to keep my straps from showing, and this is where strap keepers come in.
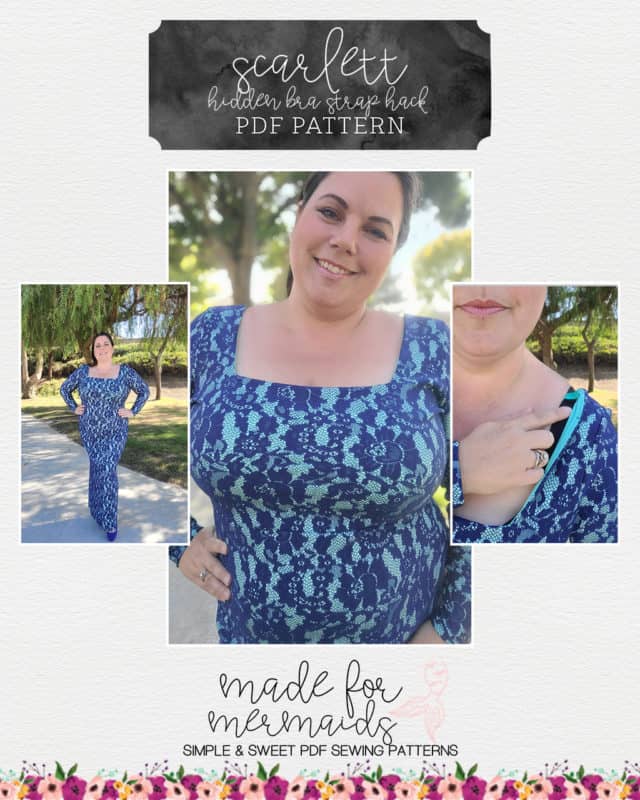
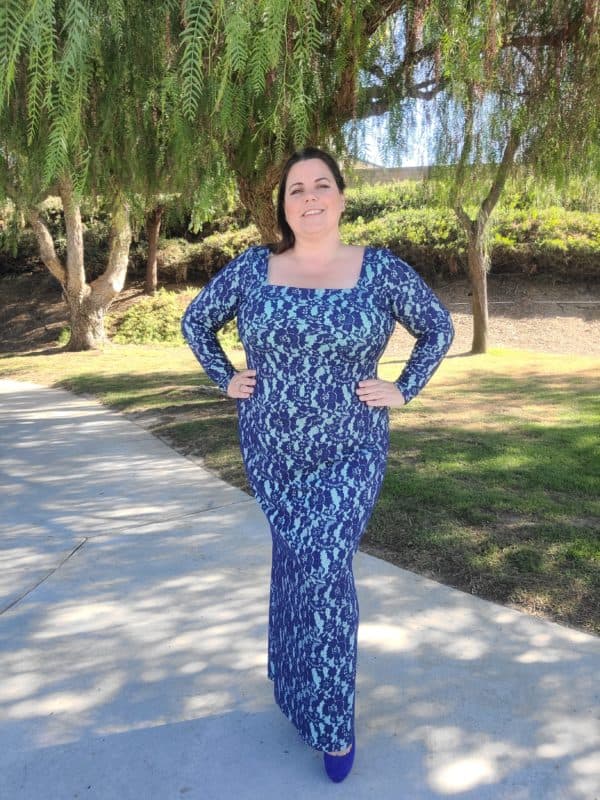
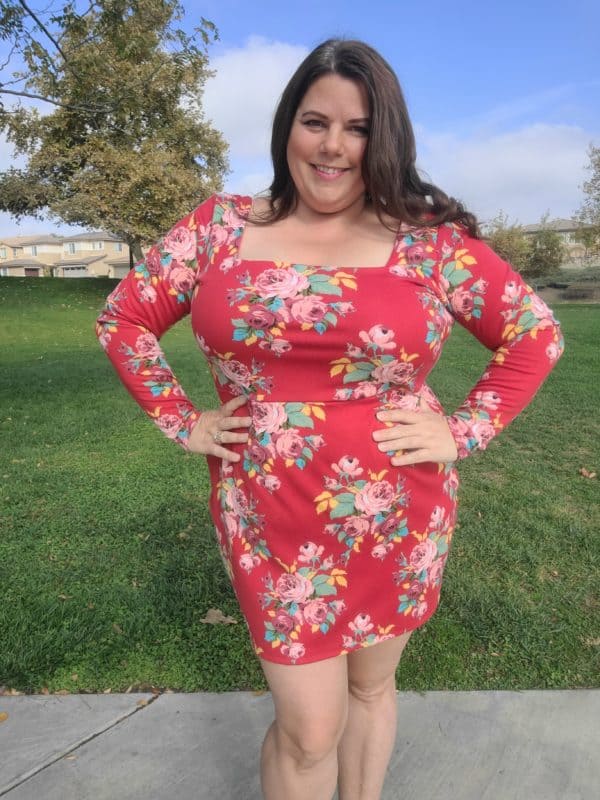
How beautiful is the newest pattern from Made For Mermaids that just released, SCARLETT?
Scarlett’s square neckline is so on trend and looks fabulous on everyone. Due to the nature of this neckline, it can sometimes migrate a bit towards the shoulders and your bra straps might peek out a tiny bit (especially if you’re a wild dancer like me and like to throw your arms up in the air!).
To stop this from happening, you can easily sew in some bra strap keepers. Now don’t worry, these bra strap keepers are actually easy to make, and you’ve probably got everything you need to create them at home already. The basic concept is to sew a strap to the inner side of your finished bodice at the shoulder seam that you can snap open and closed around your bra strap, effectively holding the bodice and your bra strap together, keeping your bra strap covered.
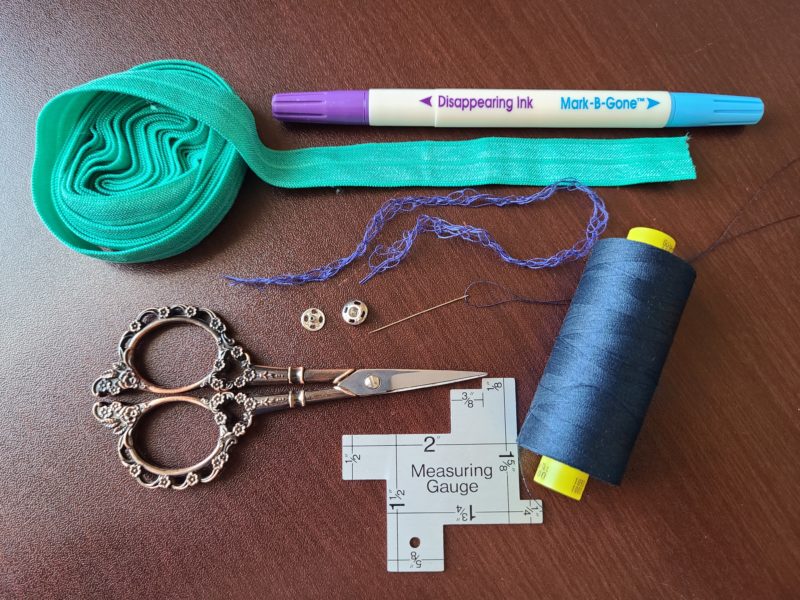
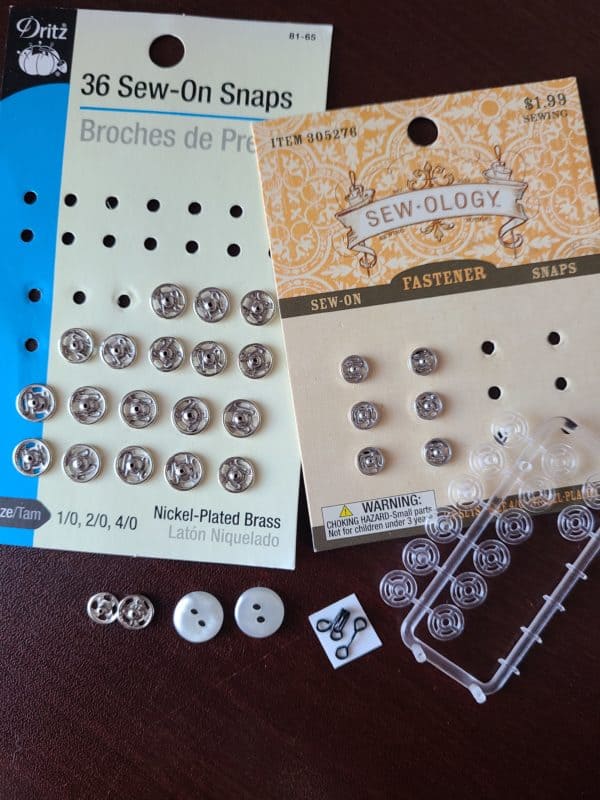
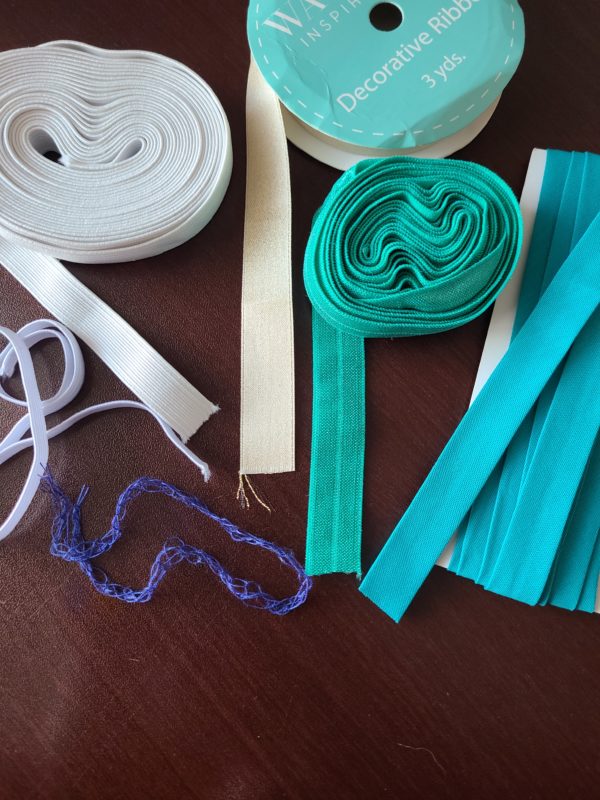
This can be done using many different materials. You need something to “snap”, and something to use as a “strap”, as well as some needle and thread. Here’s the supplies that I used to create my two sets of keepers:
- measuring tool
- marking pen
- needle
- thread
- scissors
- snaps
- serger tail
- fold over elastic (FOE)
Keep in mind the material of your garment that you’re adding bra strap keepers to – is it a single layer, or does it have a lining? Does it need a lightweight strap, or can you get away with something a bit more substantial? Scarlett has a lined bodice, so it’s great for using a myriad of materials.
Get creative if you need to – I took a little walk around my sewing space and came up with these as alternatives to use. Snap alternatives: hook & eye or small buttons. Strap alternatives: serger tail, ribbon, elastic (regular or Fold Over Elastic/FOE), bias tape, a scrap of fabric – you can also hand crochet the strap with doubled over thread if you want a super lightweight version.
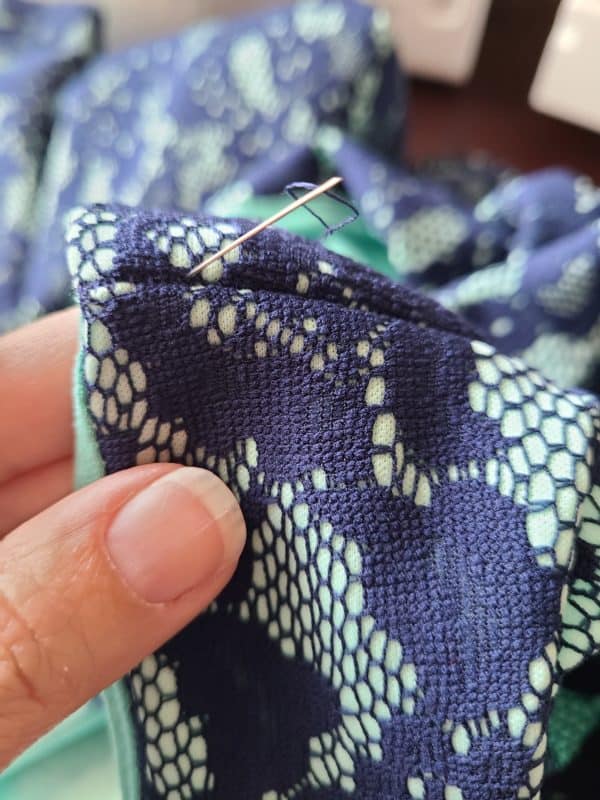
For the Scarlett, we will be working with the inside of your bodice, and only the lining material. If the garment that you’re working on is only one layer of fabric, you will want to have matching thread and “stitch in the ditch” (have your needle going into the seam at the shoulder) to make it virtually unnoticeable from the right side.
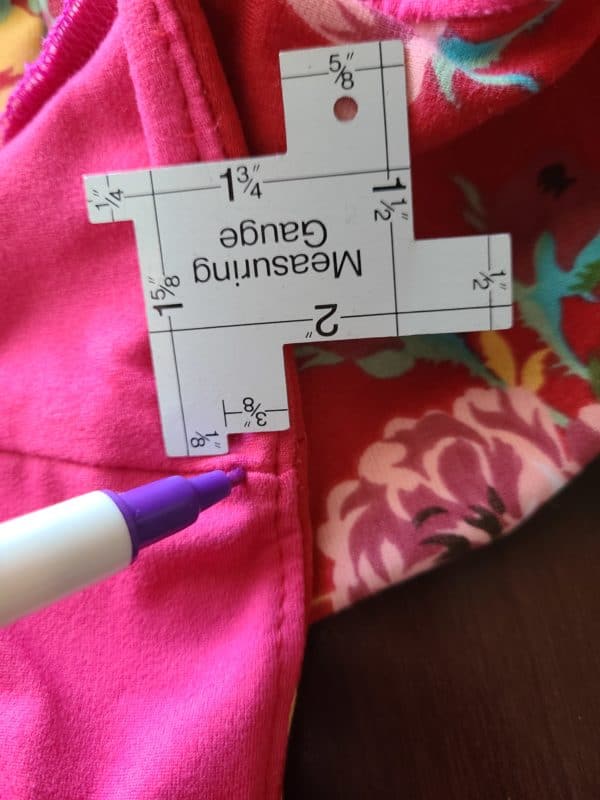
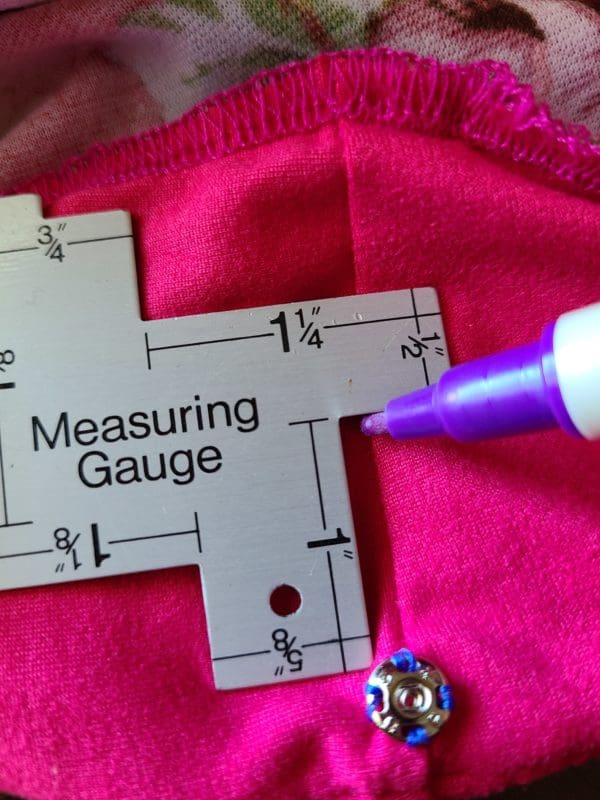
The first thing that you need to do when creating the bra strap keepers is measure your bra strap. I measured my bra that had the widest straps so I could wear any of my bras and know they would all work with the keepers.
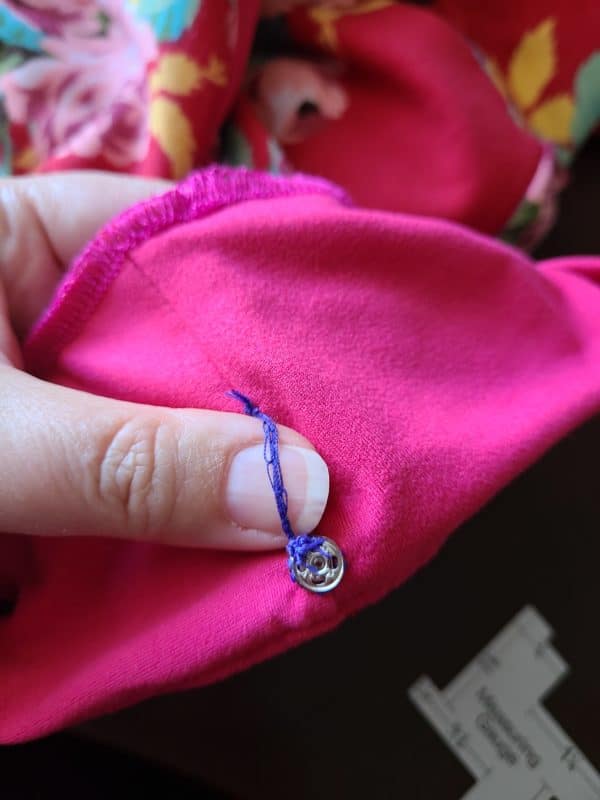
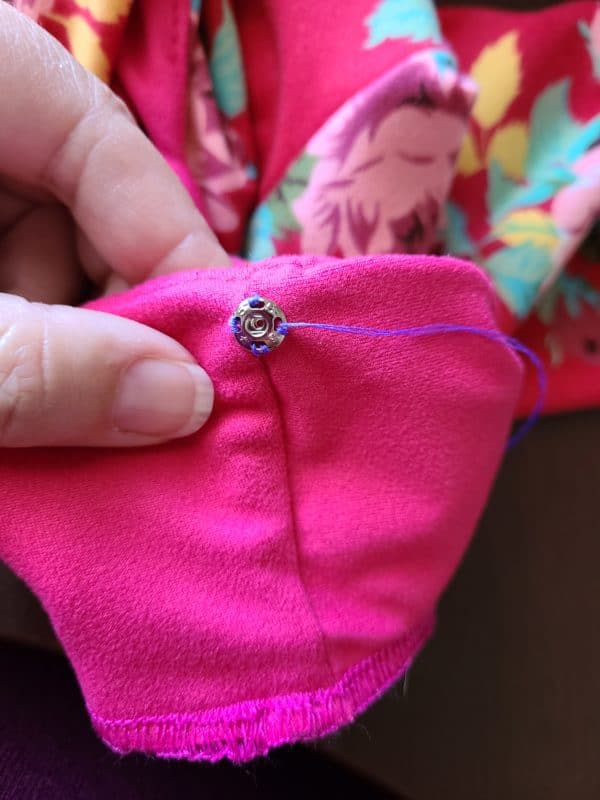
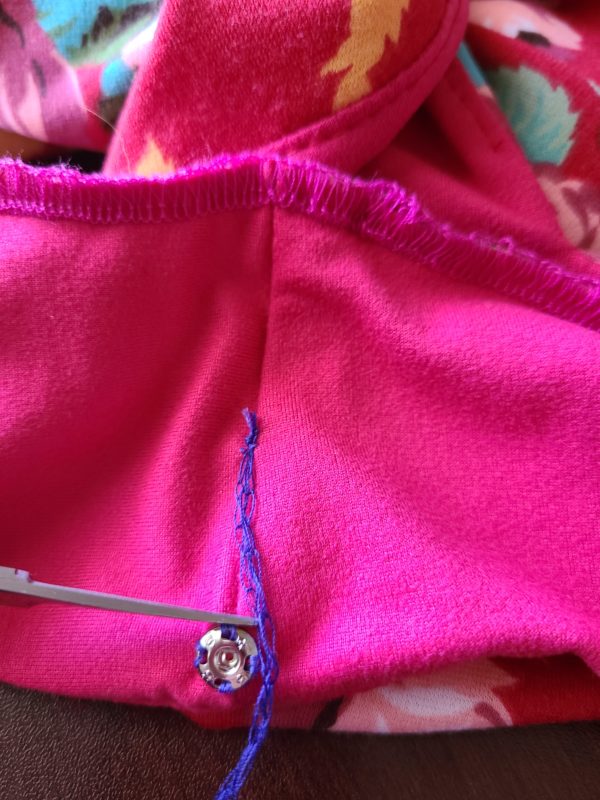
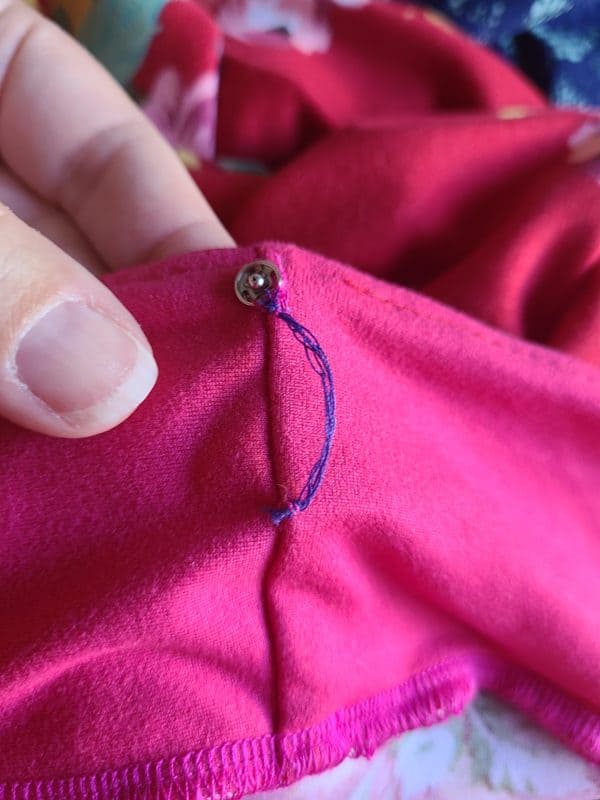
You will sew one half of your snap set directly onto the lining material. I found the 2/0 size snap in my multi pack to be a nice size that I could easily snap on my own – remember it’s on your shoulder, so if you are alone when you’re dressing, it can be difficult to snap if the snap is smaller. Make a mark about 3/8″ from the edge of the neckline – you want to make sure that once the snap is sewn on it will not be visible from the “right” side. Sew your female snap (or button or eye) at this location.
I like to pass my thread through each hole on the snap about 2 times to make sure that it will be secure.
Now we need to measure out from the first sewn snap enough space for your bra strap to fit. My widest strap is ¾” wide, so I measured 1” from the first snap. Mark this location.
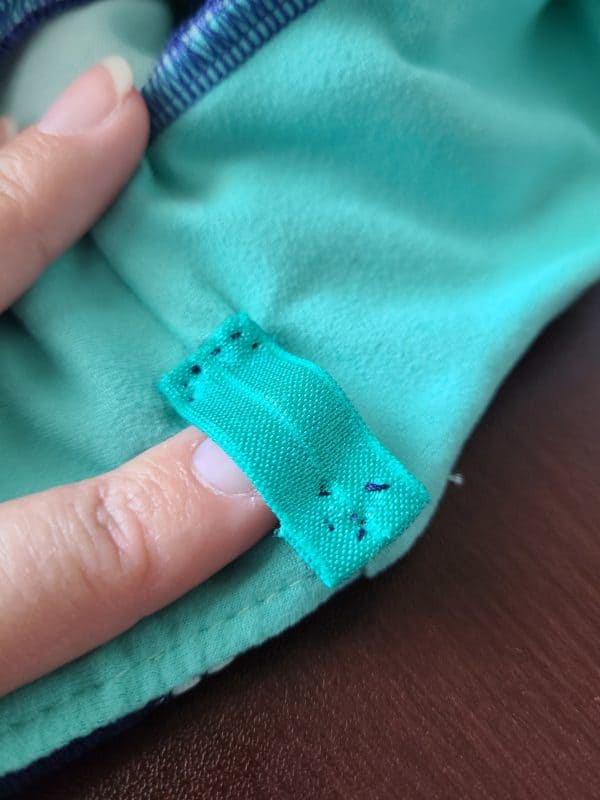
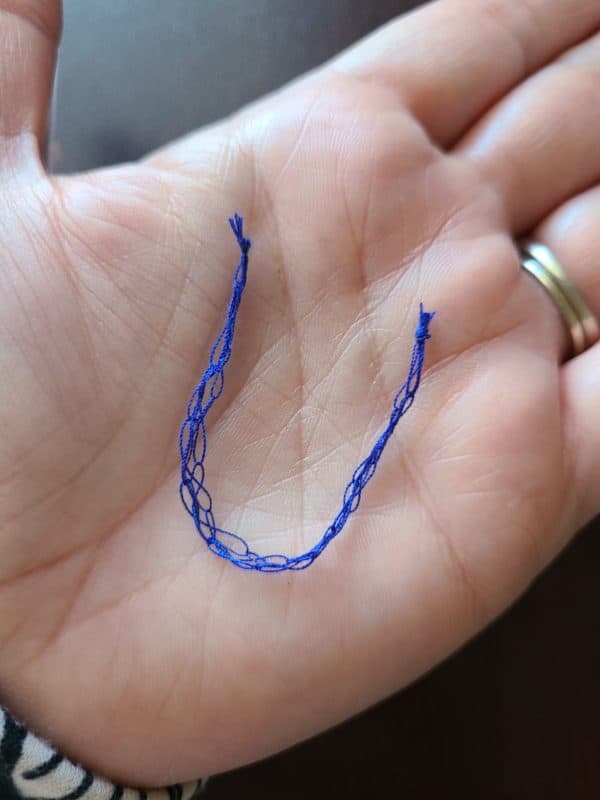
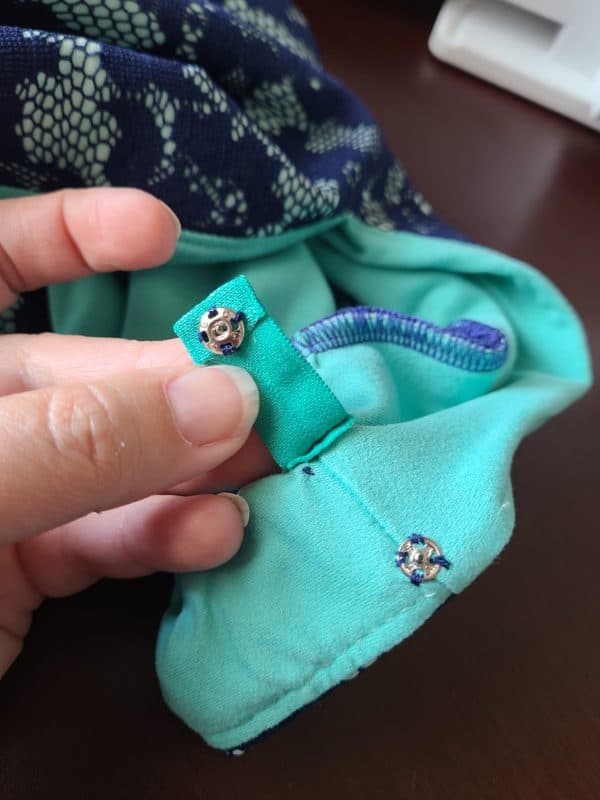
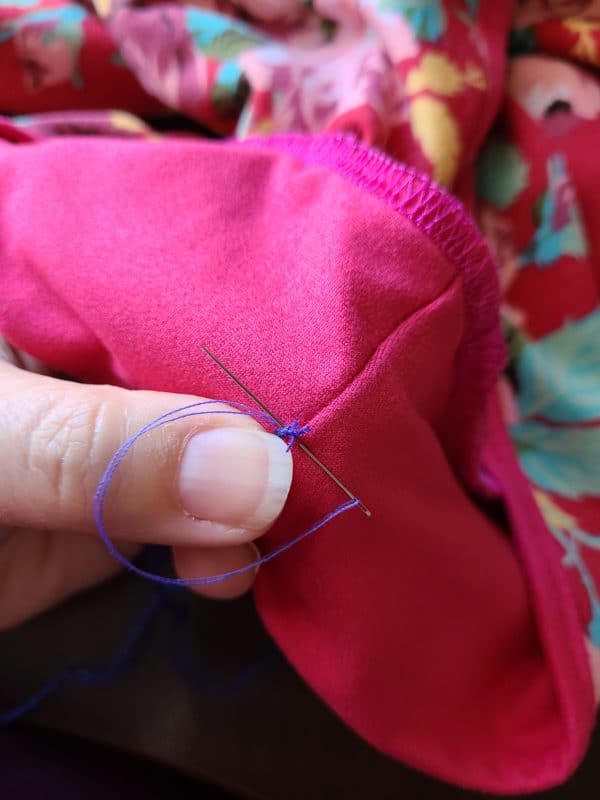
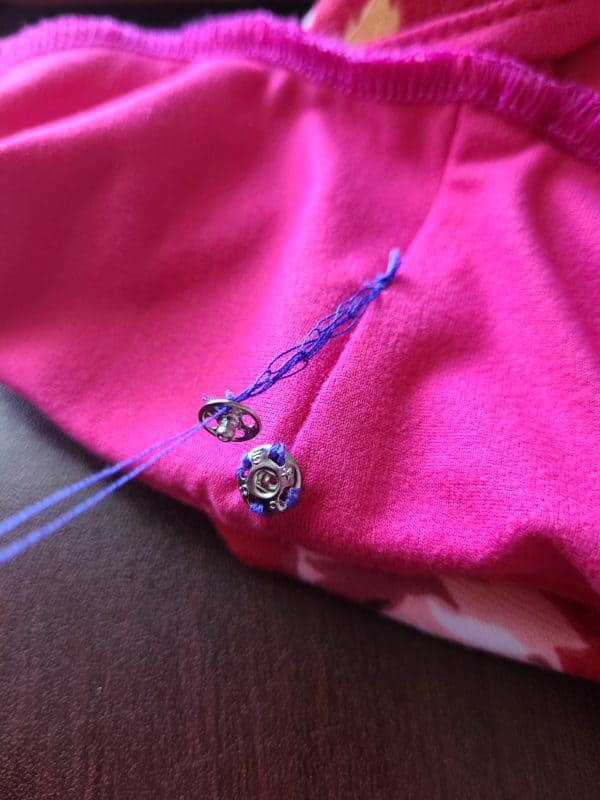
For my thread strap version, I just ran my serger without any fabric going through and pulled off a tail about 10” long. Make a knot at the end of the serger tail and sew that knot to your marked location. You will do the same thing if you’re using any other strap material – I used fold over elastic for my blue dress!
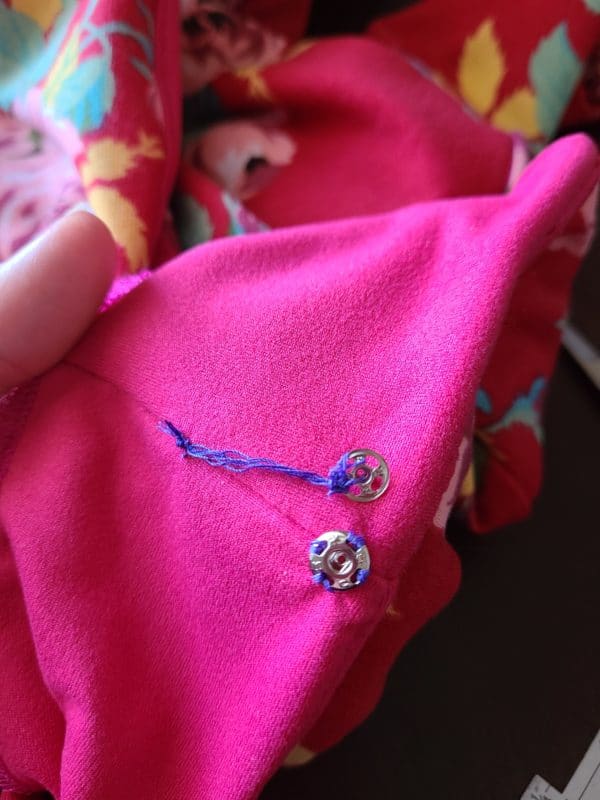
Once you’ve got that end secured, pull your serger tail along to the first snap and make another knot here (or mark your elastic or whatever strap material you are using). Cut off the excess serger tail/elastic to use for your other shoulder/keeper. Now you’ll want to sew the male snap onto this knot/end.
Check and make sure that the snaps go together without too much slack in the strap itself.
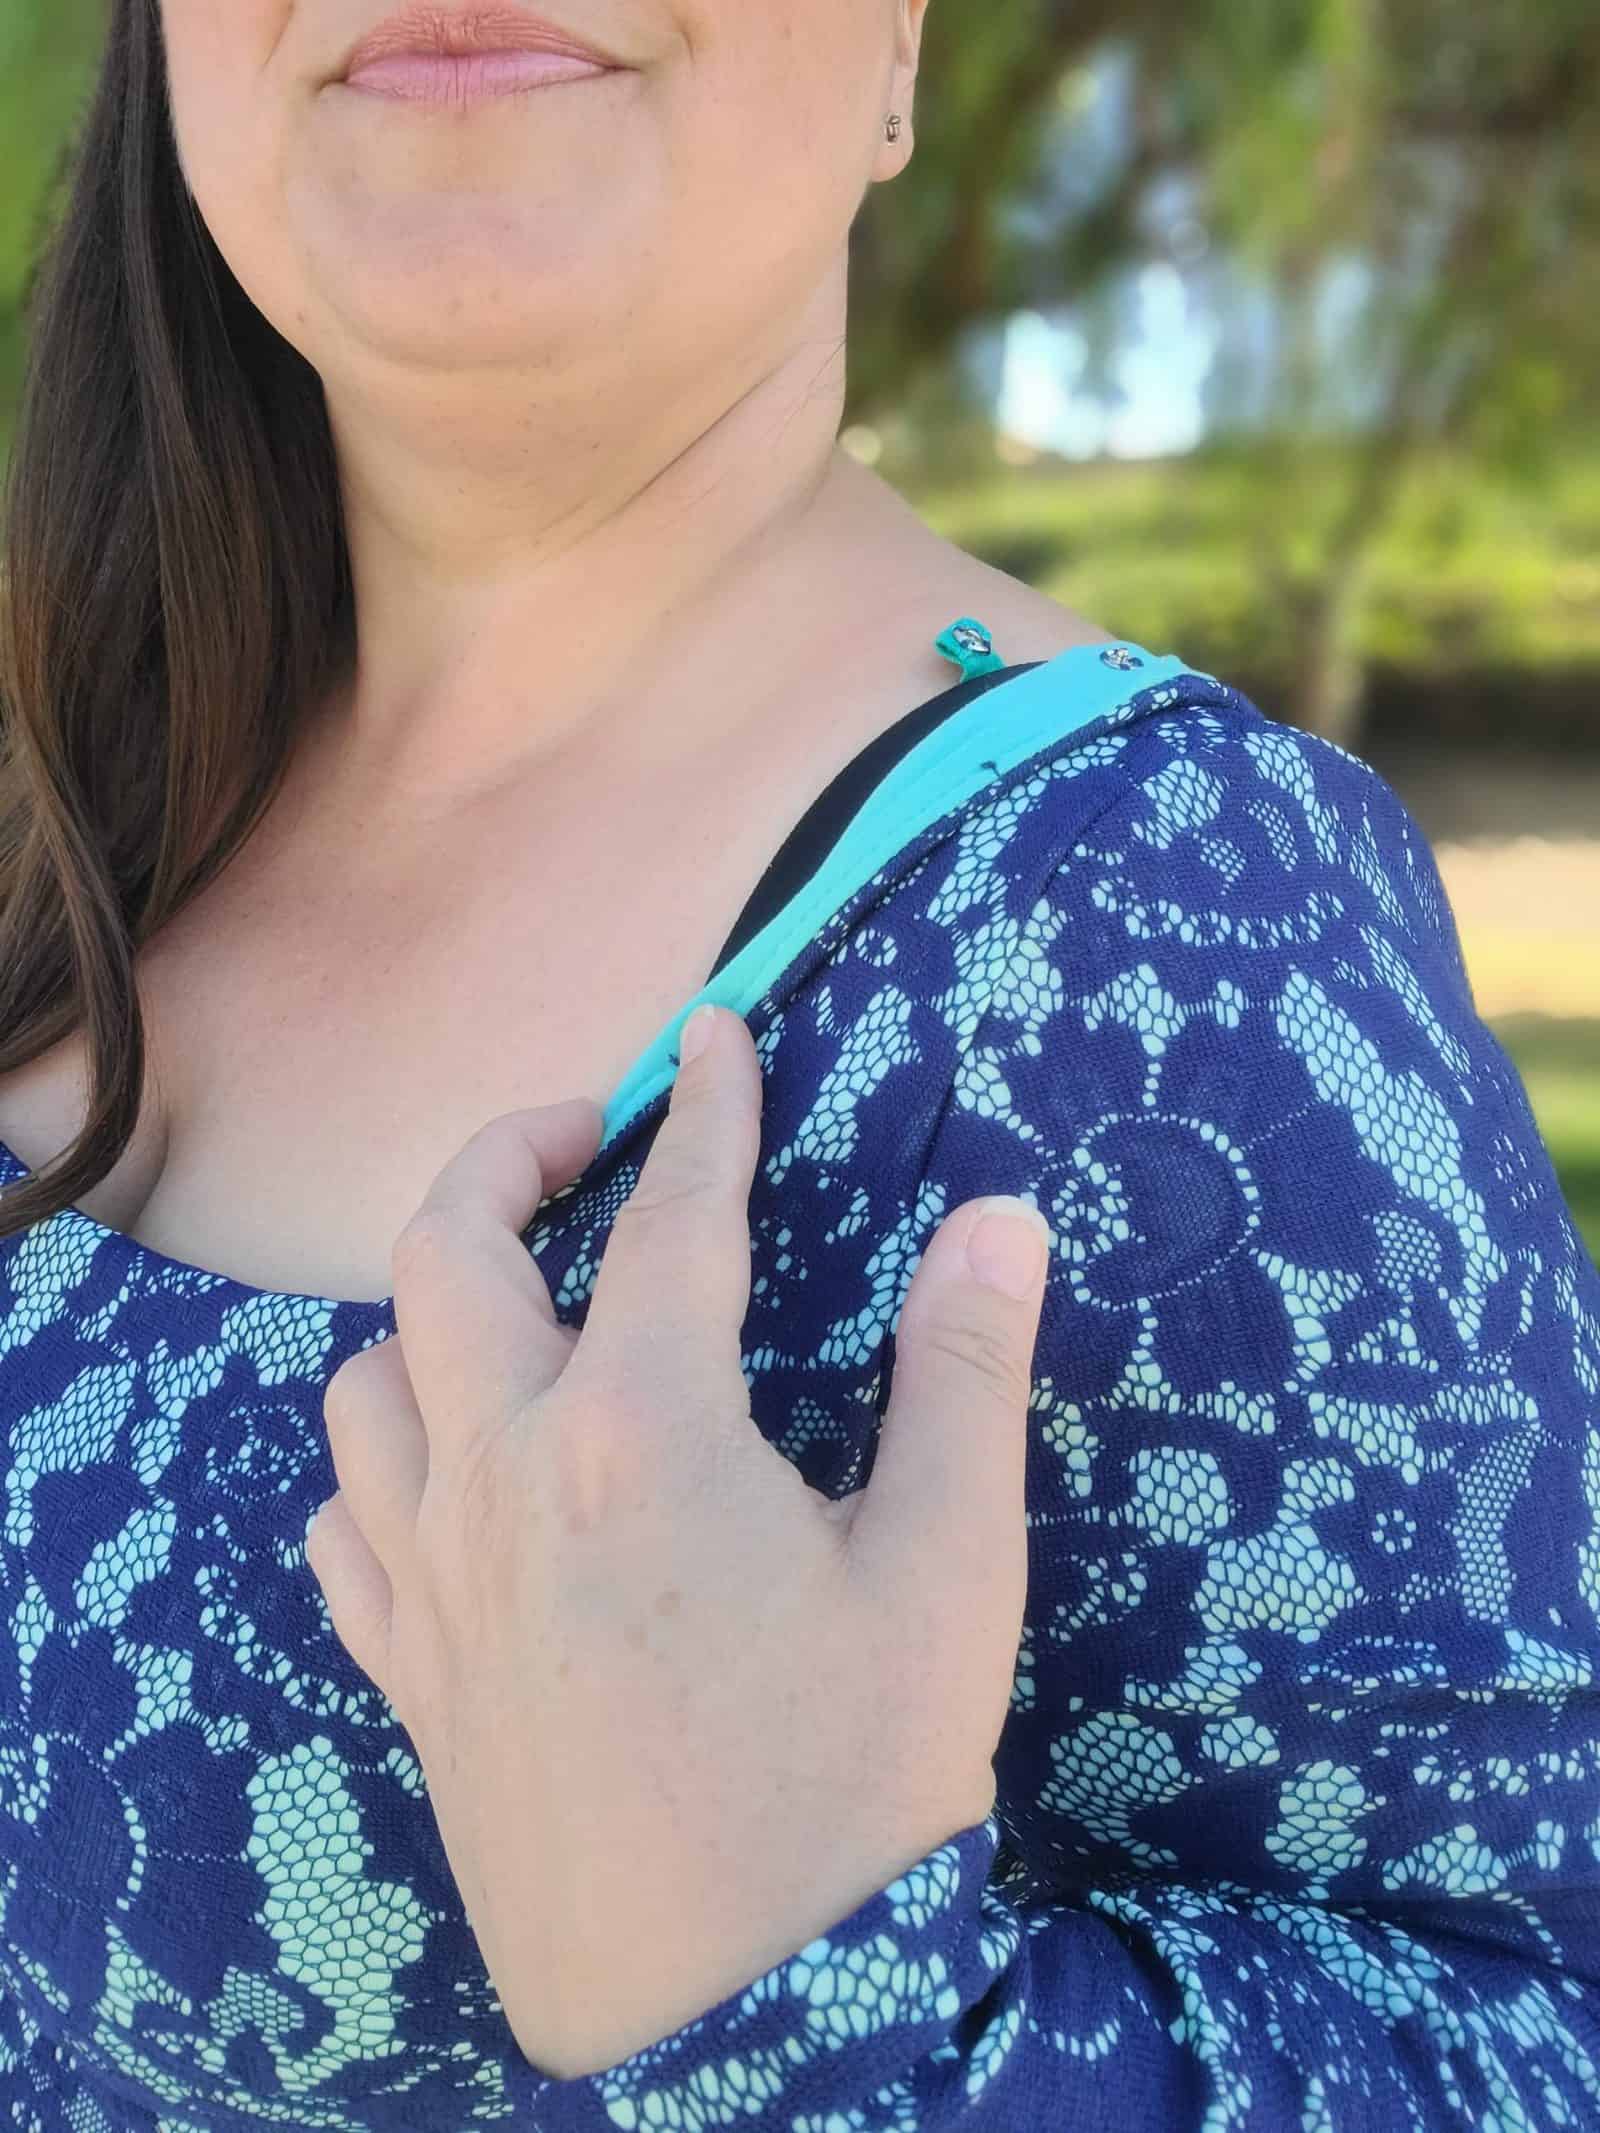
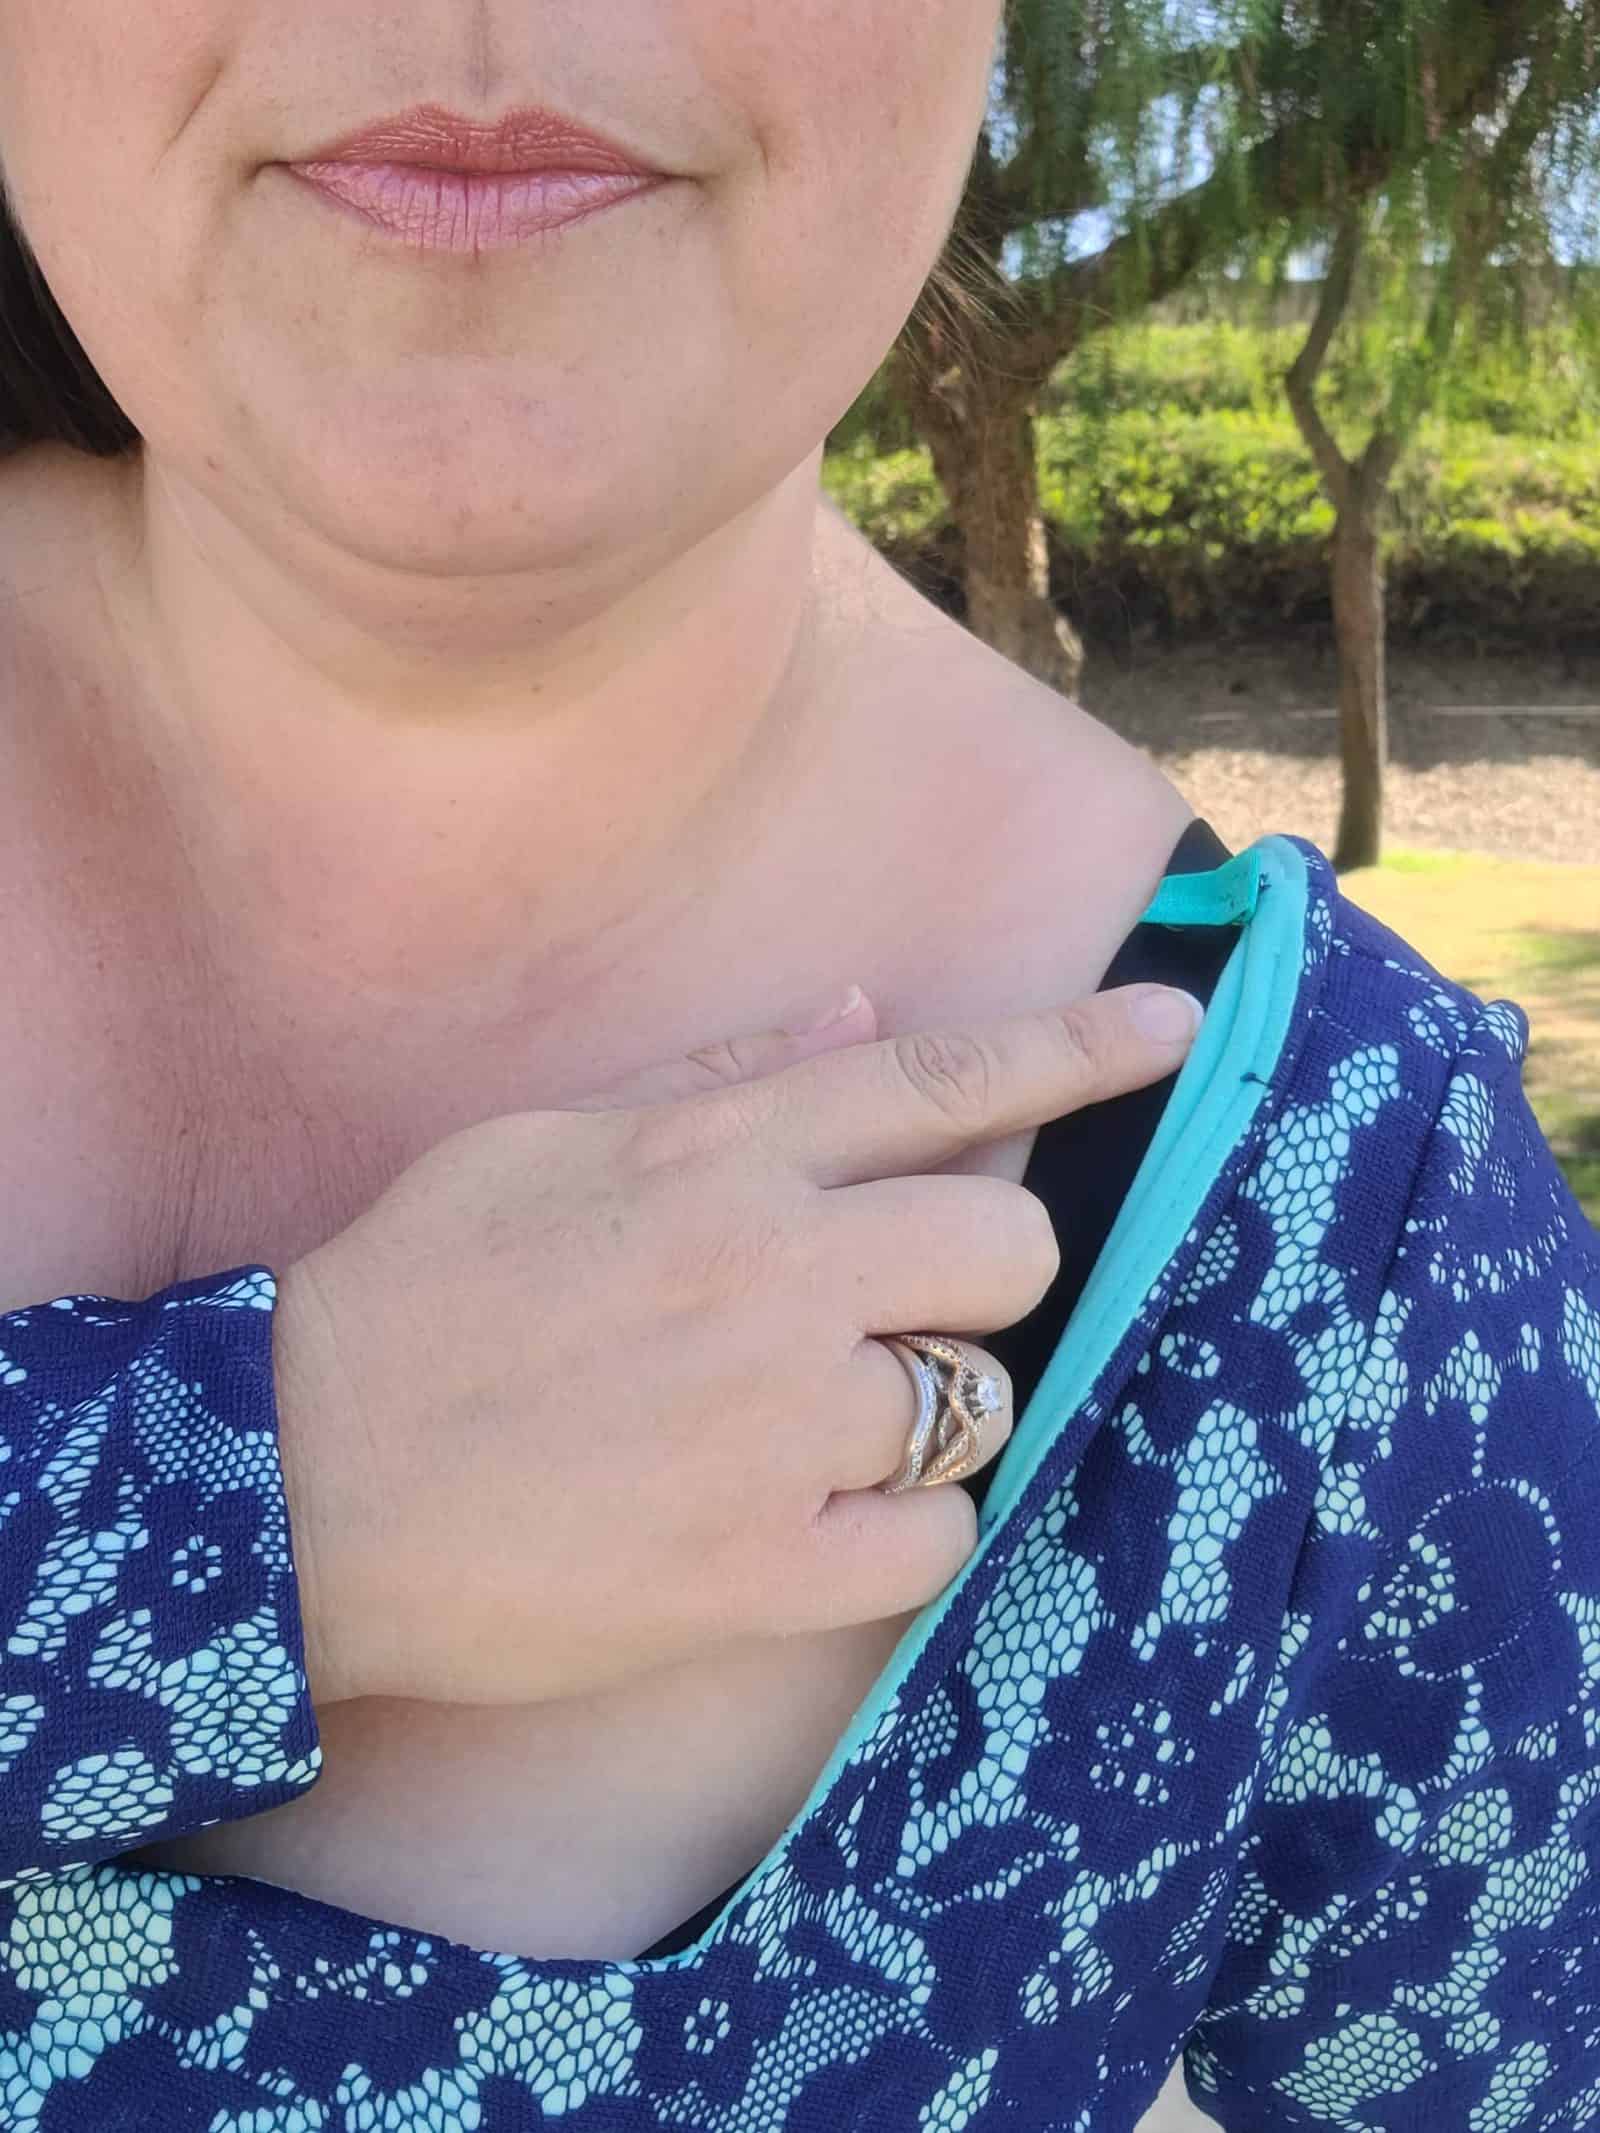
Do the same to the opposite shoulder and your garment is all ready to try on. Make sure your keepers are open and unsnapped when you’re getting your garment on. Slip the strap portion under your bra strap and snap together at the neckline edge.
THAT IS IT! Now you’re ready to dance the night away, raise those hands up in the air, and not have a strap slip out.
If you don’t have snaps handy and can’t get any, go ahead and use a button sewn straight to the fabric, and use a serger tail strap that can loop over the button, or a piece of ribbon/fabric with a buttonhole sewn into it!
I quite like it with the elastic; it’s very easy to manage when you’re slipping it under your strap on your own, and works well with a lined bodice like the Scarlett.
I hope you have learned a new technique to add to your bag of sewing tricks – thank you for reading, and I’ll see you next time! -Kelly
Separates Hack
It’s SIMPLE HACK TIME!
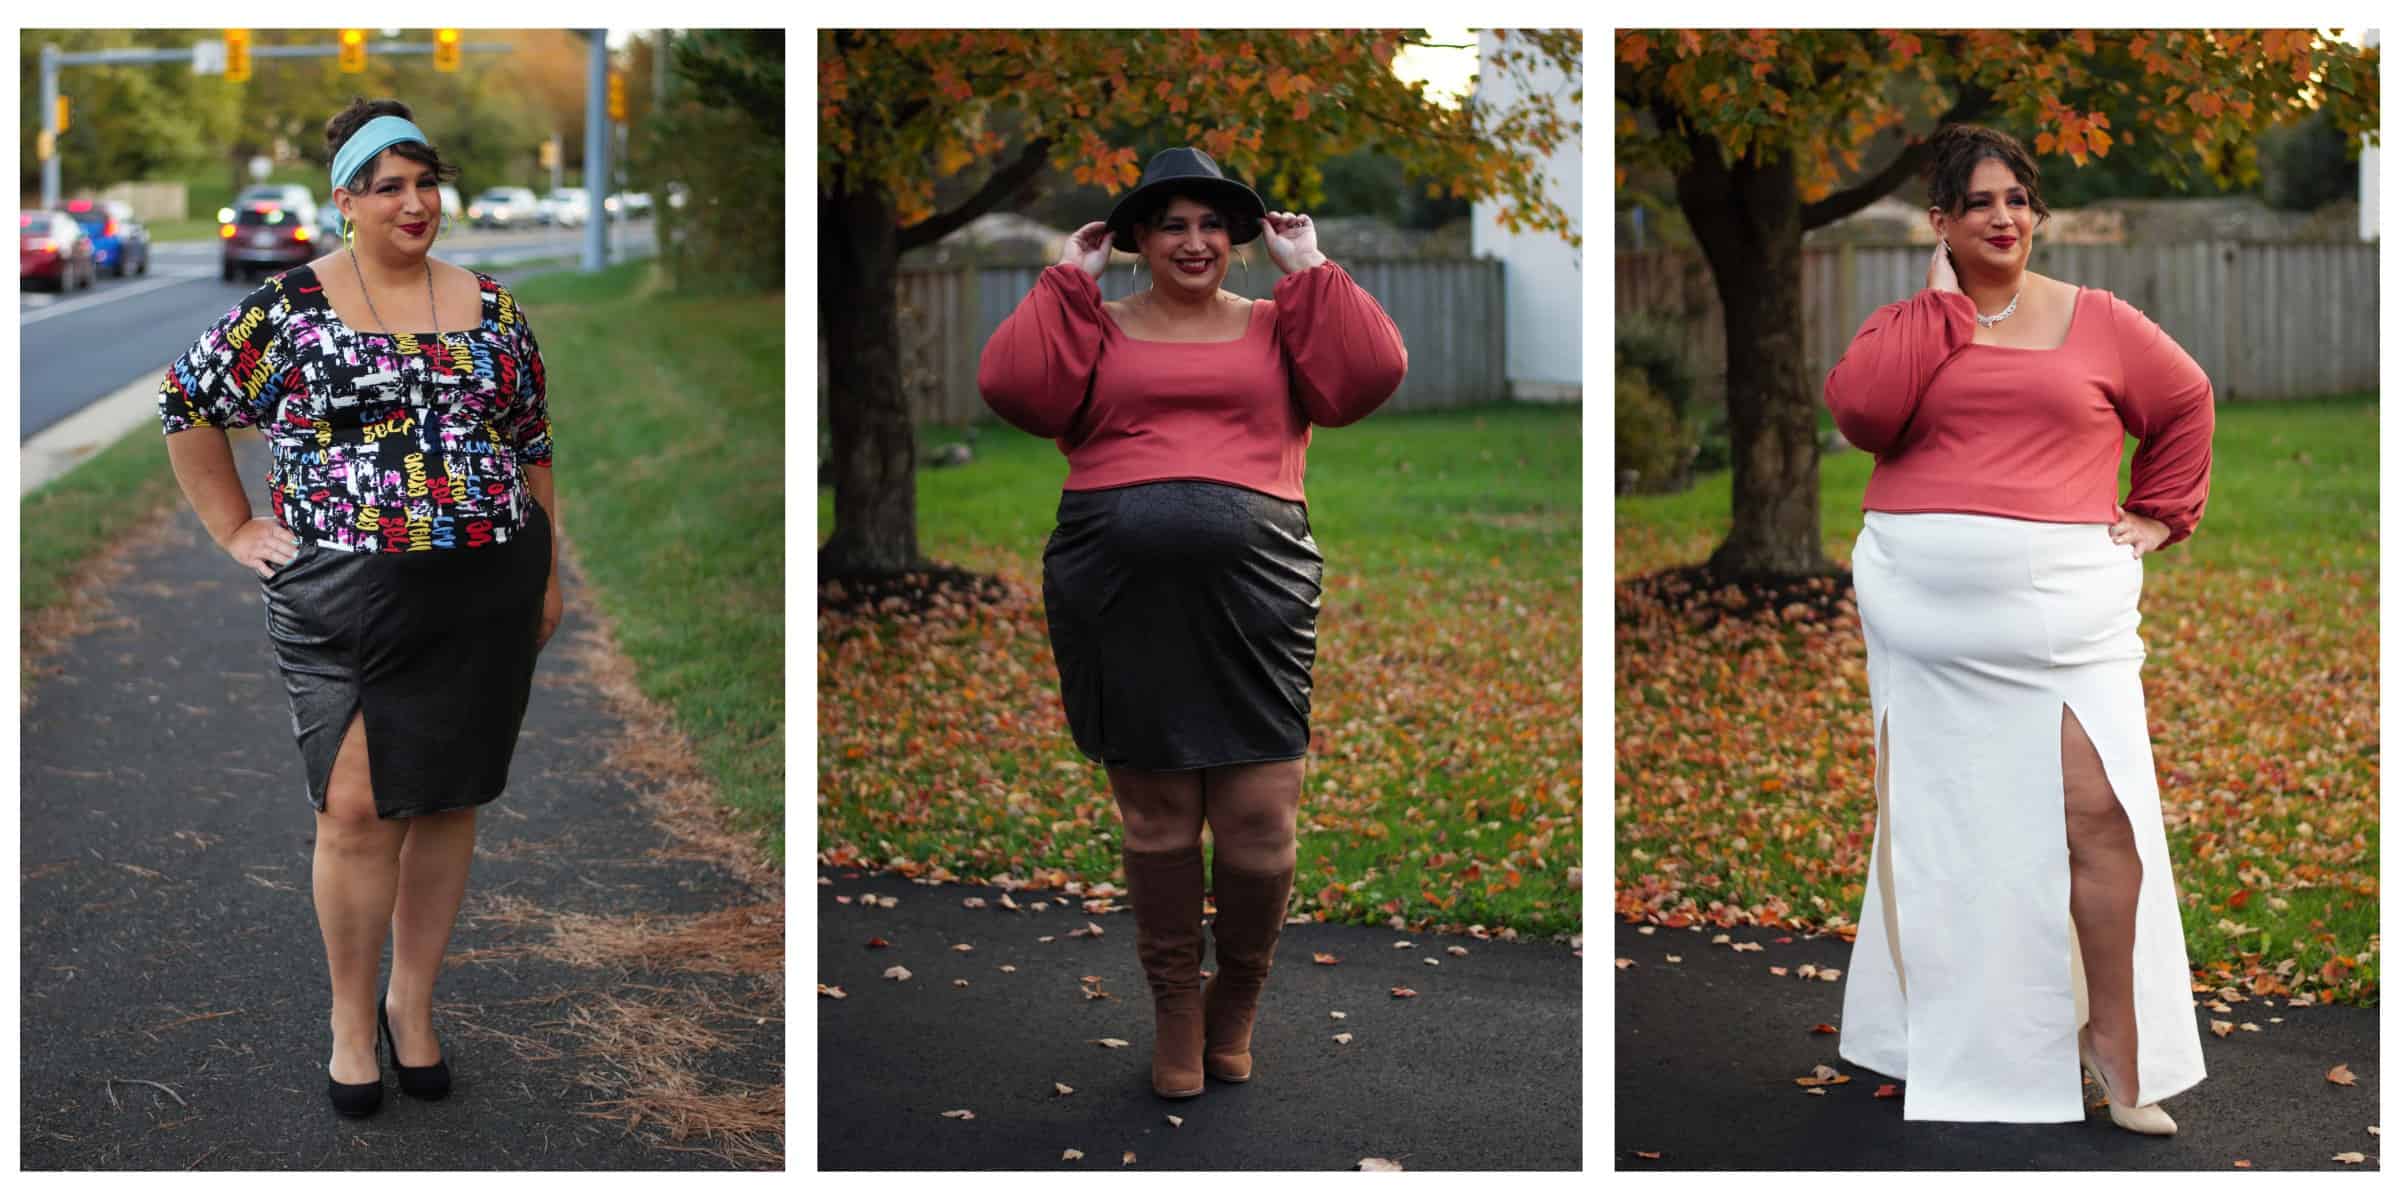
We are LOVING Scarlett here—the square neck is super on trend right now, colorblocking adds another creative element to it, and I am so excited to try all these fab hacks and mashes to make it even better! I’ve got an easy hack for ya, though! SEPARATES!
Michelle made this super simple for us, since we already have a separate bodice and skirt to work with. We just need to finish them off!
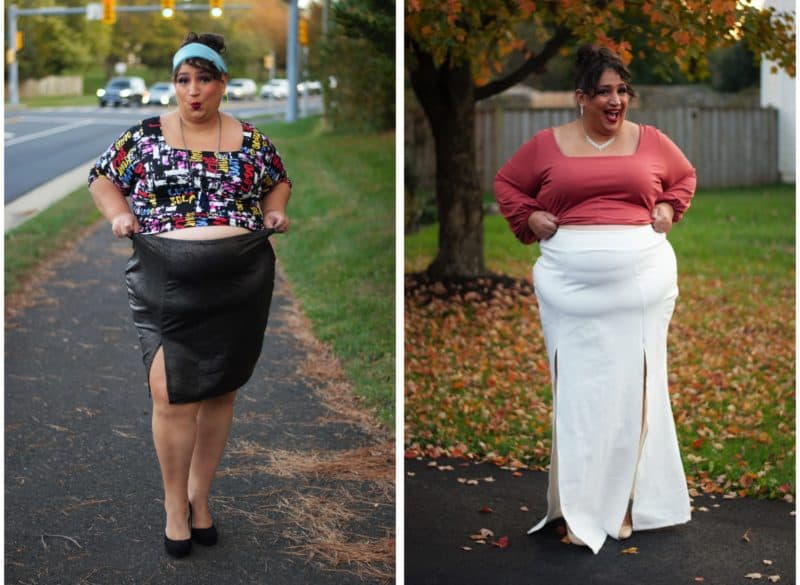
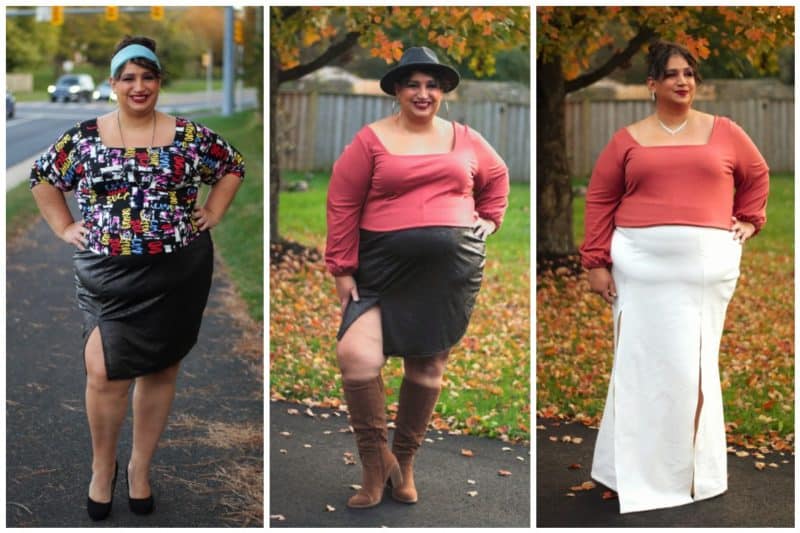
How you finish them off really depends on you, your end goal for the pieces, and your fabric choice. I made a couple of tops and skirts to show off a few ideas, but feel free to experiment on your own and use what you love best!
Let’s talk tops first!
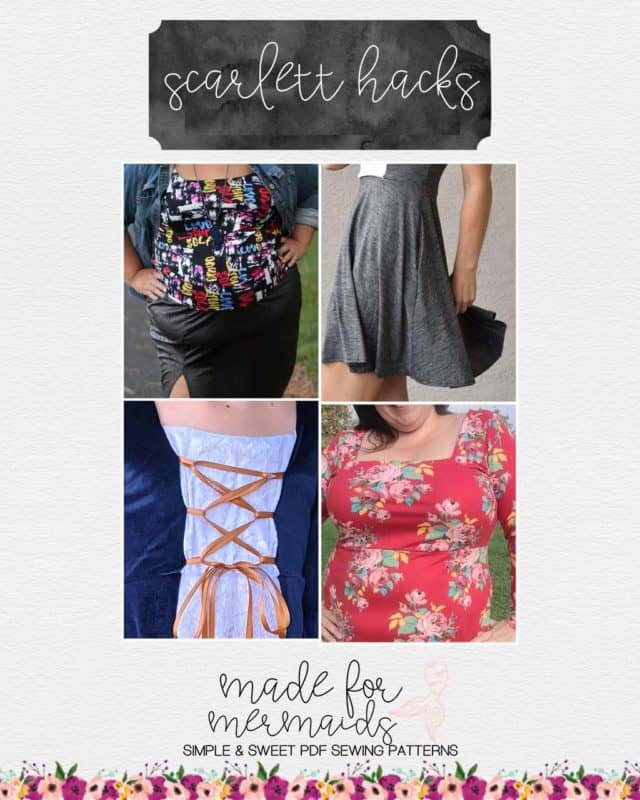
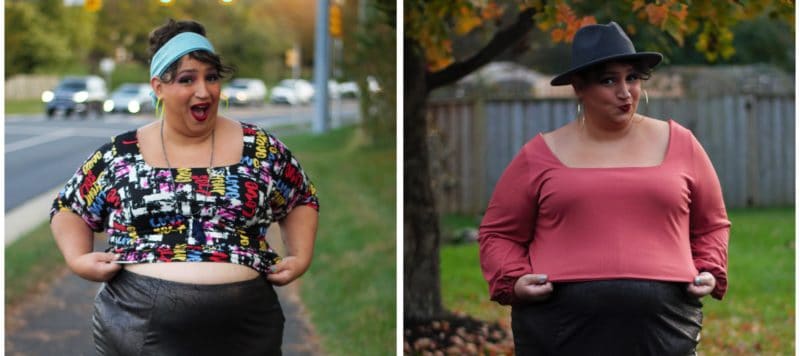
For both of the tops I made, one in double brushed poly (DBP) and the other in rib, I lengthened “8 clicks” (on the projector pattern), which is about 3” for me. This left me with a crop length top that hit around the natural waist. If you want longer, simply lengthen further.
I do recommend lining your tops, as you would for the bodice. The solid rib top here is fully lined, and I finished that one with a “burrito hem”, but more on that in a second! For the DBP top, I made a facing for the neckline by simply cutting my pattern about an inch around the neckline pieces, and using those as my pattern. But with the square corners, it doesn’t work as well, at least in DBP. So if I didn’t want to line it, I would use picot elastic or similar and finish the neck that way.
I also found that the DBP didn’t hang as nicely on its own and ended up a much shorter top than planned. To make it wearable, I simply measured out a band about 4” shorter than my waist measurement, and 6” tall. I sewed the band into a loop, divided into 4 equal sections, and then attached to the bottom of the top.
Now, the lined rib top actually hit at a nice spot when I tried it on, so I didn’t want to add or really lose any length. You could just hem it as is, or add a band the same way I did for the DBP top. I decided to go the “extra” route and did a burrito hem. Yes, it’s finished just the way you would burrito roll the tank version of Scarlett!
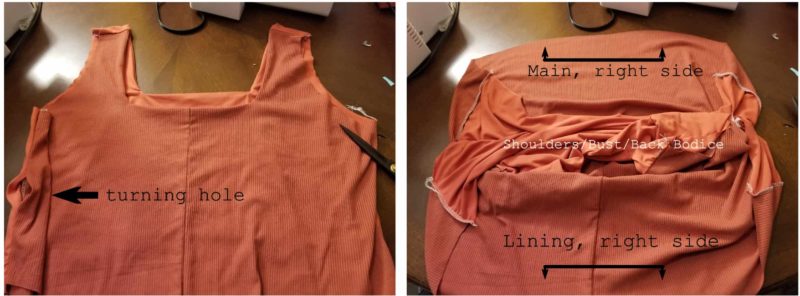
Sew up your top as normal to start—if you’re doing a tank, go ahead and burrito roll those to finish them off. If you’re doing sleeves, you can skip dealing with the armsyce for now. When you go to sew all your side seams, though, leave a gap in the lining side seam (about 3-4″) so that you can turn your top right side out once you’re finished.
Now that you’ve got the top ready to “hem”, go ahead and lay it facing up, right sides out. The most helpful hint I’ve ever been given when burrito rolling is think about what you want to match up. In this case, it’s the main and lining. So we need to get those right sides together, with everything else in between.
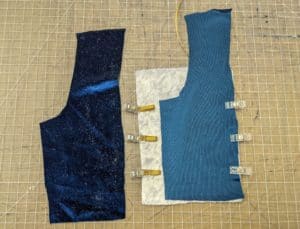
Open up your top so that the lining stays in front of you and the main is furthest away from you. The shoulders/bust/back/etc should all be in the middle now. Flip your lining bodice piece up to the main so that they meet right sides together. Go ahead and pin/clip as you can, but you won’t be able to do much right off the bat.
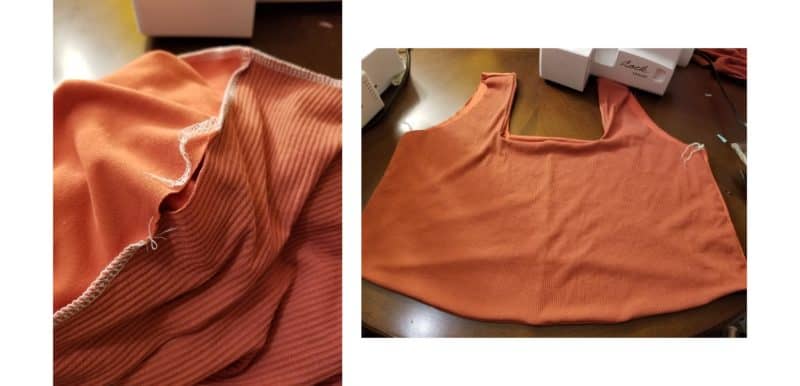
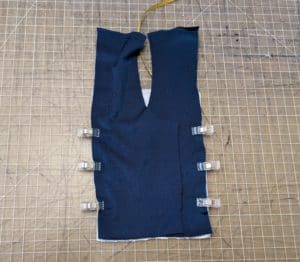
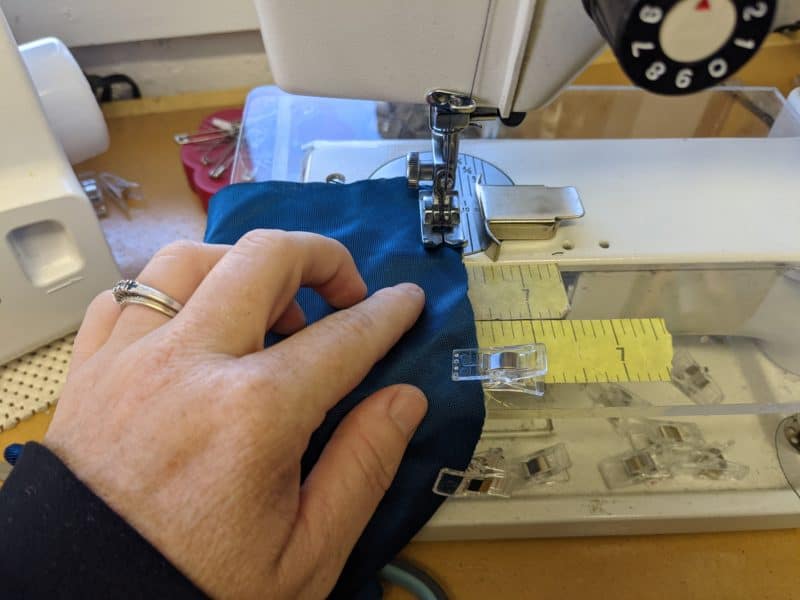
Start sewing this up (I used ¼ seam allowance, so I wouldn’t lose any extra length, but you can use any seam allowance you want) and when you run out of hem to sew, pull out more from the center, pin/clip and continue. Do this until you reach where you began. Backstitch or chain off, trim threads and pull through the opening you left in the lining (you might want to put a clip or something on it to make it easier to find, especially if your lining and main fabrics are the same.

First pic shows the starting point, and progresses around in a circle, pulling out more bodice main and lining to sew together as you go, eventually completing the circle (last pic.)
That’s it! Give your hem a good press and it’s good to go (if you made a tank, at least! If you’re adding sleeves, go ahead and add those now if you haven’t yet and THEN you’ll be good to go!)
Now that our tops are done, let’s work on our skirts. Start by sewing up your side seams, slits, hems, whatever you need to do to sew the skirt according to the pattern. Now we just need to finish the top waist!
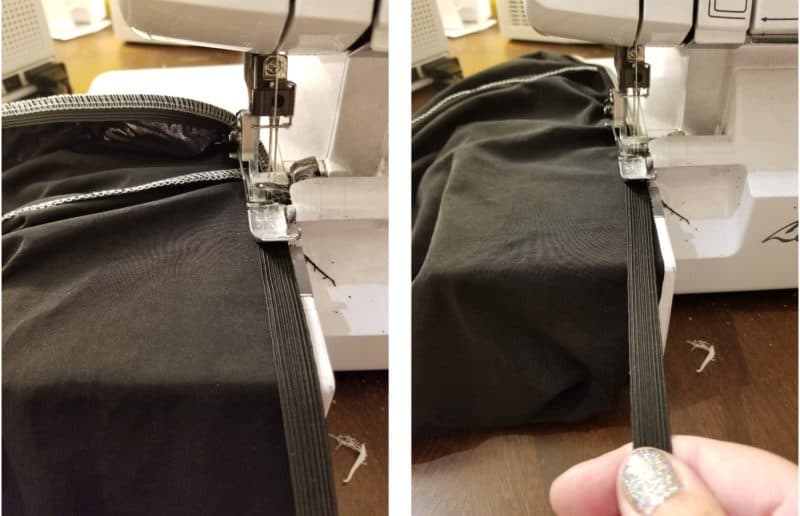
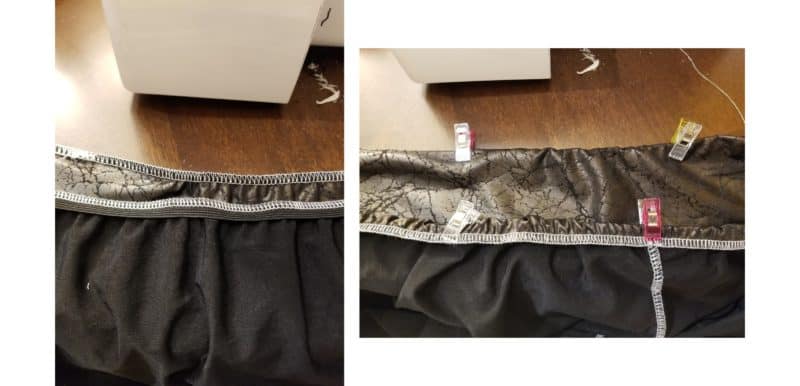
I have two examples for you! First one is a dress length skirt out of a pleather-like ITY-ish fabric. It’s very lightweight, so I didn’t worry about having a lot of support. I grabbed whatever narrow elastic I had nearby, exercised it a bit (stretched it and relaxed it several times), and sewed it on the wrong side of the waist, while holding it taut. I didn’t stretch it, just kept some tension on it as it went through the machine. Once you complete the circle around, go ahead and cut your elastic. You’ll then flip the elastic down, enclosing it, and pin/clip that in place. Topstitch around to secure and that’s it! Your skirt is now complete!
Now, for my white skirt, it is a heavy nylon ponte in maxi length with double slits. Not the lightest skirt option at all. So, I wanted a little more support than just some narrow elastic. I went ahead and cut a band, also out of ponte, but you can use a different fabric with GOOD recovery if your fabric doesn’t have enough stretch and recovery for a band. Same math as I did for the top—4″ shorter than my waist and 6” tall. You can also use the measurements from the Ivy separates hack for a rough waistband measurement.
Sew that into a loop, divide into 4 equal sections, pin/clip to the top of the right side of the skirt. Sew that on, pulling the band ONLY gently as needed to get it to fit. Once you’re done, backstitch/chain off, and you’re done!
If you find you need extra holding power, or you’re concerned about the recovery of your fabric when used as a band, you can add 2” elastic to it at the same length before you sew it on. OR, if you’ve already sewn it on and don’t feel like opening it up to add elastic, you can sew some clear ¼” elastic to the seam allowance for a little extra holding power.
That’s it! Can’t wait to see your separates! Happy sewing!
~jess
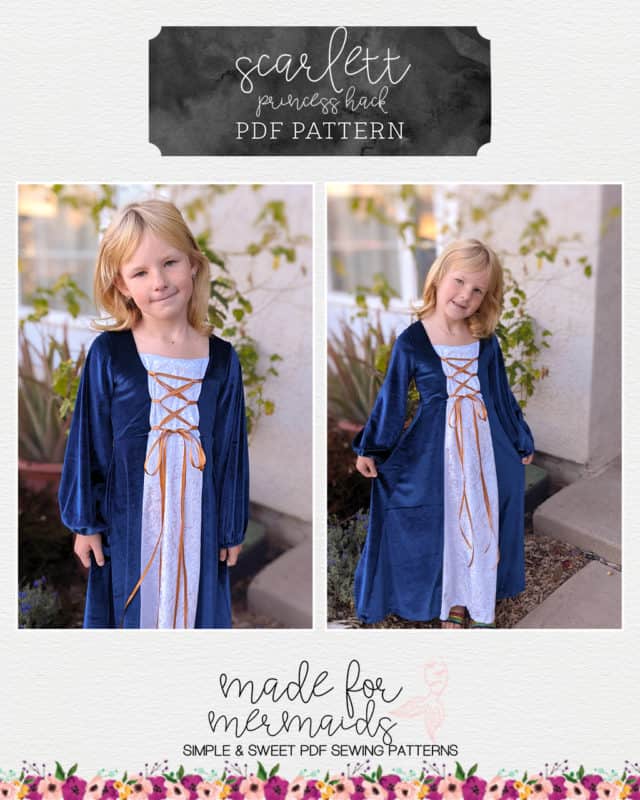
Princess Corset Hack
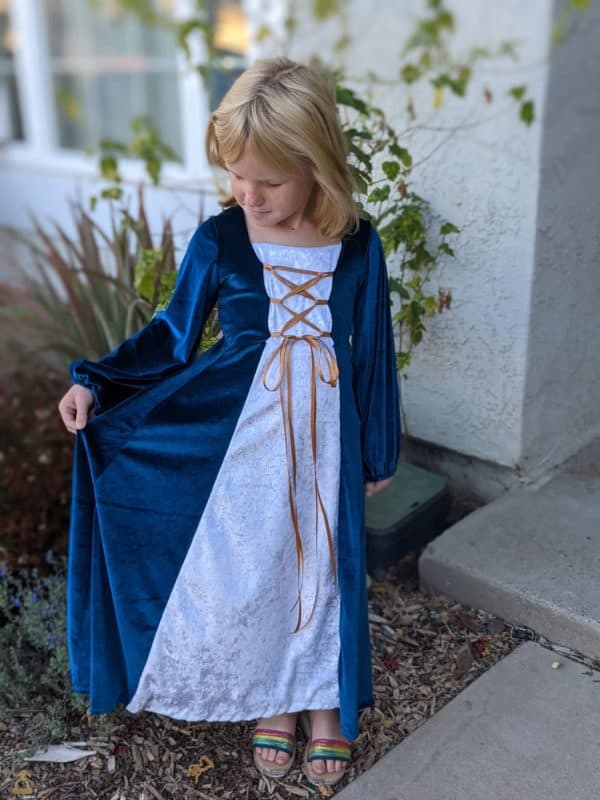
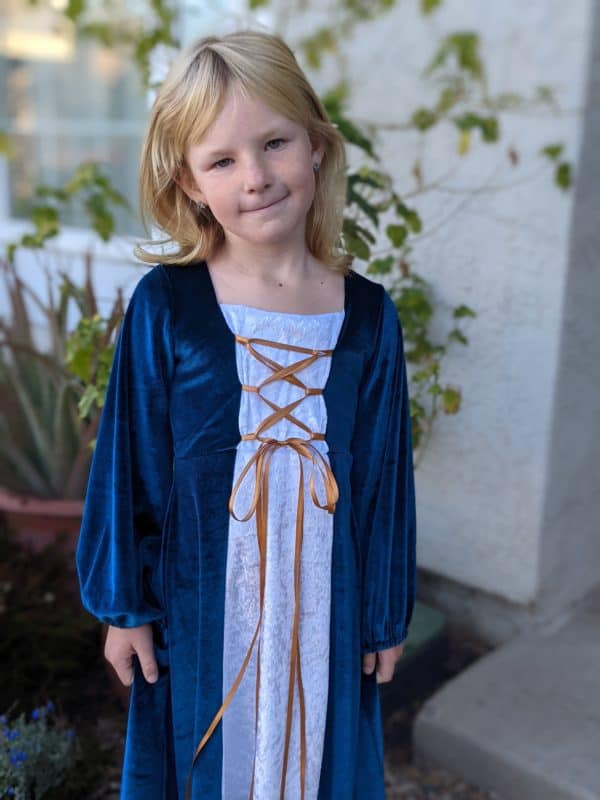
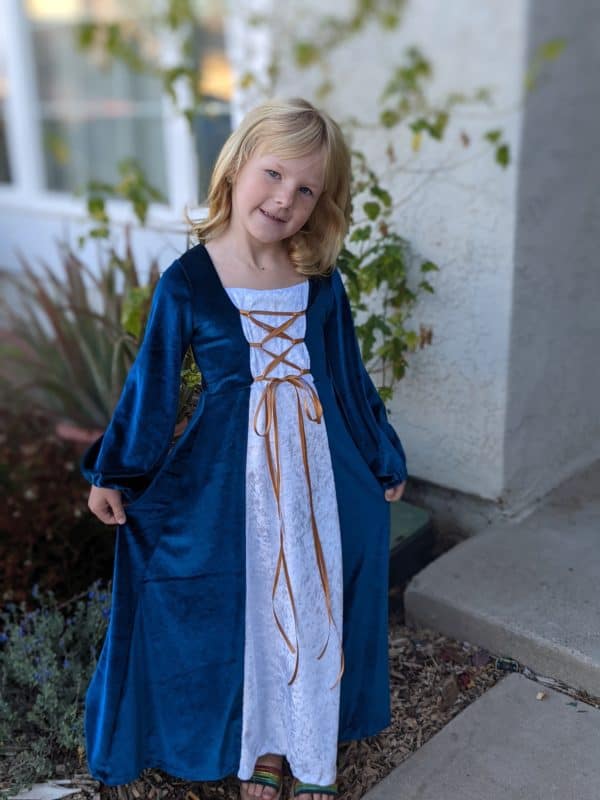
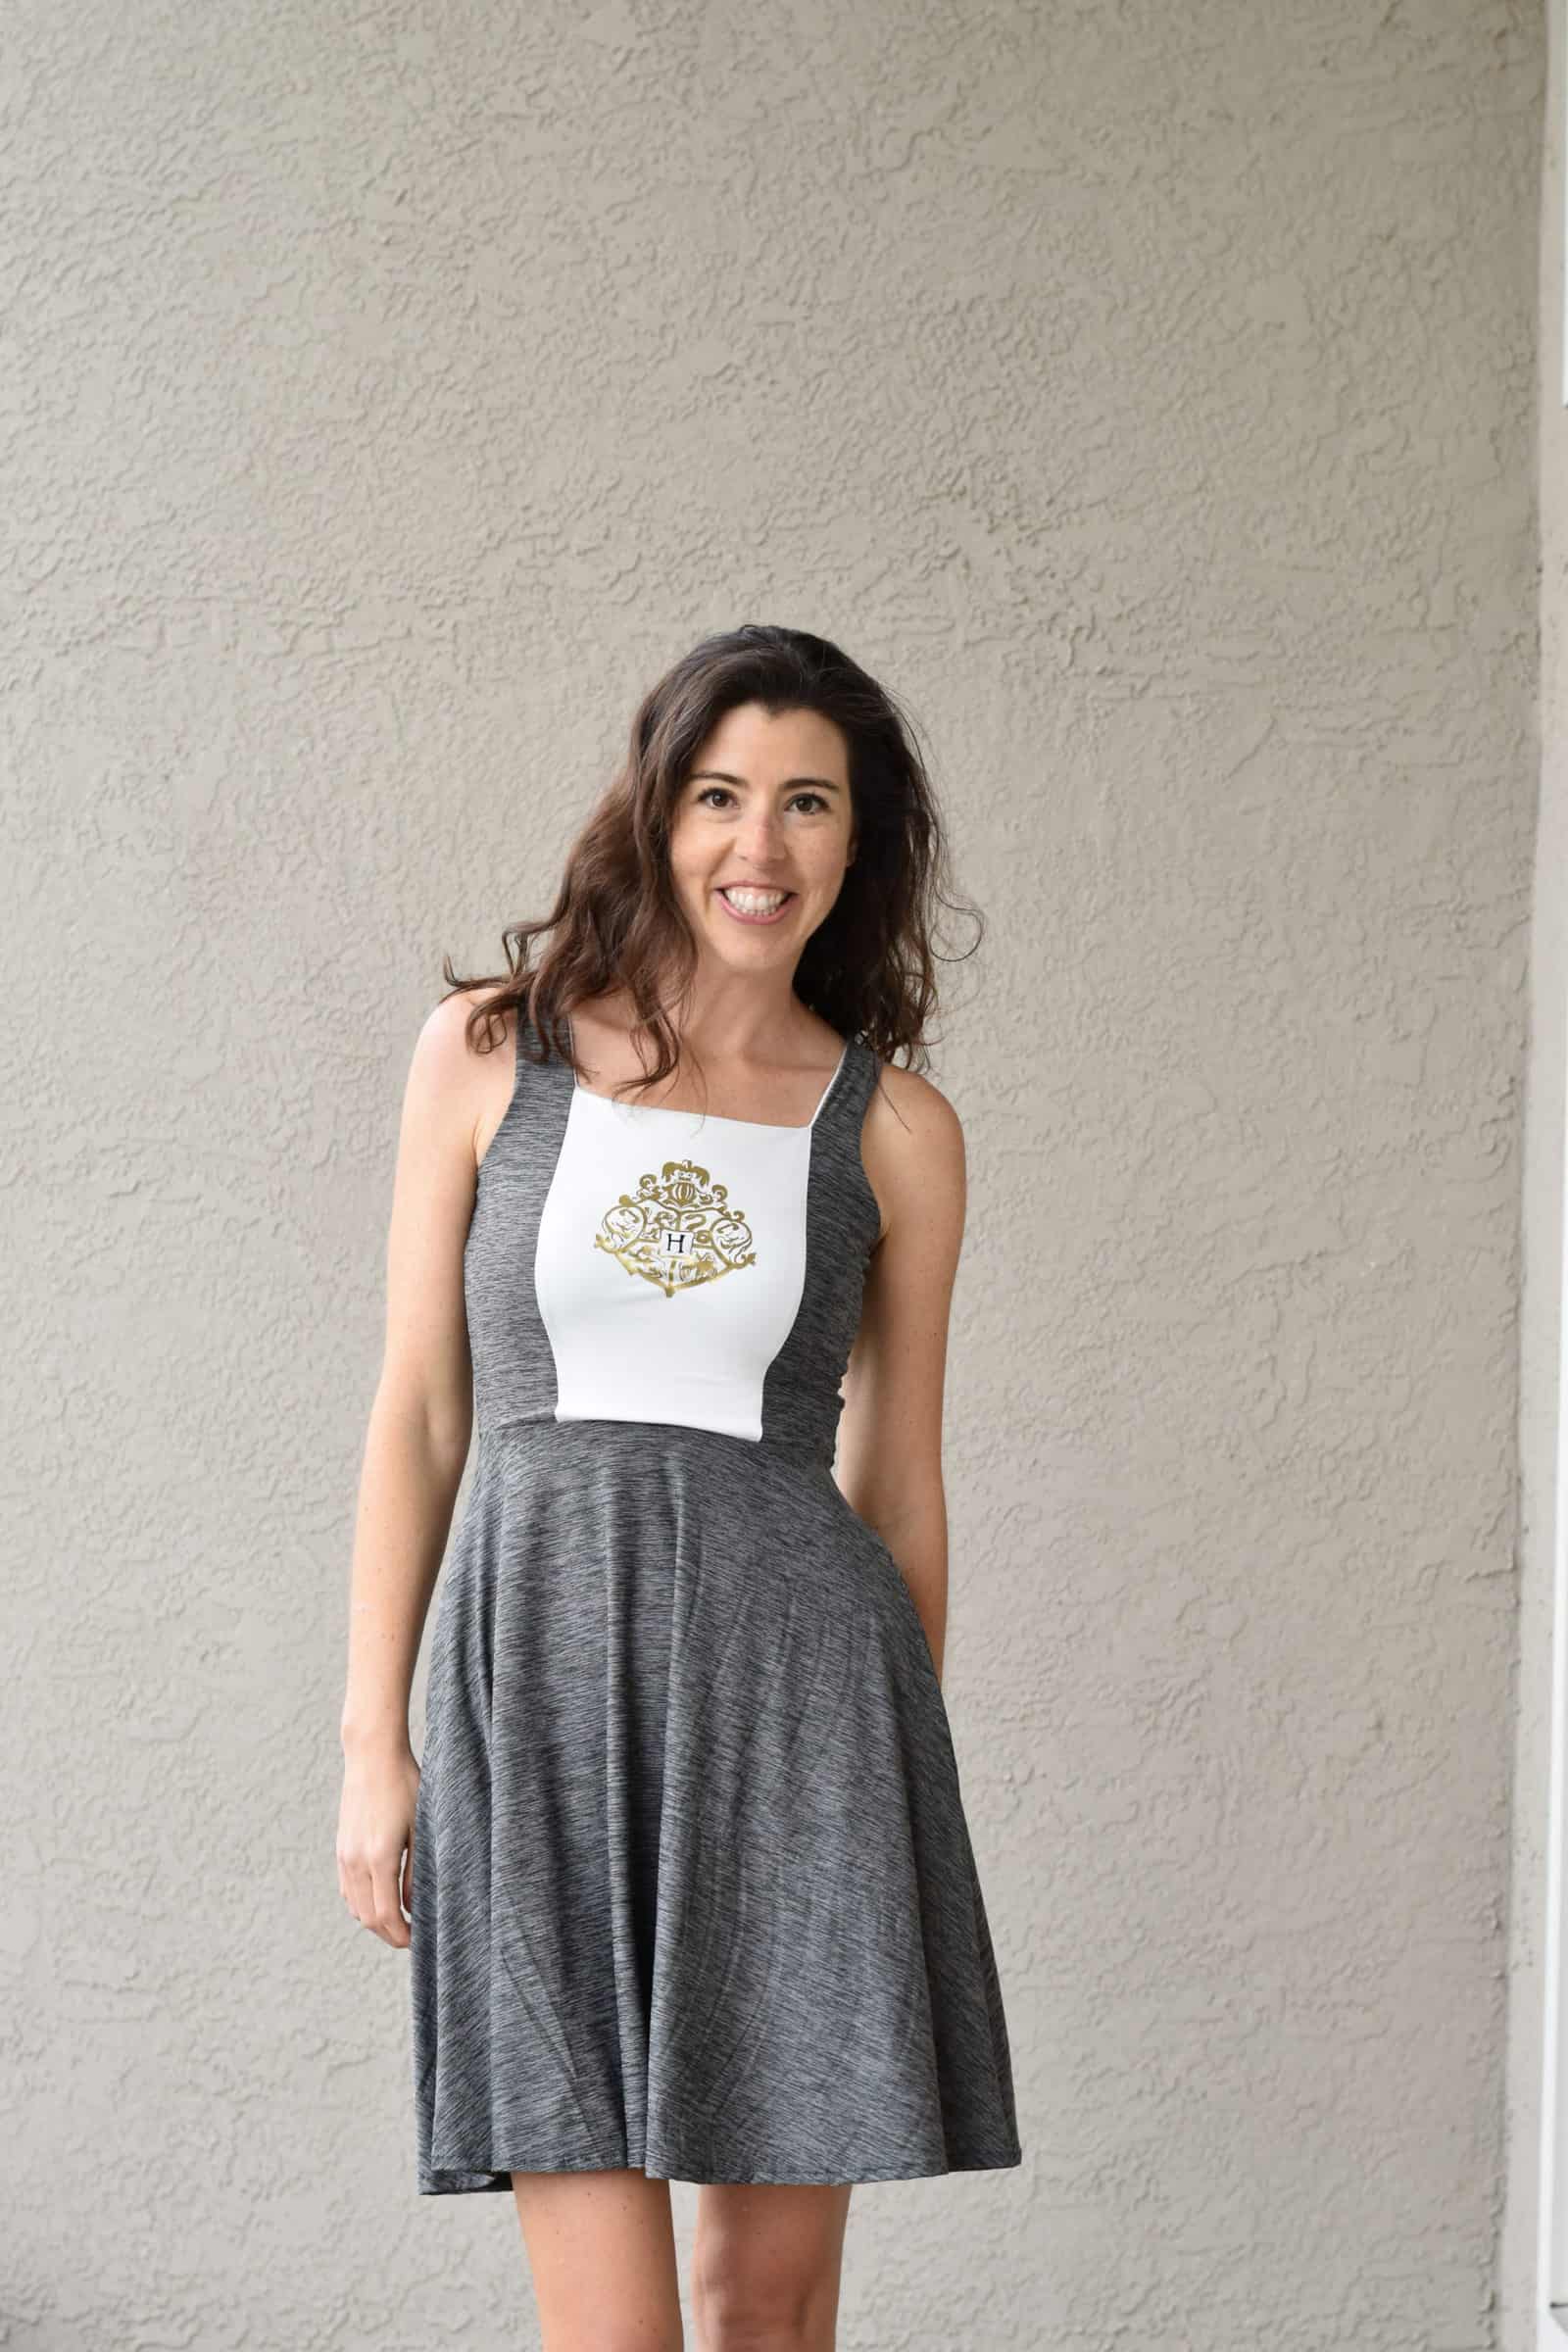
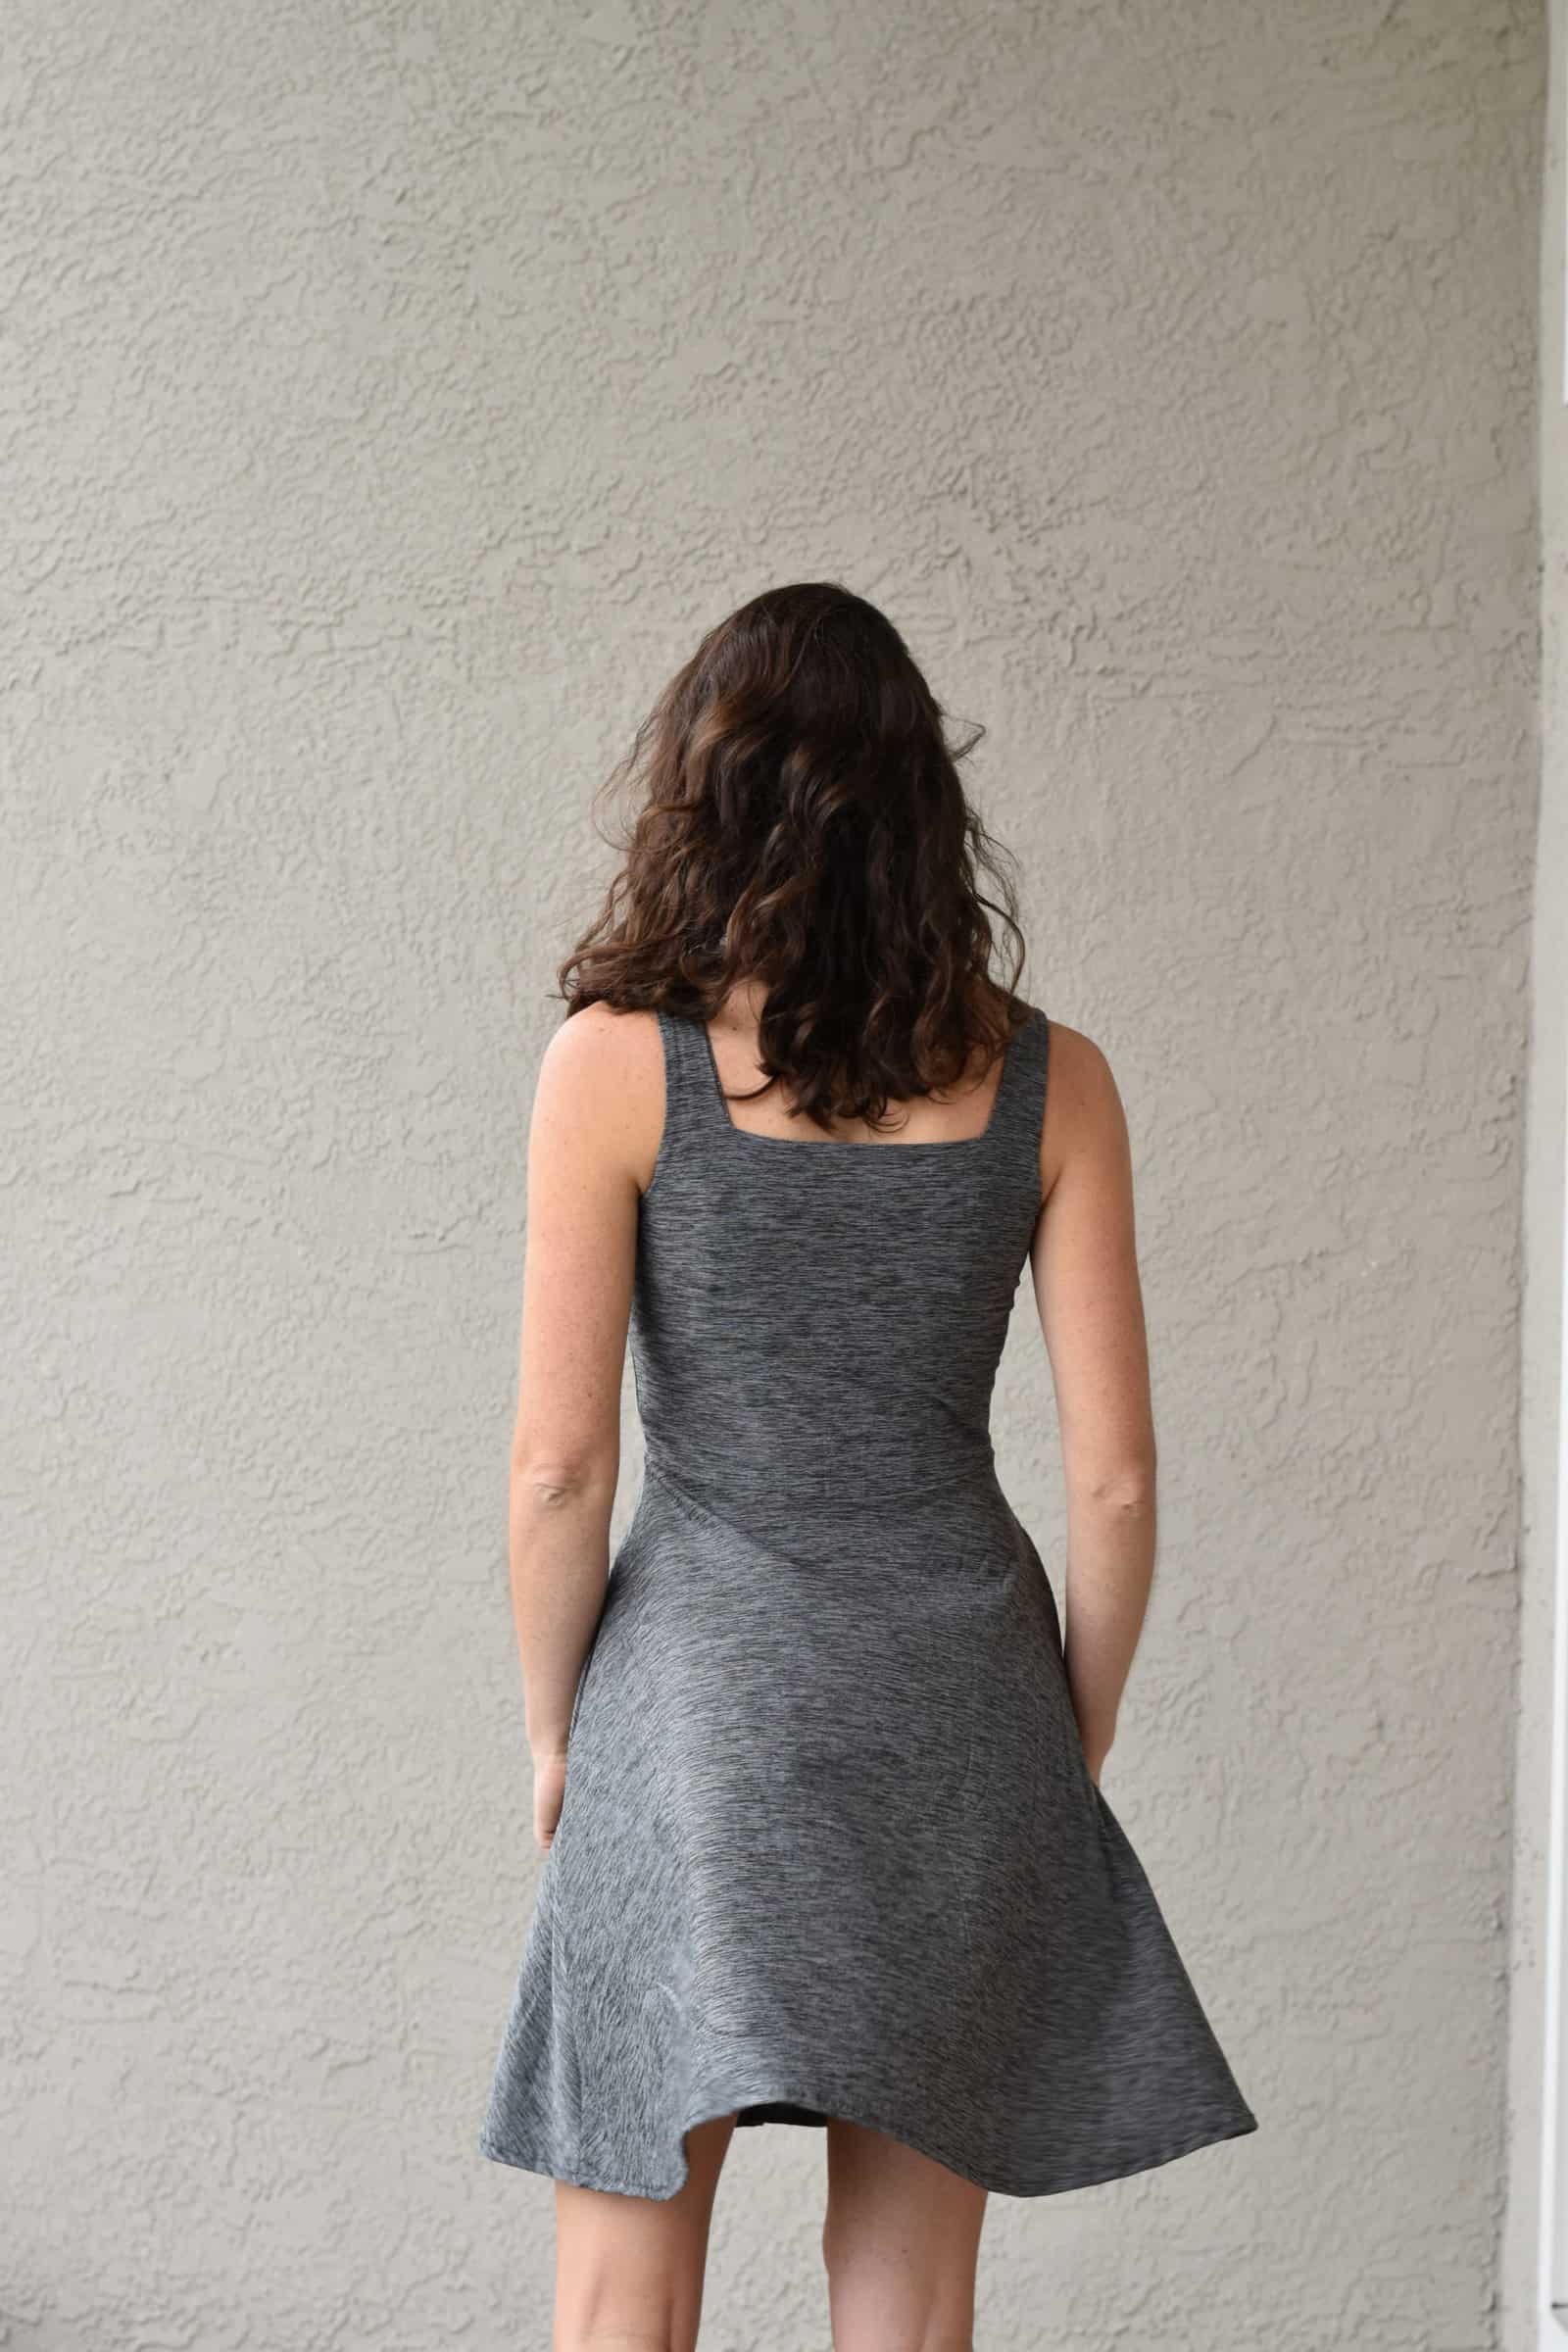
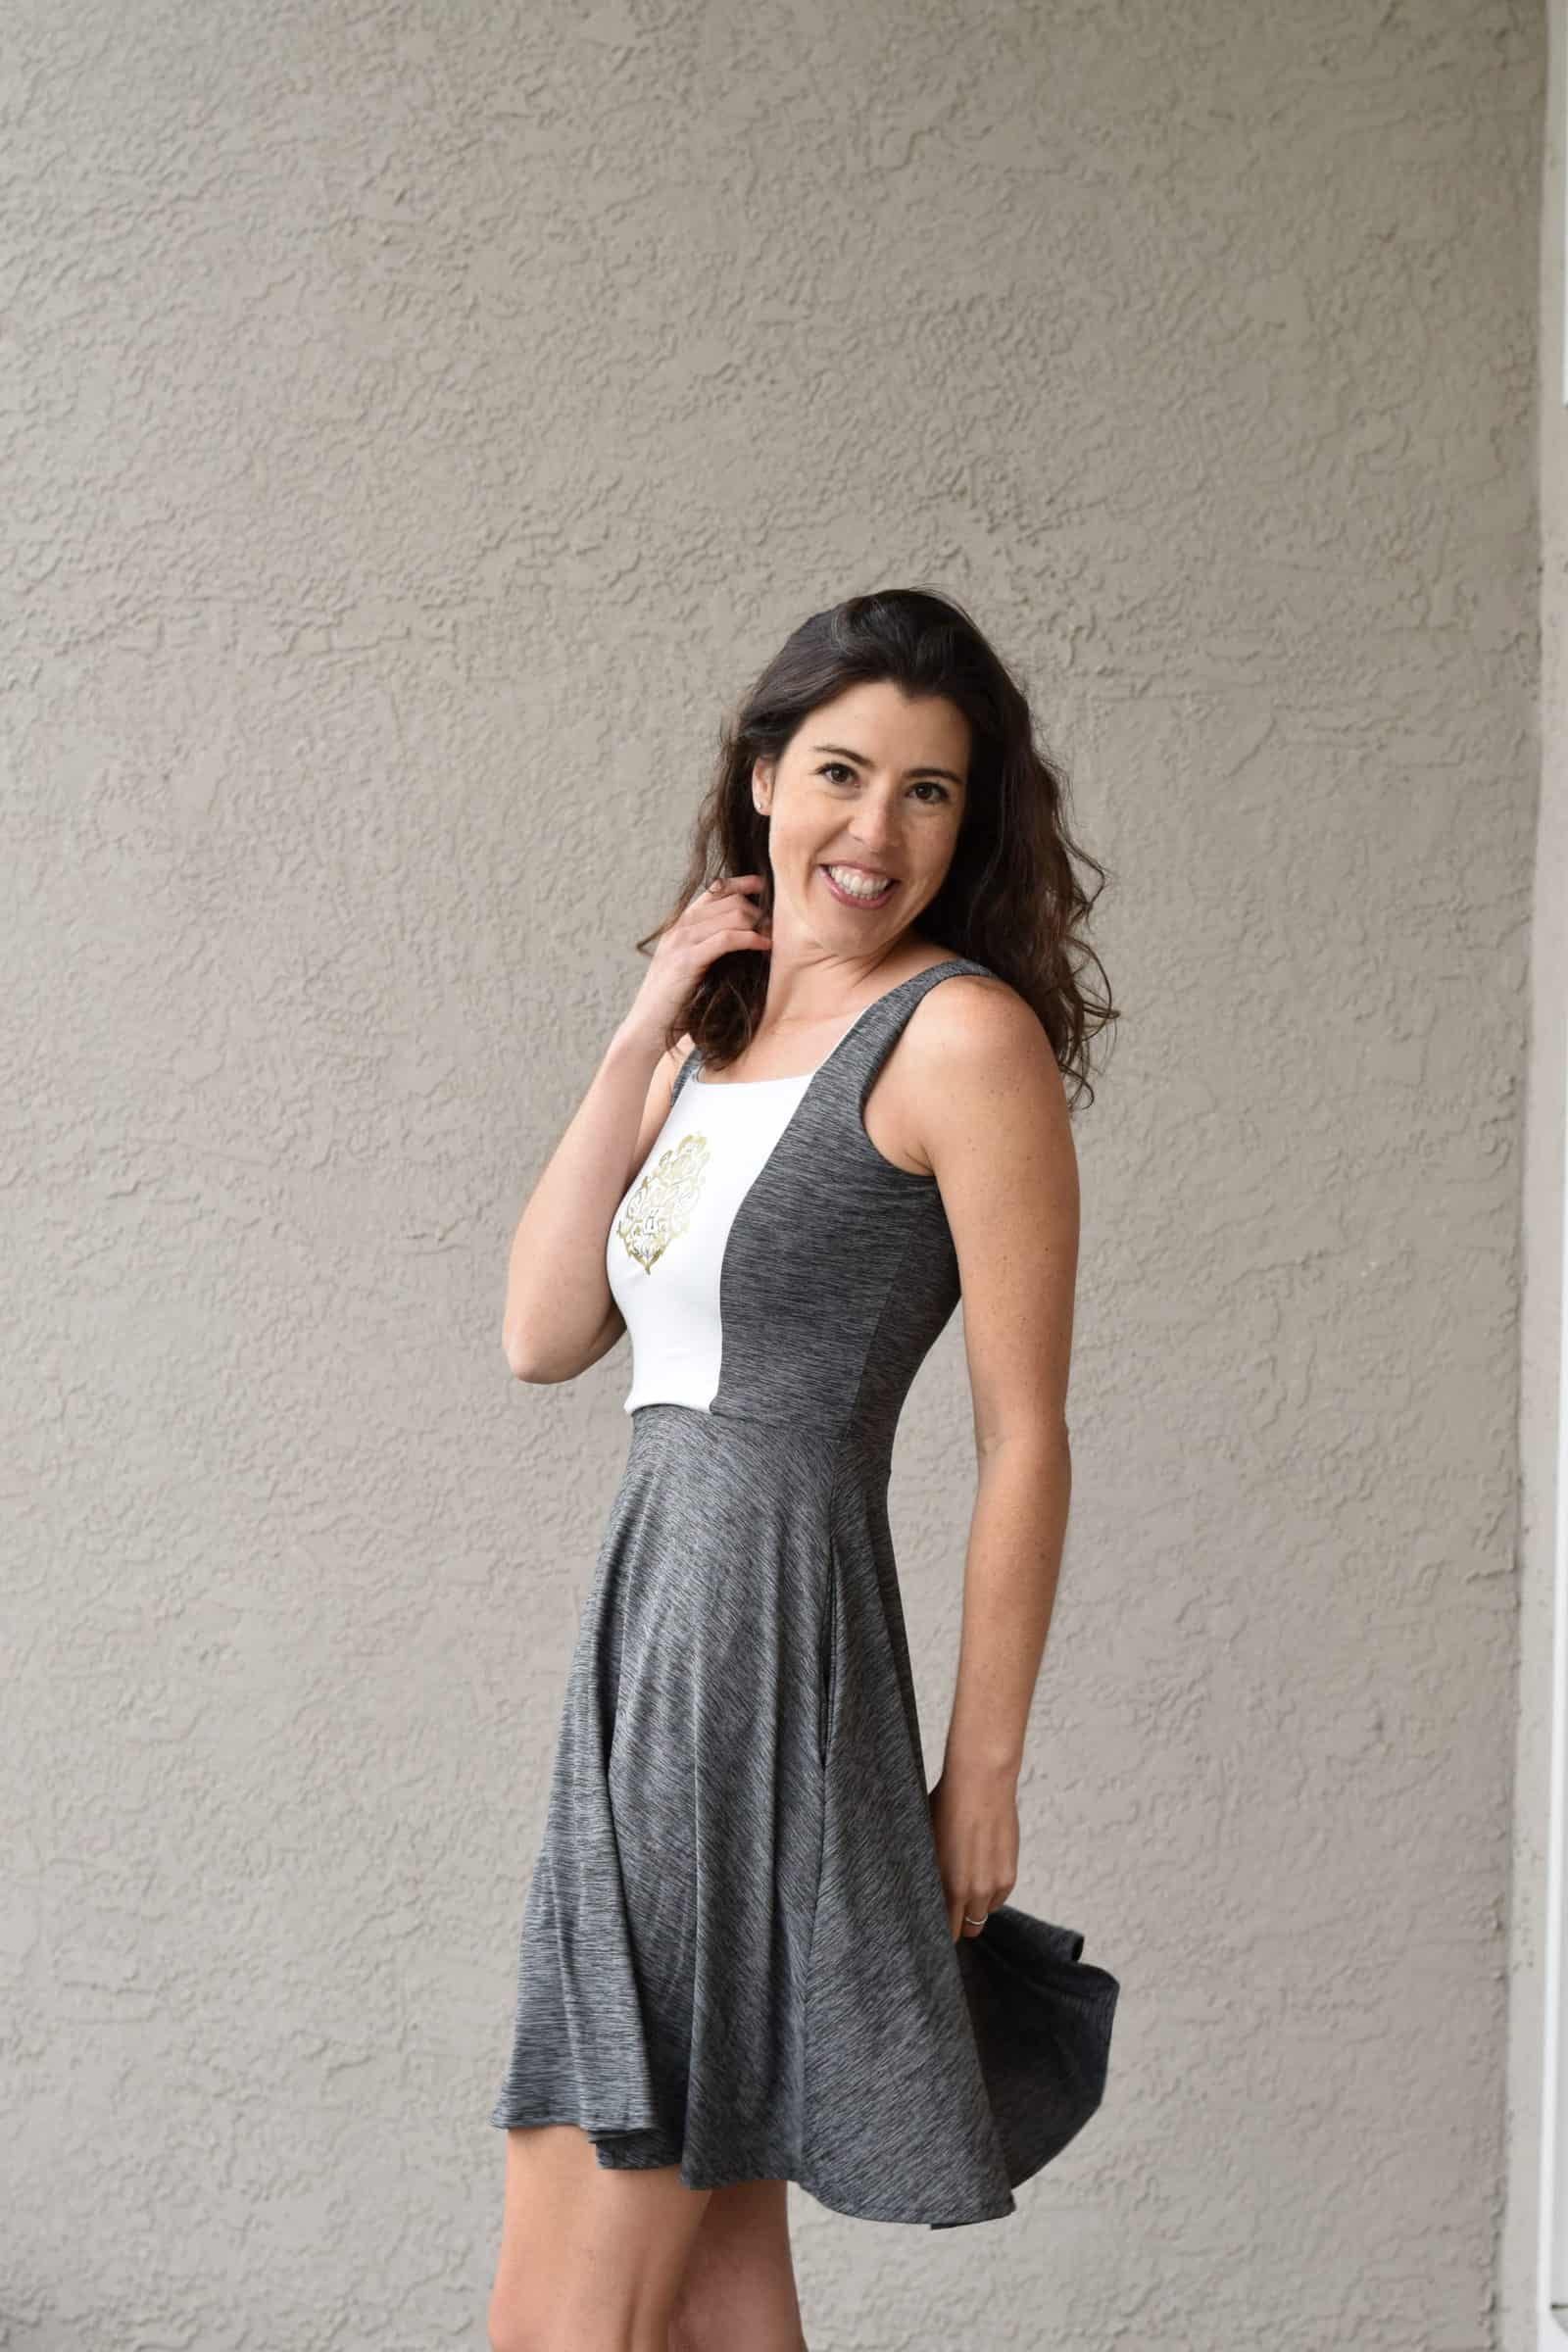
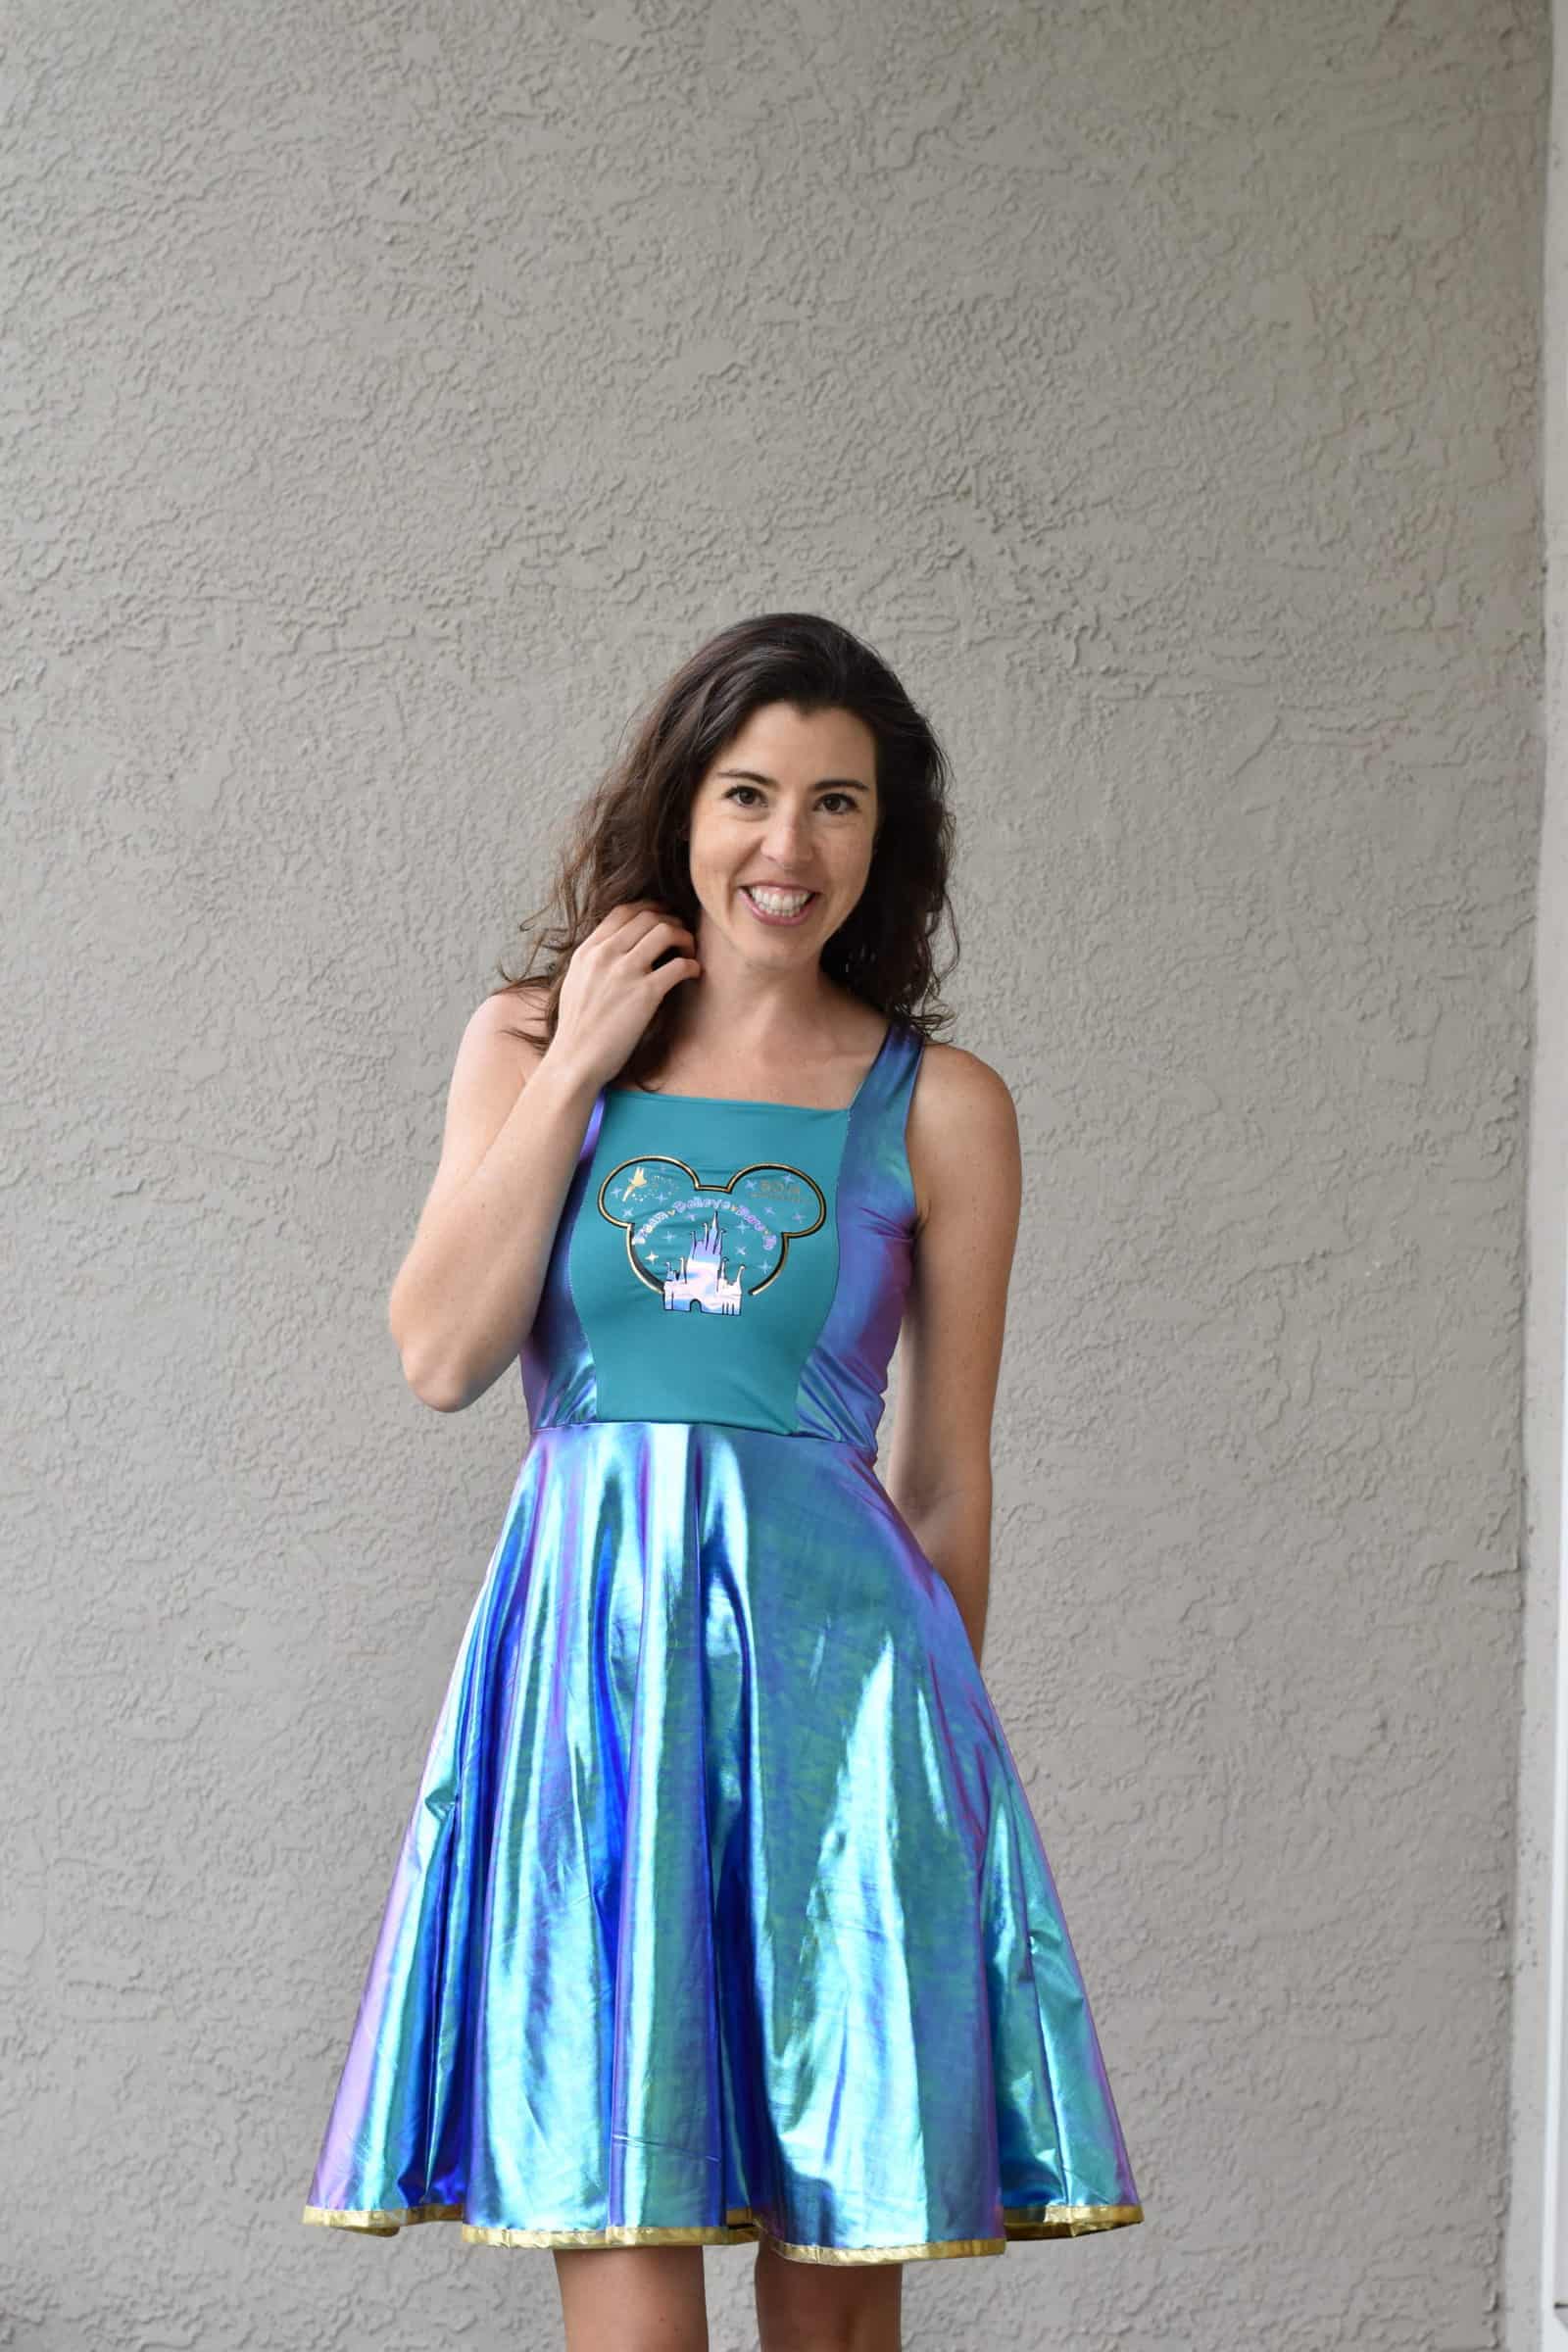
The color-blocked bodice of the Scarlett is the perfect pattern base to add some renaissance flair.
Let’s try an easy lace-up corset for a princess look. You can easily do this hack with either the adult or youth bodice. We will not need to alter any pattern pieces.
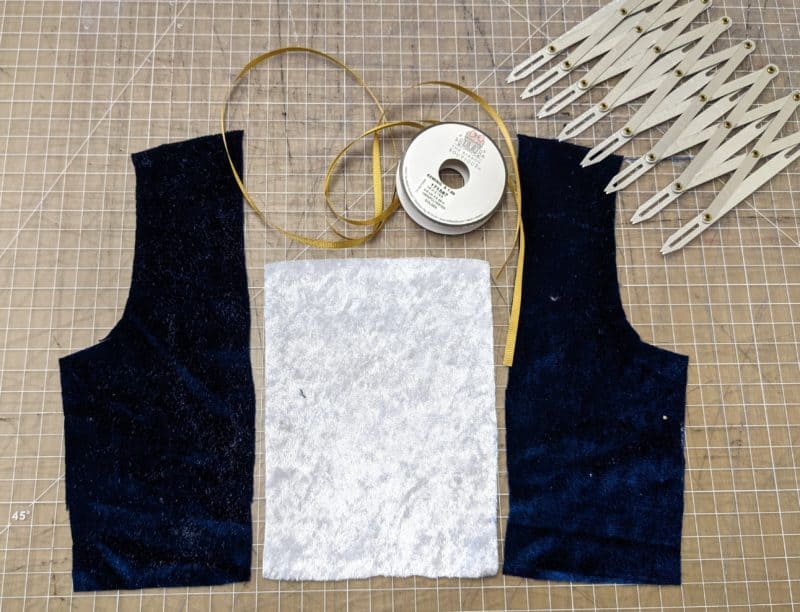
Cut out all the pieces you need using the front color block option.
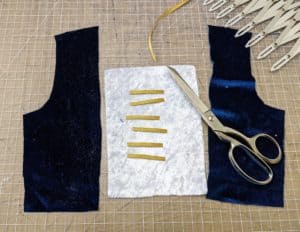
For this alteration, you will only need the 3 pieces of your front bodice and a spool of ribbon (or other trim). Alternatively, you can make a drawstring in the fabric of your choice. If you need help with that, check the Penelope hack here.
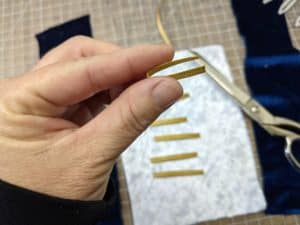
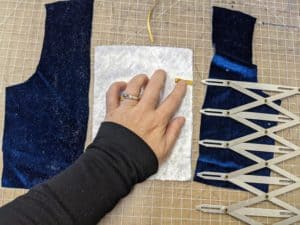
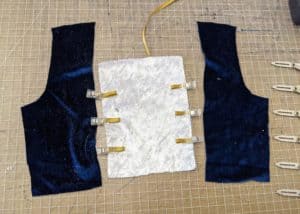
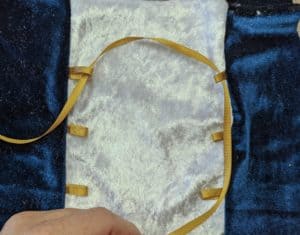
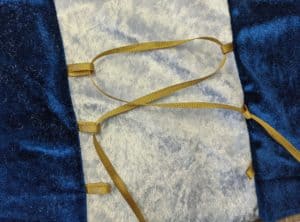
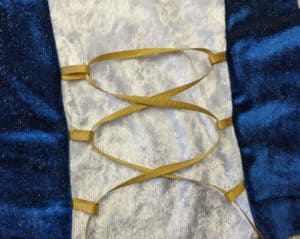
Cut six 2″ pieces of ribbon. We will be placing three on each side. You may place them at any distance you would like, and can add extra loops if desired; just be sure to not get too close to the seam allowance at the top and bottom of the bodice. Fold each ribbon in half, and clip/pin the open edge along the edge of the front bodice piece.
After all the ribbon pieces are placed, lay the side bodice on top of the center bodice, right sides together, aligning at the bottom. Remove and replace clips/pins, sandwiching the ribbon ends between the two bodices pieces.
Sew with 1/4″ seam allowance as described in the pattern. Now your bodice is complete and you may finish sewing the Scarlett as written in the instructions.
Once the construction is complete you can now lace the corset of your dress.
It’s as easy as that!
Happy sewing! – Bekah
Pssst! Want to sew up this hack with me? Check out the video below:
Eloise Mash
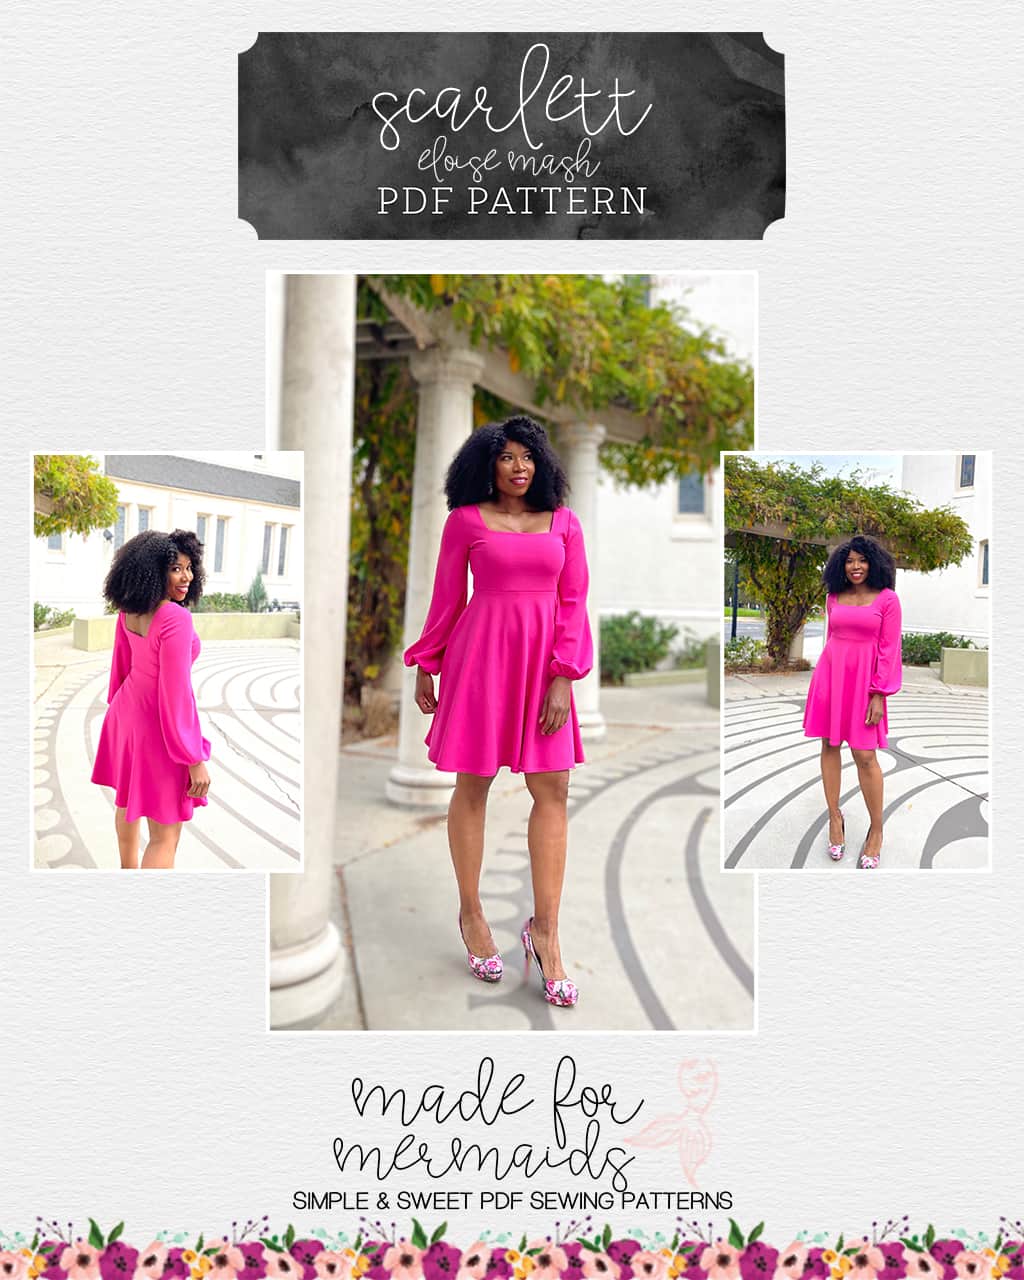
The Scarlett bodice also happens to be a perfect mash with Eloise! For this simple hack, just make sure you cut the same skirt size as bodice waist size (remember this is important if you grade at the waist!) Then, all you have to do is prepare the bodice and skirt pieces according to the respective pattern instructions, and attach the bodice to the skirt just like the fitted version! It’s basically just a swap of one skirt style for another! It’s so fast and simple, I couldn’t help but make more than one!
We hope you love Scarlett as much as we do! We can’t wait to see which version you sew up first.








Leave a Reply