We don’t know about you, but Team Mermaid is READY for summer. Our two newest Resort Collection patterns, Venus and Catalina, have us dreaming about palm trees and sandy beaches. Whether you’re actually traveling, or just dreaming about it like us, we hope you love both of these patterns as much as we do.
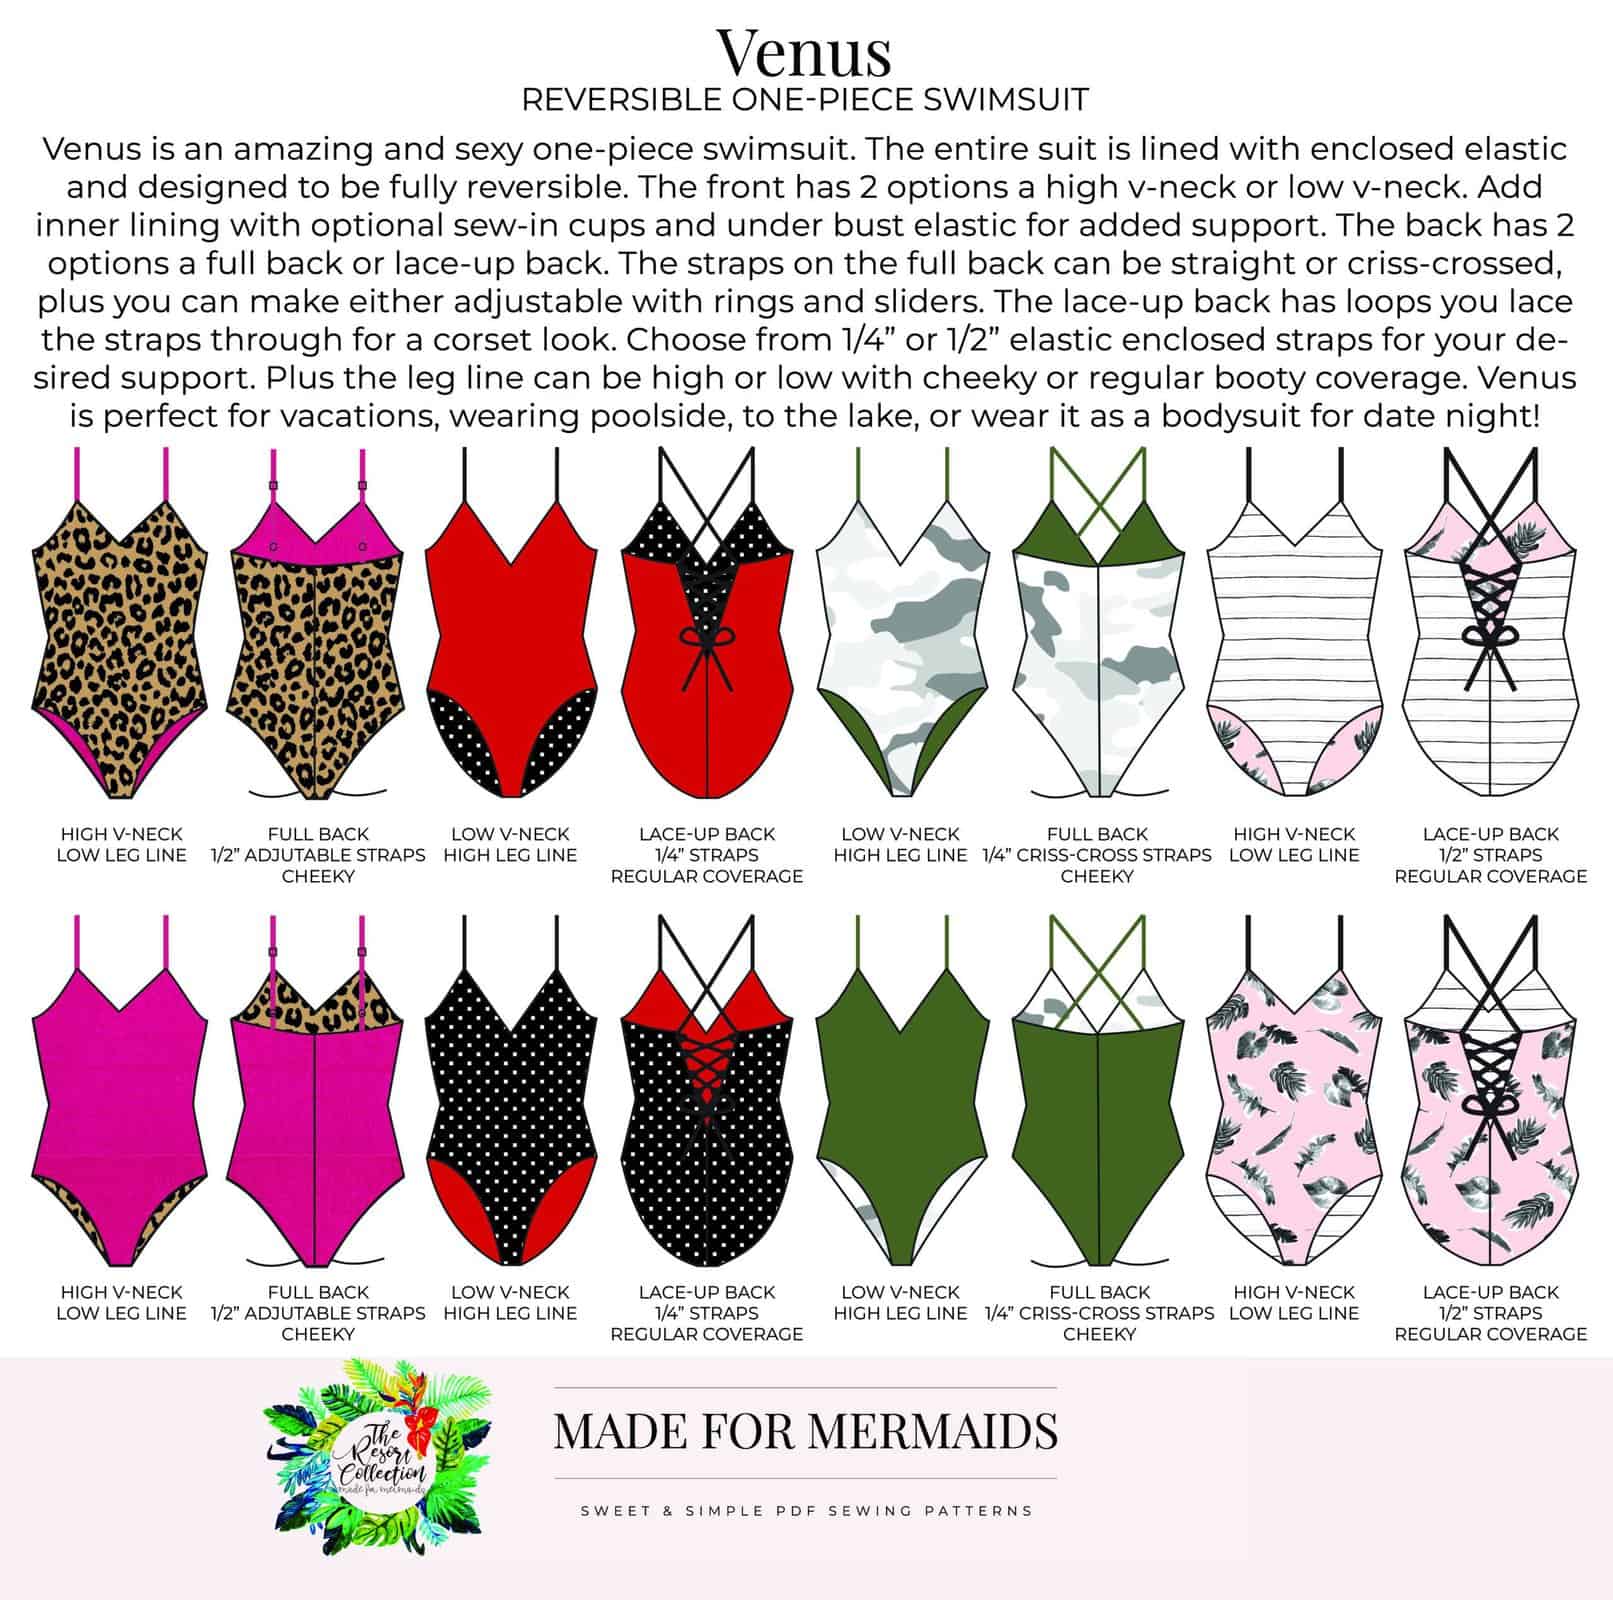
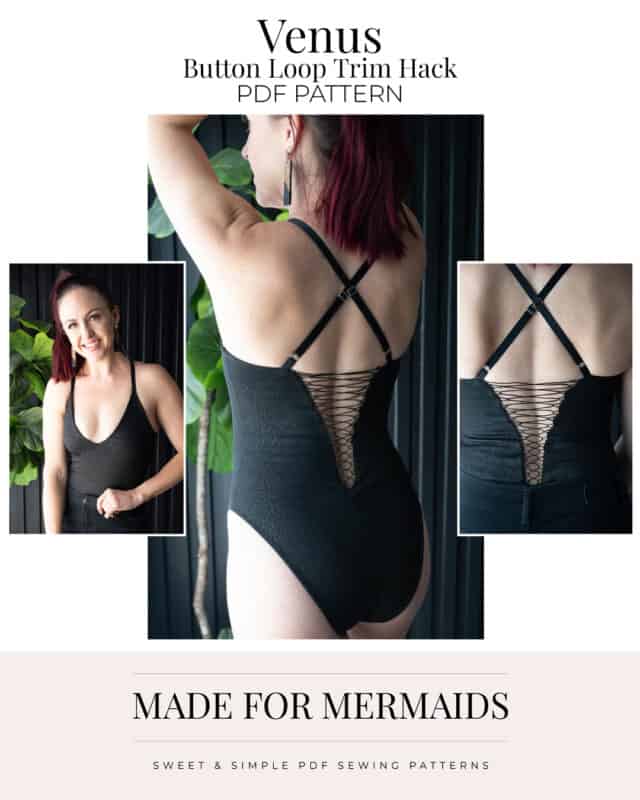
Venus is a sexy one-piece *REVERSIBLE* swimsuit. The entire suit is lined with enclosed elastic and designed to be fully reversible. The front has two options – a high or low v-neck. You can add an inner lining with optional sew-in cups and under bust elastic for added support. The back has two options: a full or lace-up back. The straps on the full-back can be straight or criss-crossed, plus you can make either option adjustable using rings and sliders. The lace-up back has loops to lace the straps through to give a corset look. Choose 1/4″ or 1/2″ elastic enclosed straps for your desired support. Finally, choose your favorite leg line – high or low, with cheeky or regular coverage. Venus is great for vacations, sitting poolside, wearing to the lake, or even as a bodysuit for a night out!
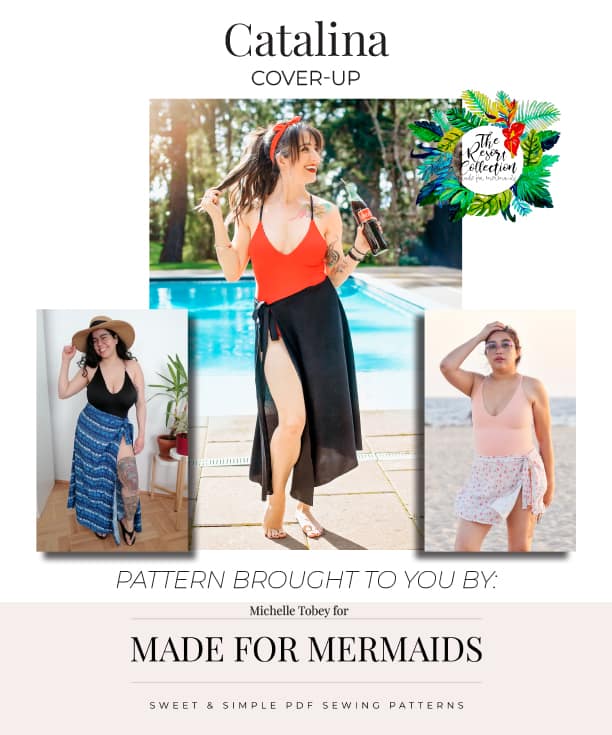
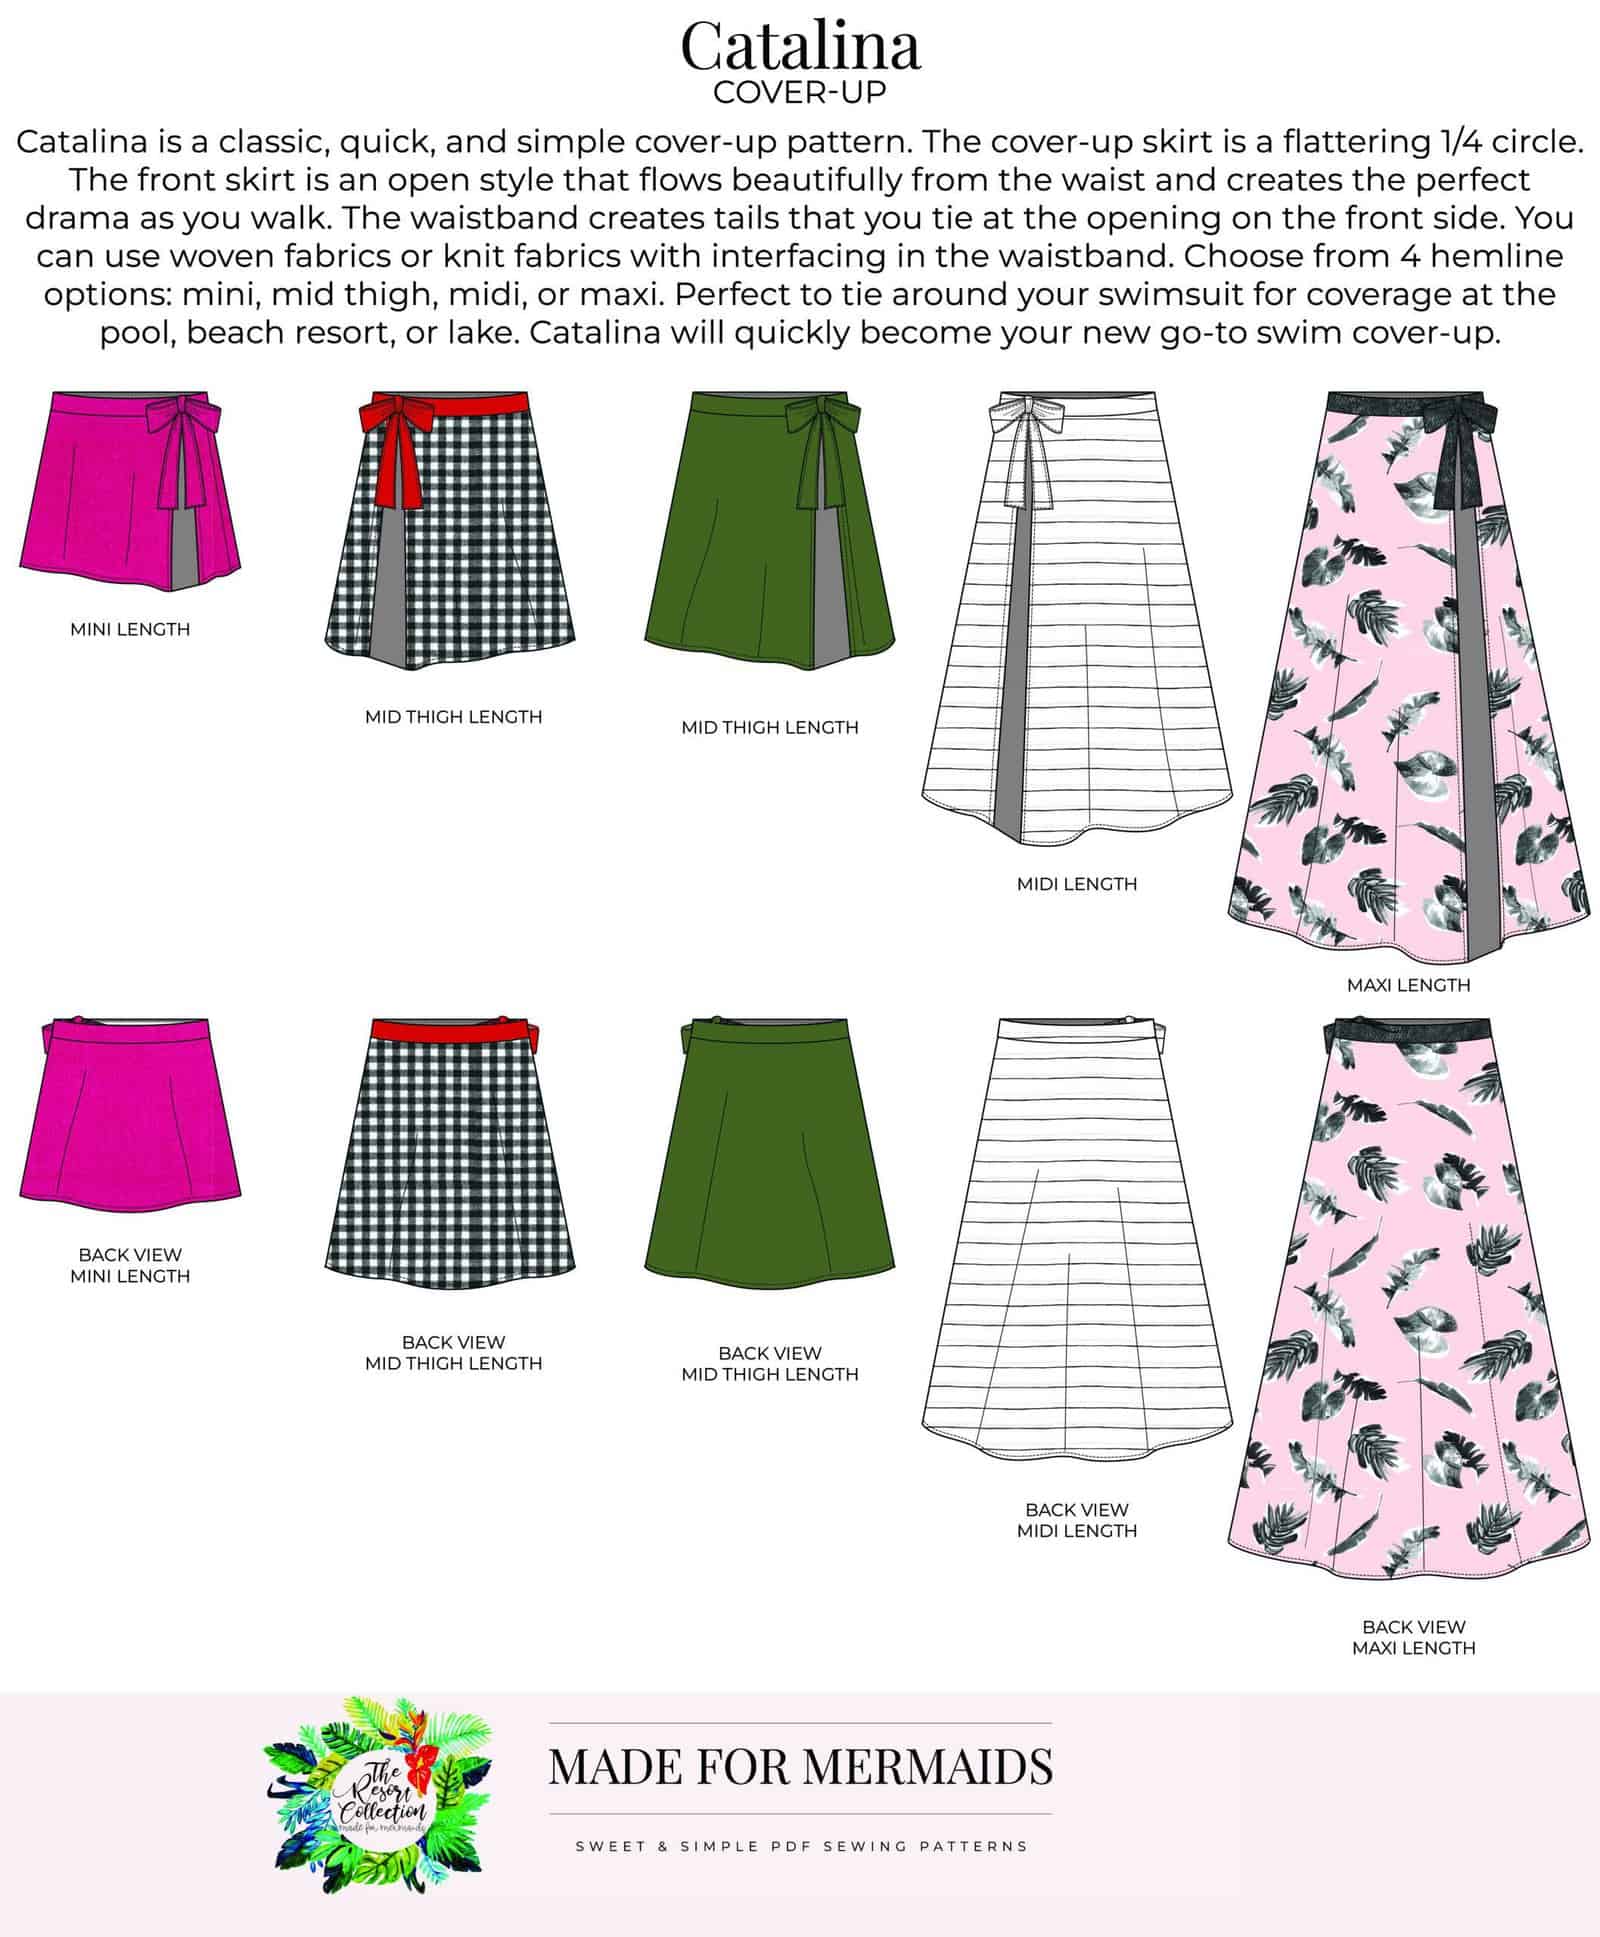
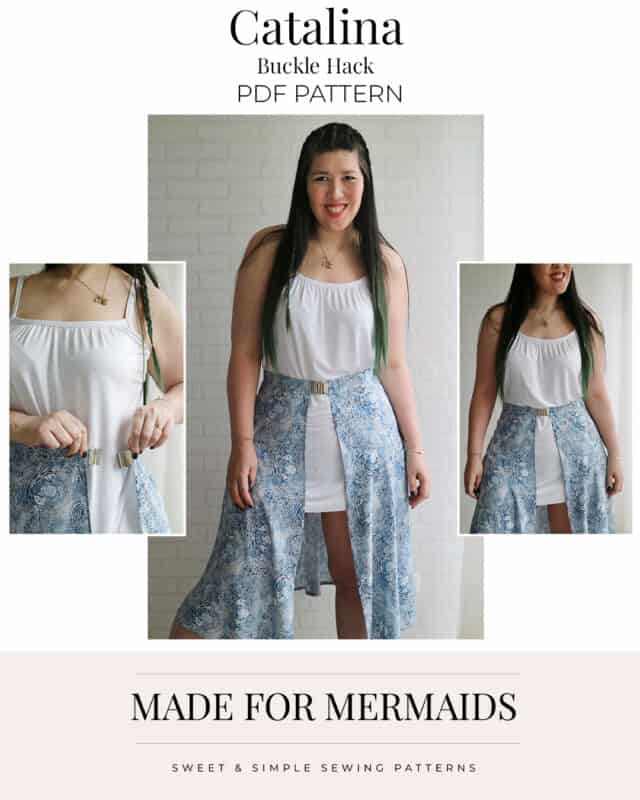
The Catalina, also releasing today, complements Venus perfectly! Catalina is a quick and classic cover-up pattern. The cover-up skirt is a flattering 1/4 circle. The front skirt is an open style that flows beautifully from the waist and creates the perfect drama as you walk. She’s the only kind of drama we’re looking for this summer! The waistband ties at the opening on the front side. You can use woven or knit fabrics with interfacing in the waistband. Choose from four hemline options – mini, mid-thigh, midi, or maxi. Perfect for tying around your swimsuit for coverage at the pool, resort, lake, or anywhere! Catalina will quickly become your new go-to swim cover-up.
Getting Started
Before you purchase your patterns, there is a ton of helpful beginner information between the M4M and P4P blogs, in case you are new to knits, or new to PDF patterns in general:
- New to PDF patterns? Check out our helpful tips here
- New to sewing with knits? Brittany has some great info here
- Not quite sure how to measure yourself accurately? Don’t worry; check out the post here!
- Having issues printing? Most issues can be resolved by using our FAQs/troubleshooting tips
- Join our Facebook group here.
Choosing Your Options
We have lots of tester photos in our FB group and on the site if you want to see a variety of photos of each option before you decide! Here is a quick snapshot of the different options:
Fabric + Notions
Venus is designed for nylon spandex (traditional swim knit), or polyester spandex blends. Venus also makes a great bodysuit using fabrics such as lux rib, athletic knit, brushed poly, and more.
You’ll also need:
- 1/4″ swim elastic for the body
- 1/2″ or 1/4″ swim elastic for the straps (thicker will provide more support)
- OPTIONAL: 1/2″ rings and sliders for adjustable straps
- OPTIONAL: power mesh or power net for inner lining
- OPTIONAL: reversible swim cups for inner lining/adding cups
Catalina is drafted for lightweight apparel wovens such as rayon challis, lightweight crepes, chiffon, georgette, silk charmeuse, some linens with drape, etc. Quilting cotton and heavier weight fabrics are not recommended. Lightweight knits such as ITY, rayon spandex, and bamboo can be used for the main fabric, but a woven waist band is recommended to eliminate stretching.
You’ll also need:
- OPTIONAL: lightweight fusible interfacing for the waistband and top of skirt if using knits.
Venus Hacks
Would we even BE Made for Mermaids if we didn’t have a few hacks up our sleeve? Sonia, Stephanie, and Livia are on the blog today with a button loop trim hack, a ruffle strap hack, and a buckle hack!
Button Loop Trim Hack
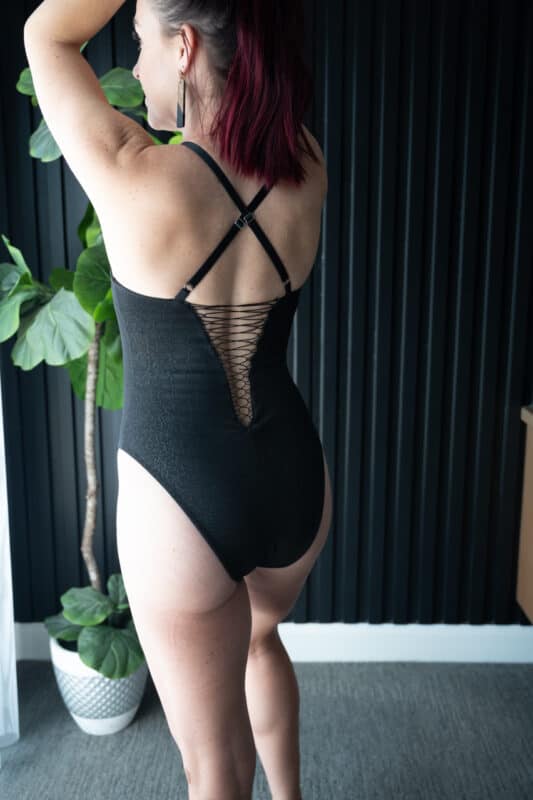
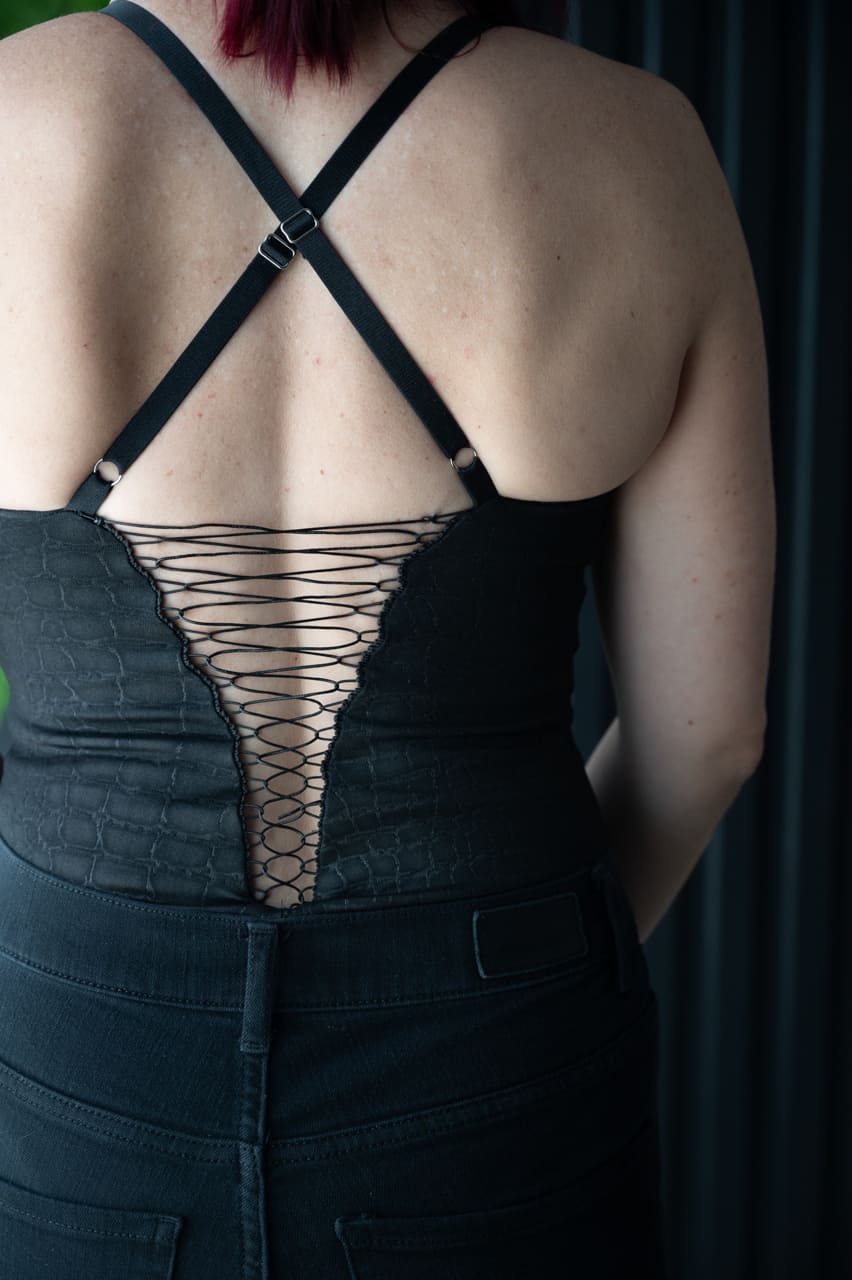
Hi friends! Today we’re doing a super simple hack on the Venus swimsuit, using a braided button trim for our loops! Using this trim gives you a lot more of a corseted look (more criss-crosses back and forth). The trim I used isn’t rated for swim, so I made a bodysuit instead with bra strapping for my straps and a very thin leather cord for my lace up. One thing to note is that the trim is non-stretch, so this hack my affect the vertical stretch of your bodysuit a bit. I found mine to be fine, but you may want to make a muslin and see if you need to adjust slightly for height due to the lack of stretch.
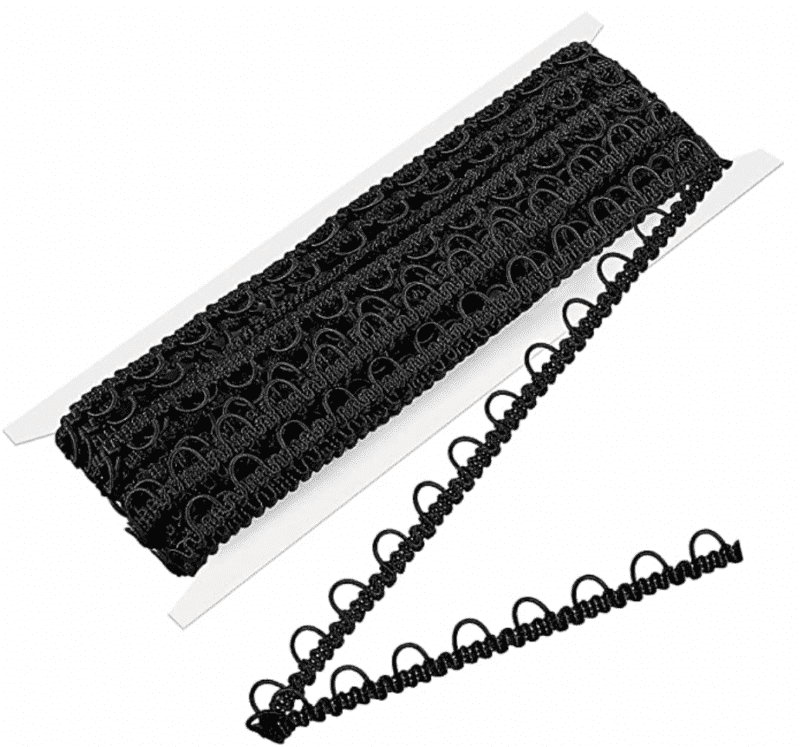
The only extra notions you’ll need for this hack are braided button trim (I got mine on Amazon here) and some kind of thin cording to lace up (you’ll want something thinner than the sewn fabric tubes you would use if sewing per-pattern). I did use a thin leather cording, but will likely switch it out with something knit to help it lay flatter.
The pattern options I used were the lace up back with the adjustable strap pieces. So let’s go!! First, go ahead and grade and cut your pattern pieces. We won’t need the long adjustable strap or the loops. We’ll be working with the back main and lining, so set those aside. If you’re using the adjustable straps with bra strapping like I did, just use the pattern piece to cut your lengths.
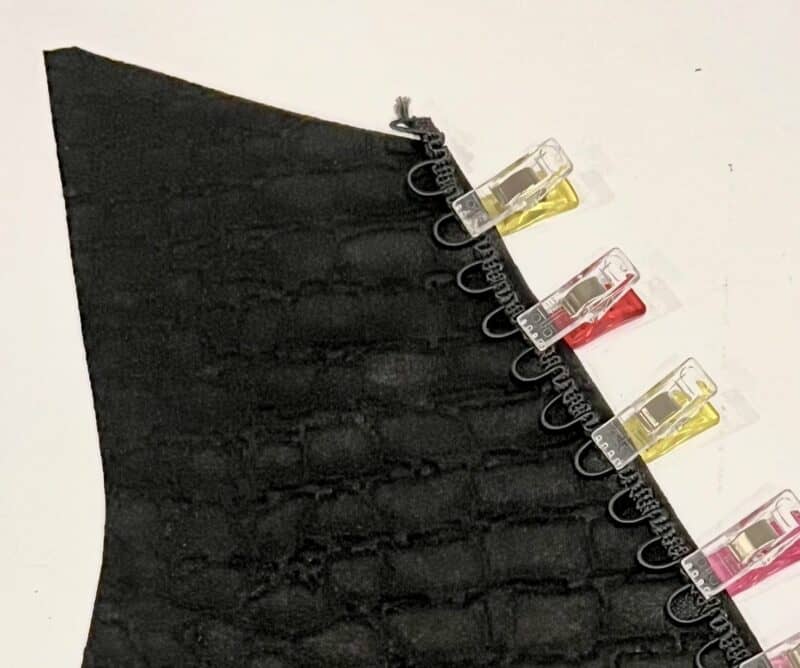
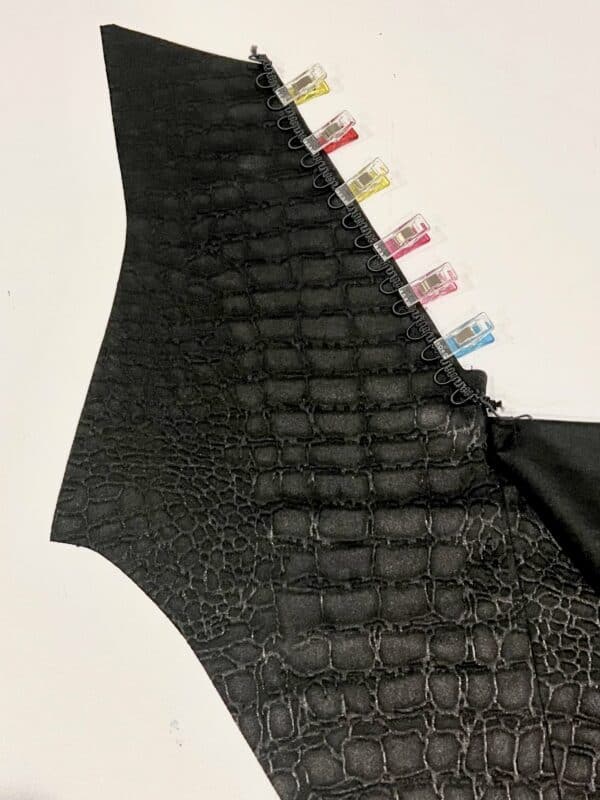
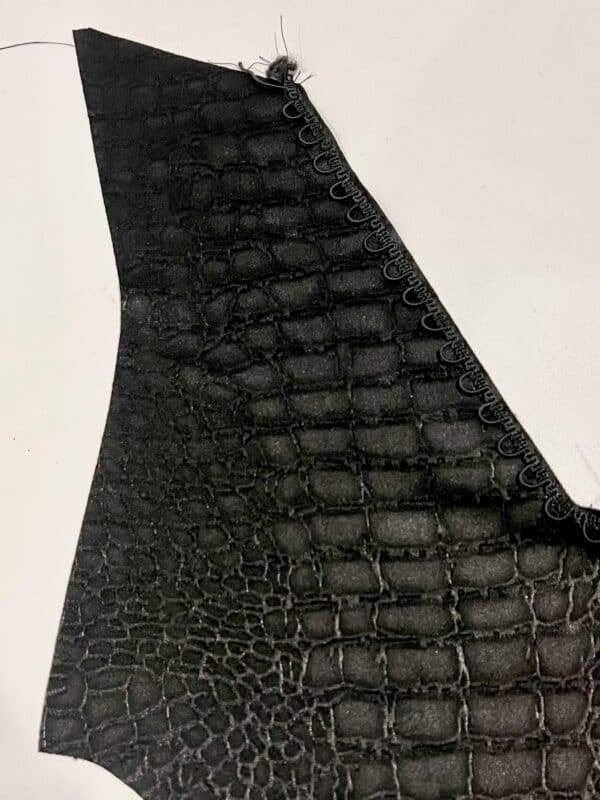
 Next, grab the trim and lay it along the V edge, cutting it slightly longer so we can trim it after sewing. Cut two of these pieces (one for each side). Clip the trim to the raw edge of the main. As the braided part of my trim was smaller than 1/4″ (our Seam Allowance) I was sure to leave a little space from the raw edge so that we can sew along the trim with our 1/4″ SA without catching too much of the trim.
Note: Scroll to the end of this hack to see the closeup of the final product, I wanted the edge of the trim showing 🙂
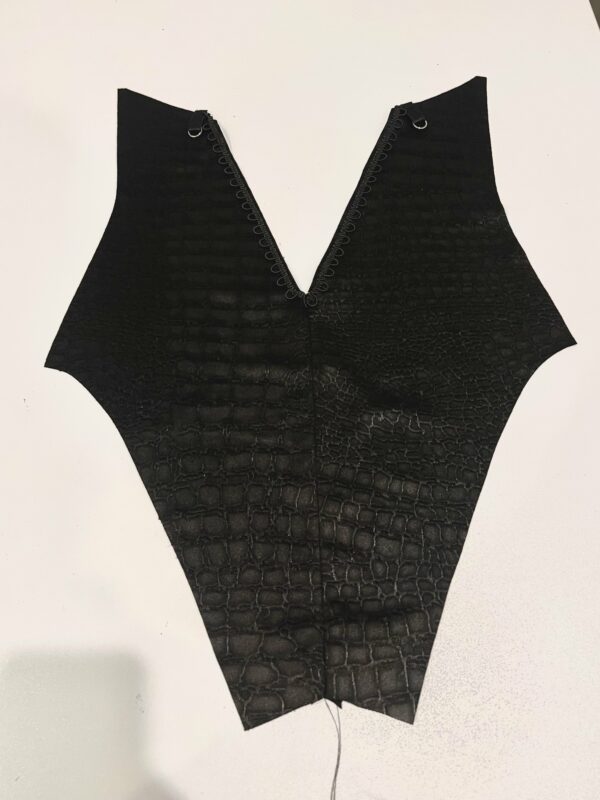
In the photo above, you can see that my back seam was already sewn and I removed the top couple inches of stitches; it’s likely easier to add the trim to both sides and THEN sew your back seam. Baste your trim on to your main using a long straight stitch, then change stitches to a stretch stitch and sew the back seam.
Baste/tack the adjustable strap loops in place, just to the outside of where the trim is basted. Do not overlap the trim!
From here, assemble the pattern as per the instructions! Stitch your lining on top of this assembled piece, sew your front pieces (add elastic if you wish – though I used a pretty stable fabric so I decided to forgo the elastics), then do that neat trick Michelle does in her video to do your side seams. I leave my turn hole in the crotch and leave it big enough to reach in to thread the straps through to tack in place. Don’t forget to cross them! I like to baste them in place to make sure they’re not twisted.
Once you turn the suit out, add your cording. I laced top to bottom to then hide the ends – I’ll hand stitch the ends of the laces down once I finalize the length and all. That’s it!
This a fun hack for a bodysuit version of Venus 🙂 and it looks super cute styled with jeans too!
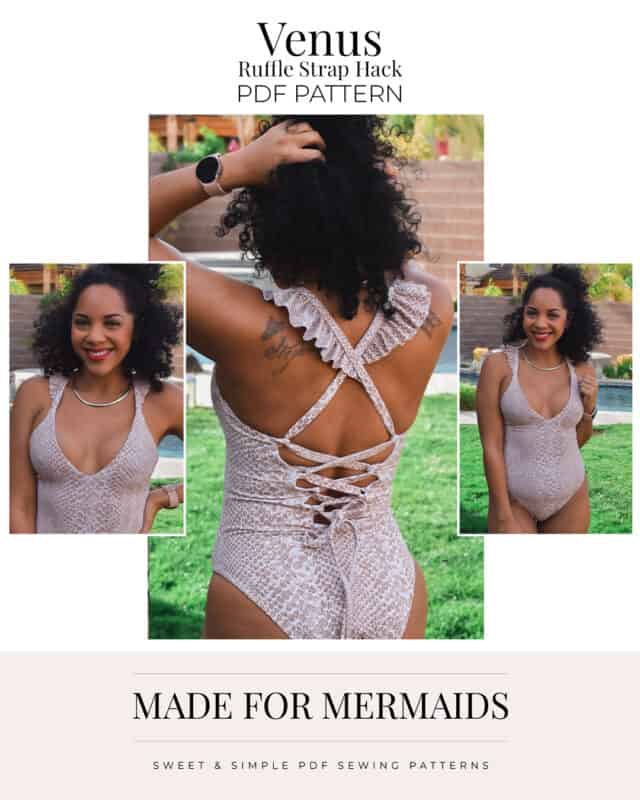
Ruffle Strap Hack
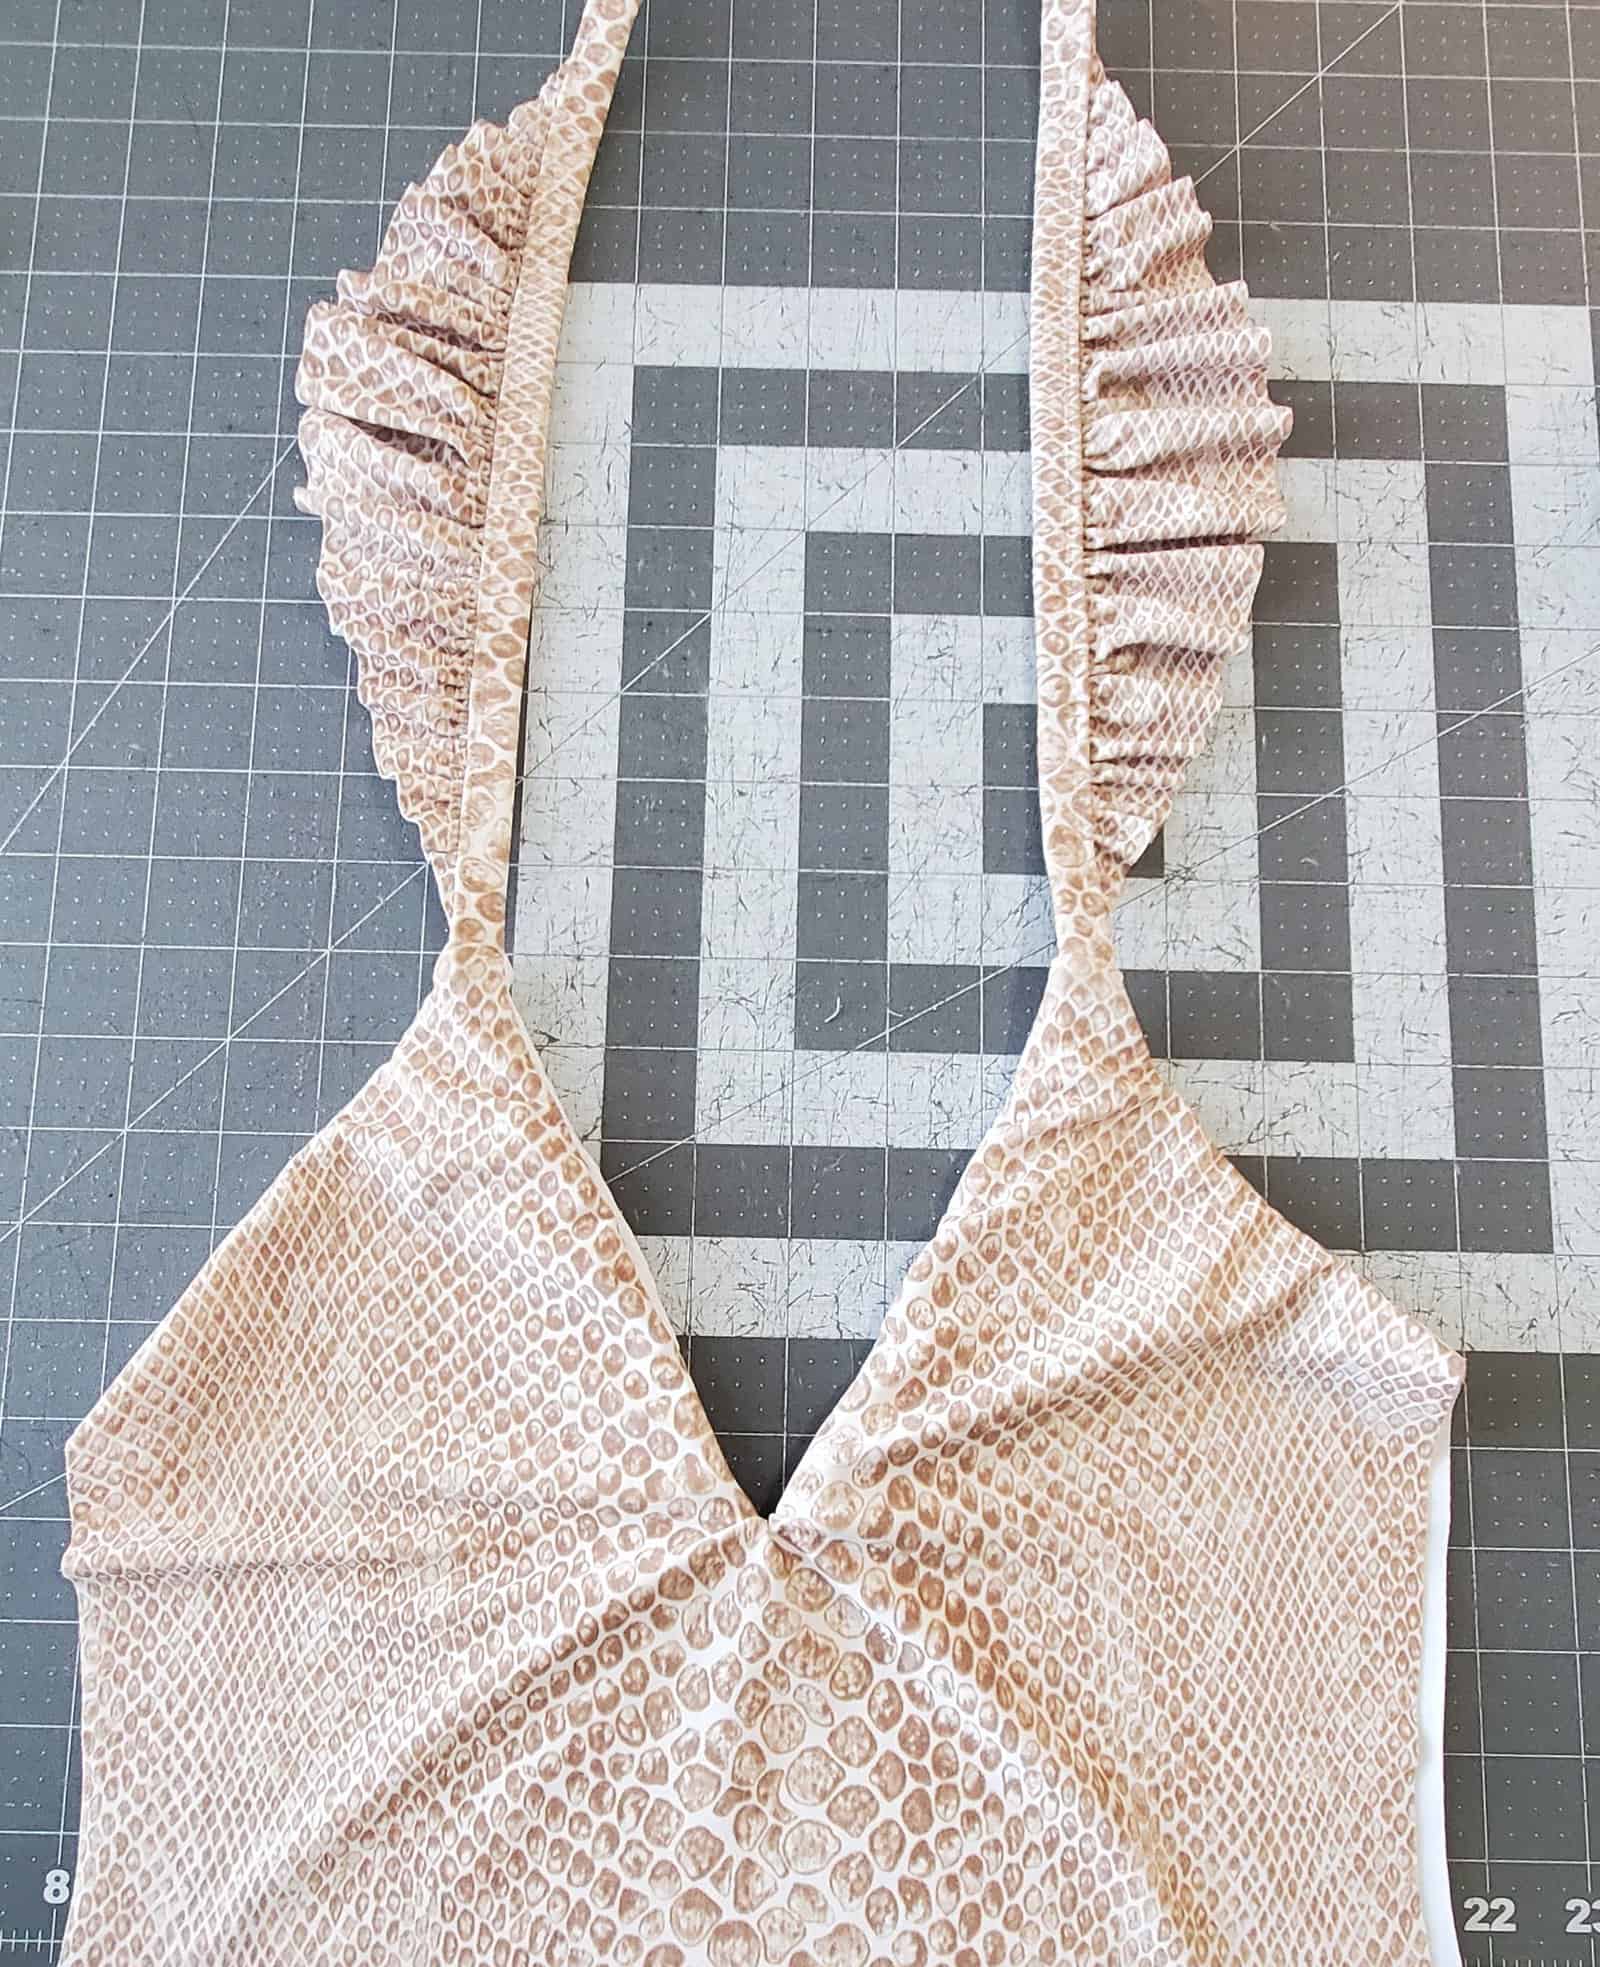
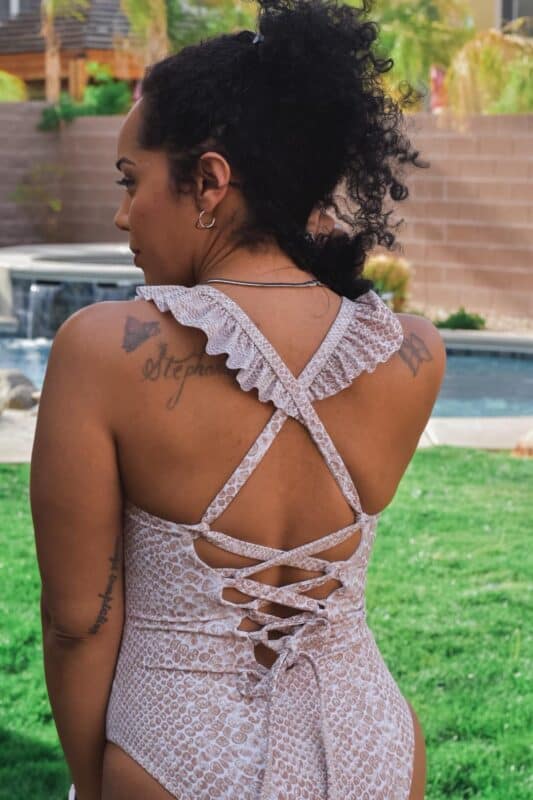
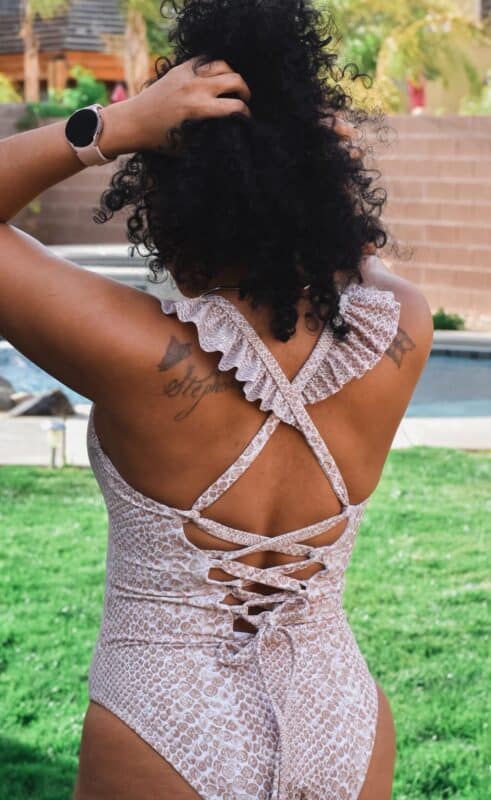
You can add a super cute ruffle to your straps with a few easy steps. It makes an adorable new version of the suit and can also add a bit of sun protection for your shoulder depending on how wide you make your ruffle.
To start, you’ll need all the same pieces for your Venus, but you need to use the wider version of the strap that calls for 1/2″ elastic. You can choose to do either the full back or the lace up back option for this hack.
I measured the length from about where the straps would start on my chest, up over my shoulder to my back, at about my shoulder blade and that length was 12″. So I decided to do my ruffle twice that length, which will be around 24″, more or less. If you want a fuller ruffle, make yours longer, or for a less full ruffle make it shorter. I also decided to make my ruffle about 2 3/4″ wide, and there will be a 1/2″ seam allowance for your ruffle, so my ruffle will finish at 2 1/4″ at its widest part. If you want a wider ruffle, make yours wider or for a smaller ruffle make it more narrow, but I do suggest making it at least 1 1/2″.
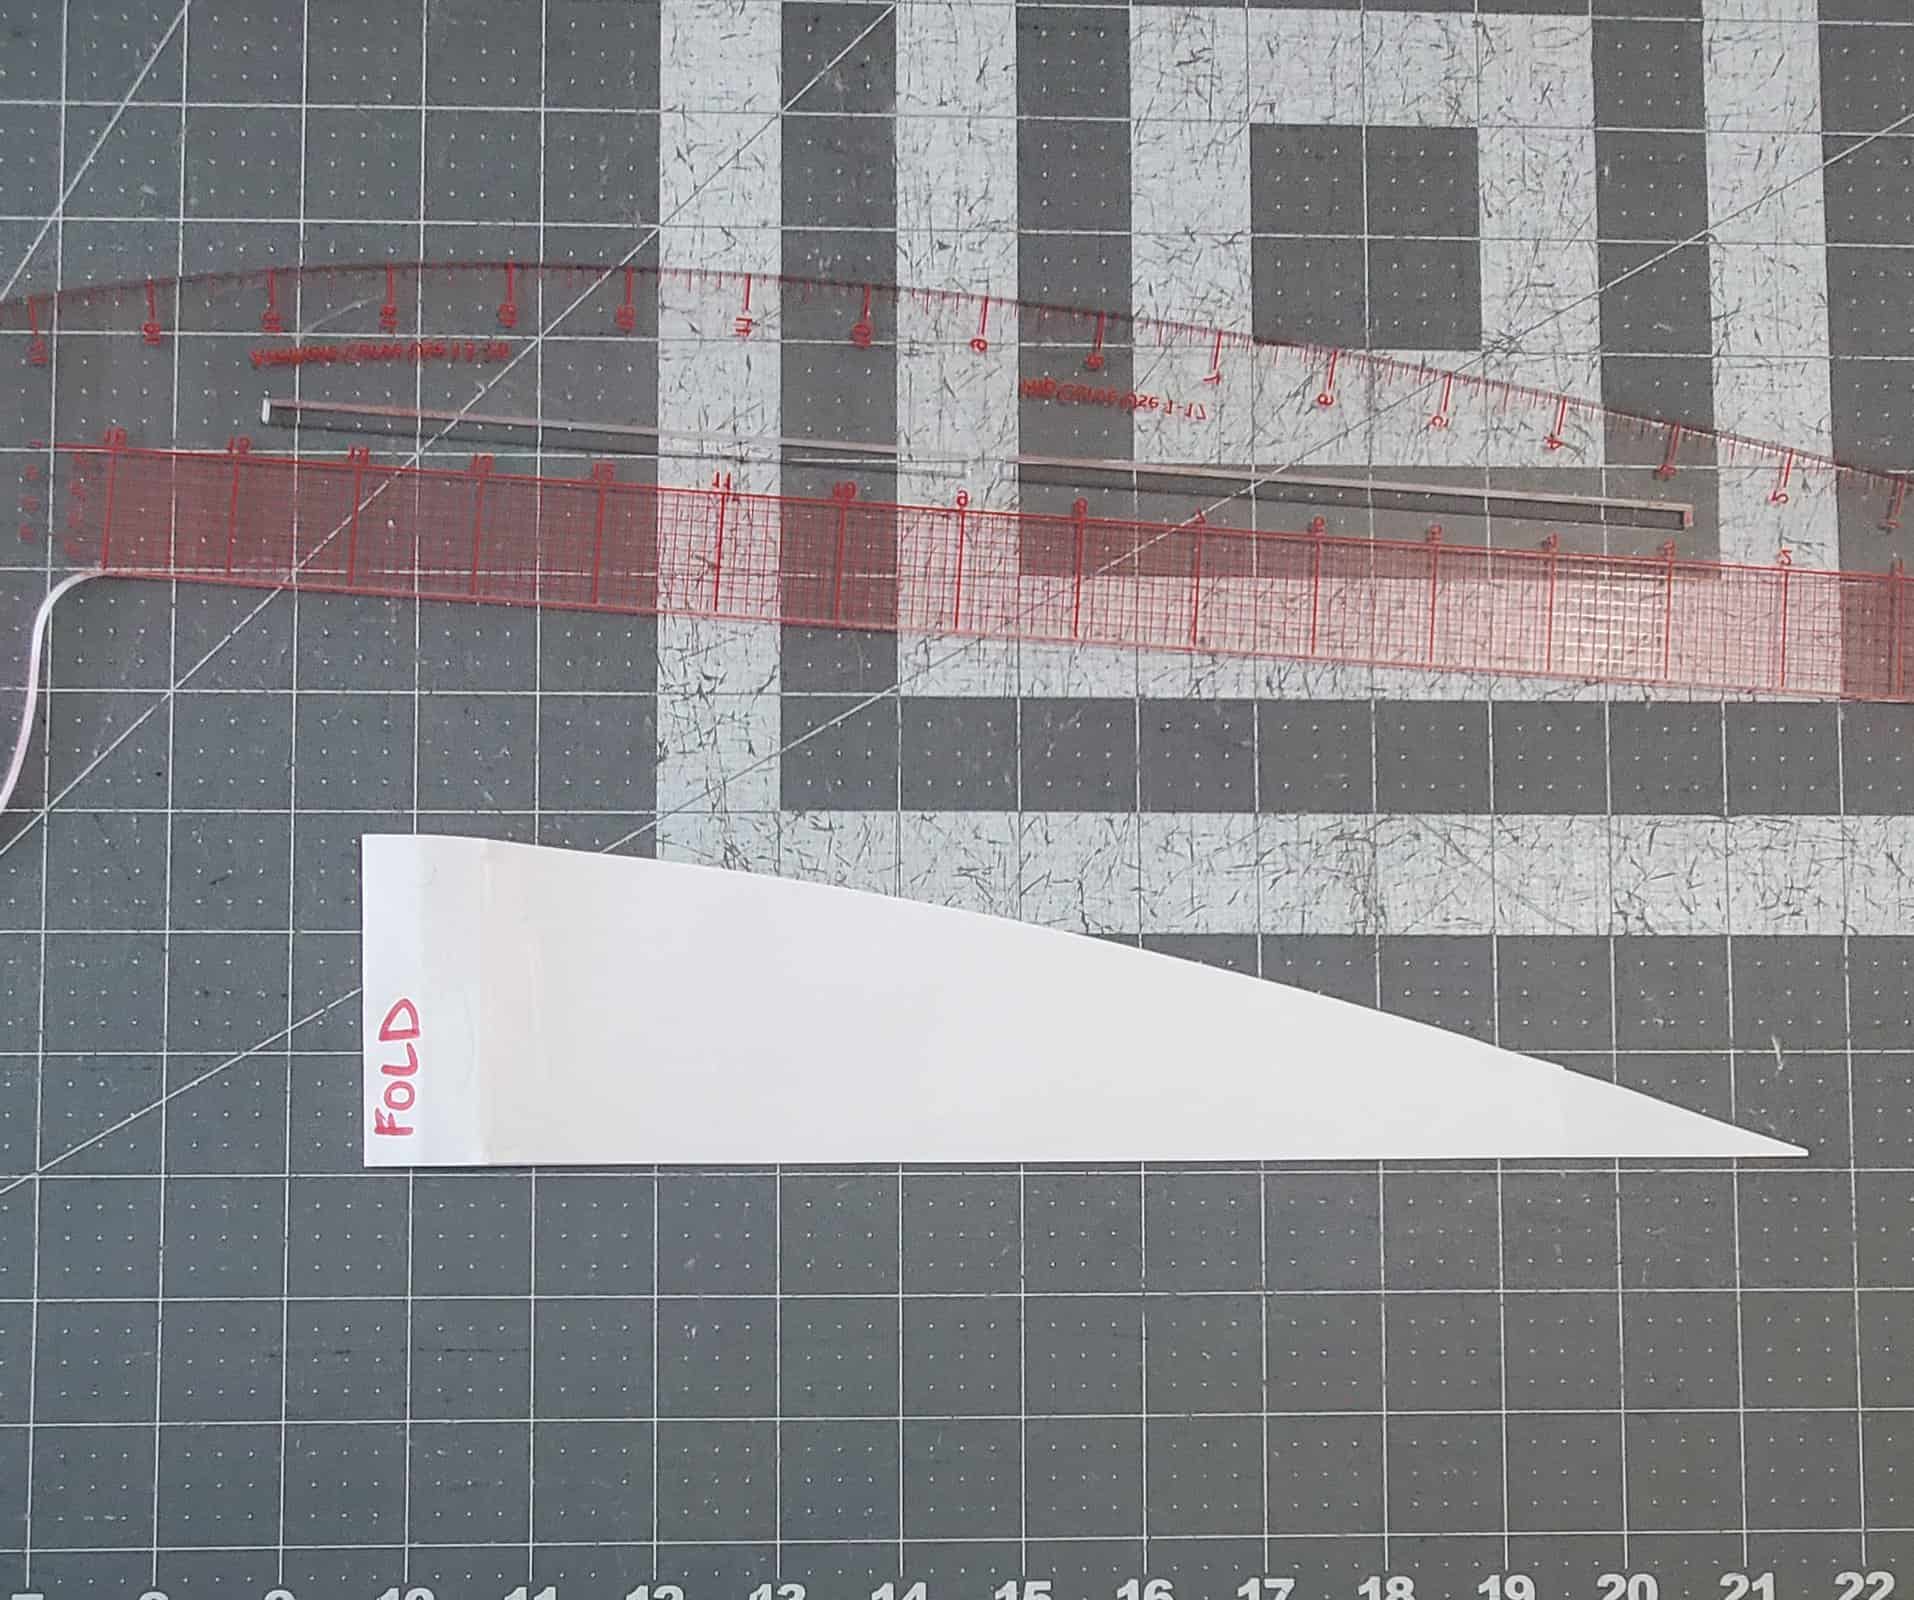
I took two pieces of paper and taped them together to get it to be 12″ and cut it to 2 3/4″. This will be my ruffle pattern piece that will be cut on the fold. My ruffle will be 24″, which will give you a 12″ ruffle when gathered.
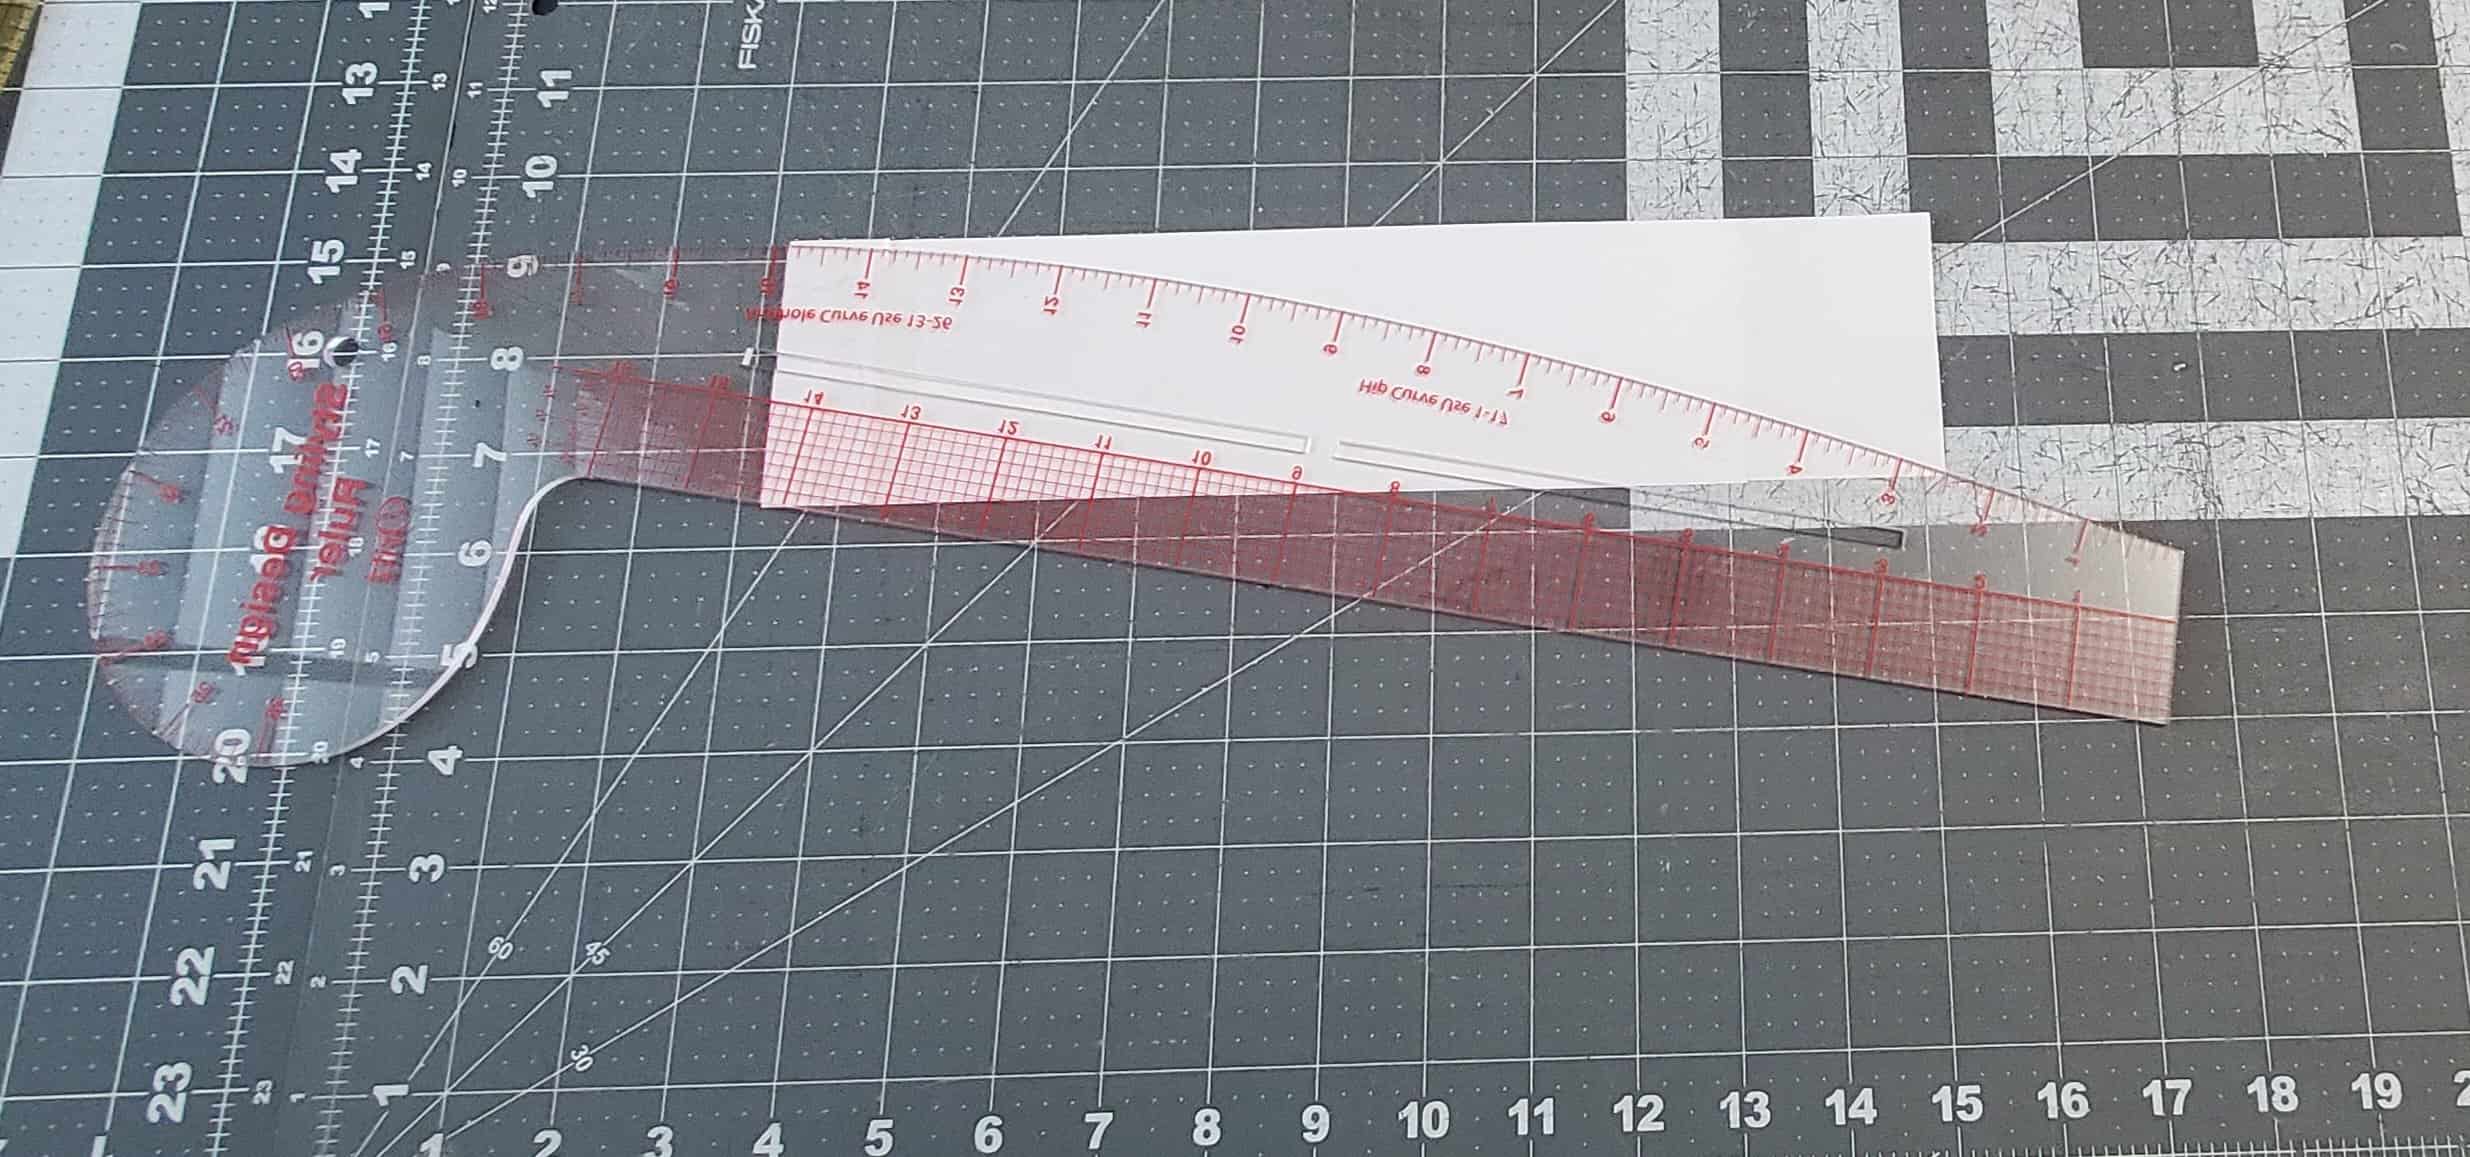
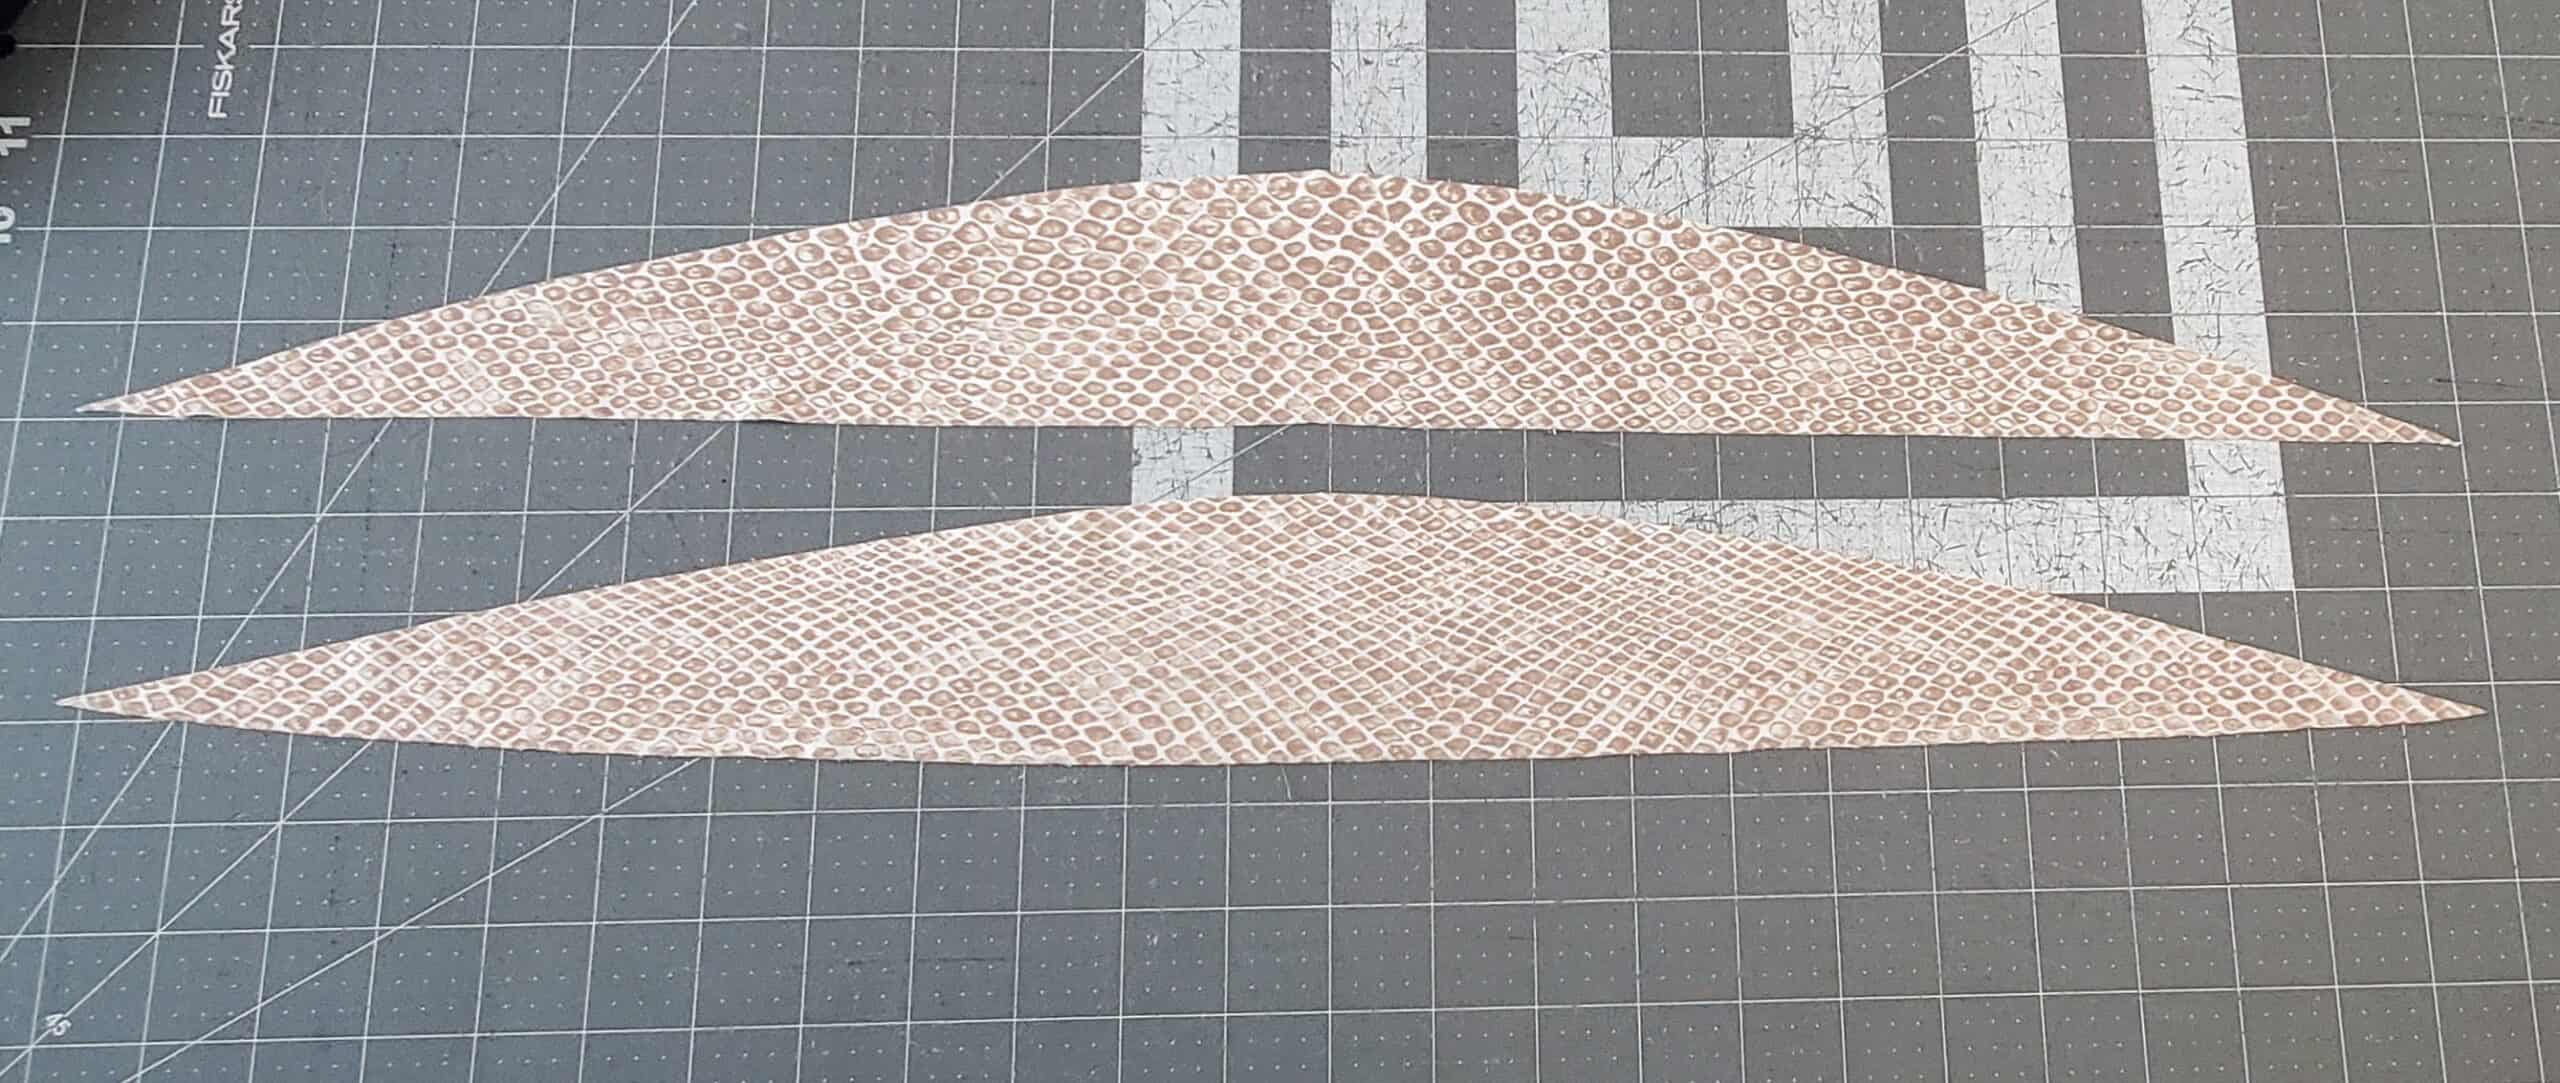
I then took my French Curve ruler (you can use anything curved that you have, such as a large plate, or even free hand a curve the best you can) and made my piece curved. Cut 2 ruffle pieces on the fold.
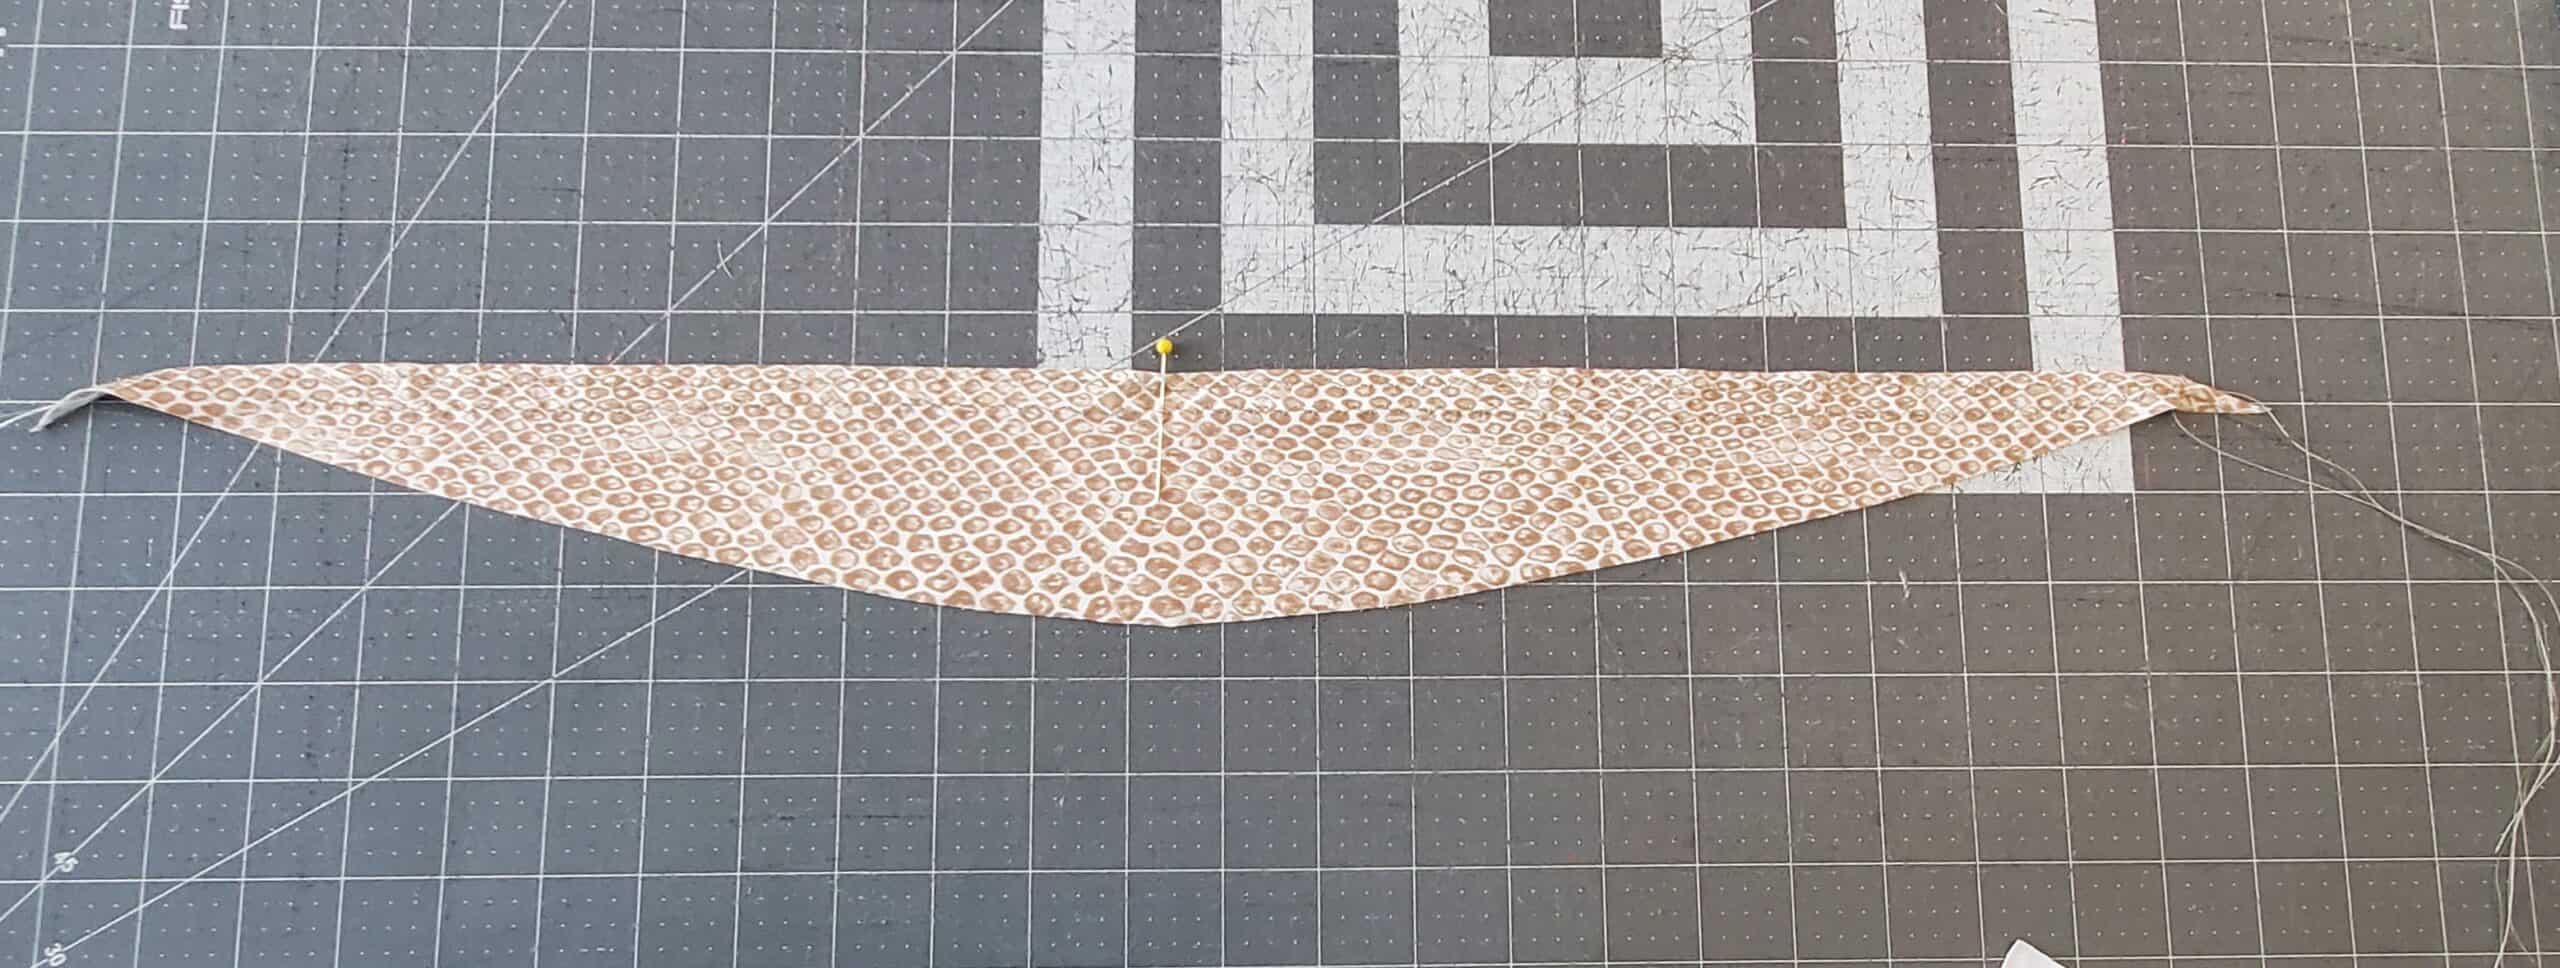
Run 2 sets of gathering stiches along the straight edge of your ruffle. Mark the center point of your ruffle with a pin or clip. For more gathering tips, check out our Gathering 101 blog post.
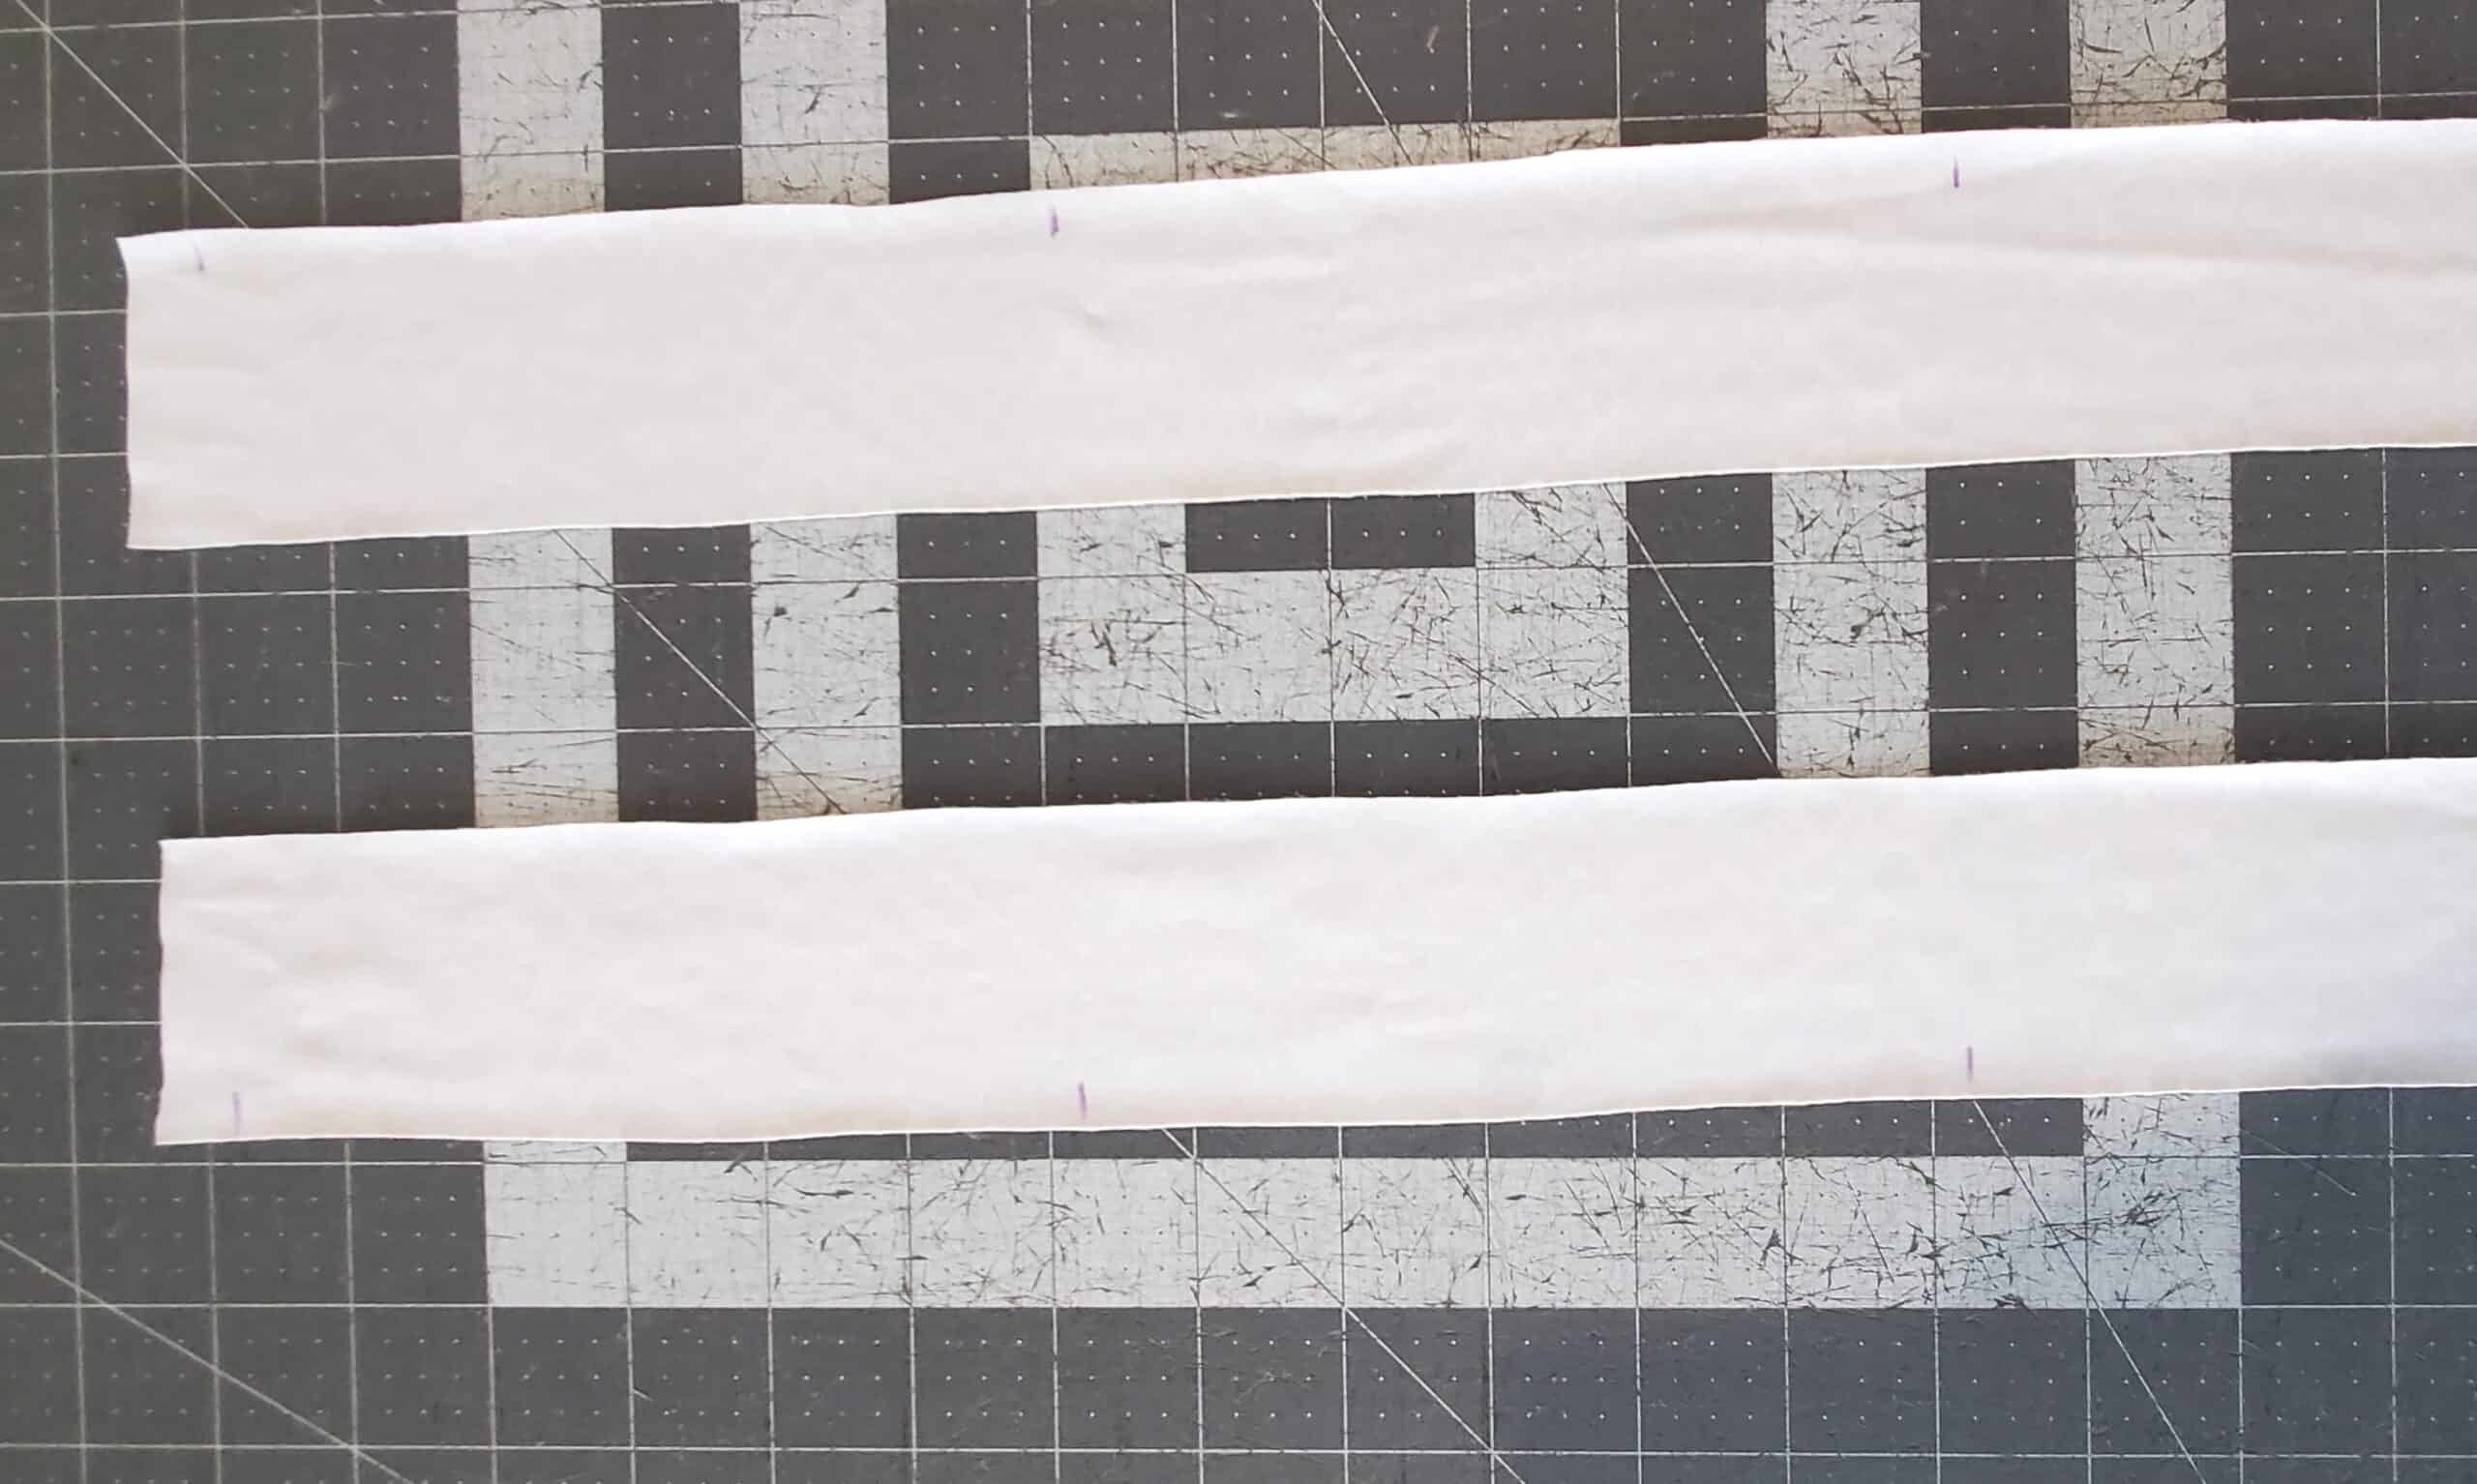
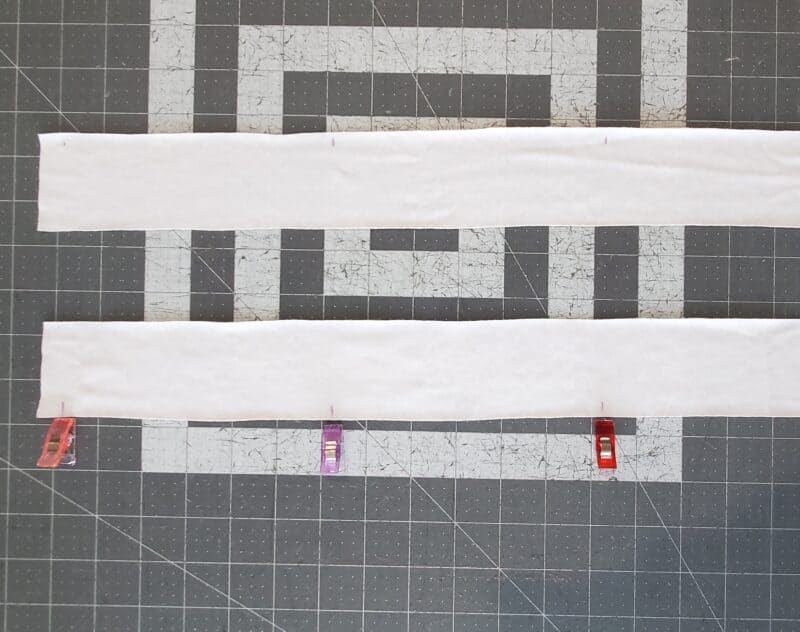
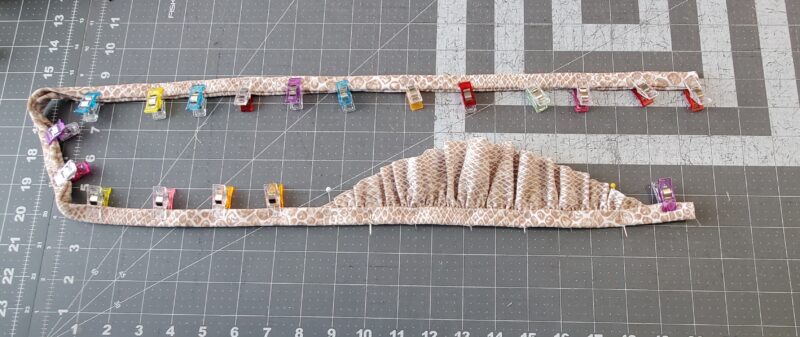
Using a fabric pen, mark either 1/4″ or 1/2″ away from one end of your strap. This will be where your ruffle starts. My ruffle is 12″, so I marked 6″ from the first marking (this will be where you place the middle of your ruffle), and another 6″ away from that marking. You will have 3 markings total. Do the same on your other strap piece but make it mirrored.
I placed clips next to the markings in the photo below for a better view.
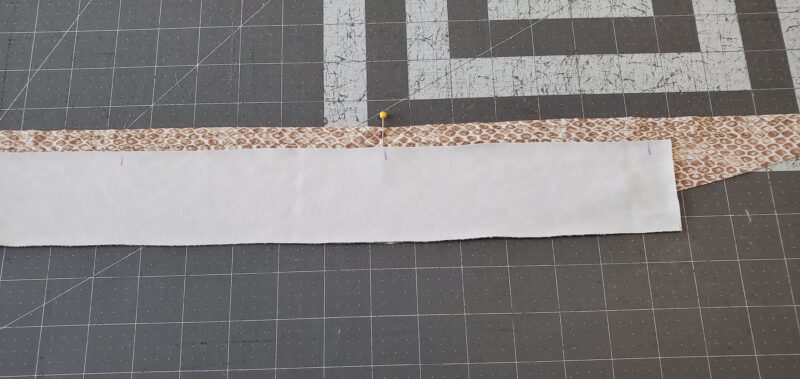
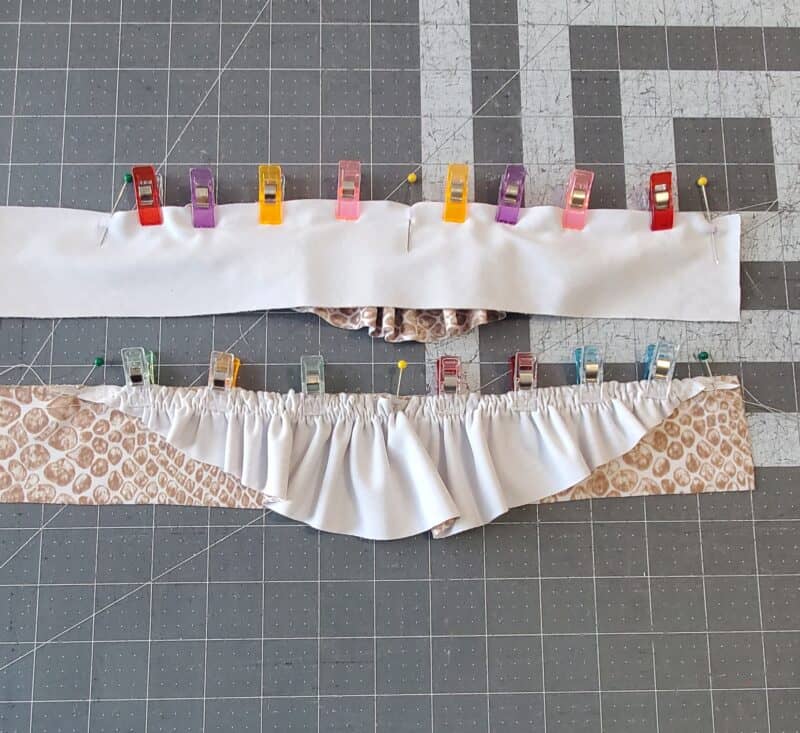
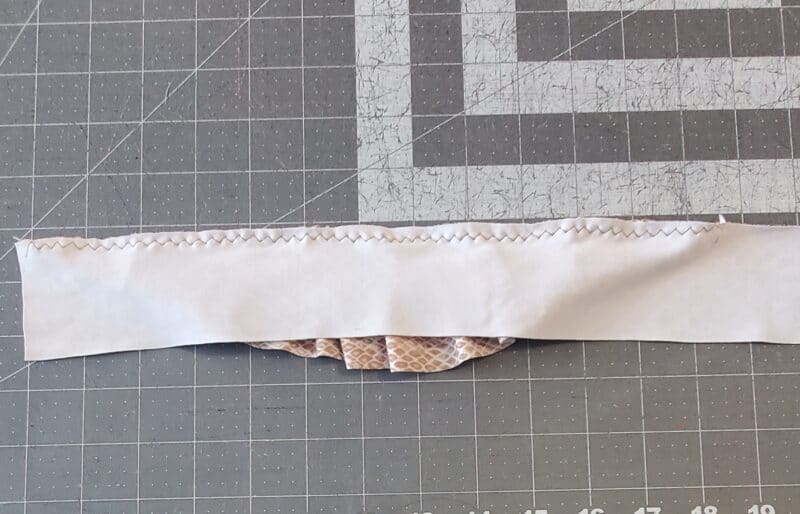
Aligning raw edges and right sides together, pin or clip your ruffle piece to your strap piece, matching the pin at the middle of your ruffle to the middle marking on your strap.
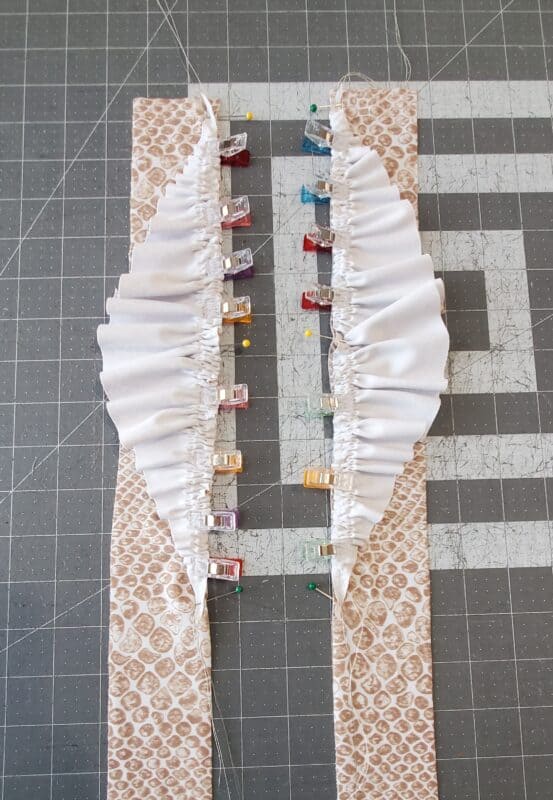
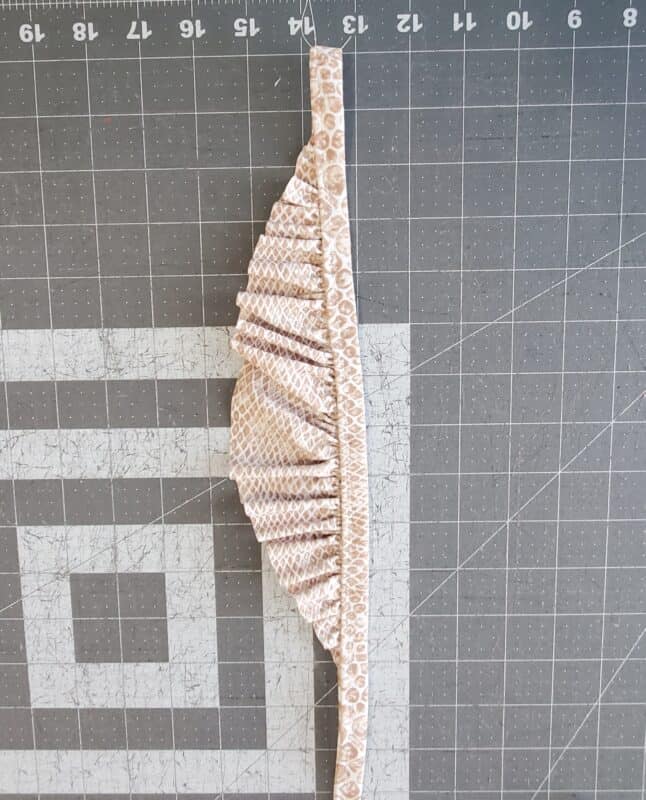
Pin the ruffle ends to the first and third markings, and gather the ruffle to fit.
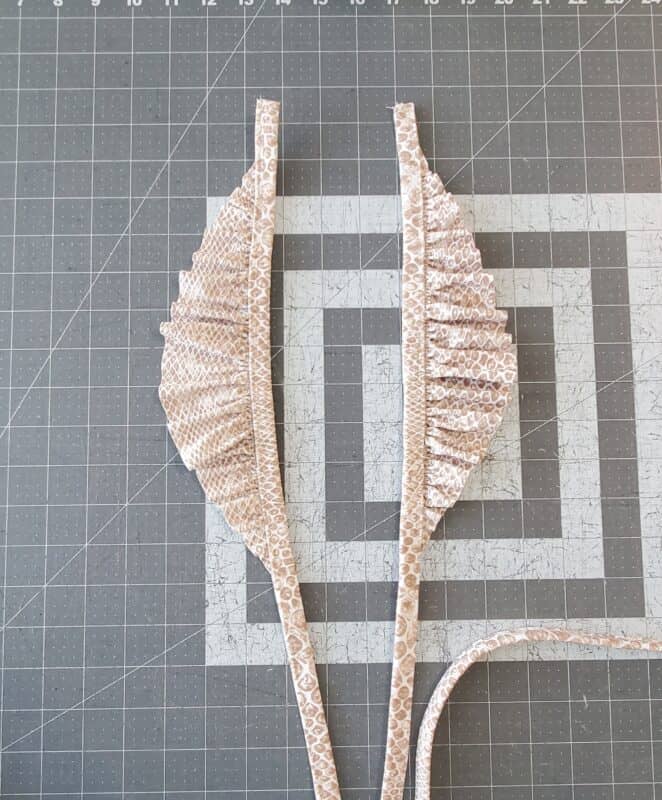
They should mirror each other like below:
Baste your ruffle to your strap.
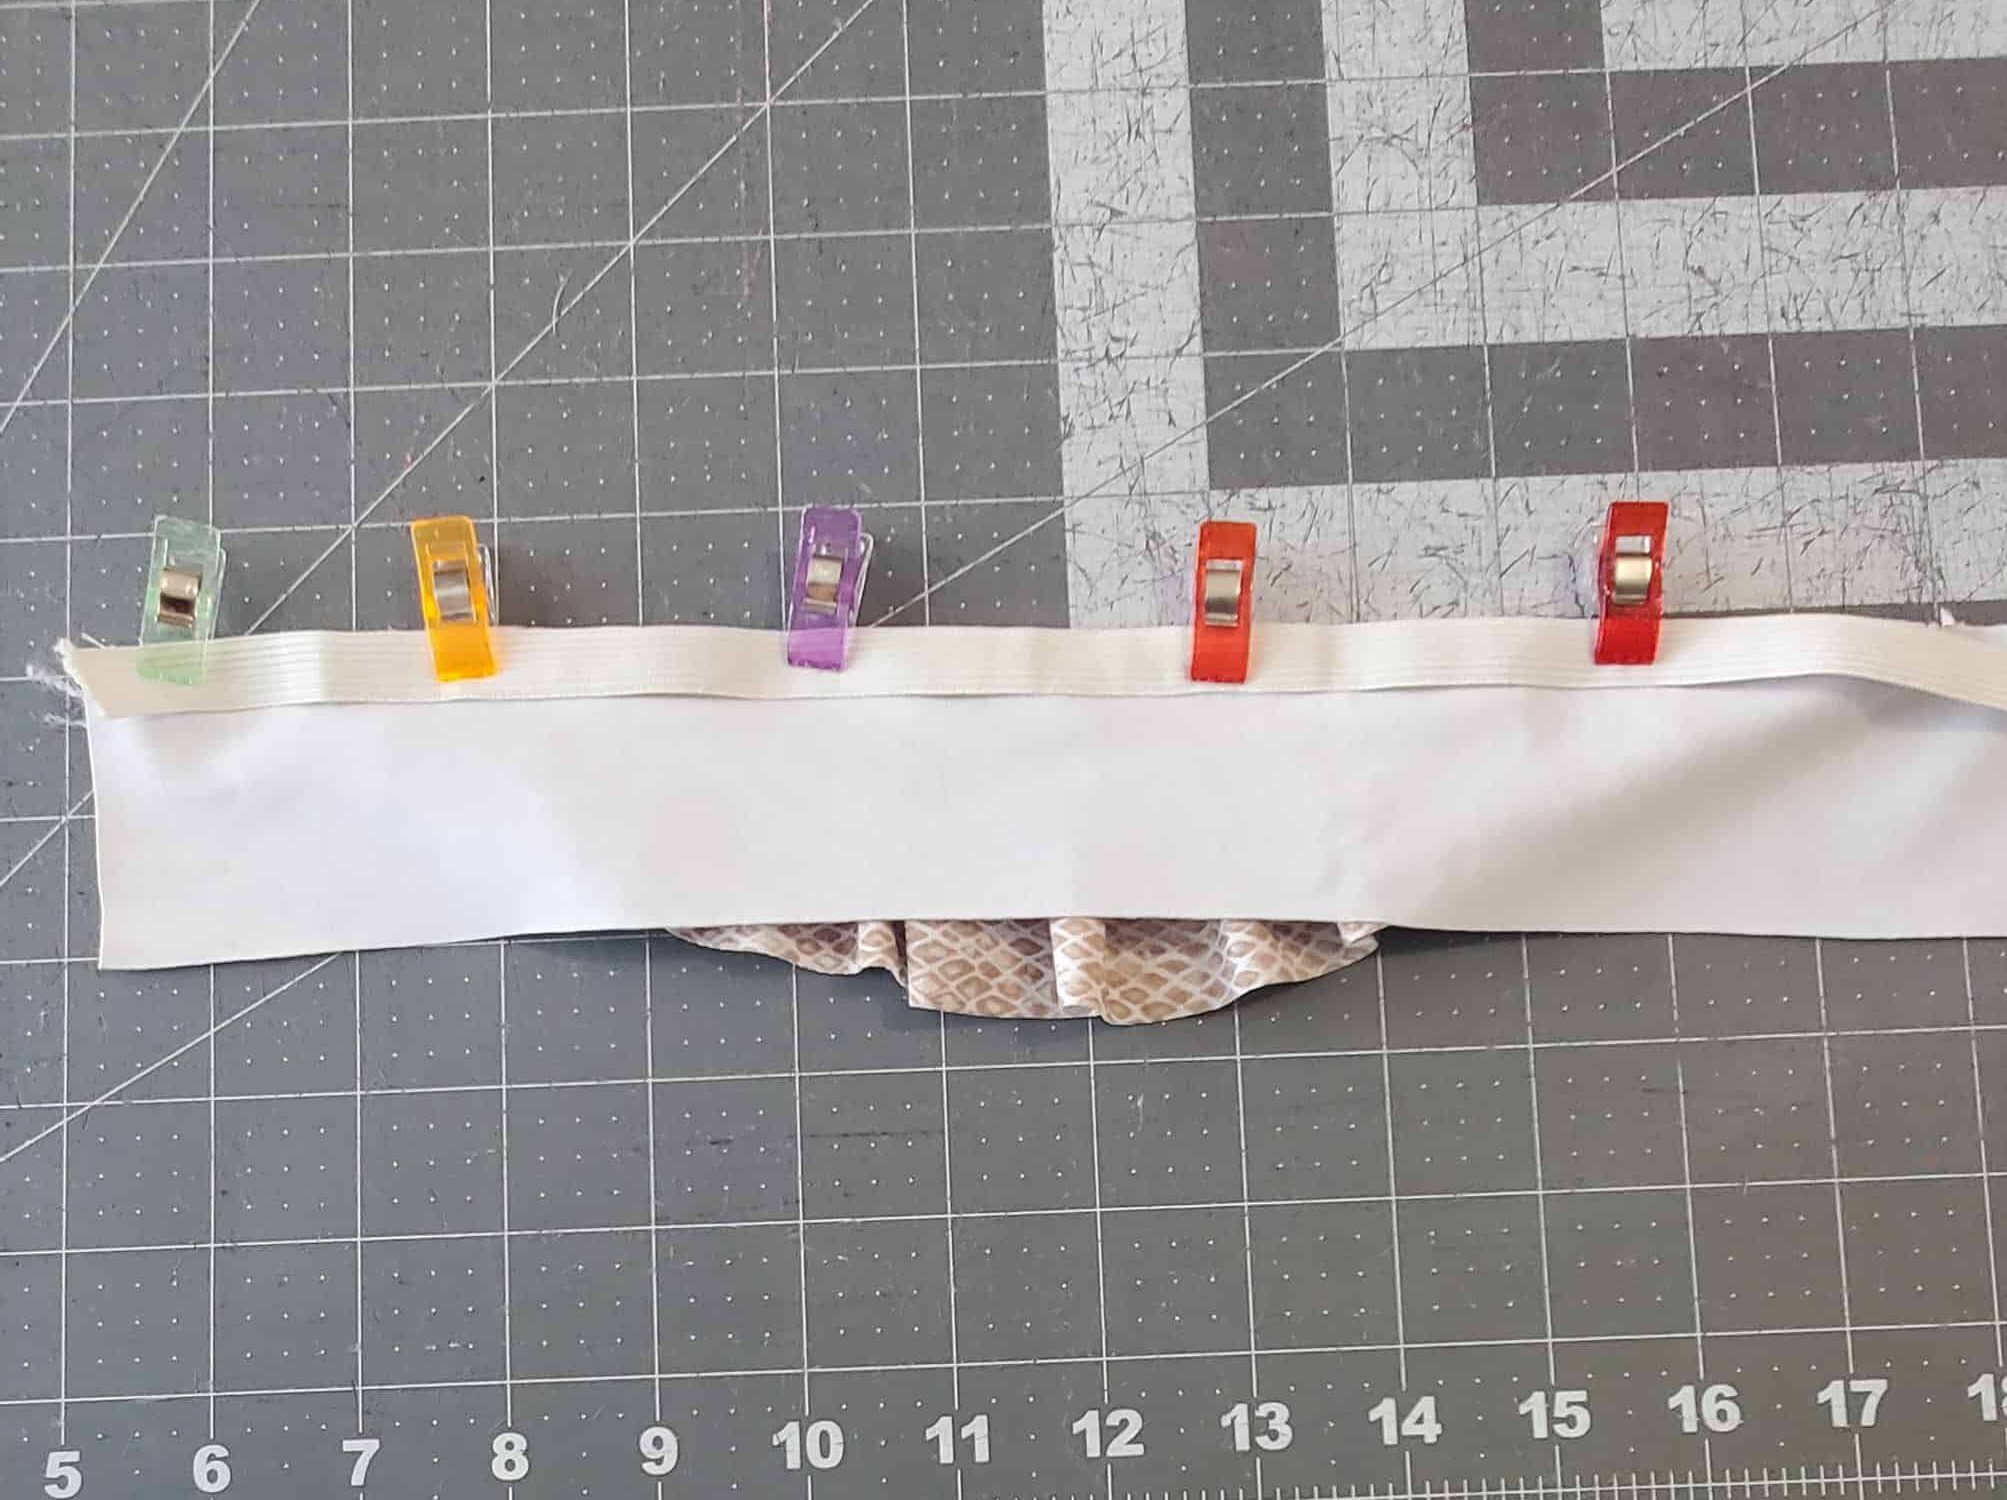
Next, take your 1/2″ swim elastic and attach it to the raw edge of the wrong side of your strap, the entire length of the strap.
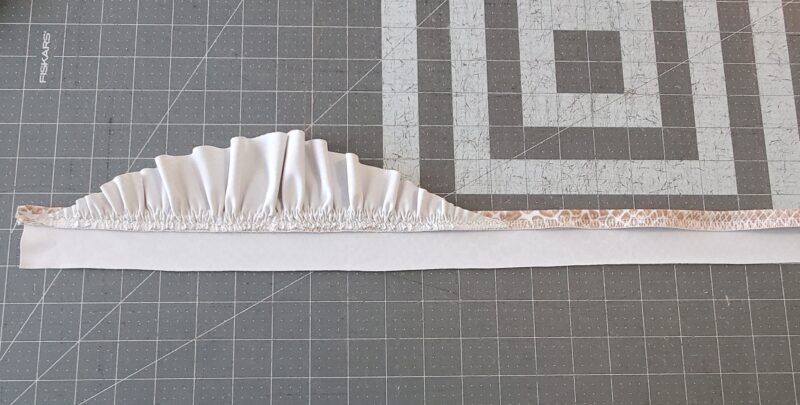
Fold your elastic/raw edge towards the wrong side of the strap piece. Your ruffle will be up and out of the way.
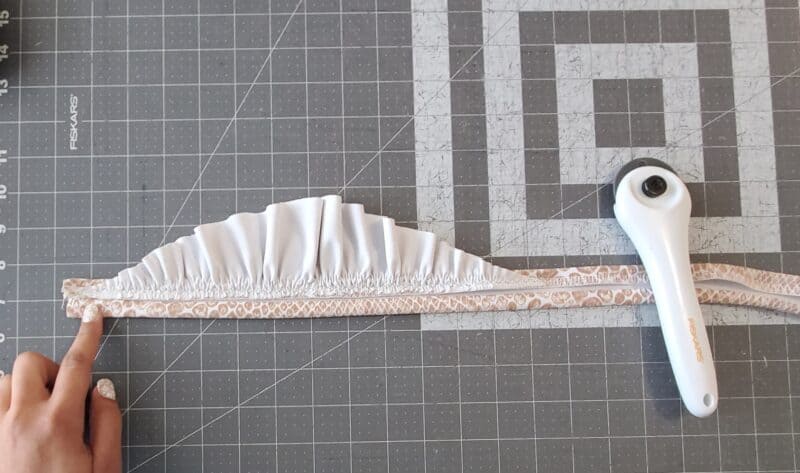
Fold the opposite raw edge of the strap piece to meet the other at the center.
Fold them together once more, enclosing your strap.
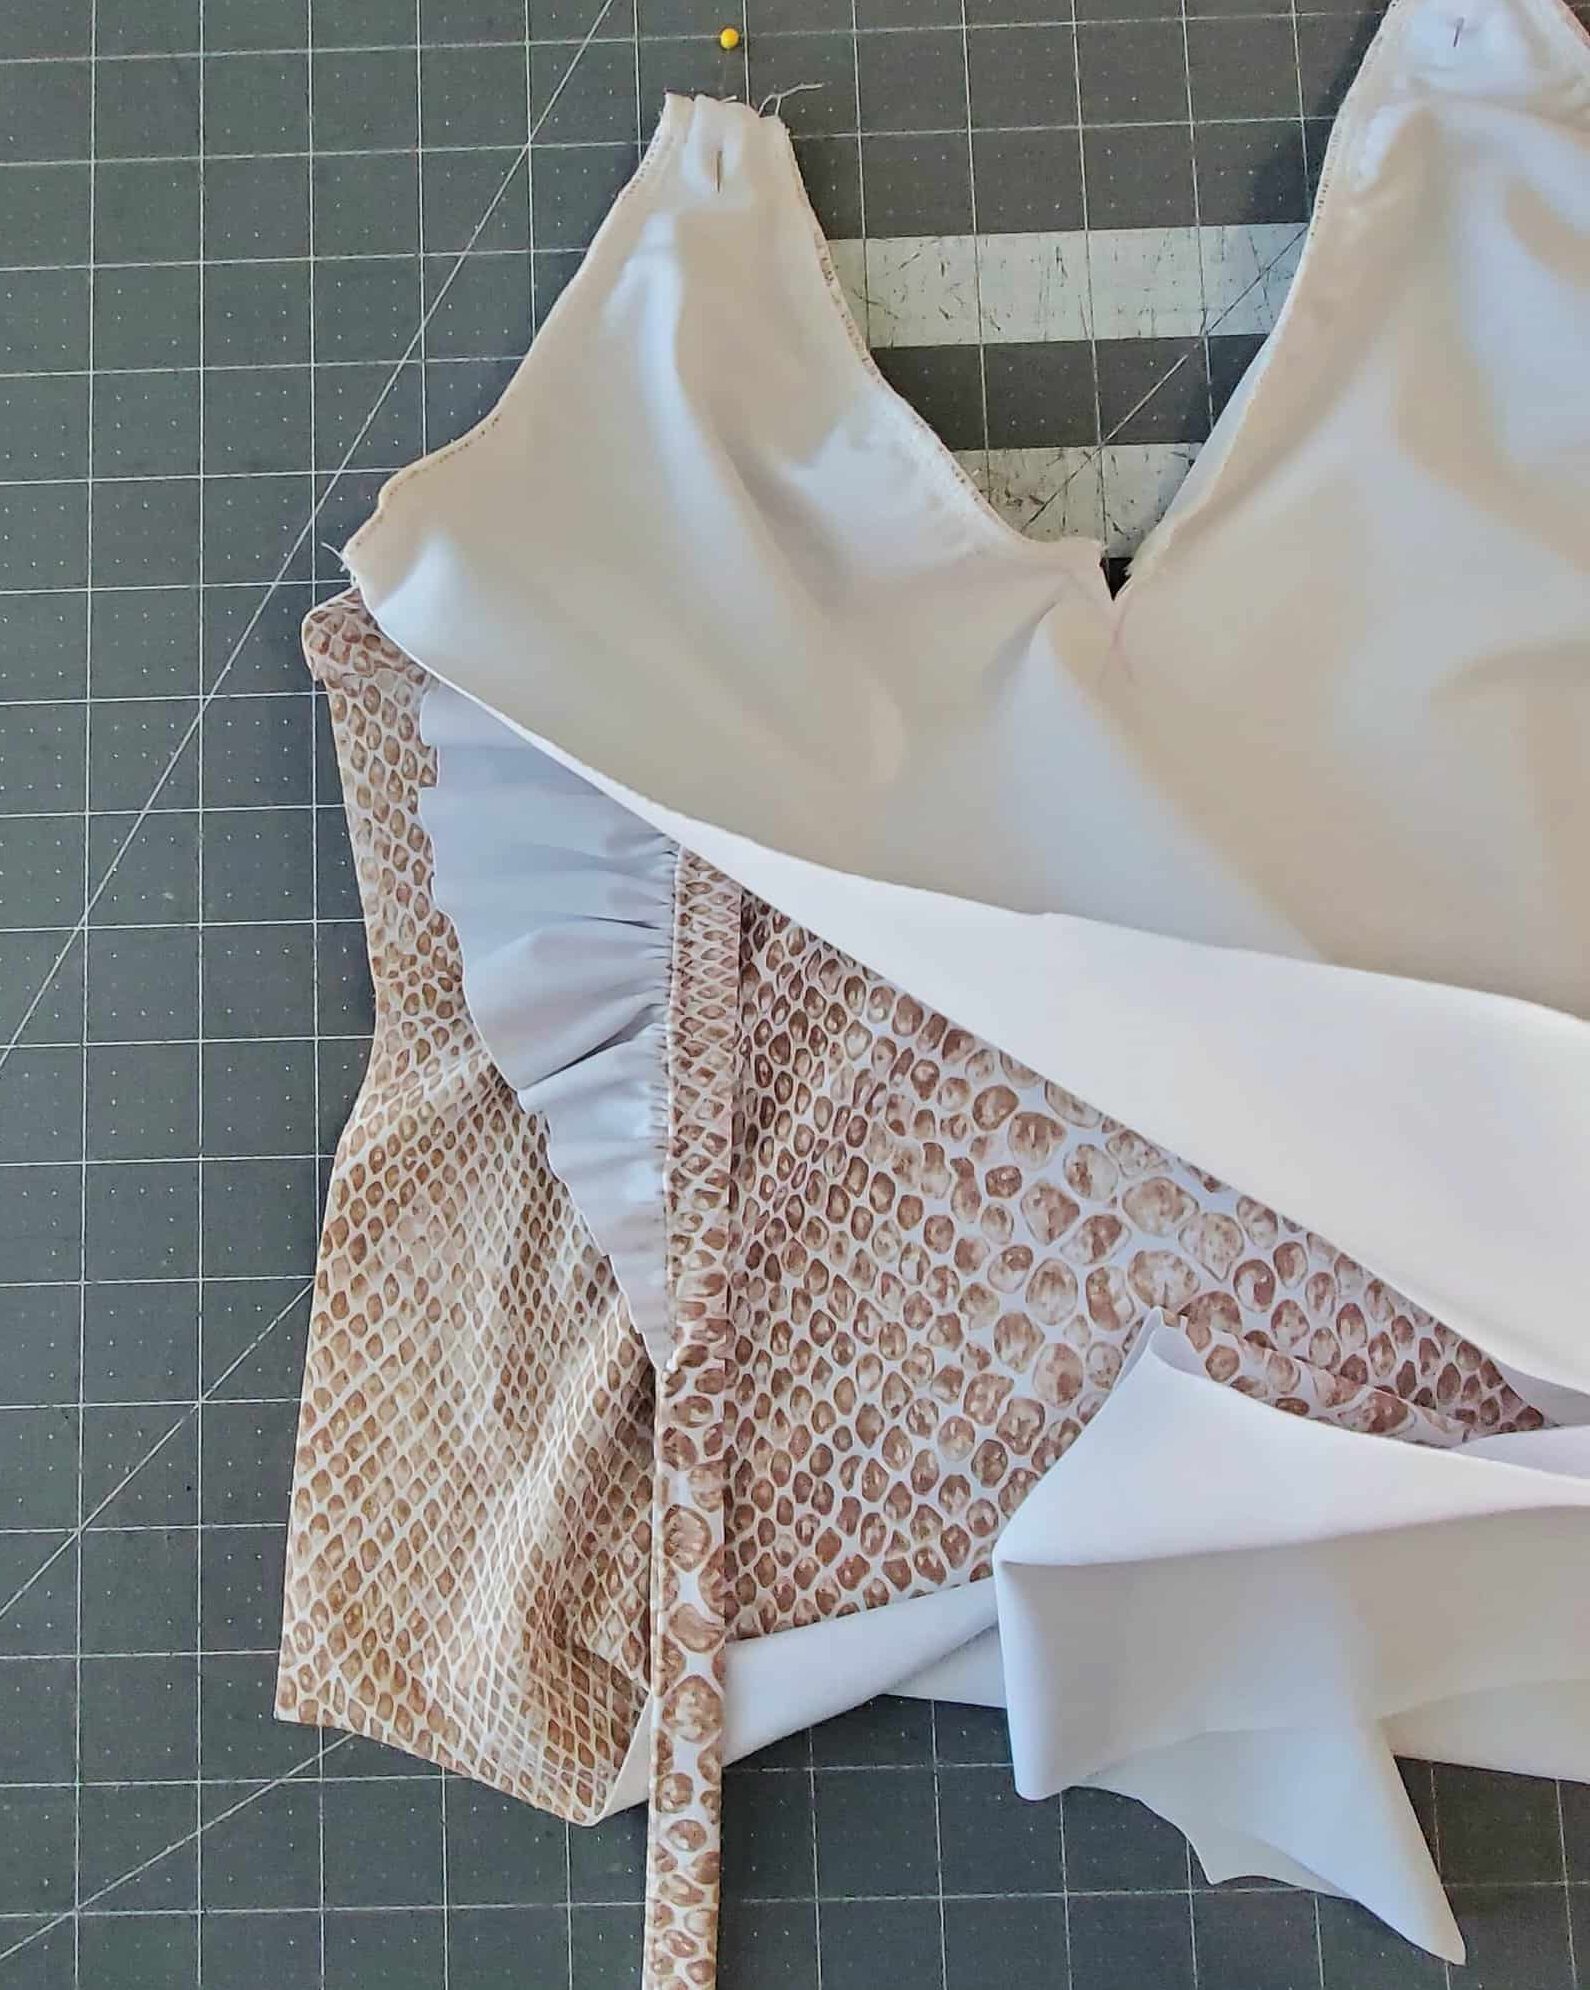
Stitch your strap closed by stitching along the edges using your favorite stretch stitch, enclosing your ruffle’s seam allowance and finishing your strap. You will have two straps, mirrored, and ready to attach per the instructions in the Venus tutorial!
Make sure you pay attention to the direction of the ruffle, as well as the print of your suit.
That’s it! Now you have the cutest ruffle straps! This would be very cute on a Venus bodysuit too, I will definitely be making more of these in bodysuit style this summer!
Catalina Hacks
Buckle Hack
This one is pretty simple, fun, and effective!
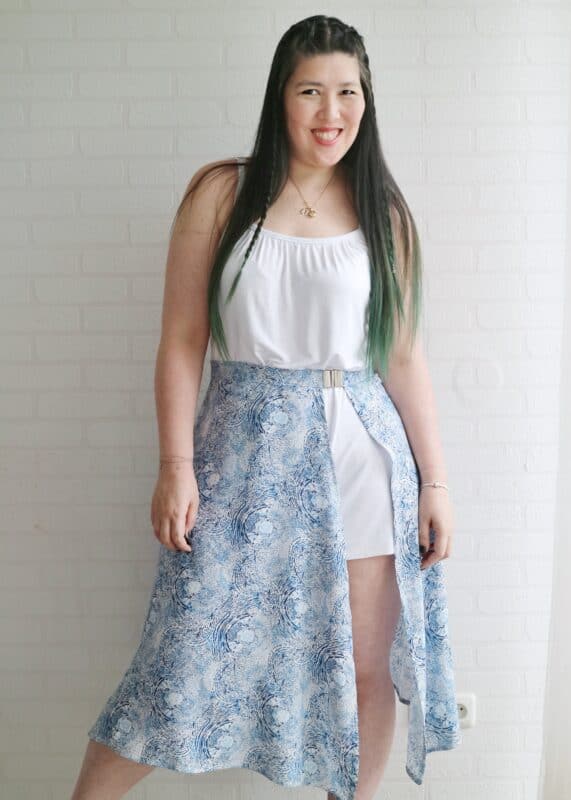
The fun part of this modification is that you can sew the pattern as is and decide which way to go afterward. Love the ties? Done and done!
Want to zhuzh it up a bit? Add a shiny buckle!
What you’ll need:
- Catalina wrap
- Buckle or closure of your choice
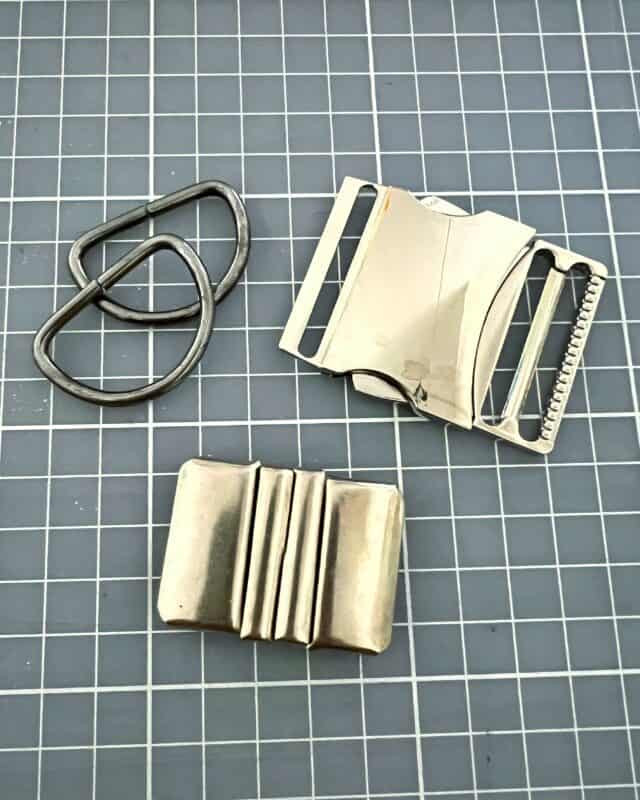
There are so many types of buckles and closures to choose from, and the hardest part of this whole hack I’m sure will be picking a favorite one. This was made easy for me, this time, as my online order didn’t arrive in time and my local shops had limited options. Here’s what I managed to gather.
Somethings to consider when choosing your favorite:
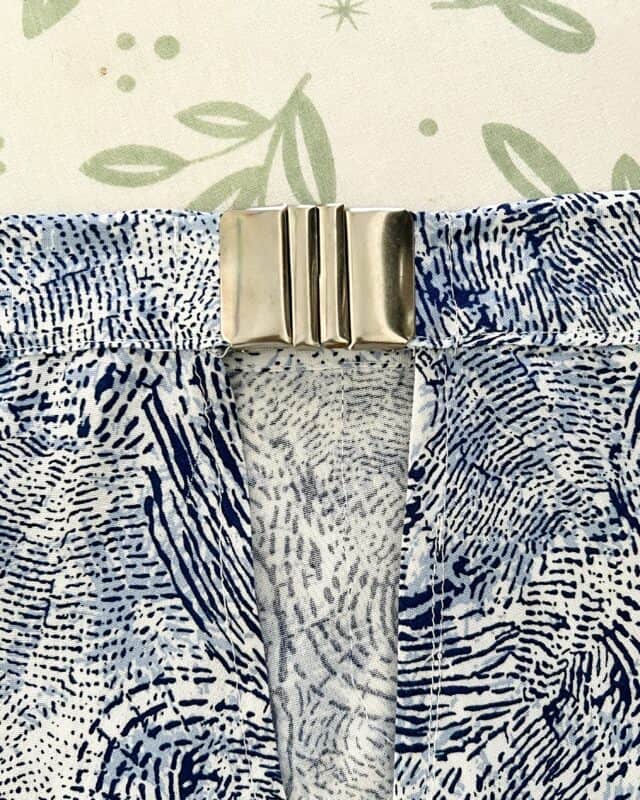
- The size of the buckle will dictate how open your Catalina will be.
The wider the buckle, the more leg you’ll show 😉 - Keep the weight of the buckle in relation to the fabric in mind.
You can use interfacing to help the fabric hold the weight a little better, but balance here is key.
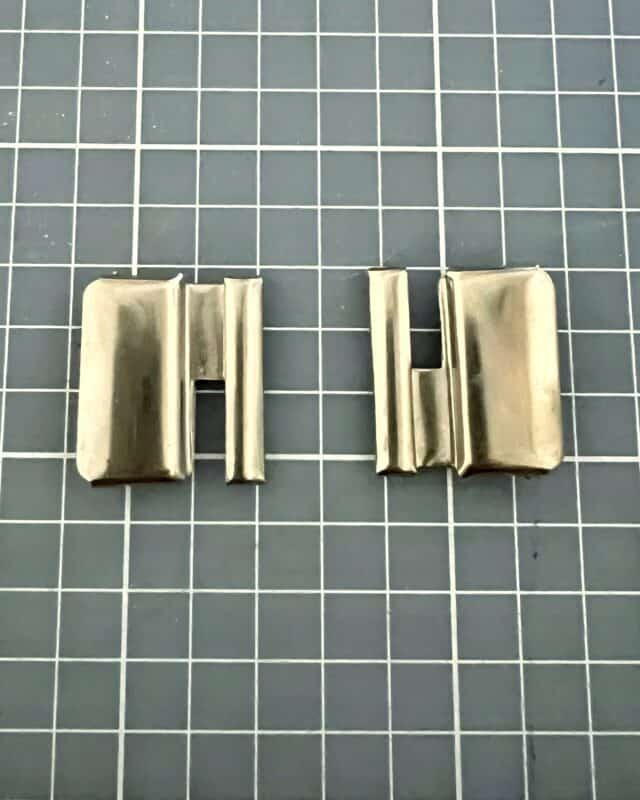
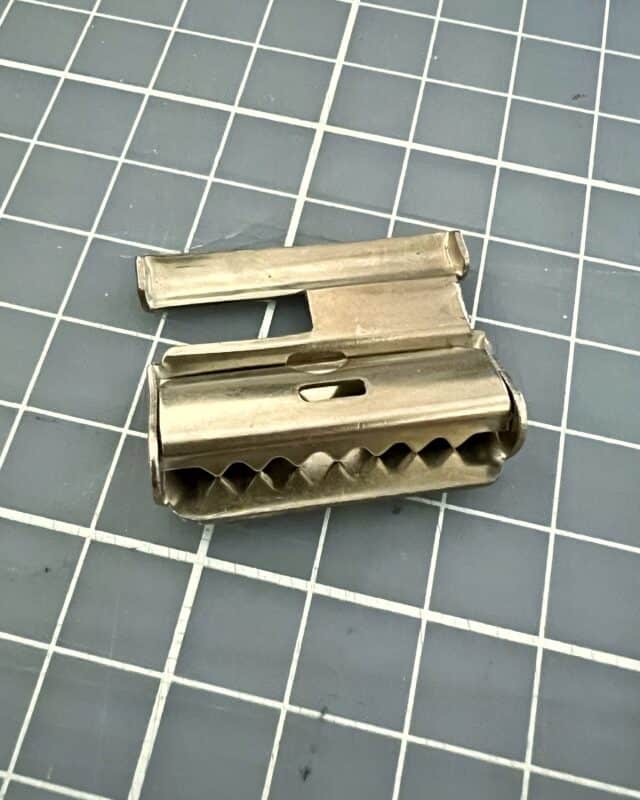
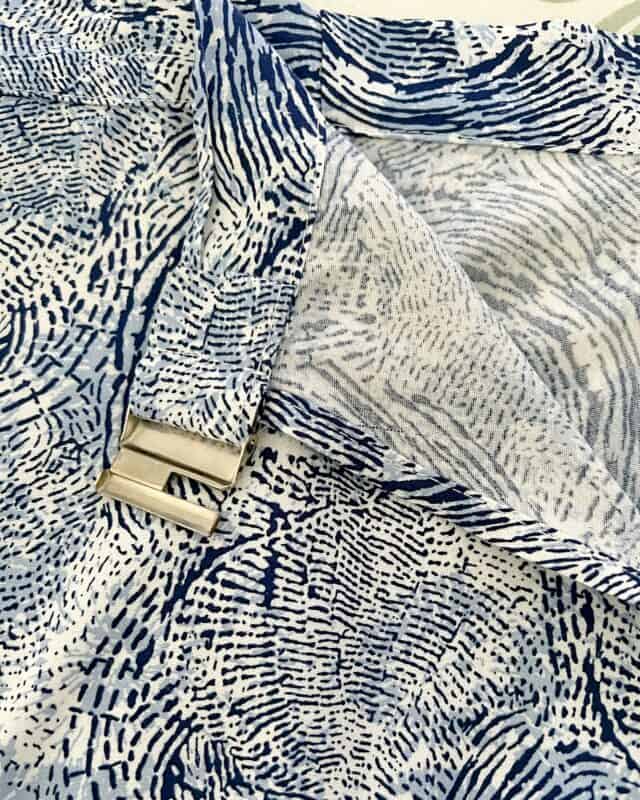
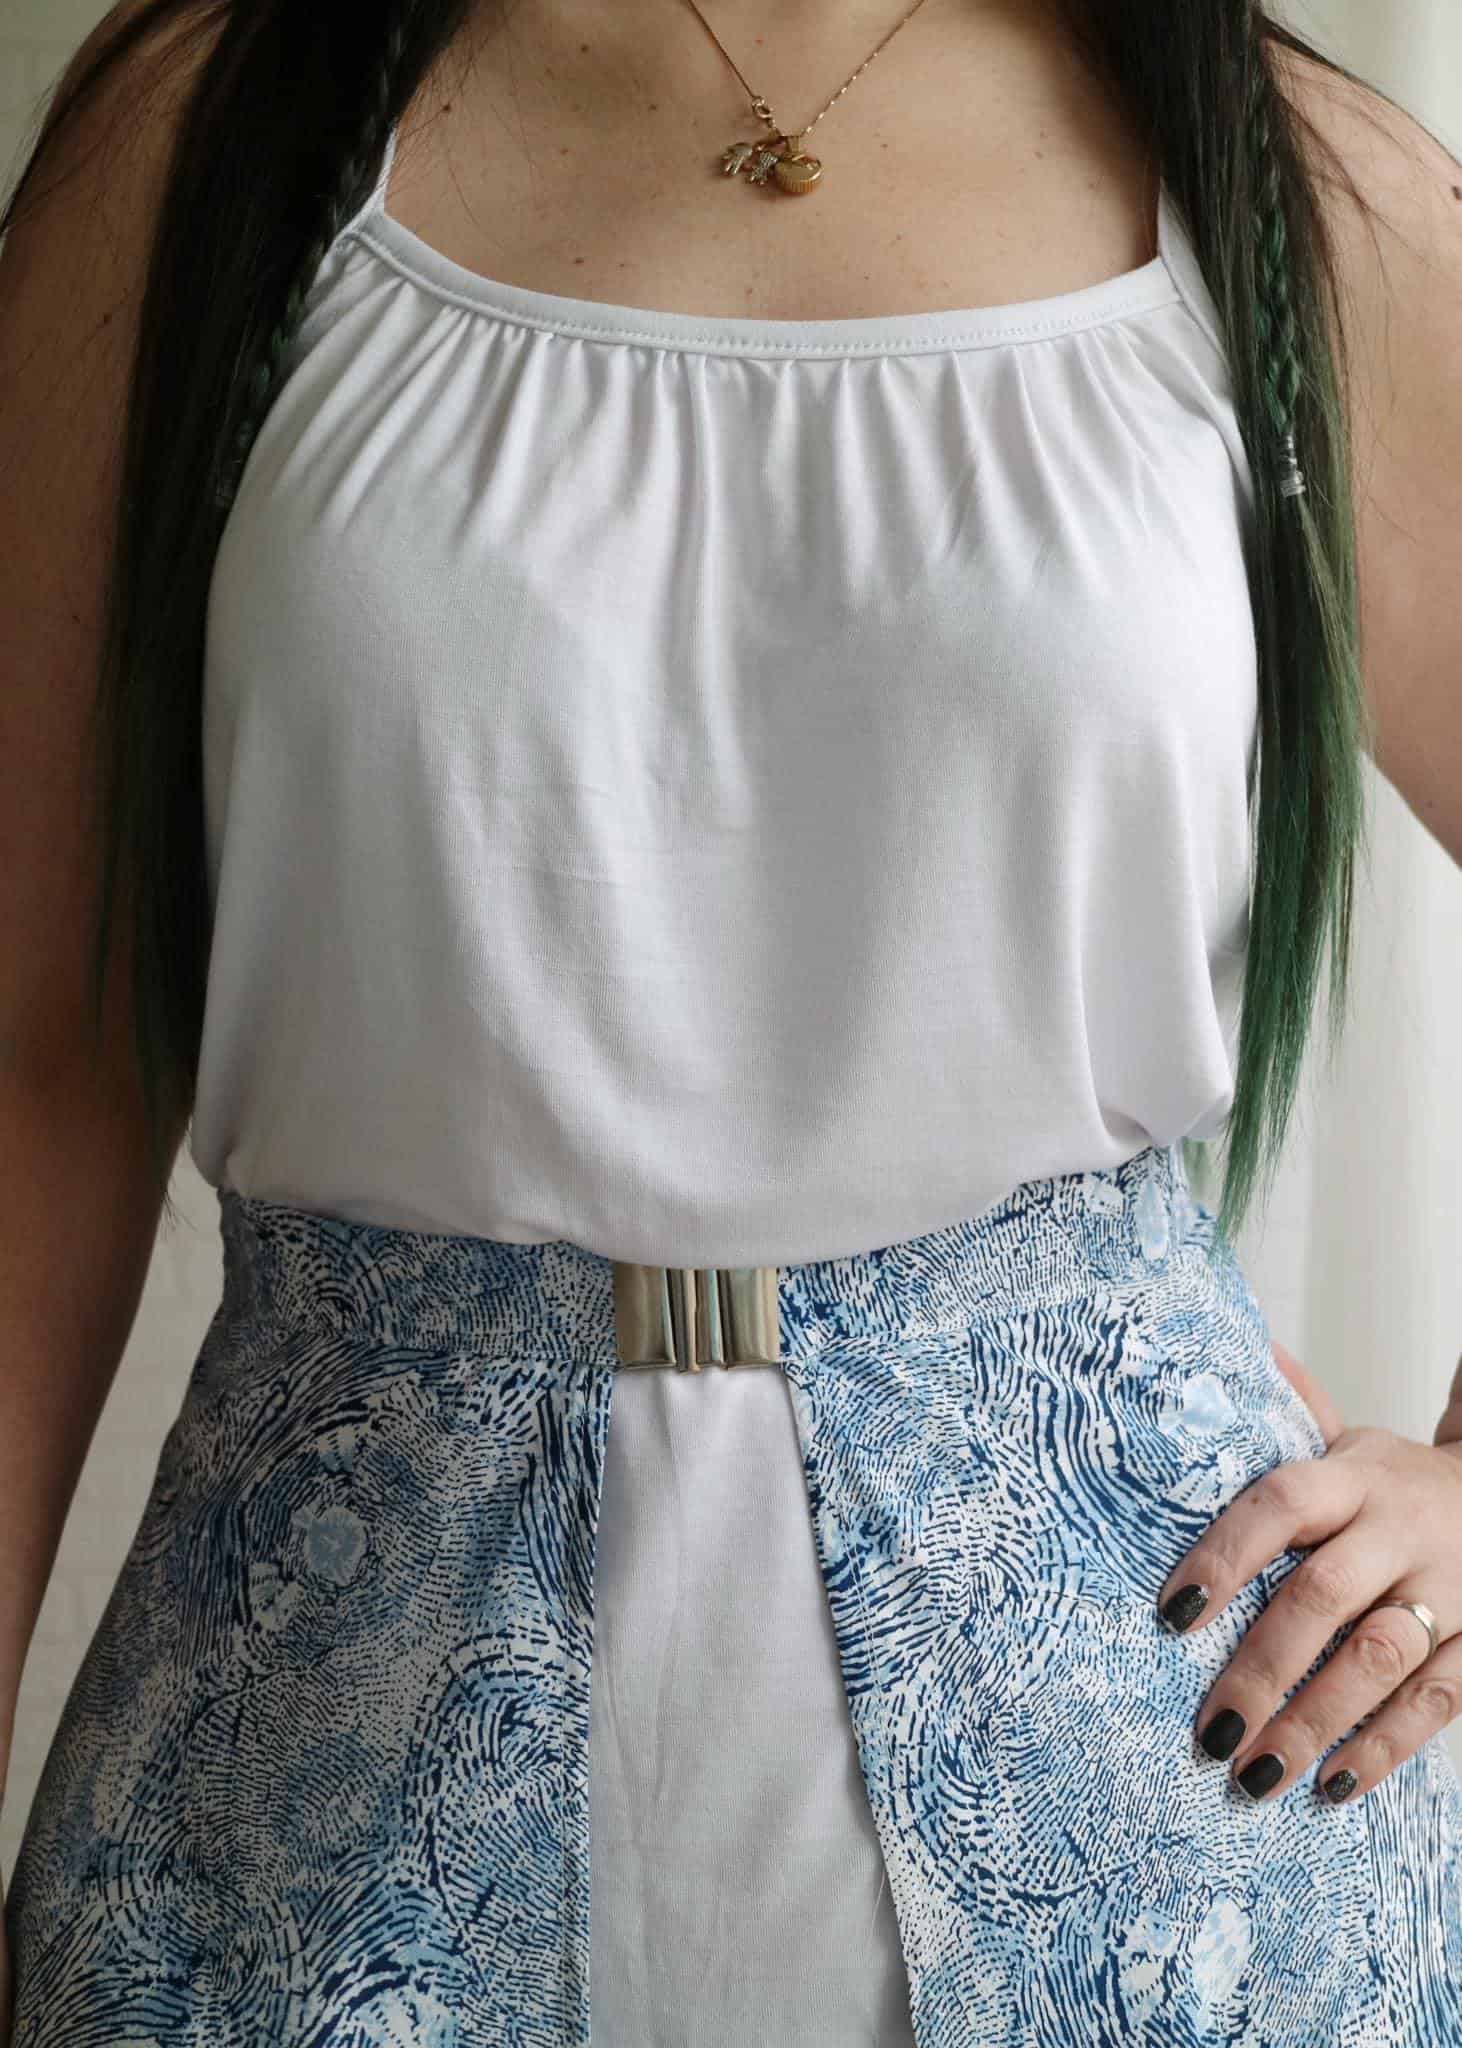
I’m using viscose for this one and opted to use this belt clasp.
This one has little teeth to grab onto the belt with no need to sew, but as it’s made to be paired with thicker materials, I didn’t trust it and sewed it in place anyways.
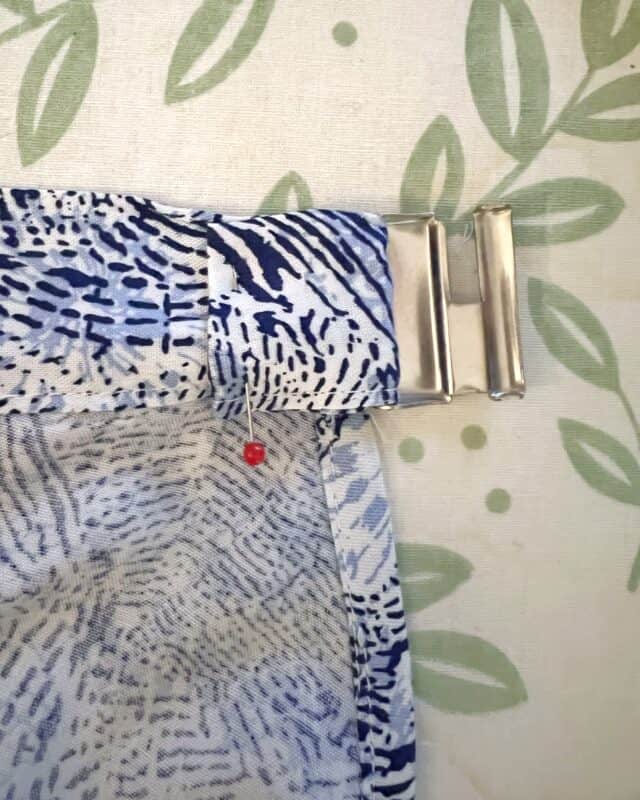
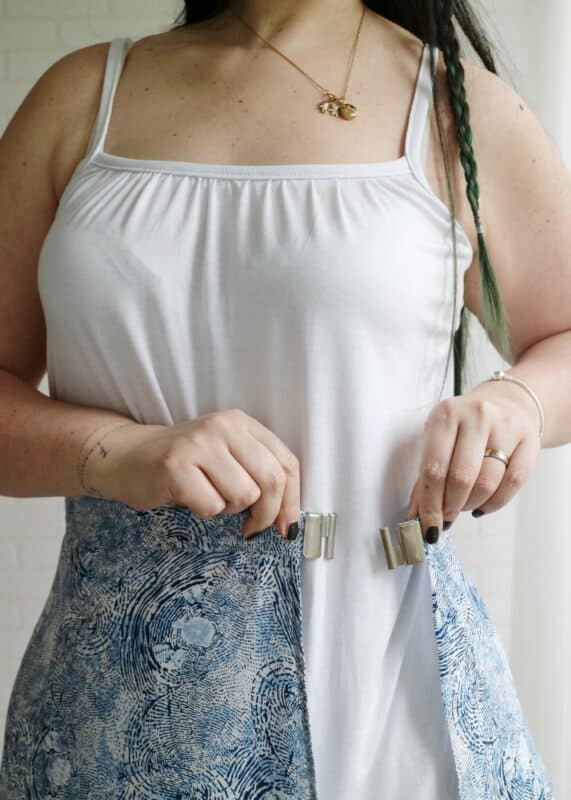
For this one, I needed to eliminate both sides of the waistband ties.
Just thread the buckle through the tie, measure how much you’ll need, chop the excess, and sew it in place. Easy peasy!
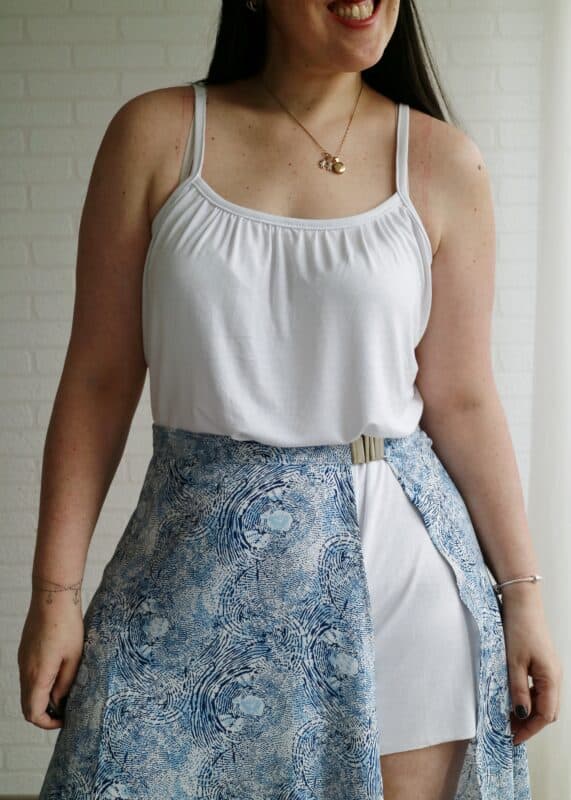
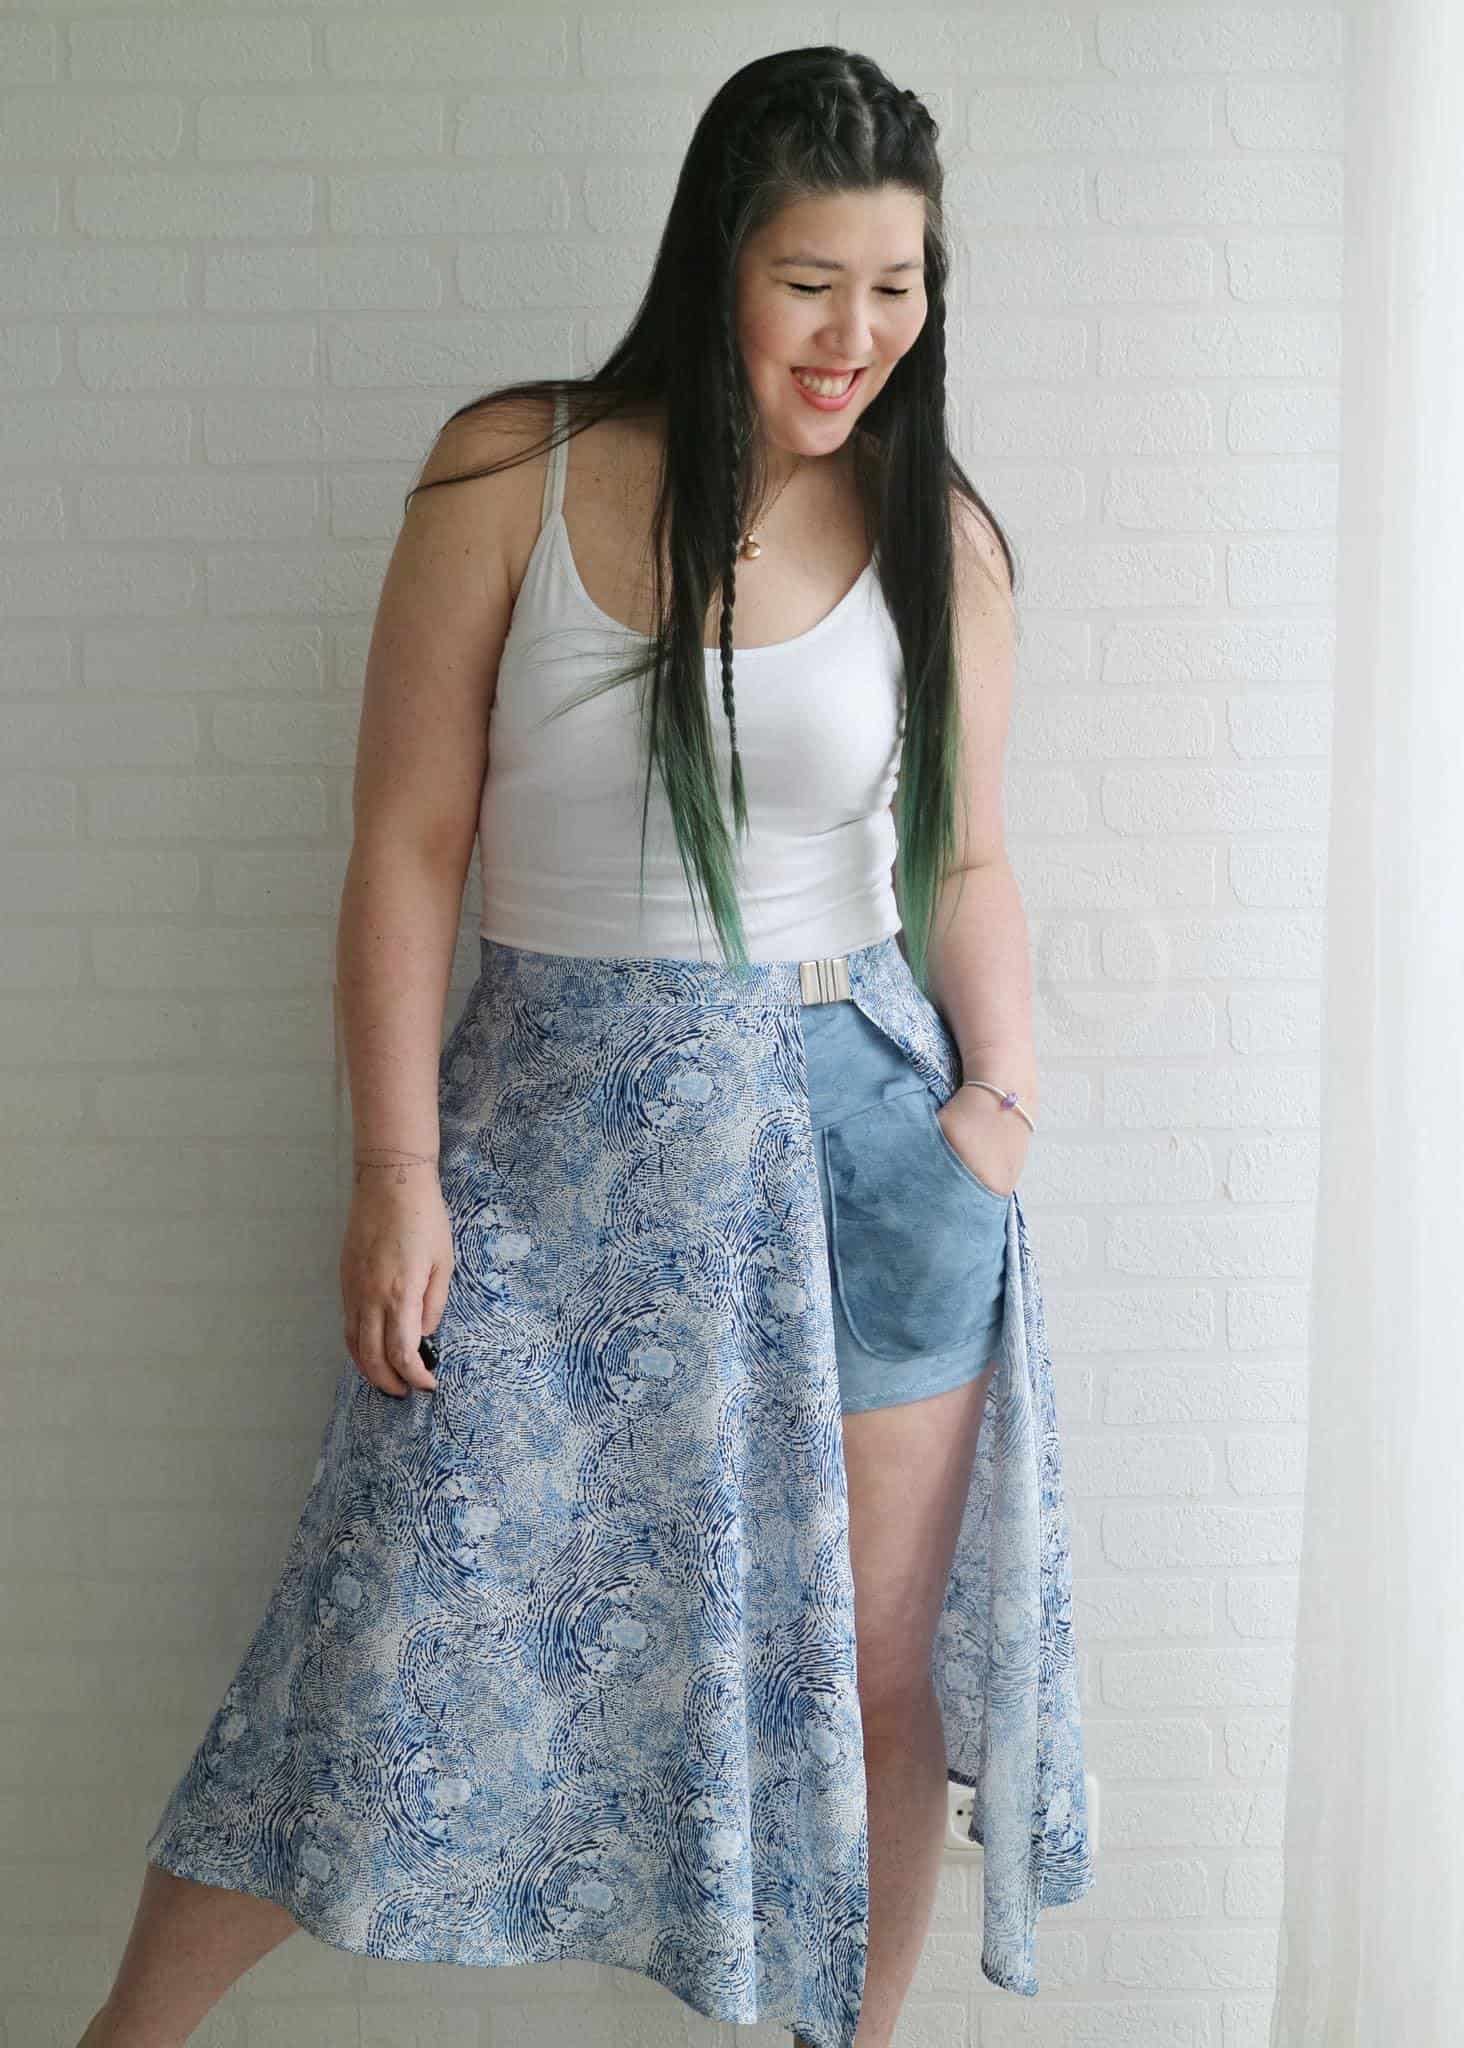
Didn’t I say easy and effective? I LOVE the look of this!
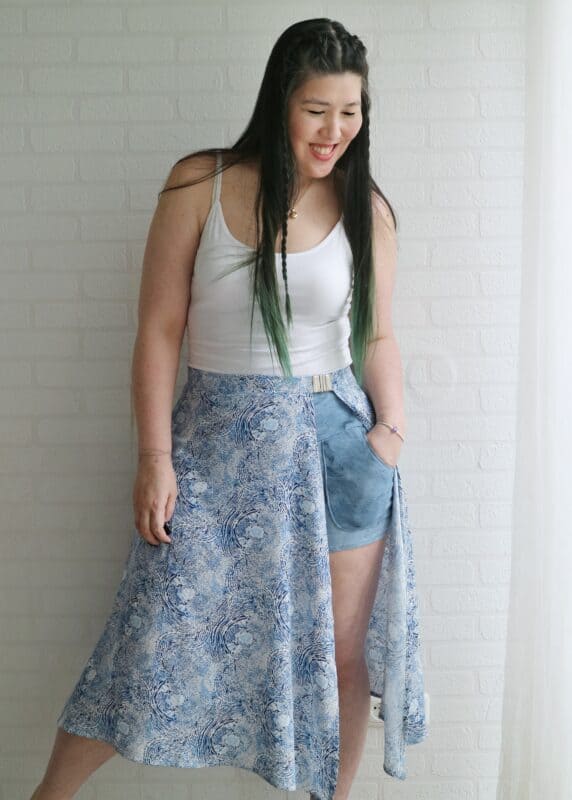
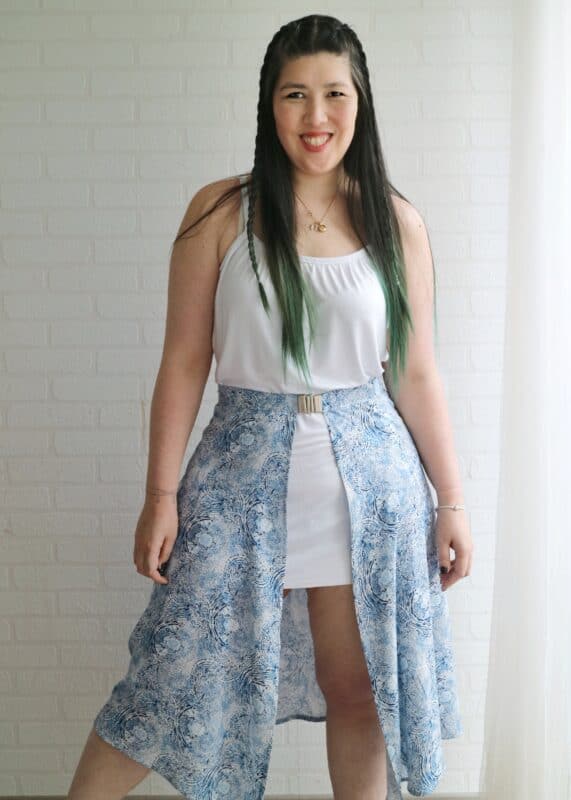
So much so that as I don’t have too many opportunities to wear a swimsuit throughout the year, this Catalina will be worn as an overskirt instead.
I paired it with a Willow dress that I cut to be mini length and with a pair of Finley shorties that ended up a bit too short on the back side (fabric choice error, not enough vertical stretch haha).
The fun part is that it can be worn with the opening to the side as intended or to the center for a variation look. I like center for the dress and side for the shorties, what do you think?
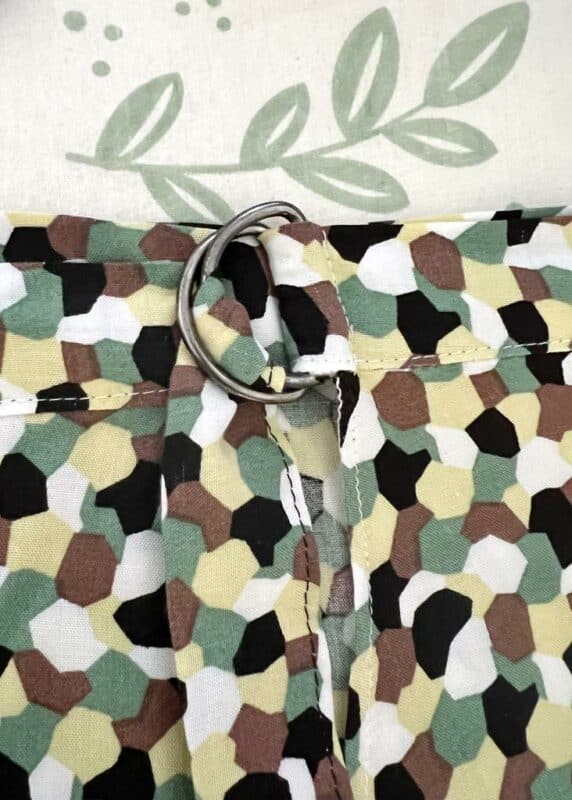
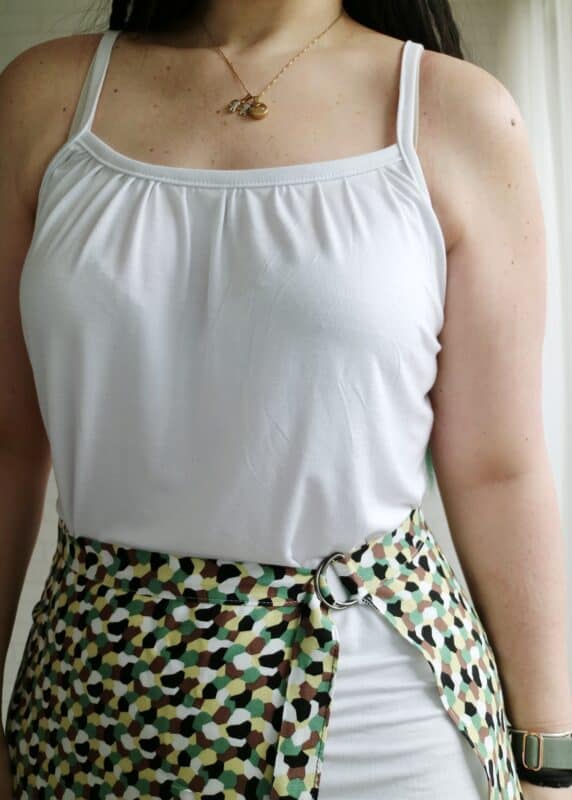
I also went ahead and added D-rings to my muslin wrap as I was curious to know if it would work and hold the wrap in place. It absolutely does!
The only thing is that I’d only use this option for an actual swimsuit wrap and the tie may slip loose with movement and that would be annoying when running errands or so.
And remember, before you go a-chopping, that for this type of closure, both rings go on one side. So leave the other side tie as is. 😉
That’s it.
Have fun making all the Catalina wraps!!
xxx, Livia
We can’t wait to see your Resort vibes! Don’t forget to share with us on Insta, in our Facebook group, or over on TikTok!









Leave a Reply