
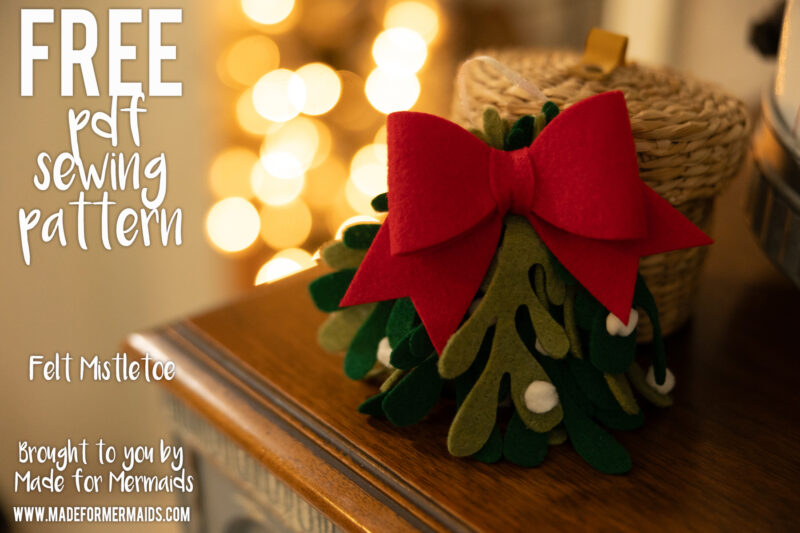
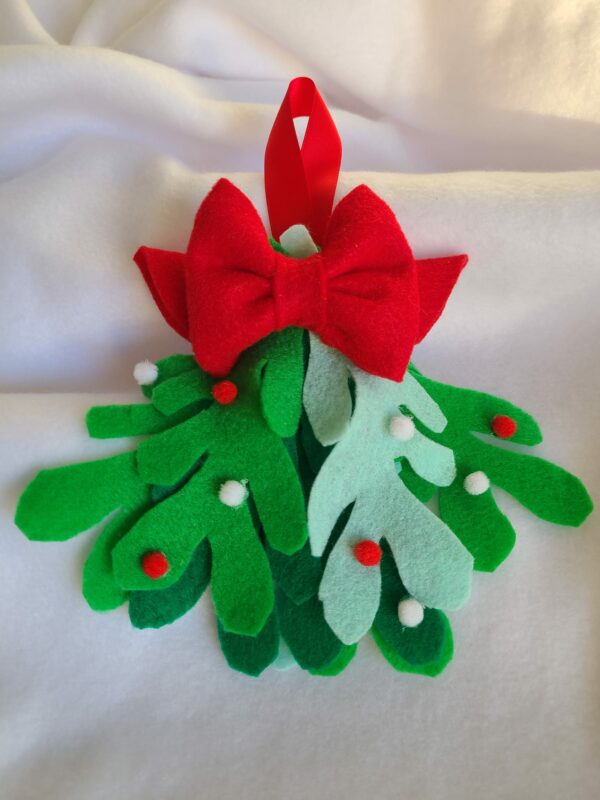
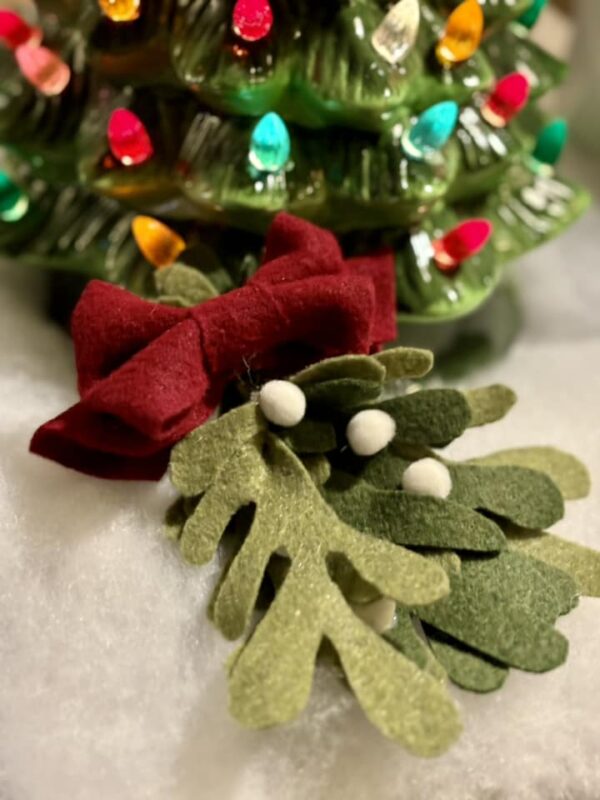
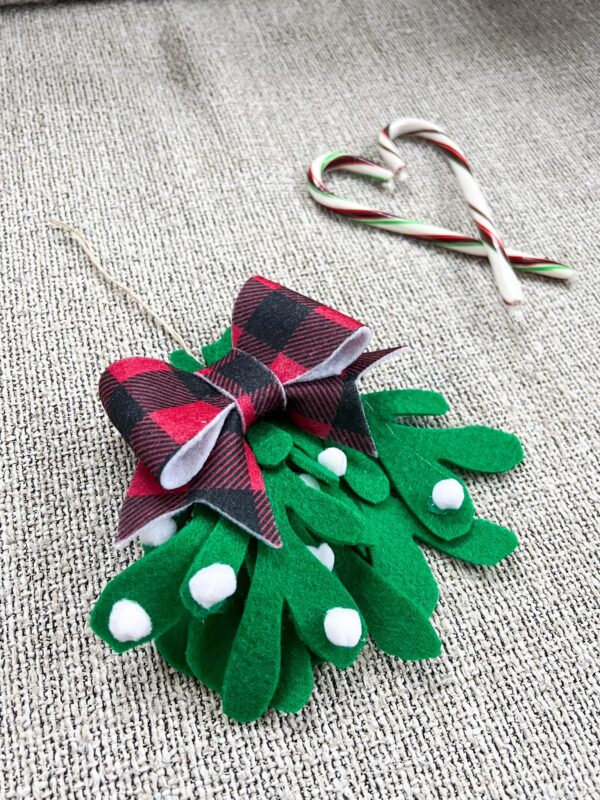
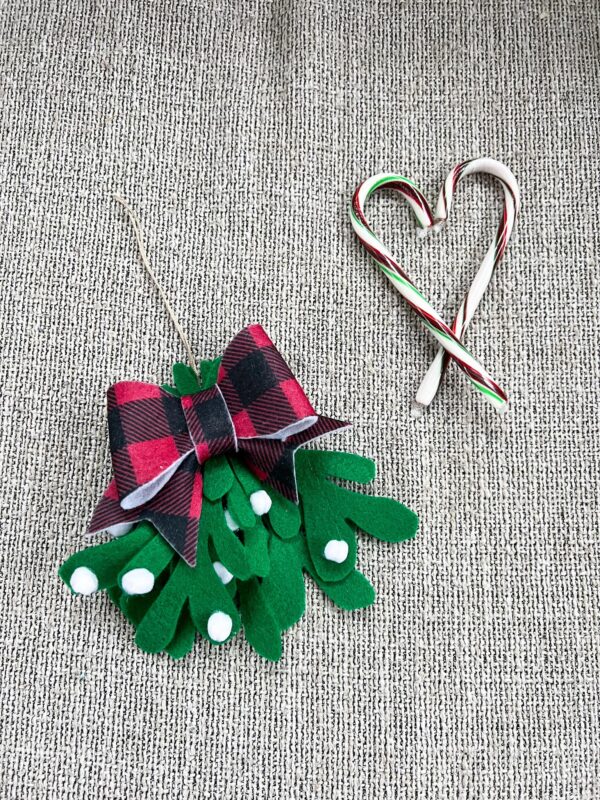
We hope you’ll meet us under the Felt Mistletoe for Day 4! Hosting a dinner party? This would be so cute with our cloth napkins or table runner as part of your table setting, or with our fabric gift bags as a gift topper. These also look so cute on your tree as ornaments with the retro, alphabet, or nativity ornaments we’ve done in past years.
SUPPLIES:
- Felt – 3 mm felt is recommended as it will hold its shape better than thinner felt; American Felt and Craft has excellent quality felt and beautiful ranges of colors
- Ribbon or twine
- Optional – pom poms, sequins, beads, embroidery floss, etc. for berries
LET’S GET STARTED!
Step 1: PREPPING
Go grab the pattern here! The pattern is 100% free, but you do need to add it to your cart and checkout. Then, it will always be available to download from your account. The pattern is a no-trim pattern; if you need help putting the pattern together, pop over to the faqs and troubleshooting page or ask in our Facebook group.
The files also include cut files (SVG, DXF, & PNG fils) in a zipped folder if you prefer to use your cutting machine to cut the pieces!
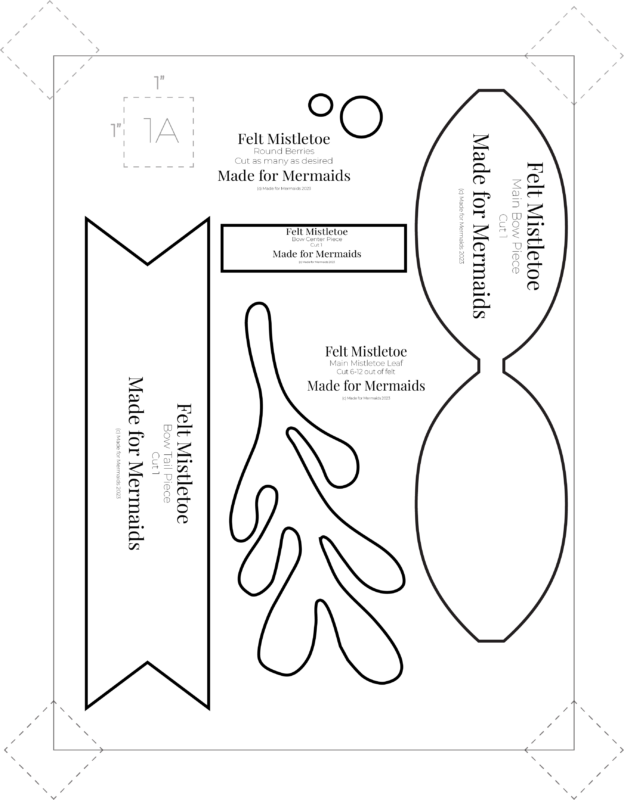
Print and assemble the pattern. Alternatively, you can use the projector file if you’re using a projector. Pattern layout below:
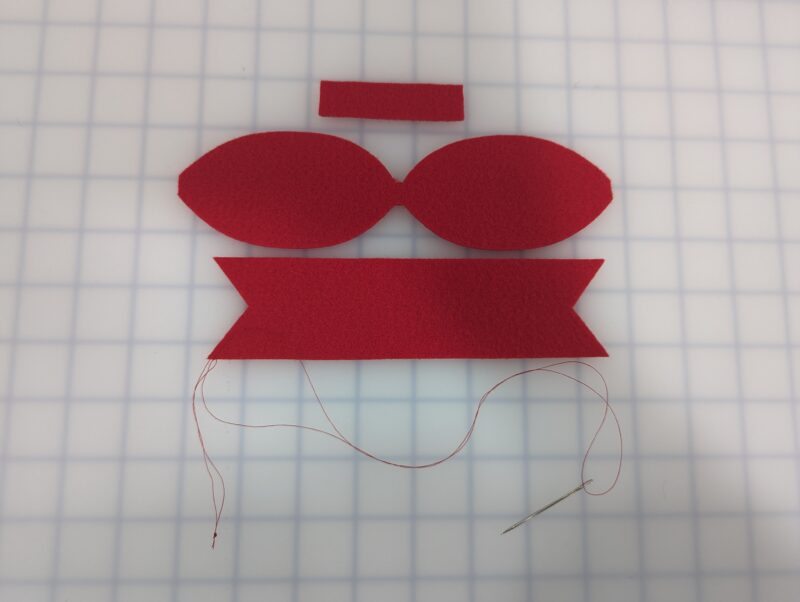
Step 2: CUTTING
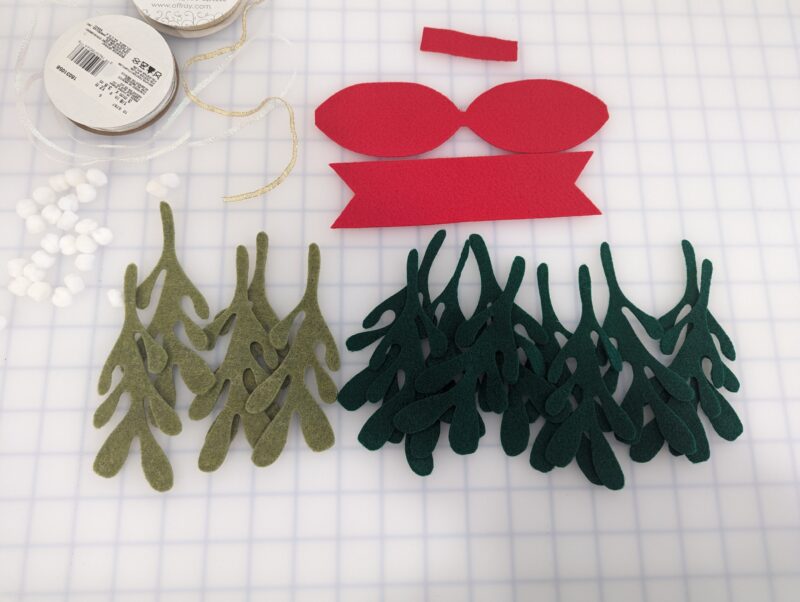
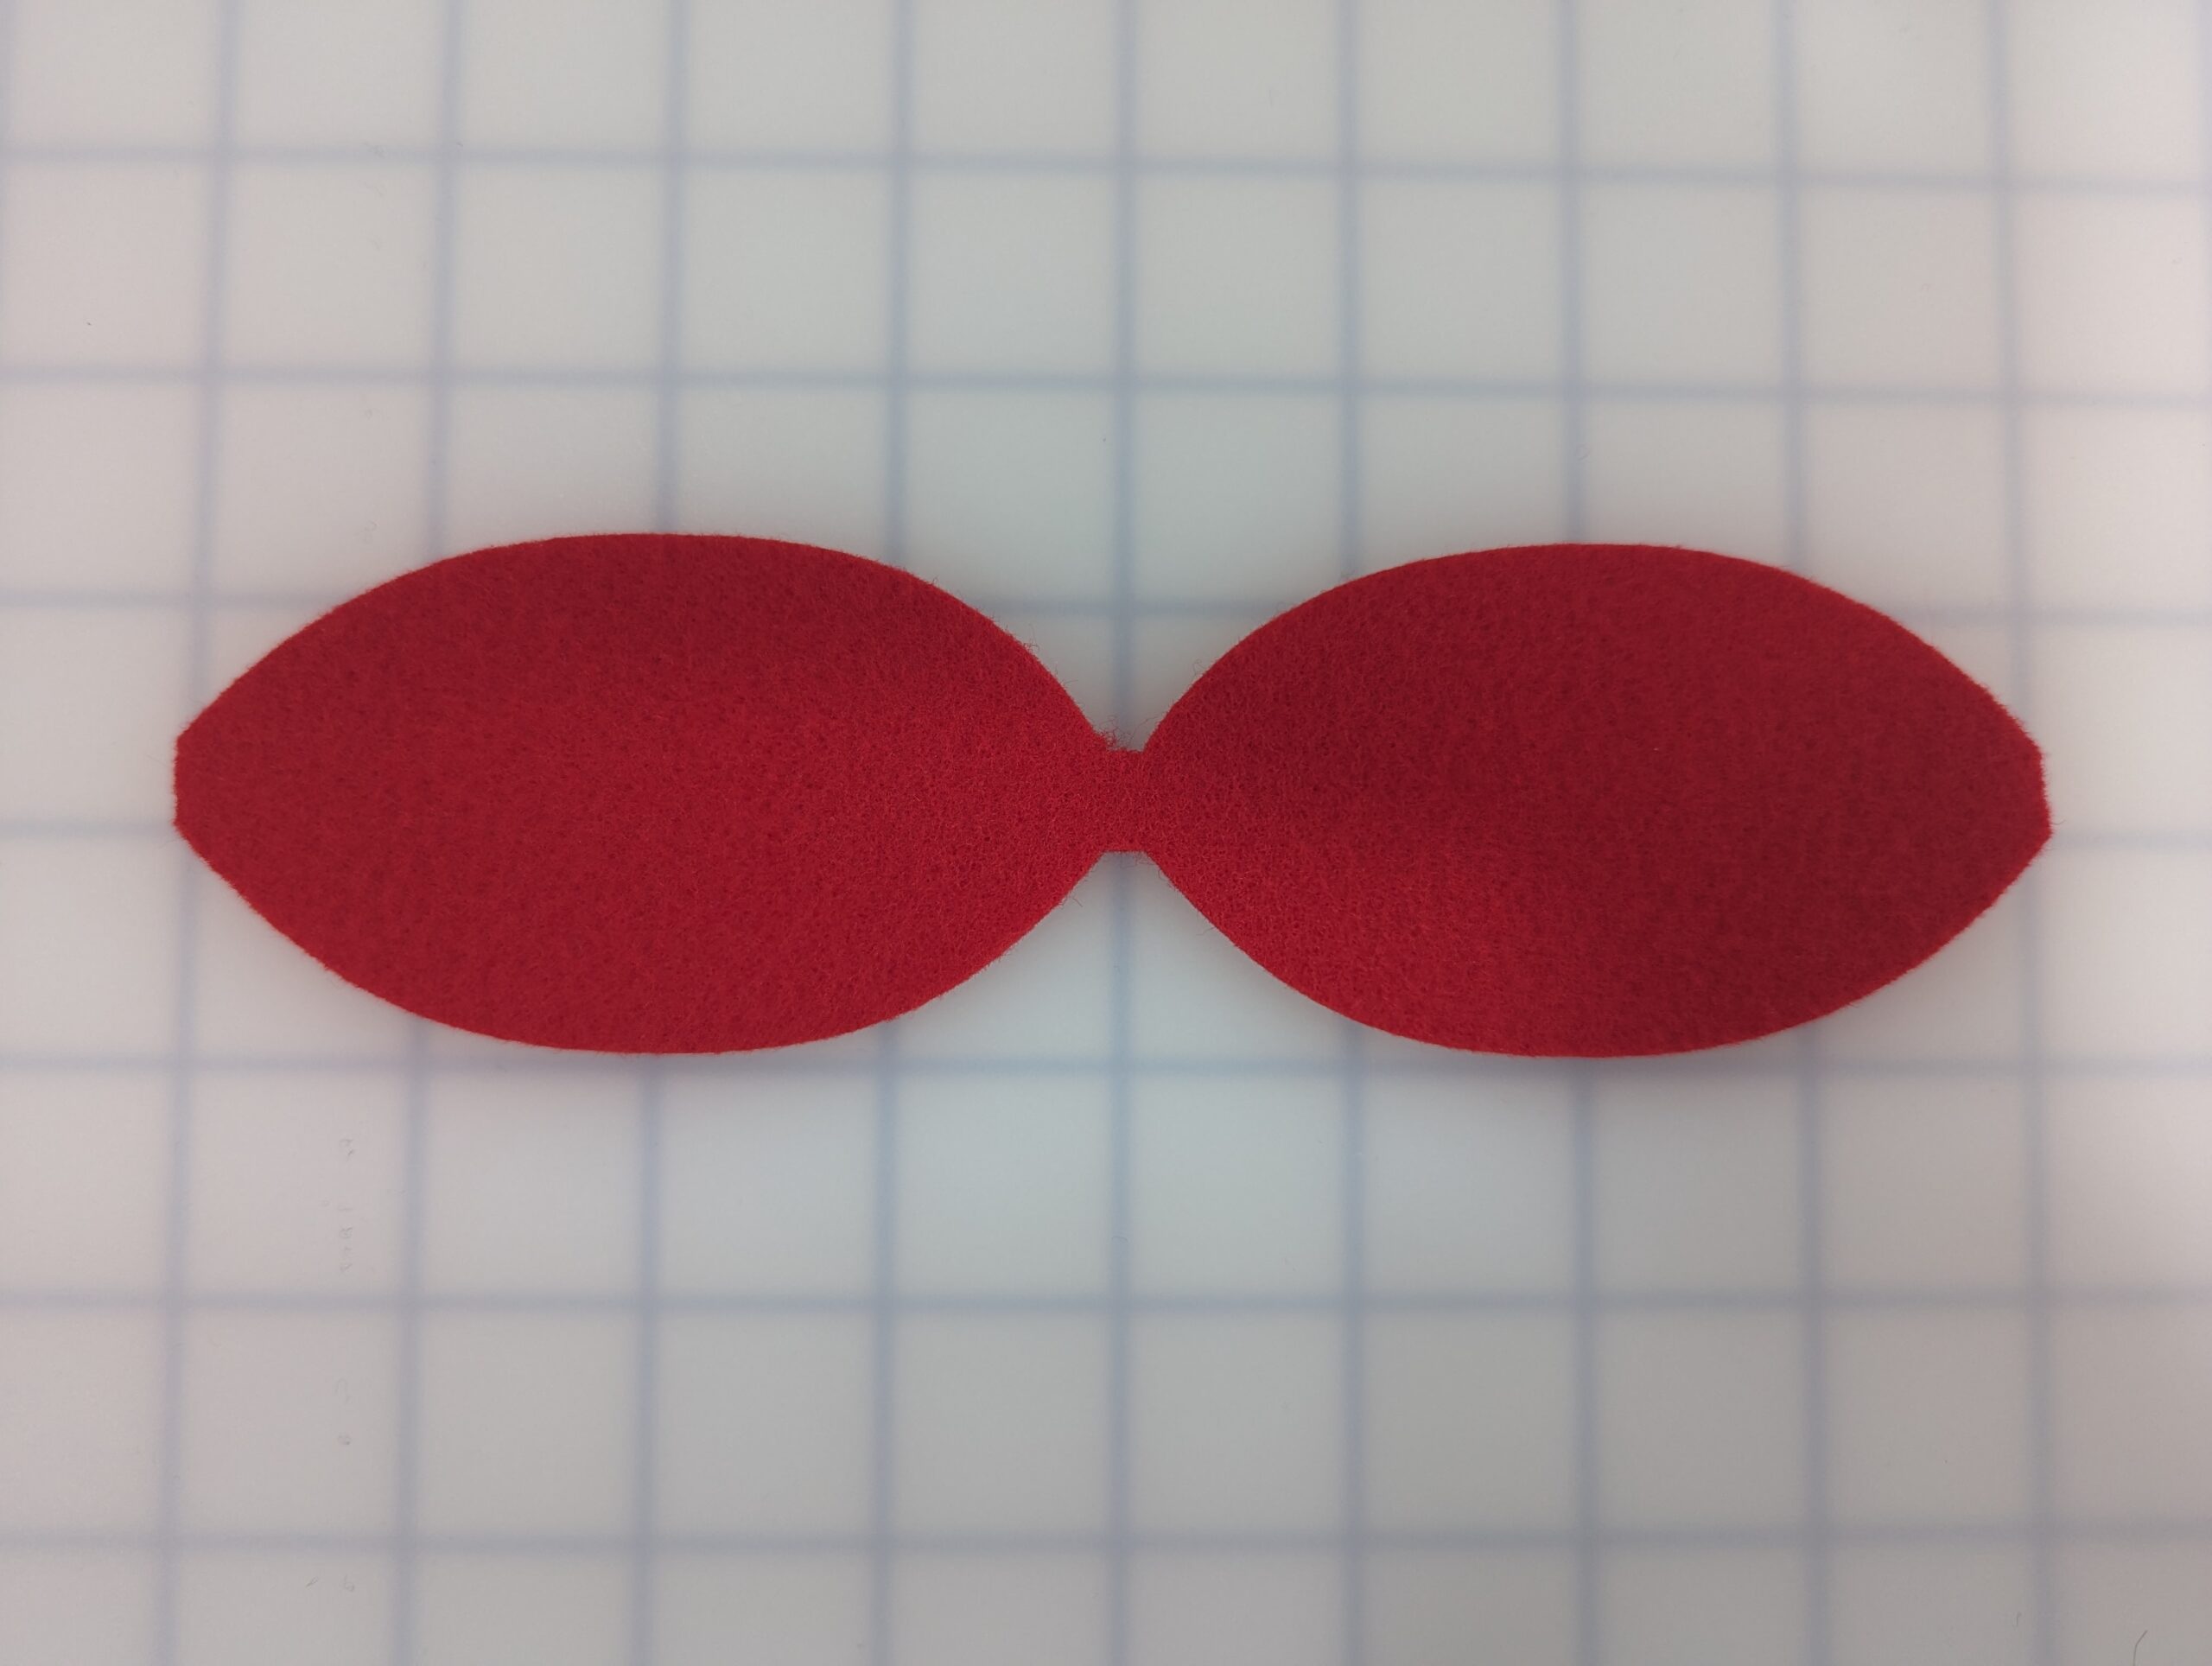
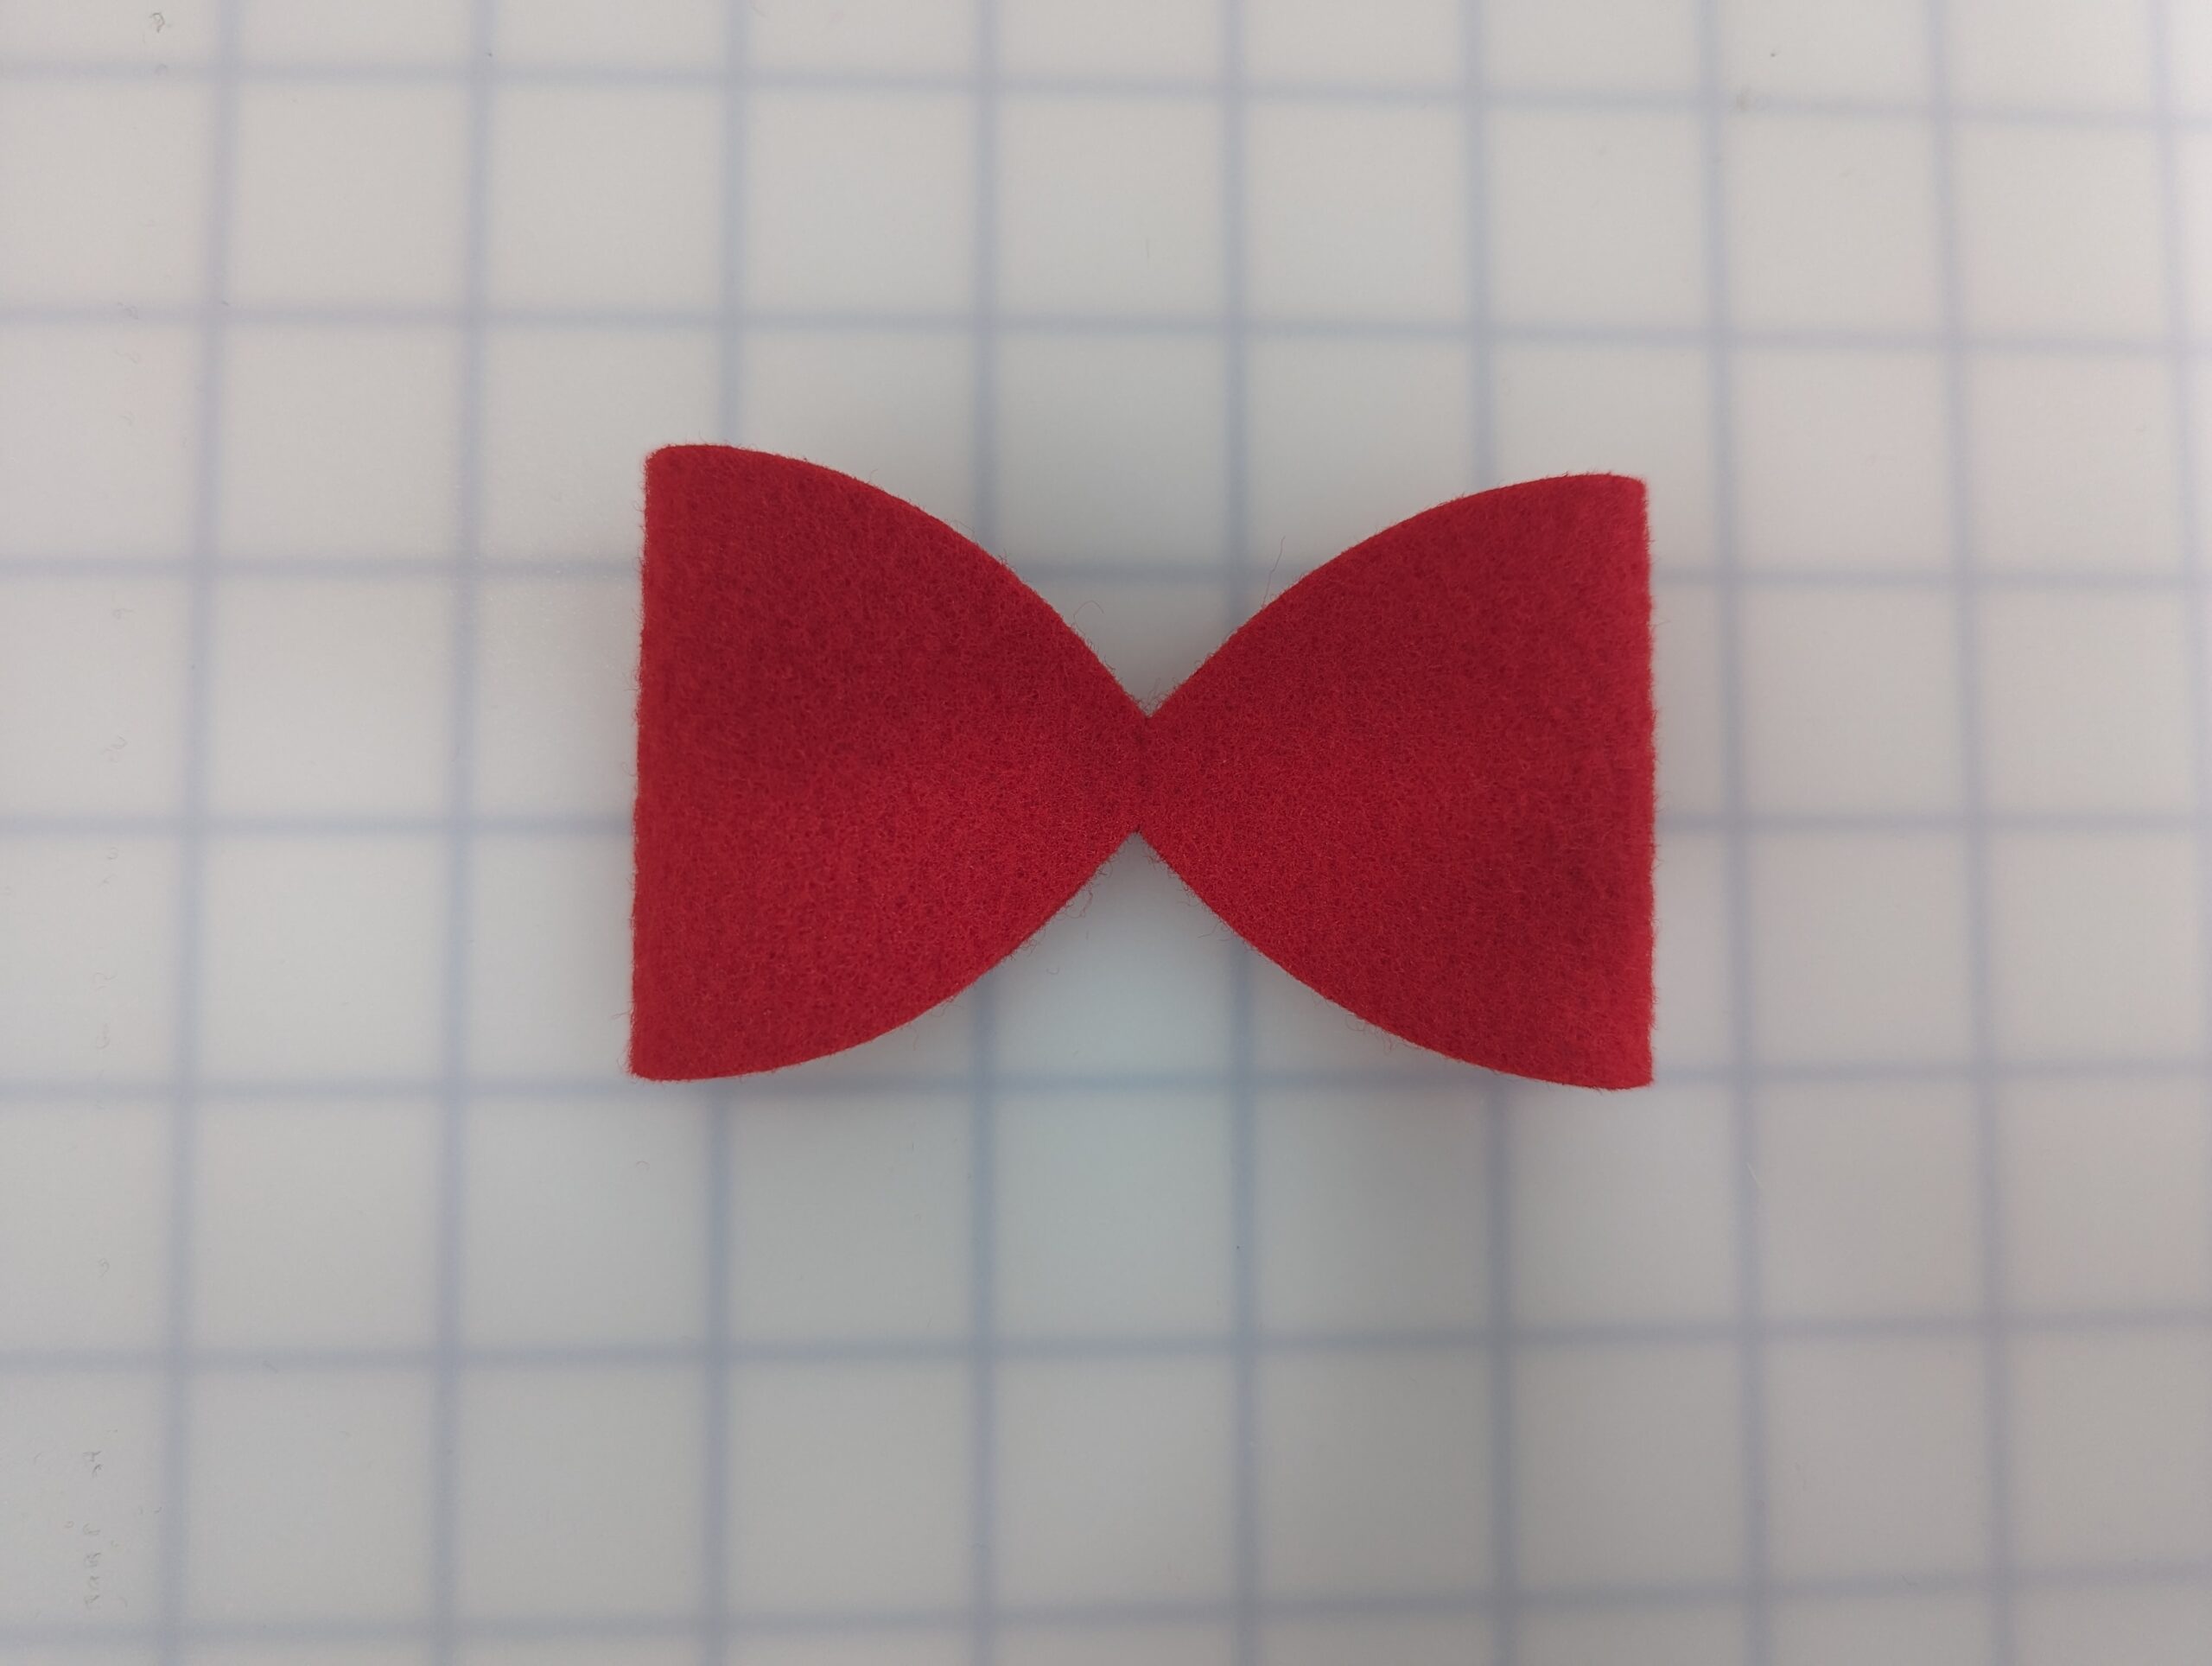
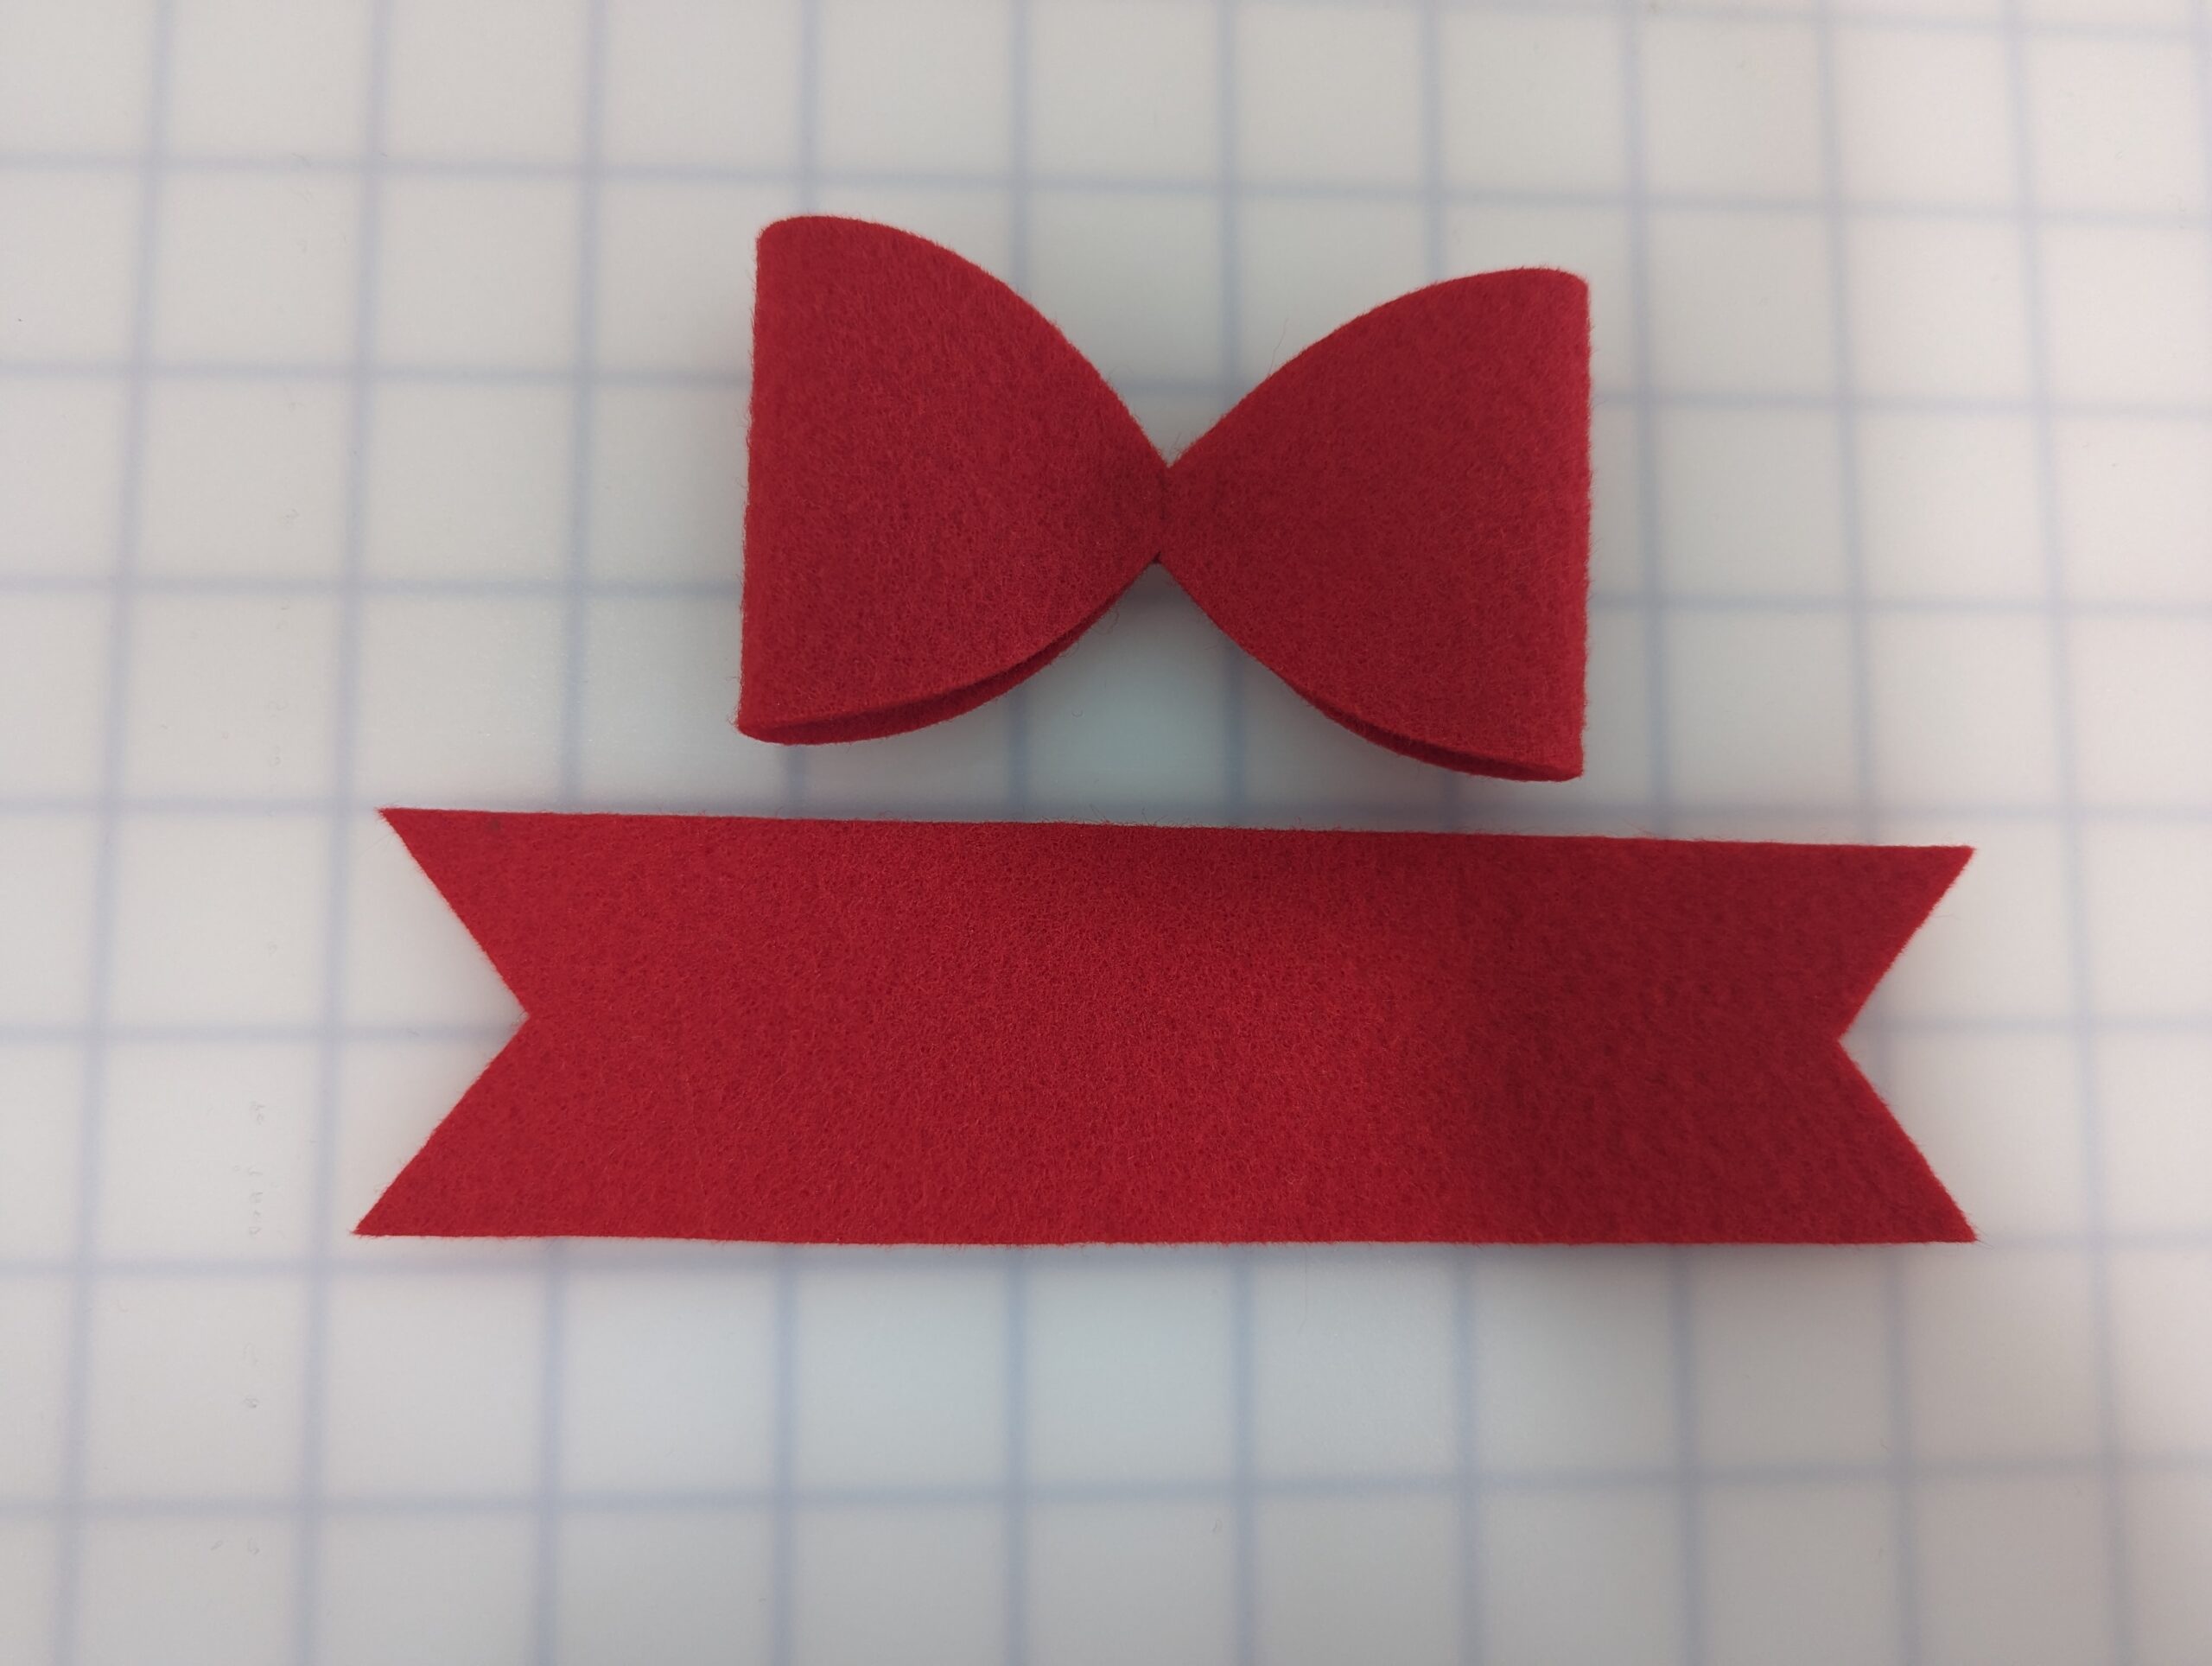
For the bow, cut one tail piece, one main piece, and one center piece.
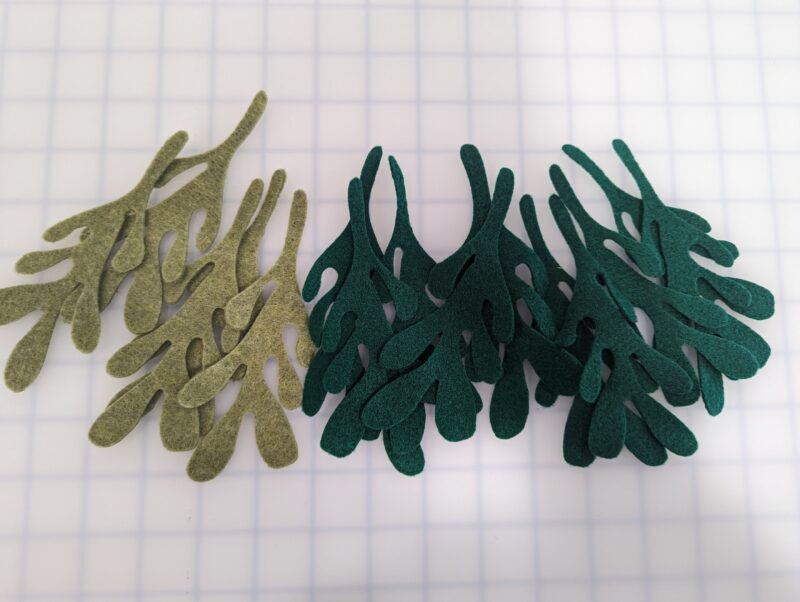
For the mistletoe, cut leaves based on your desired fullness. If you use a thinner felt, you may need more. A thicker felt may only require 6-12 leaves. You can cut berries out of felt if desired, or you can use other embellishments if you prefer.
You will also need to cut a short piece of ribbon or twine.
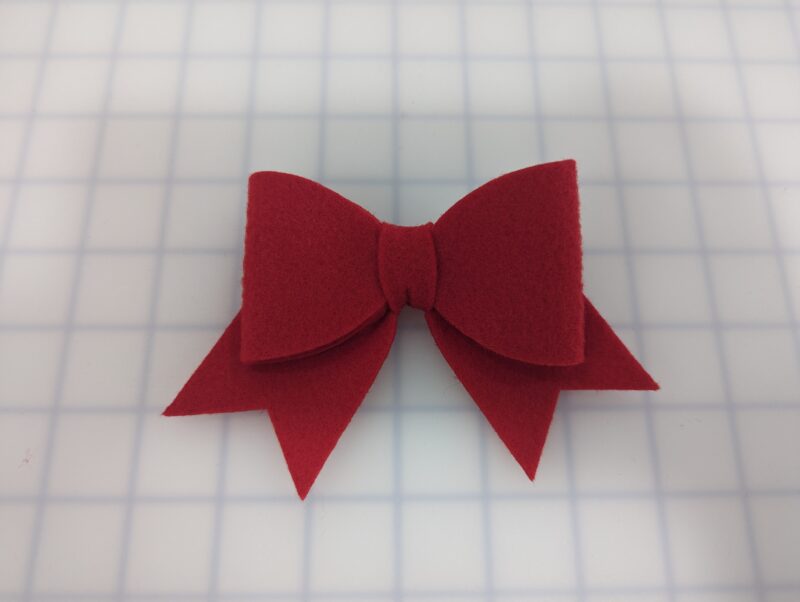
Step 3: BOW
First, we’ll assemble the bow. You’ll need the tail, center, and main, as well as needle and thread. NOTE – You could simply glue together if you prefer, using hot glue or fabric glue.
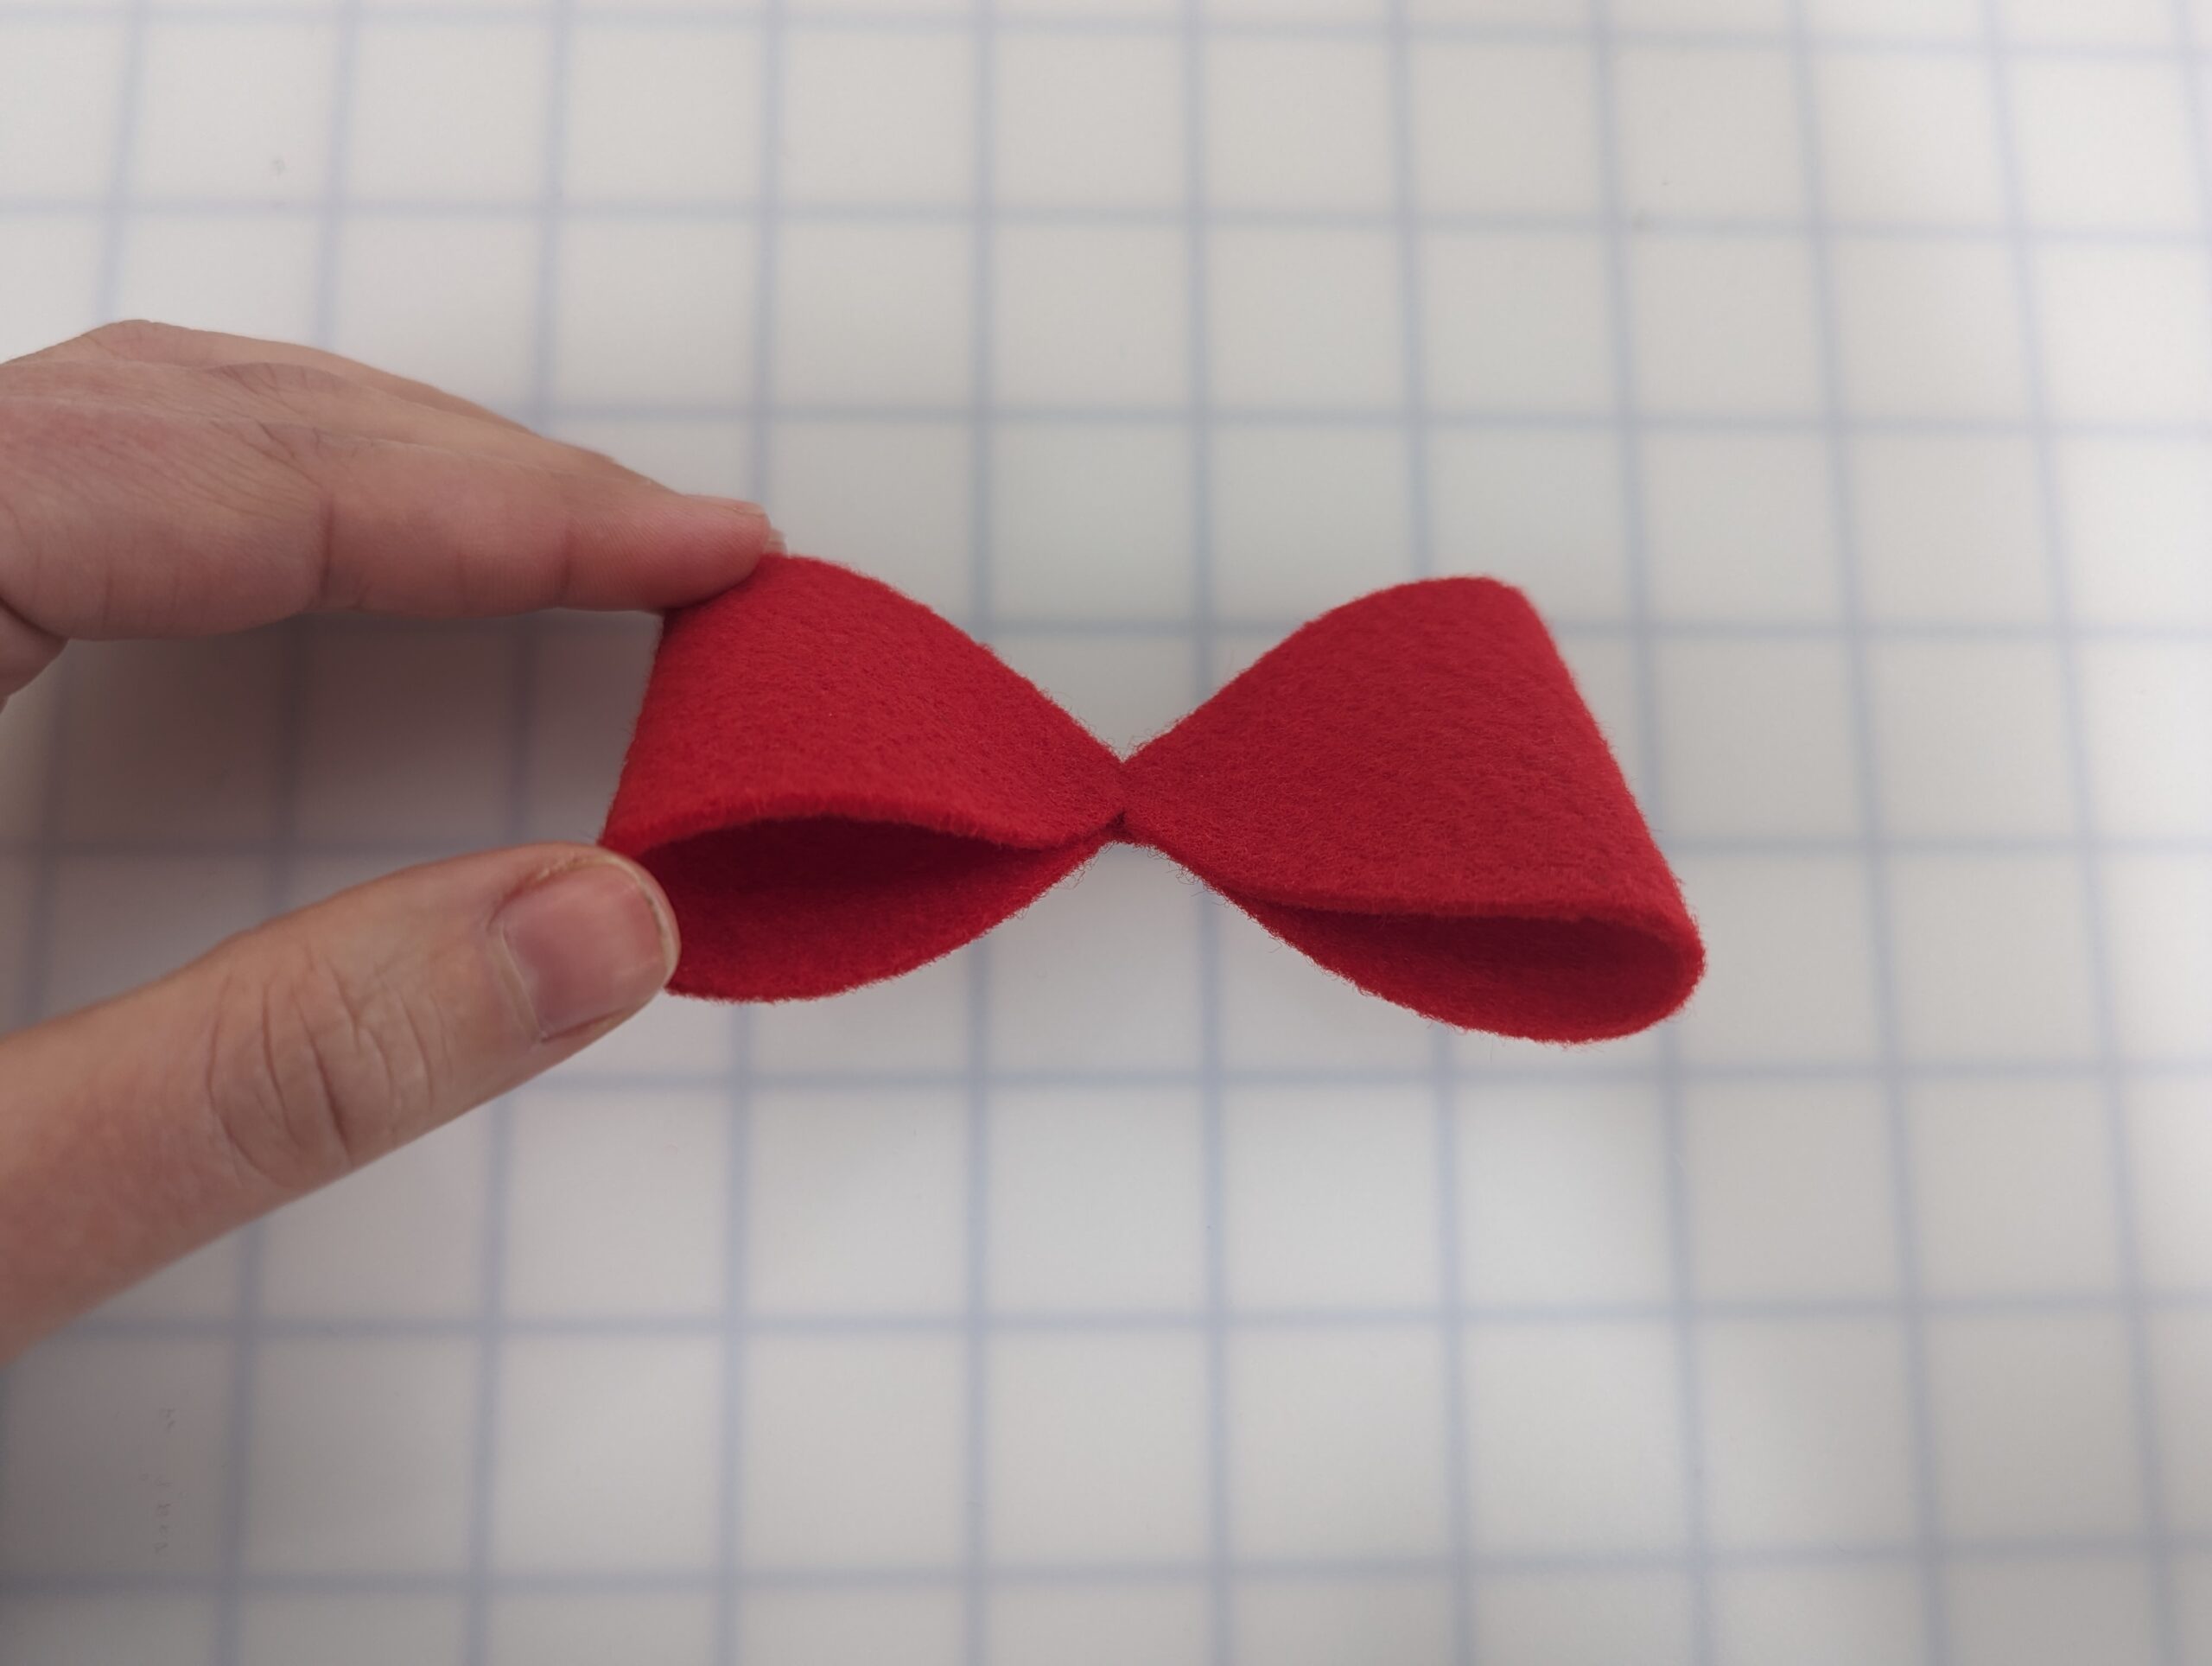
Lay the main bow piece flat. Fold the left side toward the middle. Fold the right side toward the middle. Both raw edges should touch without any overlap.
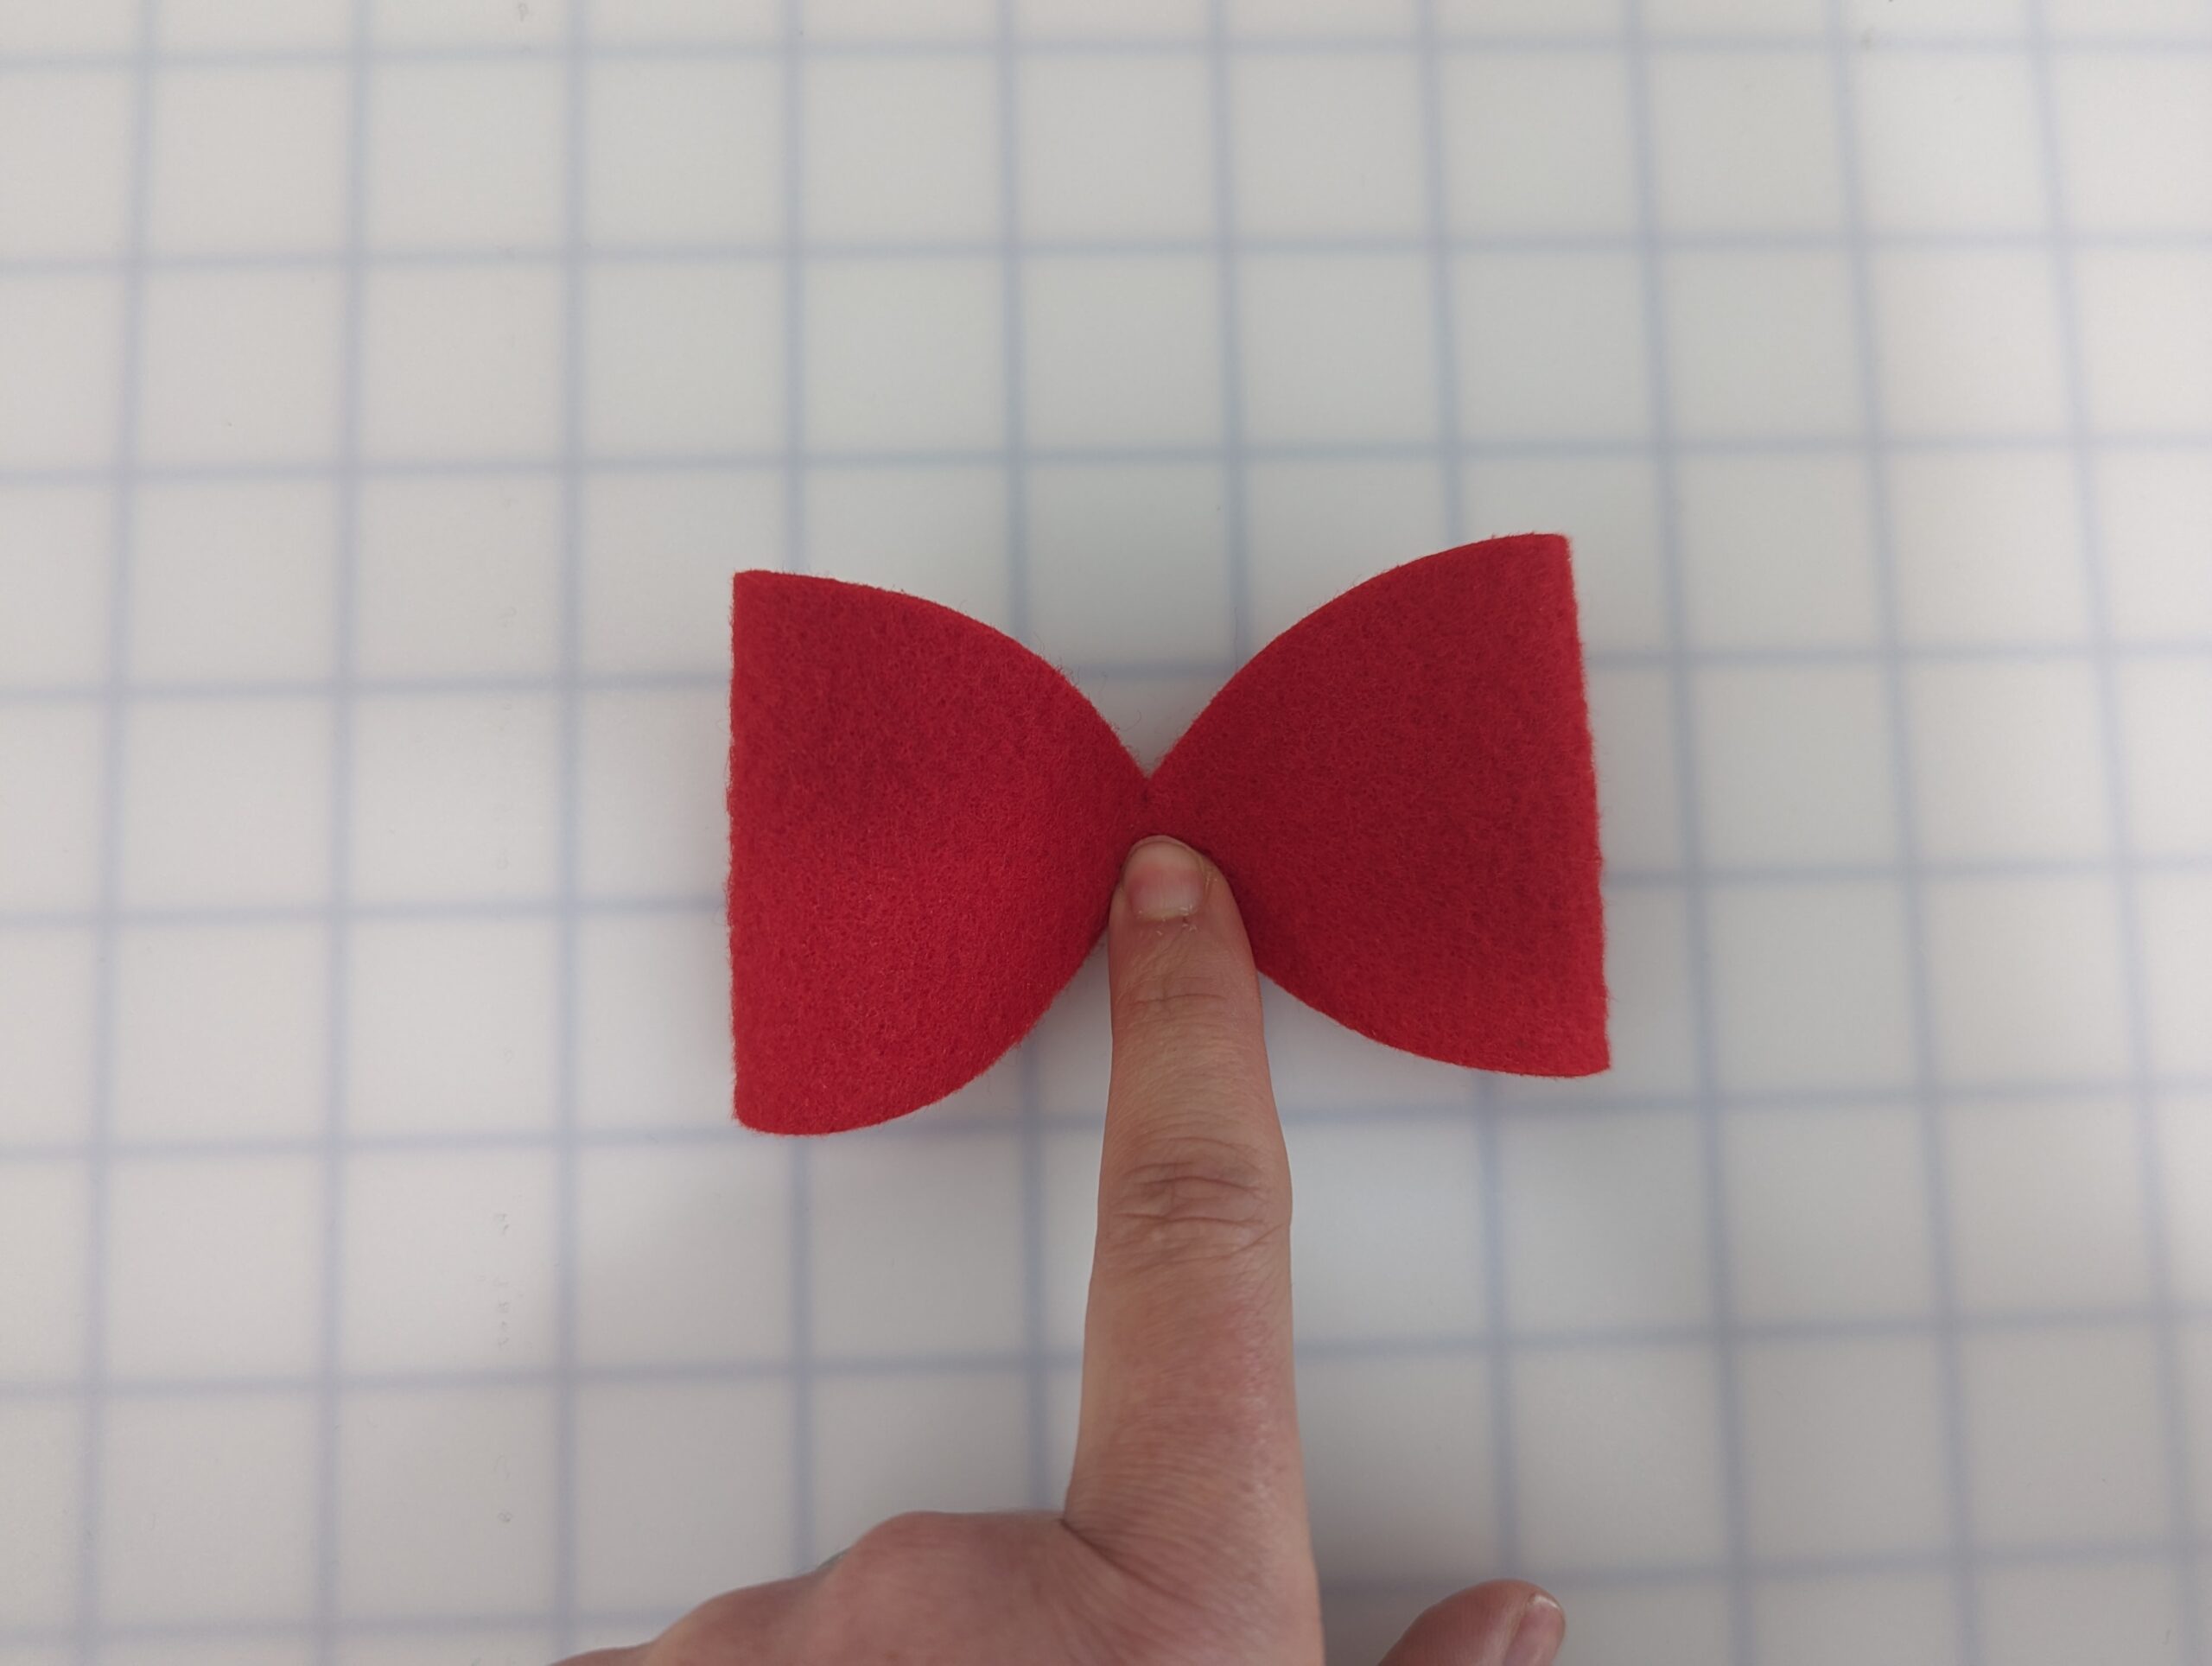
Using your favorite hand stitch, place a few stitches to secure each end. NOTE – only stitch in the center.
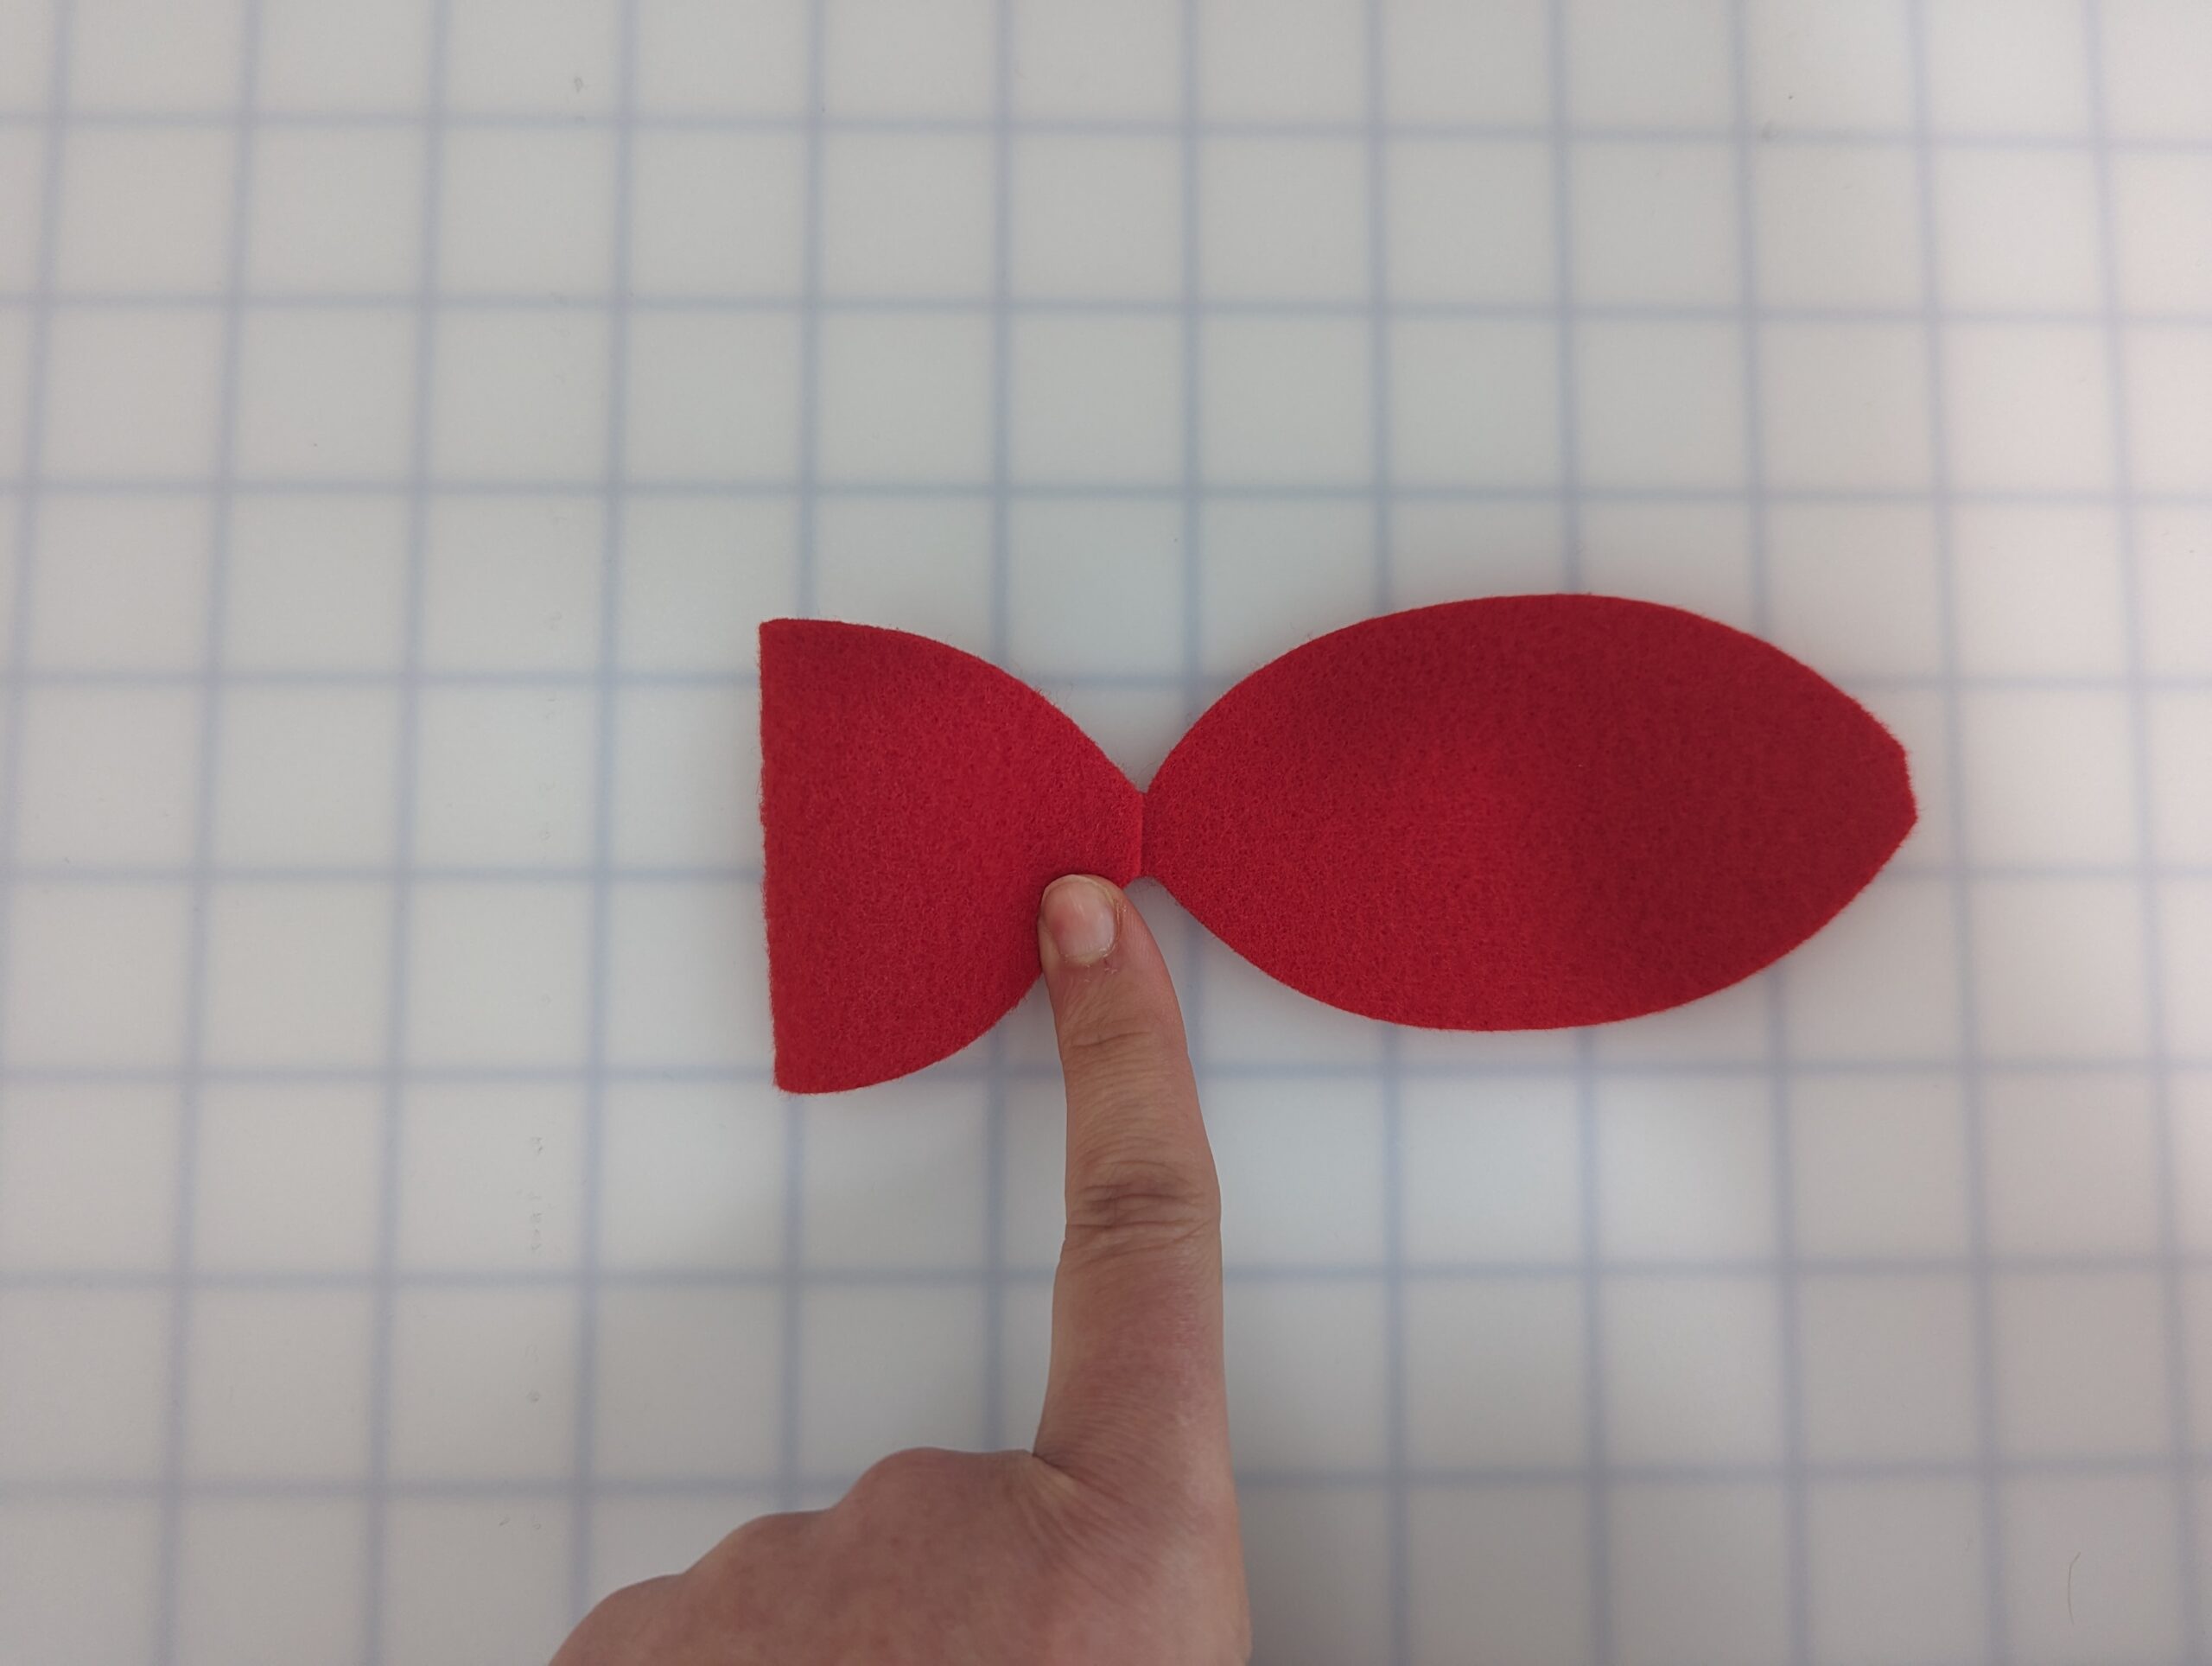
Take the left side of the tail piece, and fold it over at a 45 degree angle so that the dovetails are face down, and facing in opposite directions.
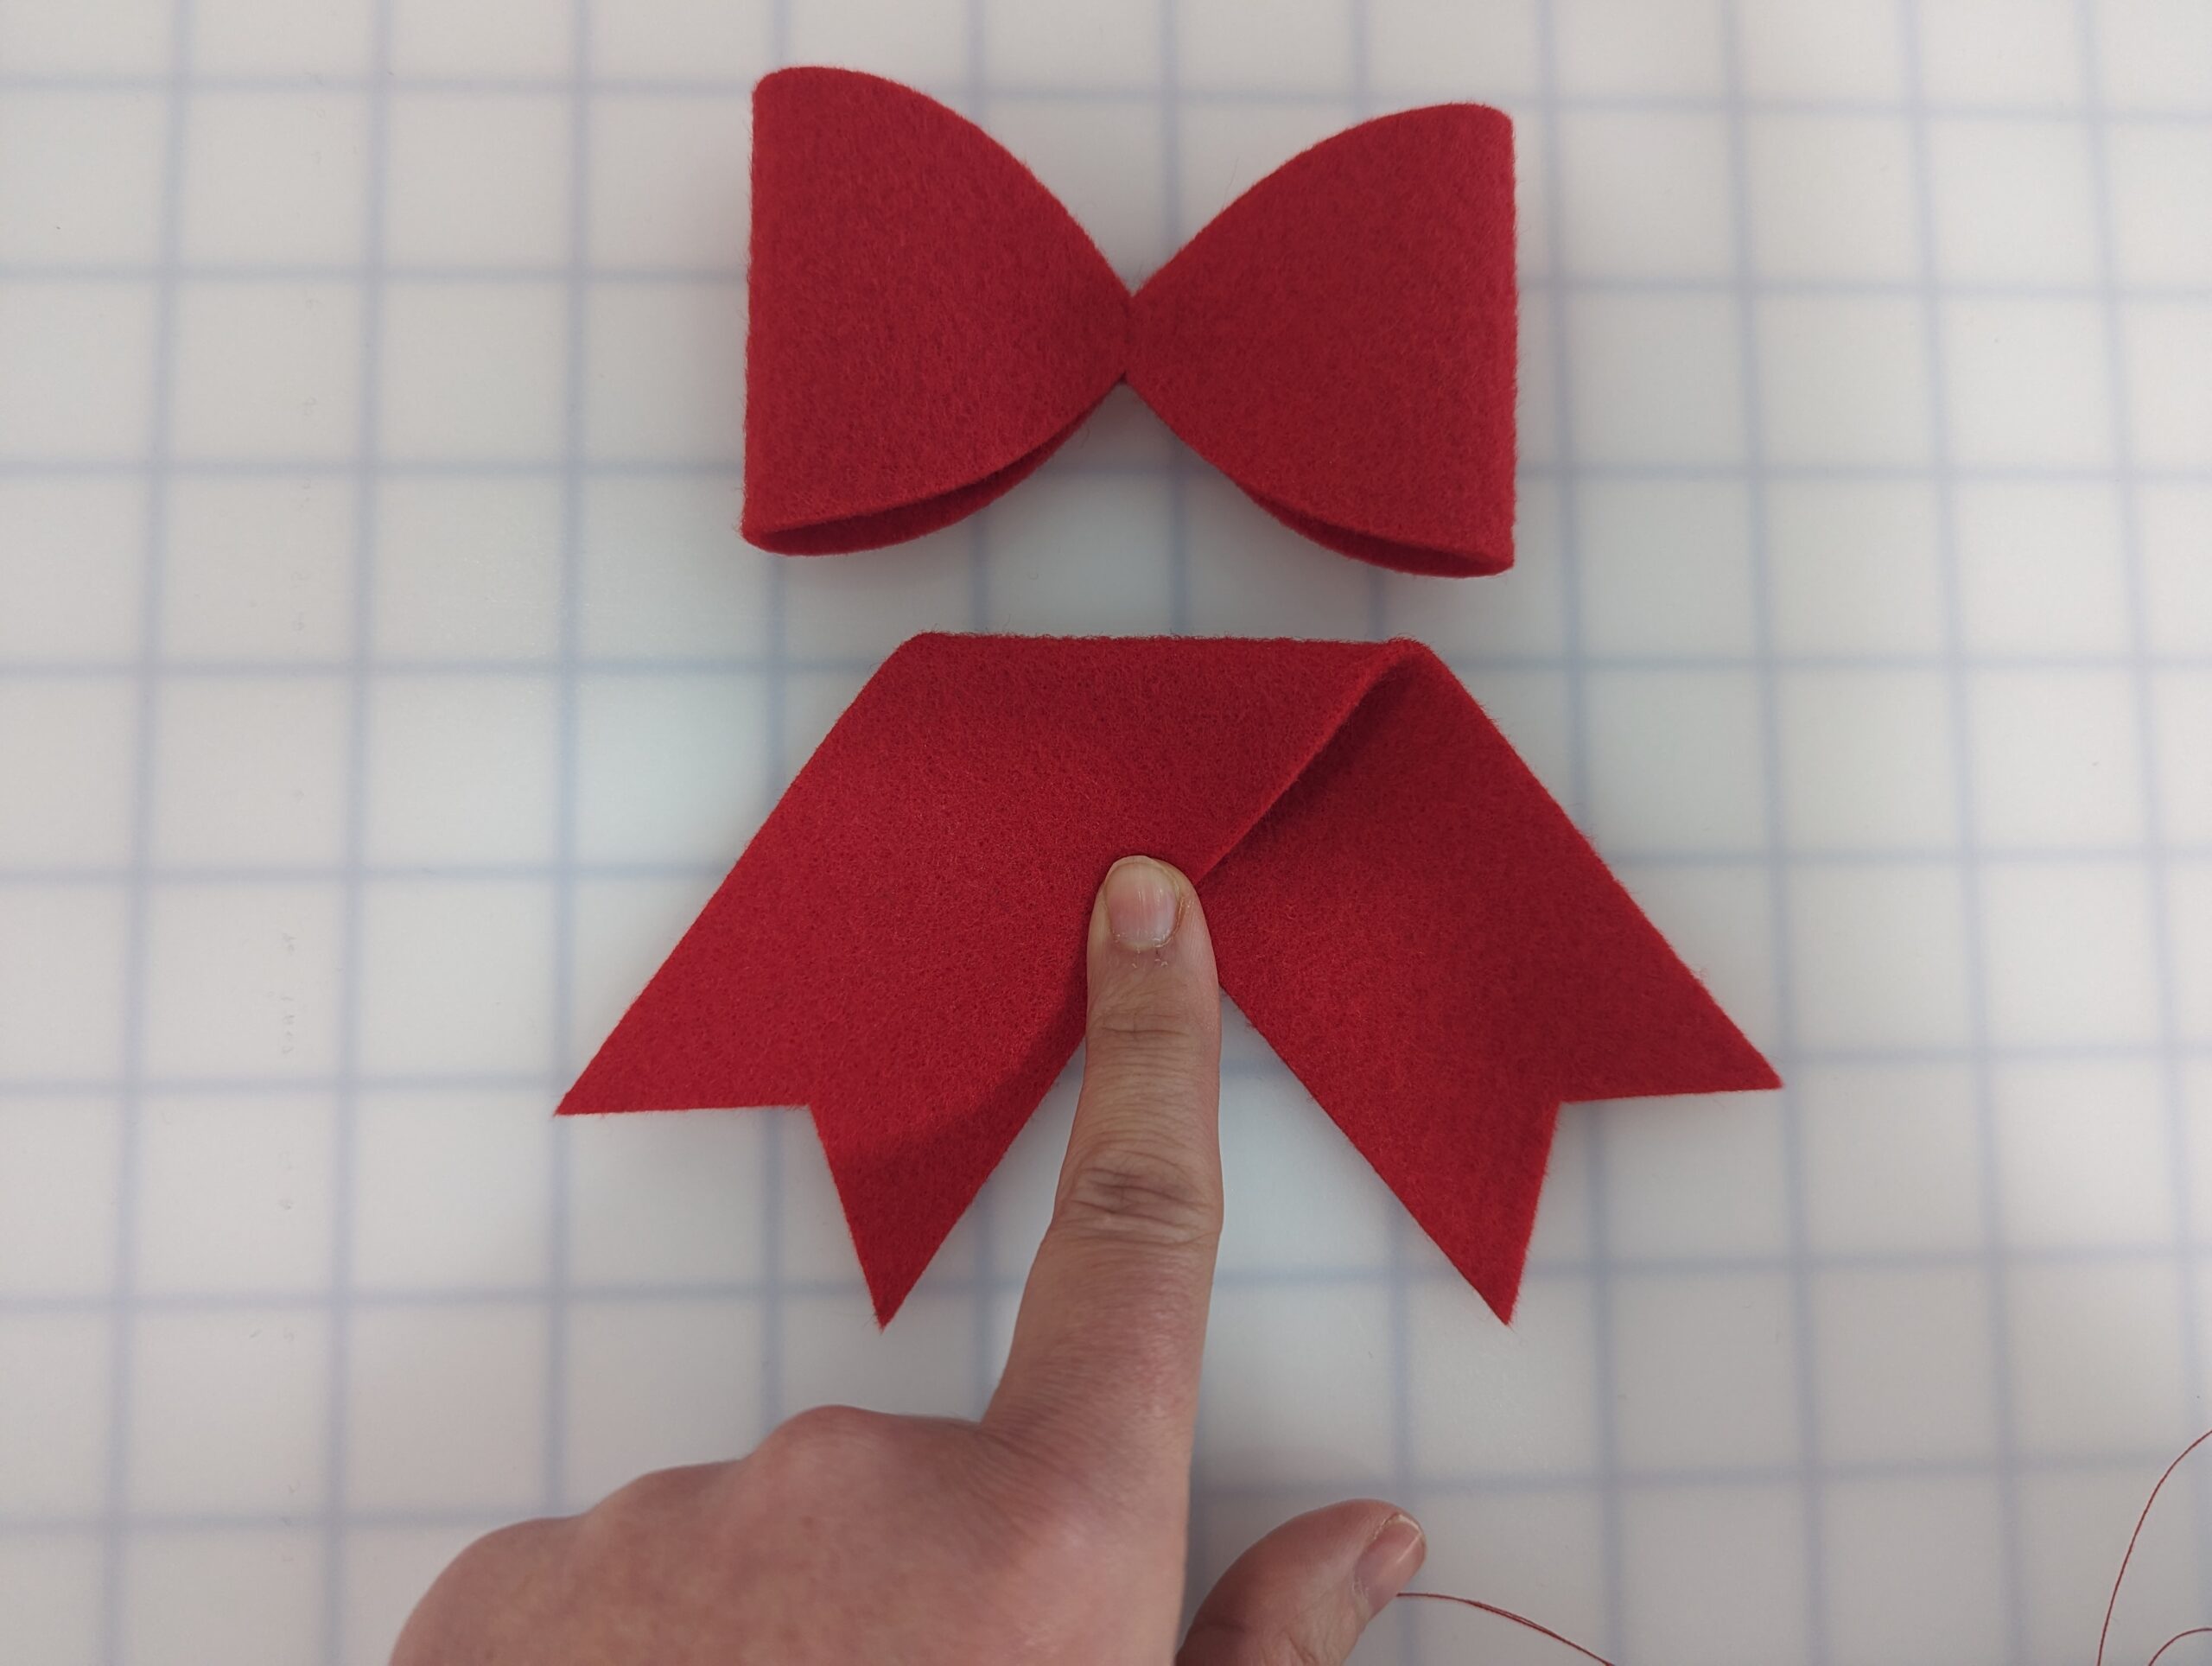
Place the main box piece on top of the tail piece. Stitch in place using your favorite hand stitch. Again, you could also use glue for this step.
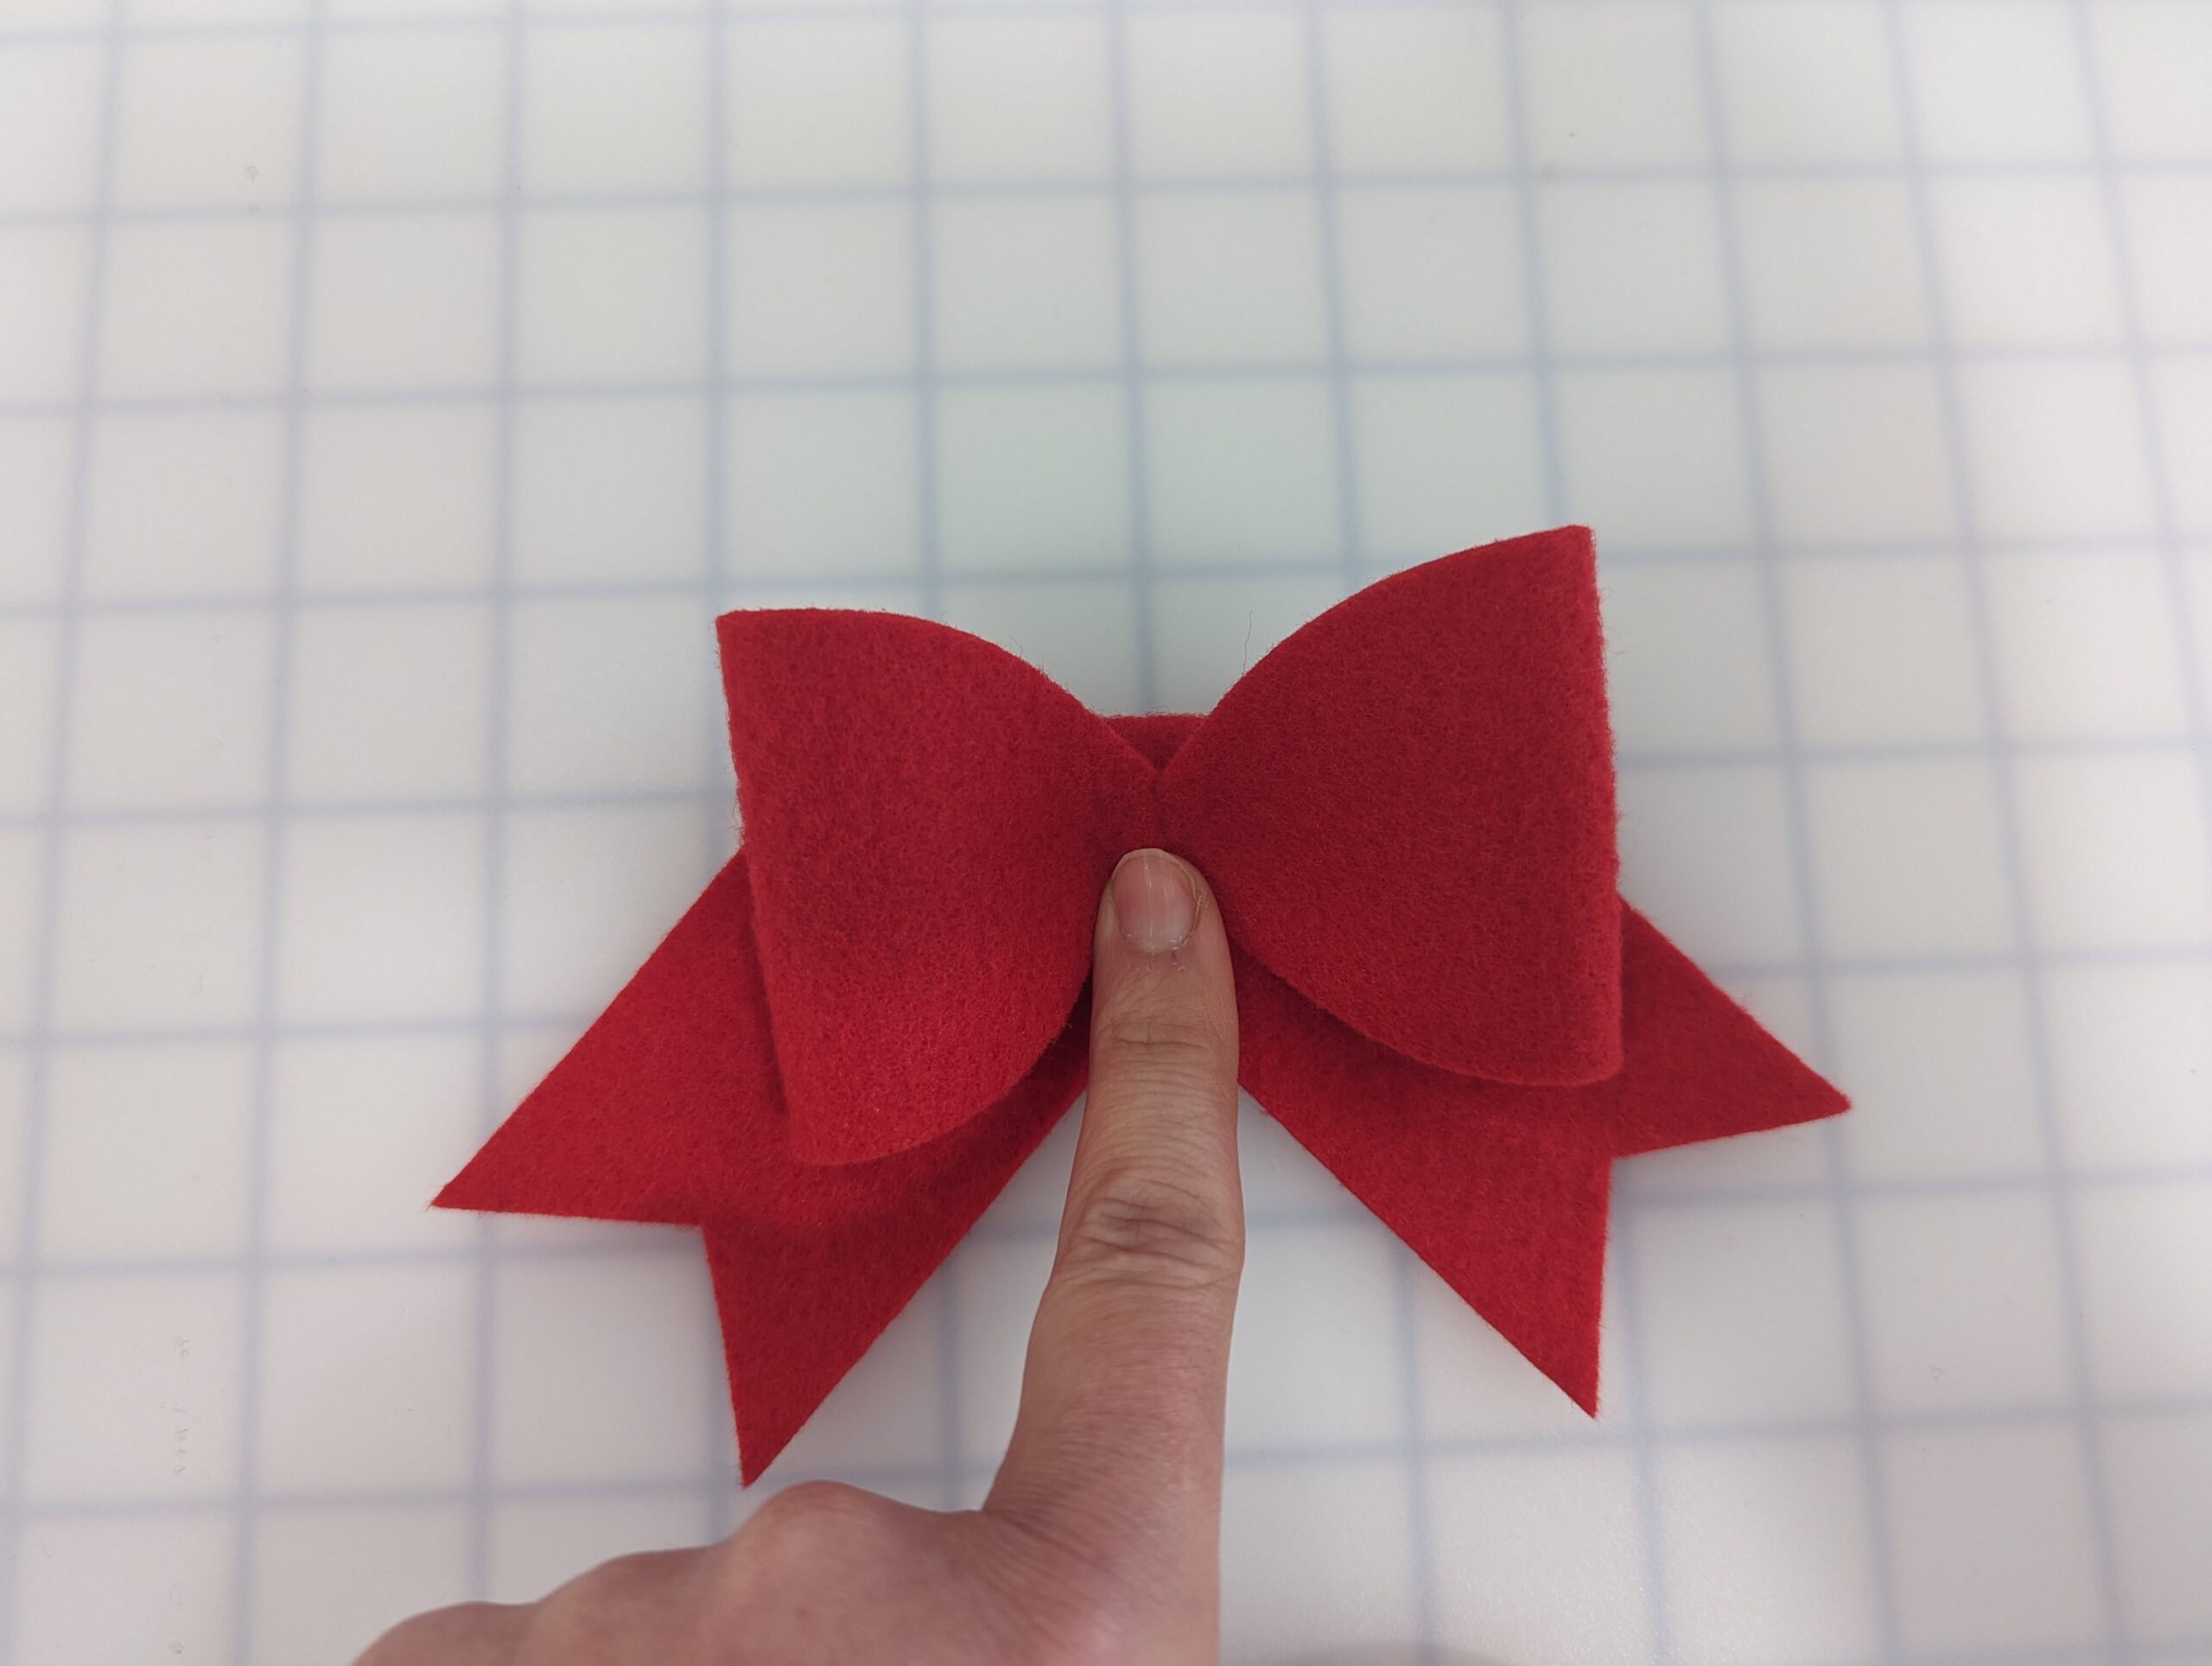
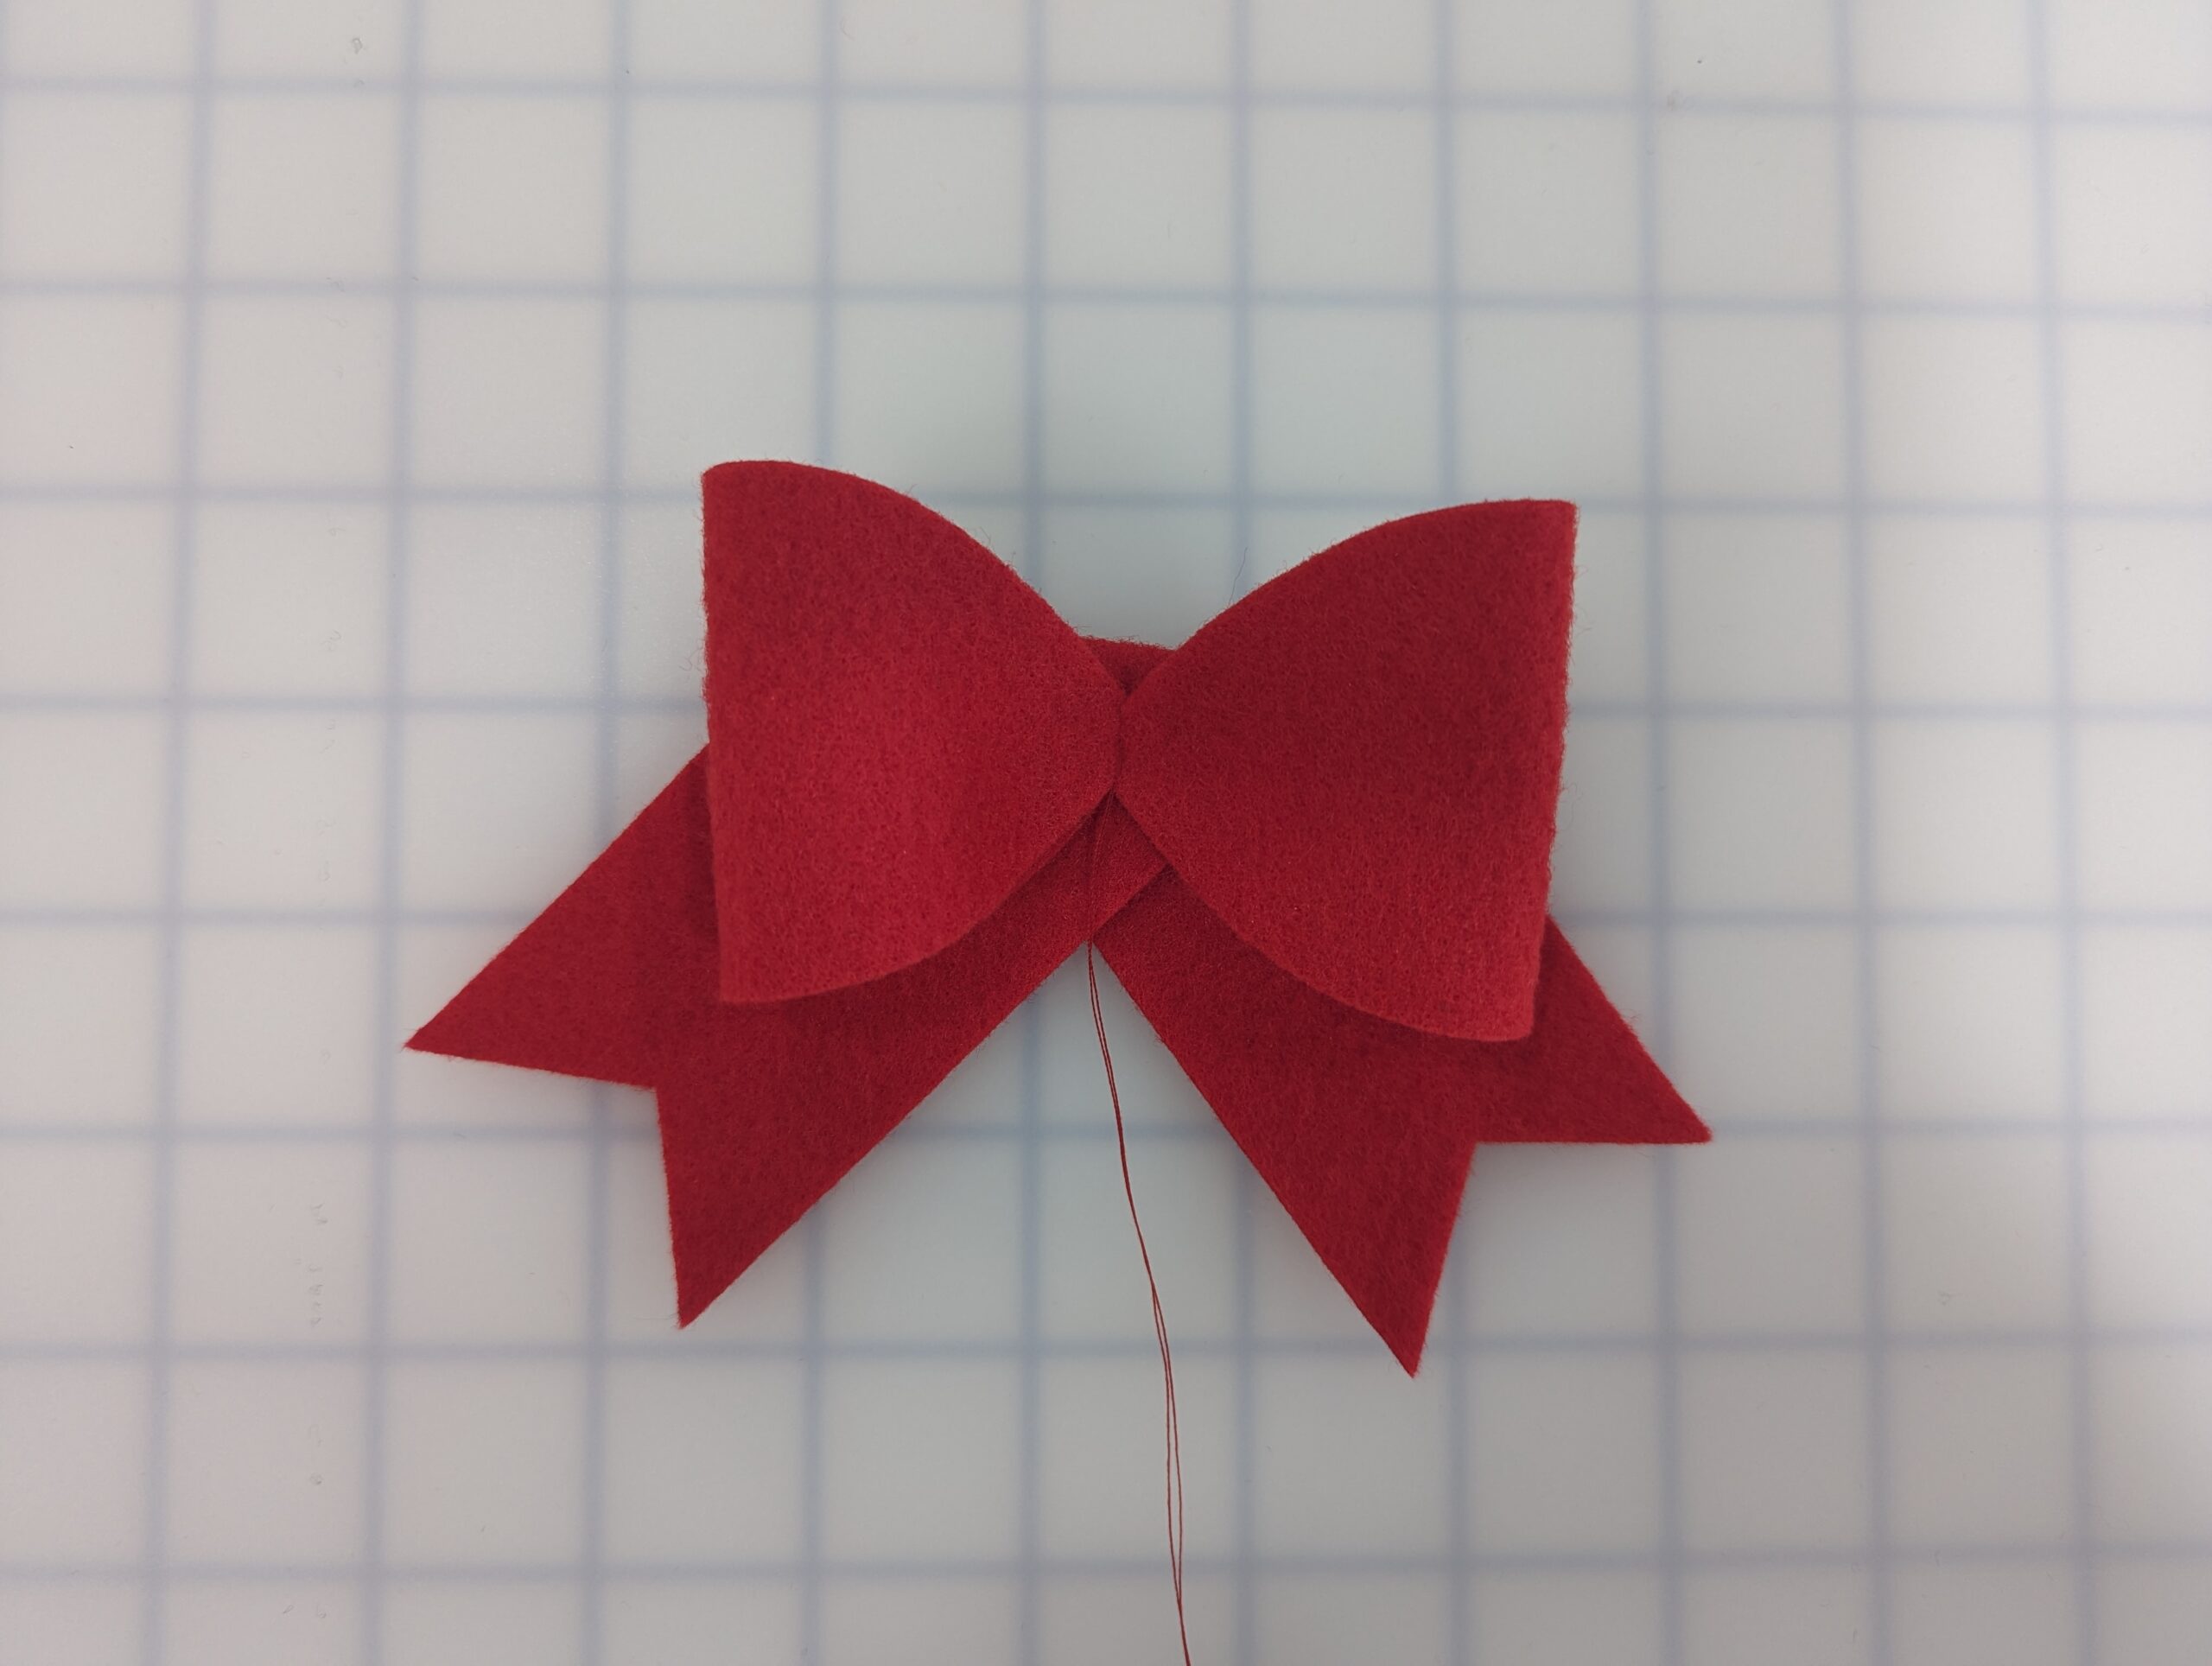
Wrap thread around the center and tail pieces to cinch your center in. Place a few stitches to secure both pieces, then tie your thread off.
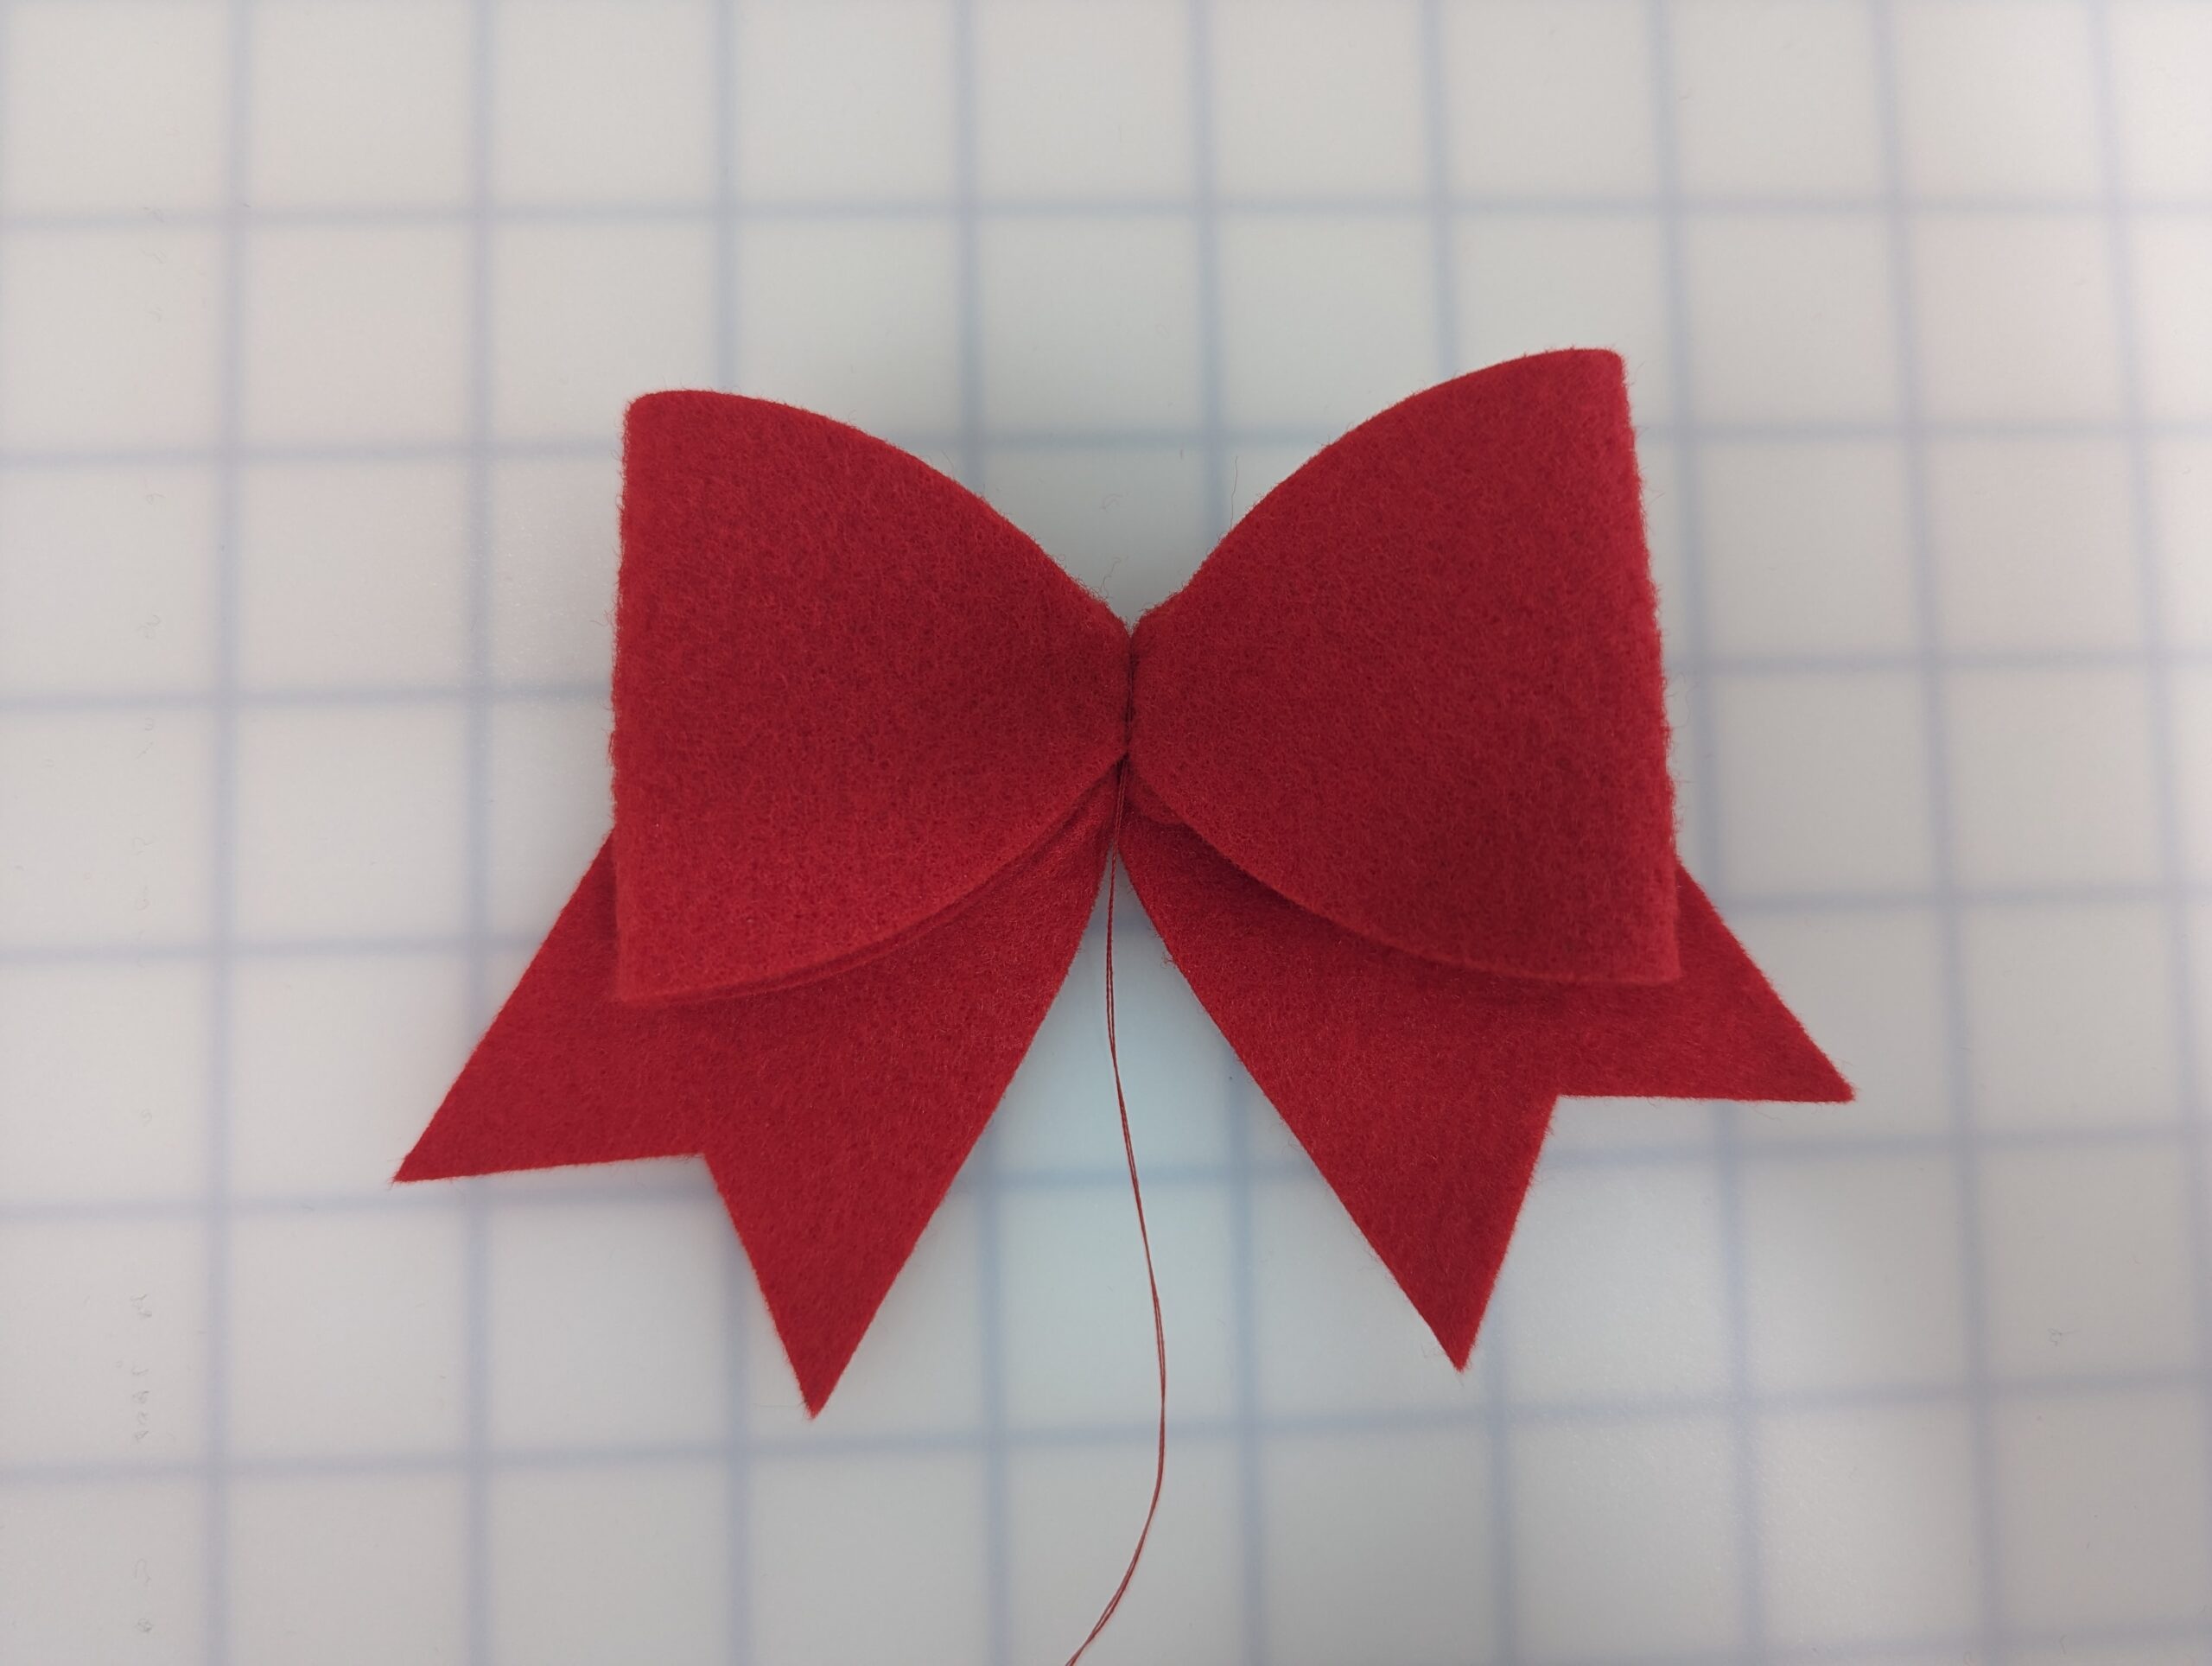
Place your center bow piece on top of the front main bow piece, being sure to match up centers.
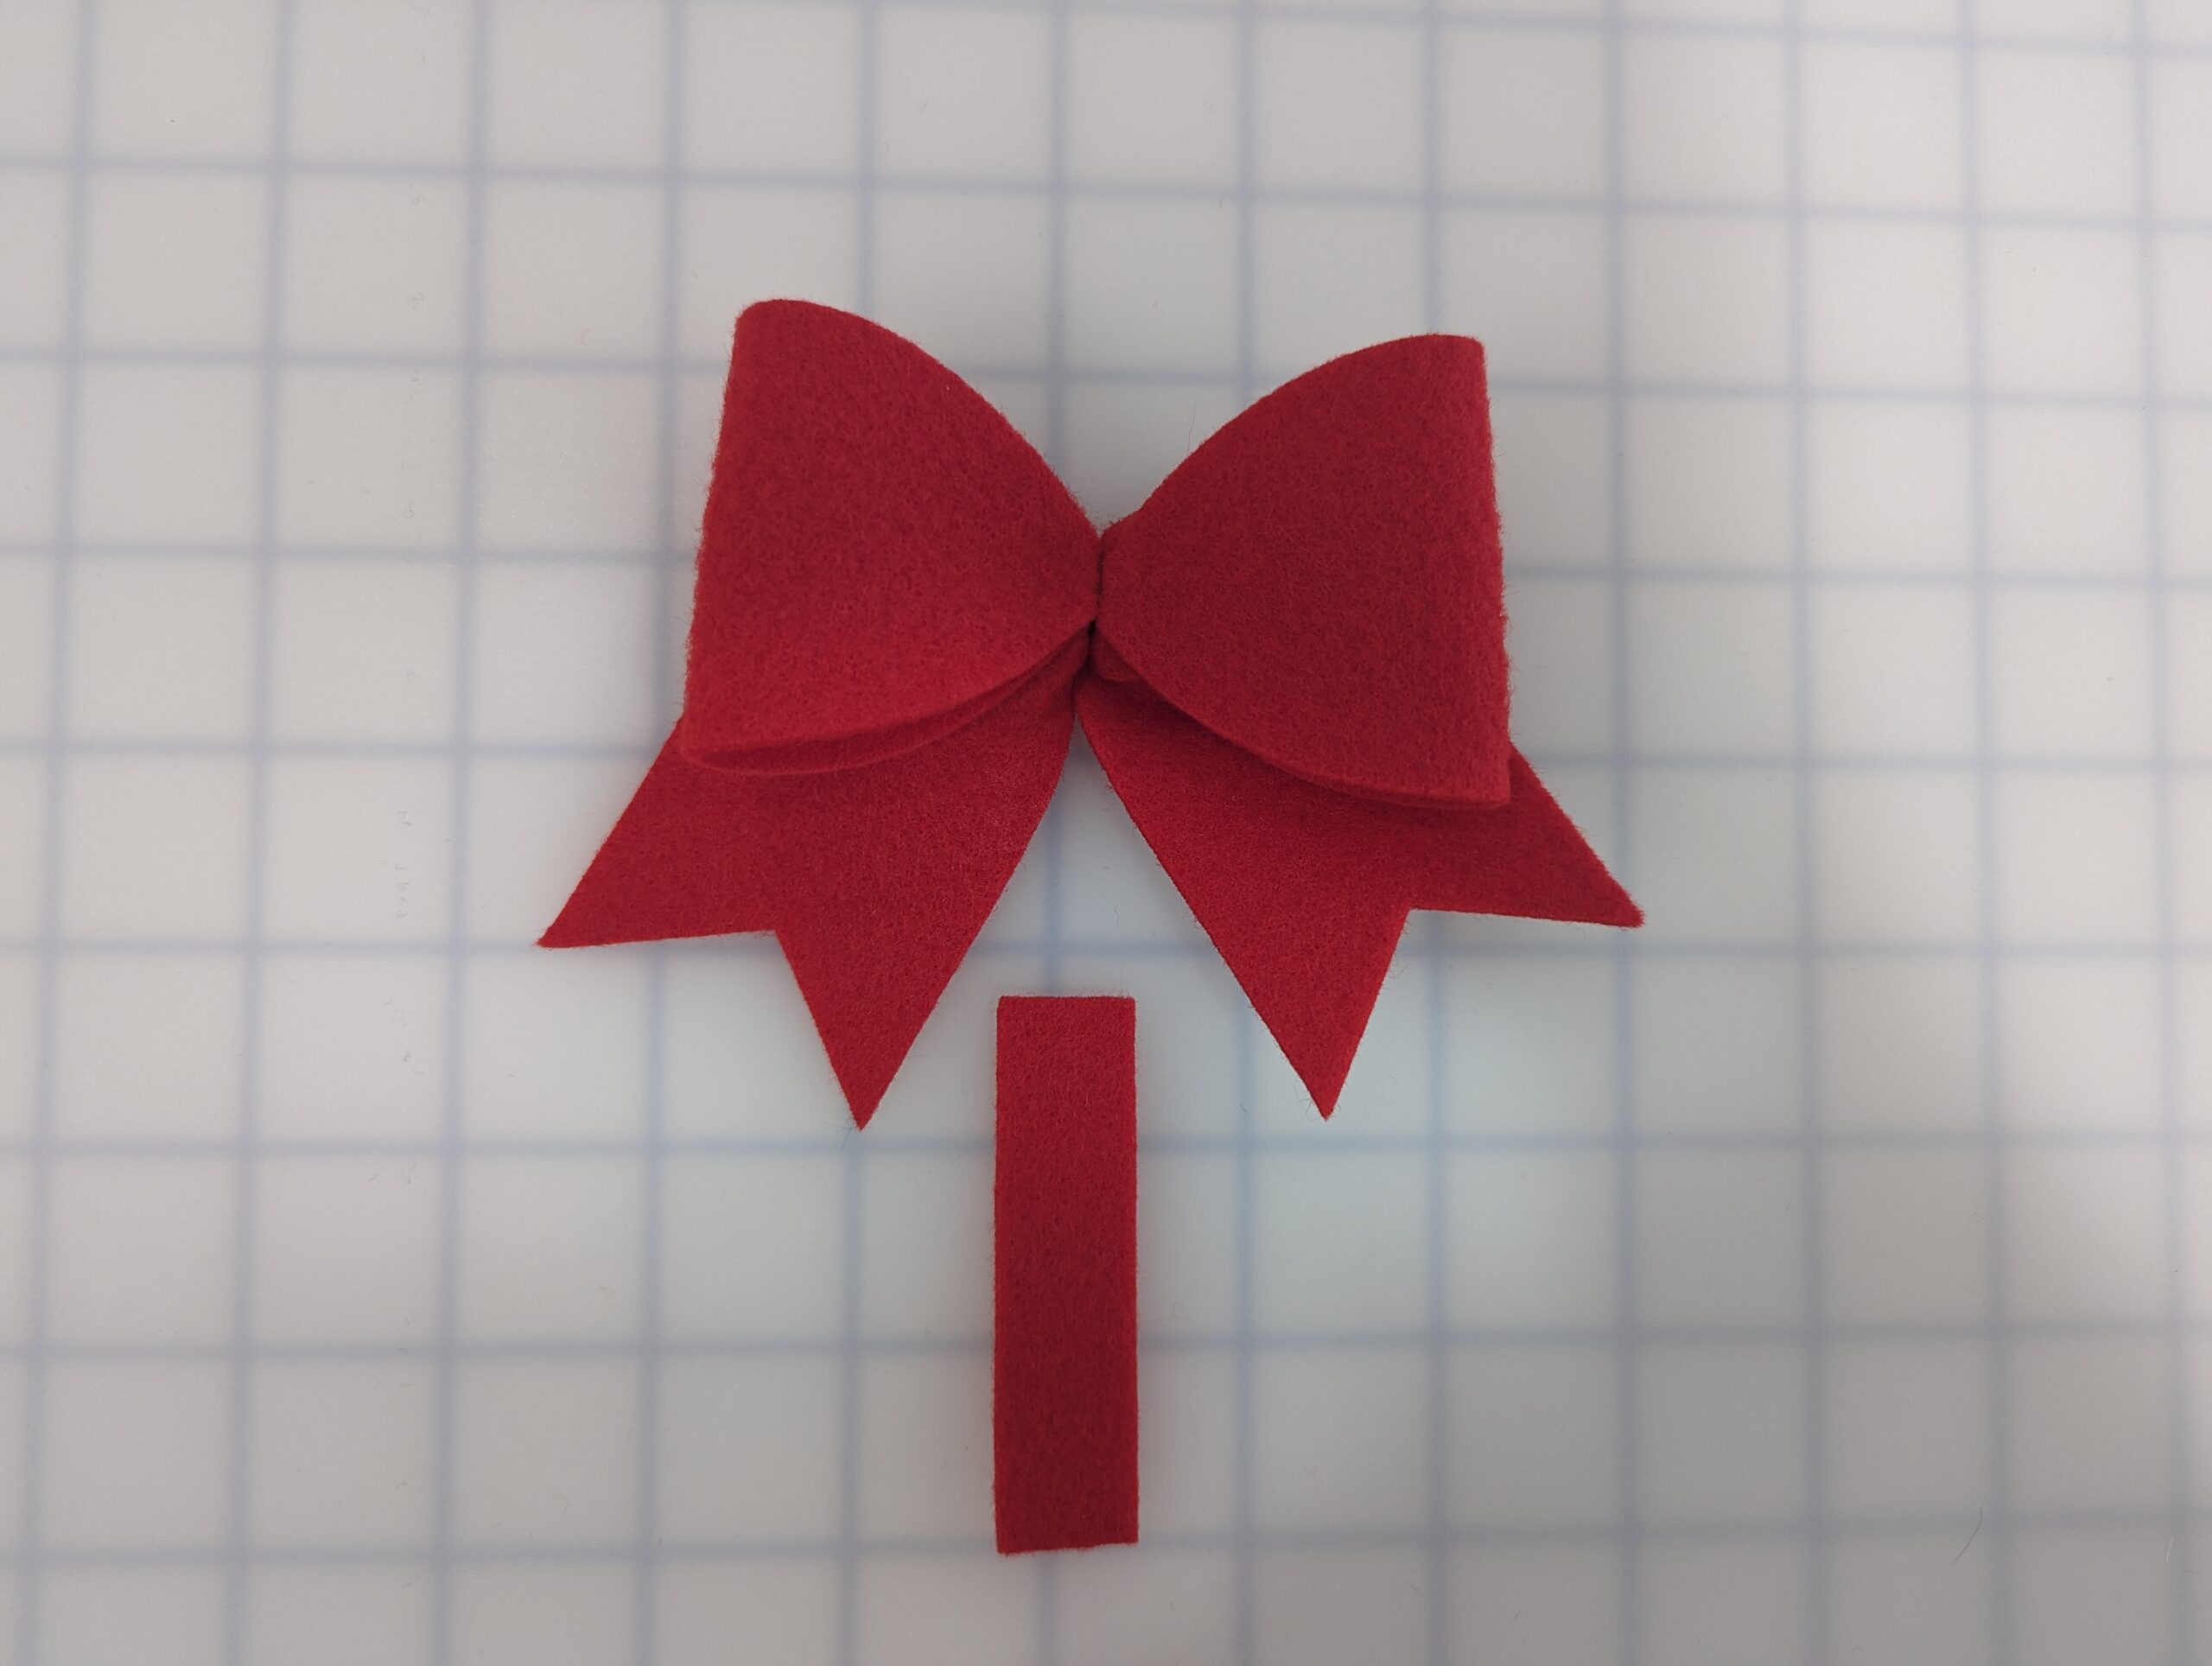
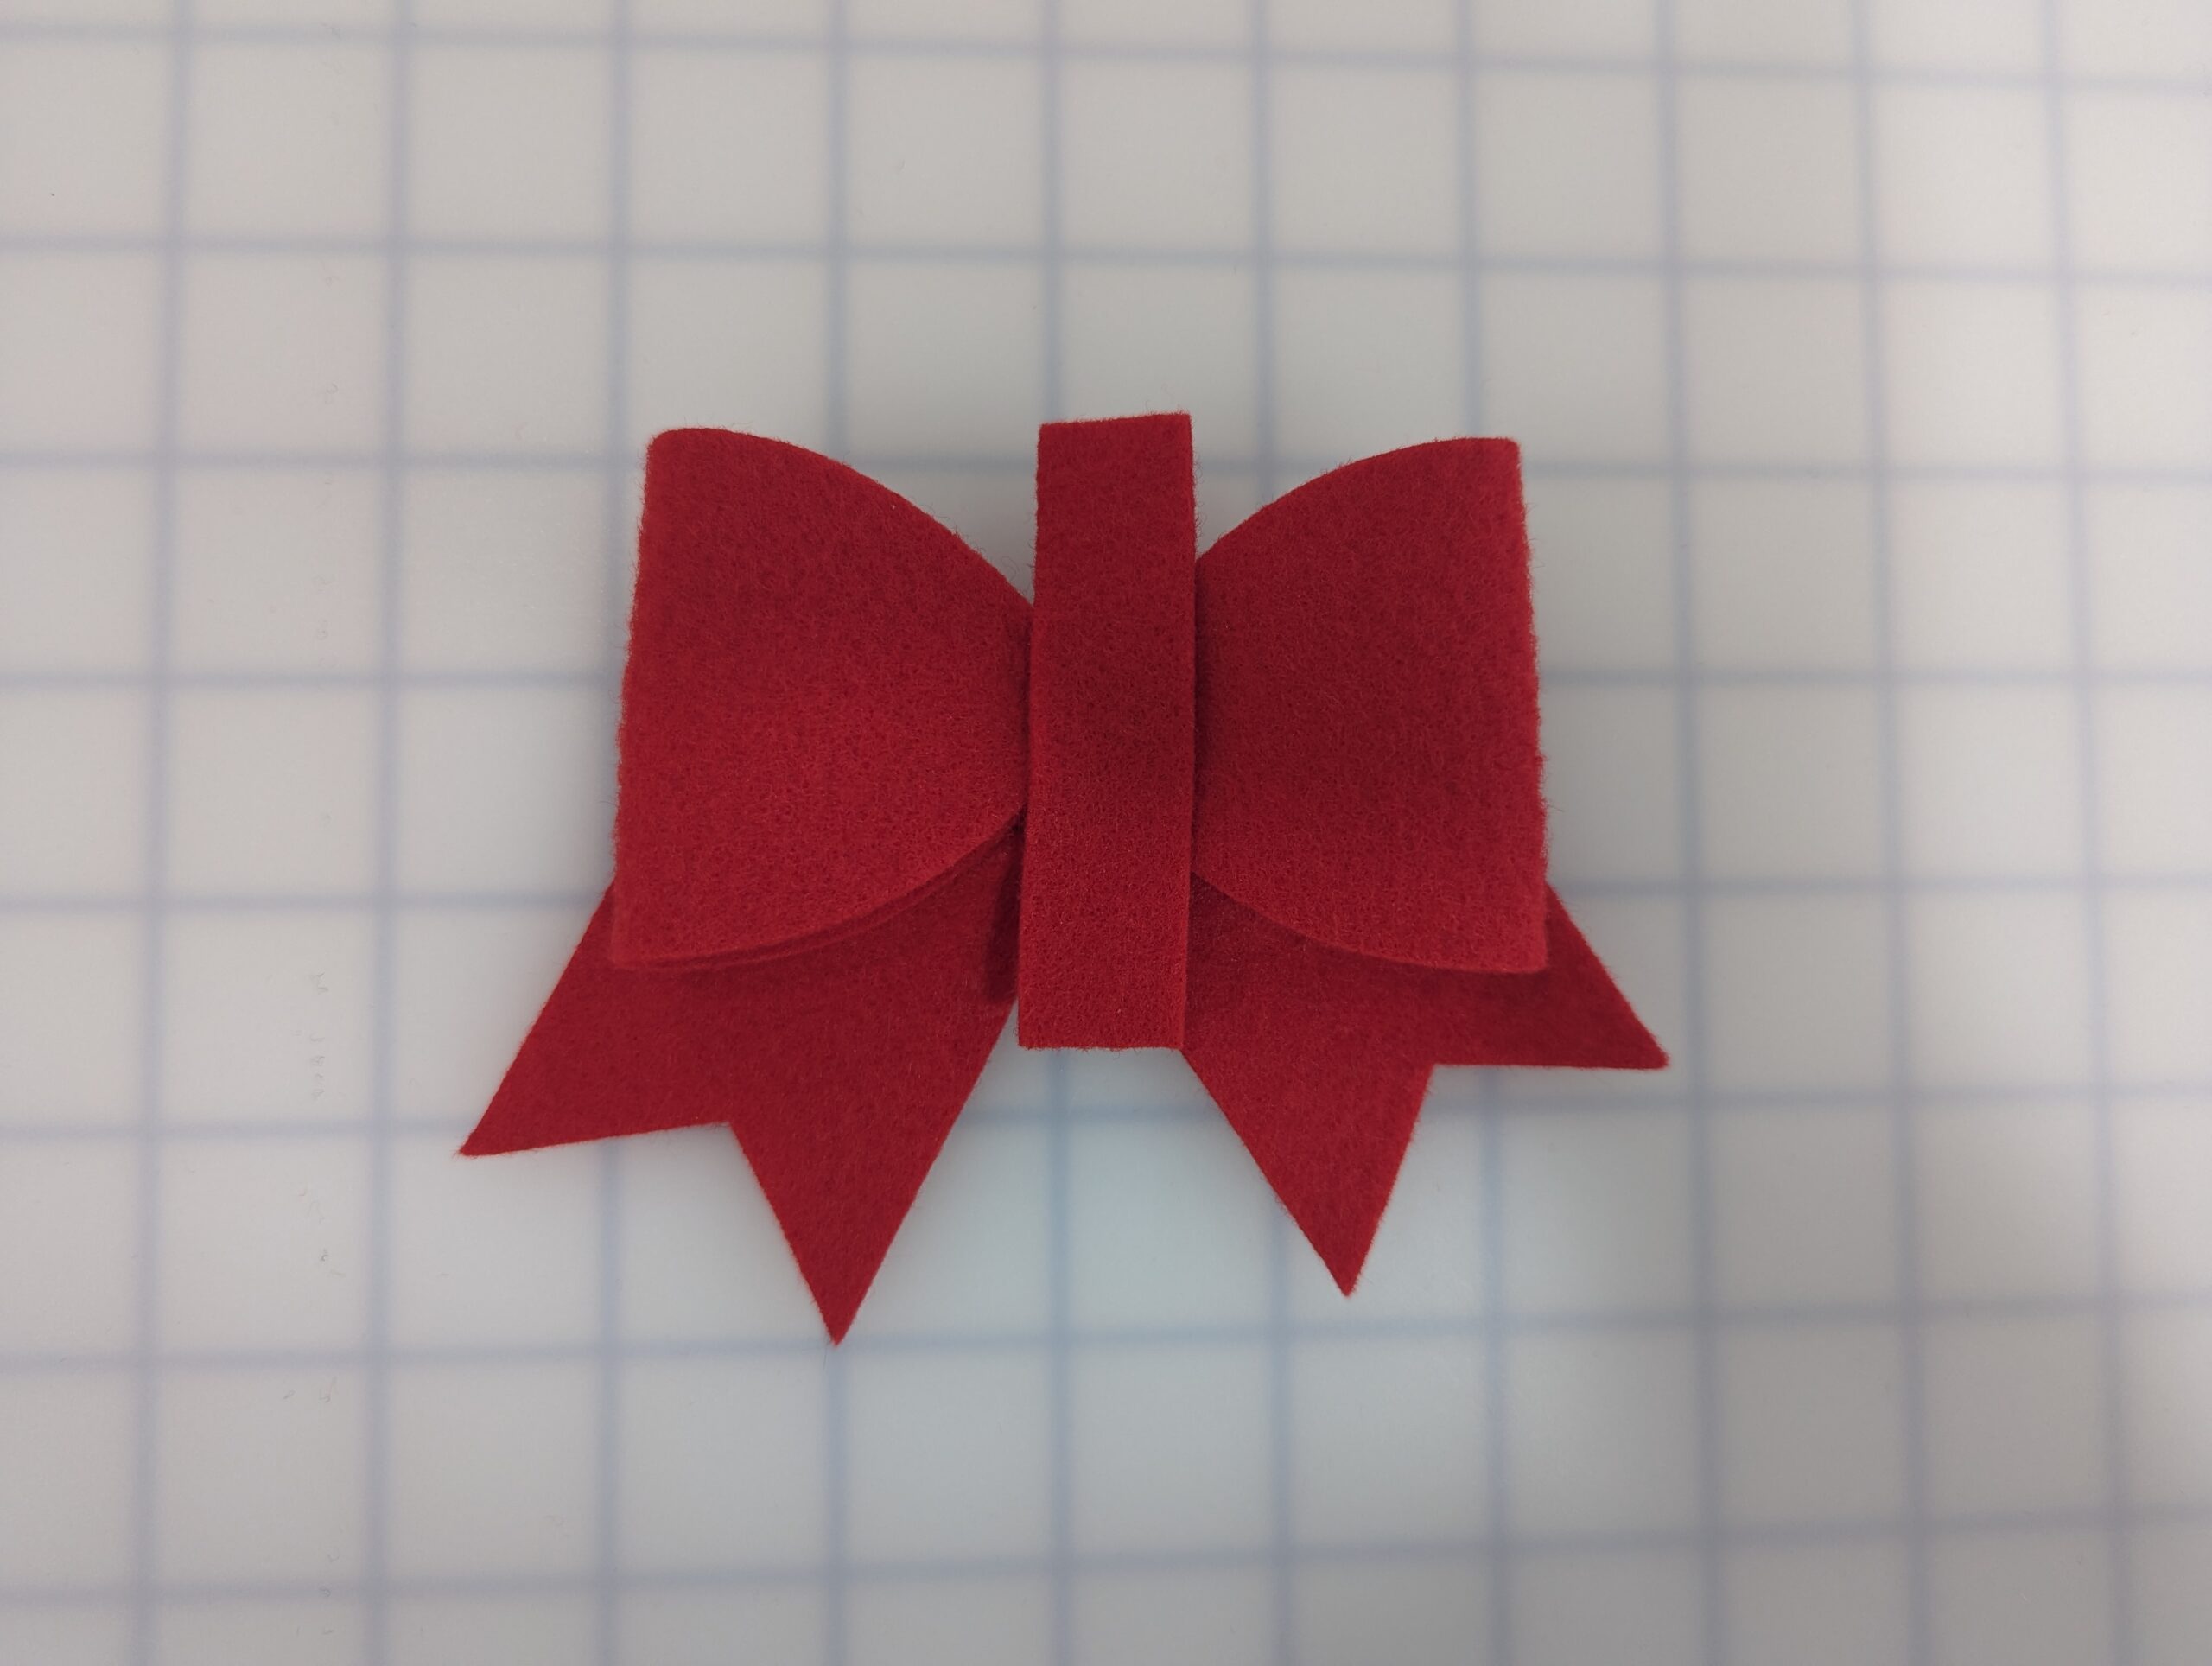
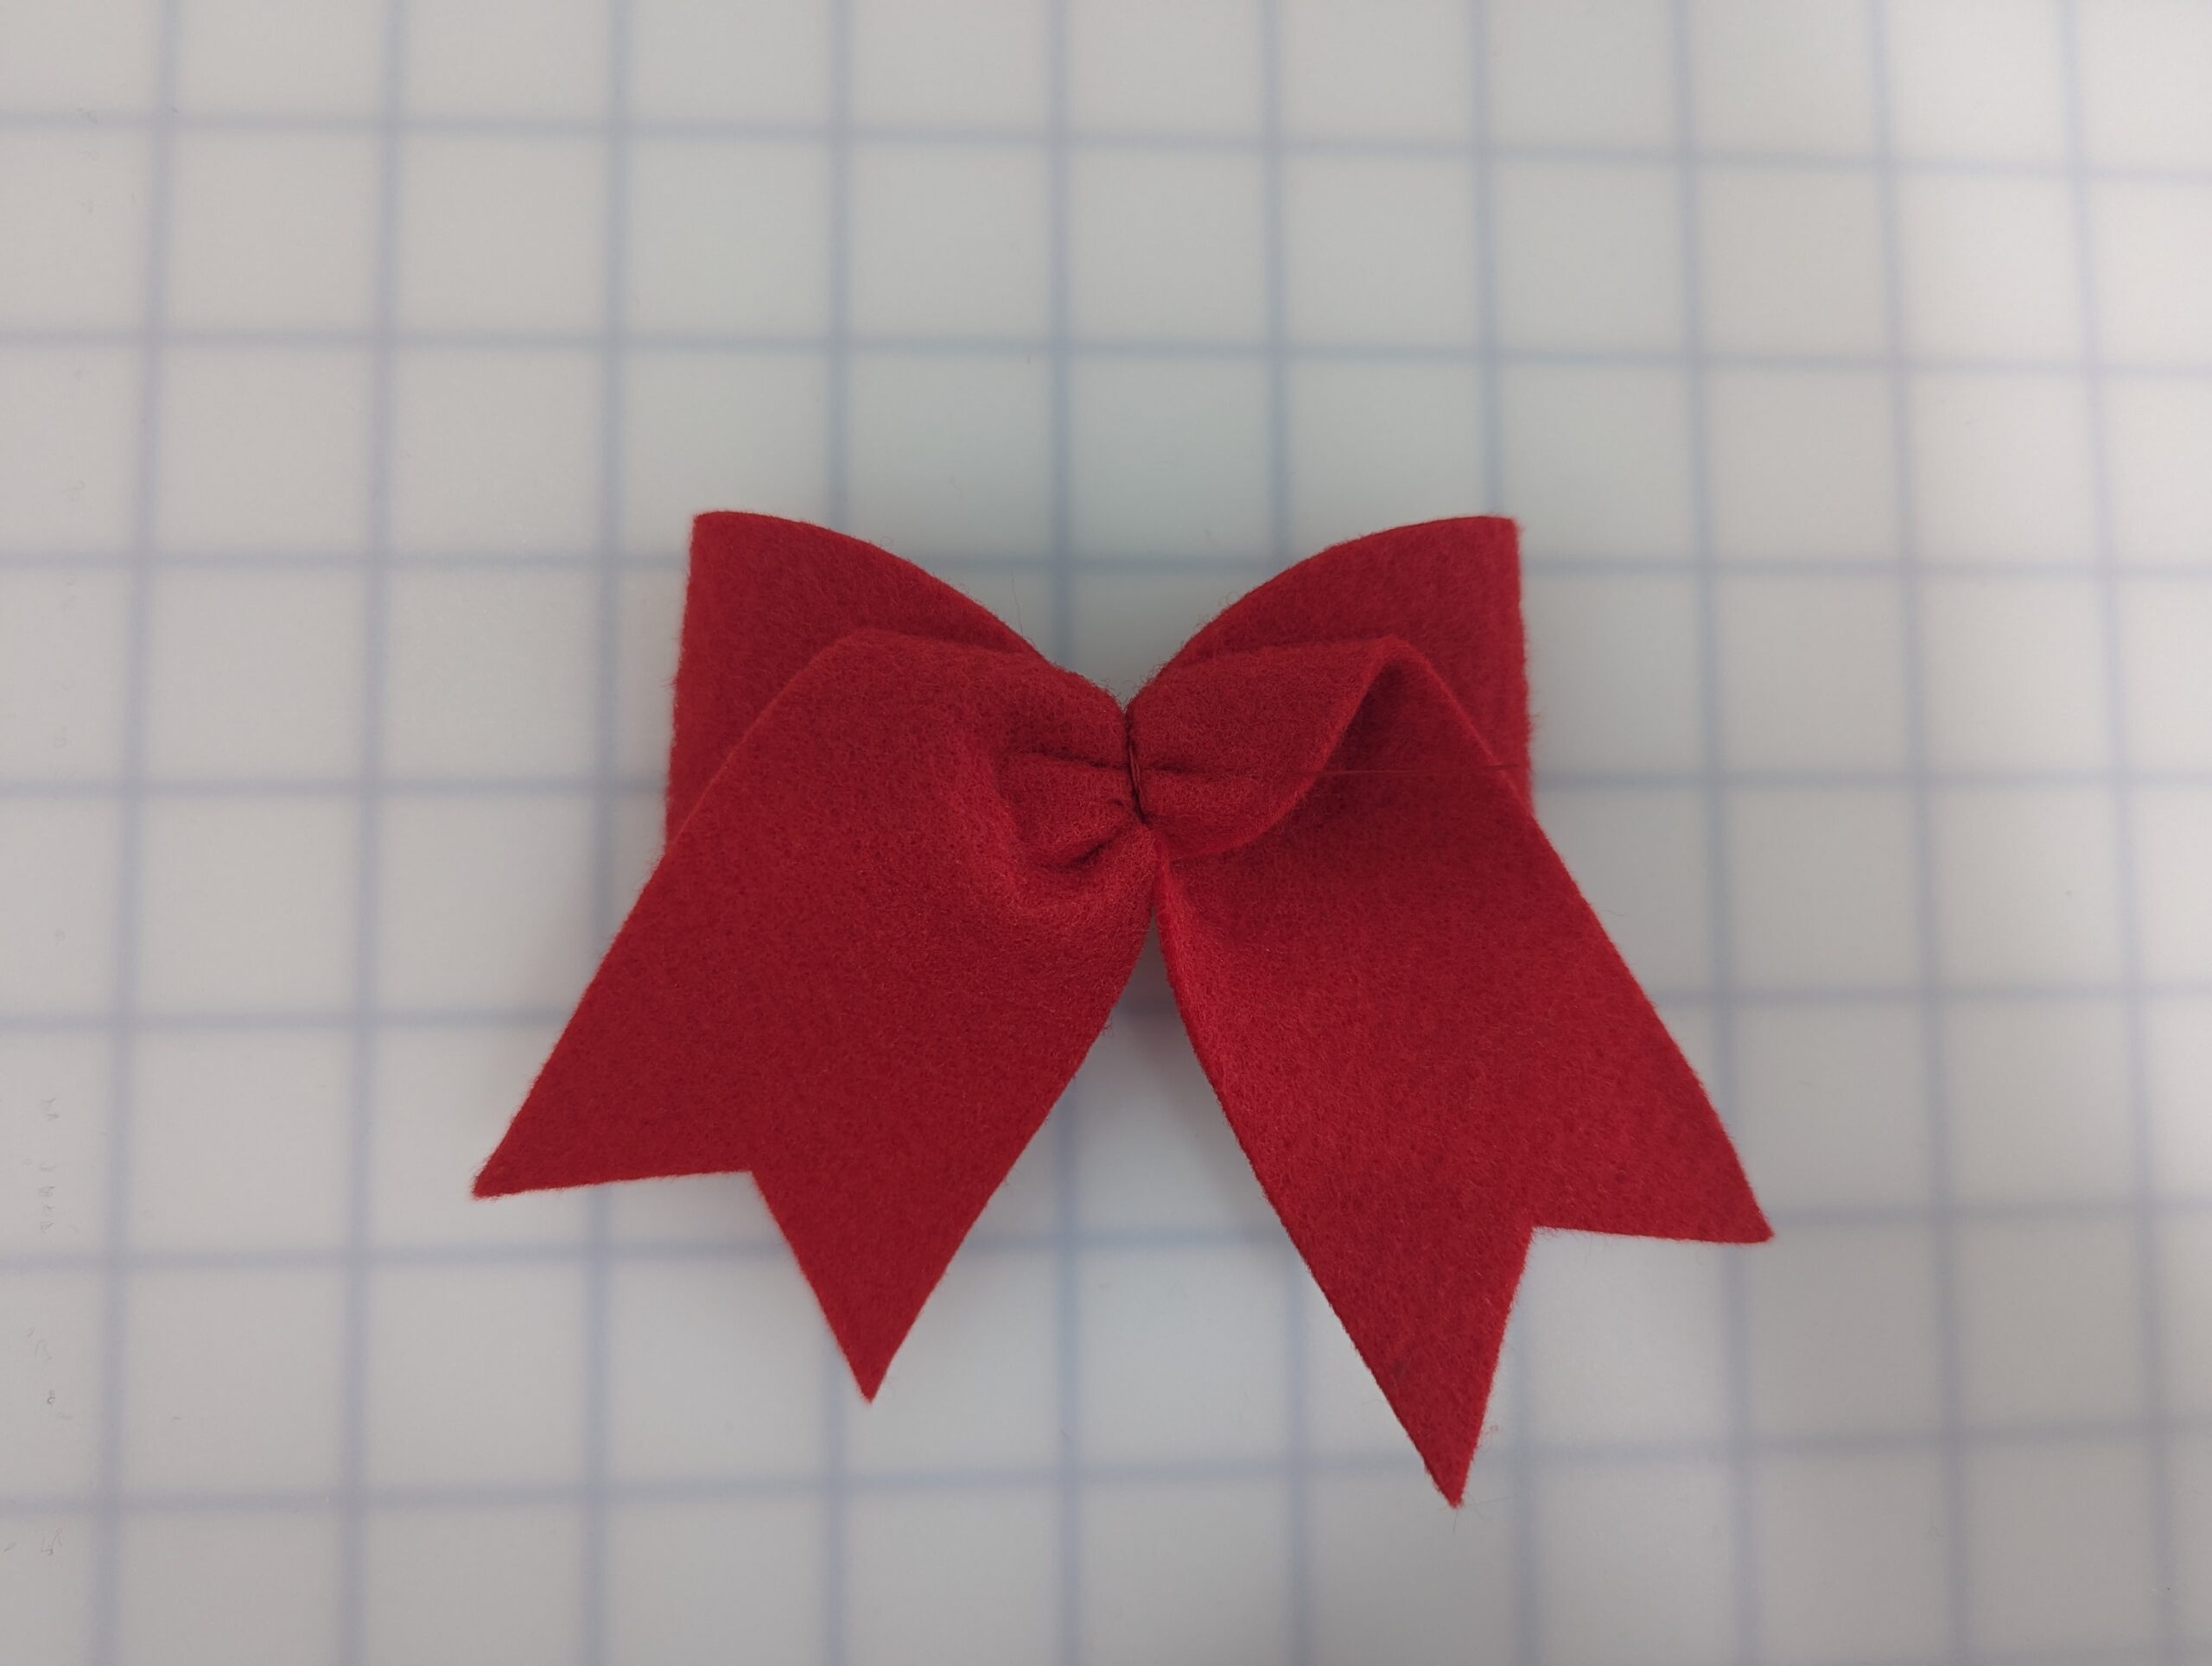
Wrap the center around the bow, and using either thread or glue, secure the center in the back.
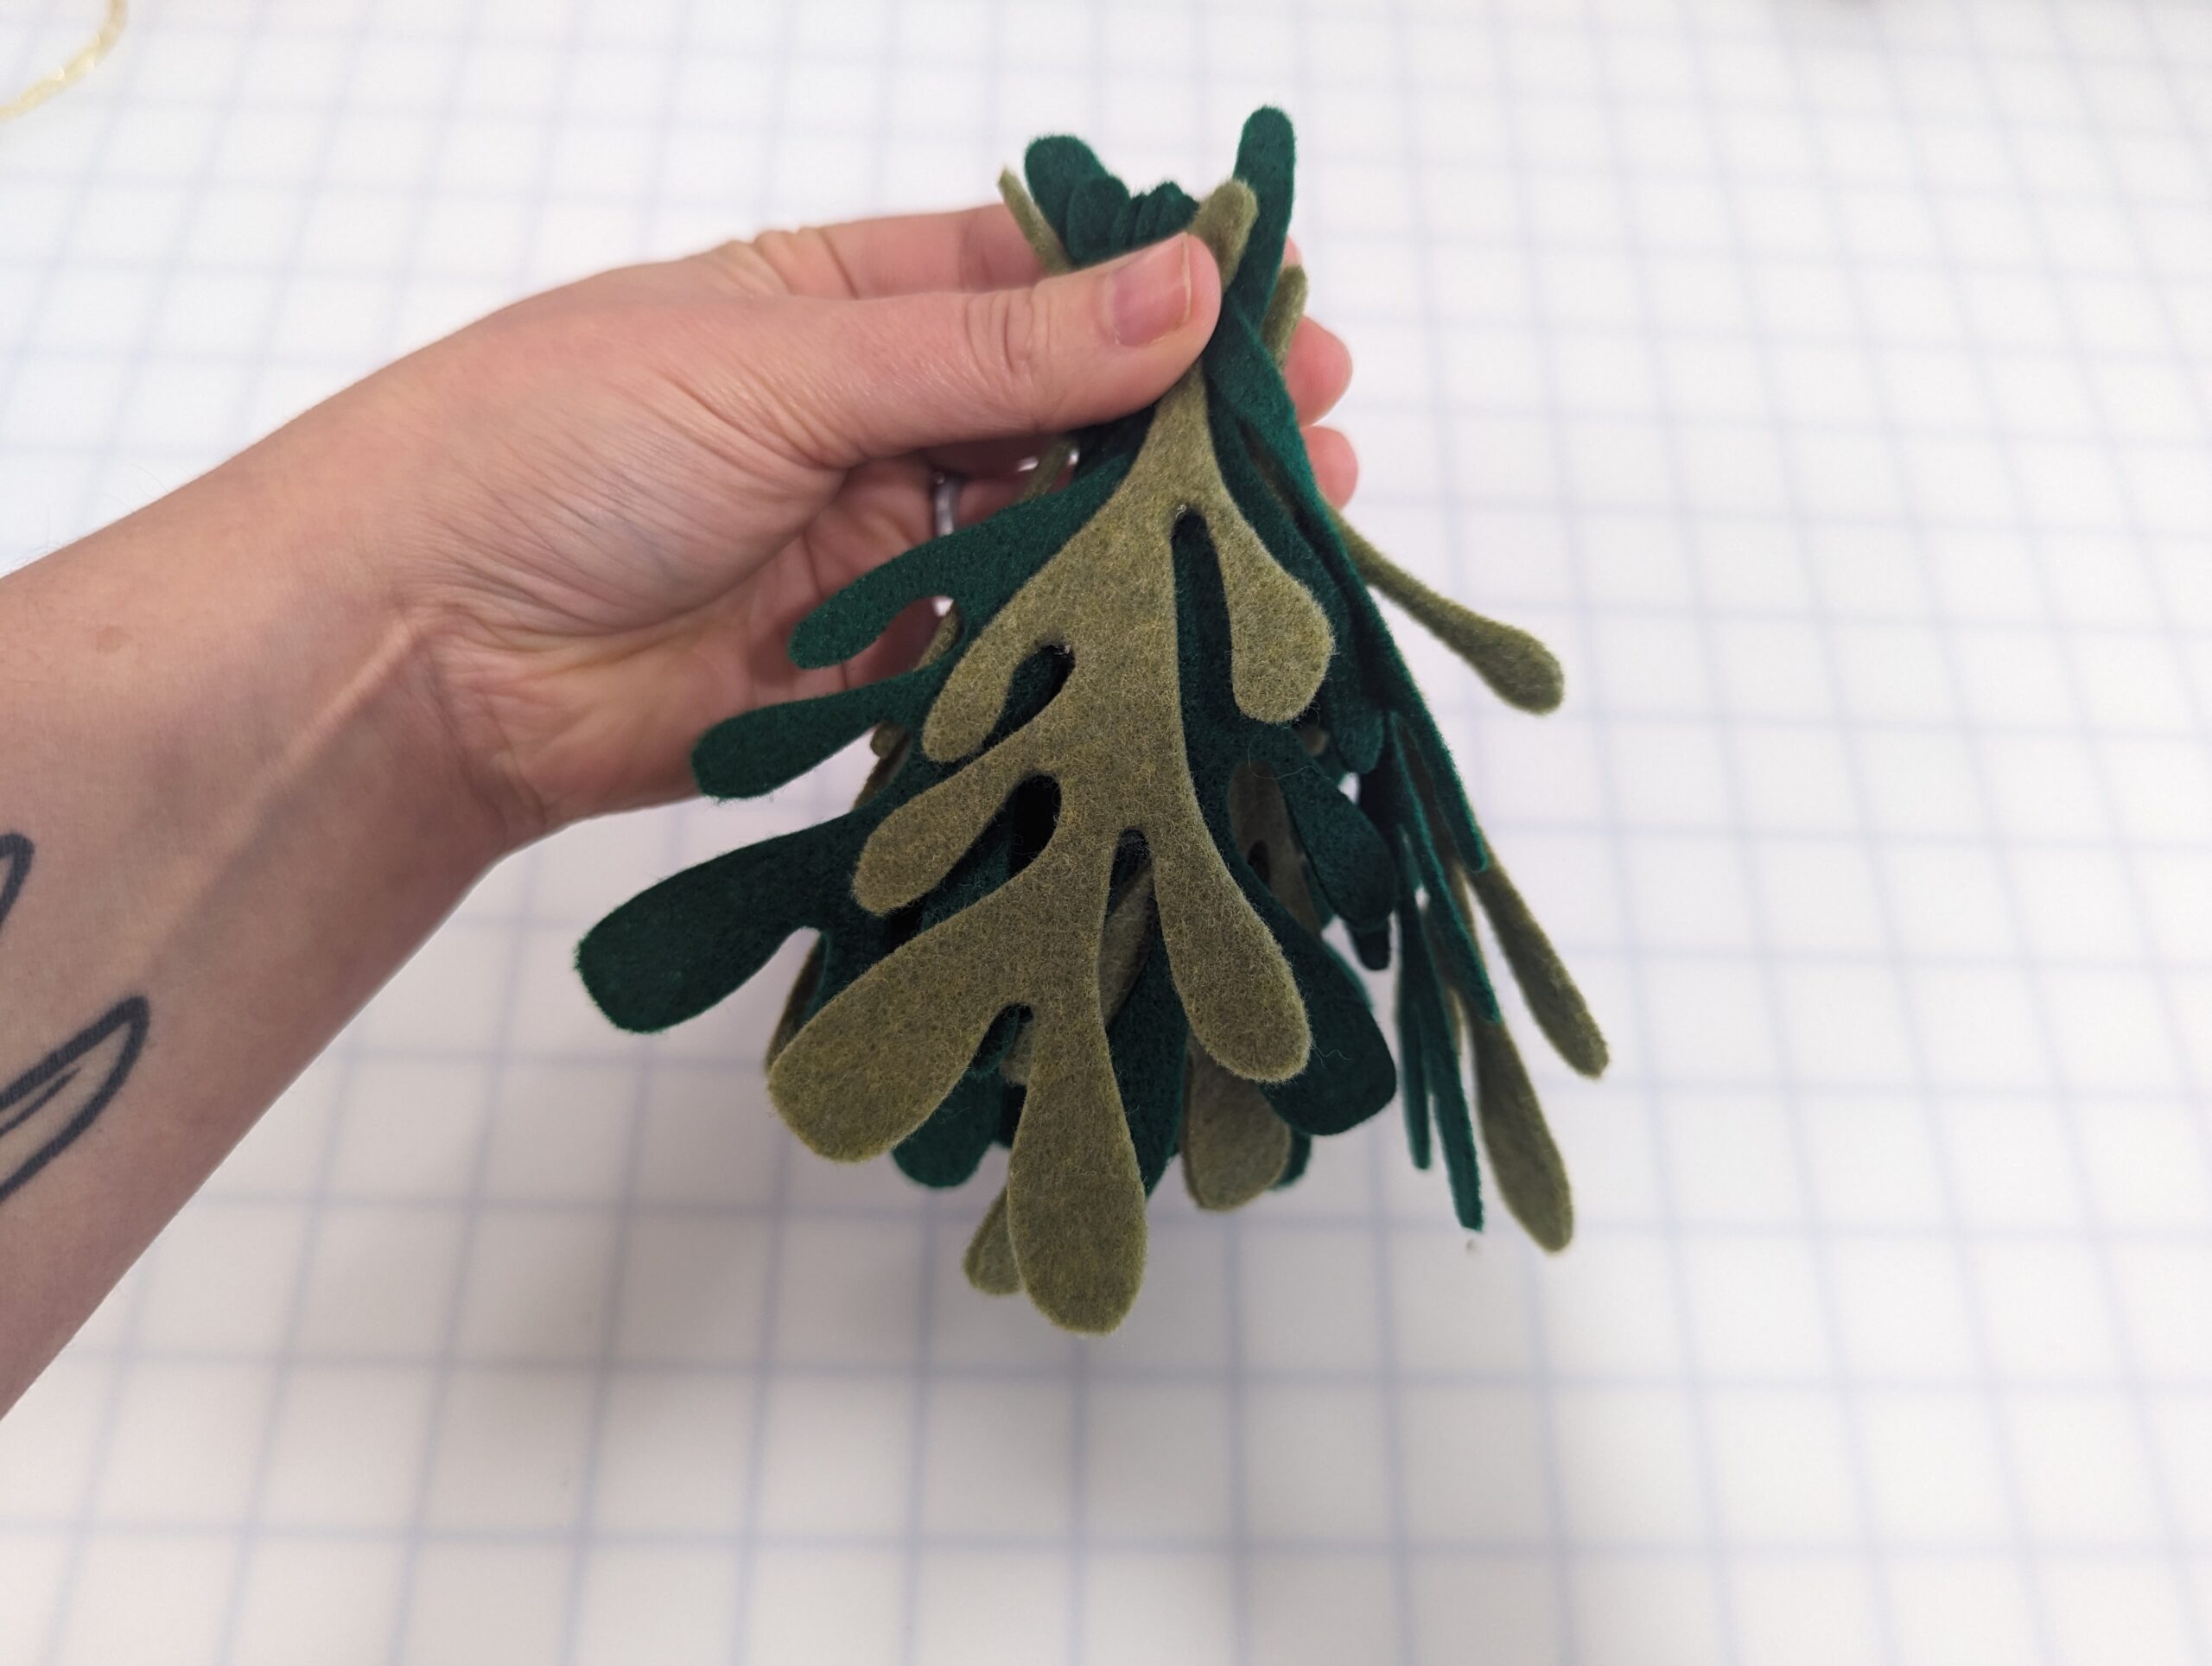
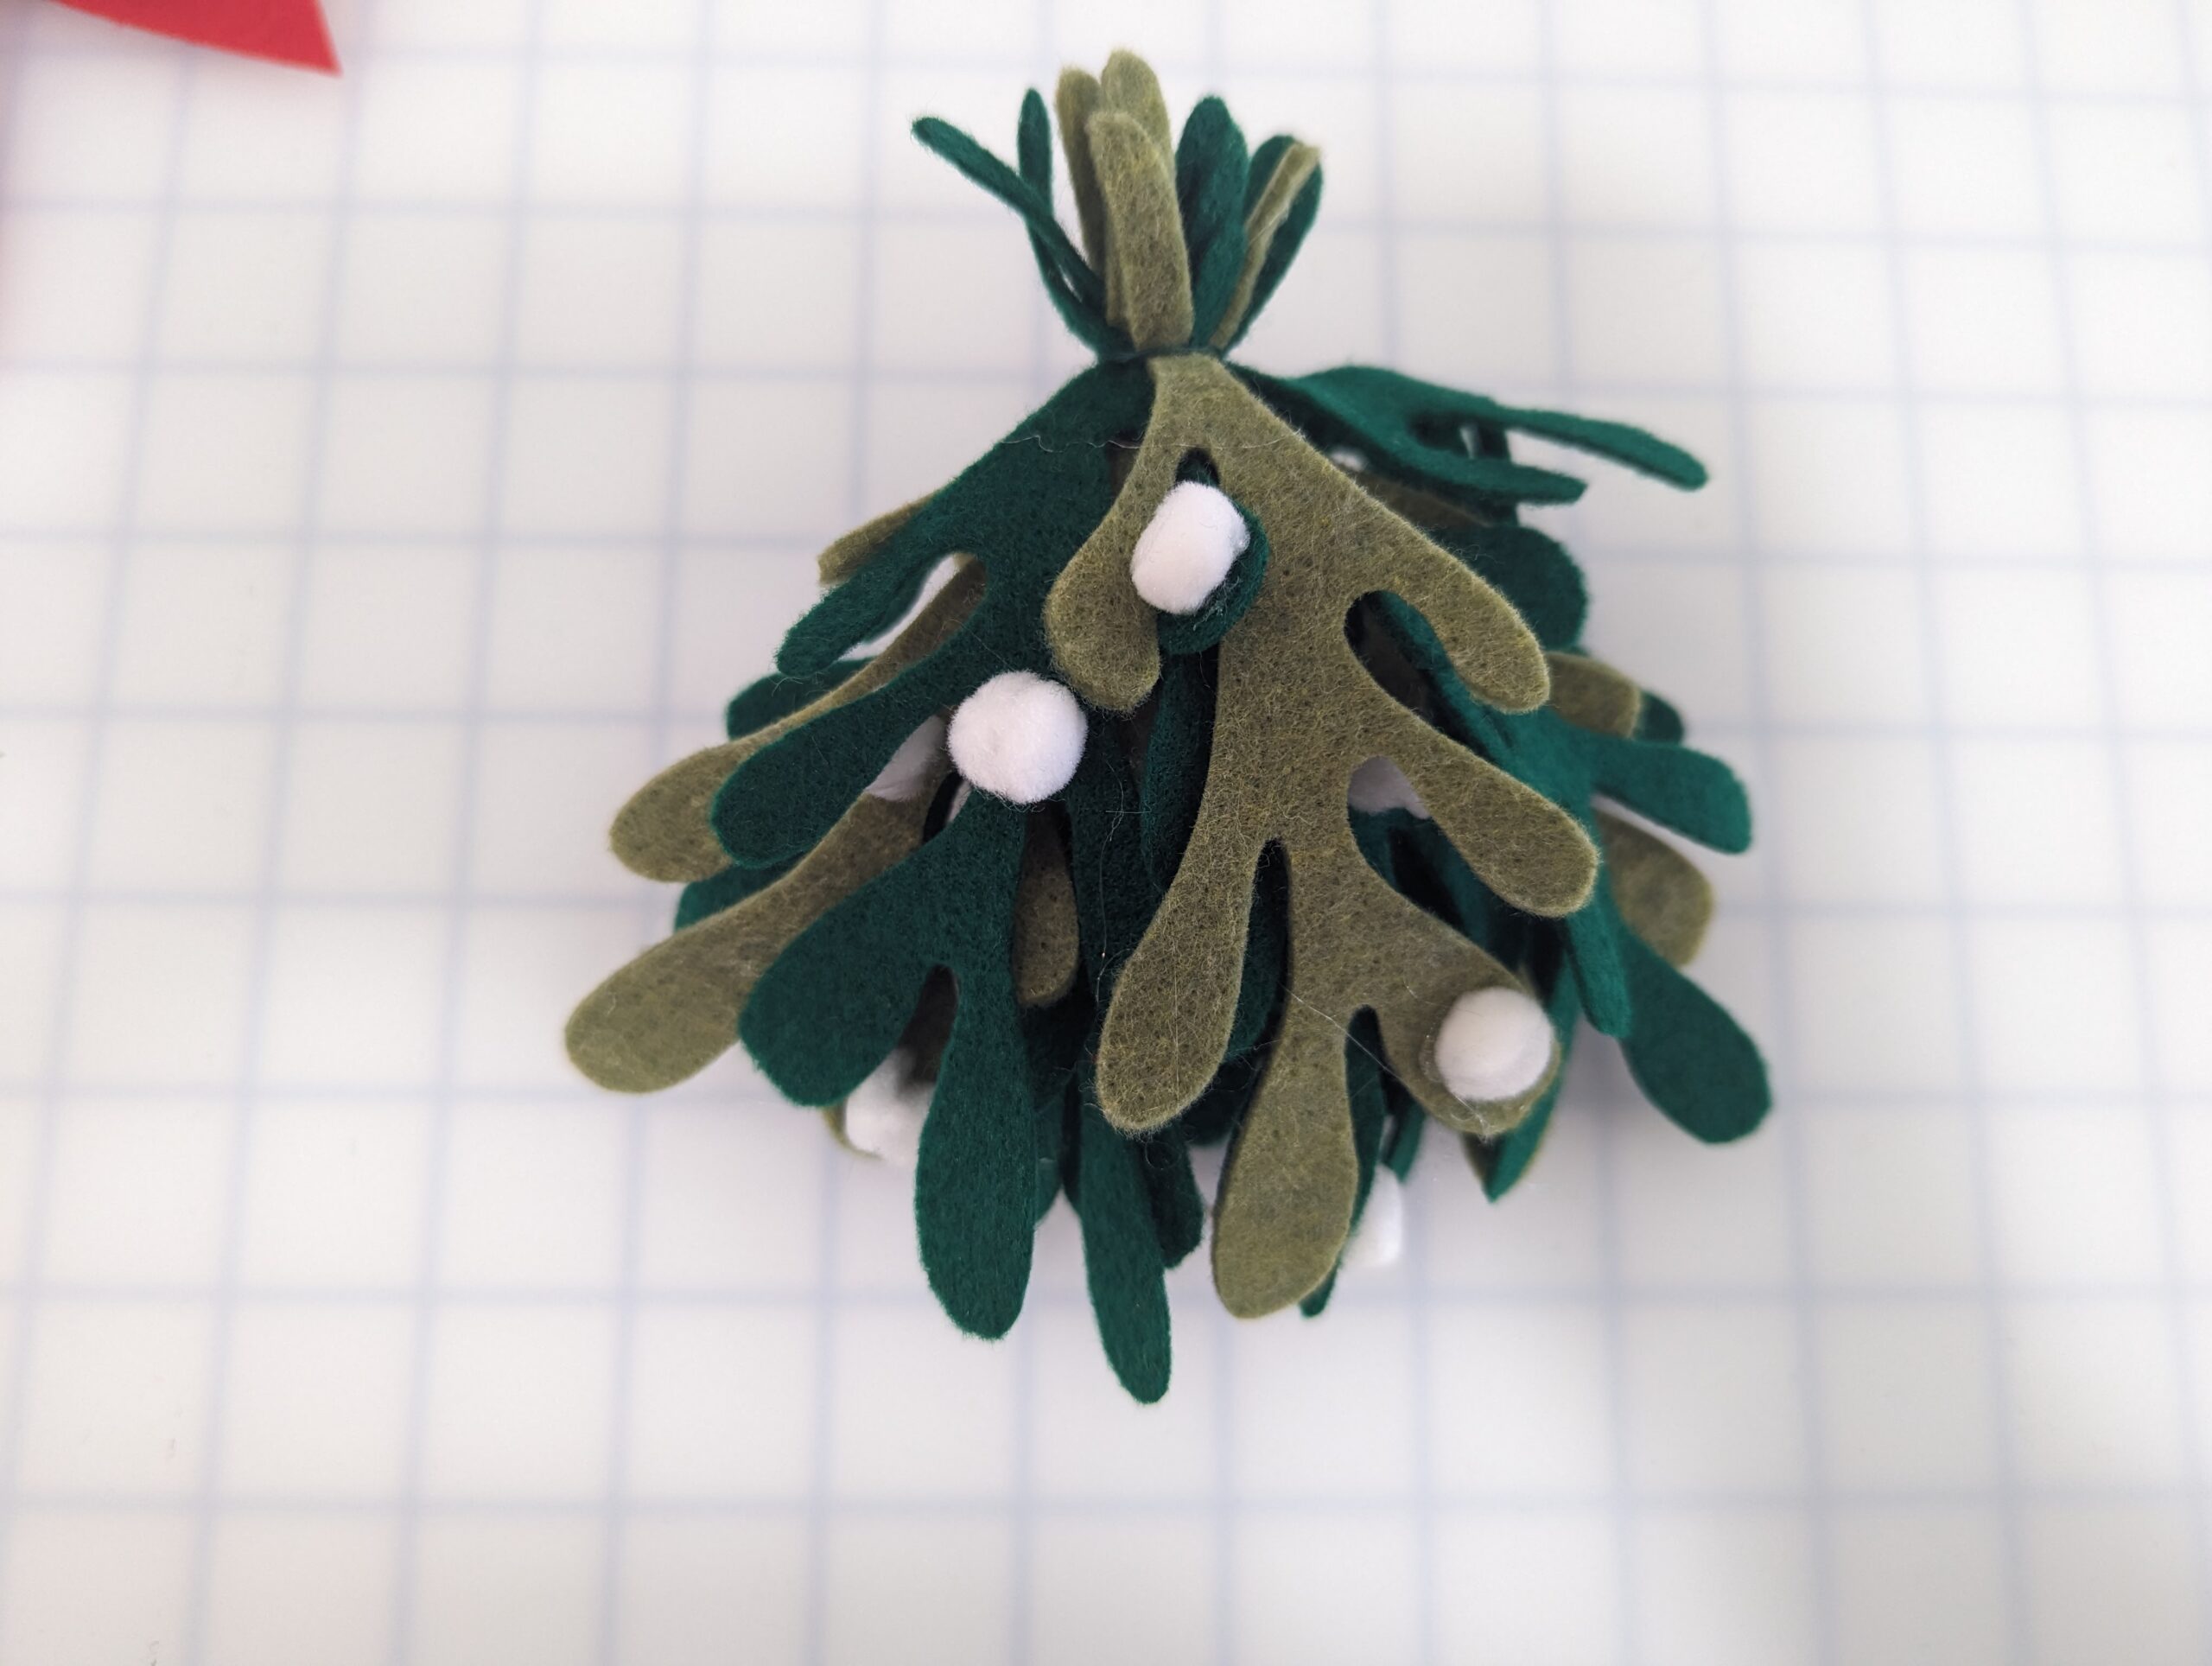
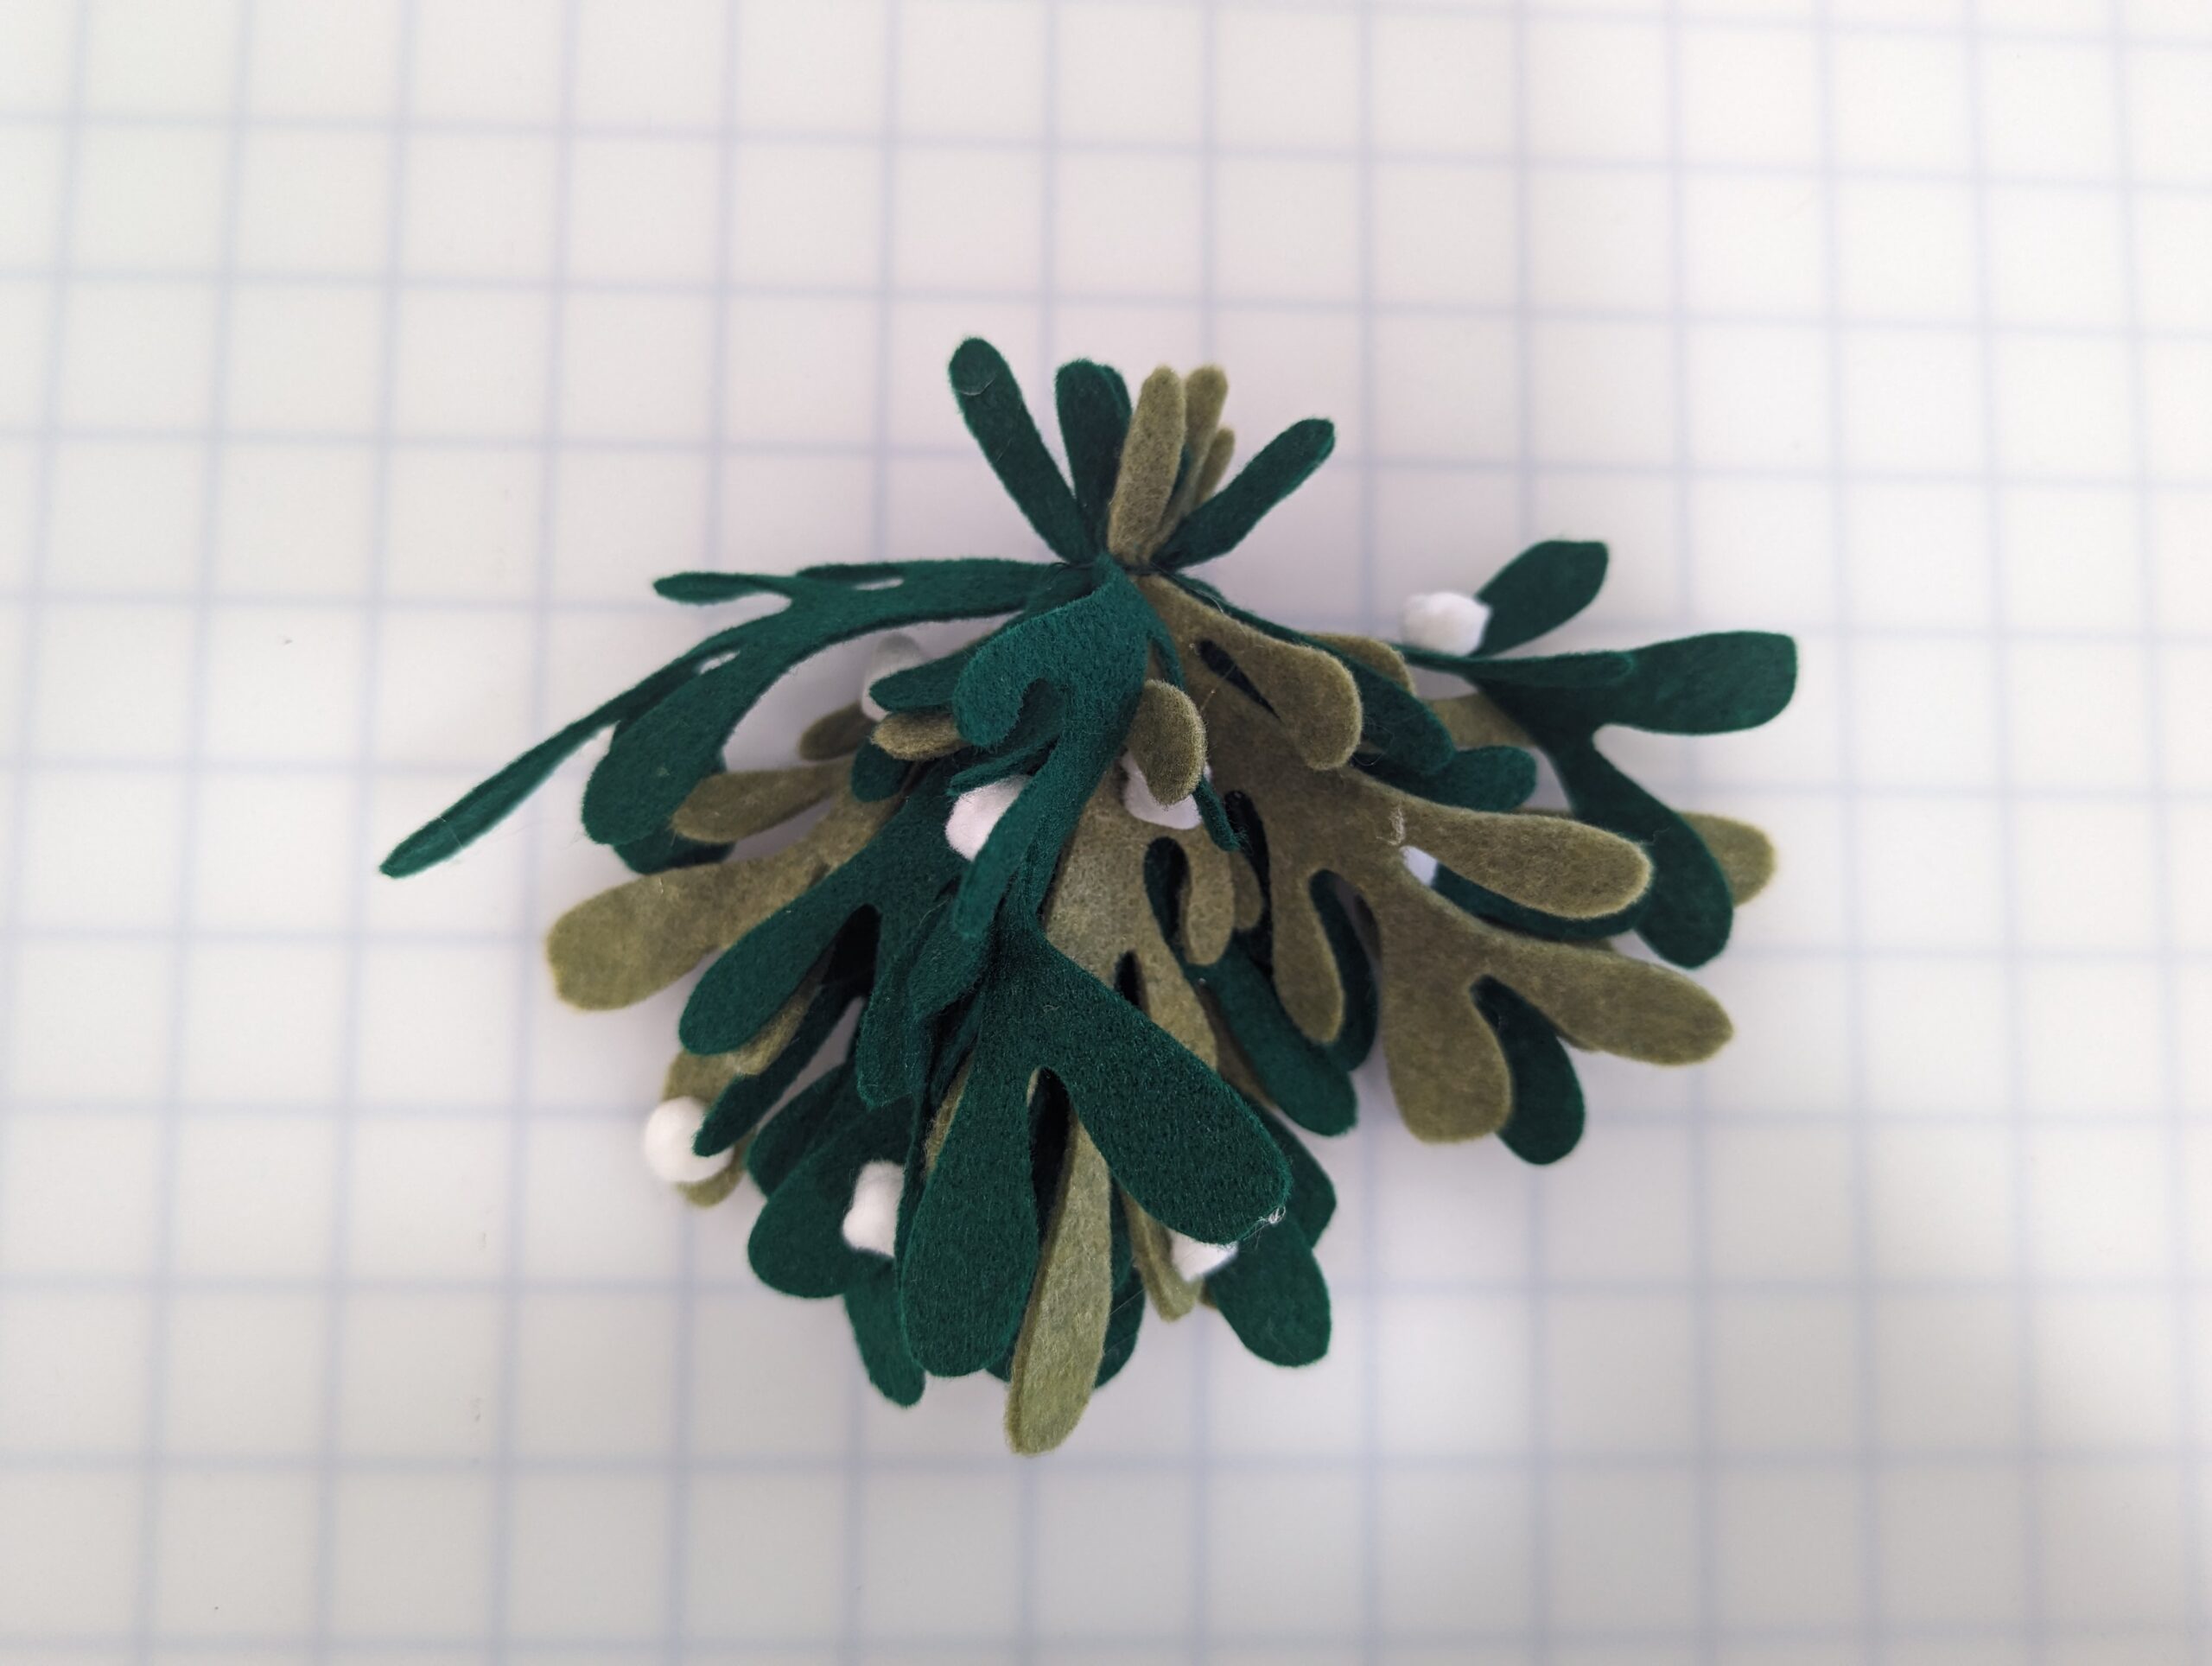
Step 4: LEAVES
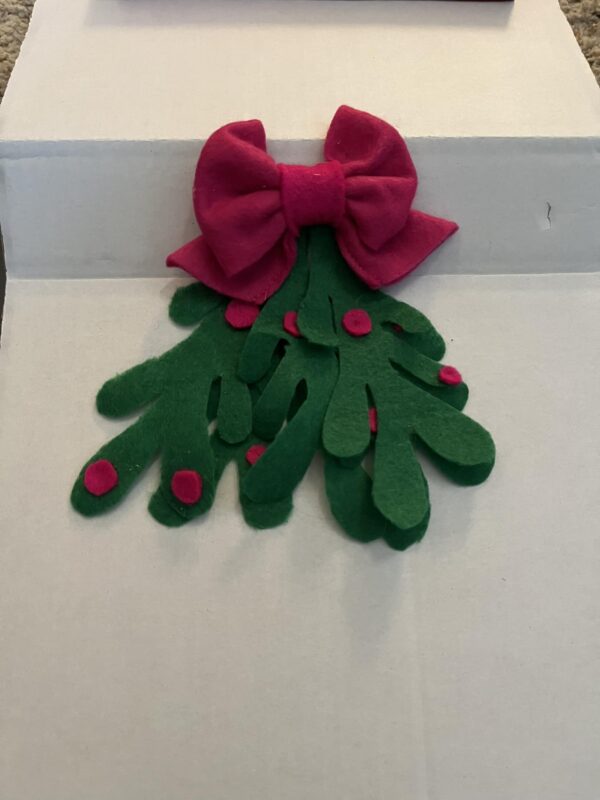
After your bow is finished, we’ll assemble our leaves! For a different look, try using different shades of green. Depending on the thickness of the felt you use, and the overall look you’d like to achieve, the number of leaves you may want to use will vary.
NOTE: You can use your favorite cutting machine and the cut files, instead of cutting these out by hand, if you’d like!
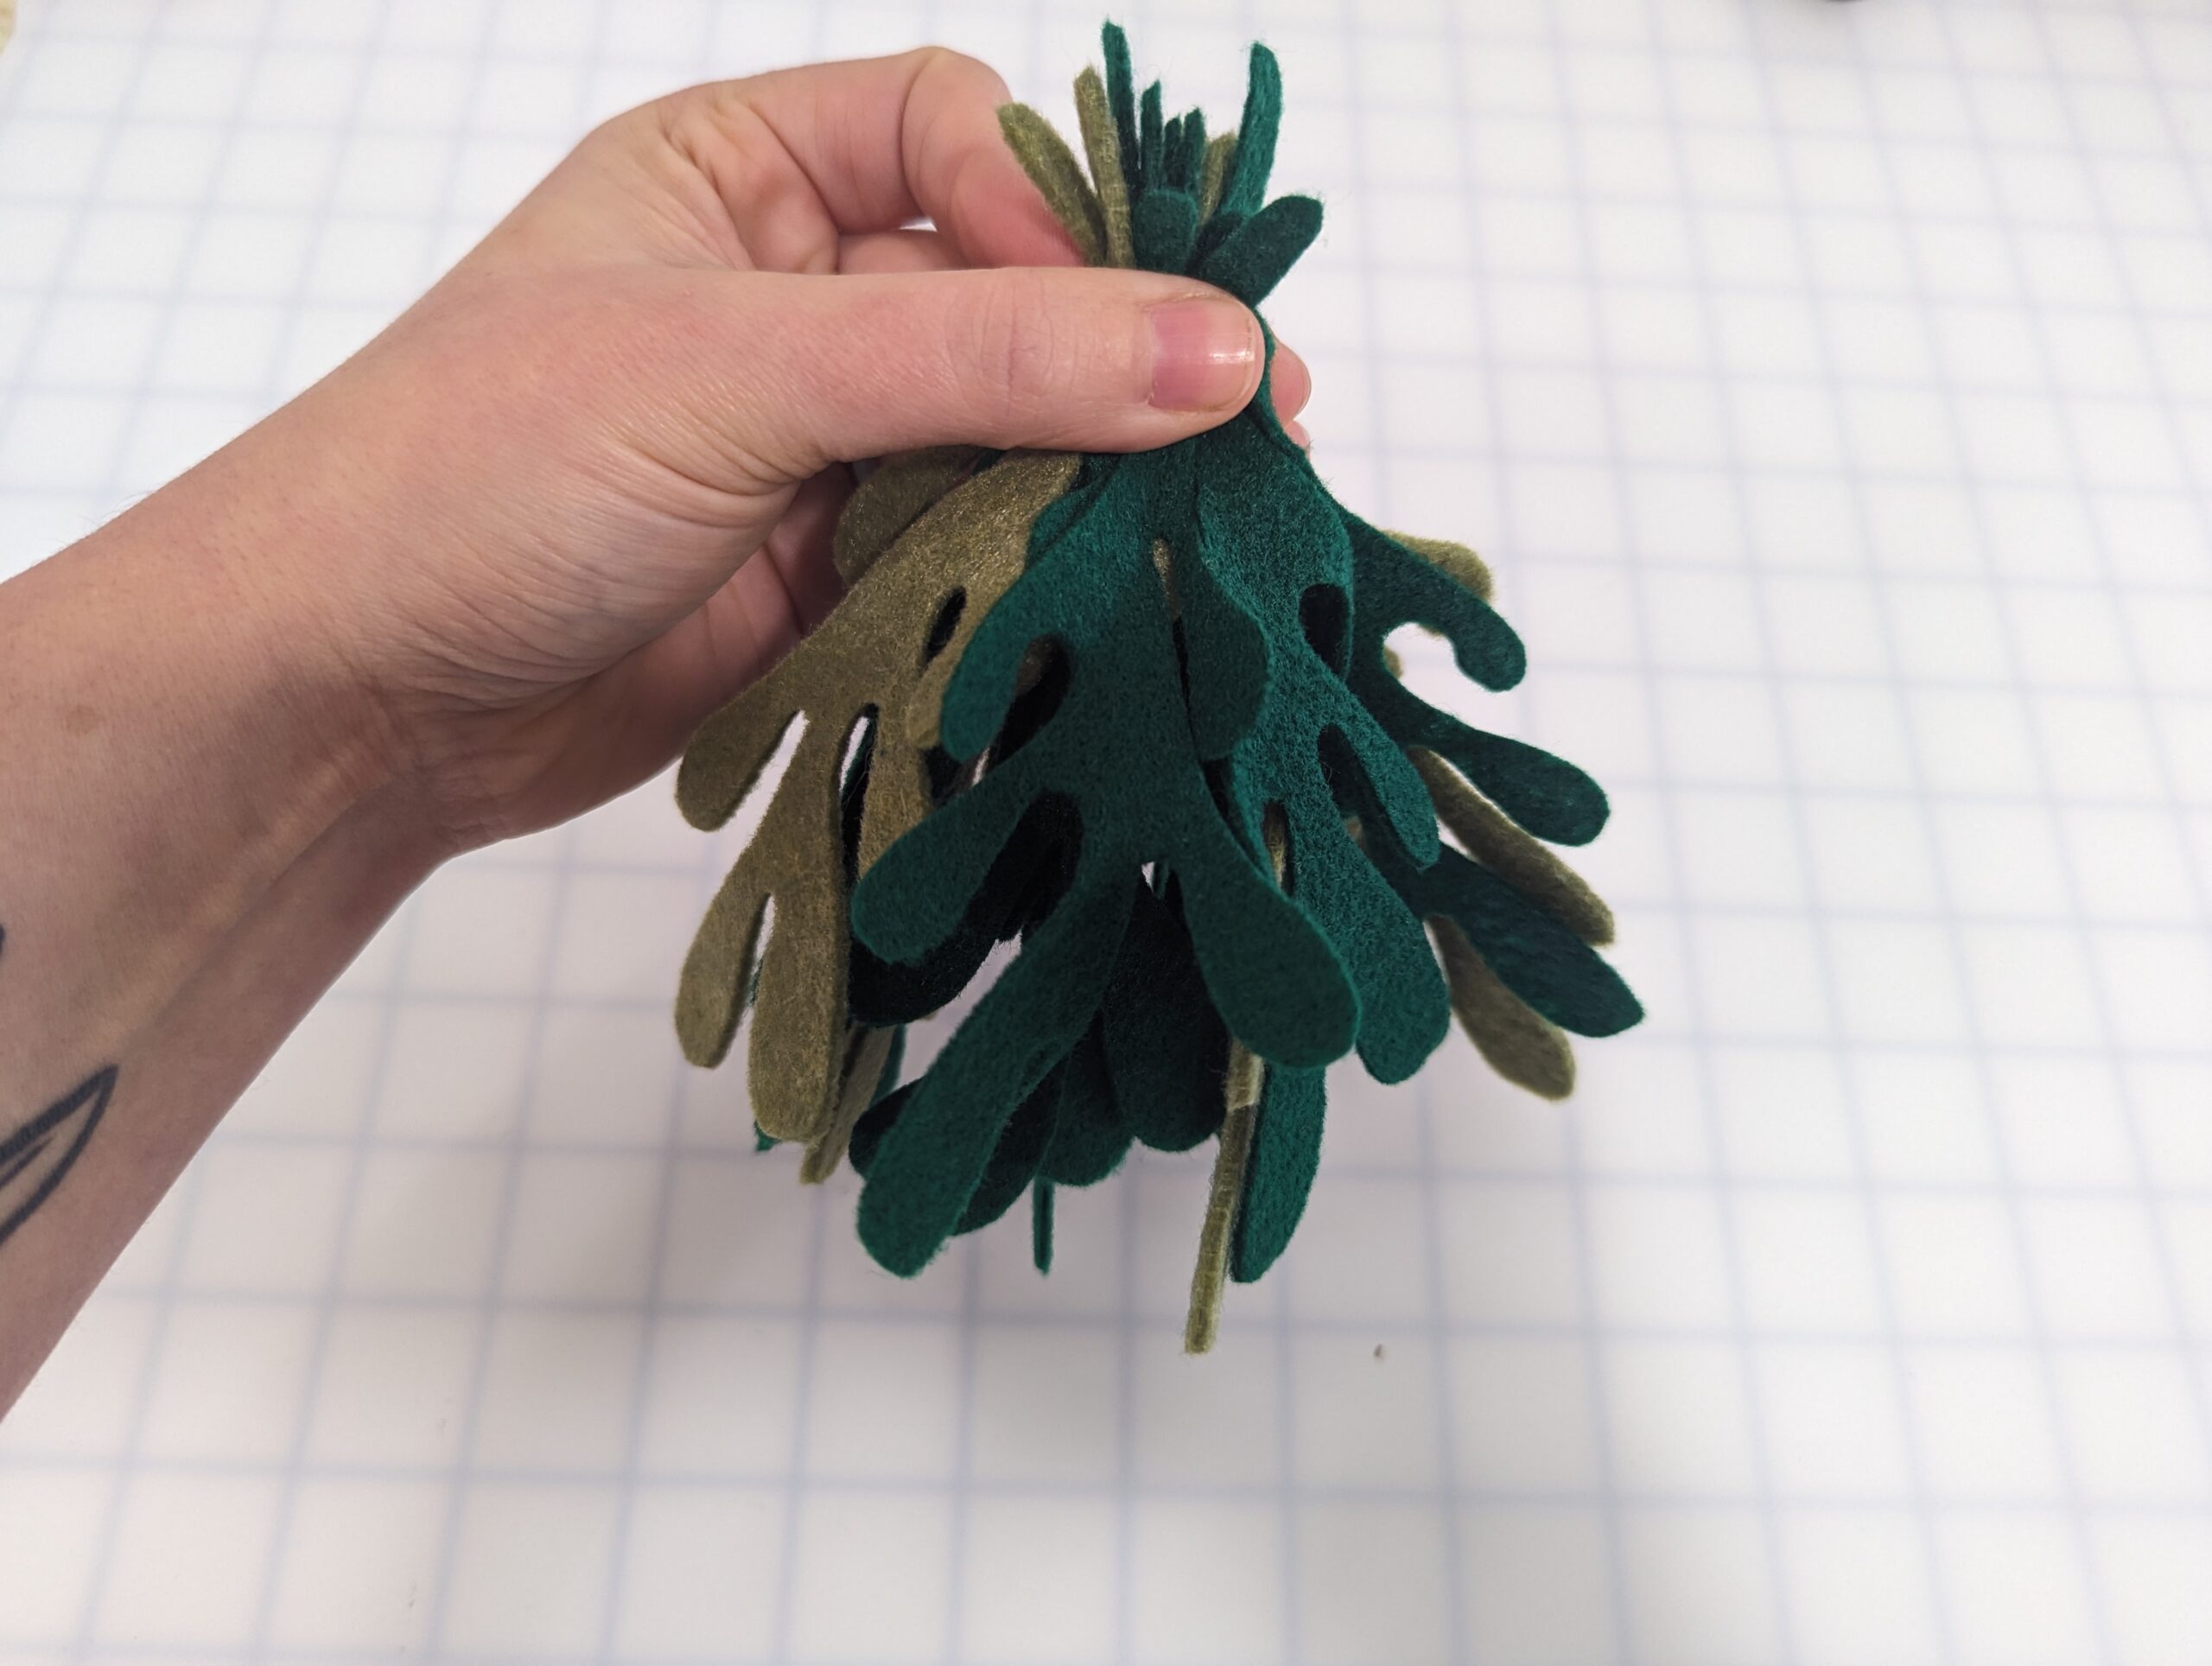
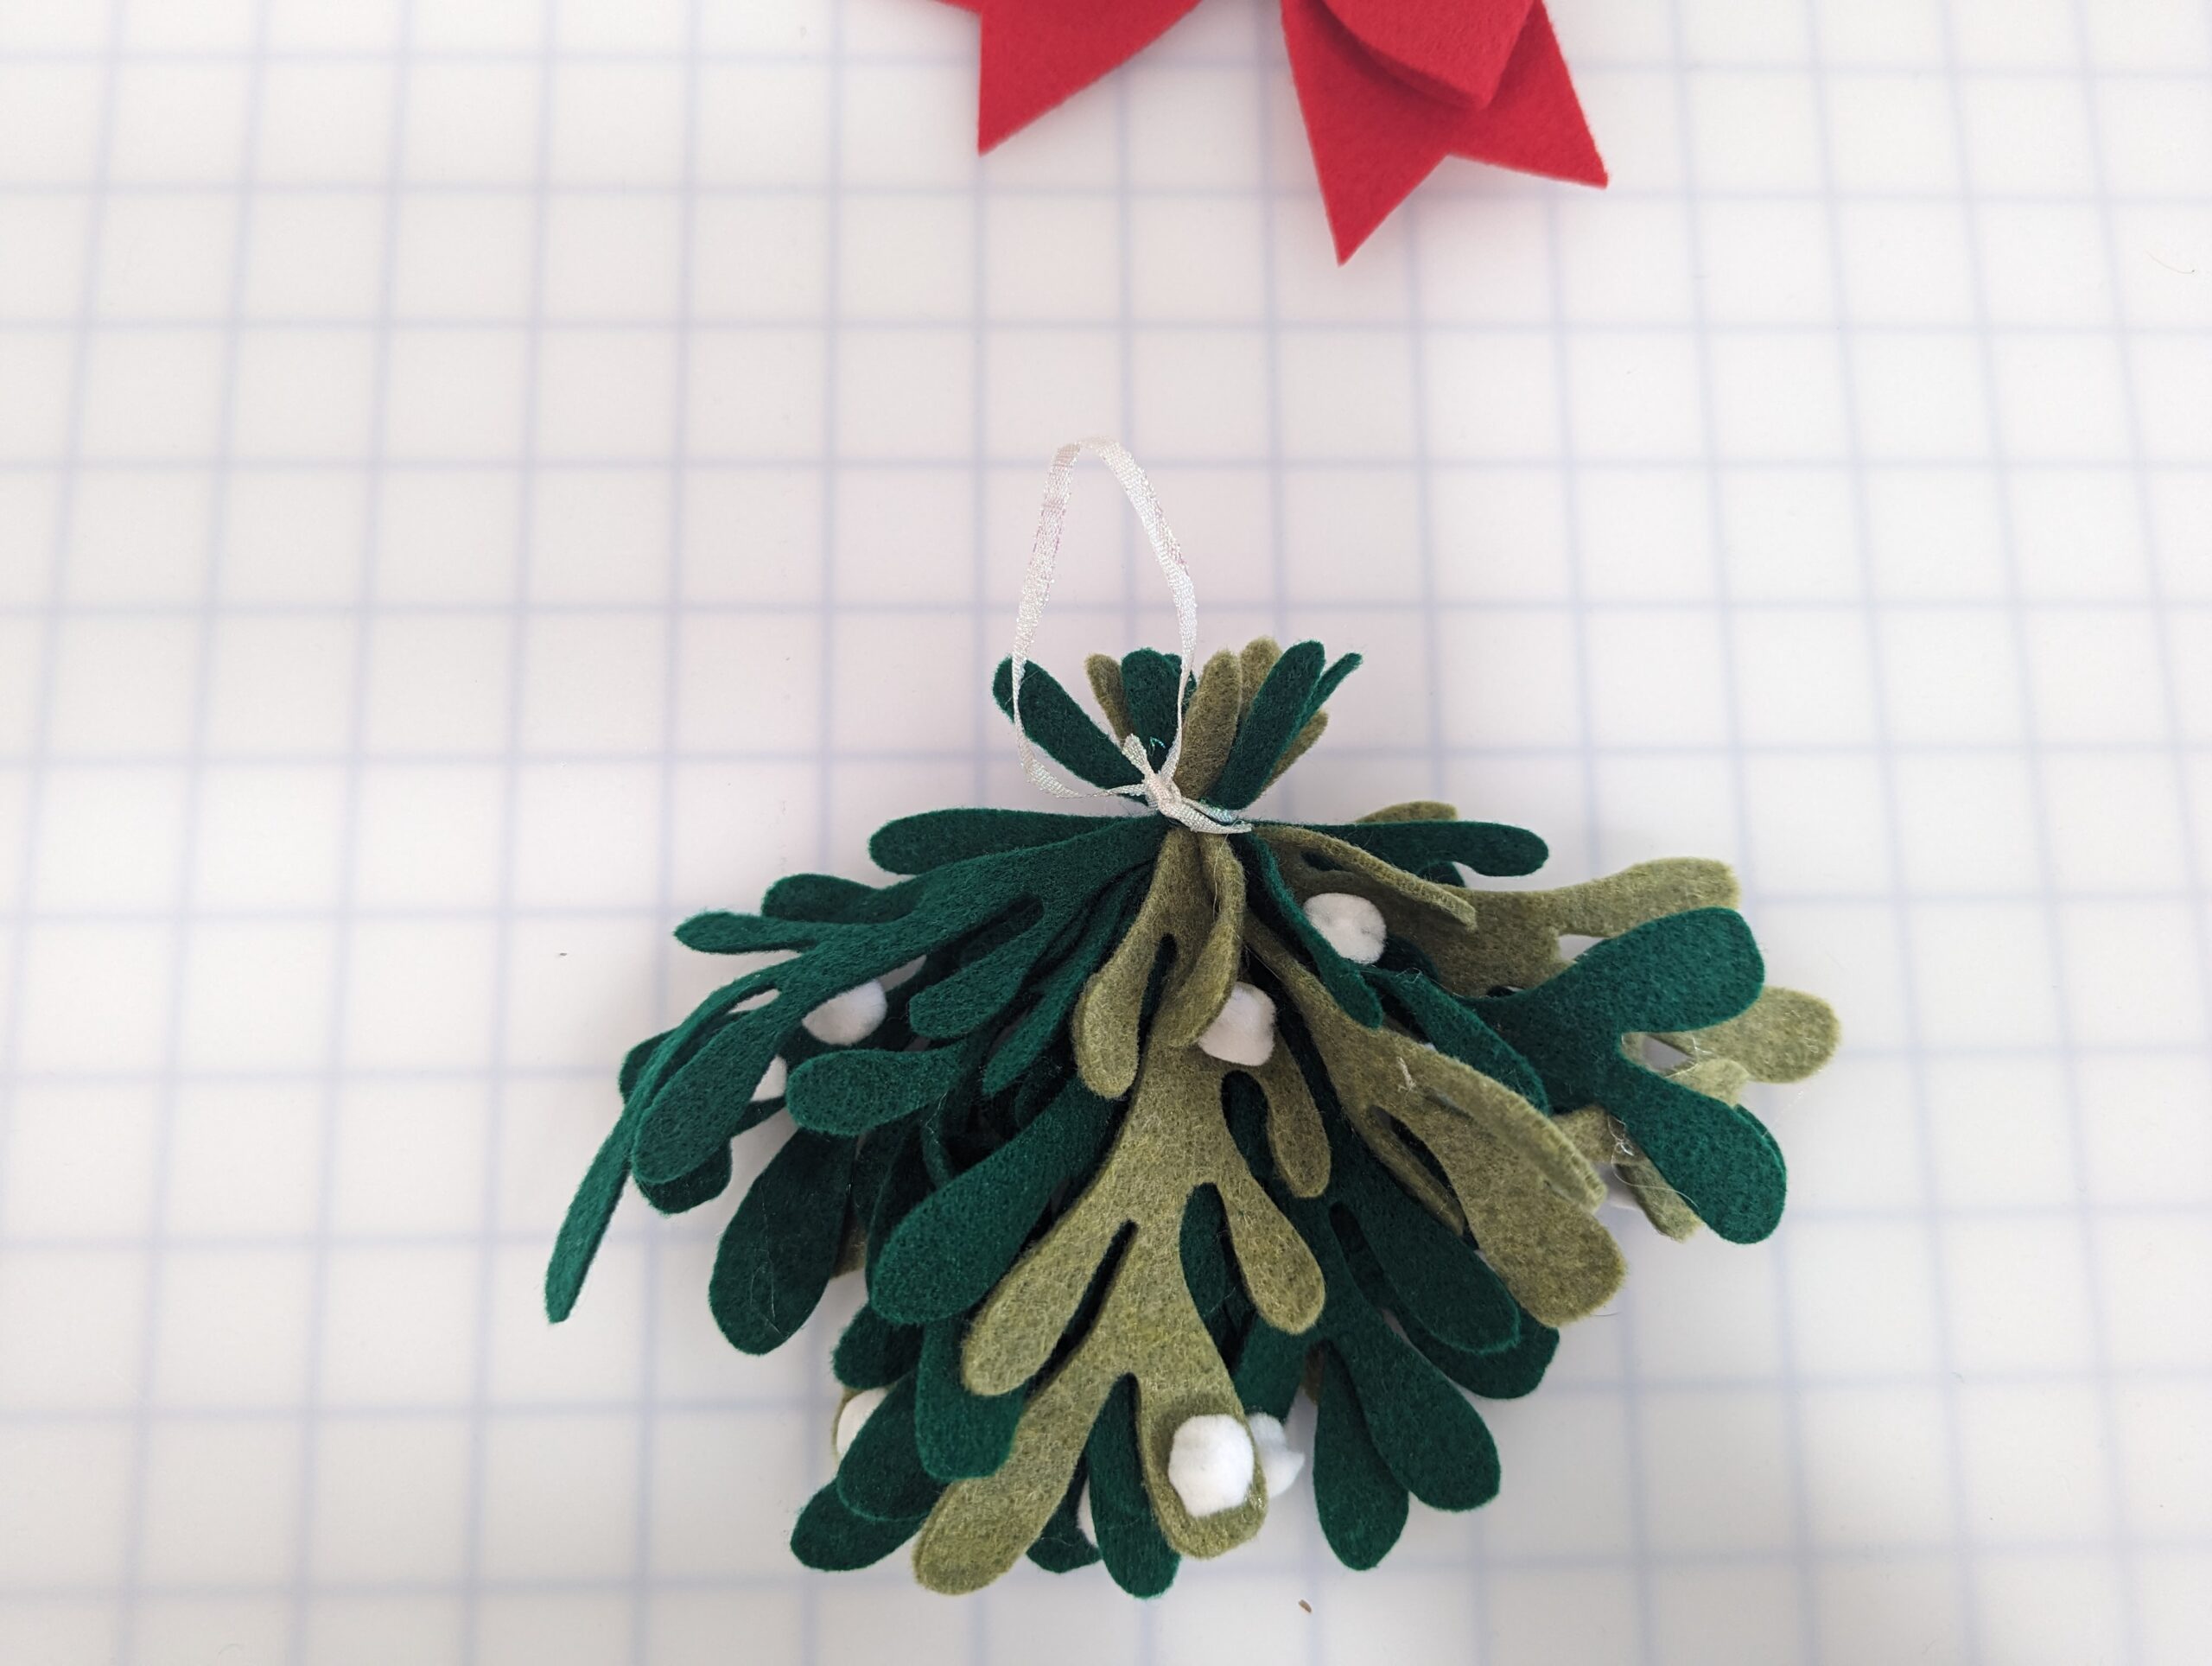
Begin stacking leaves together at the “stem”.
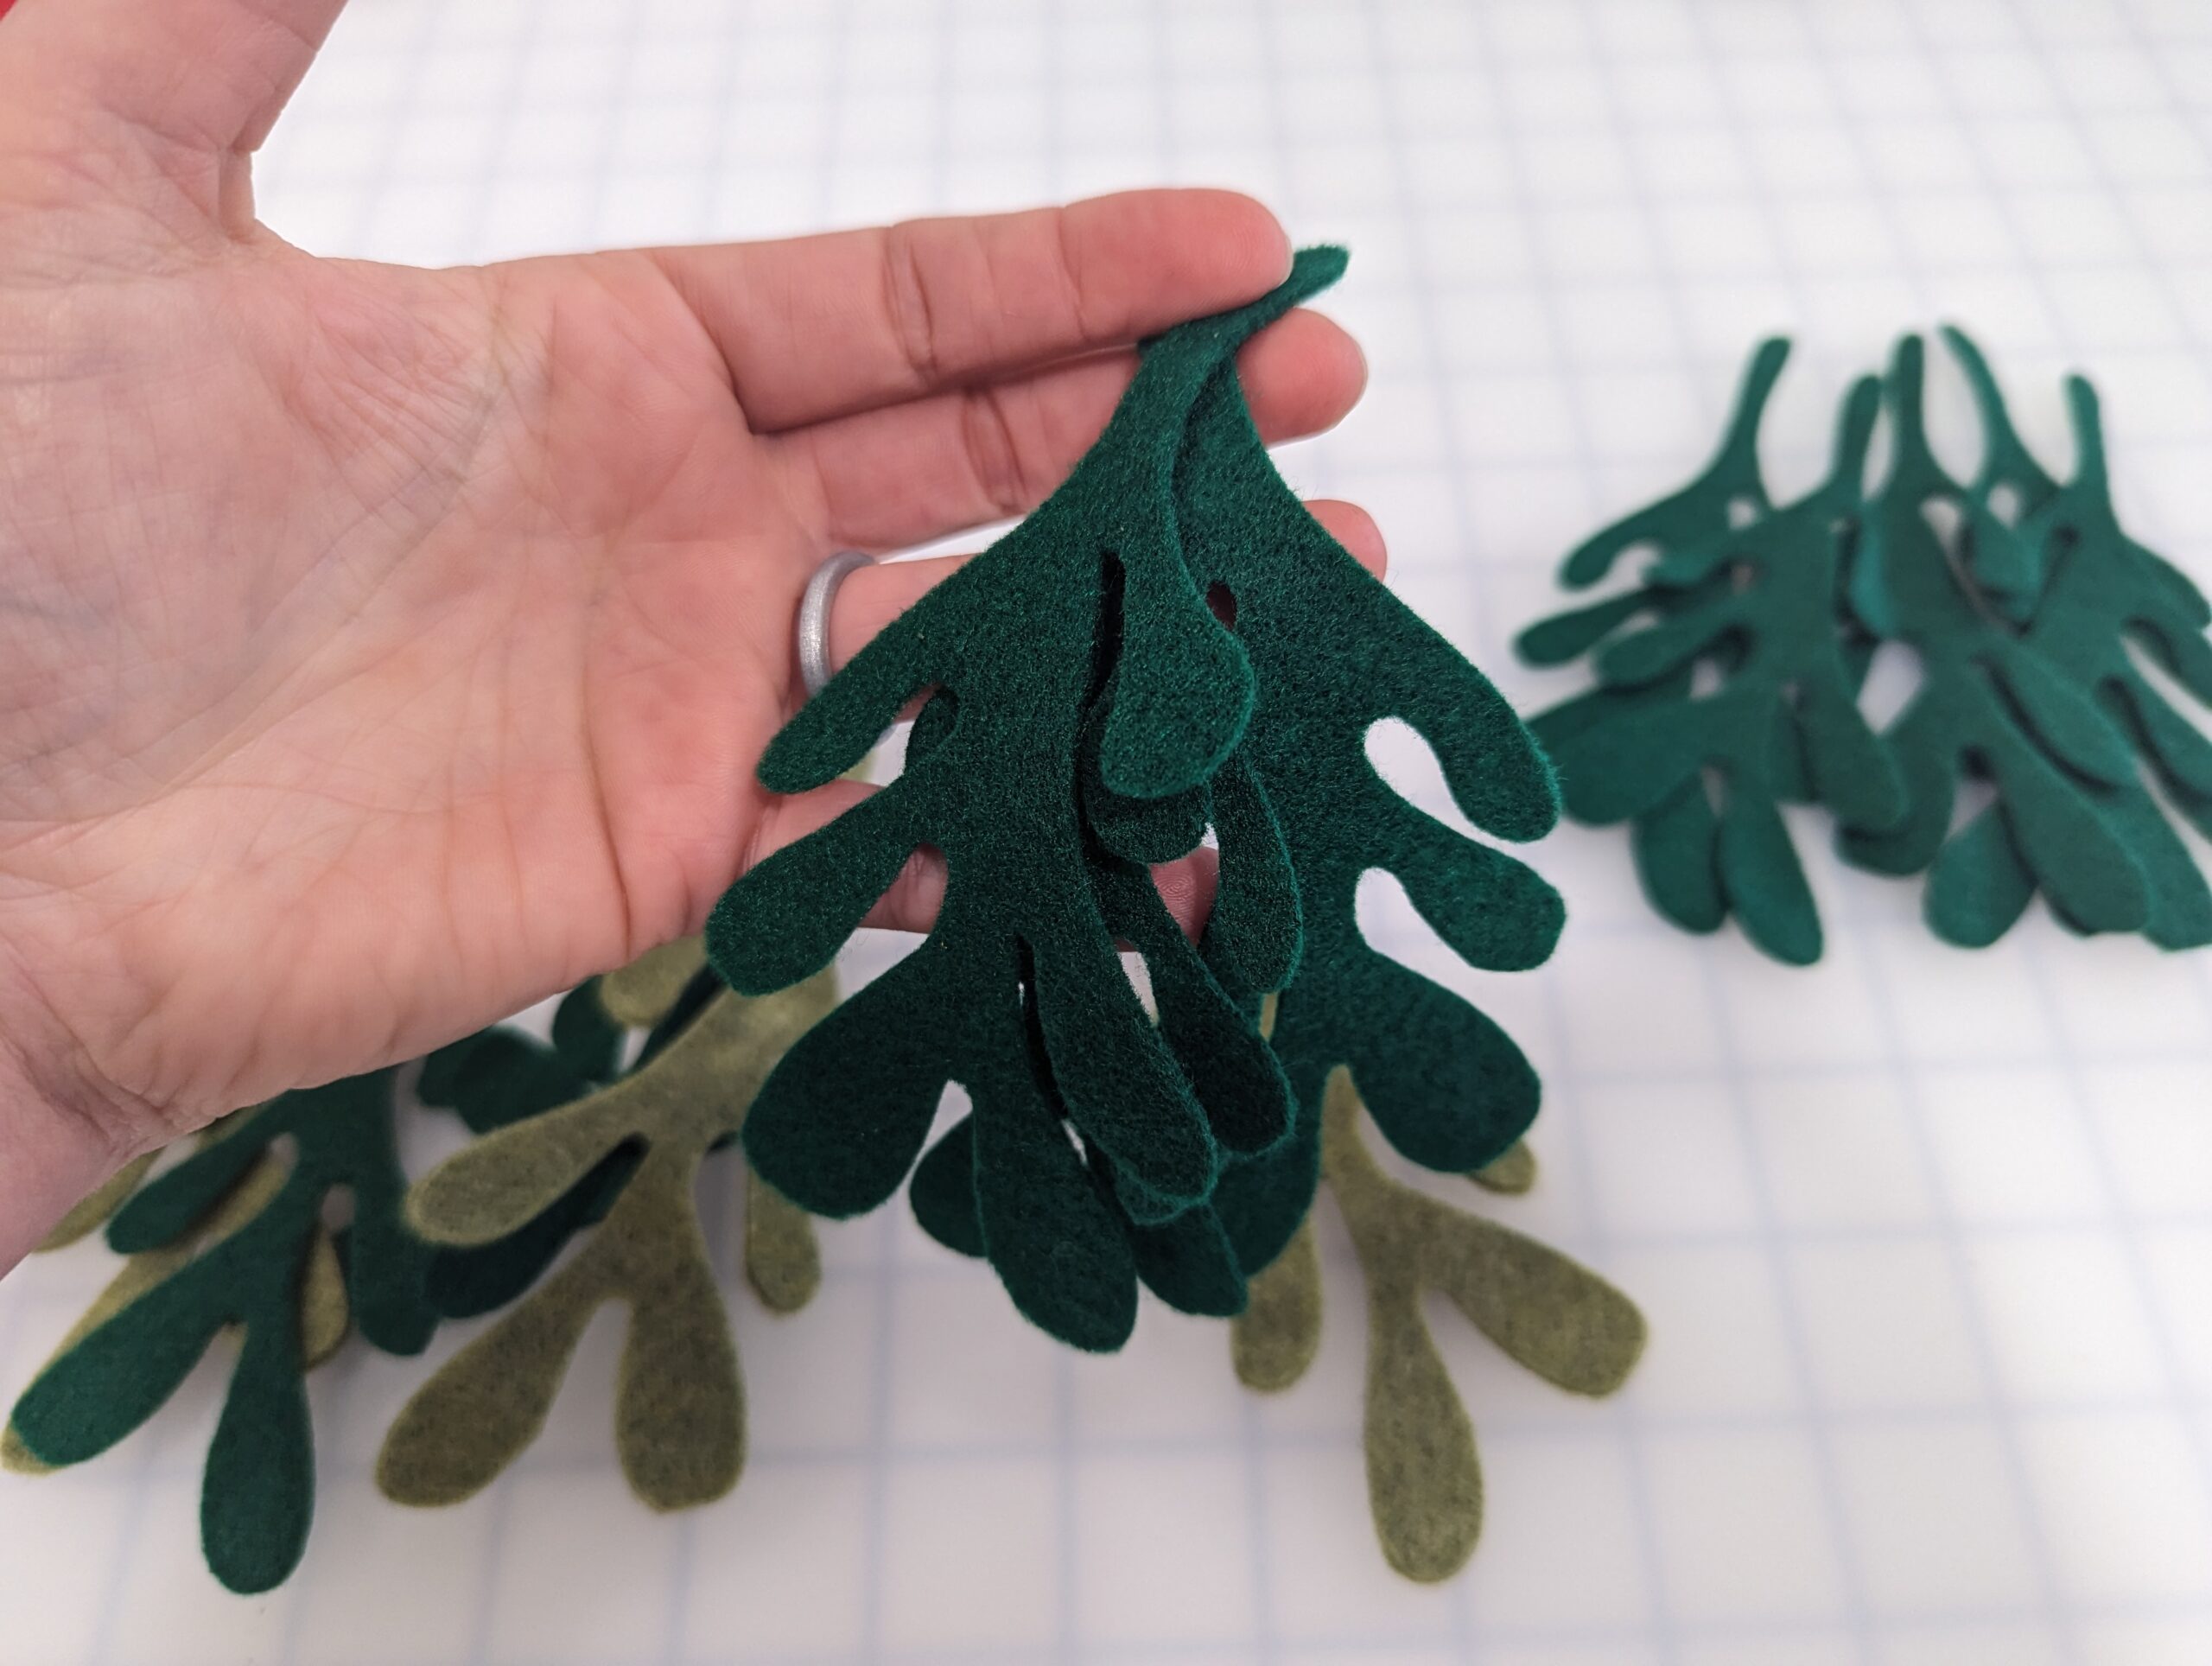
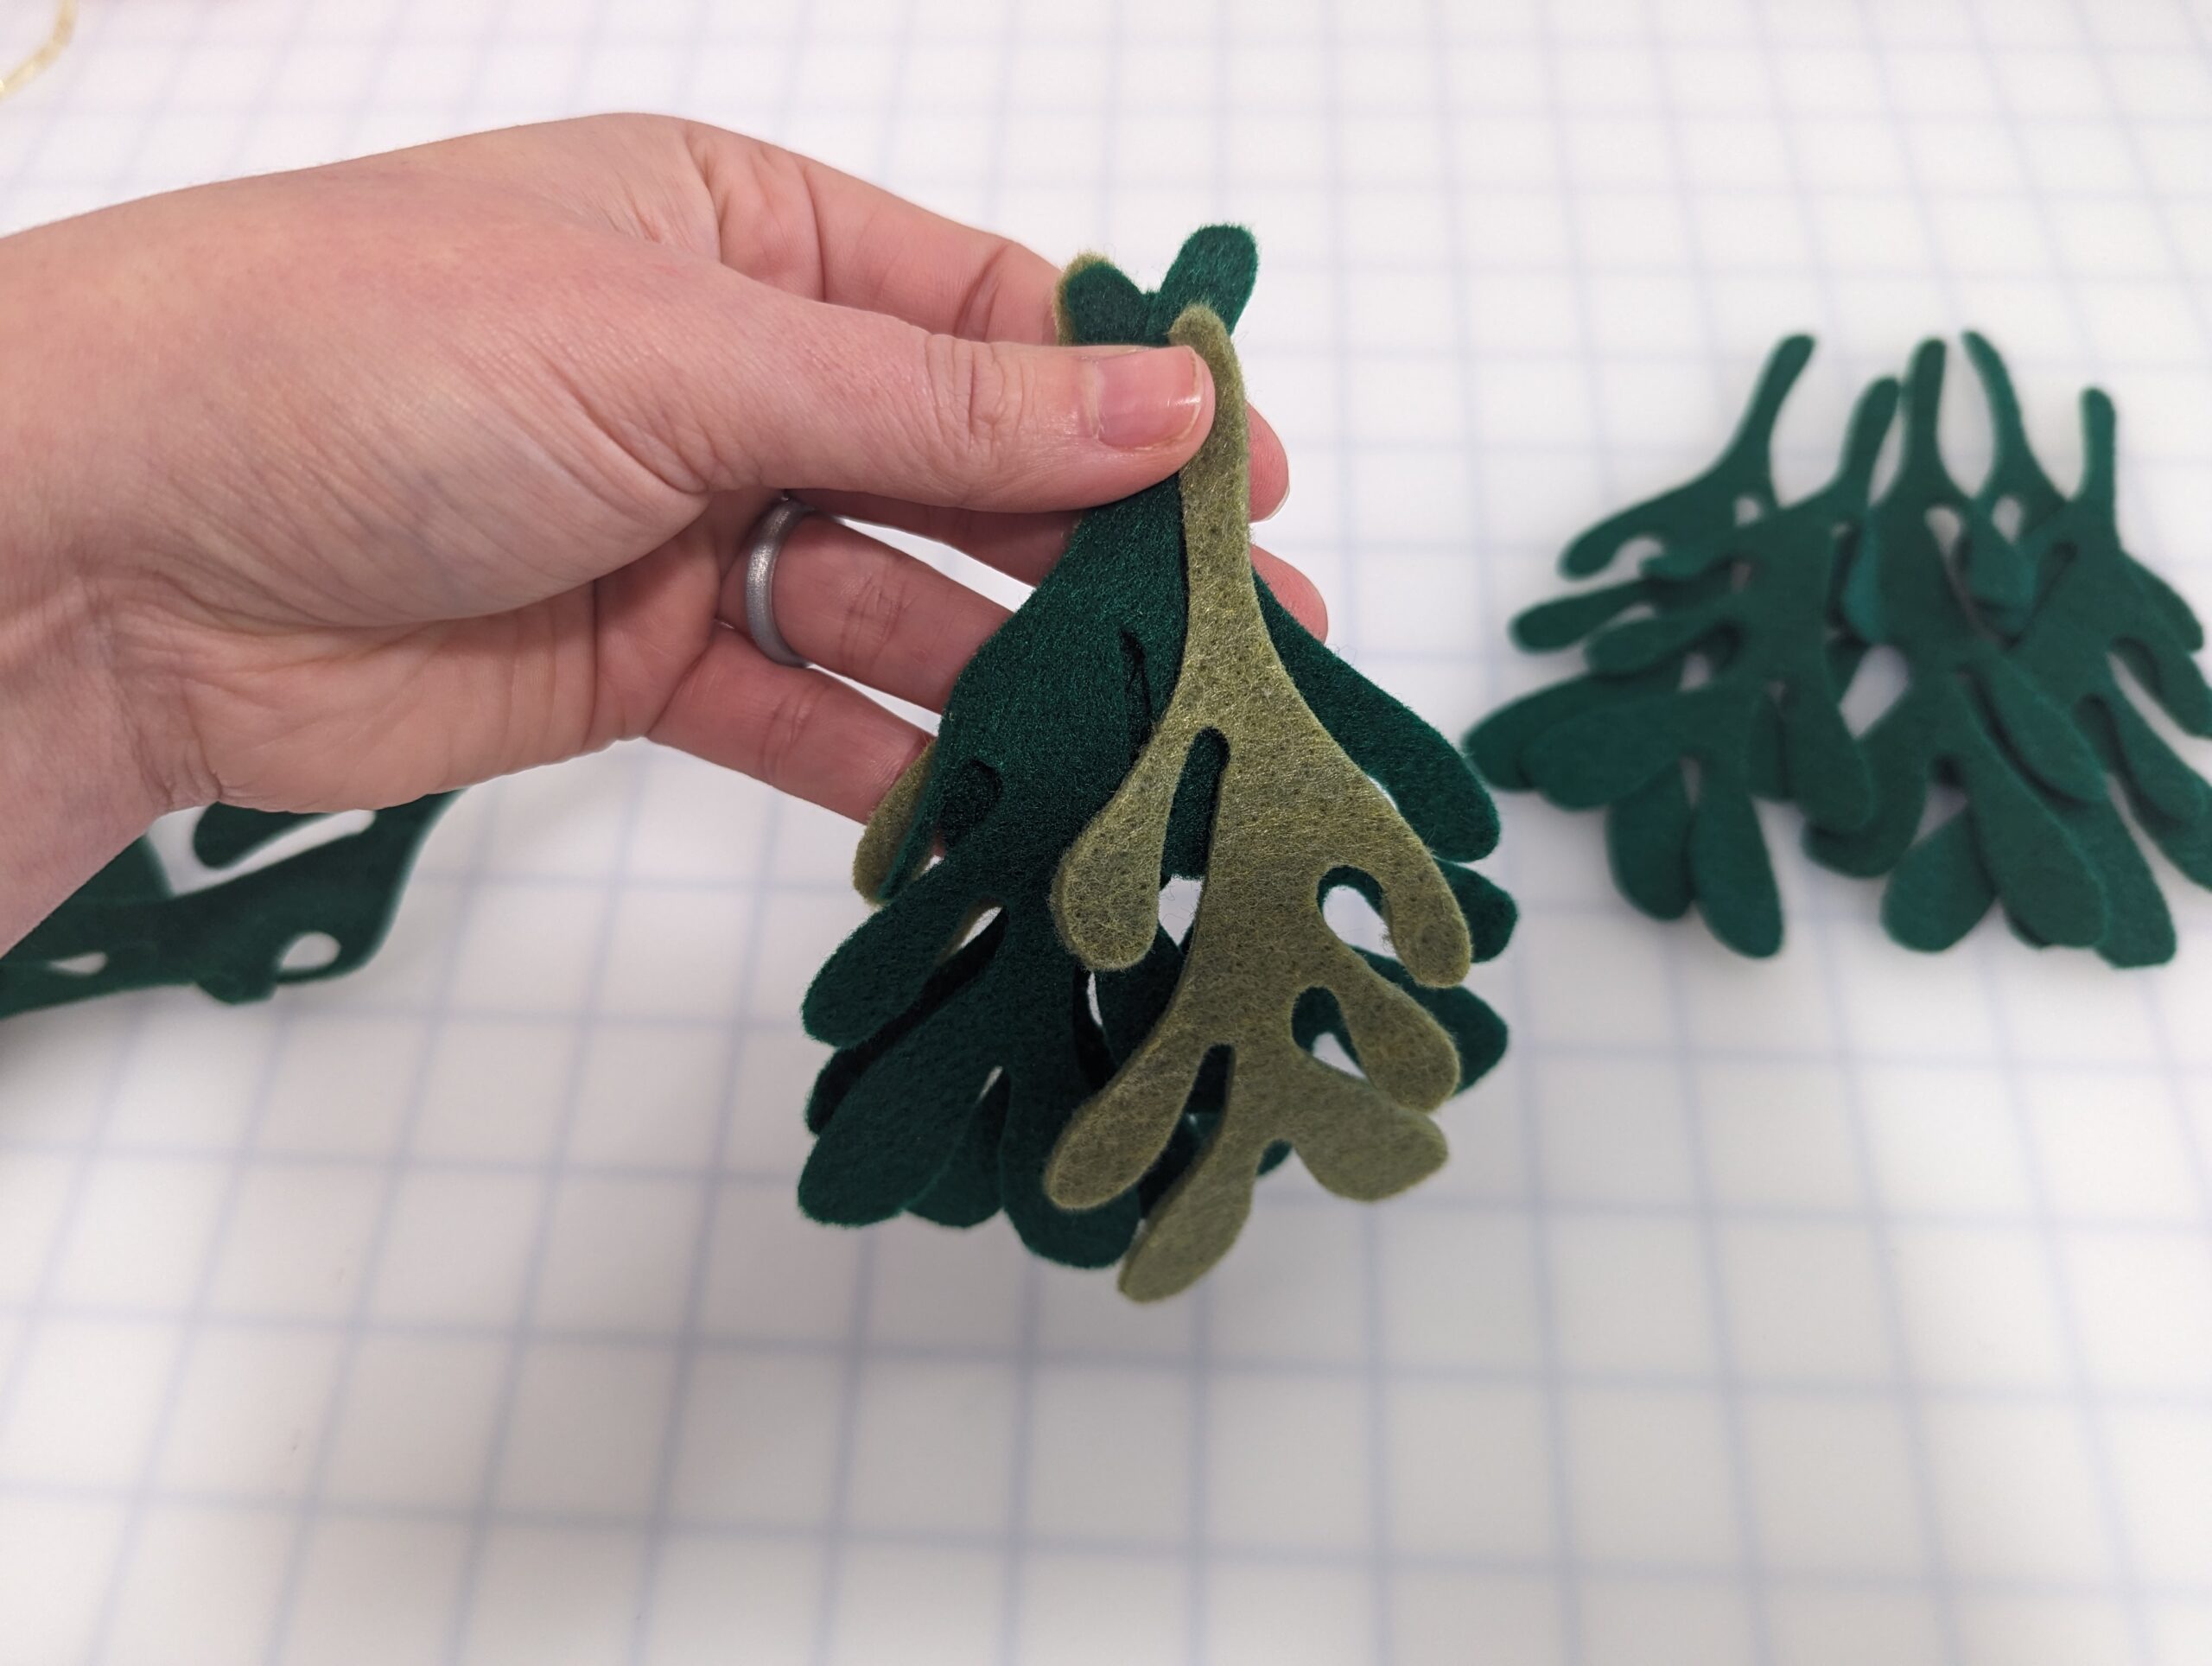
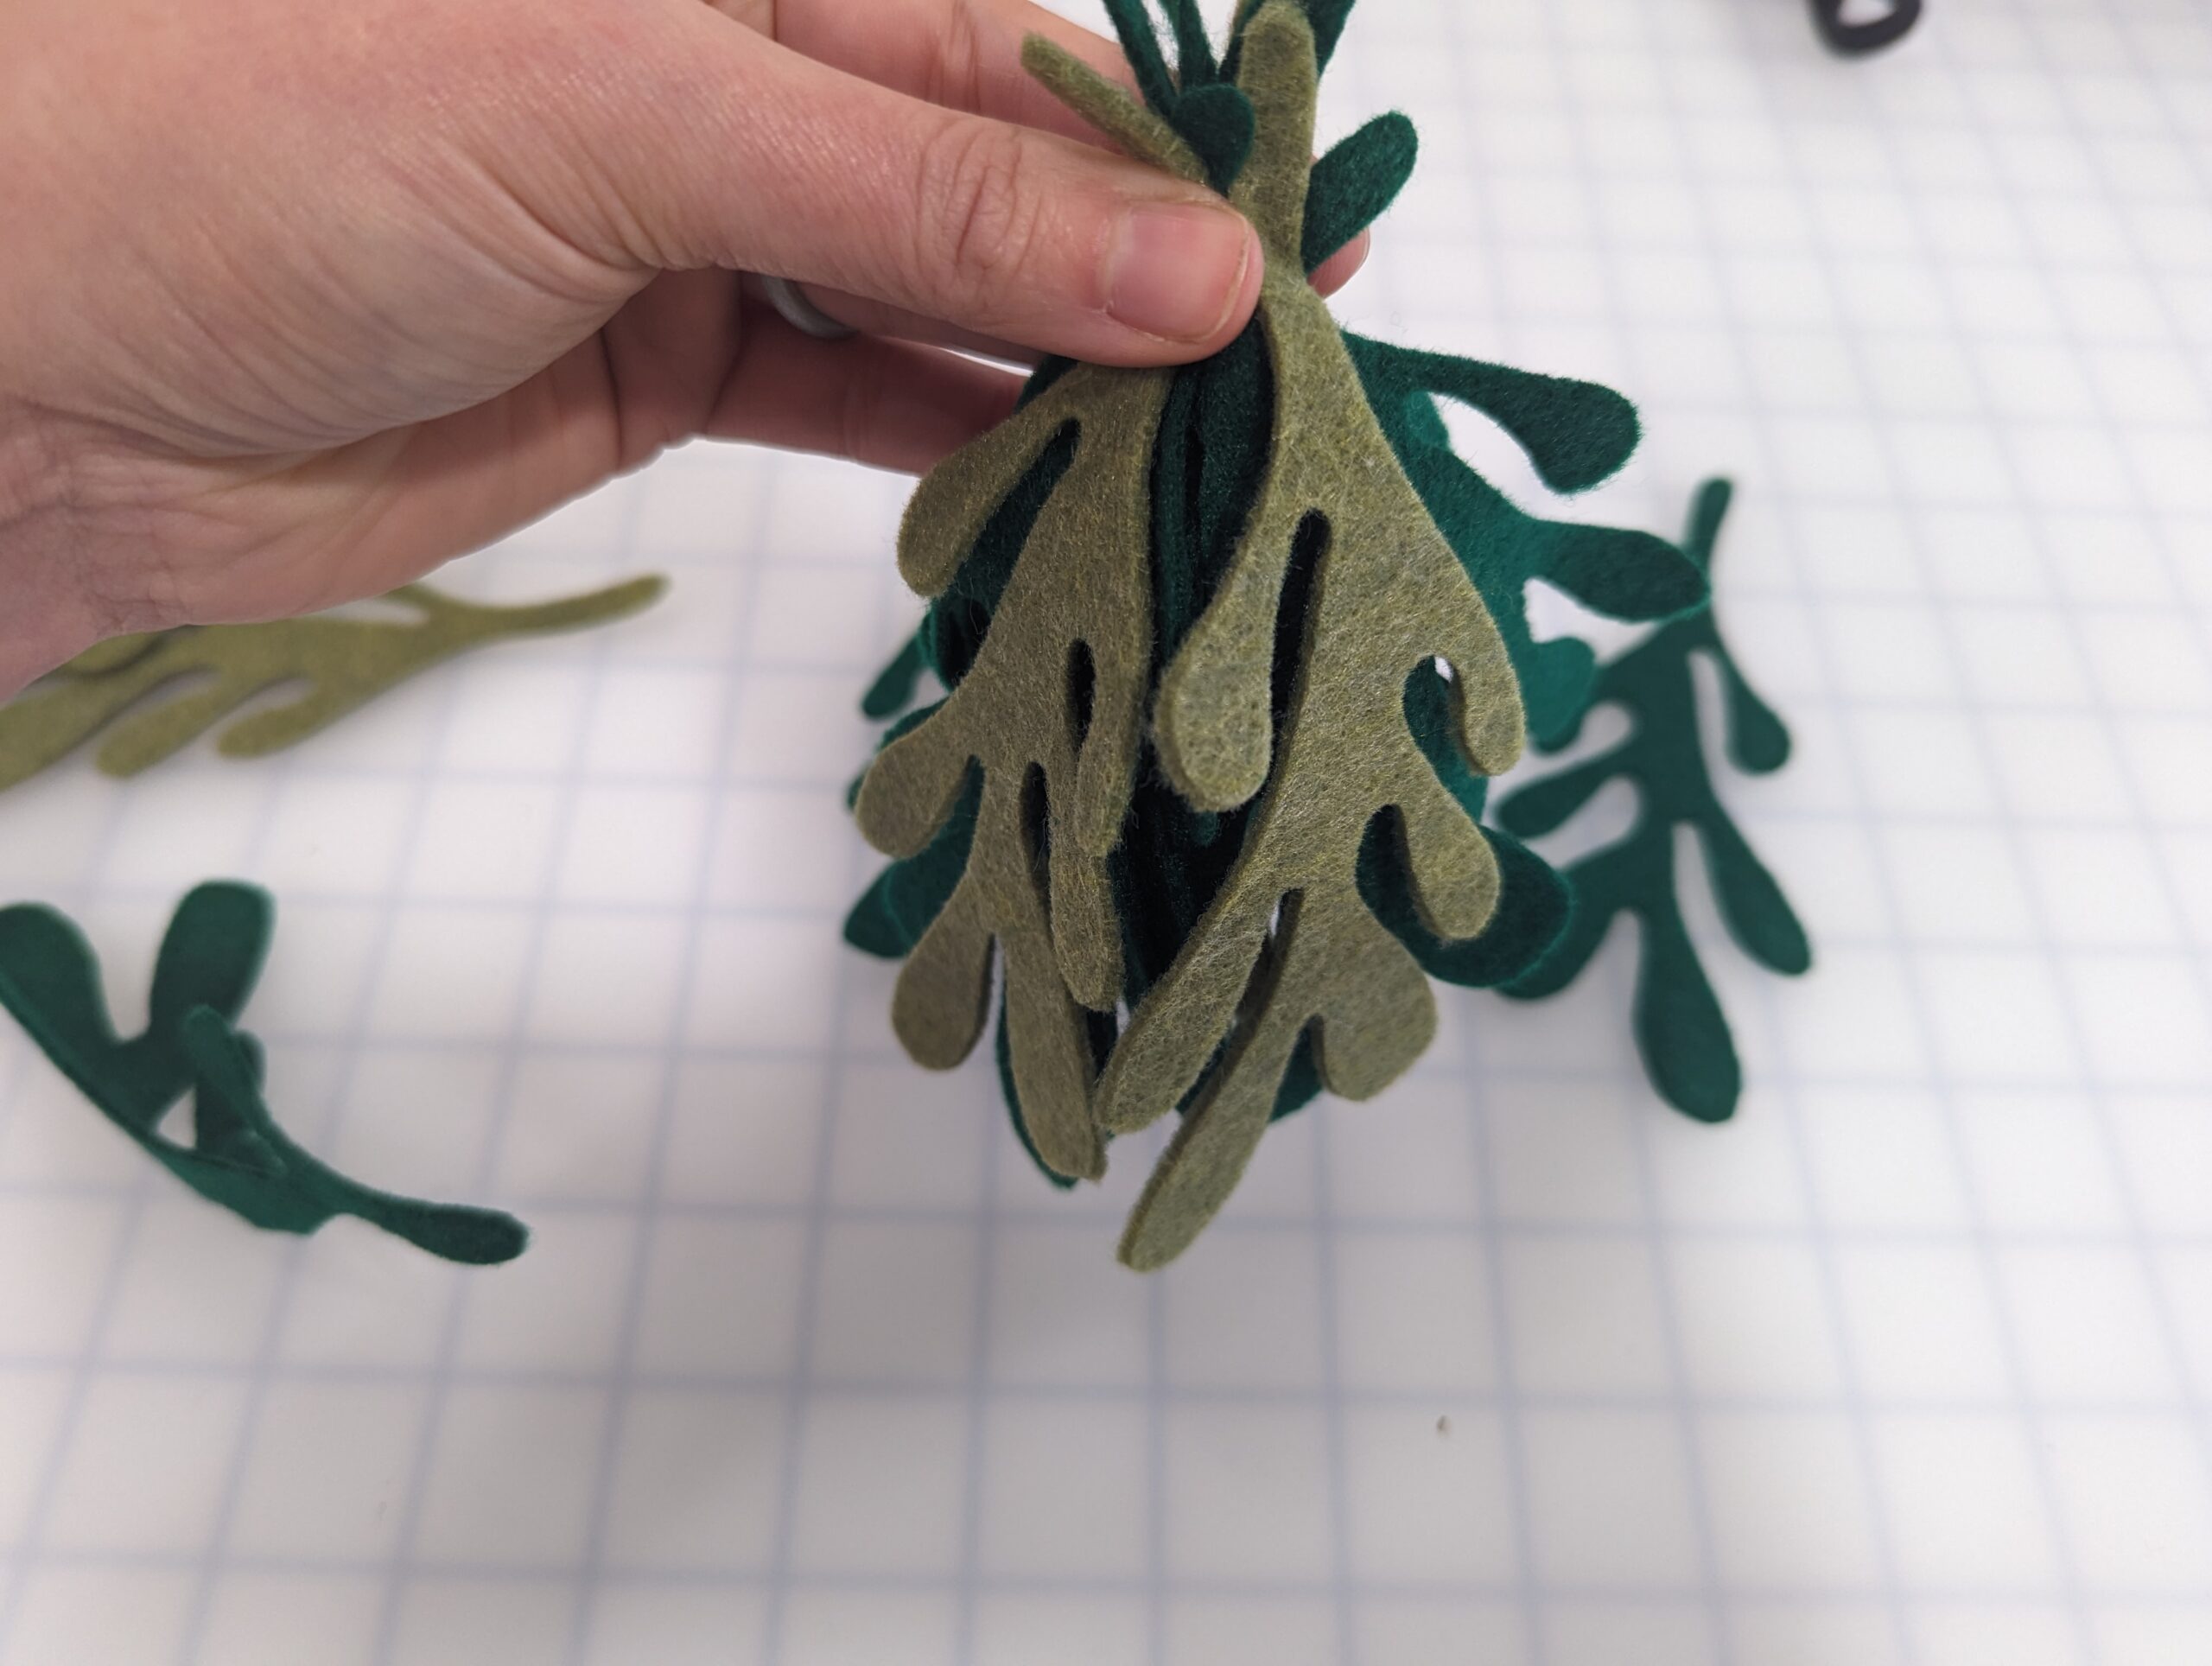
You may wish to stitch together, or simply tie them together with your thread. You could also glue here, if you wish.
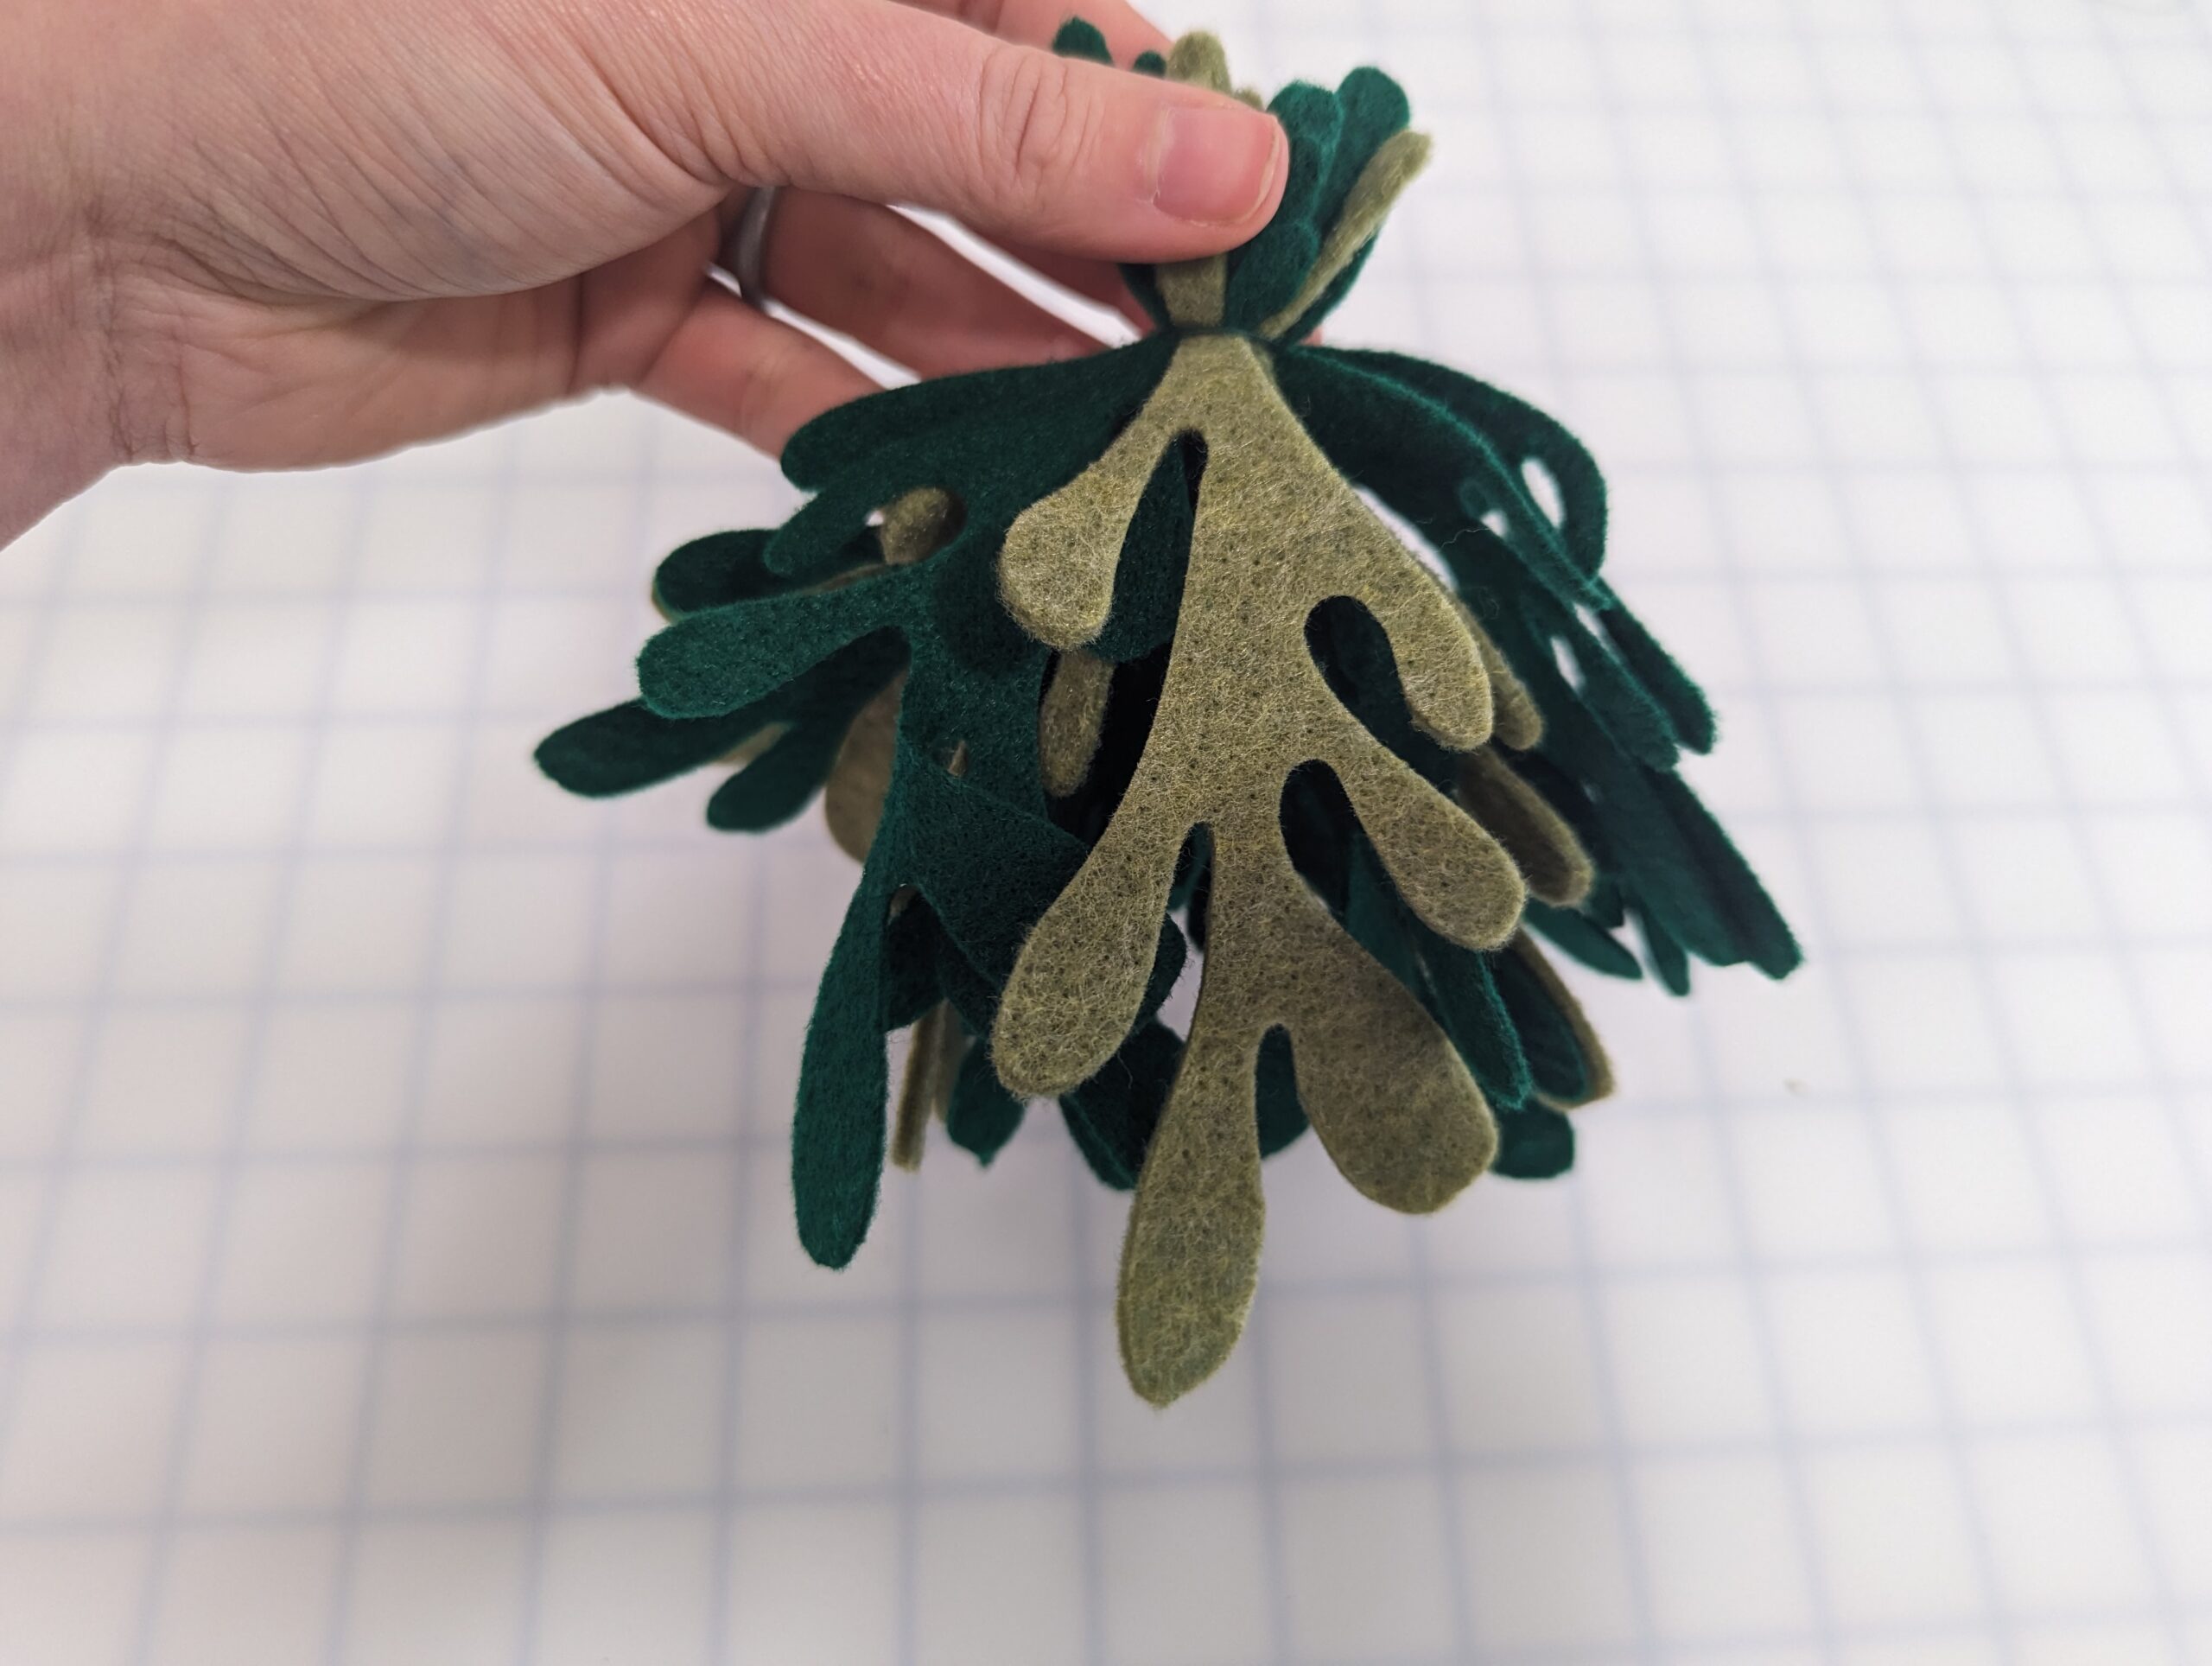
Step 5: EMBELLISHMENTS
Before attaching a hanging loop and bow, embellish any way you’d like. My favorite look is small white pom poms, but you can use a variety of materials to create different looks! You can also skip the berries, too.
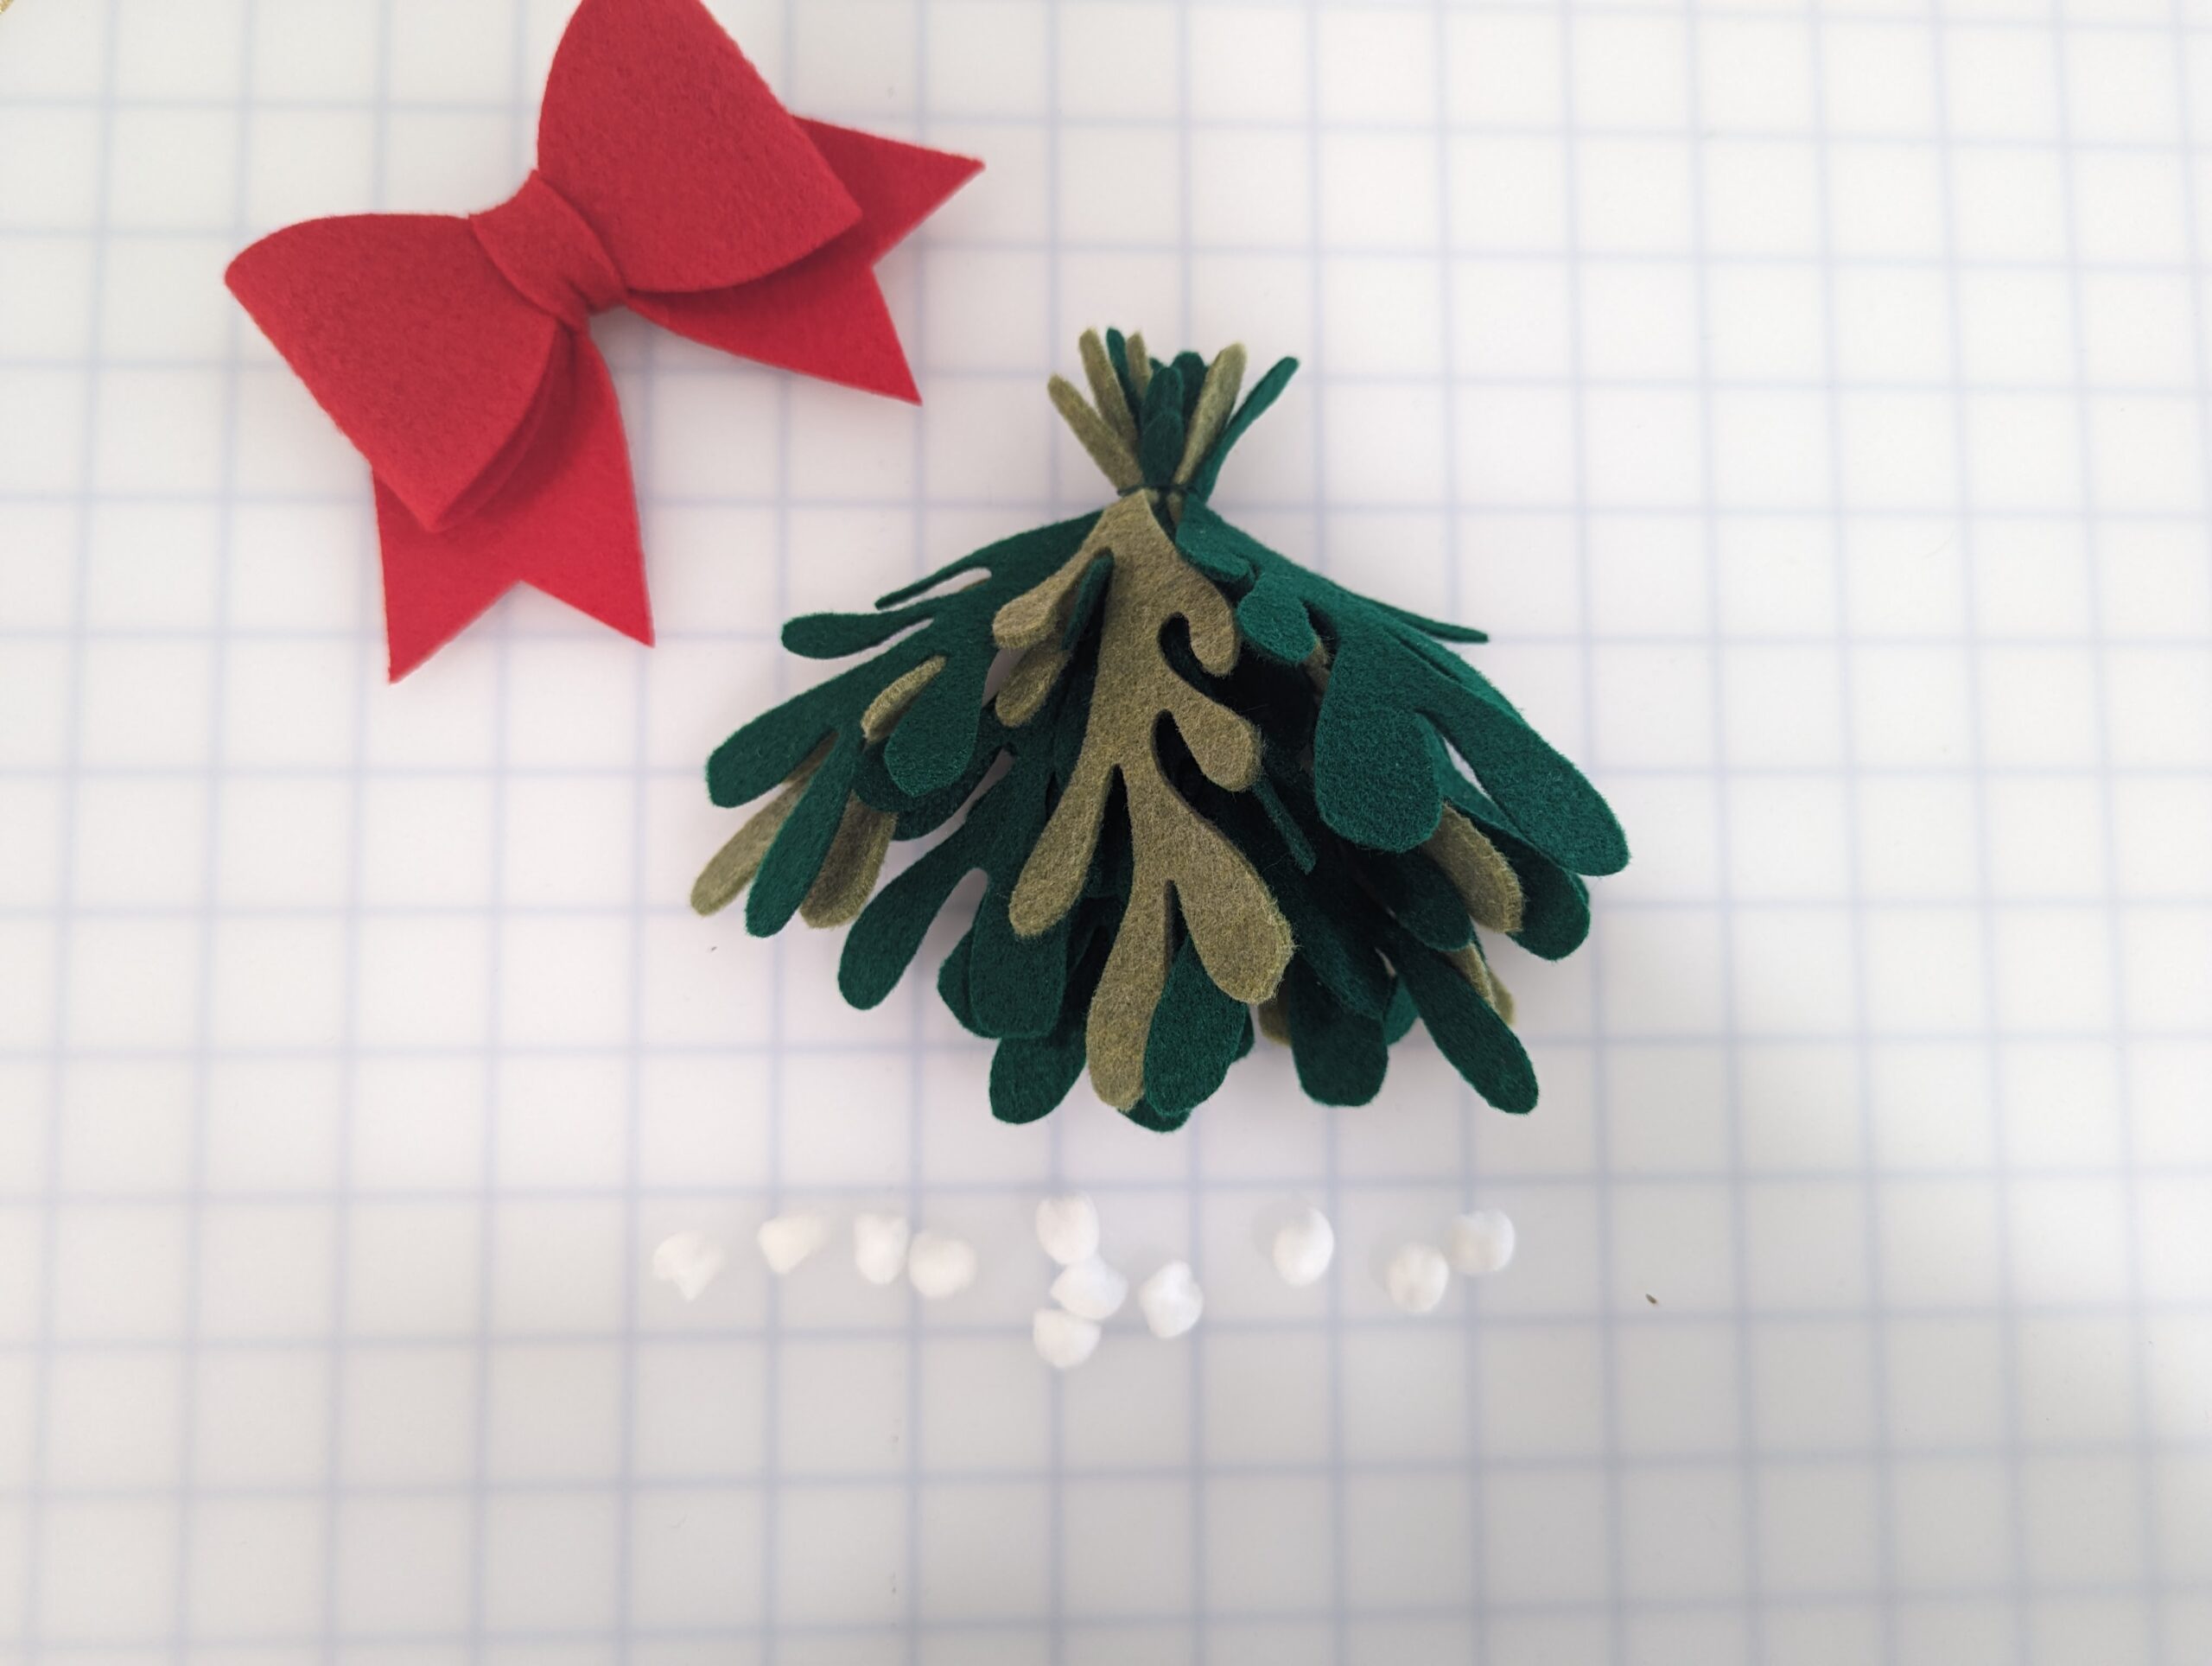

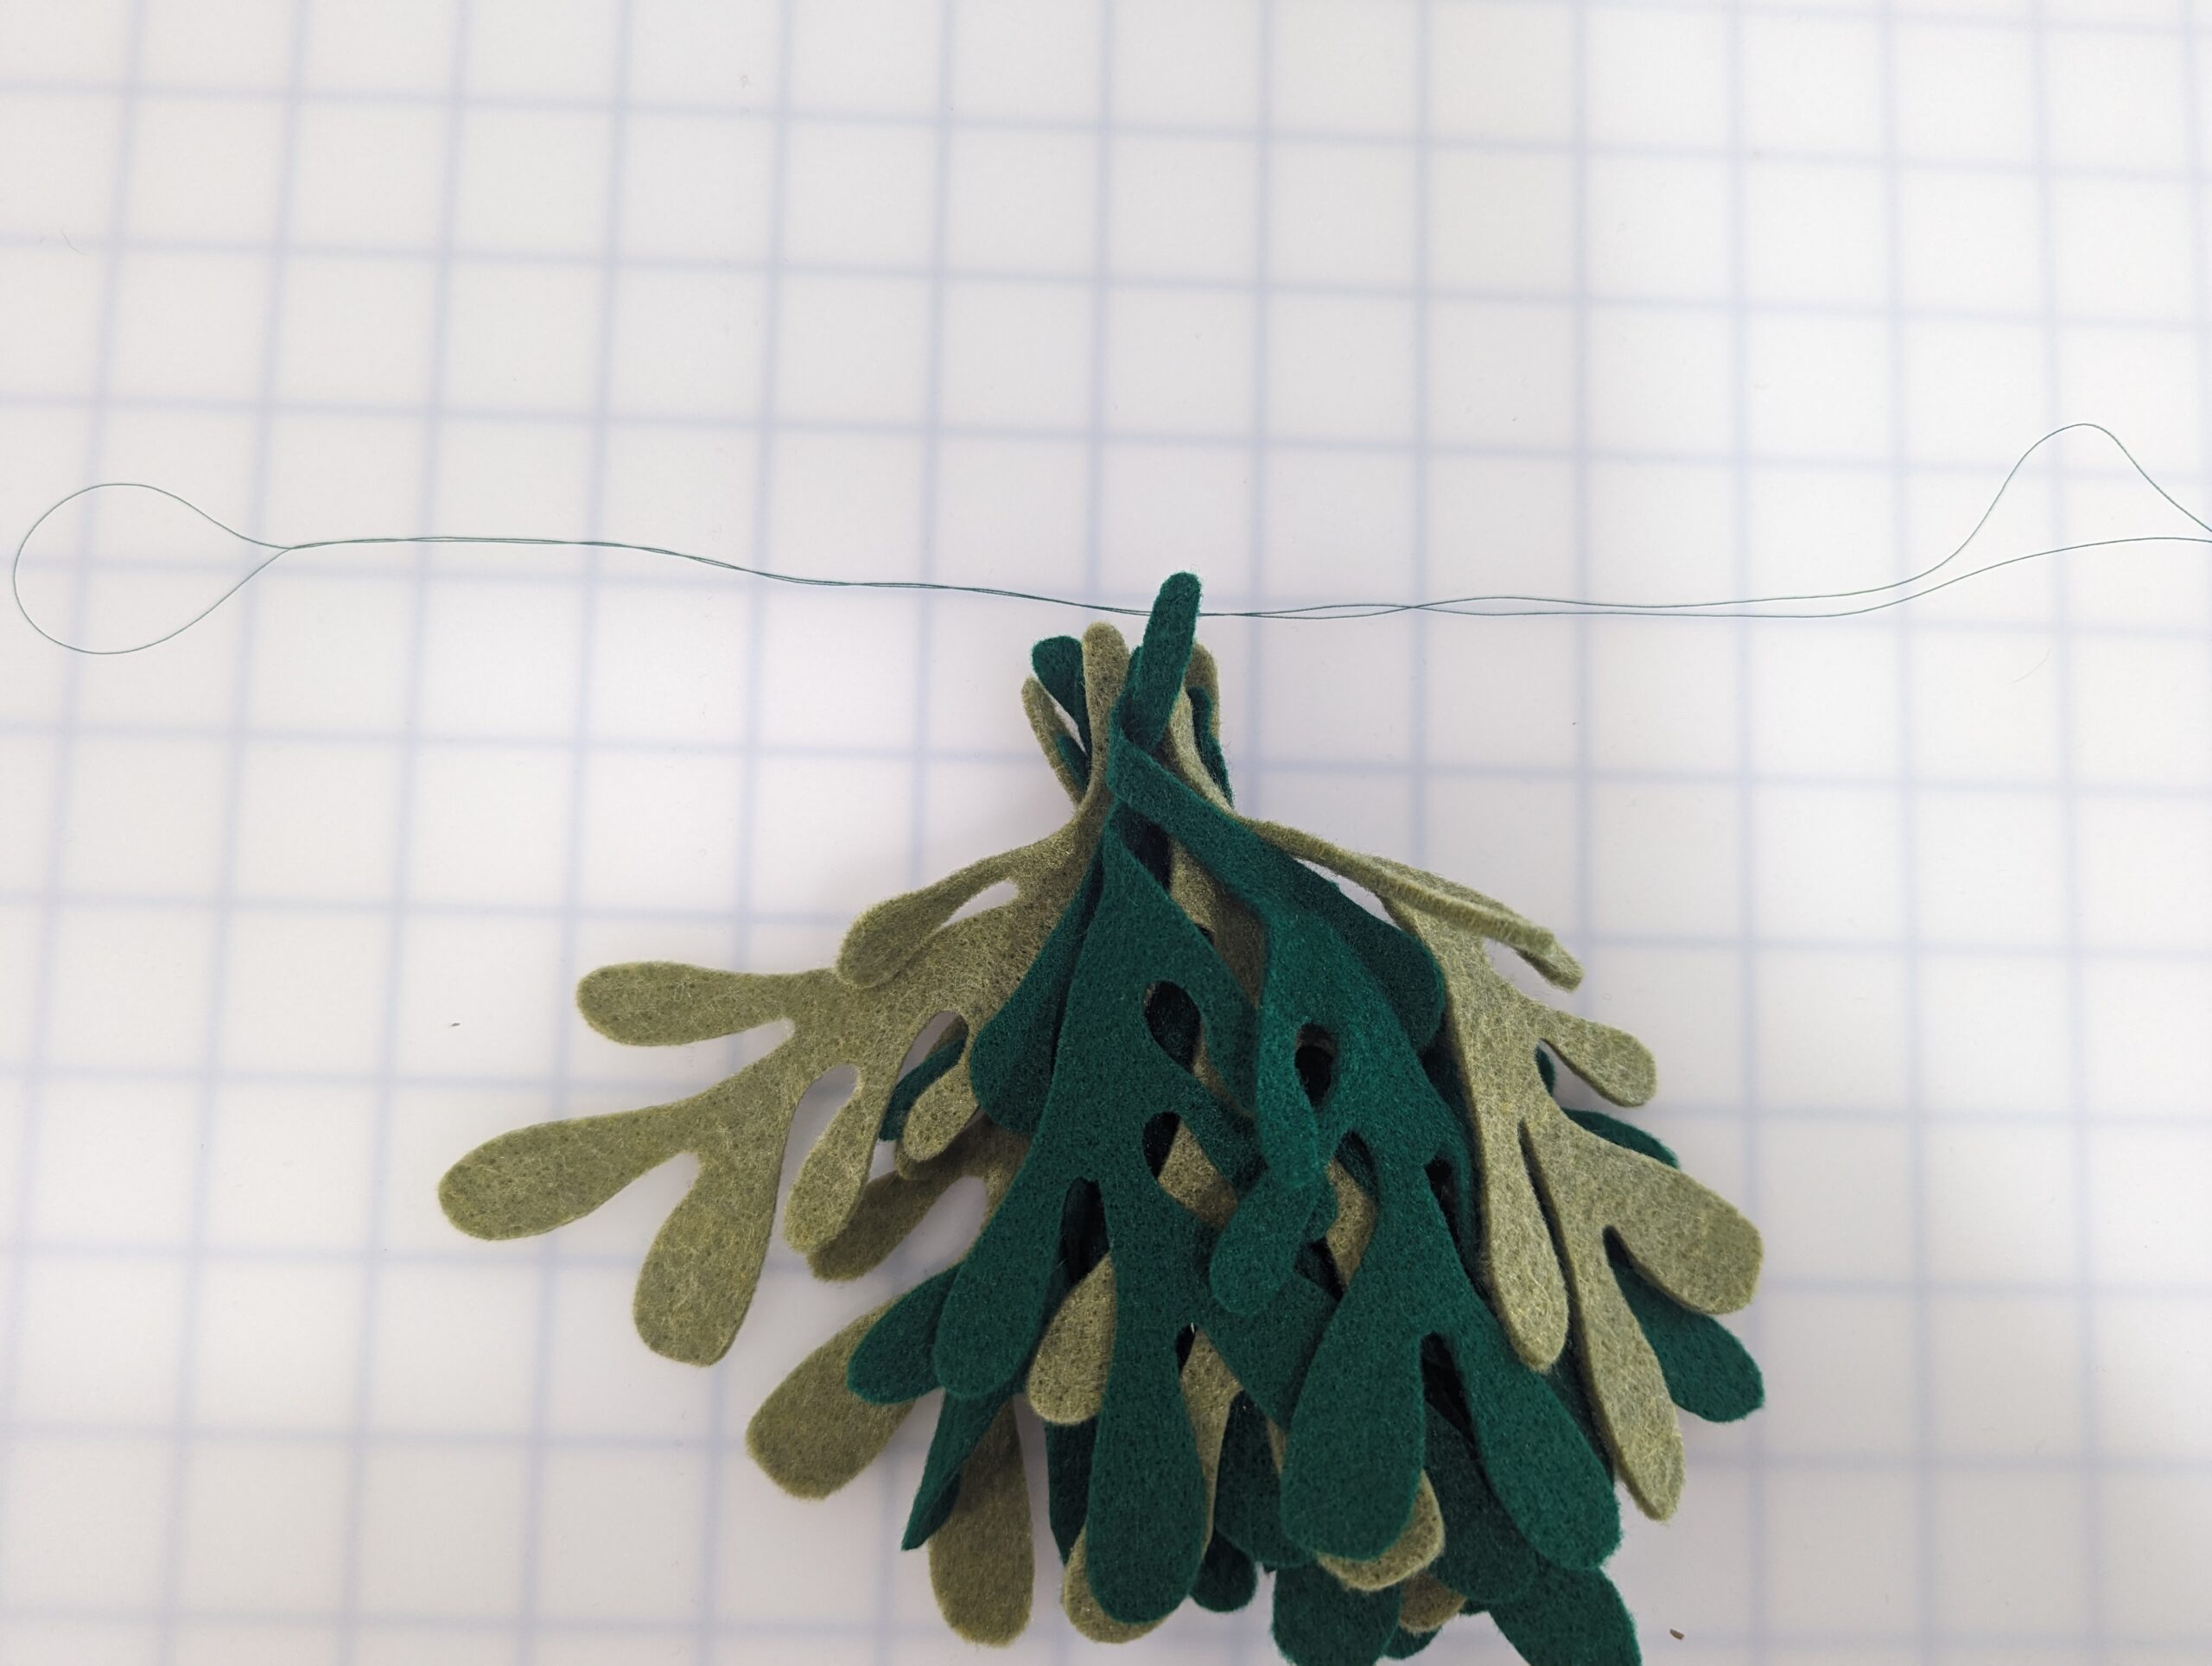
Step 6: FINISHING
Once you’ve finished embellishments, tie a small piece of ribbon or twine around the stems to create a hanging loop. Secure with a knot.
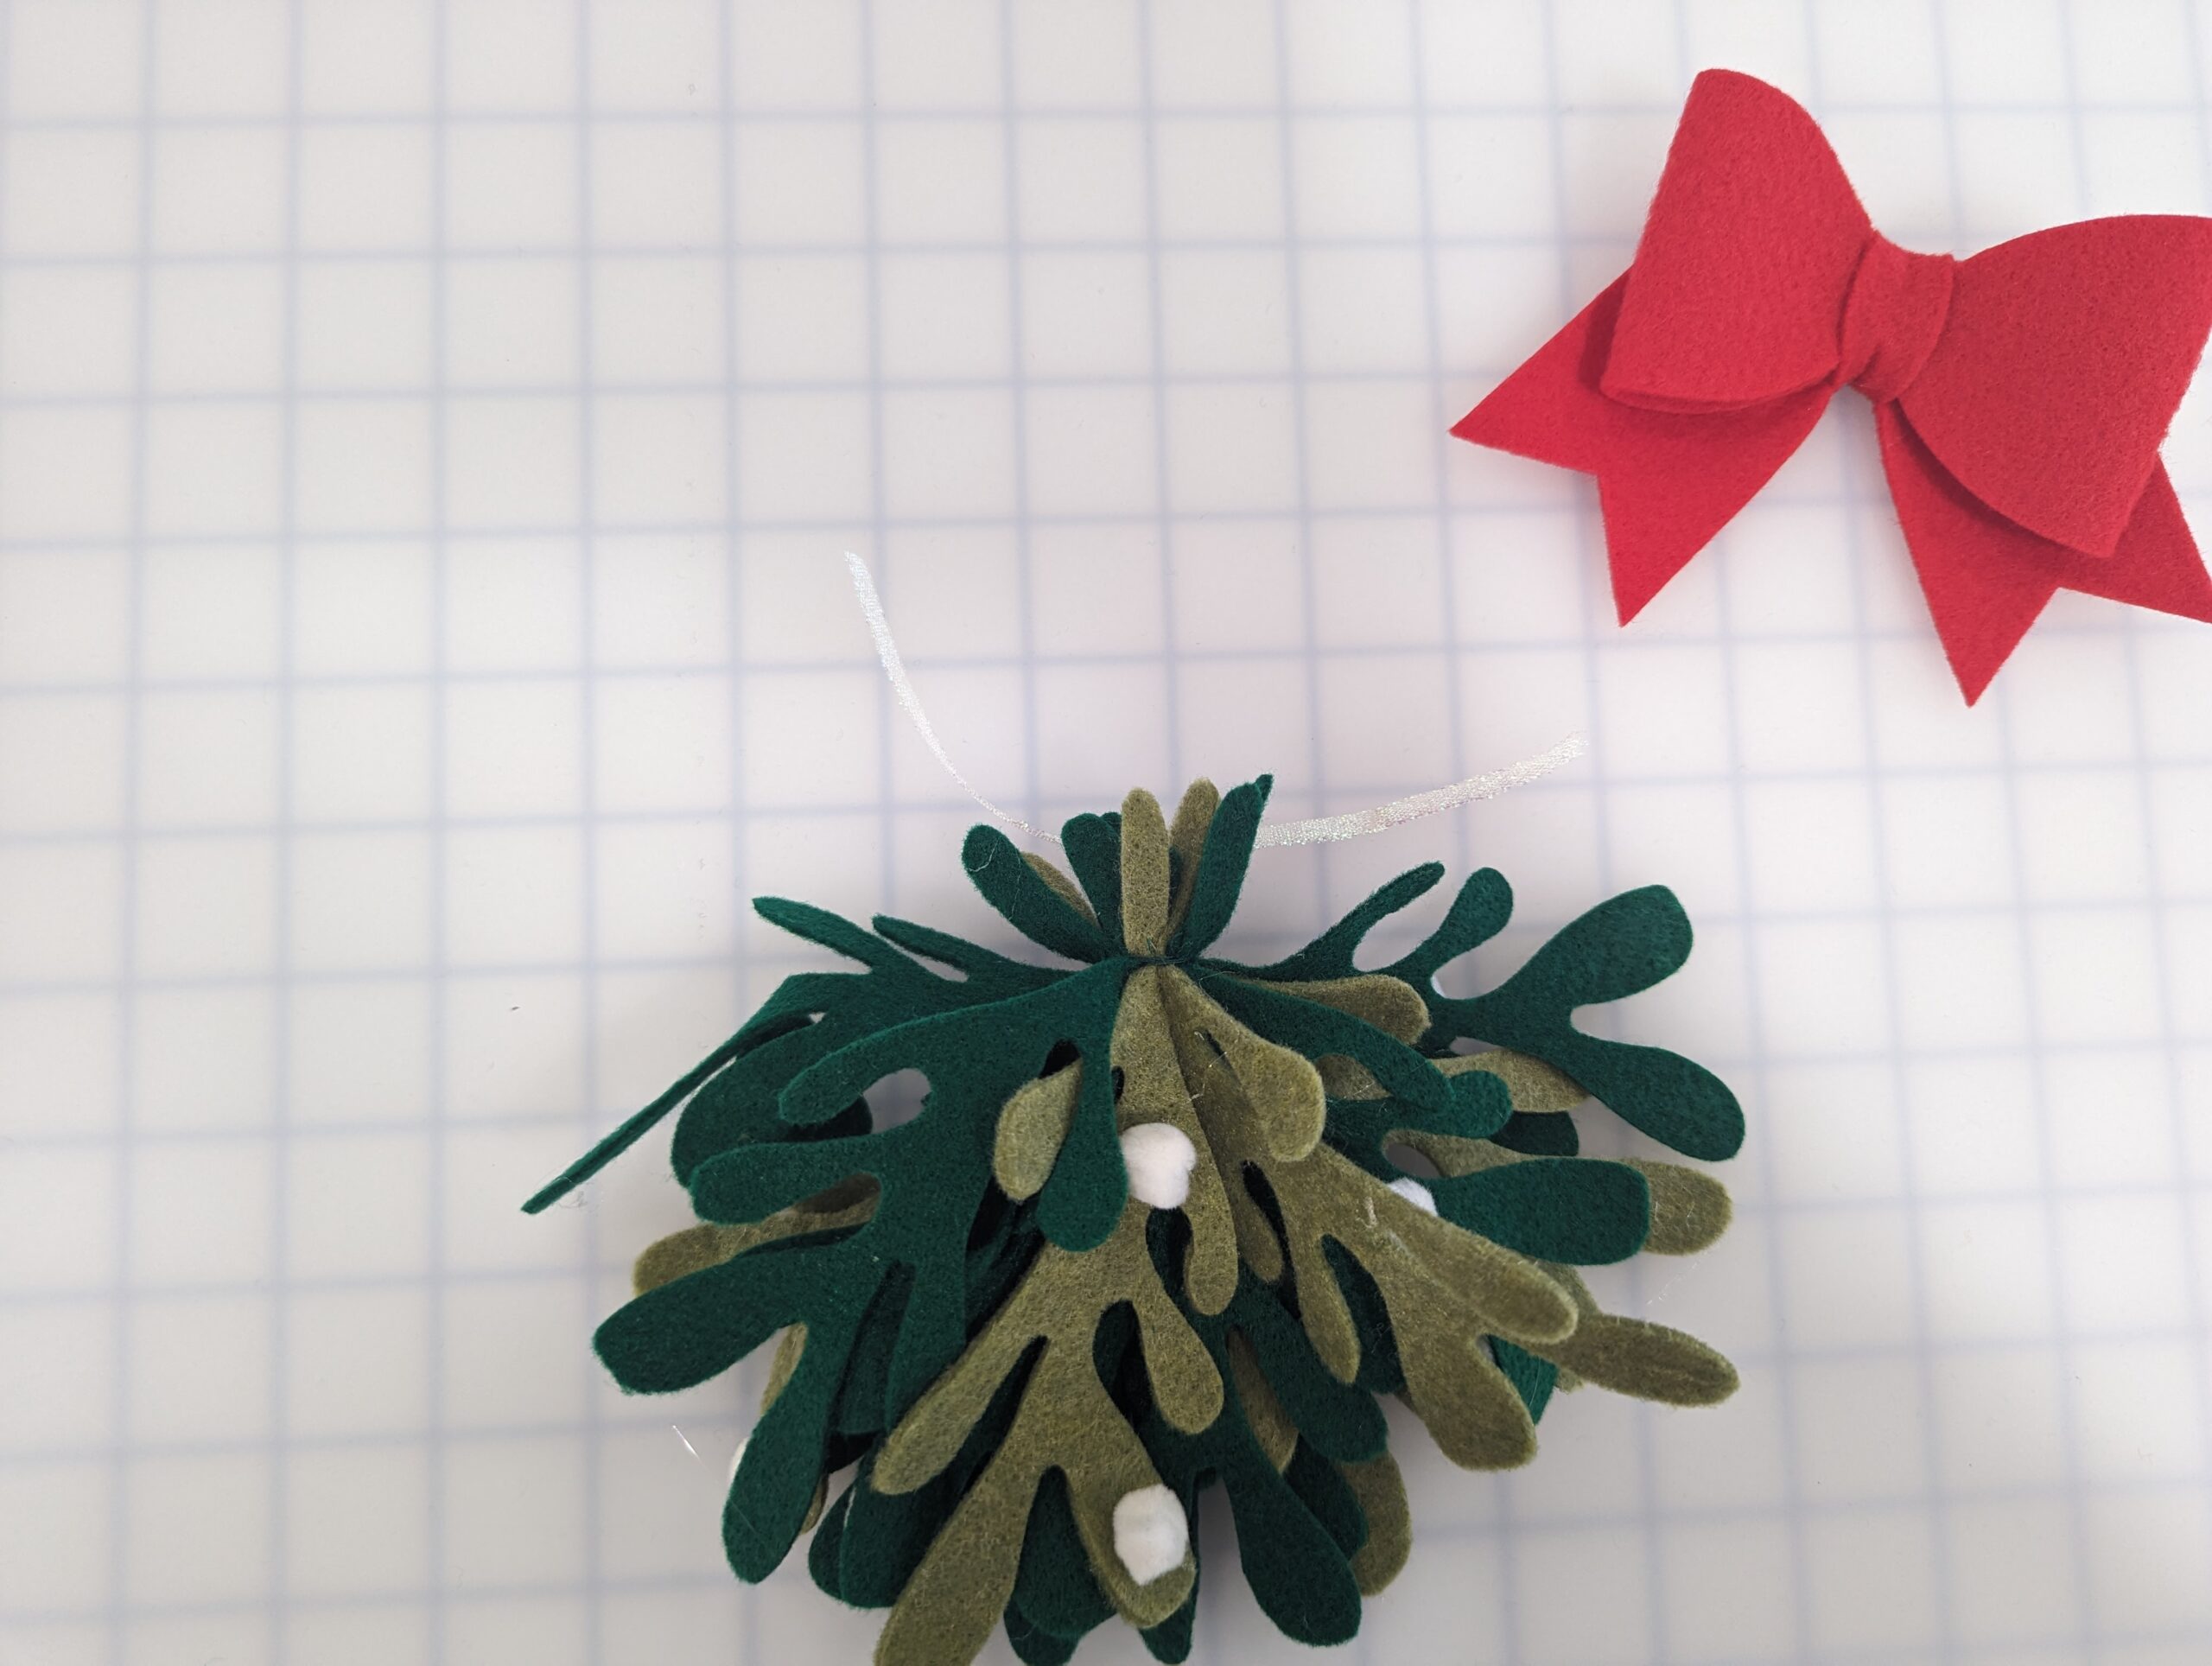
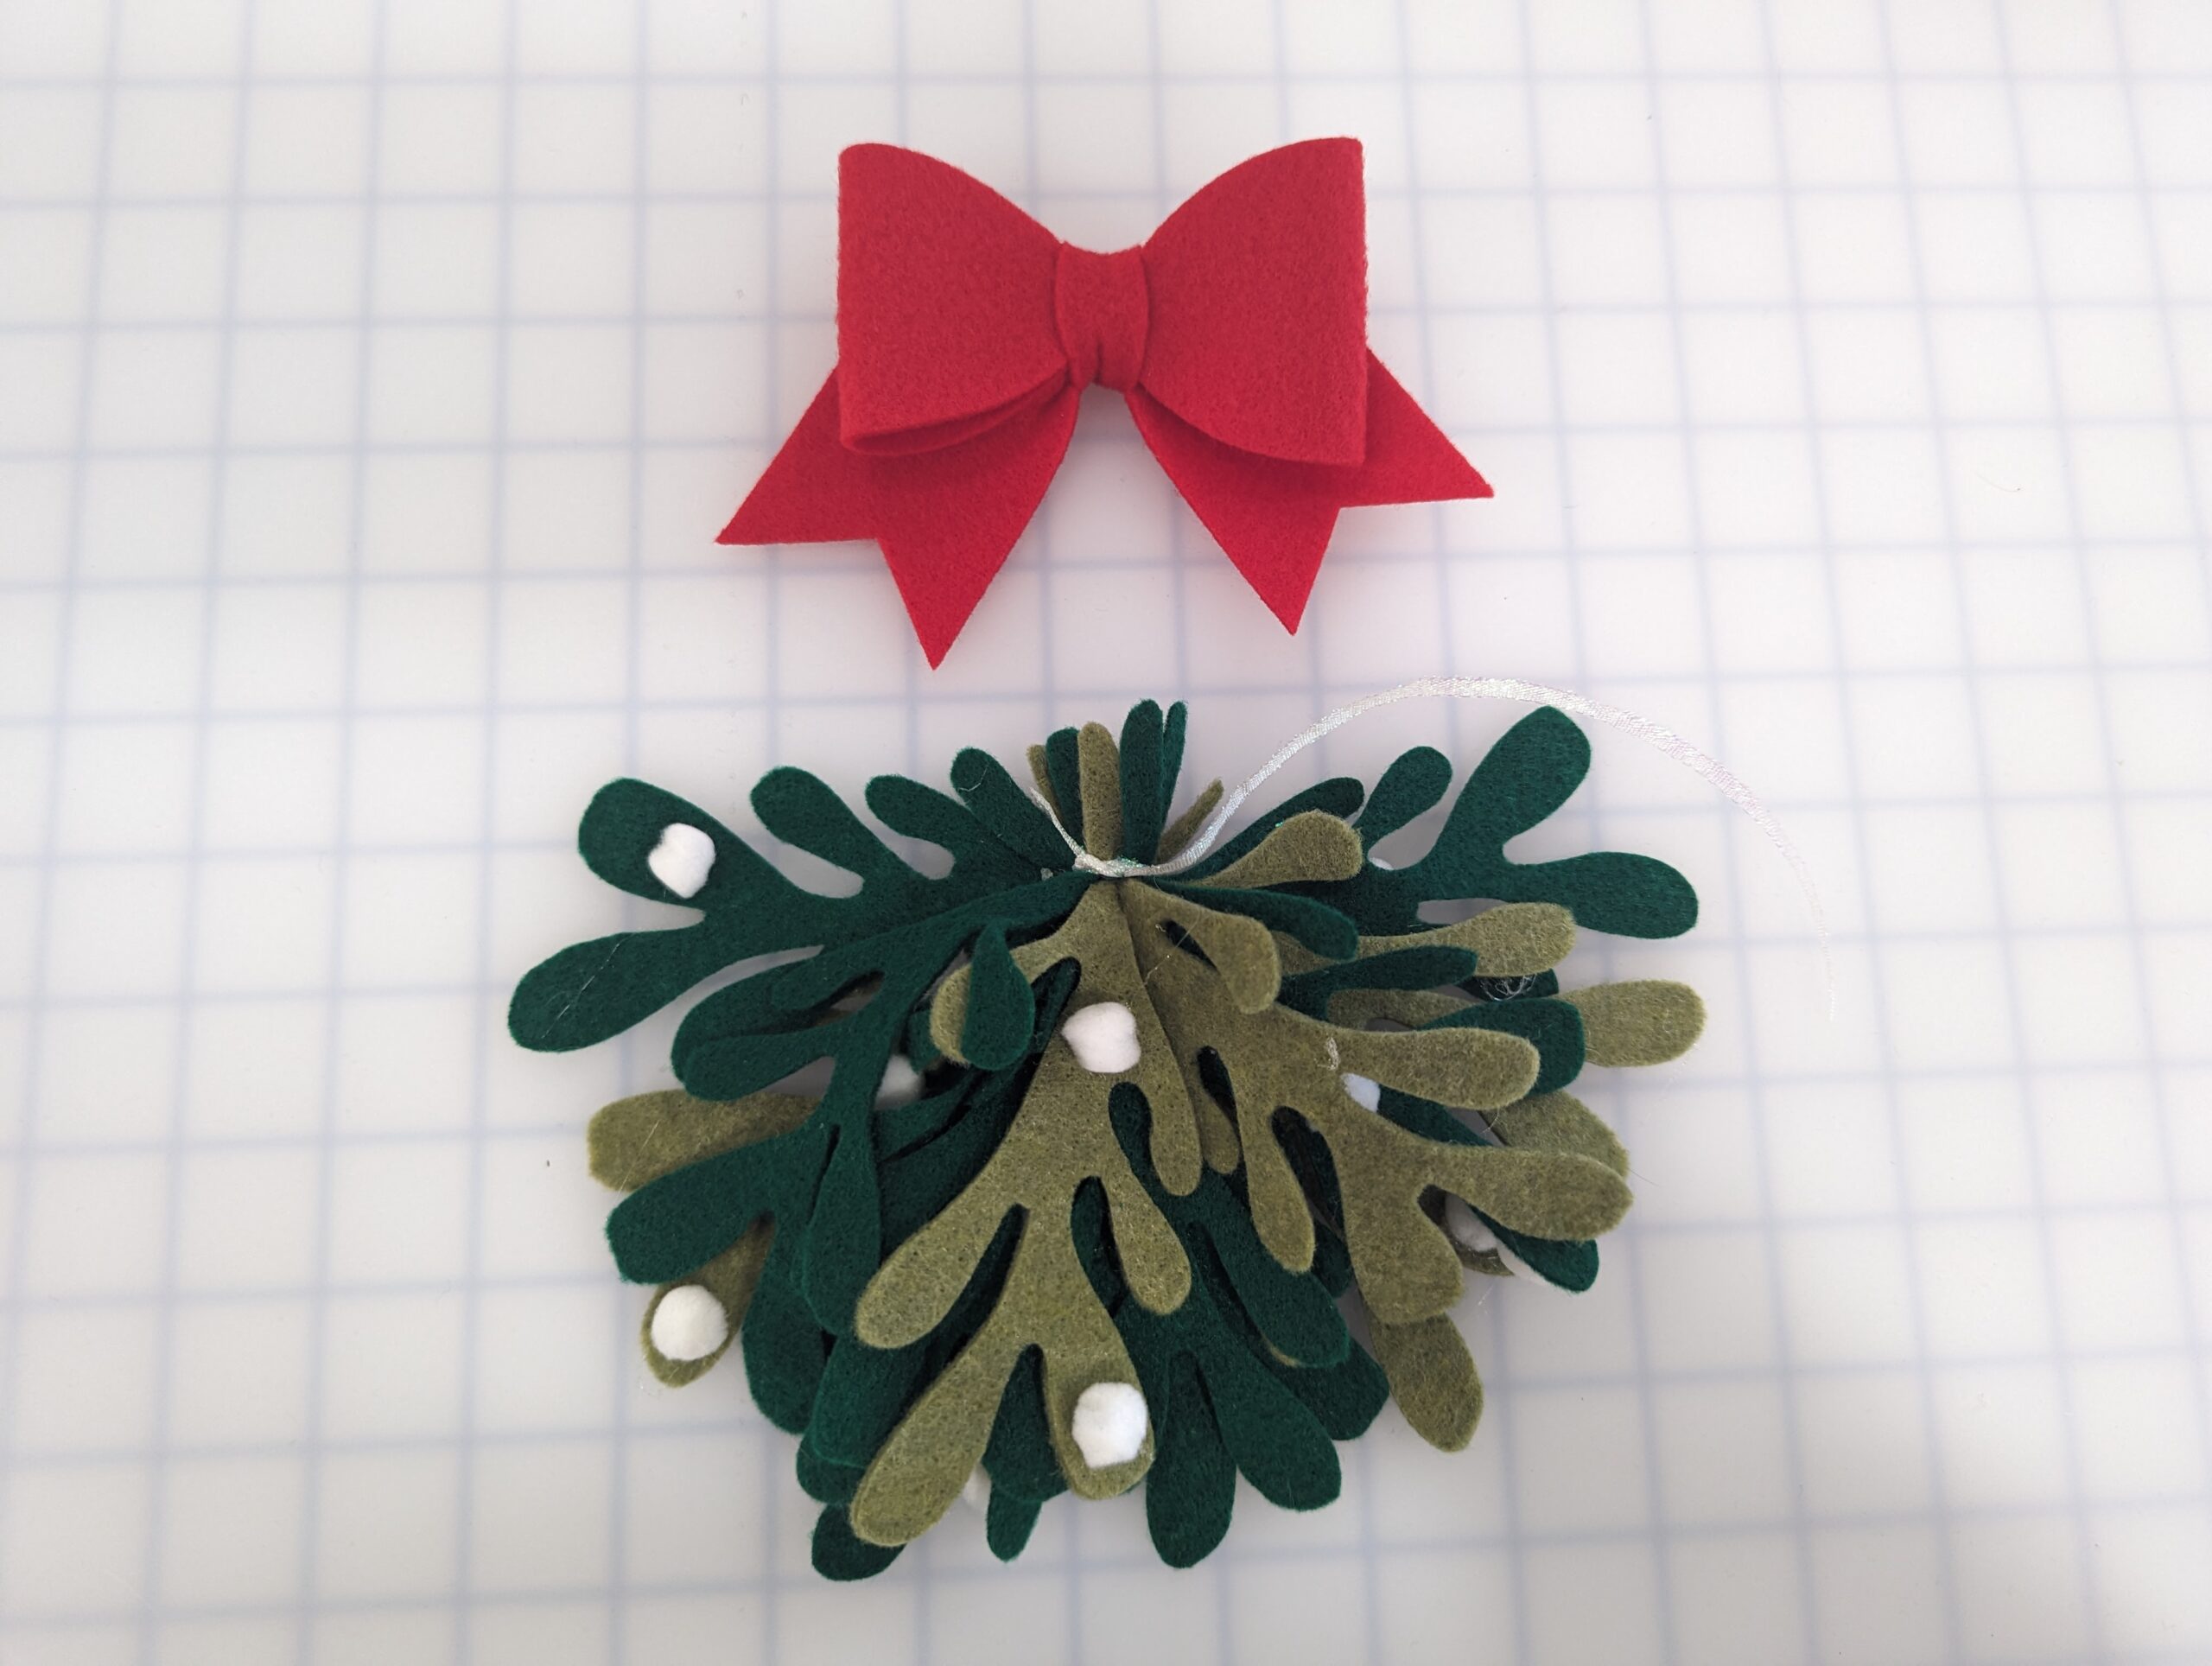
Glue or stitch your bow in place, preferably covering the knot for your hanging loop!
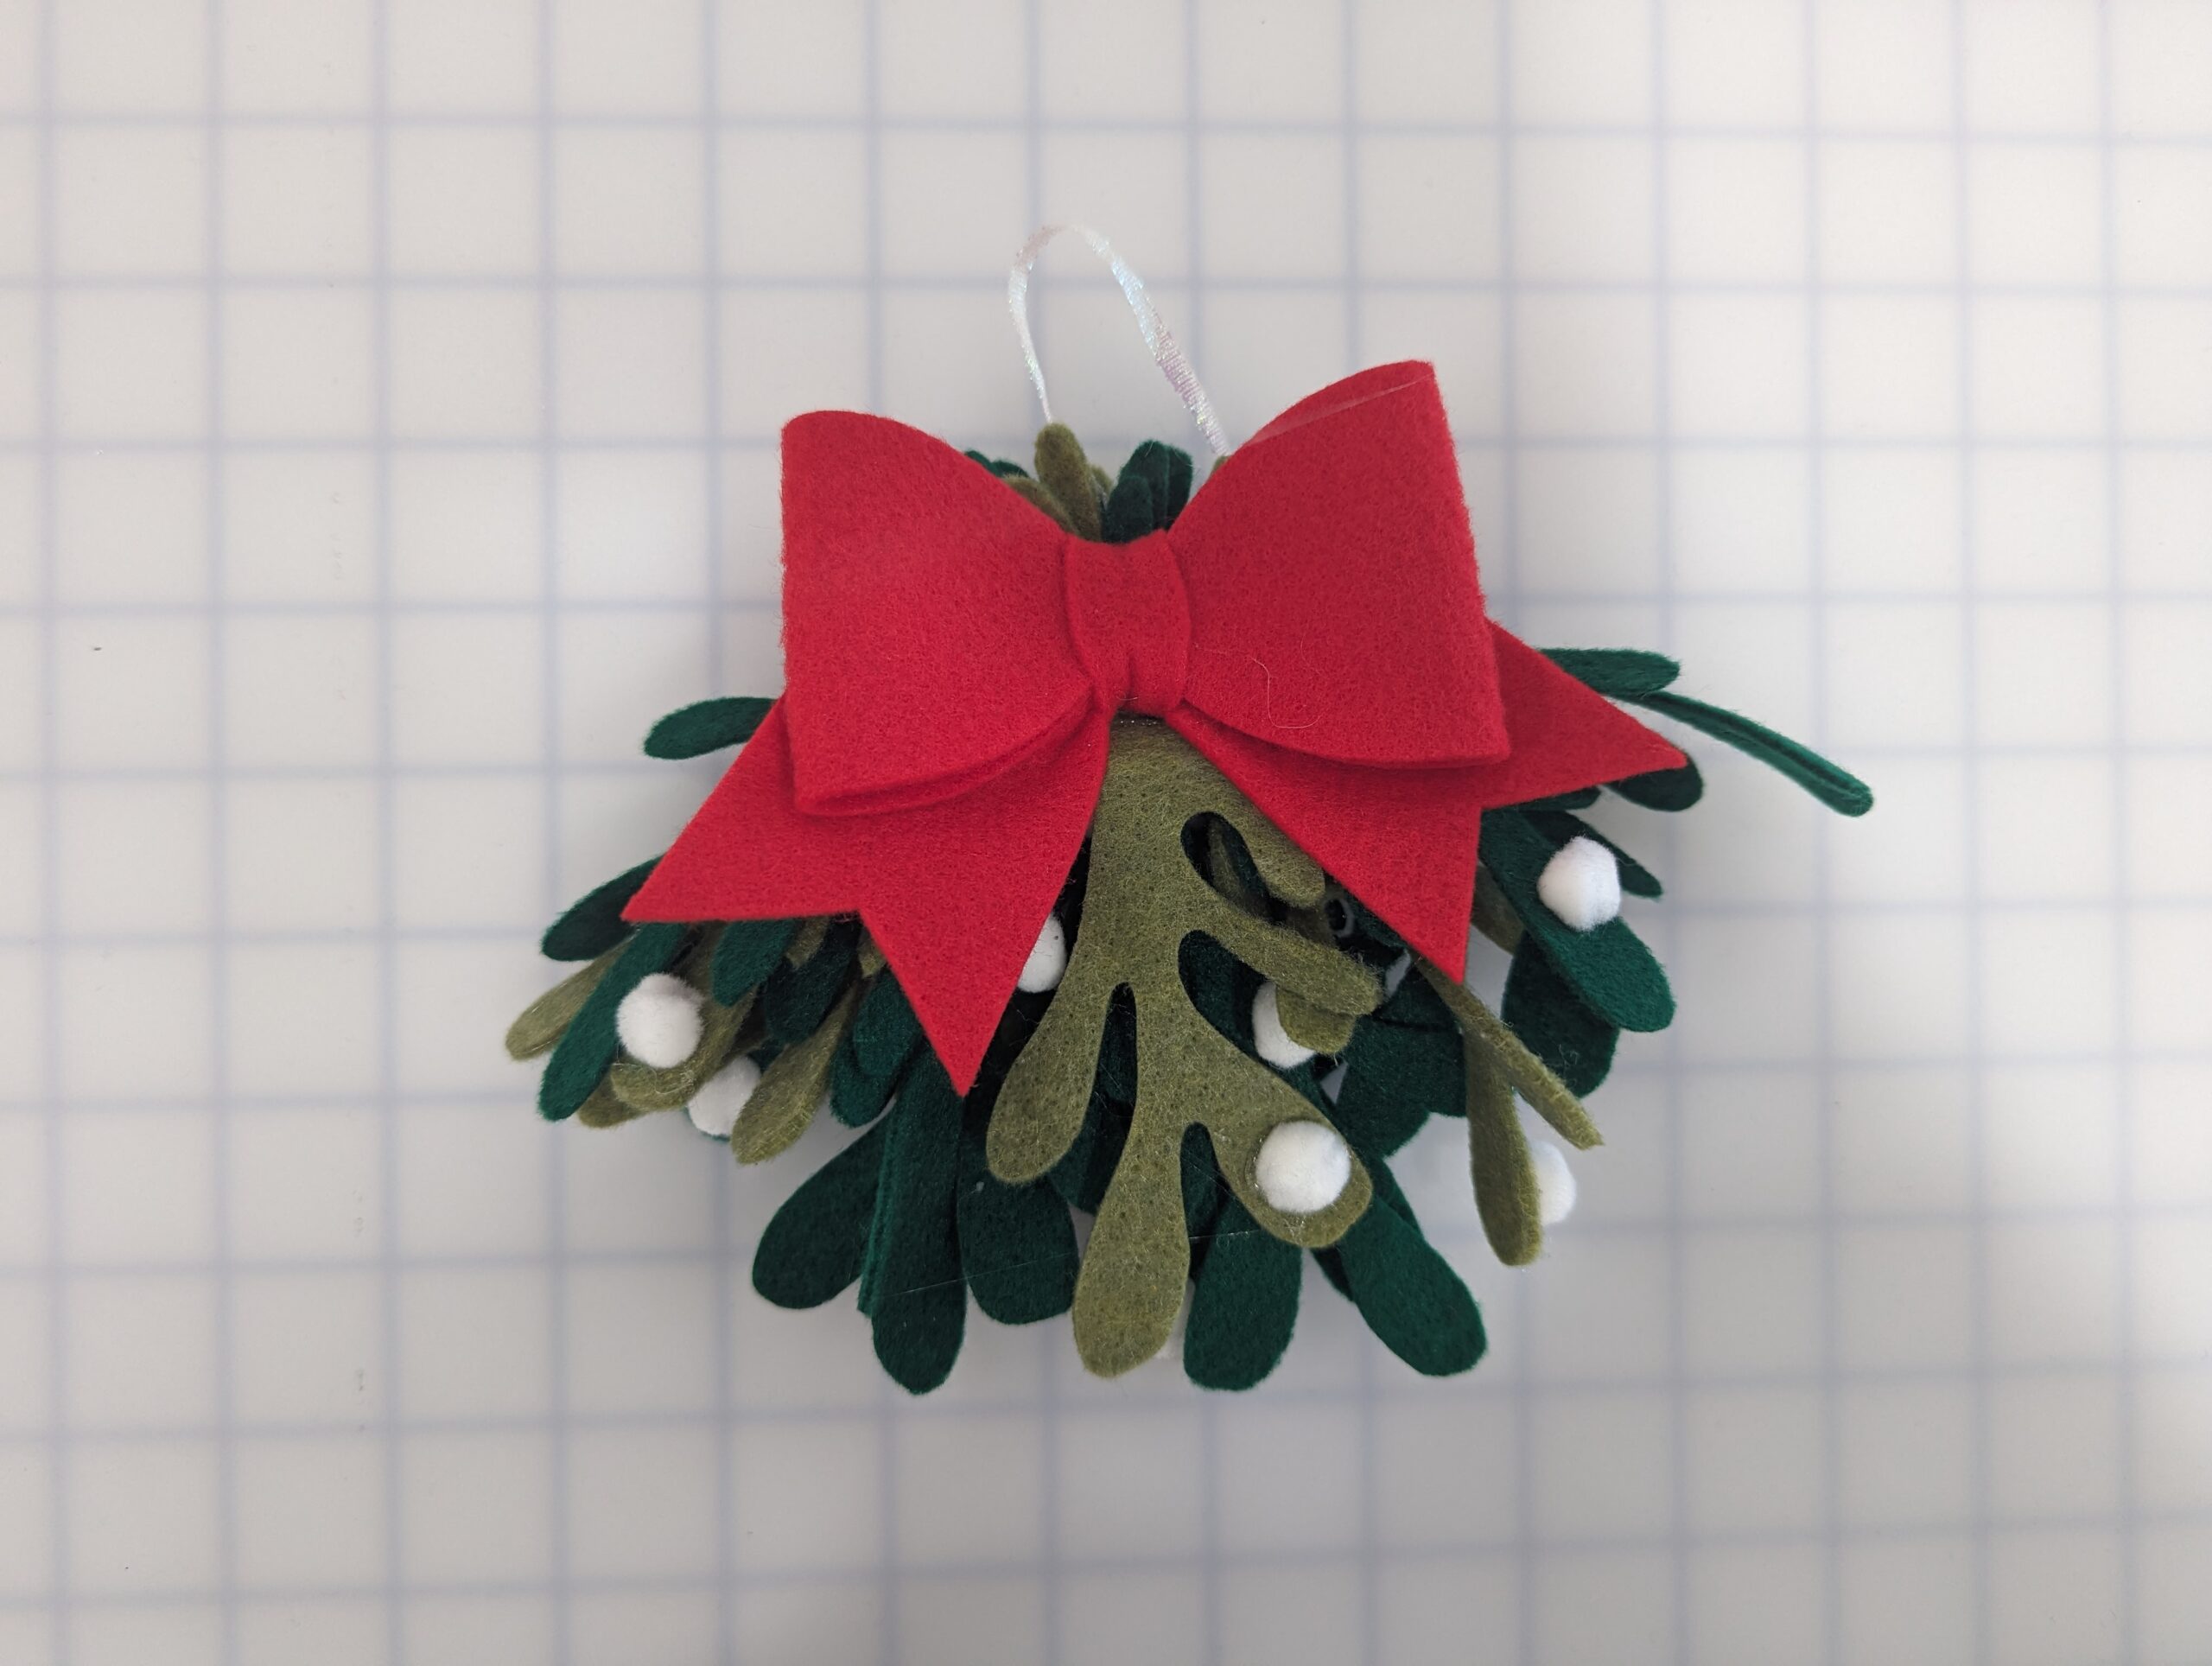
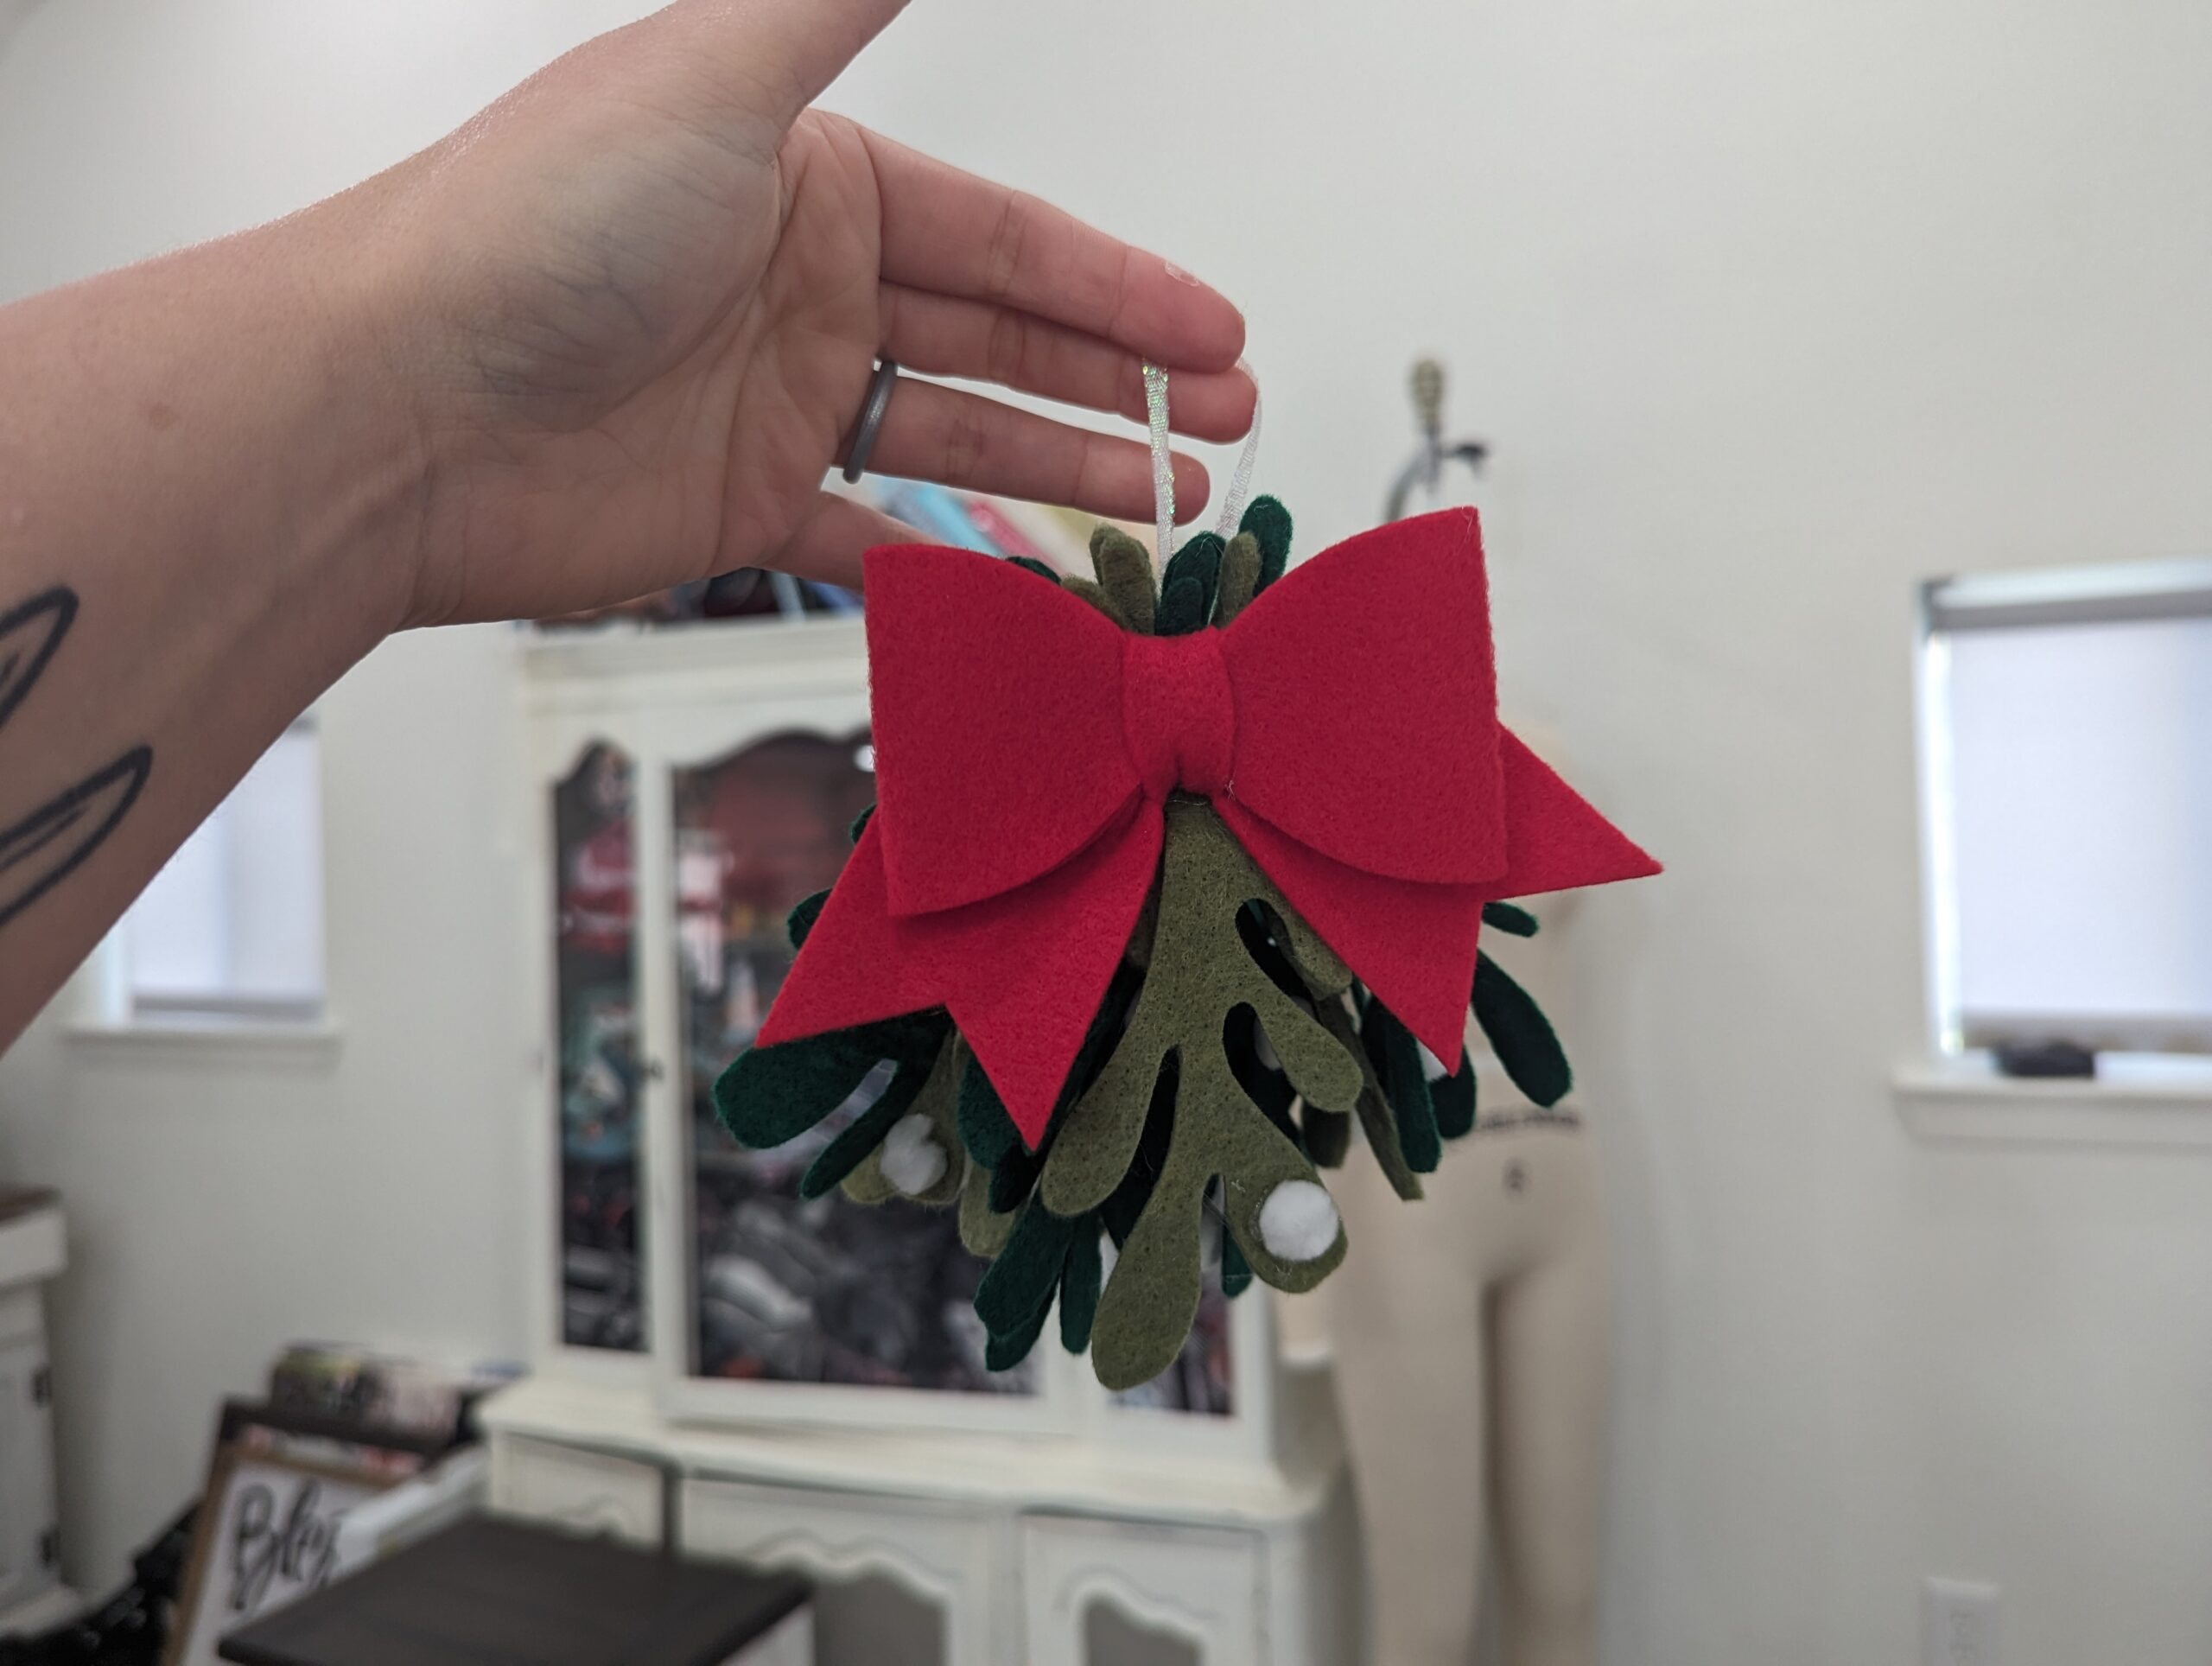
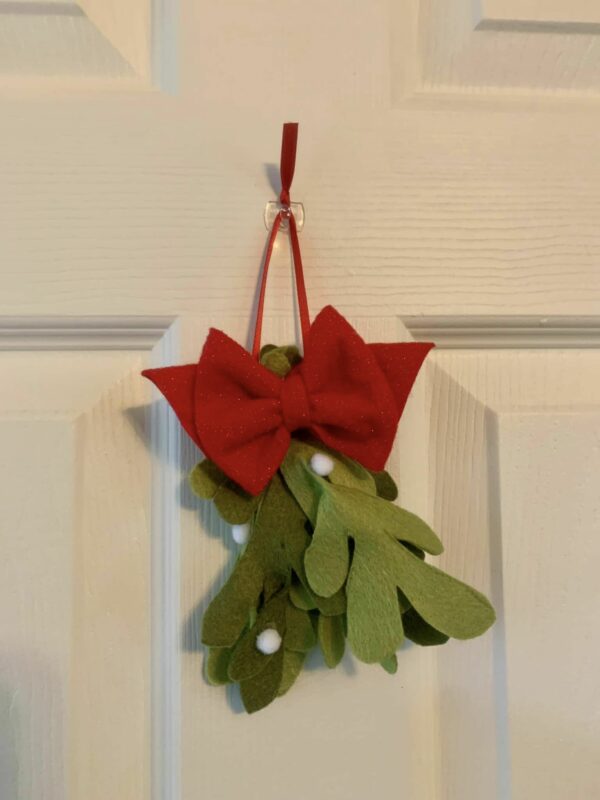
That’s it! Whether you’re hanging on a tree, or in a doorway, or dressing up a gift bag, we hope you love your felt mistletoe! Be sure to come back to the blog tomorrow to see what else we have in store for you!


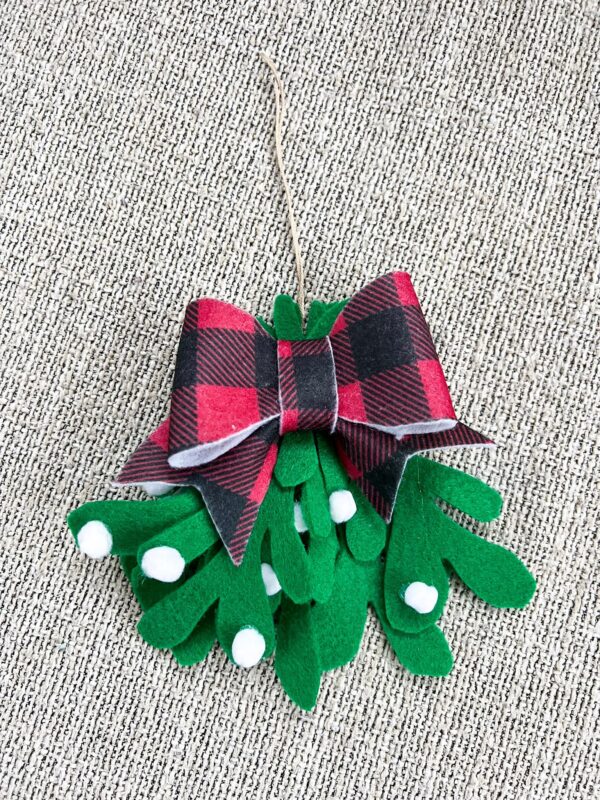
Want a different style bow? You can also use our Sydney Sailor Bow like some of the earlier versions from our testers here! Felt is a bit thick for this option, but it would be beautiful for a woven fabric!


DECEMBER 1 – 12, 2023
DAY 1 –TOASTER TREAT PLAY FOOD + PLUSHIE
DAY 2 – FABRIC KEY FOB
DAY 3 – FABRIC COASTERS
DAY 4 – FELT MISTLETOE
Thank You to ALL for such sweet and lovable designs – and some are actually ‘free’! Who would’ve guessed it??!! Am excited to get started on a few of these projects for Christmas. Thanks again from a fan – Mermaids really are wonderfully “SPECIAL”!! xox Mary Ann :~)