
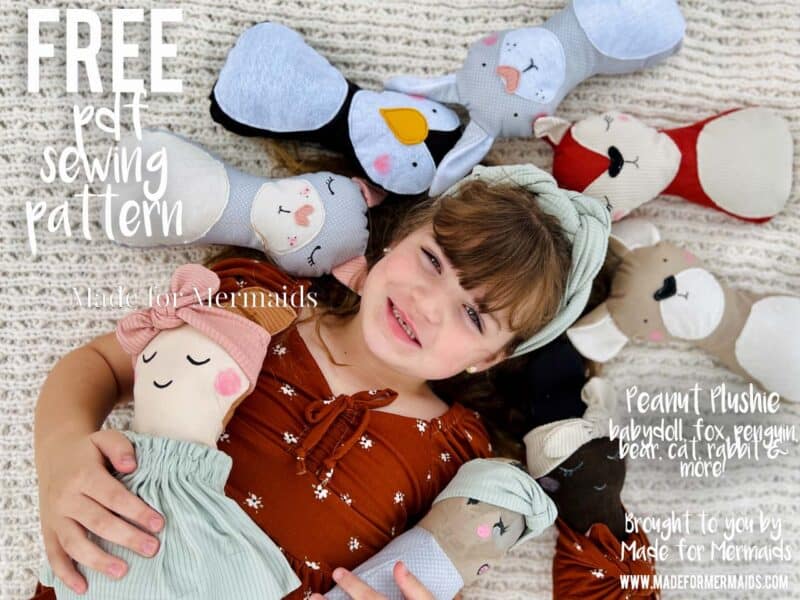
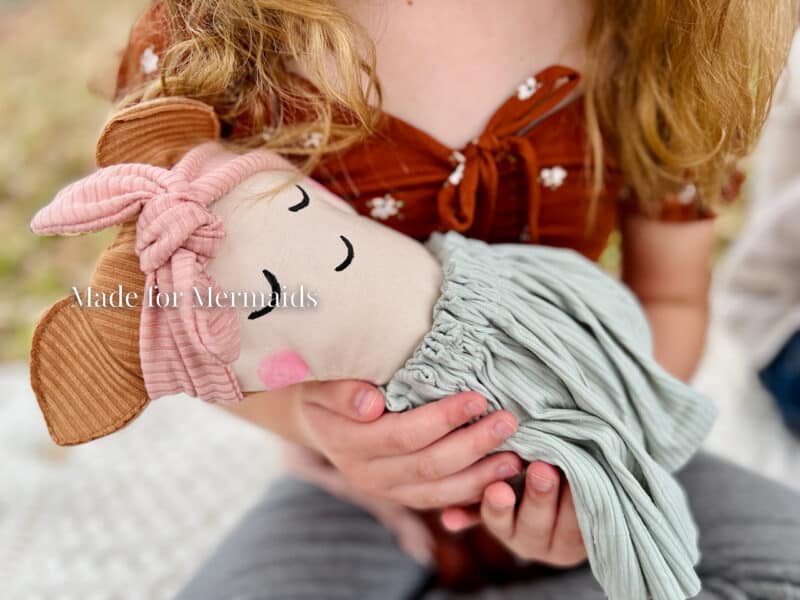
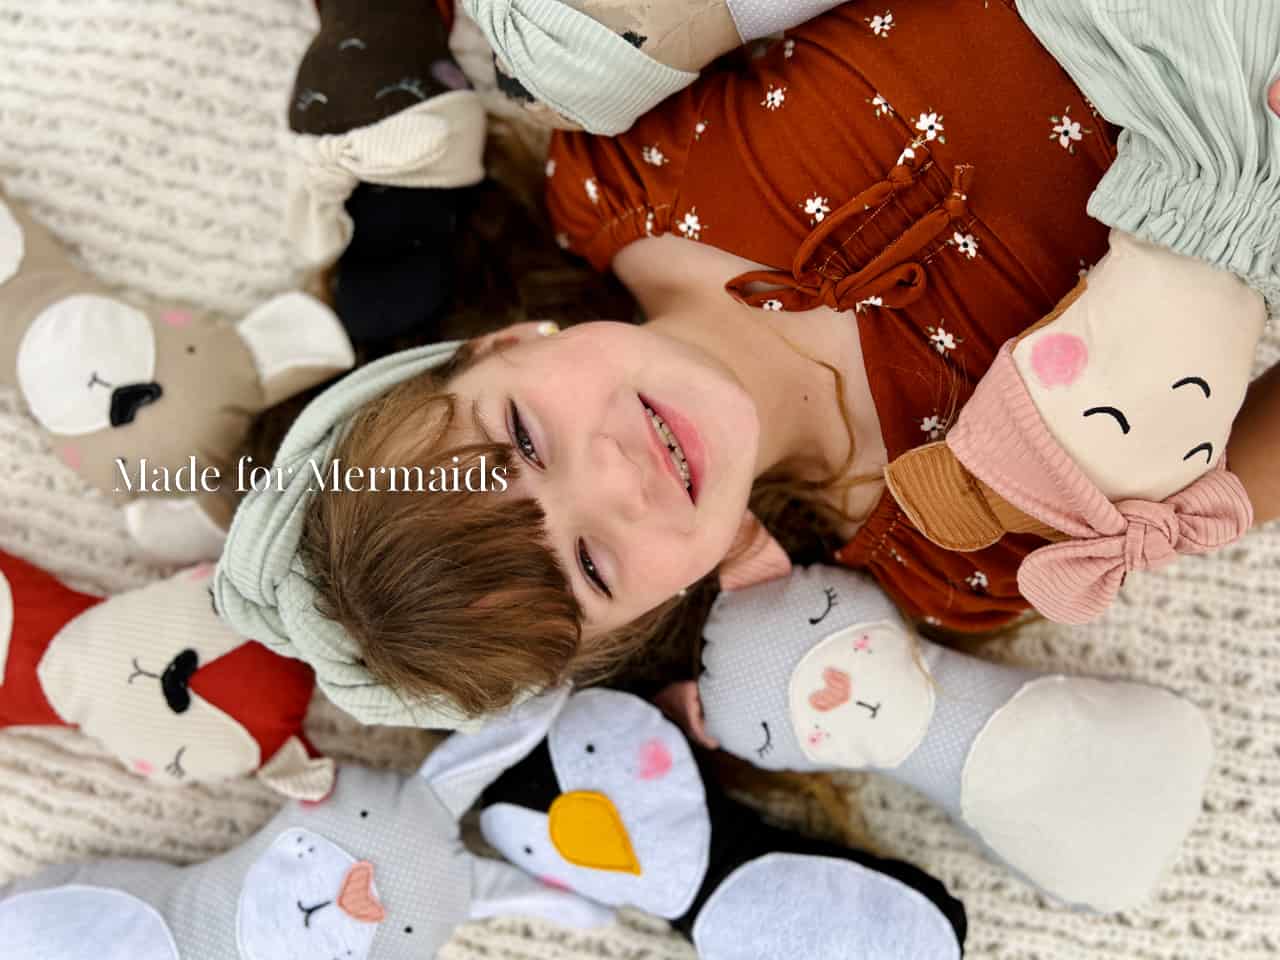
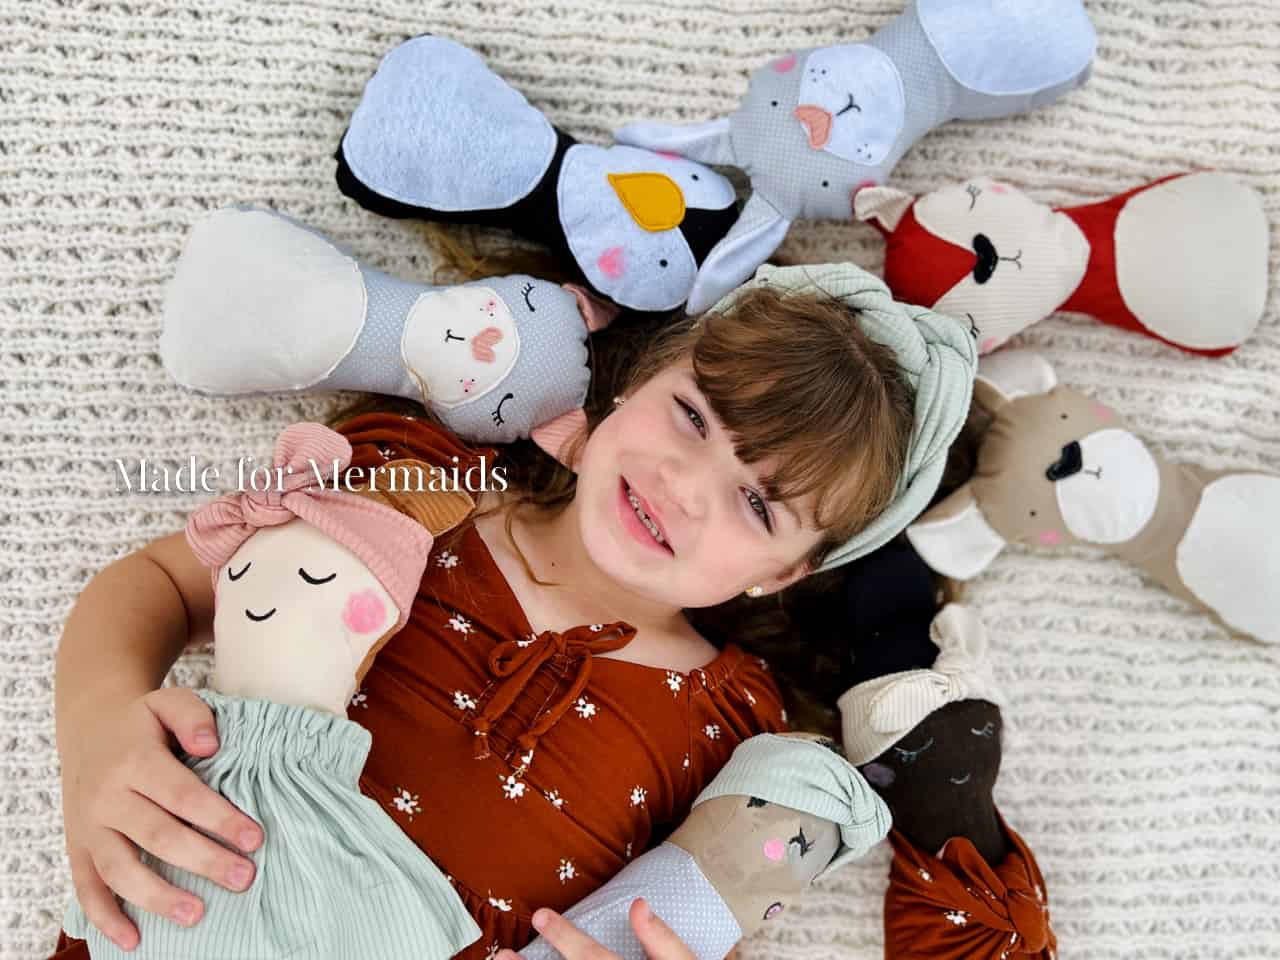
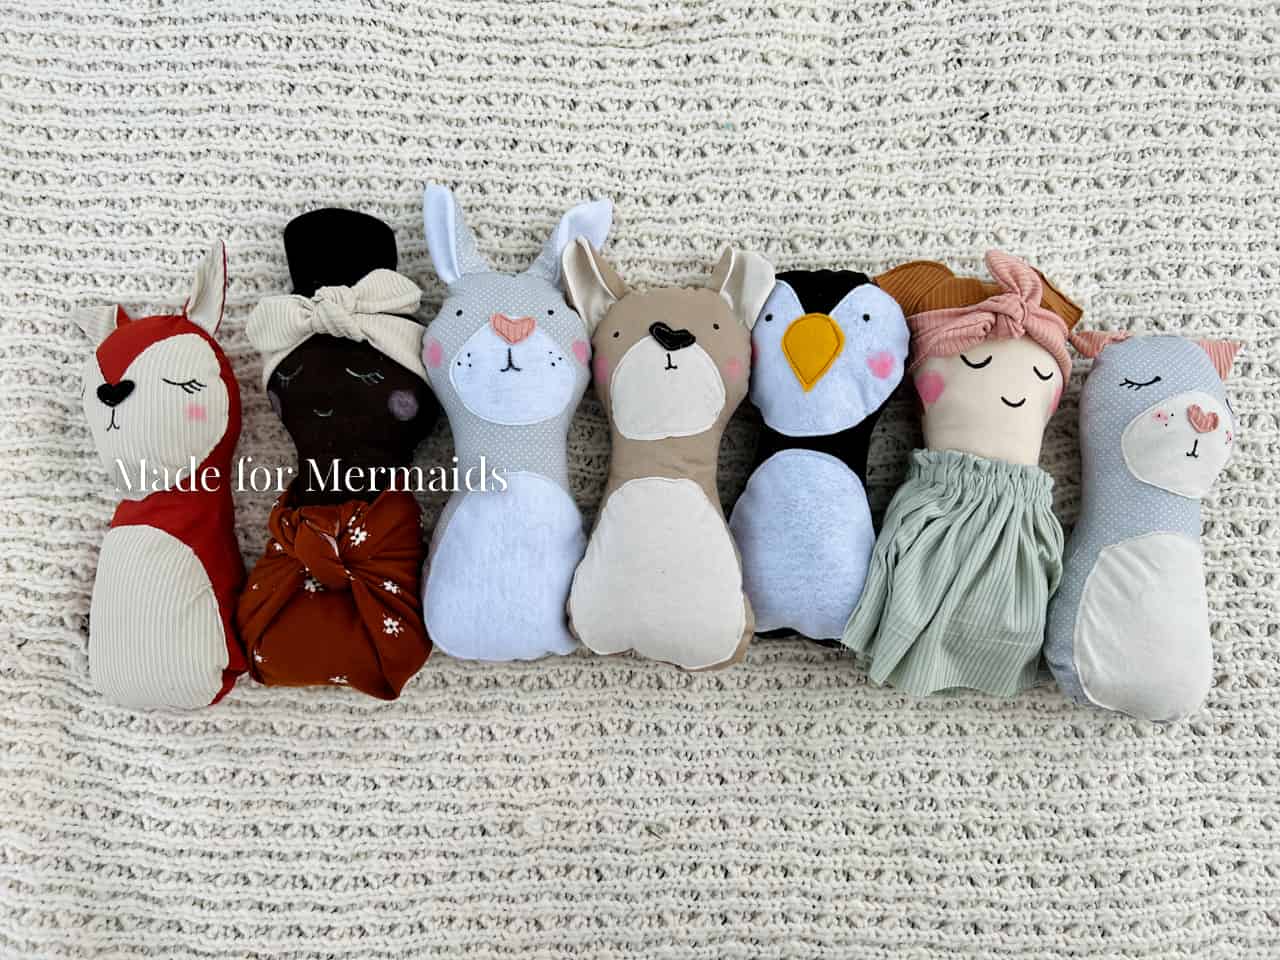
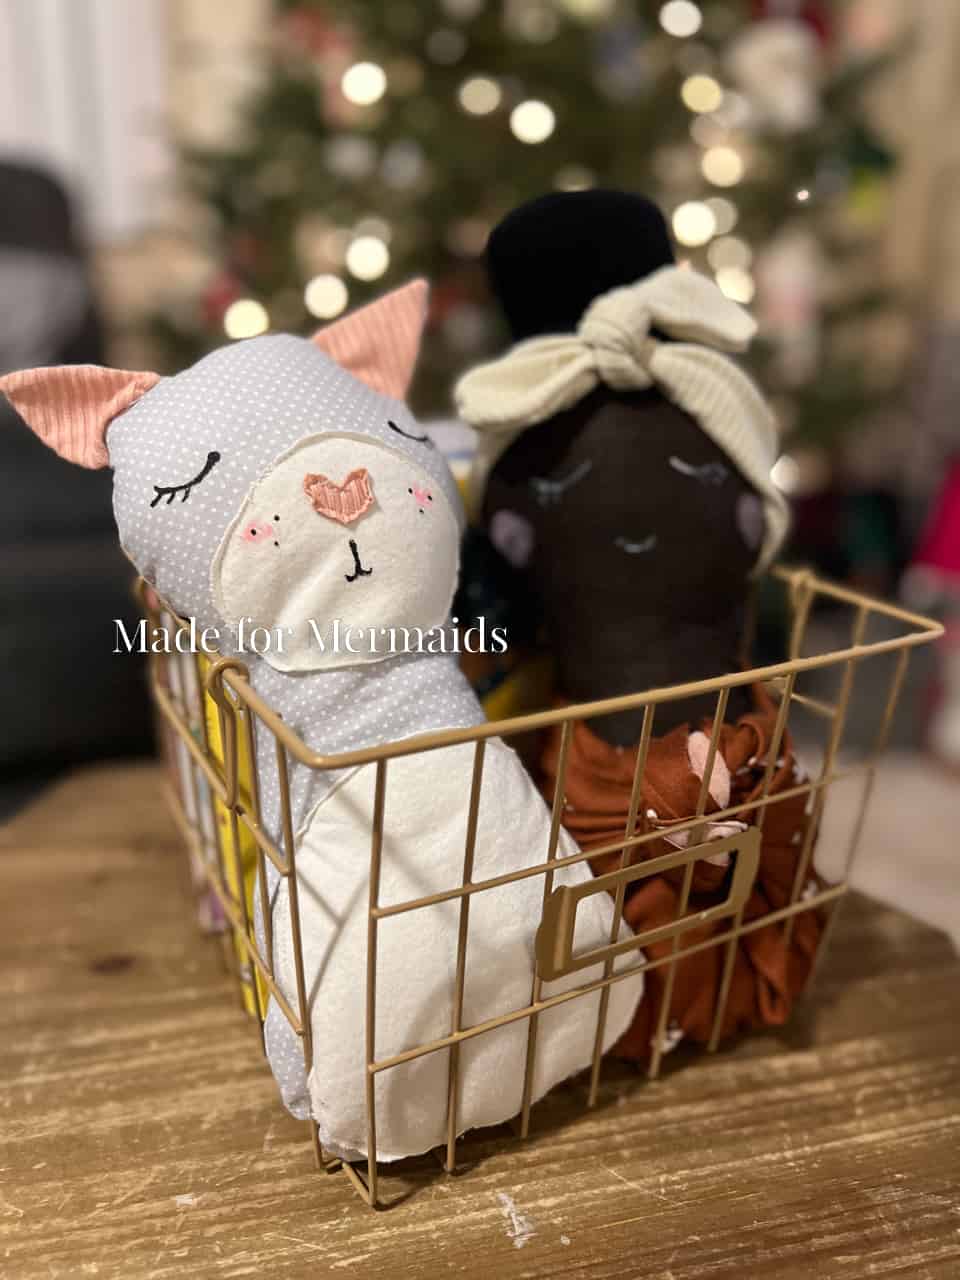
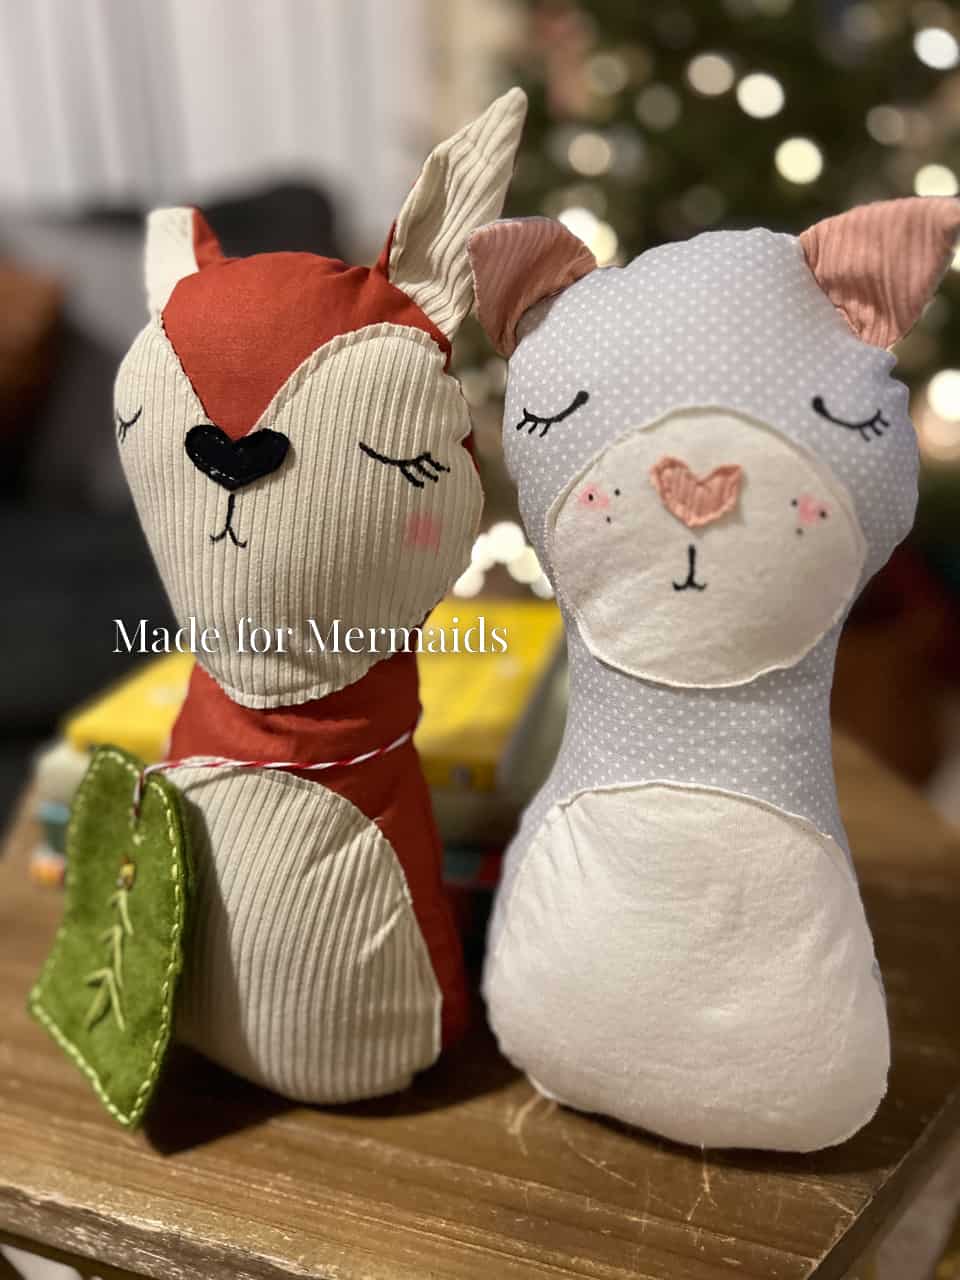
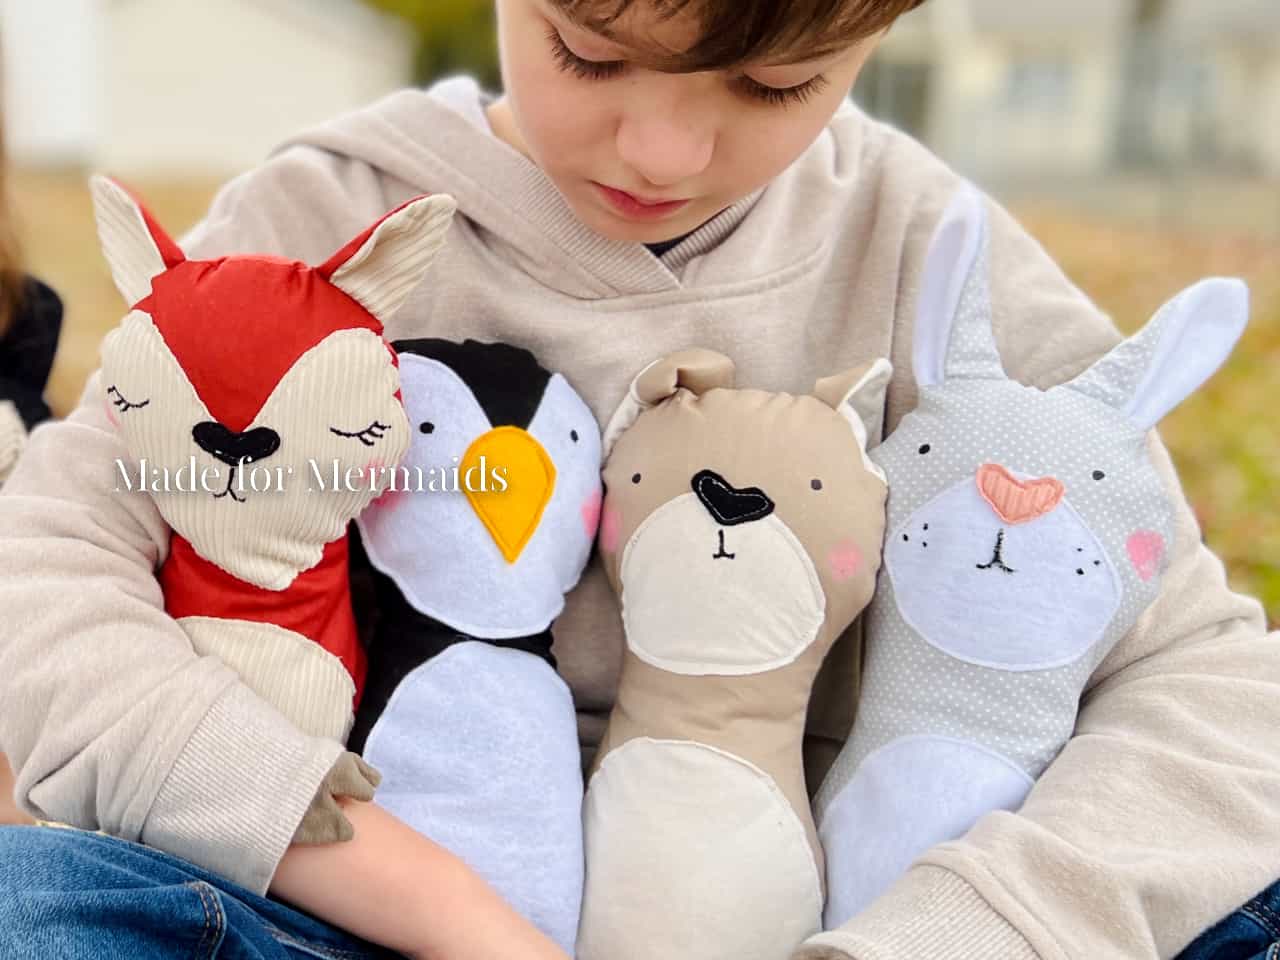
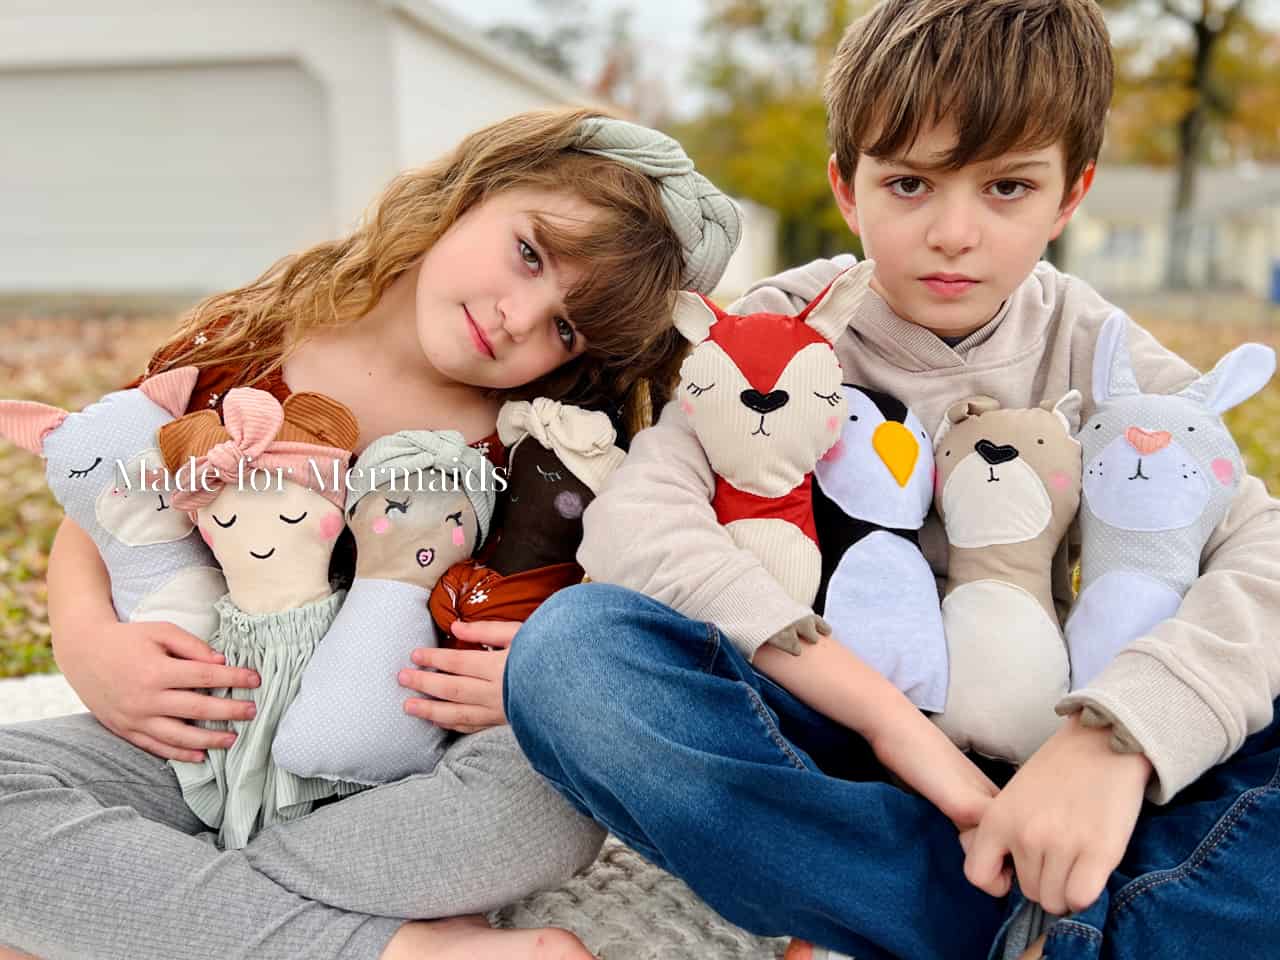
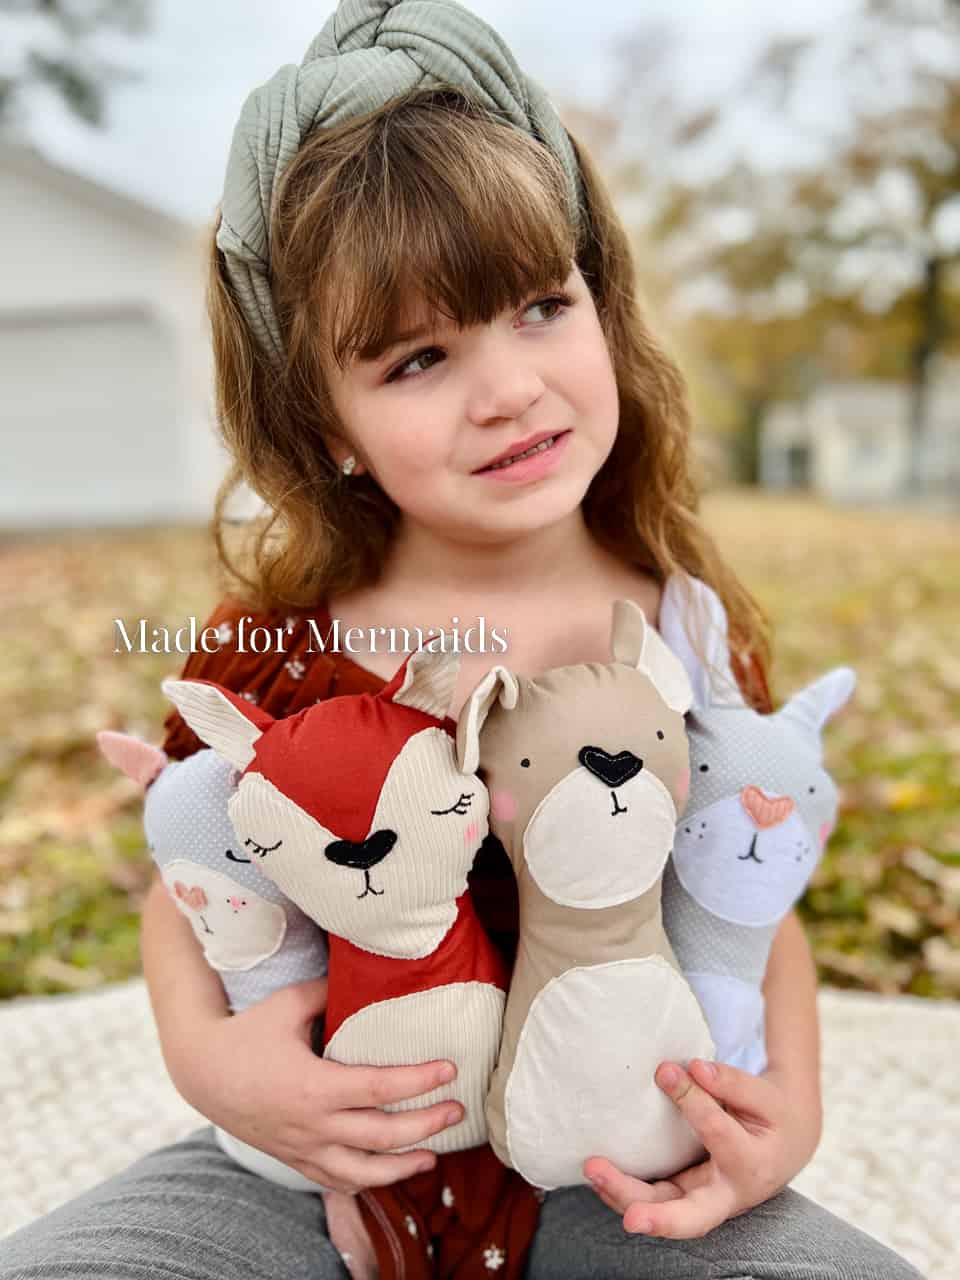
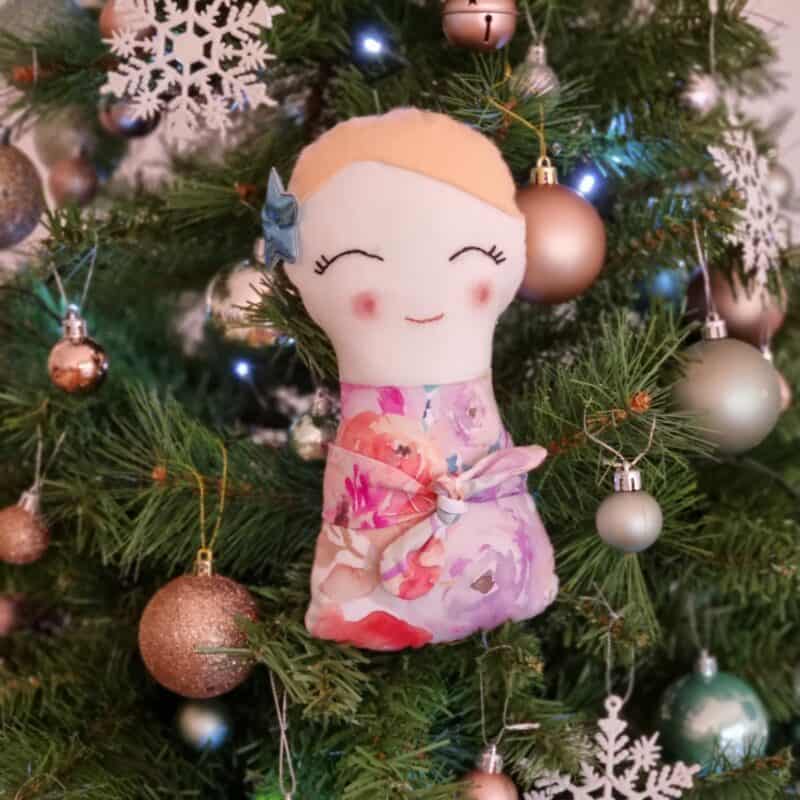
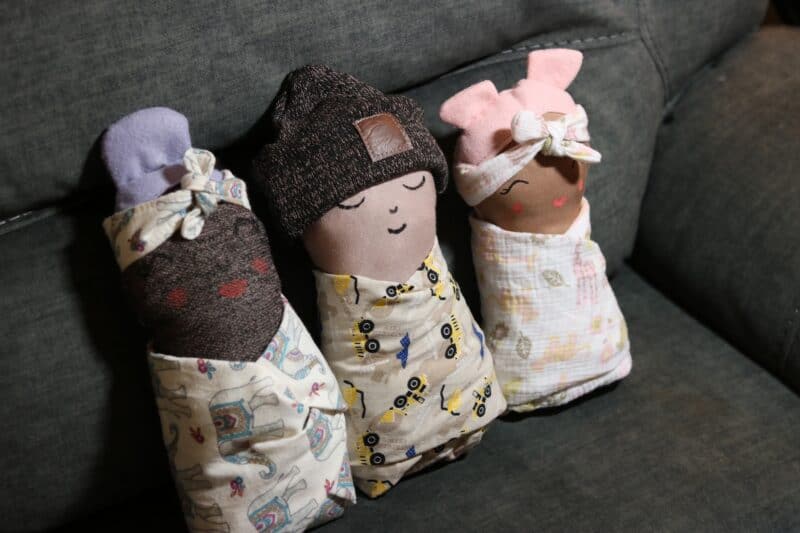
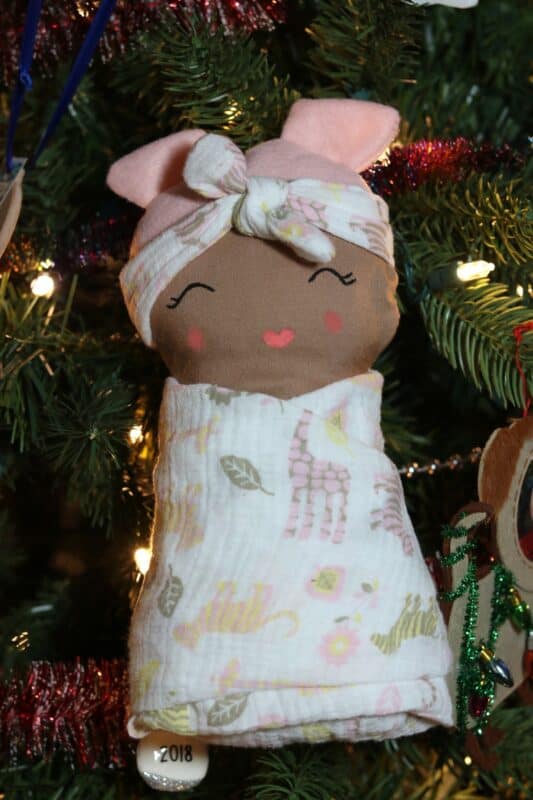
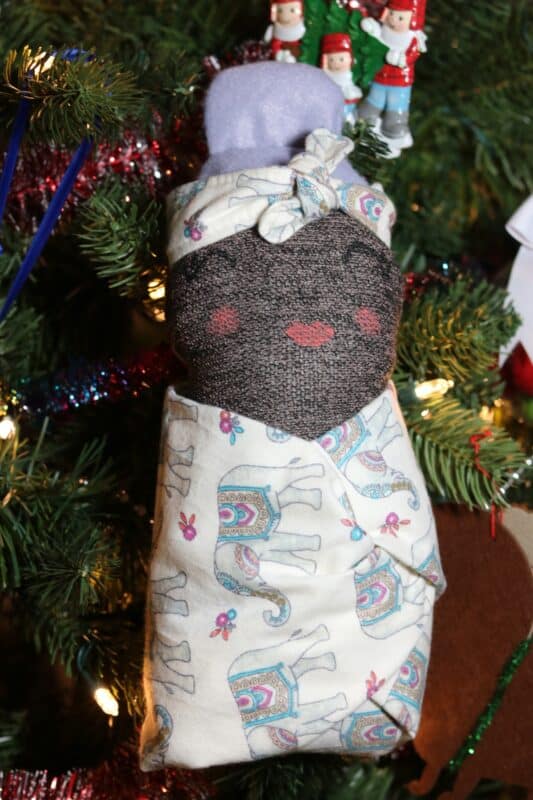
On the seventh day of freebies, the mermaids gave to me…….a peanut shaped plushie! This was originally named Baby Barnacle as a nod to our Barnacle Buddy from a few years ago, but my daughter said they looked like peanuts and changed the name. We’ve included a few basic ear and snout shapes for different animals, but the possibilities are endless! You can use the main body piece to create any plushie you’d like.
SUPPLIES:
- 1/4 yard main body fabric
- Felt, fabric scraps, etc for animal features and/or hair
- Polyfil
- Optional: fabric paint, vinyl, buttons, etc. for facial features
LET’S GET STARTED!
1/2″ seam allowances included.
Step 1: PREPPING
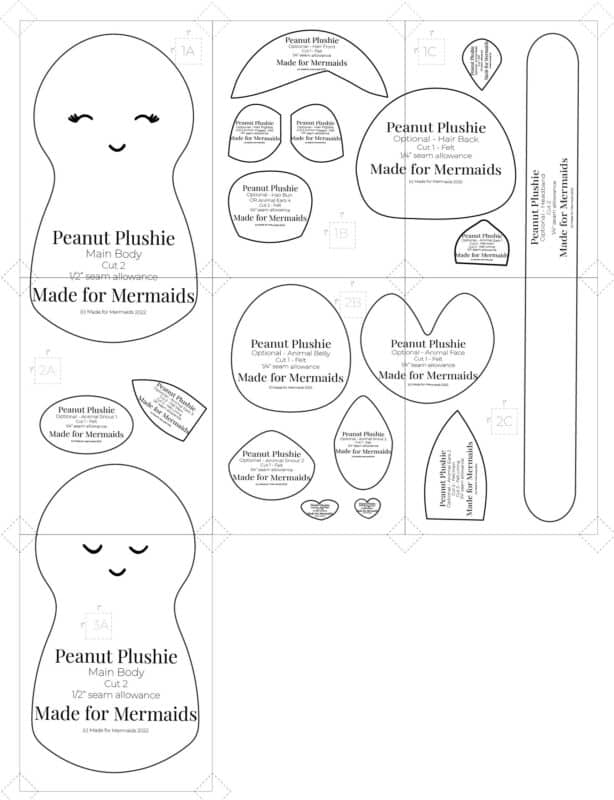
Go grab the pattern here! The pattern is 100% free, but you do need to add it to your cart and checkout. Then, it will always be available to download from your account. The pattern is a no-trim pattern; if you need help putting the pattern together, pop over to the faqs and troubleshooting page or ask in our Facebook group .
Print and assemble the pattern. Pattern layout below:
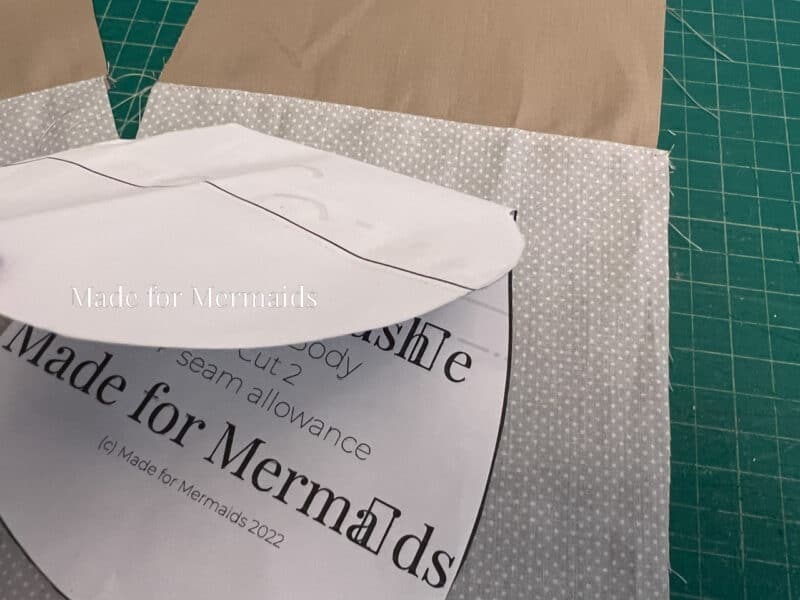
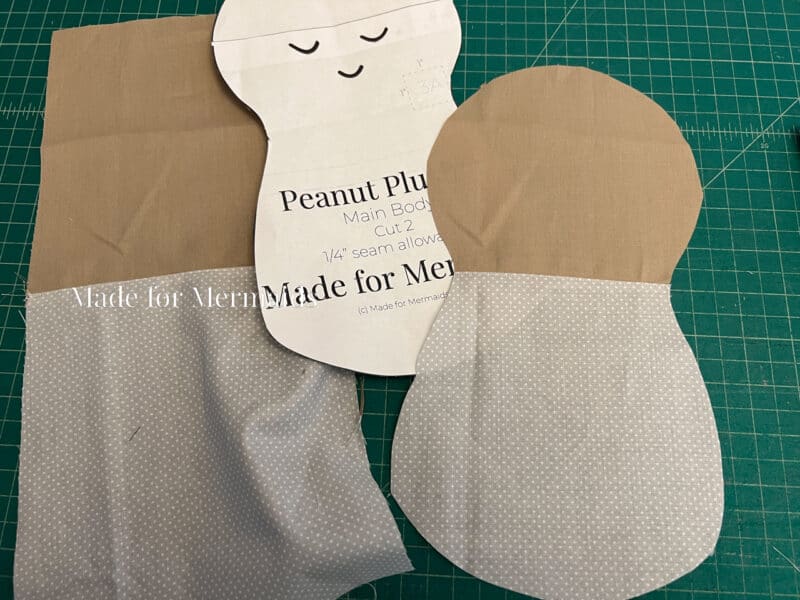
Step 2: CHOOSING YOUR PIECES
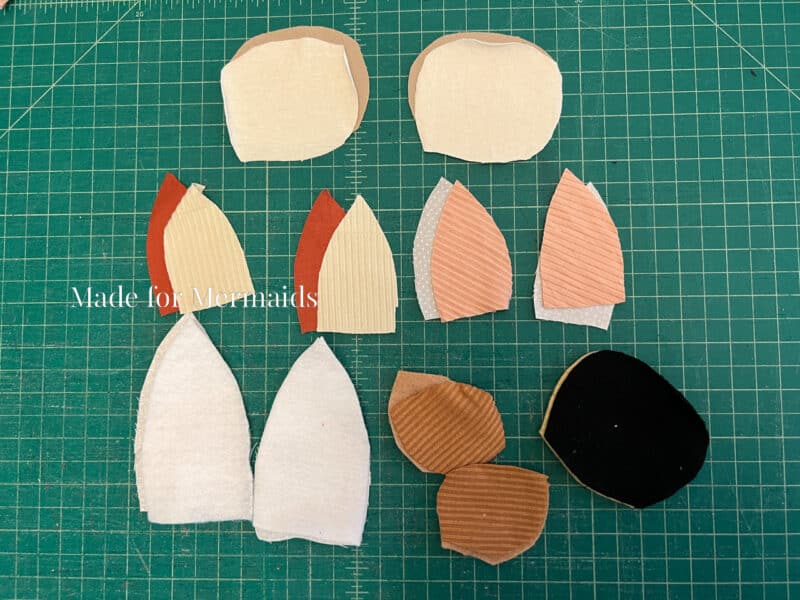
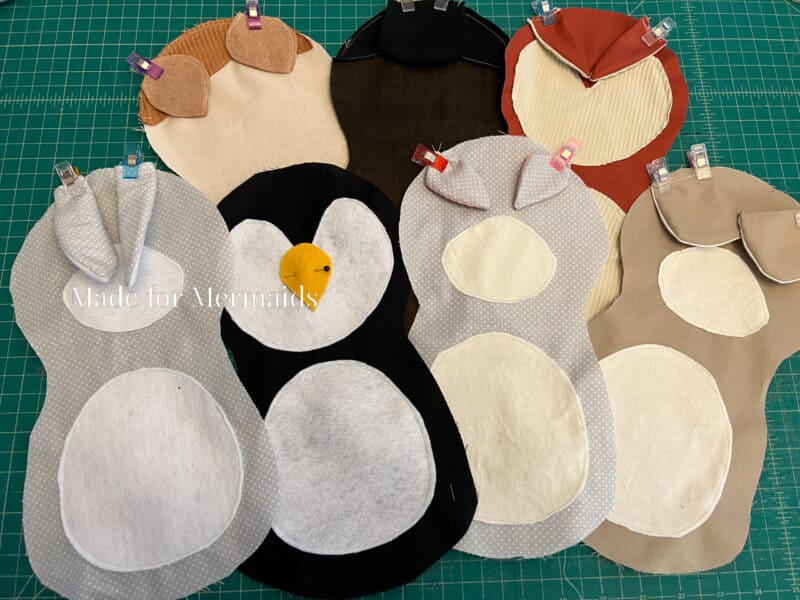
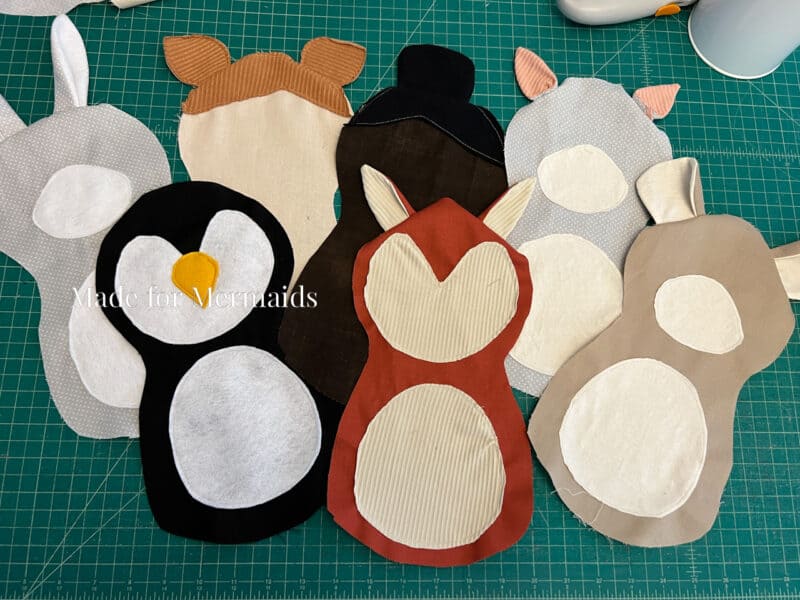
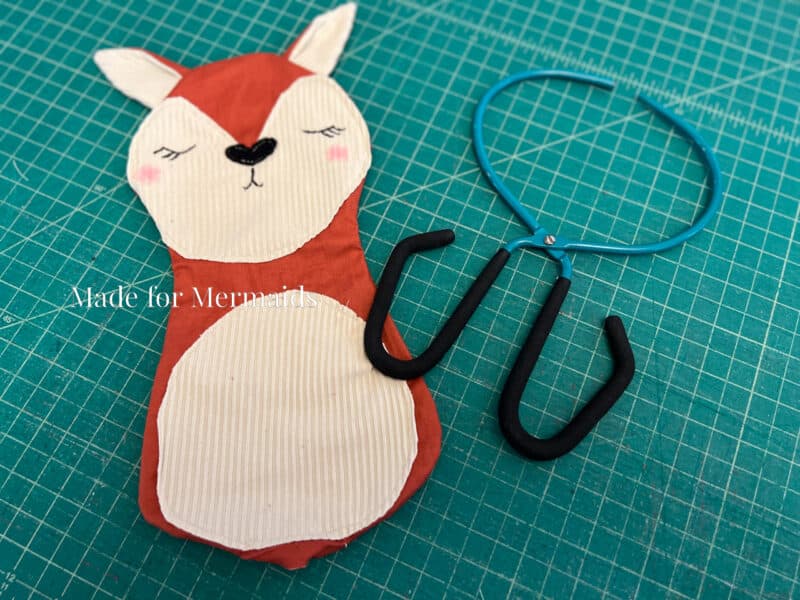
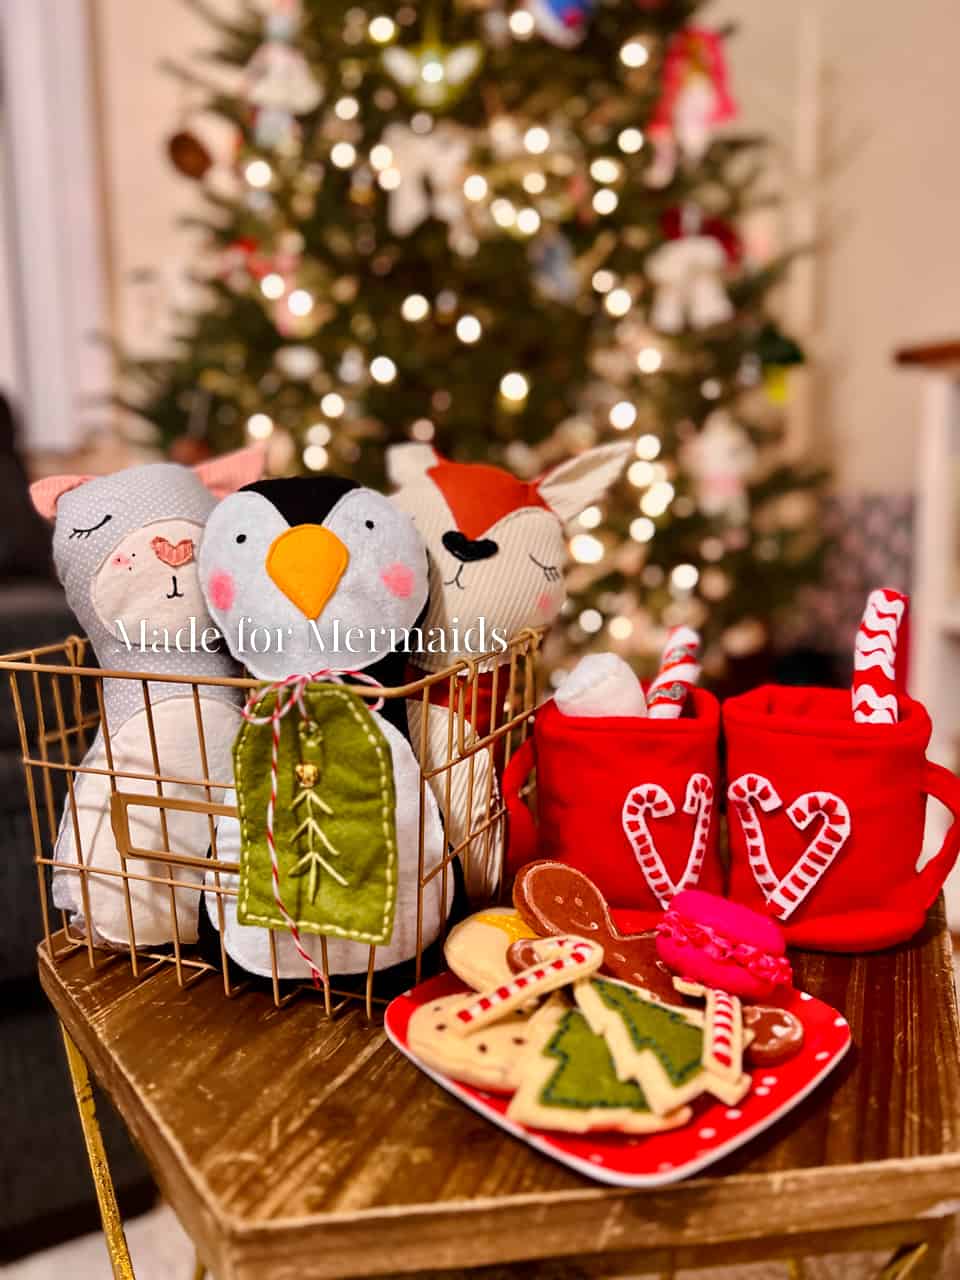
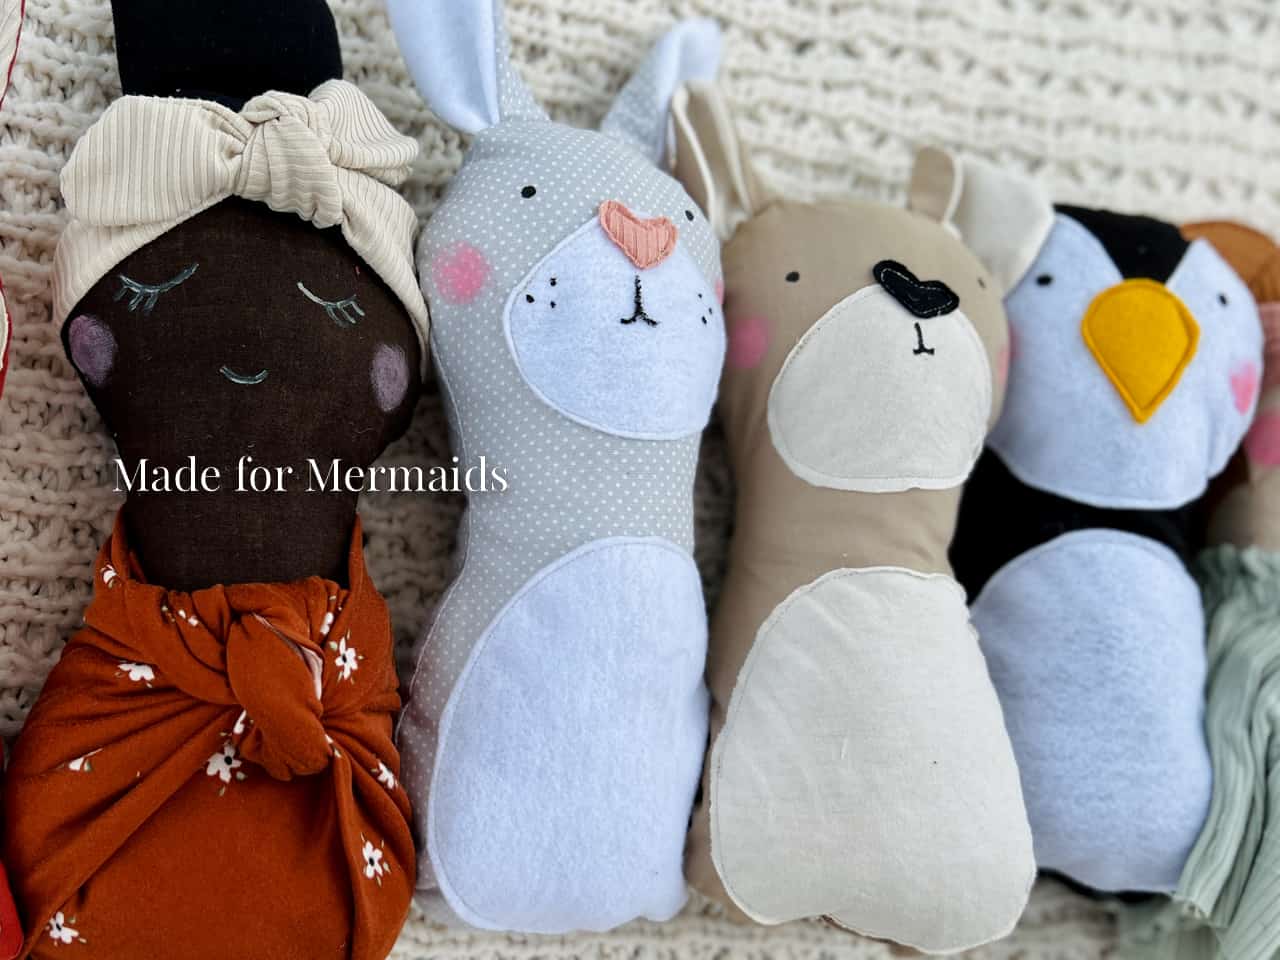
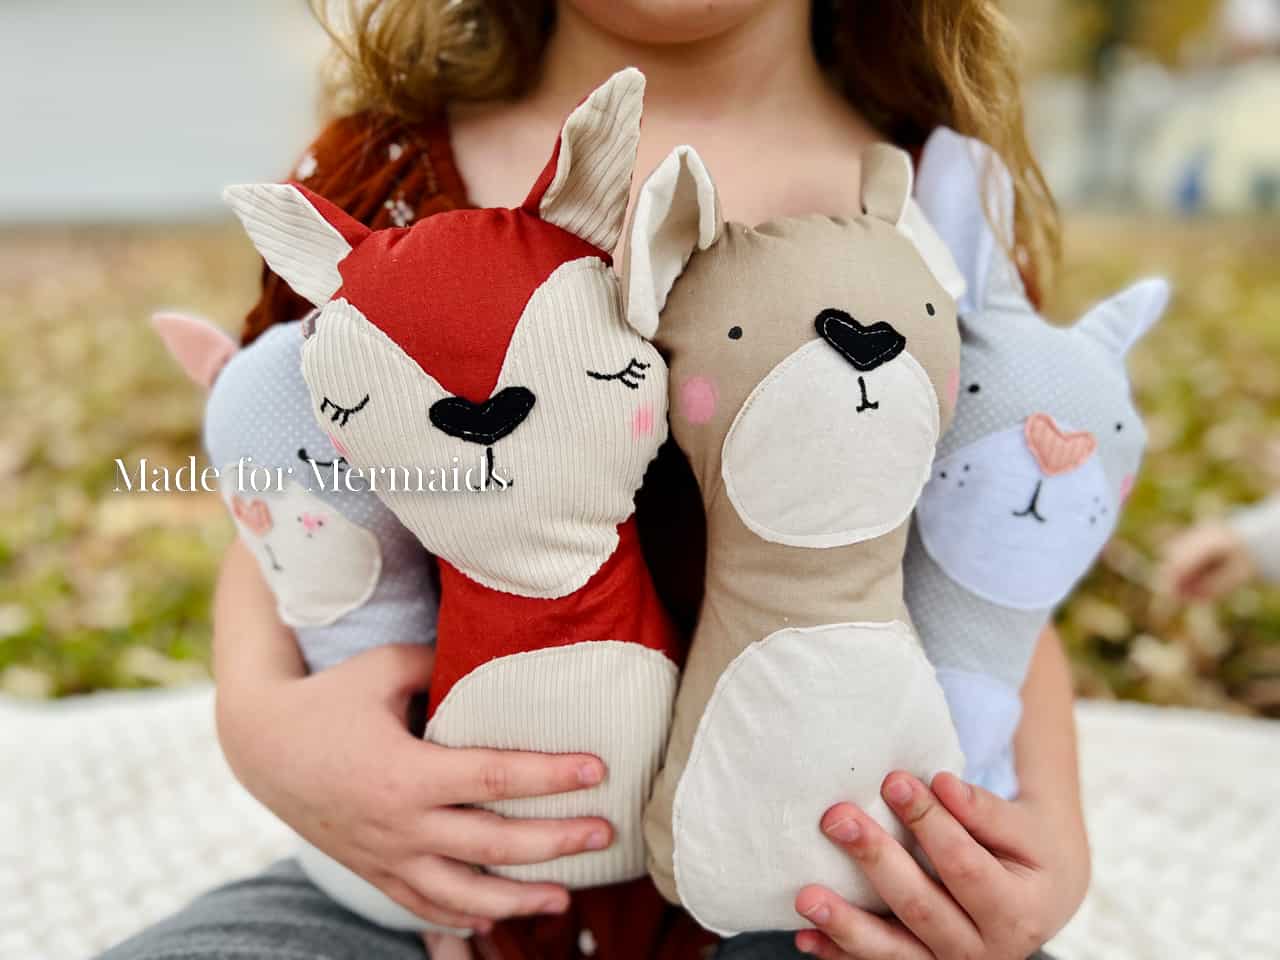
Cut whichever pieces you’d like to use! All plushies will need 2 main body pieces. Aside from that, you can do whatever combination you’d like, including animals that aren’t shown. If you’d like to make one similar to those pictured, here’s a quick list of pieces used:
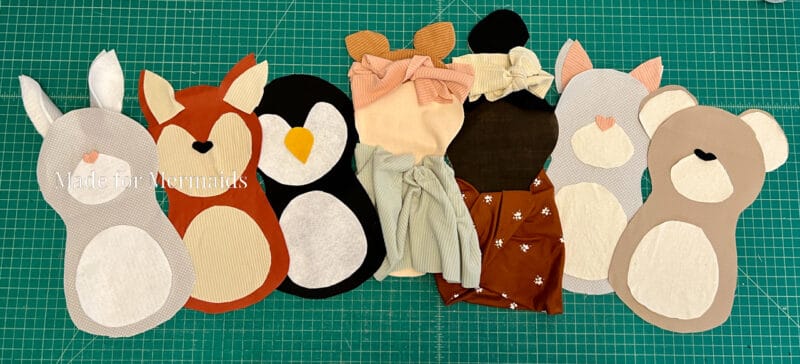
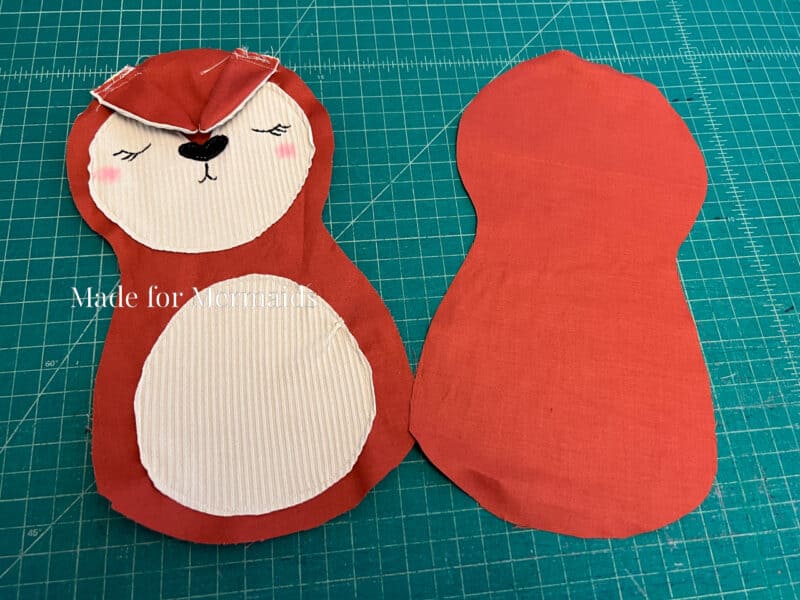
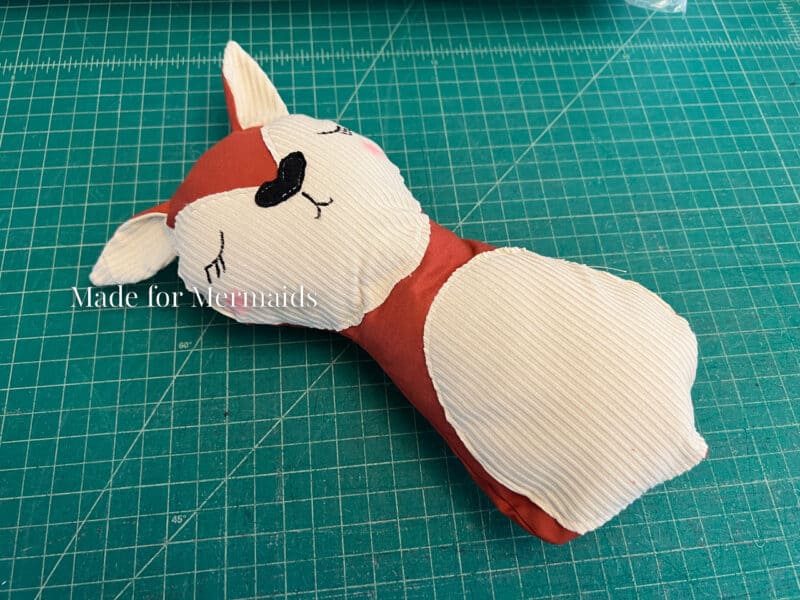
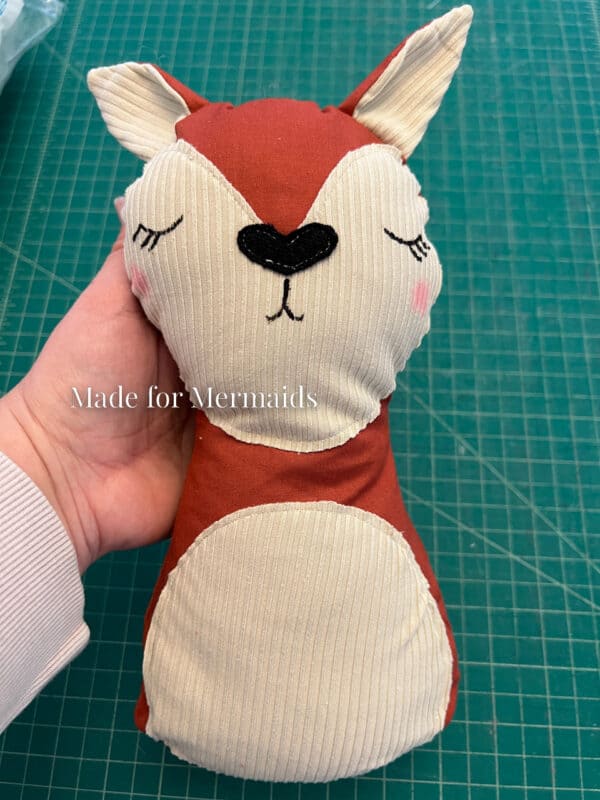
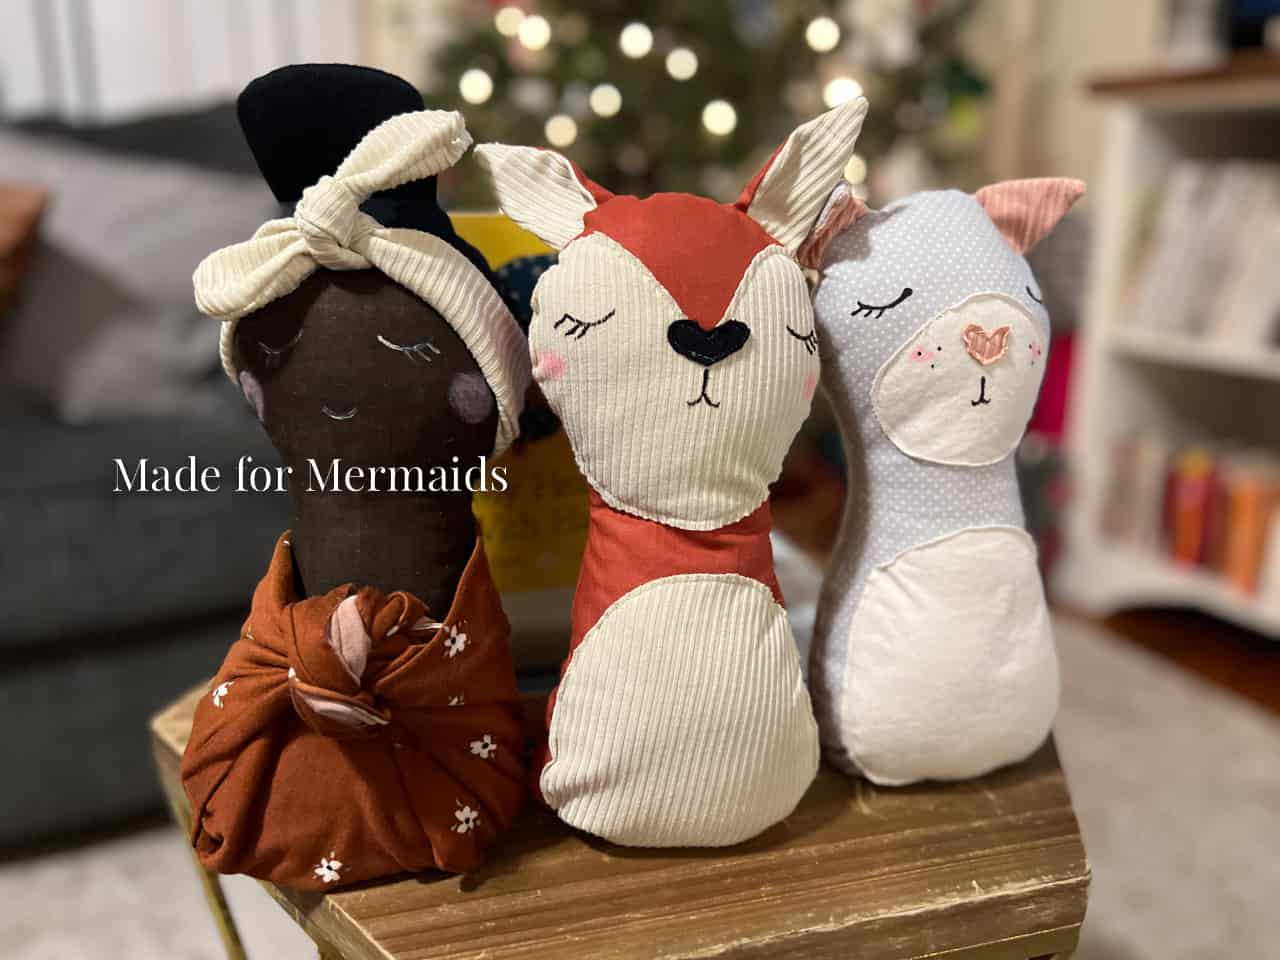
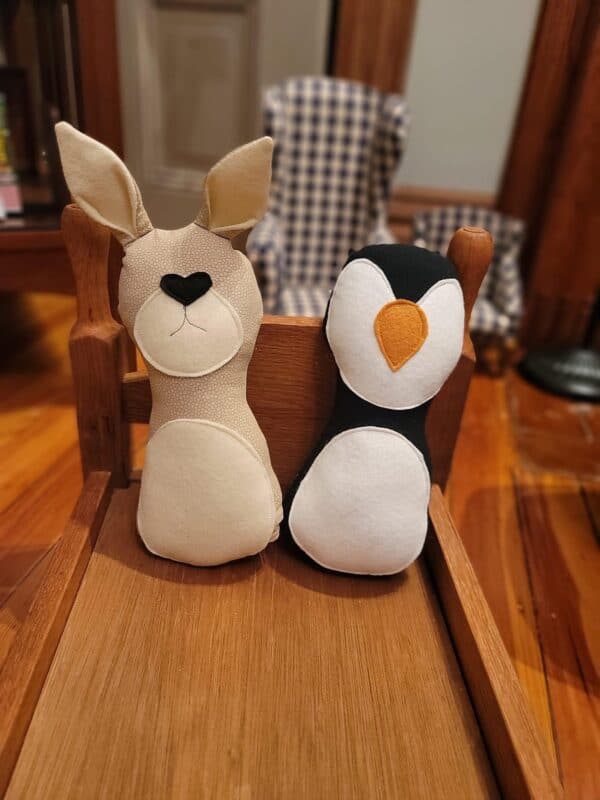
FOX – Main Body; Animal Belly; Animal Face; Animal Ears 3; Heart Nose
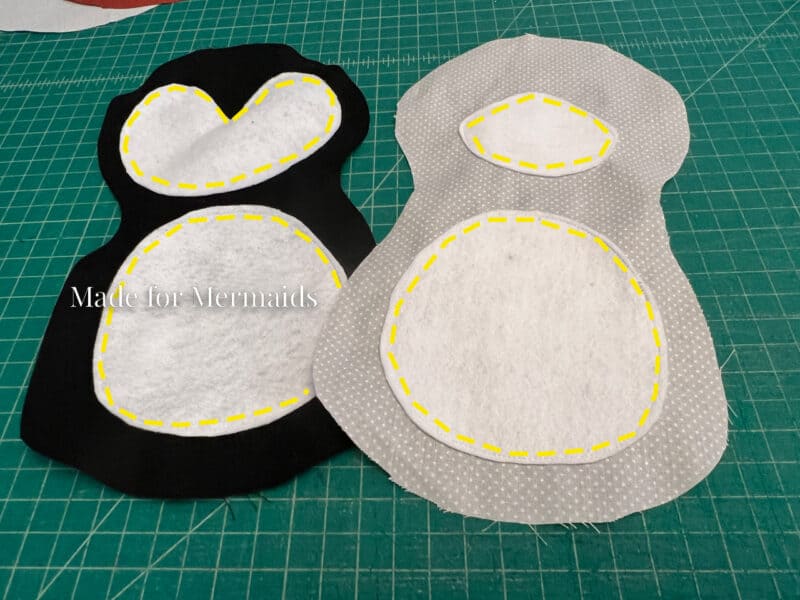
PENGUIN – Main Body; Animal Belly; Animal Face; Animal Beak
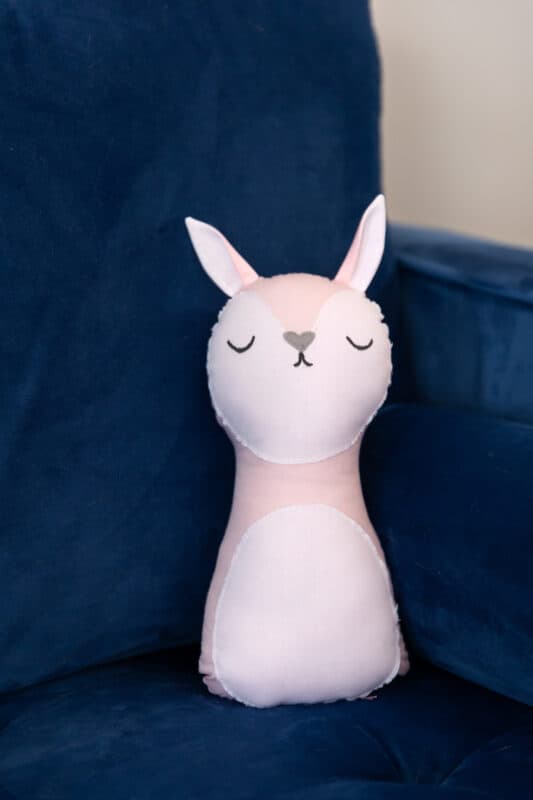
BEAR – Main Body; Animal Belly; Snout 2; Animal Ears 4 (same as Hair Bun piece); Heart Nose
CAT – Main Body; Animal Belly; Snout 2; Animal Ears 3; Heart Nose
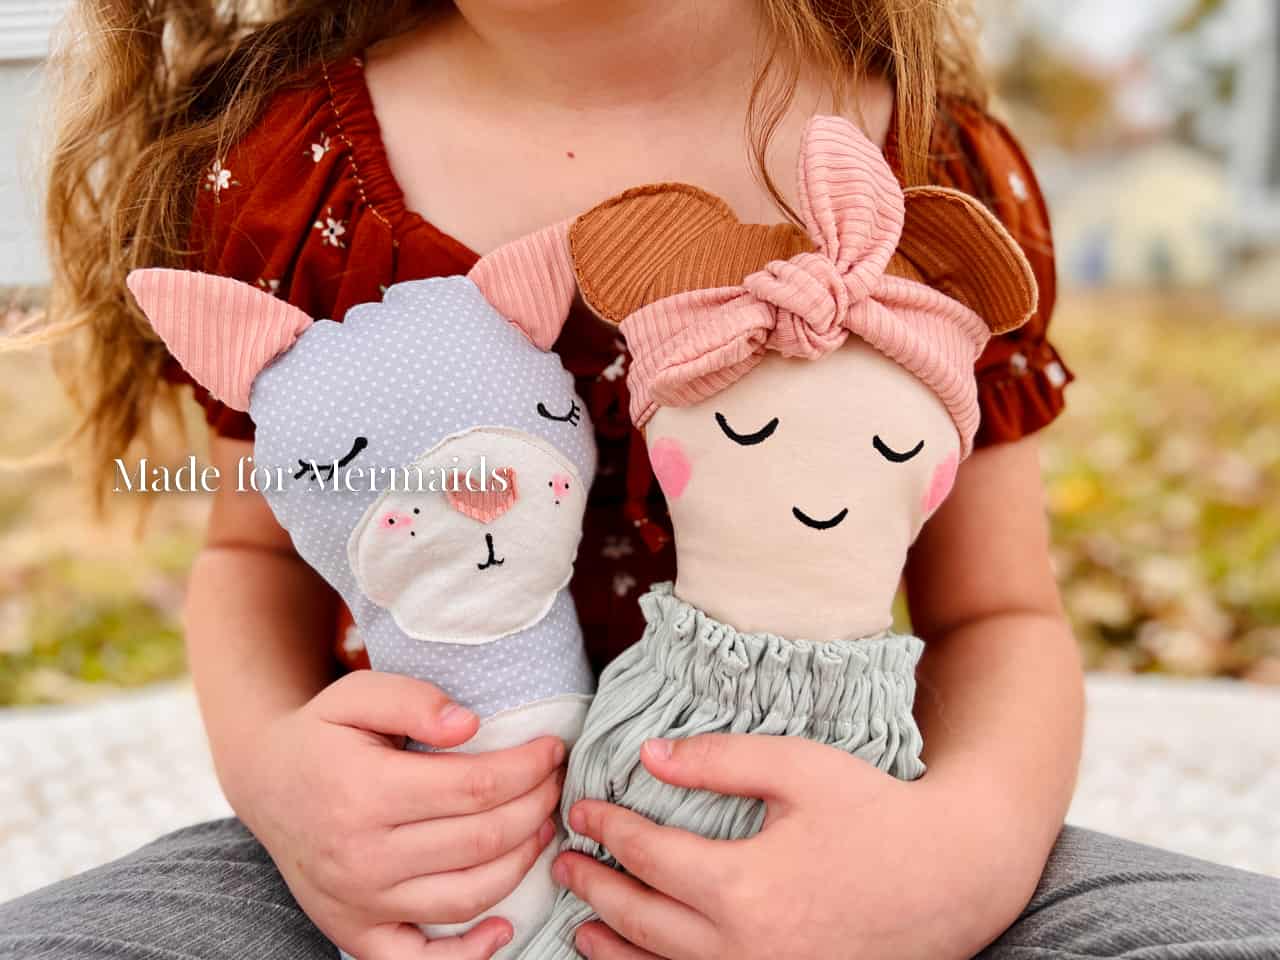
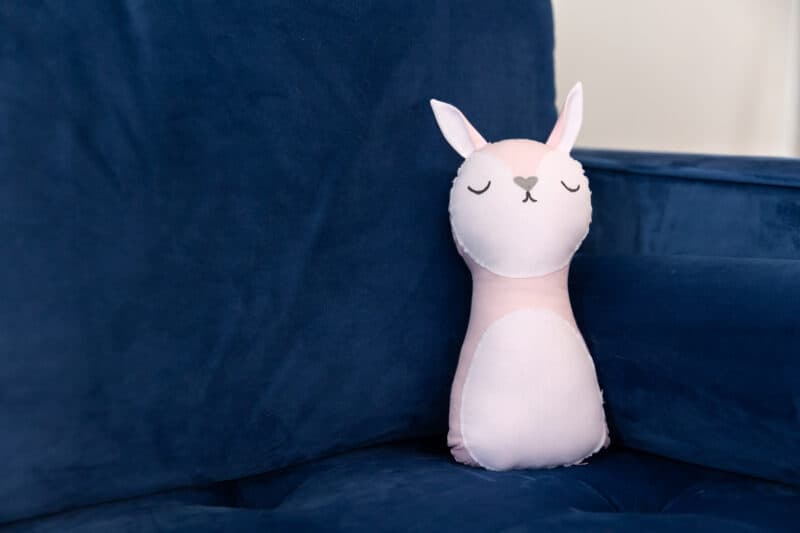
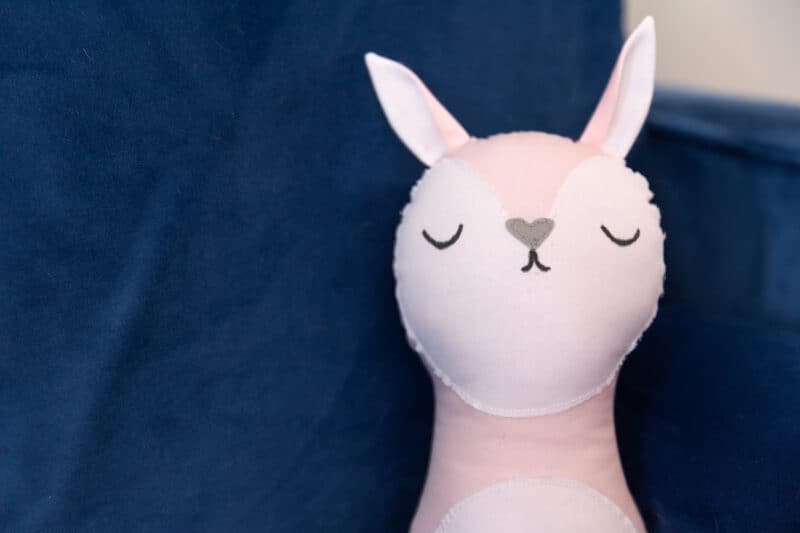
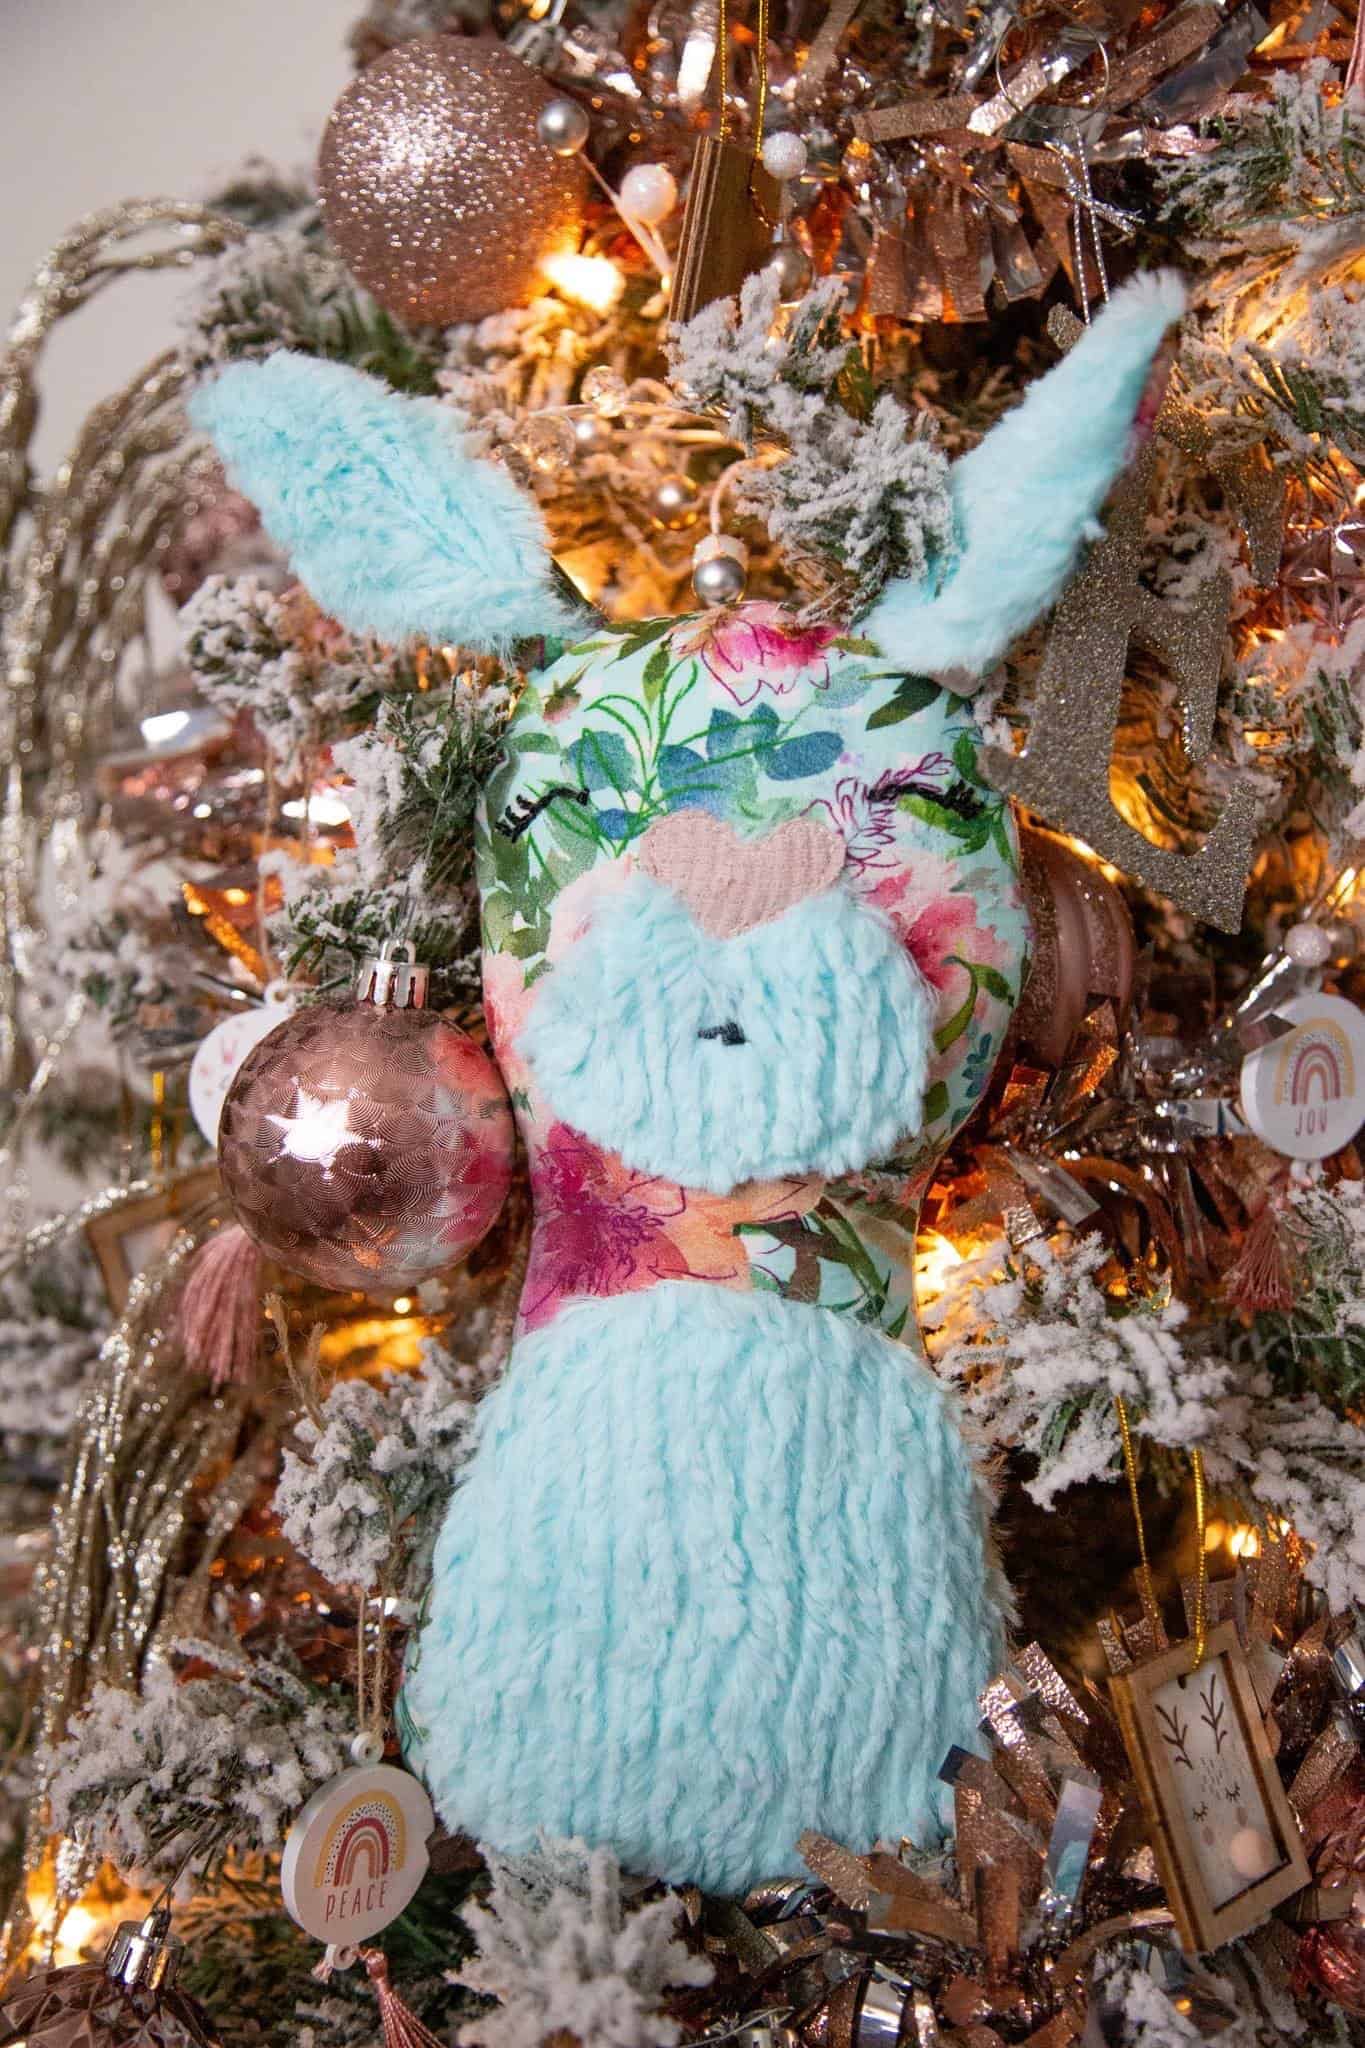
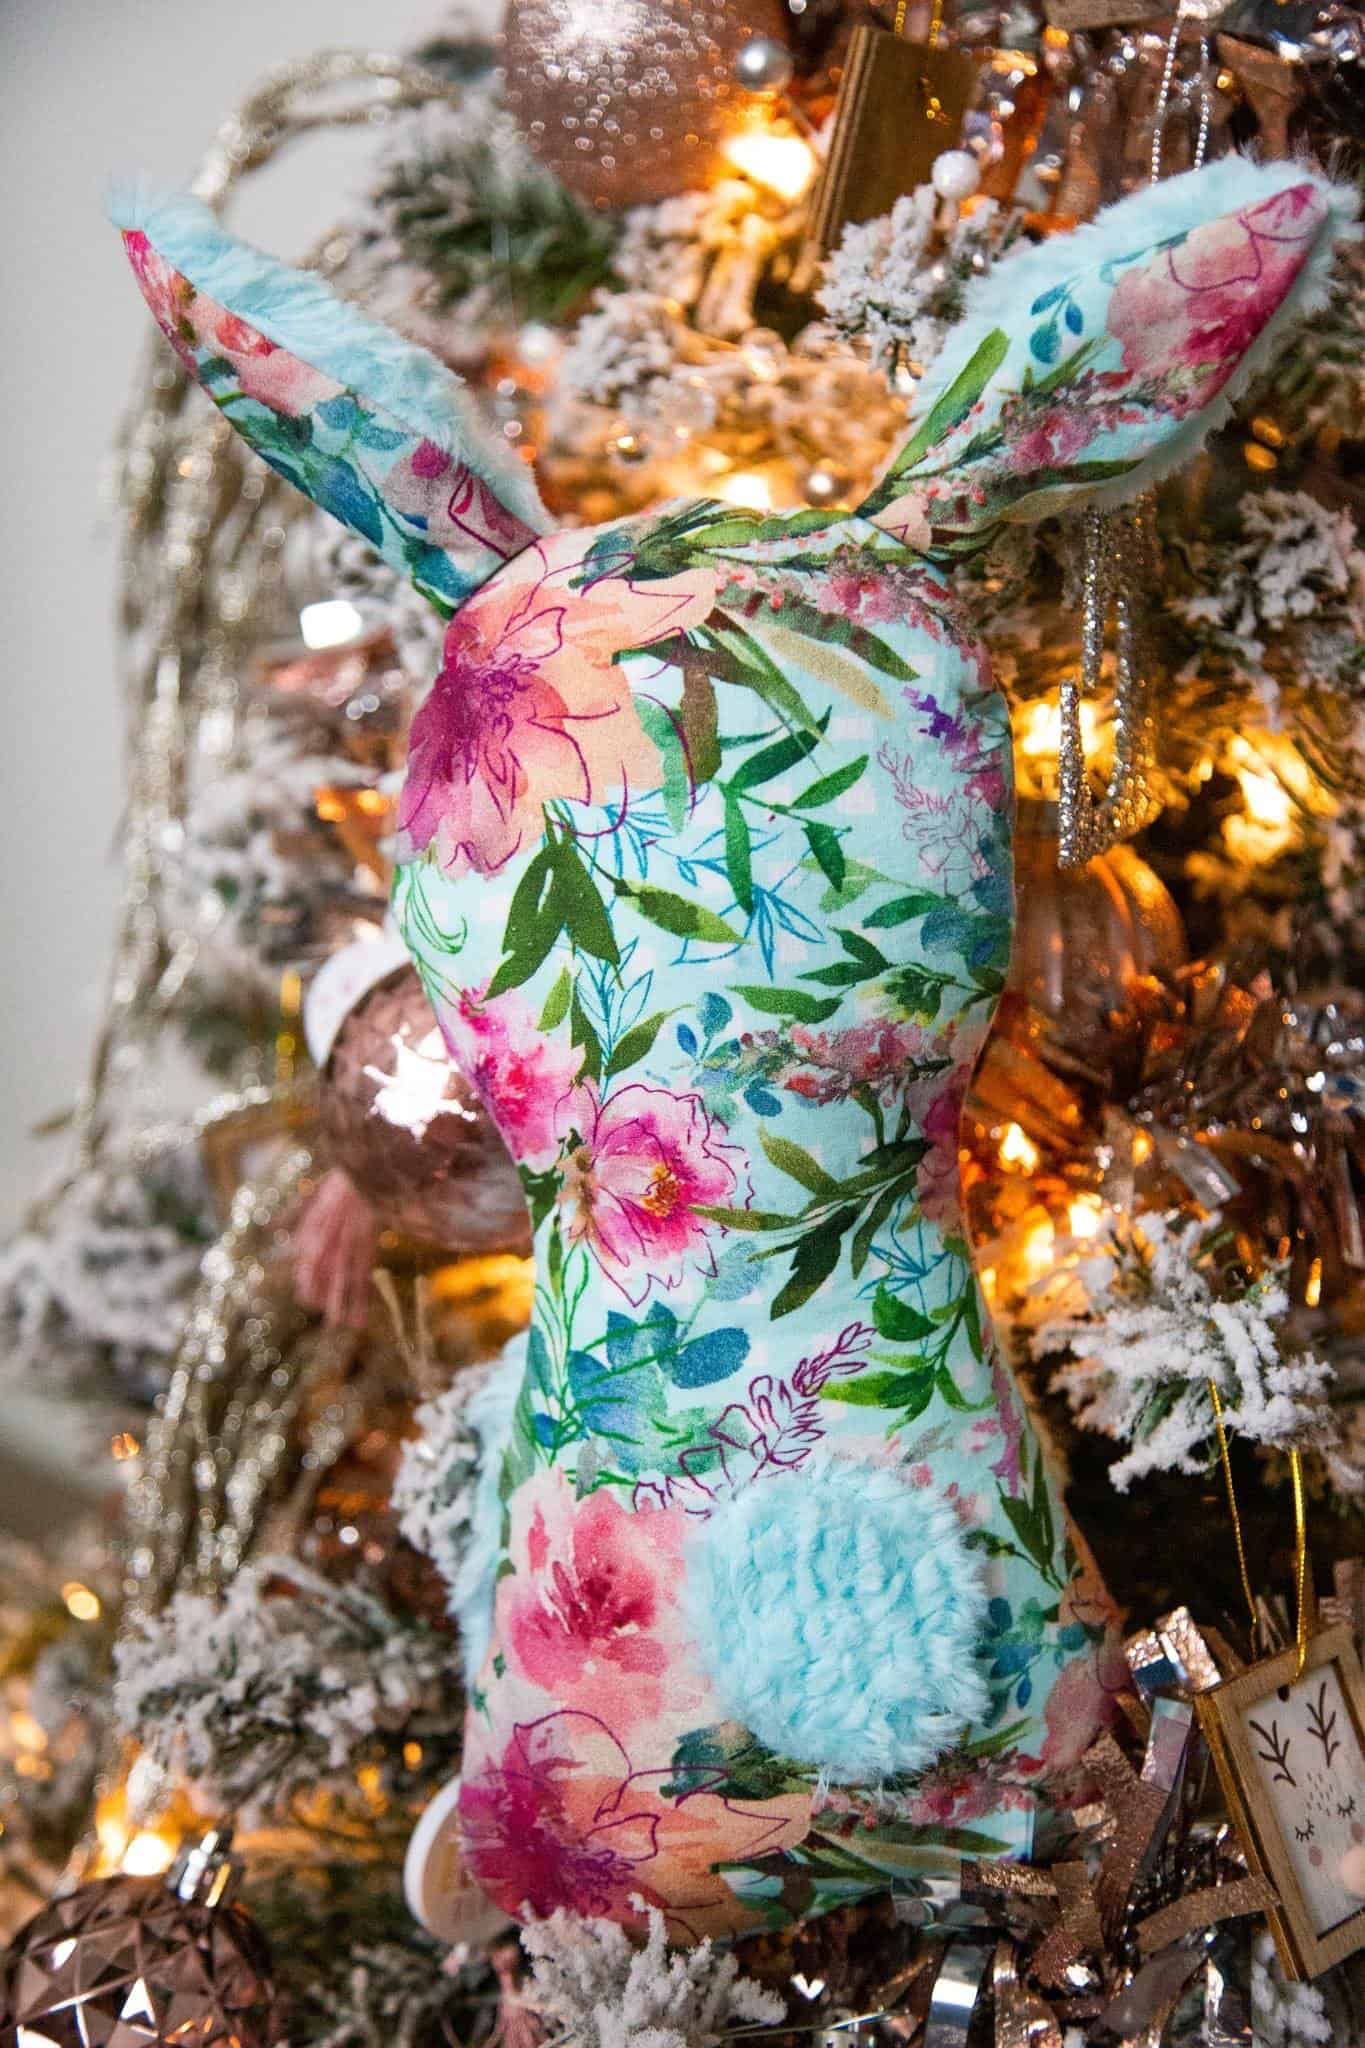
RABBIT – Main Body; Snout 2; Animal Ears 3; Heart Nose
NOTE: I didn’t use the face placement on the paper pattern pieces for any of the animals. They can be used as a reference for the baby versions, but they don’t work as well for the animal options.
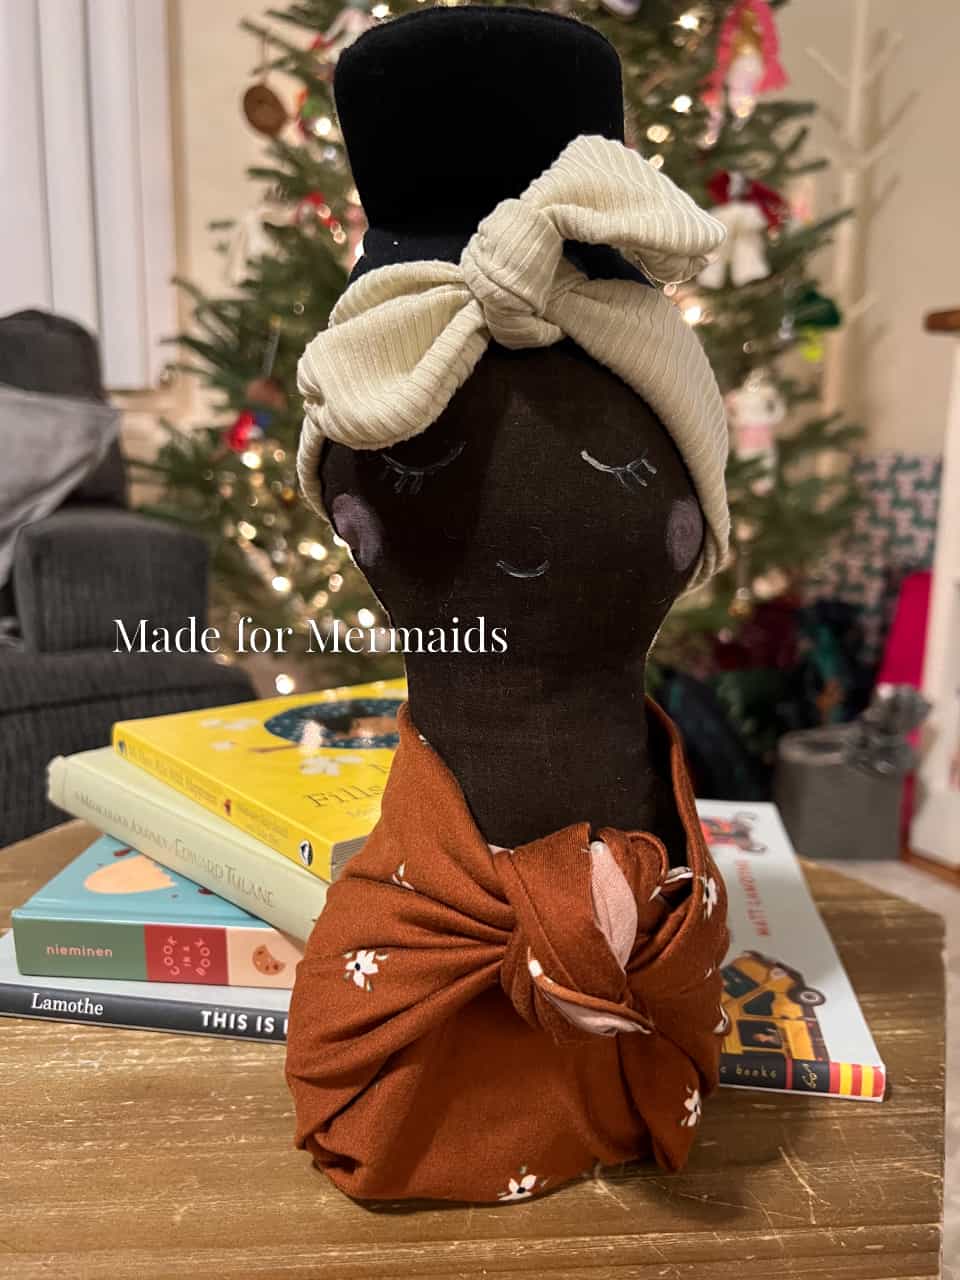
Want your plushie to be “dressed” without needing to make any clothes? You don’t need a separate pattern piece; simply cut small scraps of your “face” fabric and your “clothing” fabric. Pin or clip with right sides together.
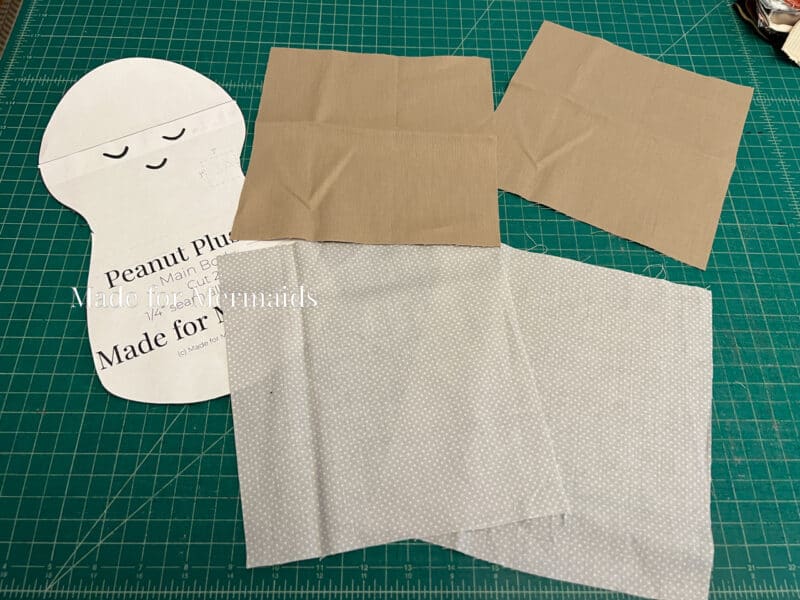
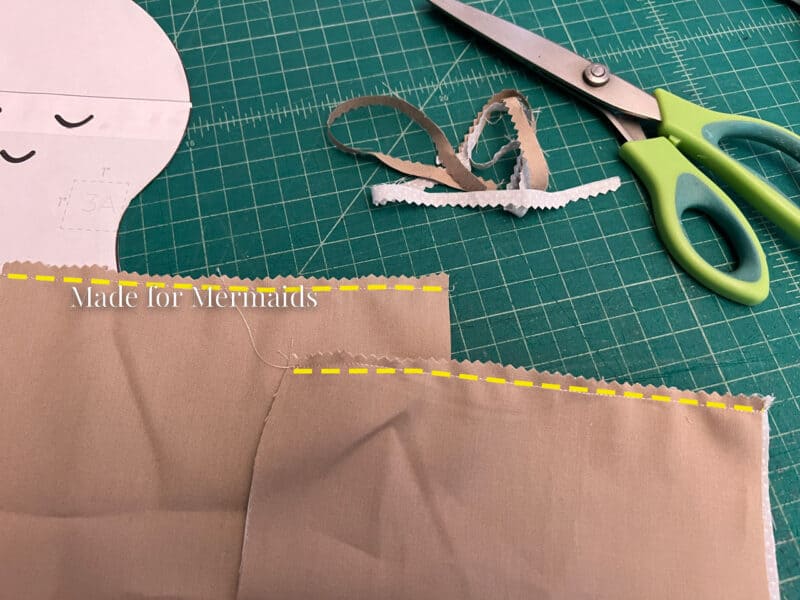
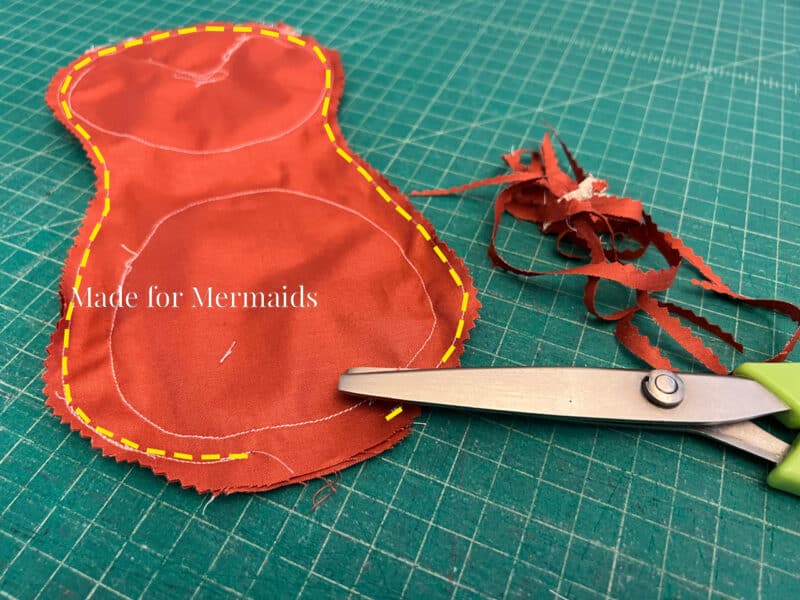
Stitch with 1/2″ seam allowance. Trim seam allowance with pinking shears.
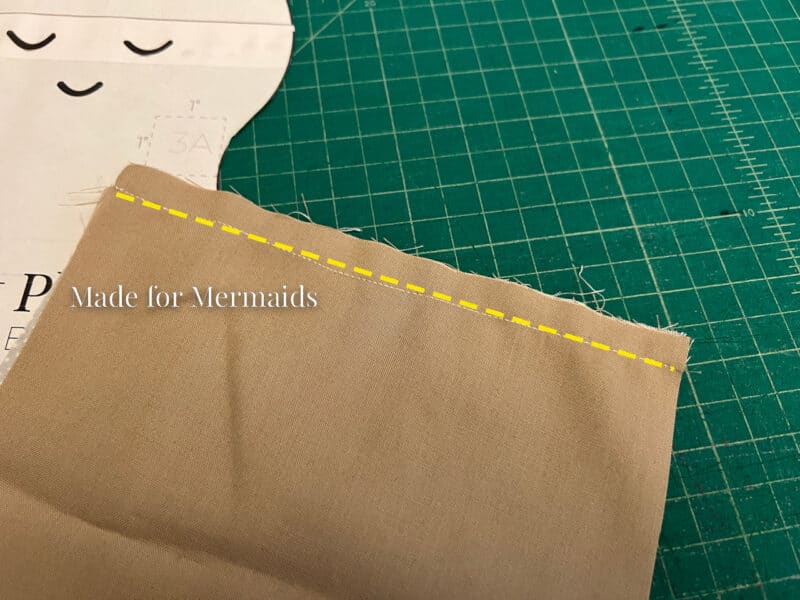
Topstitch. Fold paper pattern piece down at the “neckline”.
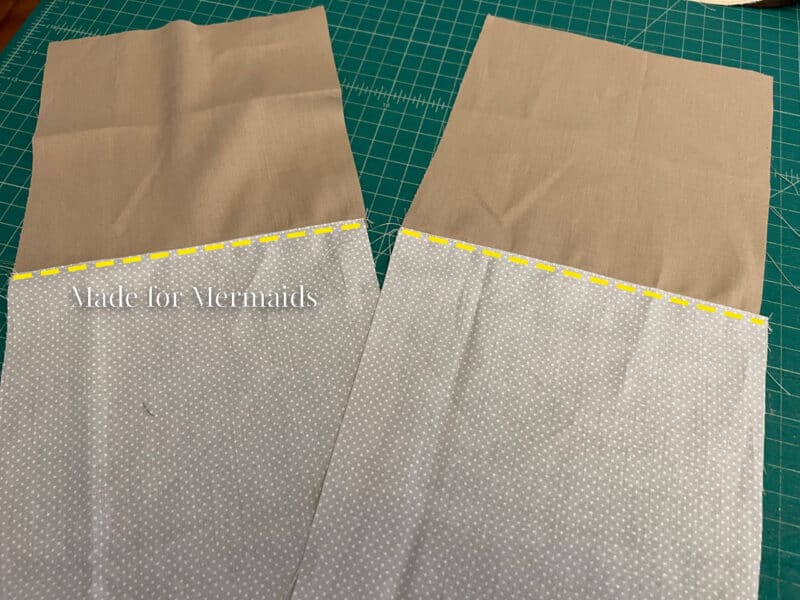
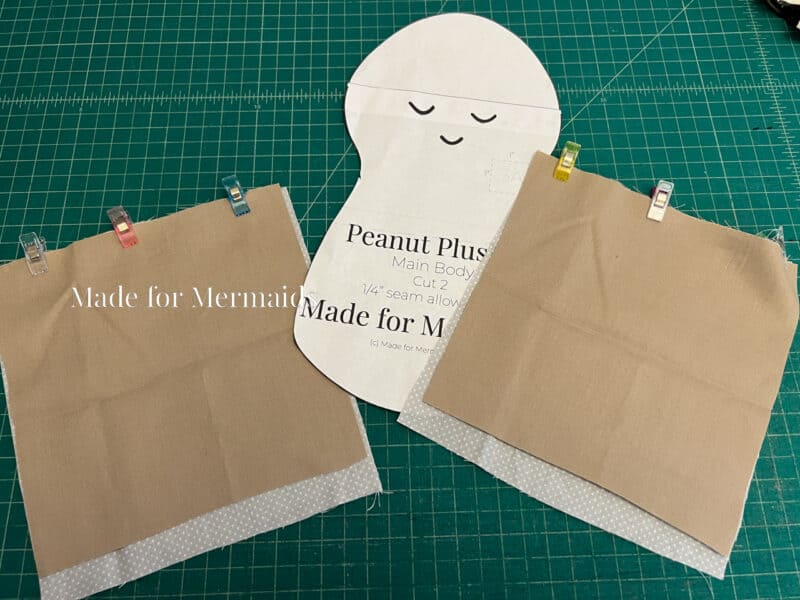
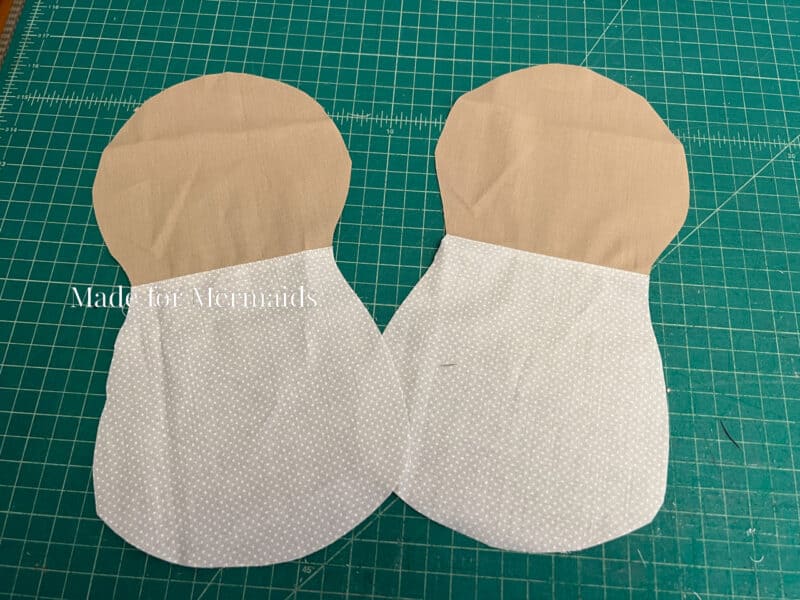
Align the fold with the seam you’ve sewn on your fabric, Cut main body piece out of fabric.

Repeat for one more main body piece.
Step 3: EARS and HAIR
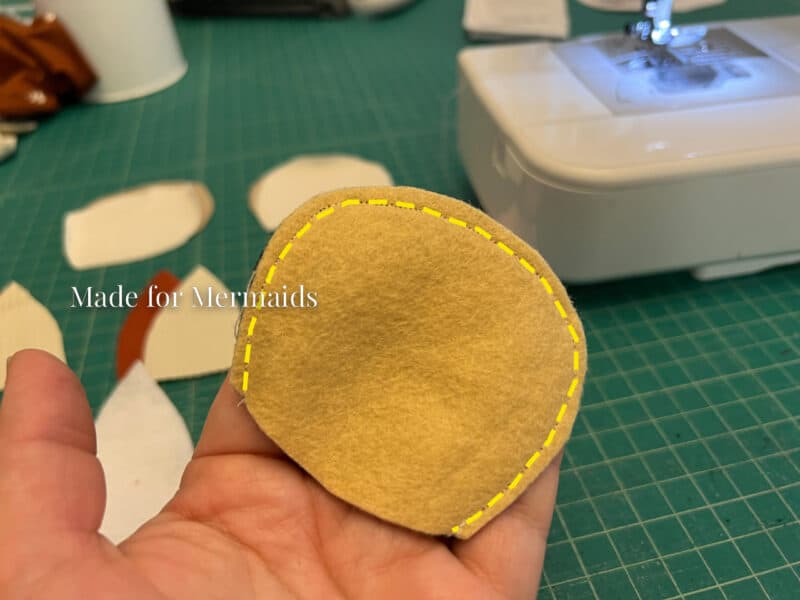
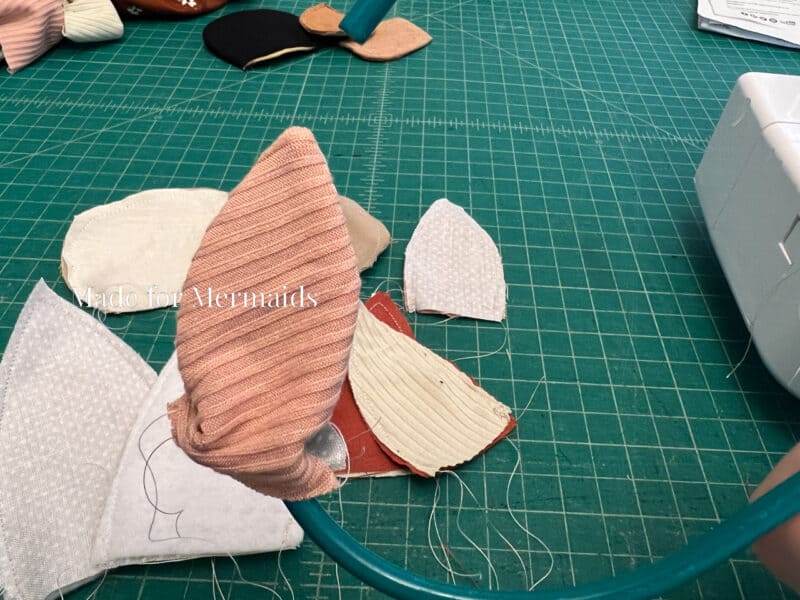
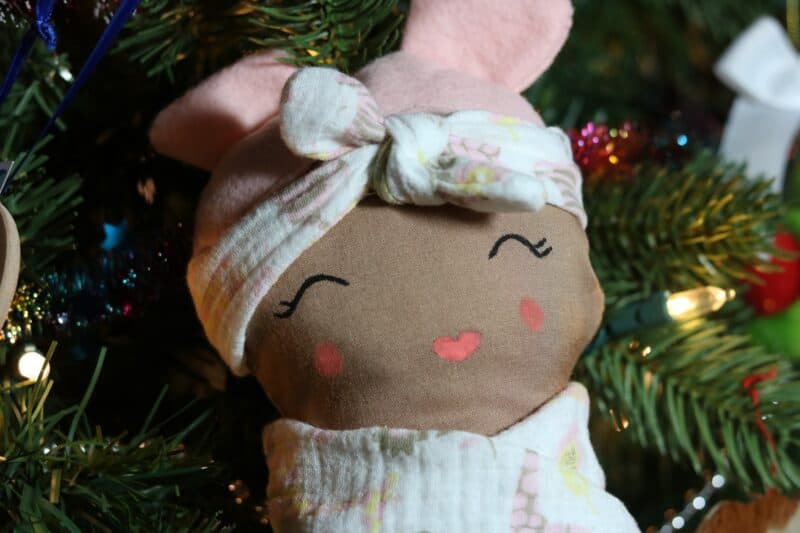
After you have all of your fabric pieces cut out, we’ll get ready to sew hair/ear pieces! You can use interfacing if you’re using a knit fabric, or you can use felt as a backing, or even layer felt in between two layers of fabric. You can stitch around the outside, or use a narrow seam allowance to stitch and turn right side out. Felt is the easiest fabric option for the ears, but I know sometimes we want a different look, textures etc.
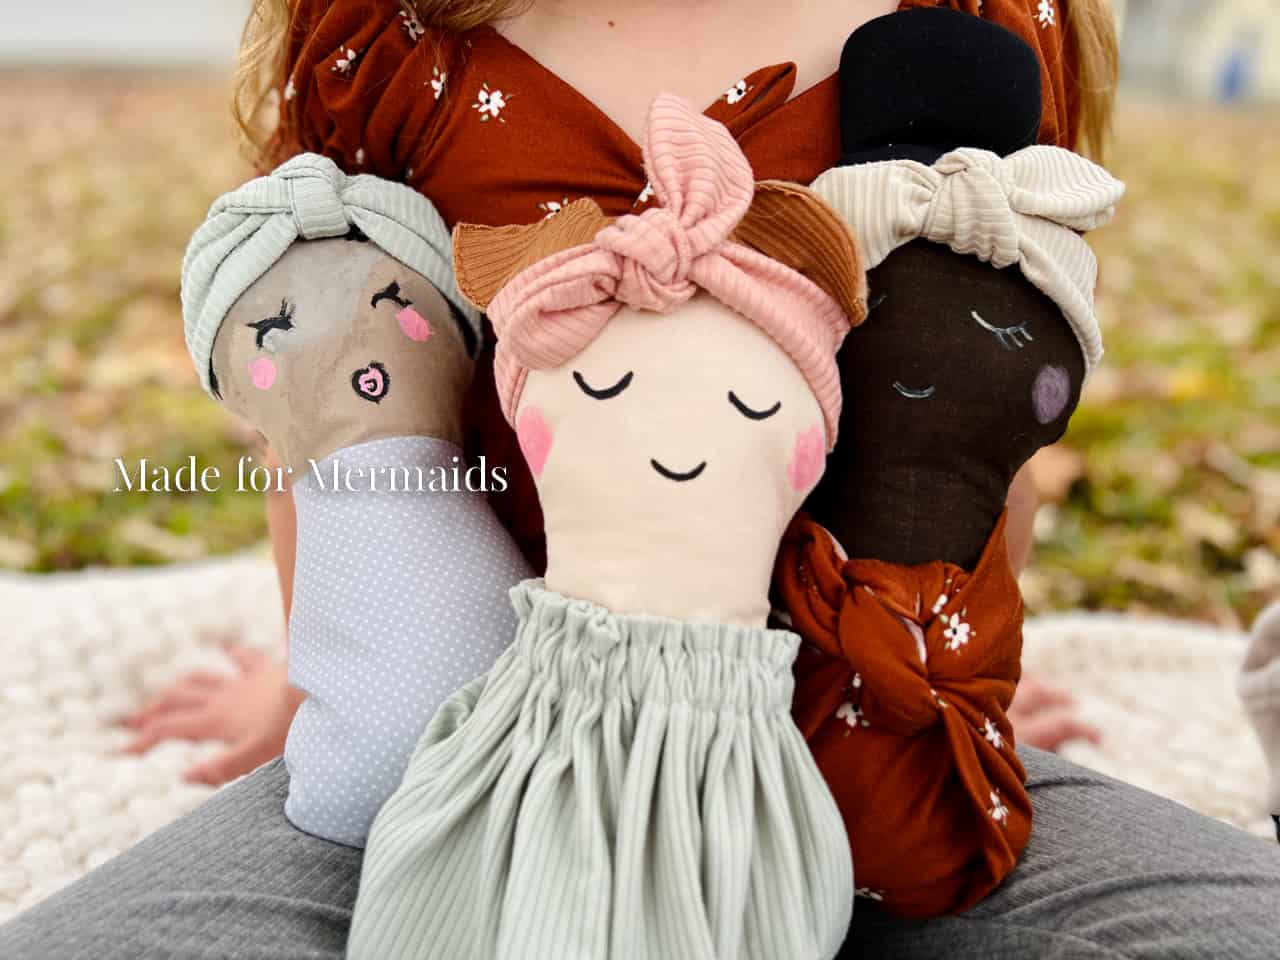
For the bun, I sandwiched a piece of felt between knit fabric, and stitched with right sides together. Then, I turned right side out.
For the pigtails, I stitched knit fabric right to the felt pieces, with wrong sides together.
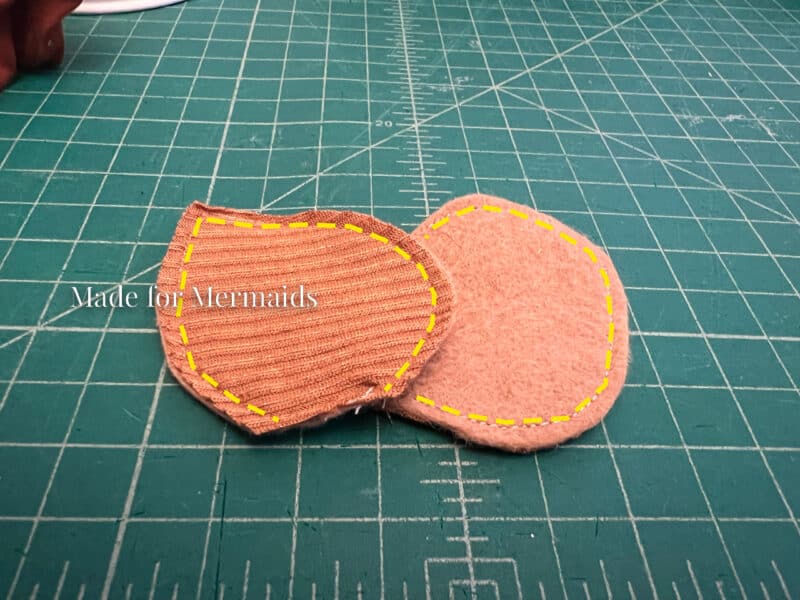
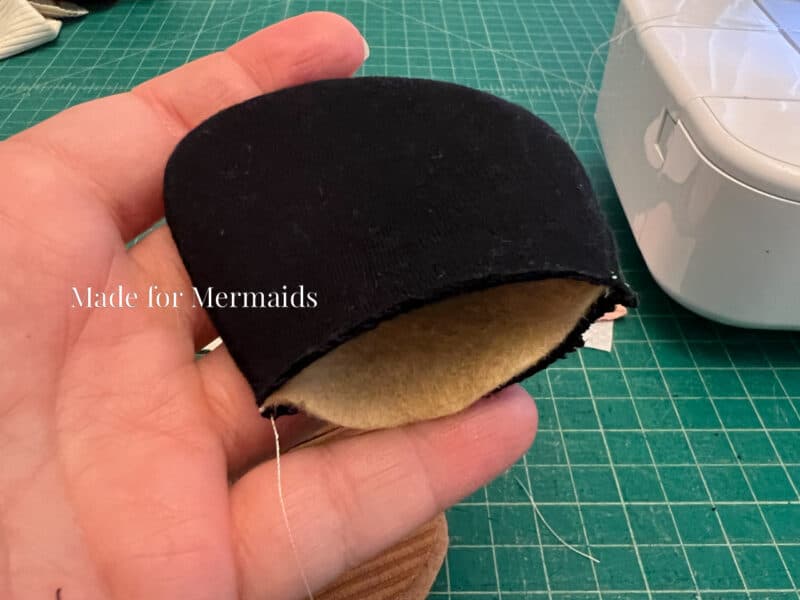
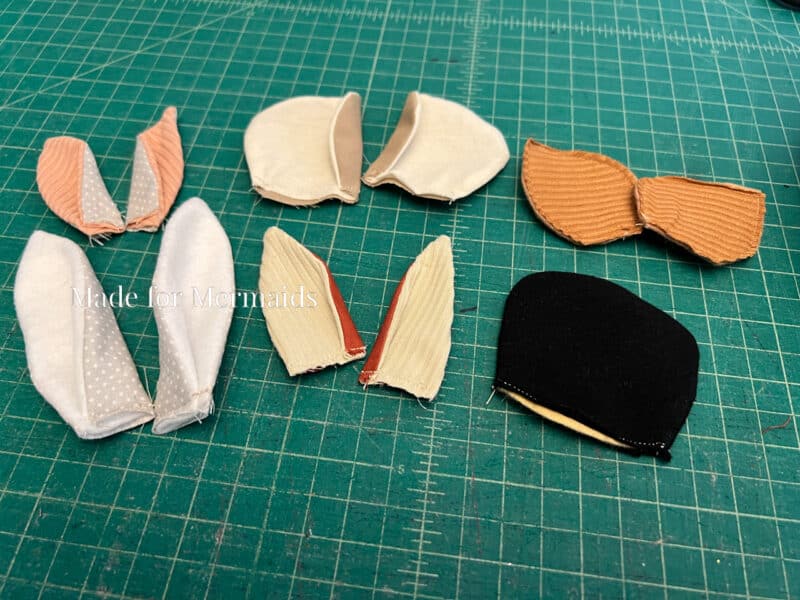
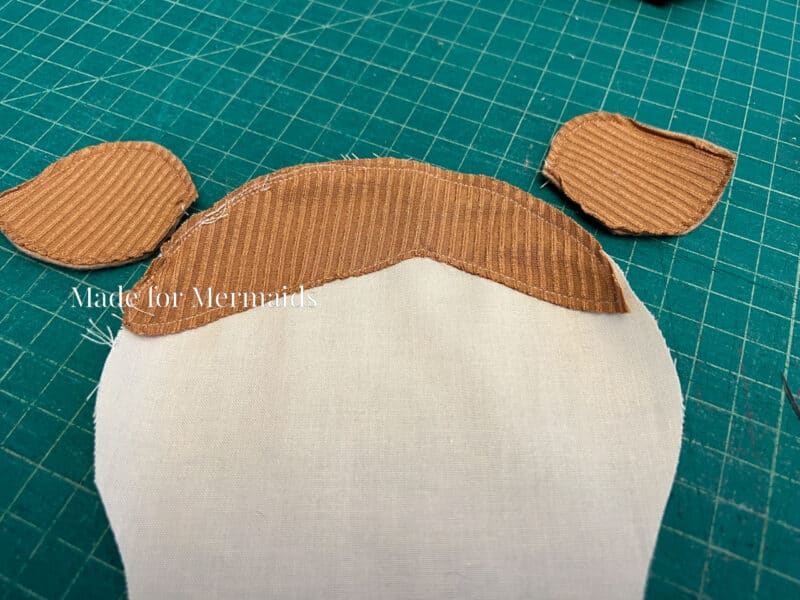
For cat ears, I layered knit fabric with woven, and pinned with right sides together to enclose the seam. I did the same for the bear and fox ears. For the rabbit ears, I used felt and woven, but still stitched with right sides together.

Use a narrow seam allowance – no more than 1/4″, but closer to 1/8″ is even better!

Turn ears right side out.
-

- The ears on the left of each pair is the “back”, while the ear on the right of each pair is the “front”
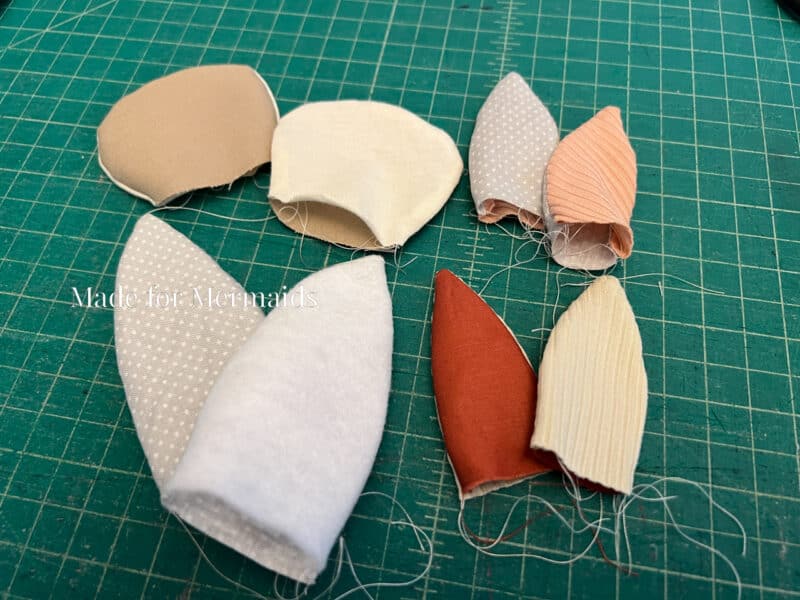
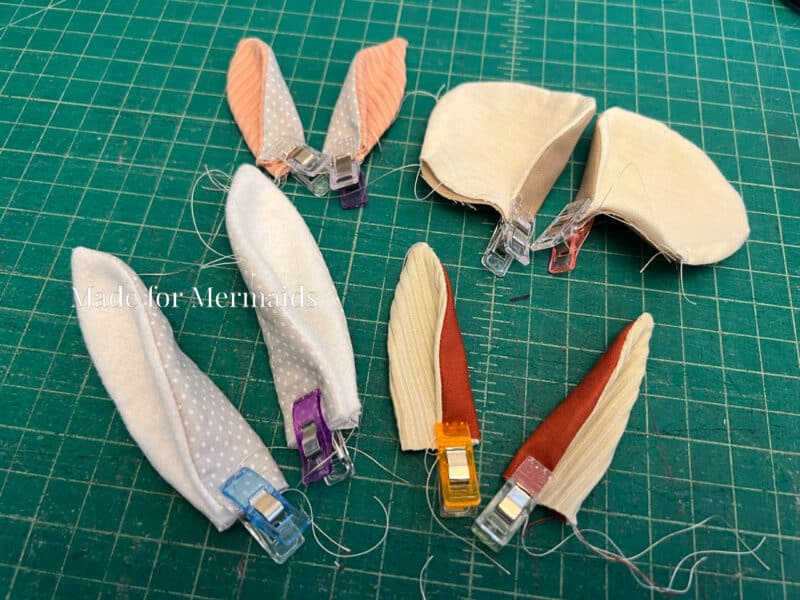
Fold ears in whatever shape you’d like! You can play around with different folds. My kids were very critical about the ear shapes, but I promise I won’t judge your animal plushies! Baste your ears to keep your desired shape.
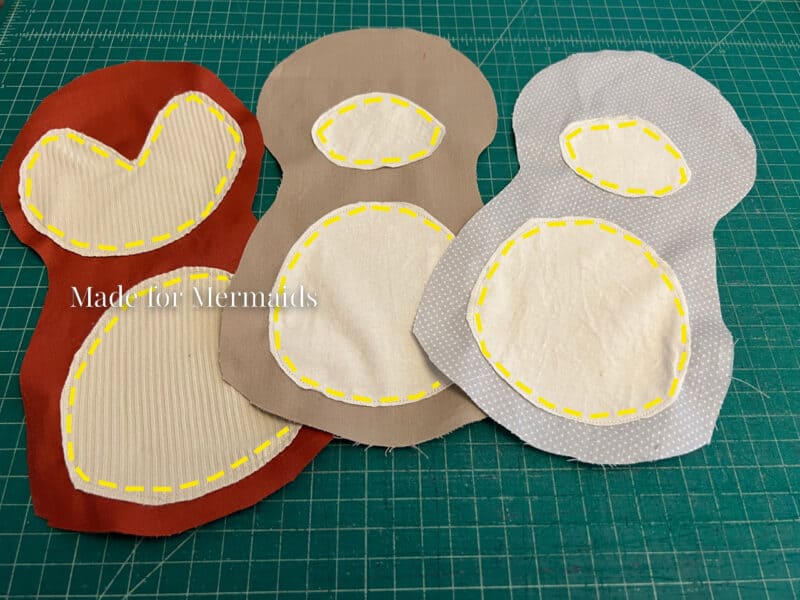
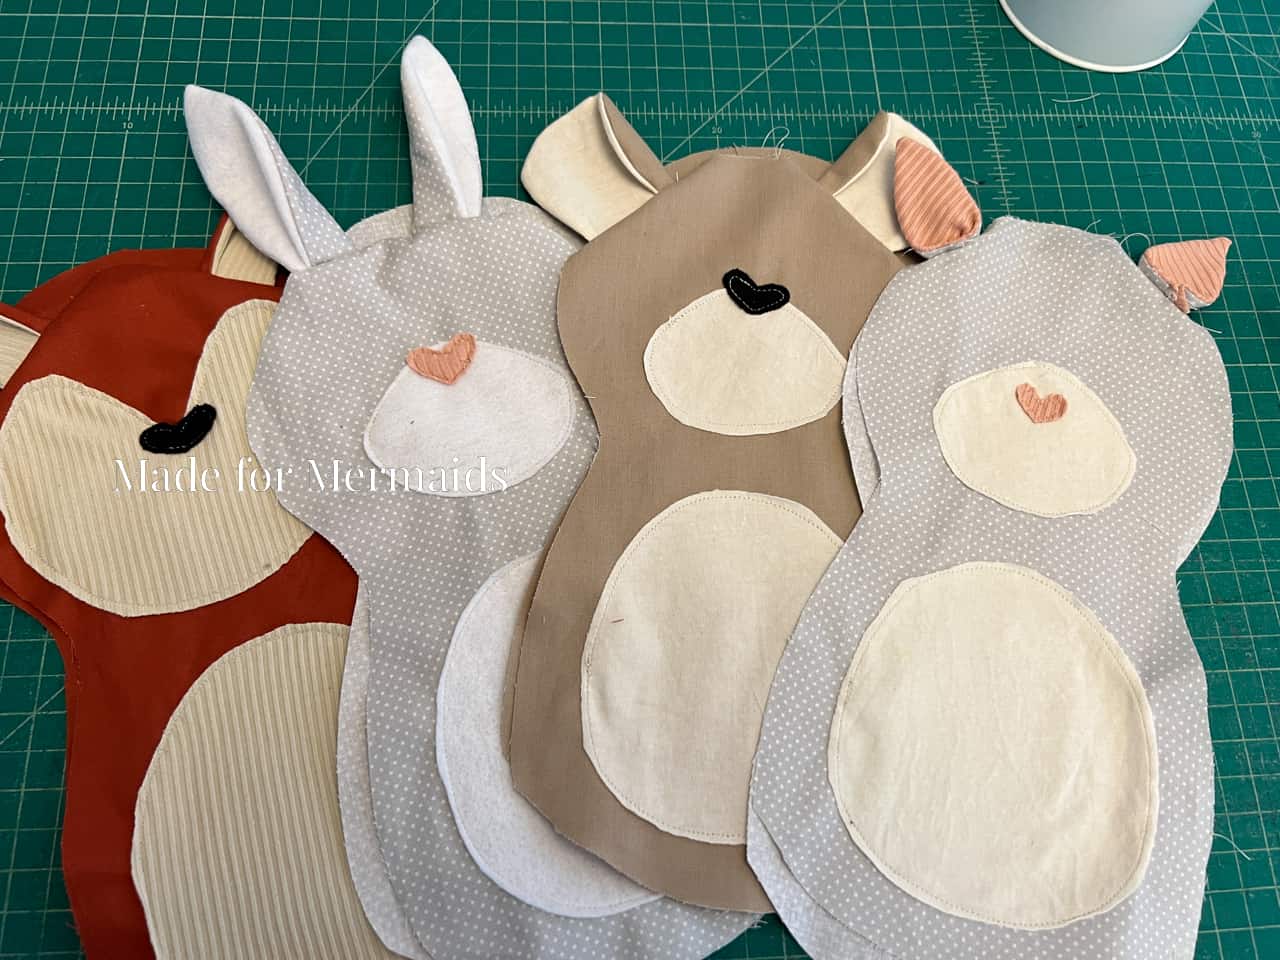
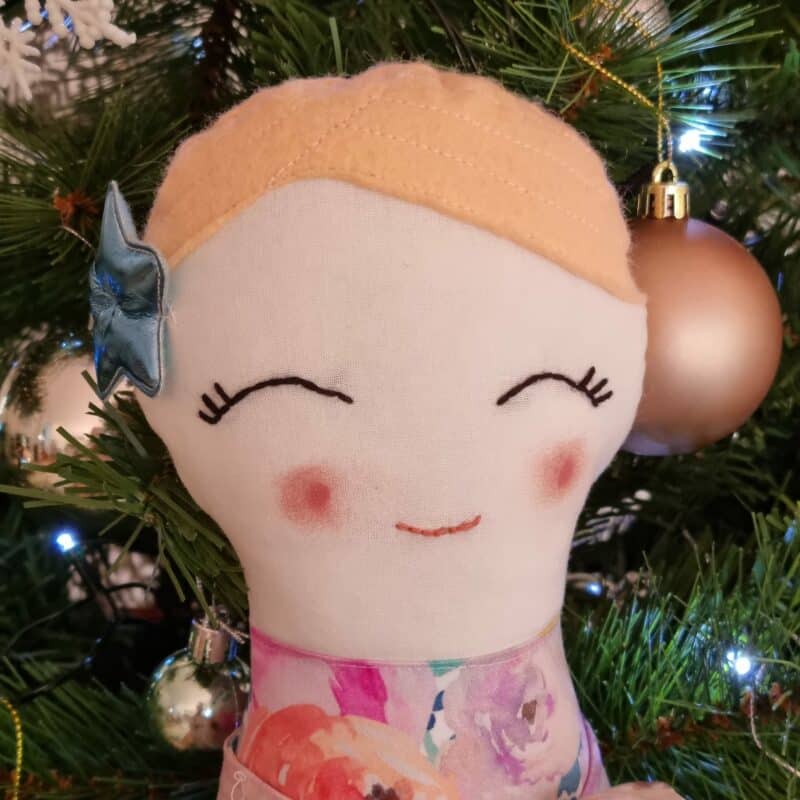
Step 4: FACES, SNOUTS, HAIR, and BELLIES
Pin any animal faces or bellies, and any baby hair, on to your plushie with wrong side of face/belly/hair to right side of plushie. I used a combination of fabrics – felt is the easiest, but I had some rib knit I wanted to use as well.
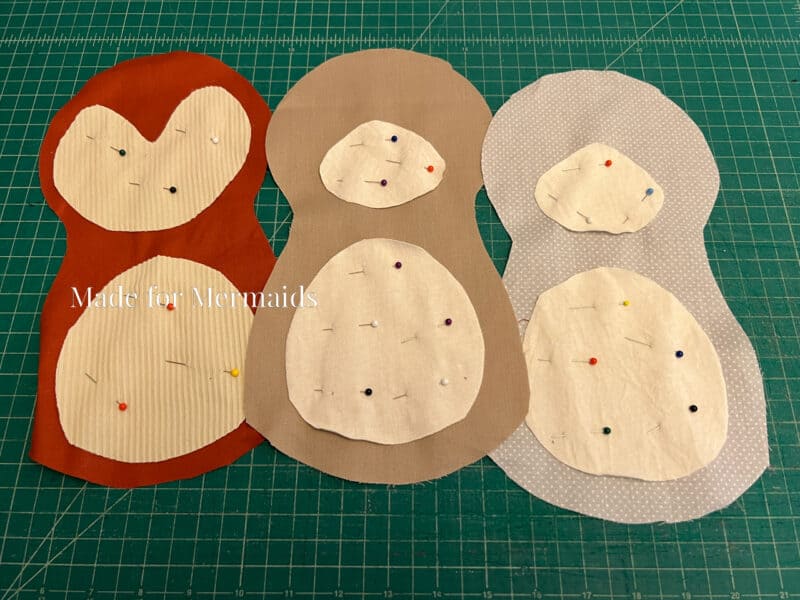
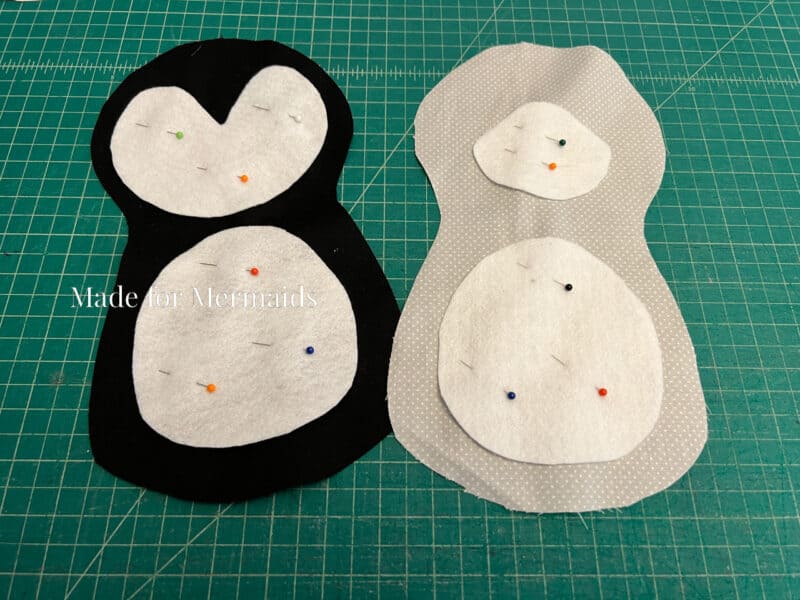

Stitch in place with 1/4″ seam allowance.

Pin hair bun/pigtails/ears in place.
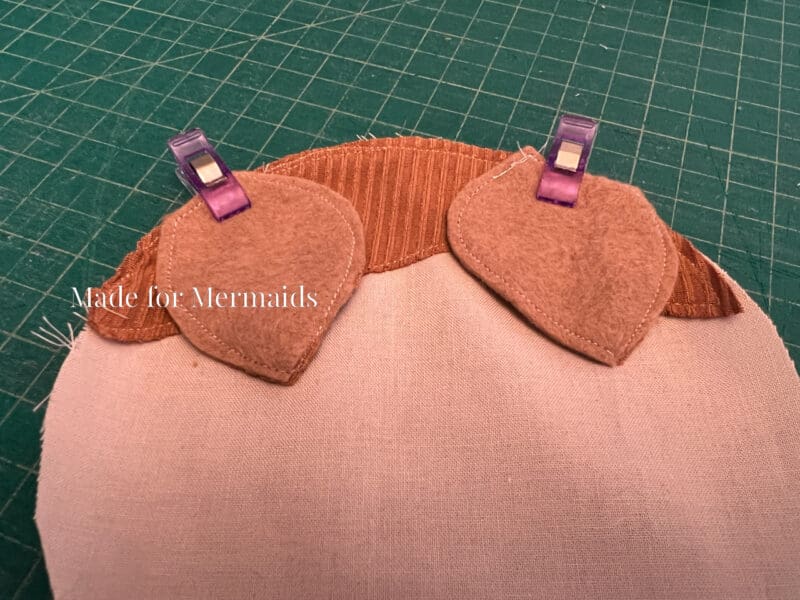
Baste in place with 1/4″ seam allowance.
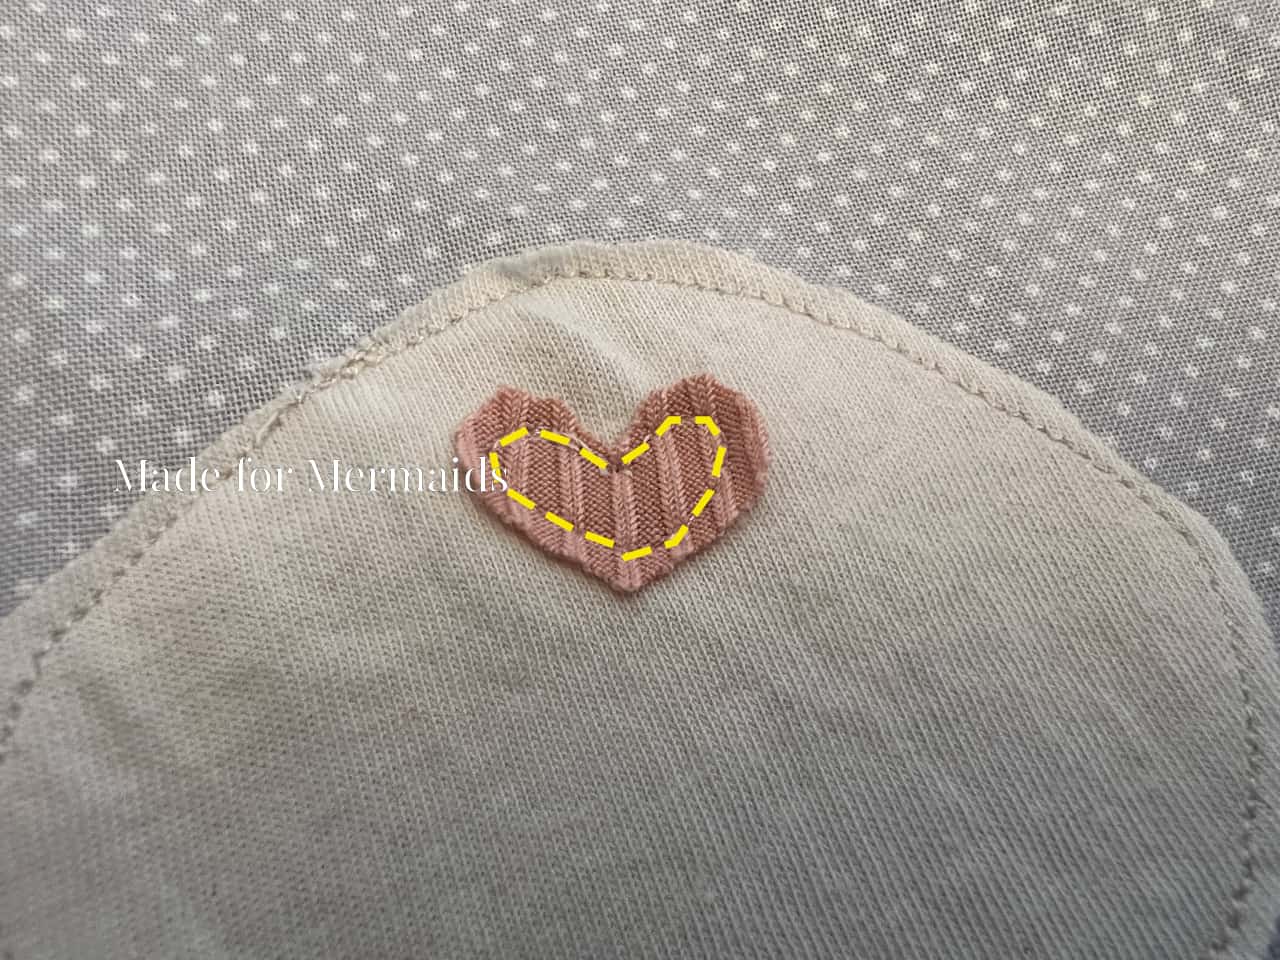
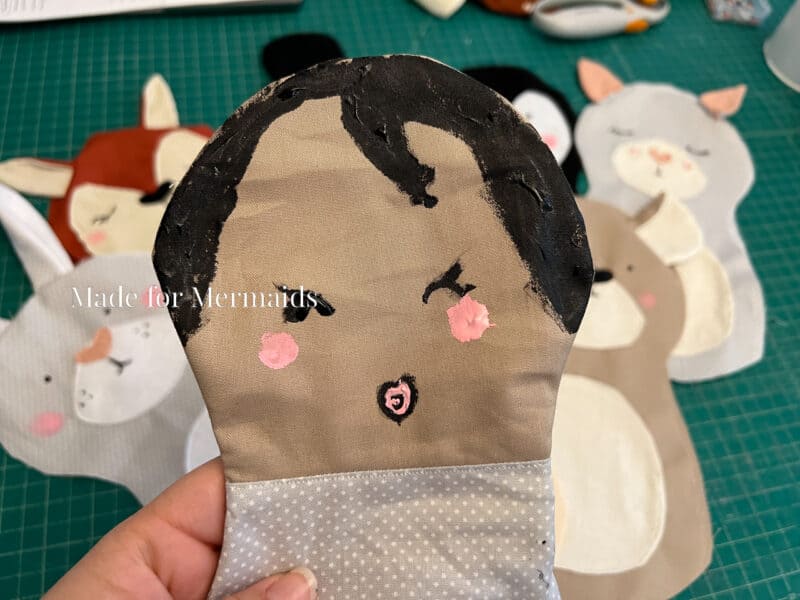
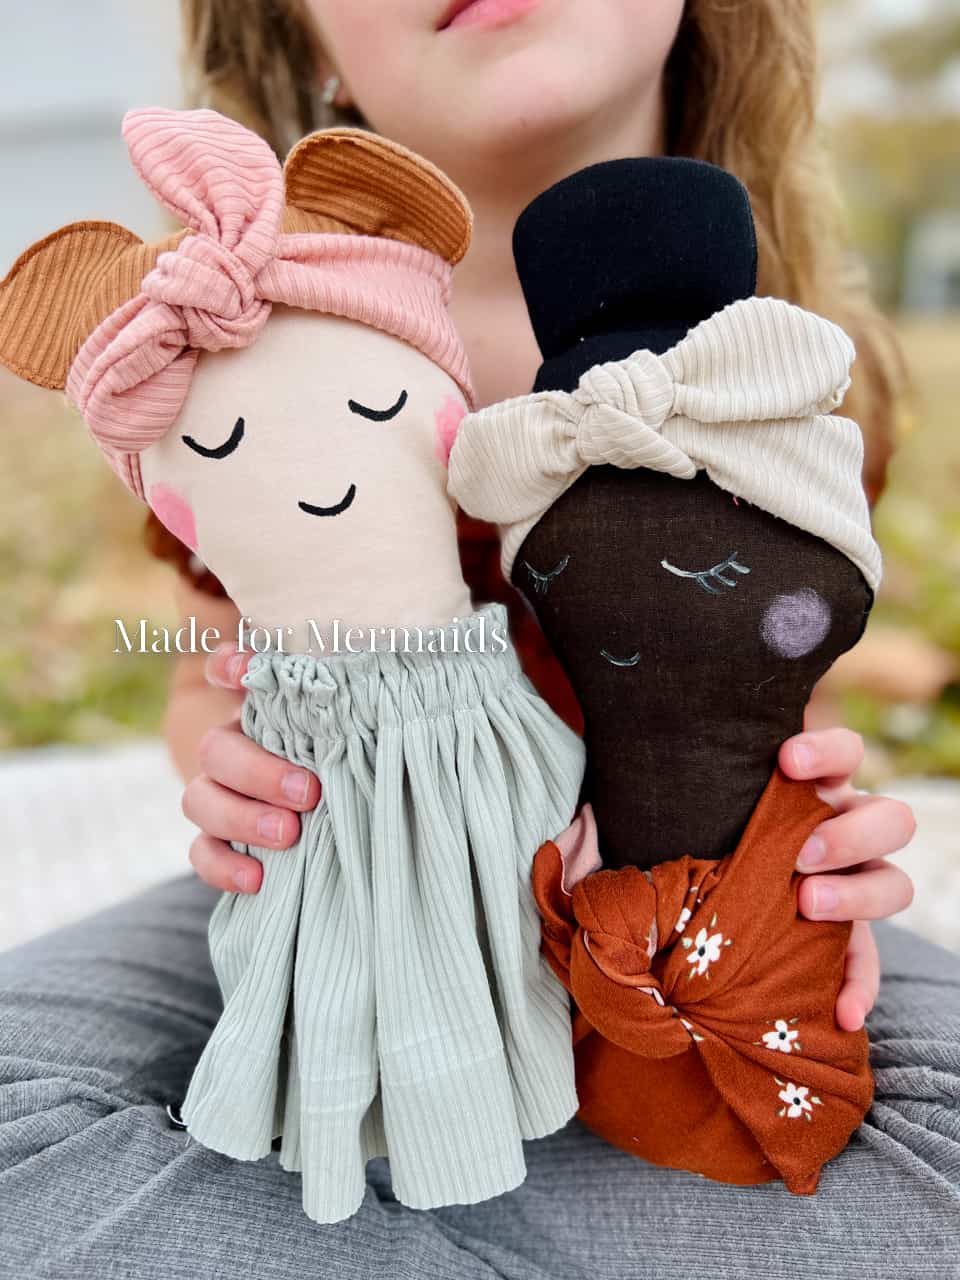
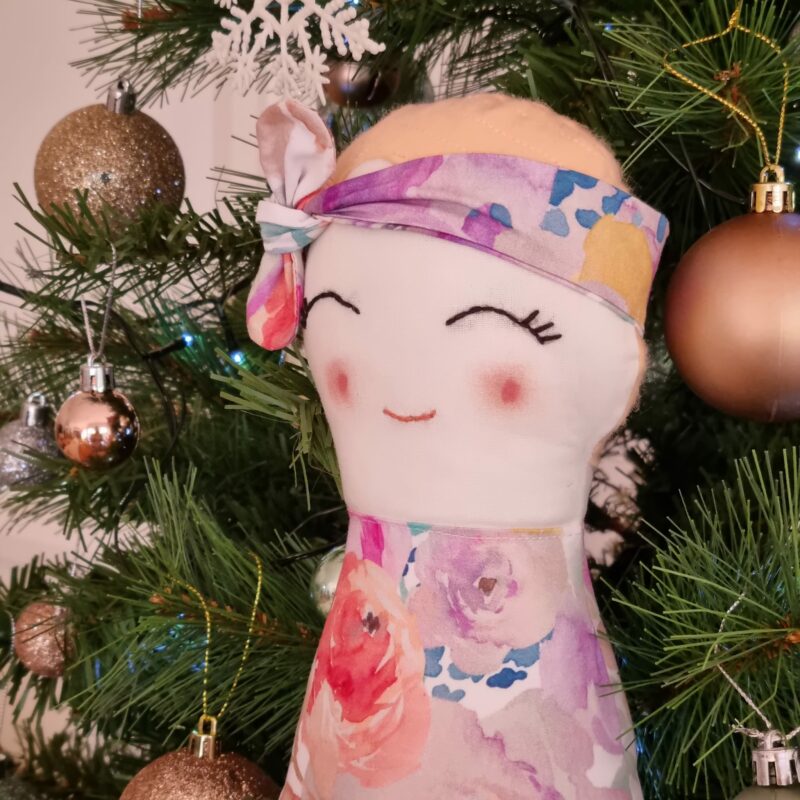
Once ears/hair has been basted on, stitch any noses or eyes on. I added hearts for noses, and decided to paint the rest of the faces on. You can also hand embroider, use vinyl, sublimate faces, whatever your preference is!
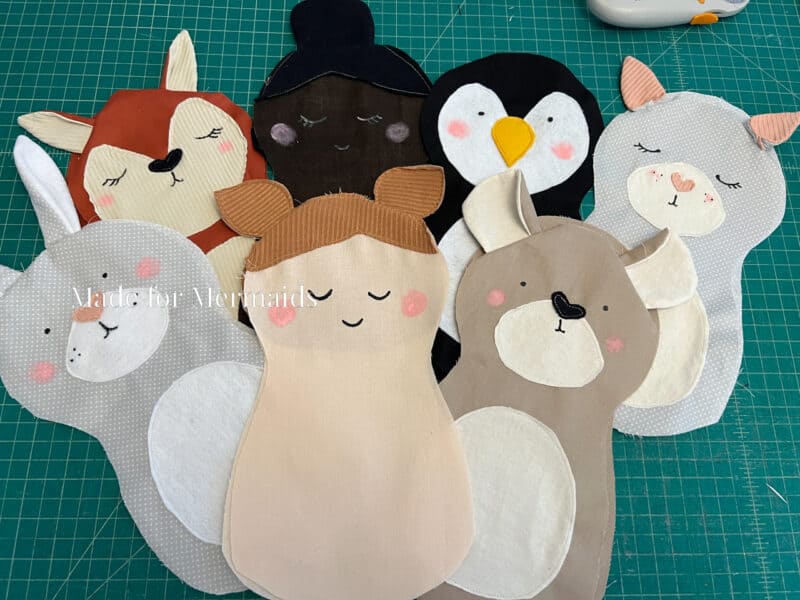
I let my daughter paint a face one on of them, and she went ahead and painted some hair too. She loved being able to help and personalize one. You might be thinking this baby has a lot of lipstick on, but she informed me that the baby has a pacifier. 🙂
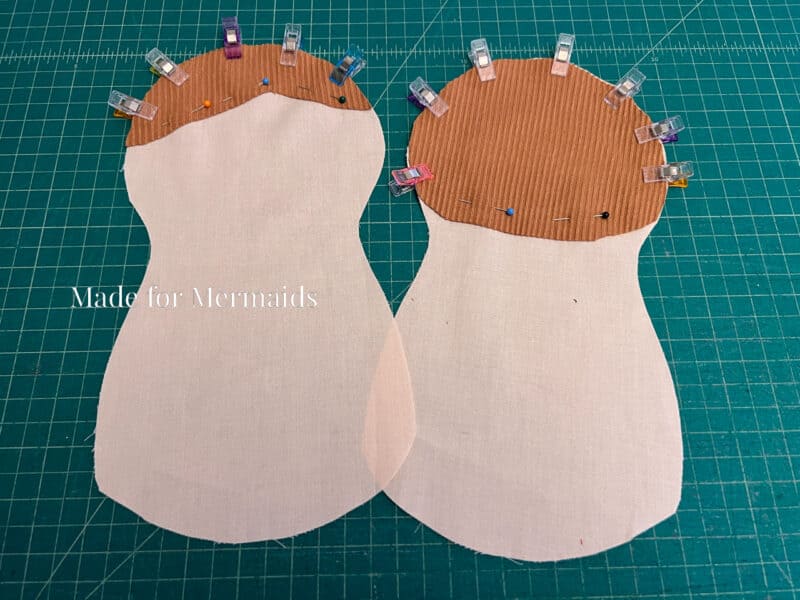
Step 5: CONSTRUCTING MAIN BODY
Place main body pieces with right sides together. Pin or clip around the outside edges.
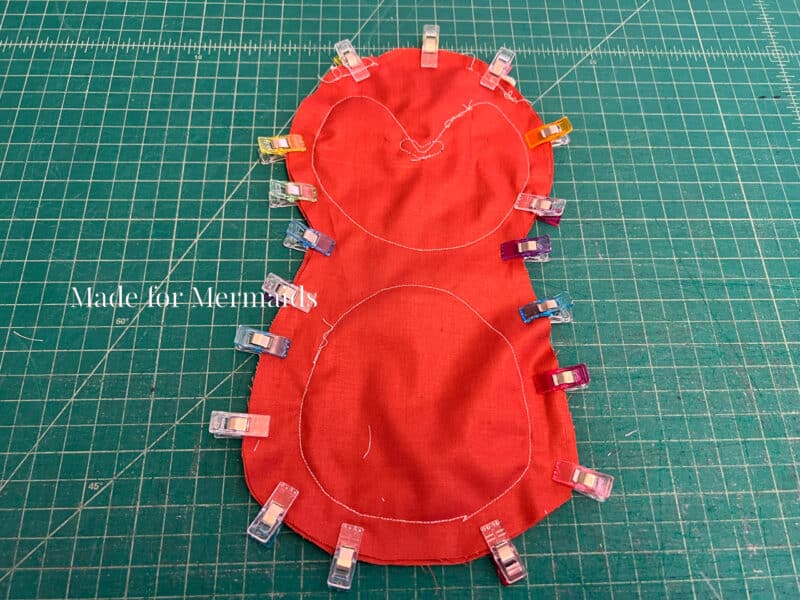
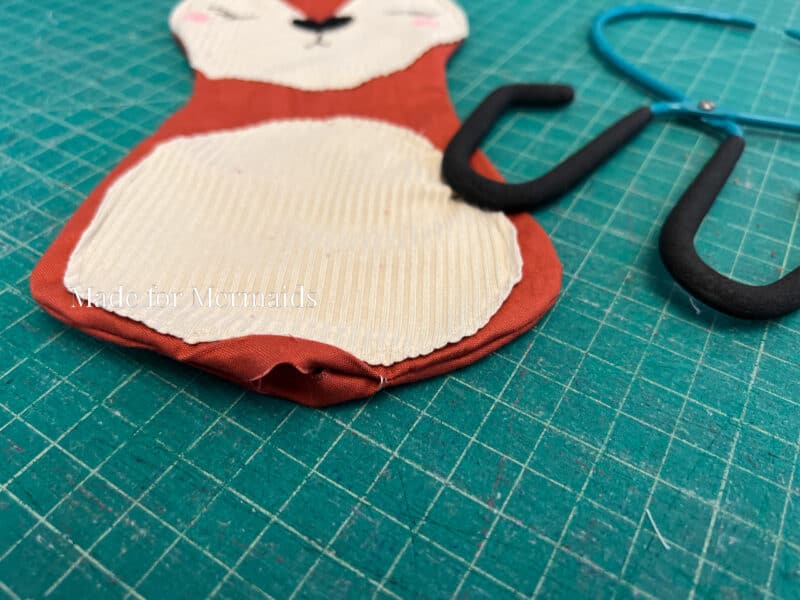
Sew with 1/2″ seam allowance. Leave a 1-2″ opening at the bottom to turn right side out. Trim seam allowance with pinking shears.
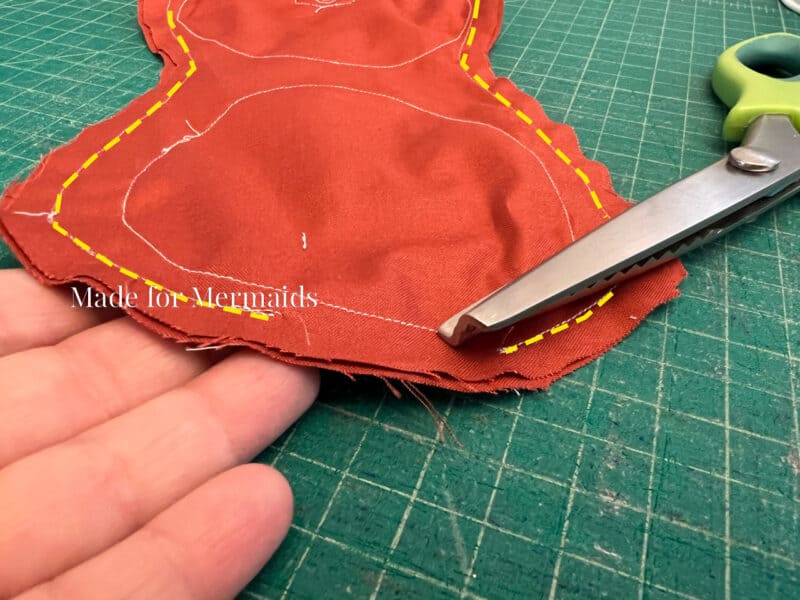
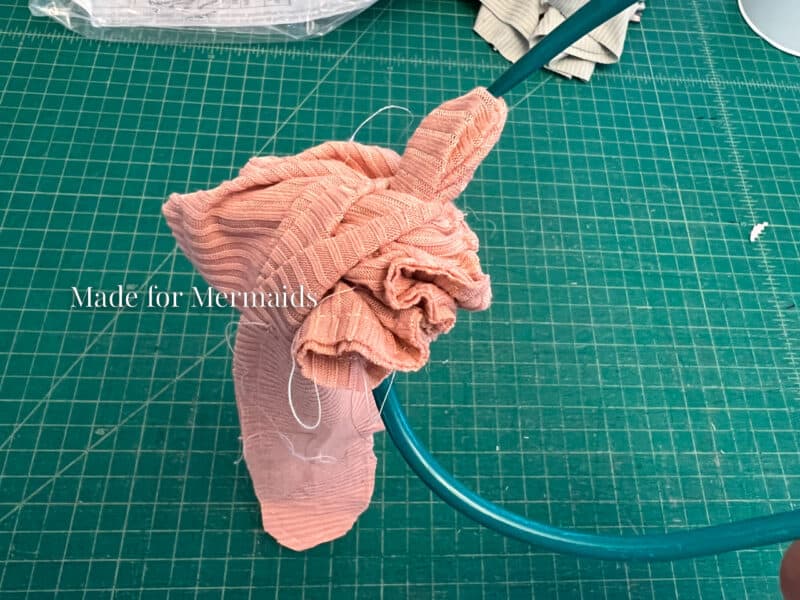
Turn right side out.
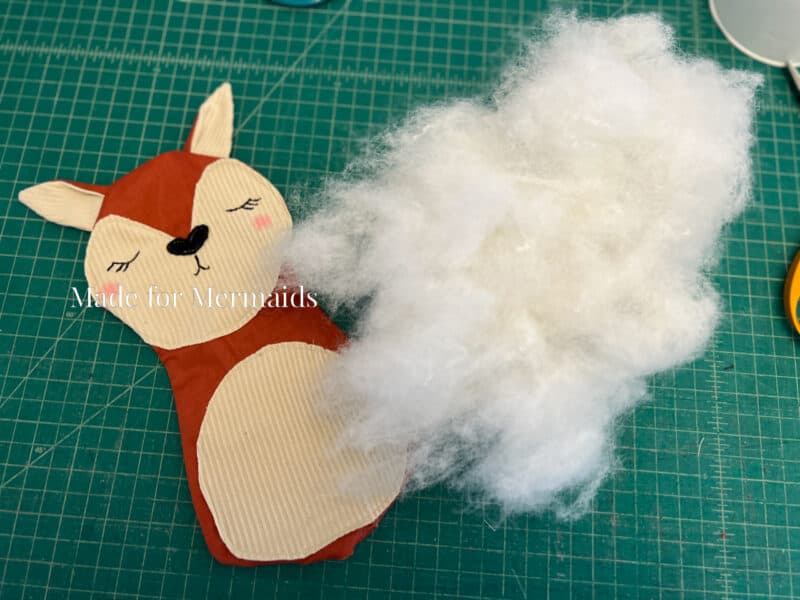
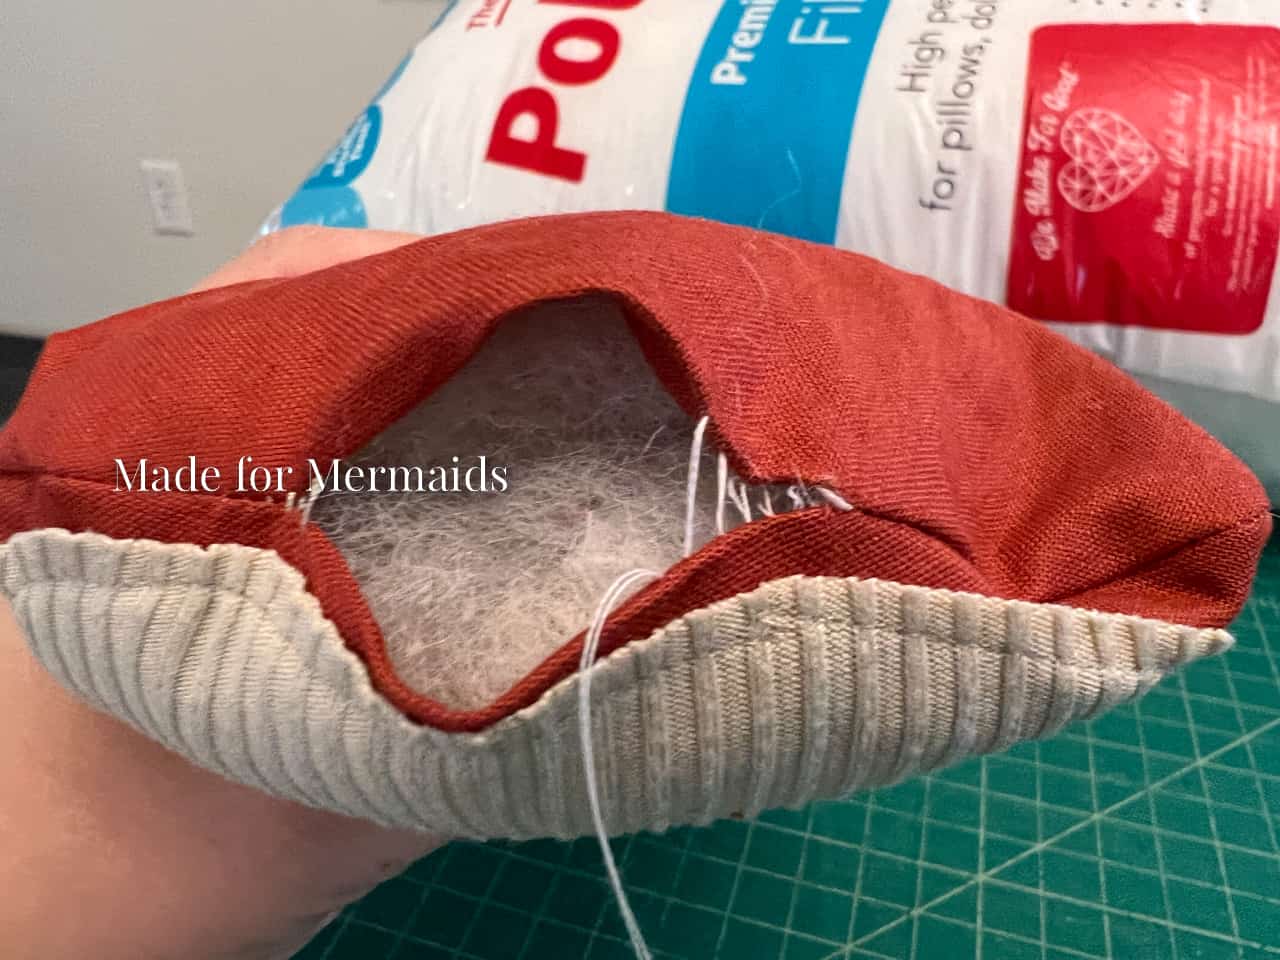
Step 6: STUFFING and STITCHING MAIN BODY
Fill main body with poly fill.
Stitch opening closed with favorite hand stitch (or, you can machine stitch – it’s just not as clean of a finish!),


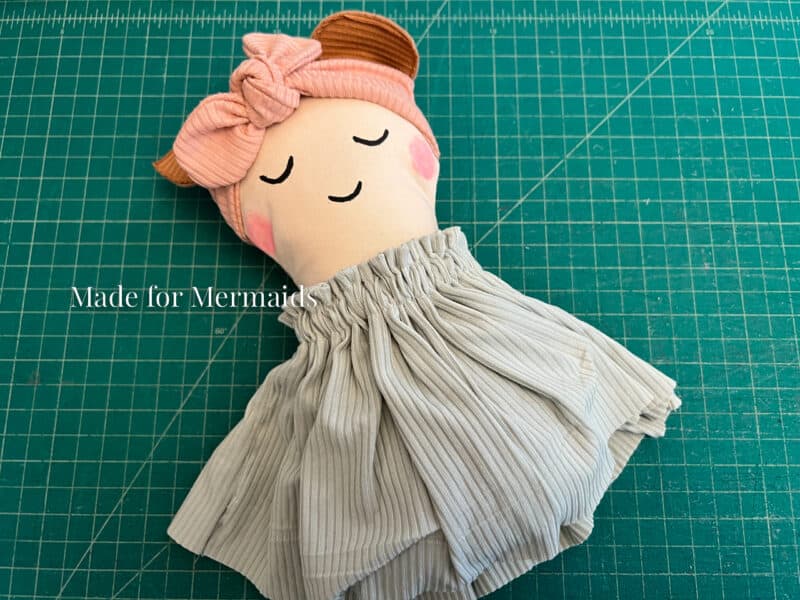
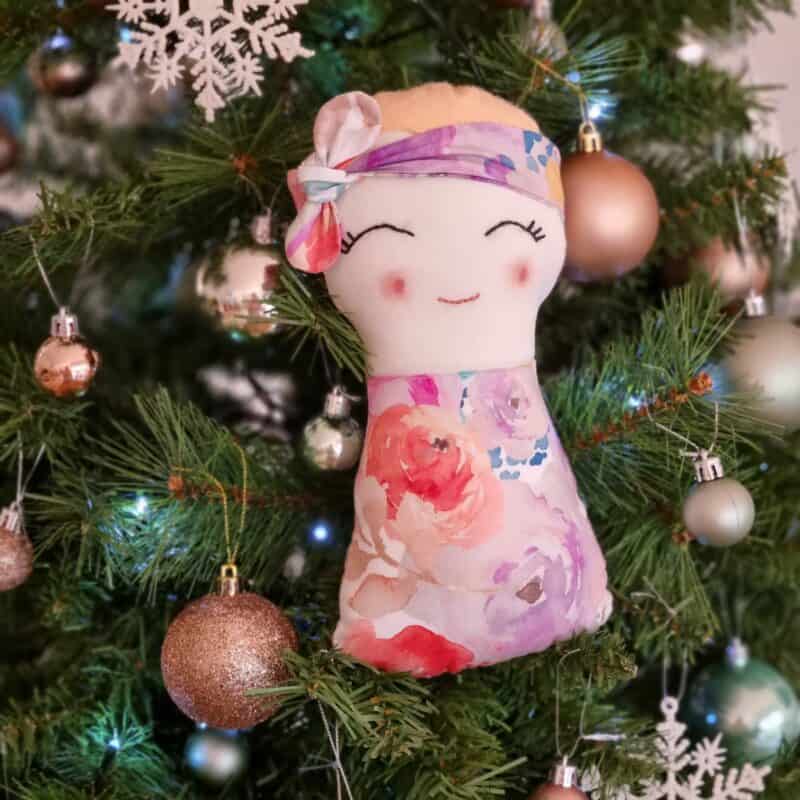
Step 7: OPTIONAL – HEADBAND and “SKIRTS”
Headband
To construct the knit headband, place both pieces right sides together. Stitch around the edge with a 1/4″ seam allowance, leaving a 1-2″ opening in the middle.
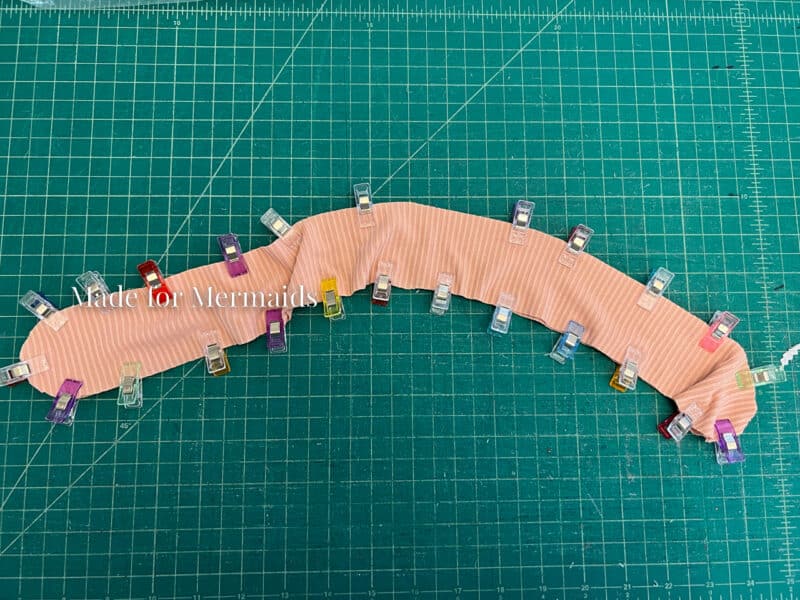
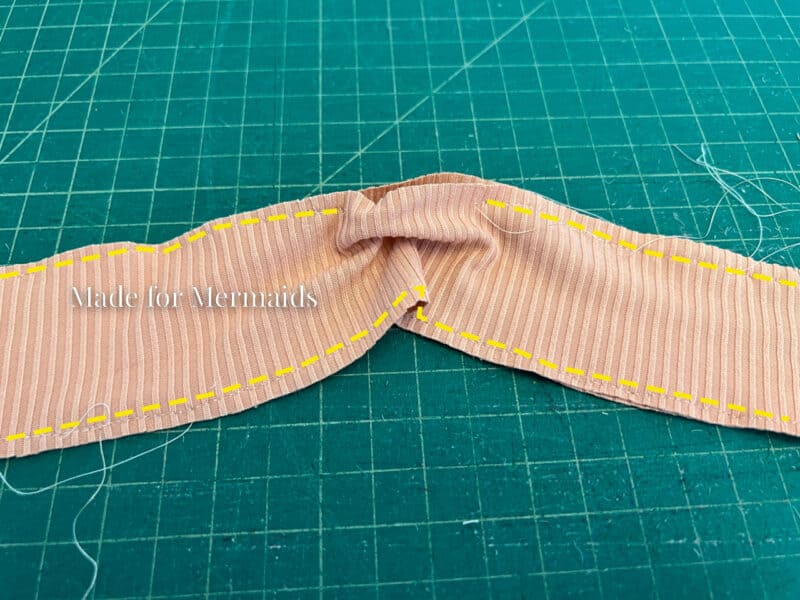
Turn right side out.
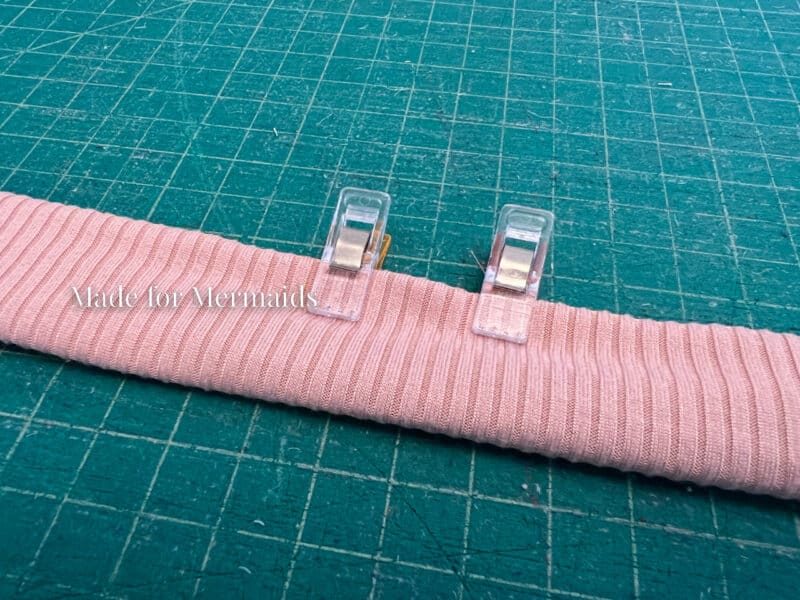
Pin or clip the opening closed. Stitch closed using your favorite hand or machine stitch.
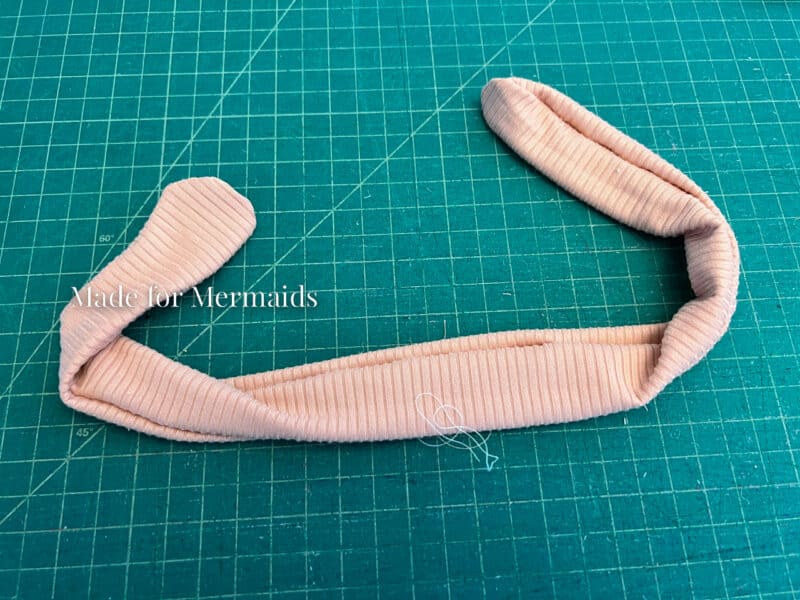
Tie around your plushie’s head. That’s it!
Dress/Skirt
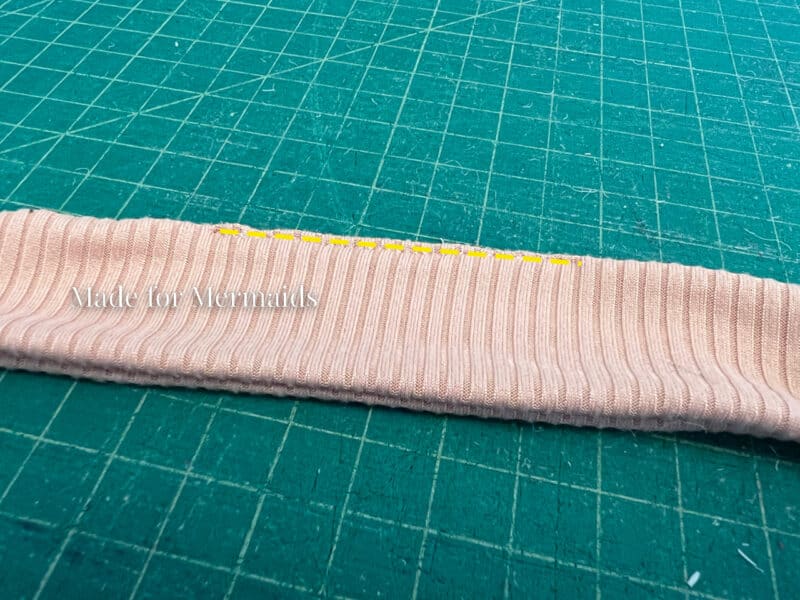
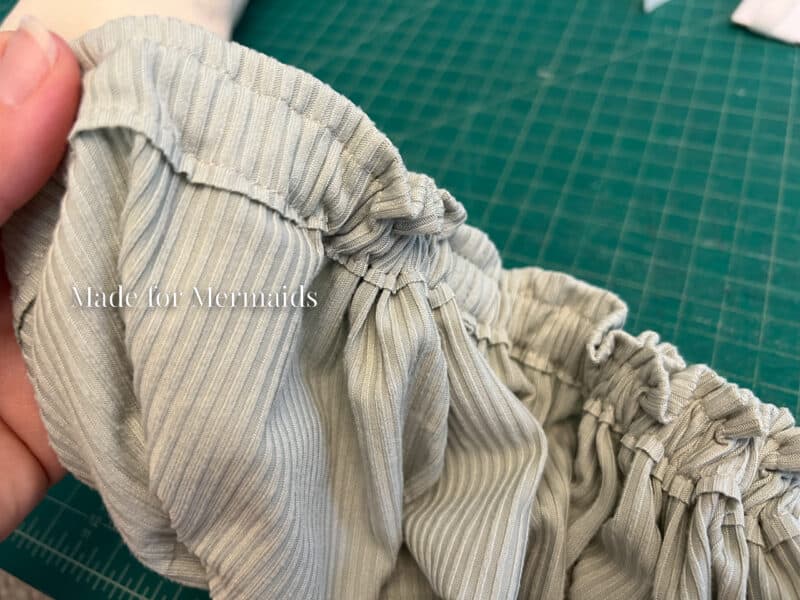
To make a little “dress”, just make a simple elastic waist skirt! Cut two rectangles about 2-3x the width of your plushie. With right sides together, stitch the short edges together with 1/2″ seam allowance.
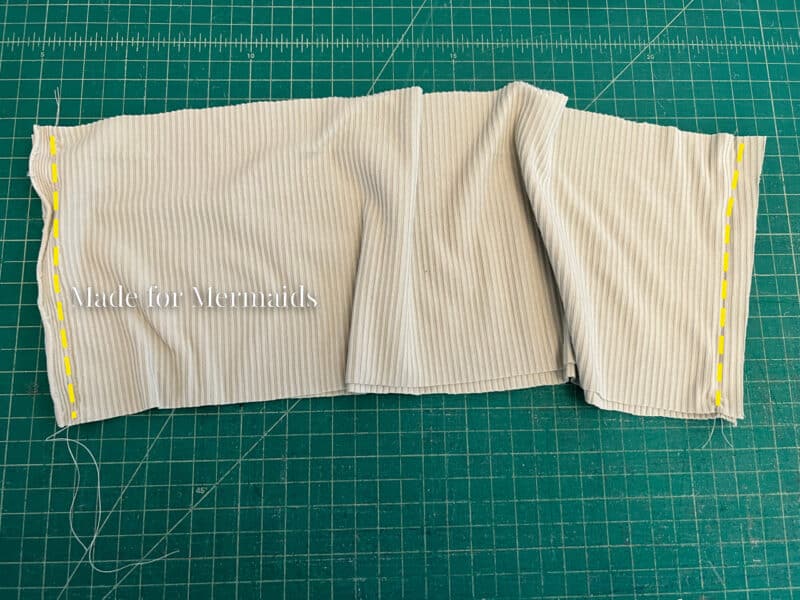
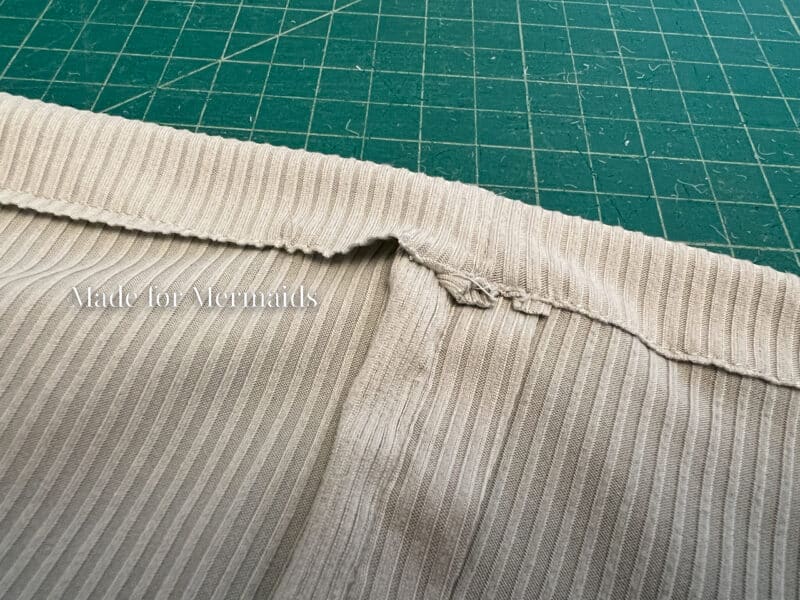
Create a casing. Fold the raw edge down 1″ toward the wrong side. Edgestitch as close to the raw edge as possible, leaving a 1″ opening to thread elastic through. Then, sitch down 1/4″ from the folded edge, all the way around.
-
- Stitch 1″ down from fold
-
- Stitch 1/4″ down from fold
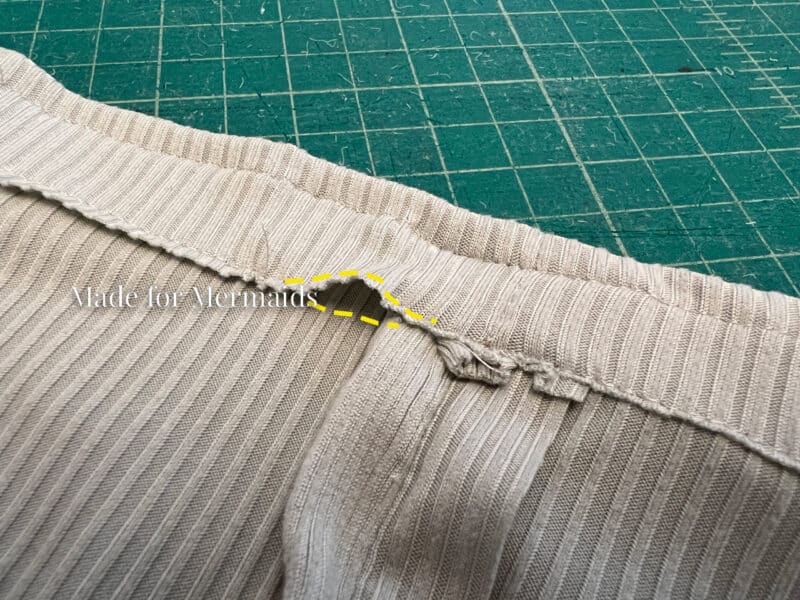
Thread the elastic through the casing. Evenly distribute your gathers, stitch the opening closed, and that’s all there is to it!
I hope the plushies bring the little ones in your life as much joy as they’ve brought my daughter and her friends! I can already foresee a plushie making party in our future, so I guess I should start cutting out animal pieces. 🙂


DECEMBER 1 – 12, 2022
DAY 1 –FELT CORNER BOOKMARK
DAY 2 –ENVELOPE CLUTCH
DAY 3 – FABRIC BOWL COVER
DAY 4 – POT HOLDER
DAY 5 – CUFFED BEANIE
DAY 6 – PILLOWCASE
DAY 7 – PEANUT PLUSHIE
Leave a Reply